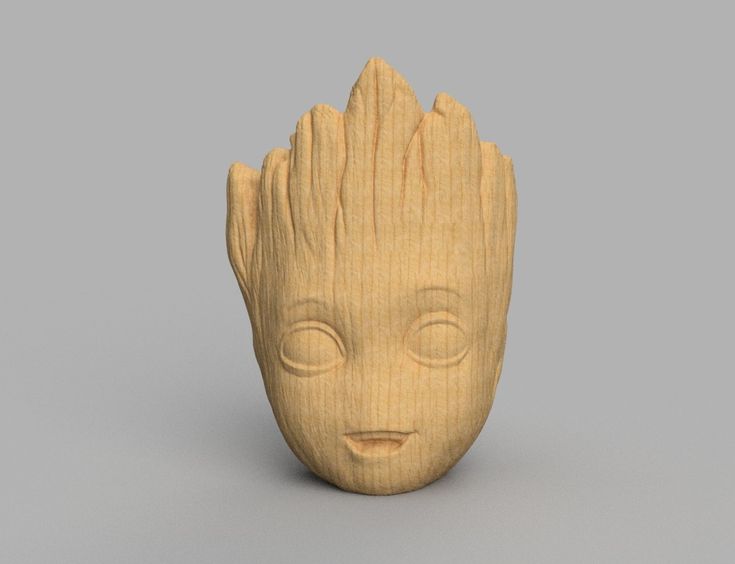
3D printer anti backlash nut
What Is 3D Printer Backlash? How Can You Fix It? – 3D Printerly
Factors that affect backlash are very important to take care of and I’ll explore the reasons why in this article.
The best way to fix 3D printer backlash is to tighten up any loose belts and make sure they are in good condition. If your printer has the relevant software, adjust backlash speed to 1500mm/s then trial and error from there. X & Y backlash settings should be between 0.2-0.6mm & 0.4-1.3mm respectively.
There is more to the backlash setting, from understanding what it actually is, to learning how to properly fix it. This article will aim to explain both of these to you so you can solve any backlash issues.
What Is 3D Printer Backlash?
Backlash is not a very well-known term in the 3D printing world or very well understood, so I’ll give you a simplified definition of it.
Backlash is the necessary correction for the looseness or slack in the moving system of your X and Y axis. It can also be referred to as the amount of play between the lead screw and the nut that runs through it to the Z-axis.
As you know, when your 3D printer is extruding material, the print head is vigorously moving on the X and Y axis in different directions, as per the software’s command, following the digital file you have put in.
Your G-Code is in control of these movements which are extremely precise, which is why 3D printers can display such high quality.
Now that drive is well controlled by different rods and belts, which provides flexibility to the head of the print.
The problem of backlash comes about when the movement in the system has slack from moving parts such as rods, belts and bearings. The parts that are flexible are the worst because they very slowly change in their flexibility over time.
After some time, that extra flexibility will have an effect on the precision of your 3D printer.
A good clue into identifying backlash is when infill diagonal lines don’t meet up with the perimeter lines.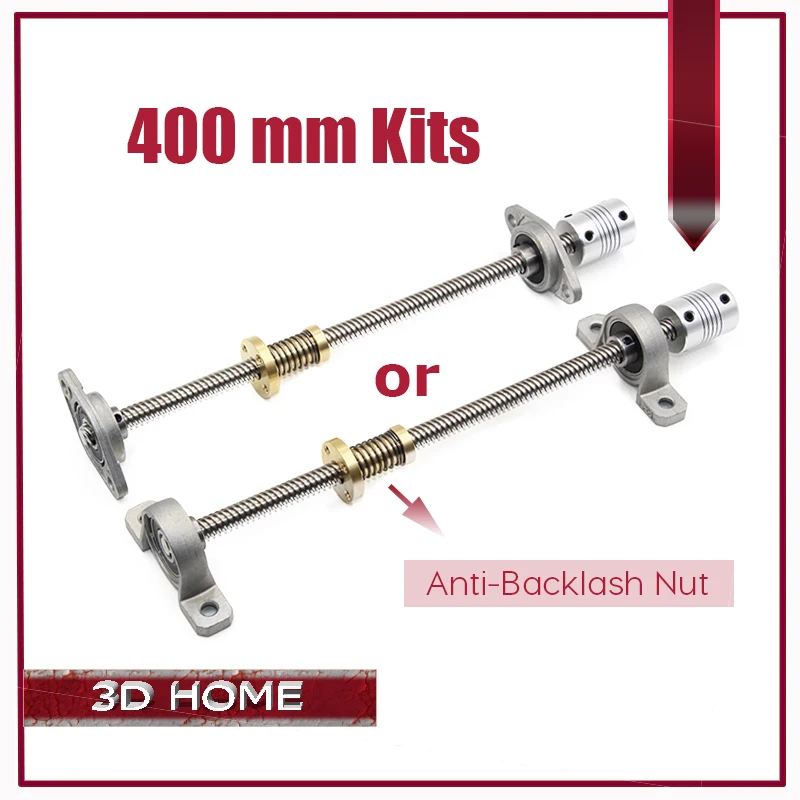
The video below goes into more detail about backlash, as well as explains how to use the backlash tower to calibrate backlash.
Backlash Tower
Backlash Explained in Real Life
Let me give you a practical example of how backlash applies.
Imagine you are standing still and I tell you that you have to step backward and then come back to your original spot.
The chances of you stepping back and coming forward to the exact spot that you were on are very thin. Similarly, your 3D printer can have a hard time going back to the same spot.
The print head moves backward and then tries to come back to the original spot, however, it may miss just by a very small difference depending on the flexibility level of the belts on the 3D printer.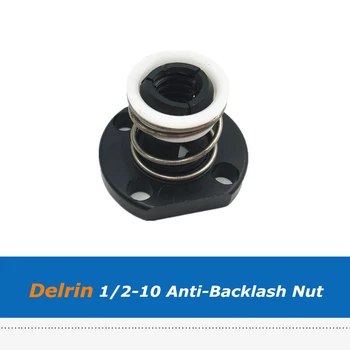
This is where the backlash comes in, adjusting the flexibility of the belts to correct the flexibility and make sure the head of the print comes back exactly where it was before, to ensure high quality prints.
Bad cases of backlash can easily result in print imperfections like gaps between walls, especially in circular objects.
Fixing the Backlash of Your 3D Printer
It’s important to know, many 3D printers don’t usually experience backlash. The M3D printer is one that is known for having backlash and its software even allows you to adjust for backlash compensation.
There isn’t always a backlash setting that your 3D printer can adjust, so how do I stop backlash from happening?
Your belts are usually the main culprit for backlash effects, so a good tightening of your belts should help a lot. If your belts are worn out, a replacement might be in order to get your high quality prints back.
Speed is one of the main factors where backlash will show itself. Your jerk & acceleration settings also contribute, so keeping these at a low level should help reduce backlash.
Ideal jerk & acceleration settings are. I wrote a whole article just on getting jerk & acceleration settings perfect which you can feel free to check out.
If the stuff you are about to print is a circle in nature, it becomes a must for you to set your 3D printer for the backlash setting so that there are no visible gaps in your circle and the shape of your circle stays perfect.
Muele designed a Quick Test Cylinder on Thingiverse to quick check your 3D printer backlash. There is an added version which has a flat spot, making it easier to identify the orientation after you remove it from the print bed.
Update: Added a version with a flat spot to make it easy to identify the orientation after removing it from the build-plate.
Changing Steps Per mm
You may have to adjust the motor speeds for your 3D printer to compensate for backlash issues. This is done by changing the steps per mm for X & Y in the firmware.
Follow these steps:
- Send an M92 command in your GCode header or – M92 X78.74 Y78.74 or,
Set it permanently in firmware by issuing:
- M500 stores current settings
- M501 retrieves the data from EEPROM
- M502 reverts to the ‘factory defaults’
From RepG/Printrun etc, send M501 to view what they are currently
- Print something which is 100mm x 100mm
If your Y setting is currently 75, while your print comes out as 85mm in Y direction, you need to calculate a new Y.
It would be 75 * 100 / 85 = 88.235
Now you would send:
M92 Y88.235
M500
Doing the same for X should leave you in a good position for your backlash.
How to Install an Anti-Backlash Nut on a 3D Printer
You can install an anti-backlash nut on your 3D printer by using something like the Z-Axis T8 Anti Backlash Spring Loaded Nut from Amazon.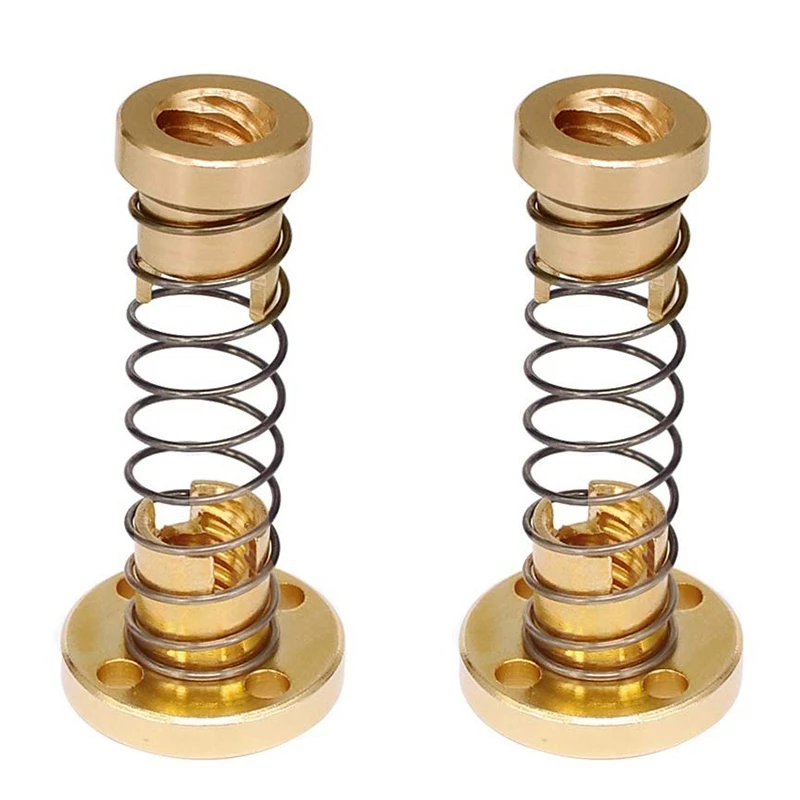 Users have mixed reviews on the product though, with some saying it worked perfectly and others mentioning that it is difficult to thread properly.
One user said that it really helped with the backlash on the Z-axis, also improving layer adhesion.
Check out the video below on this product by BV3D on YouTube.
Backlash Settings in 3D Printer
Frankly, you can control the backlash setting of your 3D printer manually through changing its speed or simply controlling the backlash along the y and x-axis.
However, the Y axis can prove to be difficult to adjust as it is controlled by belts instead of rods which are rigid and allows for only as much fluctuation as given instructions on.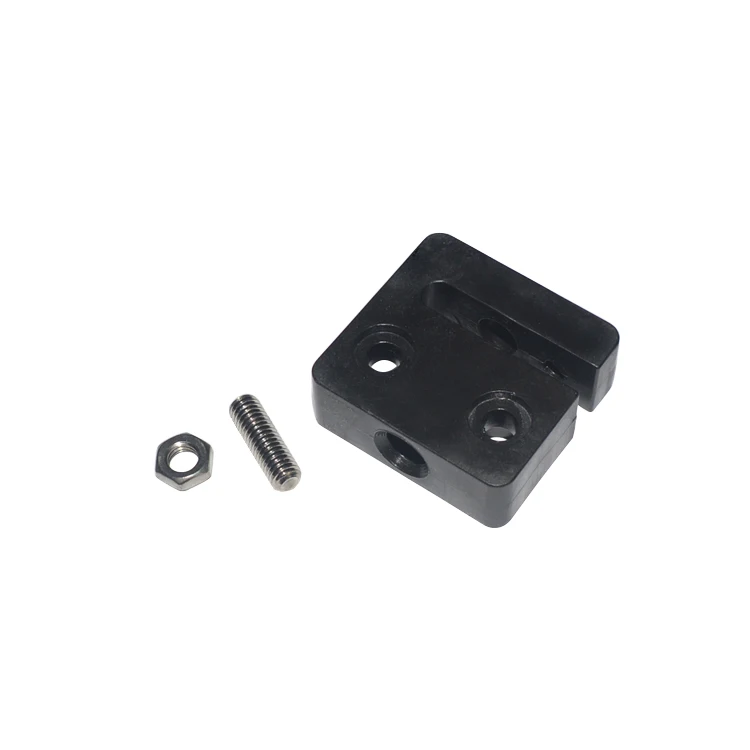
Once you have adjusted the speed, you can ensure that there are no skipping occurs that causes gaps. Remember, the higher the speed of the backlash, the more chances are that gaps would form.
You may also have to play around for a while with the settings to get the exact outcome you desire, as every printer differs from others.
The speed of the backlash that is recommended to avoid any gaps and deformation of the circle shape is 1500mm only.
Now that we know what’s going on, let us see how can we make the settings right on our 3D printer;
So, are you wondering what exactly you have to do to make sure your 3D printer is well-equipped in the field of backlash? Well then, remember that you need to have the following backlash settings done.
Your X-axis backlash should be 0.7mm.
Your Y axis backlash should be 1.03mm. And the speed of your backlash, as mentioned earlier, should no more than be 1500 mm.
Please note that these settings are only for one printer. Your printer’s setting may not be the same, and you may not get the same results. Therefore, you need to check with your printer by following my simple steps.
Step by Step for Backlash Setting
To attain the settings mentioned above, follow my step-by-step guide so that we are on the same page, and you don’t get lost in the middle of the process.
Now, in the advanced calibration setting, you would have the option to set your x and y-axis measurements.
Depending on what 3D printer you have, these backlash settings can vary. Some printers may need more of a correction to solve a backlash issue to trial and error would be needed. The level of flexibility of your machine will vary from printer to printer.
Remember that the aim of setting your backlash setting is to have a perfect circle, with no gaps whatsoever. So, therefore, with a very composed mind, you have to keep changing the adjustments until you have a perfect circle shape.
I would suggest you to remember those measurements for later use also as if you plan to use the same 3D printer even in the future, it is very likely that you will have to make the backlash measurements again.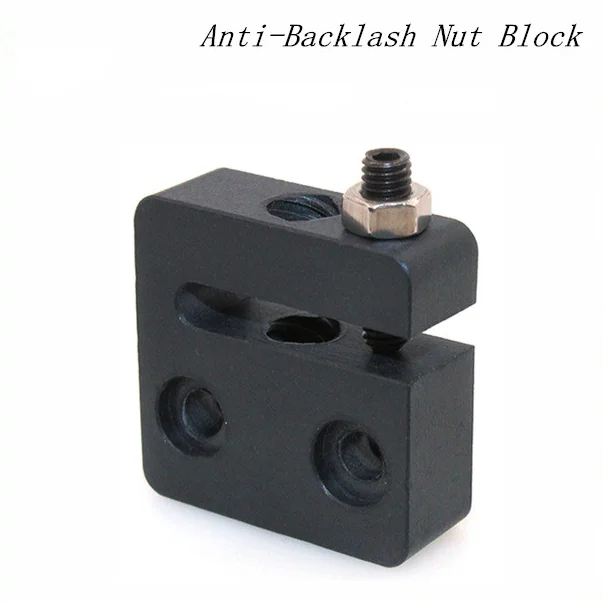
However, with time, your 3D printer’s belt and rod may lose its flexibility and become loose, so make sure you keep your printer well maintained to get the best result out of it.
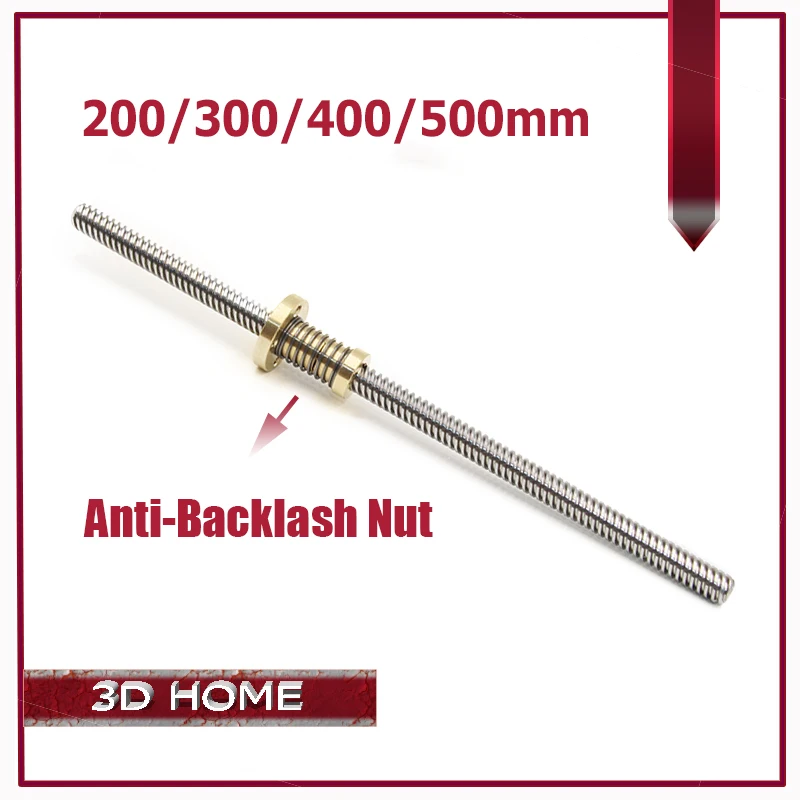
How to Choose Anti-Backlash Nut
Lead screws are the norm for today's linear motion applications. However, despite the lead screw's advantages over competing technologies (i.e., affordability, precision, the ability to design with freedom and reduced maintenance), all lead screw systems inherently have a certain amount of "play." Therefore, an important design consideration when utilizing a lead screw is the amount of backlash your system can tolerate while still achieving the project goal.
Lead screws are the norm for today's linear motion applications. However, despite the lead screw's advantages over competing technologies (i.e., affordability, precision, the ability to design with freedom and reduced maintenance), all lead screw systems inherently have a certain amount of "play." Therefore, an important design consideration when utilizing a lead screw is the amount of backlash your system can tolerate while still achieving the project goal.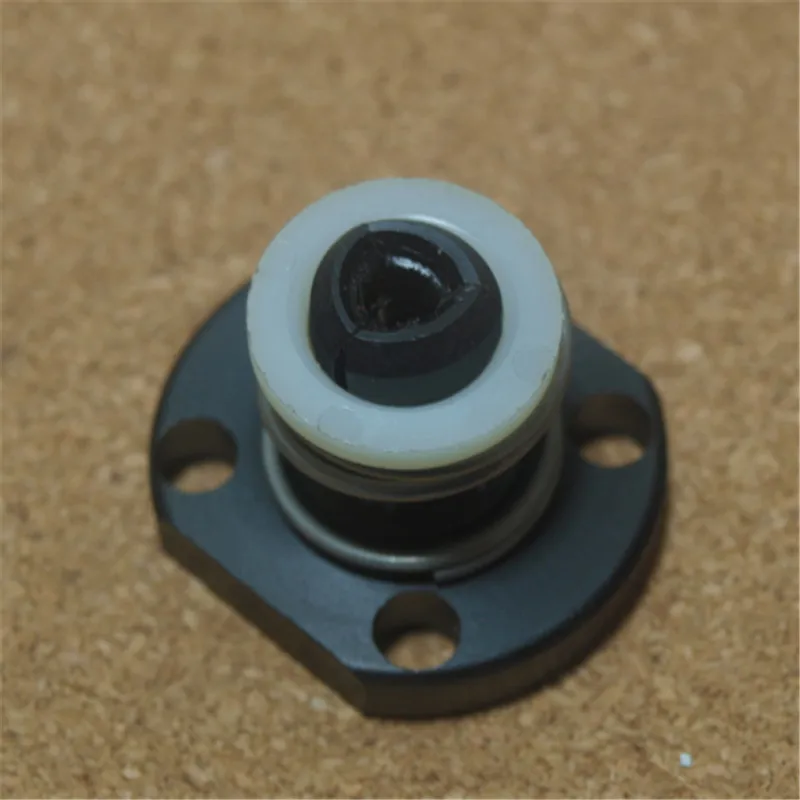
How do I choose the proper anti-backlash lead screw nut for my application?
Backlash can be detrimental to your application by causing wear and inaccurate positioning. Syringe pumps and robotic applications are two examples of lead screw systems where positioning and accuracy are essential. Thankfully, compensating for backlash is relatively simple, and Helix Linear Technologies offers a variety of anti-backlash lead screw nuts to ensure your application performs as expected.
There are multiple styles of anti-backlash lead screw nuts, but two of the most common are Axial Anti-backlash nuts (AAB) and Radical Anti-backlash (RAB) nuts. Like lead screws themselves, the type of anti-backlash nut that is selected depends on the intended application.
3 Steps to Selecting the Correct Anti-Backlash Lead Screw Nut
Step 1 - Determine the level of repeatability and precision required in your application.
Step 2 - Calculate the intended load of your application.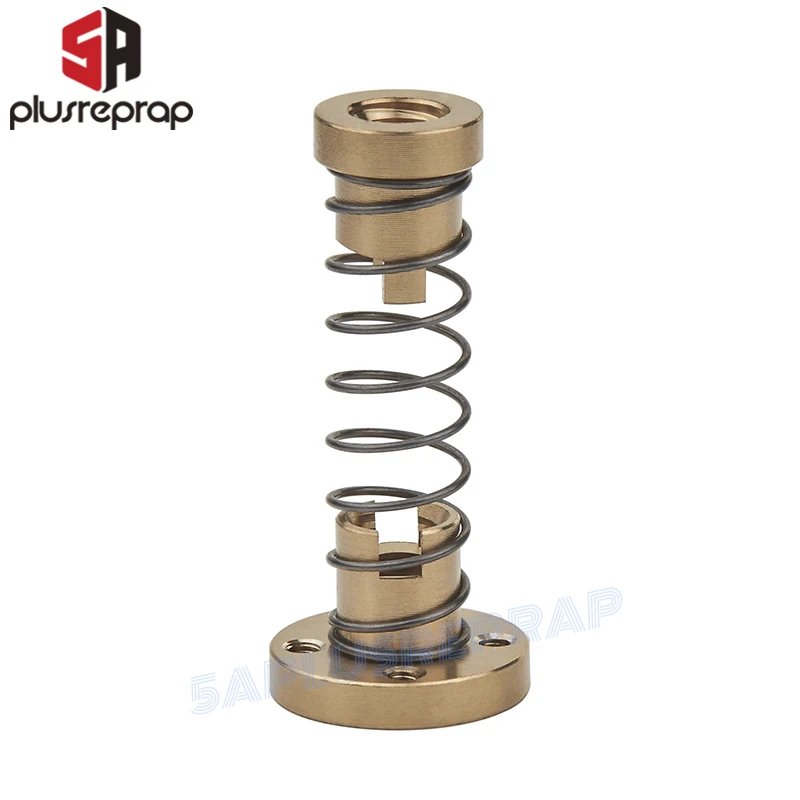 Each anti-backlash
lead screw/nut assembly has specific load requirements for the lead screw to function correctly.
Use our Helix Linear Technologies Lead Screw Calculators HERE.
Step 3 - Assess the amount of drive torque necessary in your application.
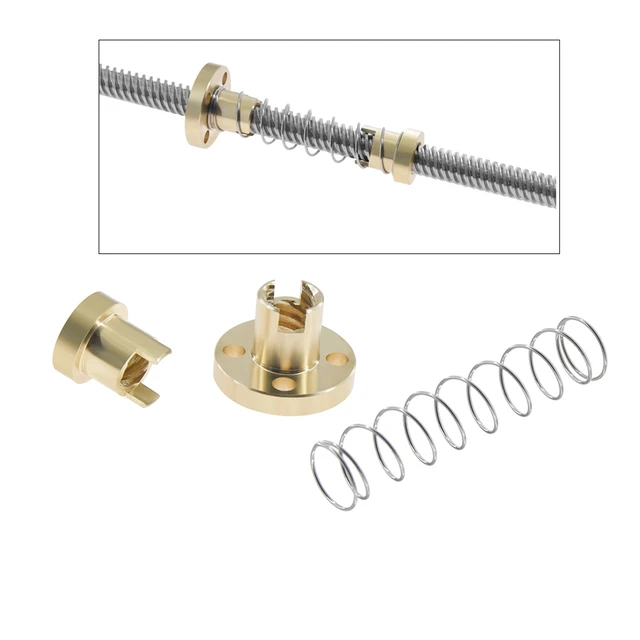
Axial Anti-Backlash Nuts (AAB)
Axial anti-backlash nuts consist of a main nut body and a secondary ring that share the same thread form. There is a spring between the two components that force each part against opposing flanks of the screw thread. This biasing takes up the clearance between all the components, i.e., gets rid of the backlash. The drawback to this design is that if the load is greater than the spring force, you can still get backlash in the system. For a more significant load, you need a stronger spring to keep backlash to a minimum. However, a more robust spring means more friction between the nut and screw which requires more drive torque to overcome.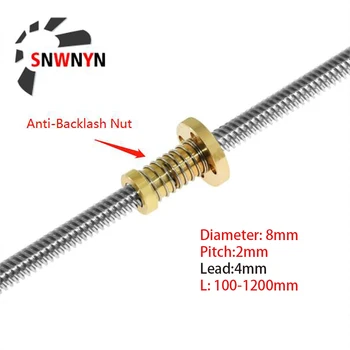
Radial Anti-Backlash Nuts (RAB)
Radial anti-backlash nuts consist of a nut body with flexible "fingers." There is an axial spring that pushes a ring along the nut body. There are ramp features on the ends of the fingers that the ring uses to push the fingers inward towards the screw. The threads on the fingers are pushed into the valleys of the screw thread to take up any clearance. There is a mechanical advantage provided by the ramp features between the fingers and the collar, which amplify the force of the spring. Unlike the axial anti-backlash nut design, the radial anti-backlash nut can handle loads greater than the spring force. There is also less of an increase in required drive torque compared to an axial anti-backlash nut.
Both nut styles serve the same function of preventing backlash while maintaining high efficiency. They are available from Helix Linear in standard and metric thread forms with flanged, threaded, or threaded with a screw-on flange nut body.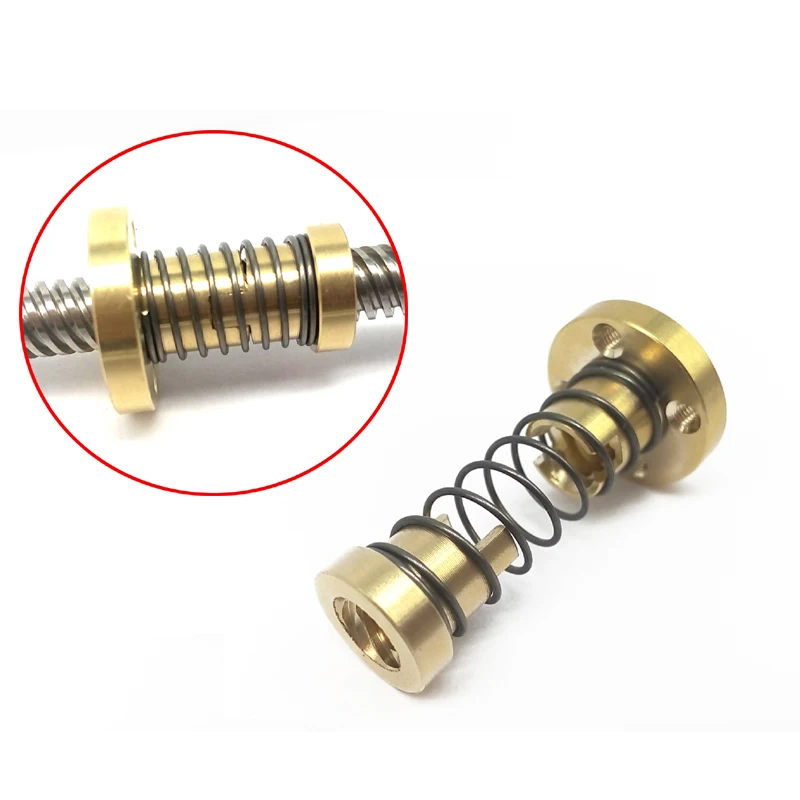
To view additional anti-backlash nut options from Helix Liner Technologies, CLICK HERE.
If you are unsure which style of anti-backlash nut is suitable for your application, contact one of our sales engineers for assistance. We would be glad to put our expertise to work for you to help determine the best anti-backlash solution for your application.
We hope that you've found this information about controlling backlash useful. To assist you in selecting an appropriate lead screw assembly for your next project, we have also assembled some expert tips in our Engineer's Guide to Lead Screw selection.
Additional Reading
Selection of Anti-Backlash Nuts in Linear Motion Systems
The Acme Lead Screw Backlash Survival Guide
Products
Anti-Backlash Nuts
Lead Screws
Ball Screw Catalog
Unpacking, assembly, specification, benefits and printing examples.

Creality Ender Packaging 6.Ender Assembly 6.Creality Ender Specification 6.Ender 6 Key Features.
Creality universal hotend. Partially enclosed body. Creality V4.3.1 is a 32-bit board with TMC2209 drivers. Belts GATES 10 mm. Heated platform 250×250. Nut with backstop protection (anti-play). Power supply 360 W. Dual drive extruder. 4.3 inch touch screen.
Examples of 3D printing on Ender 6. Conclusions: is it worth buying Ender 6?
Creality has a reputation for making some of the best 3D printers on the market and in this review we will try to figure out if the Creality Ender 6 is worth buying. attractive to buyers of 3D printers, whether they are new to the field or advanced users with years of experience.
Even without delving into the features and specifications, at first glance, this printer wins among budget 3D printers with its professional appearance and semi-enclosed design, and Core XY kinematics gives hope for fast results.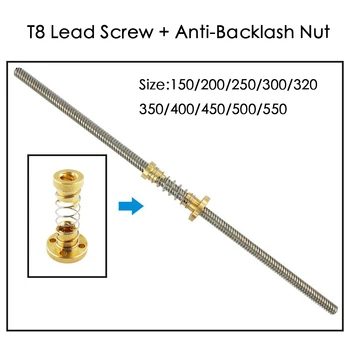
The rest of this article will focus on Ender 6 features, advantages, disadvantages, specifications, printing examples, and user feedback.
We hope you find this post useful.
Let's run the standard tests and see if the Creality Ender 6 is worth buying.
Creality Ender 6 Packaging.
Ender 6 comes in a large cardboard box with all components tightly packed with foam on all sides.
The packaging is strong enough to withstand all possible transport vicissitudes.
Ender 6 comes with the following accessories:
500g PLA spool;
Manual;
Spool holder;
Cutting pliers;
PTFE tube;
Spare nozzles;
Spare fittings;
Nozzle cleaner;
USB card reader with 8 GB SD card;
Bag of screws and wires;
Scraper;
Hex keys;
Power cable.
Assembling Ender 6.
Creality Ender 6 comes as a partially assembled kit and we recommend that you allow approximately 2 hours for this task.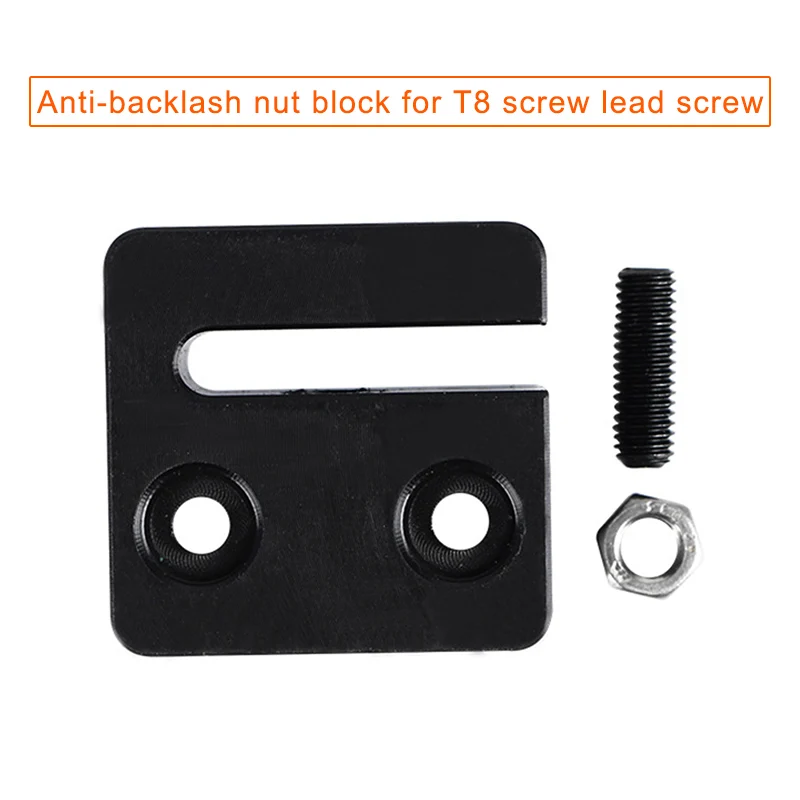
You may be able to assemble it faster, but we advise you to always take the time to carefully assemble and make sure you assemble everything evenly, because CoreXY 3D printers are much more sensitive to misalignment.
The assembly steps are well documented in the manual, and all screws are properly labelled, making the Ender 6 assembly process quite easy.
Note that the four aluminum profiles are fixed with just one screw on each side.
During assembly, this raises some concerns about the rigidity of the printer, but after installing the acrylic covers, it is safe to say that the solution works.
Specification Creality Ender 6.
| Mechanics | CoreXY |
| Print speed | up to 150 mm/s |
| Printable area | 250x250x400 mm |
| Printer size | 495x495x650 mm |
| Extruder | Bowden |
| Layer height | 0.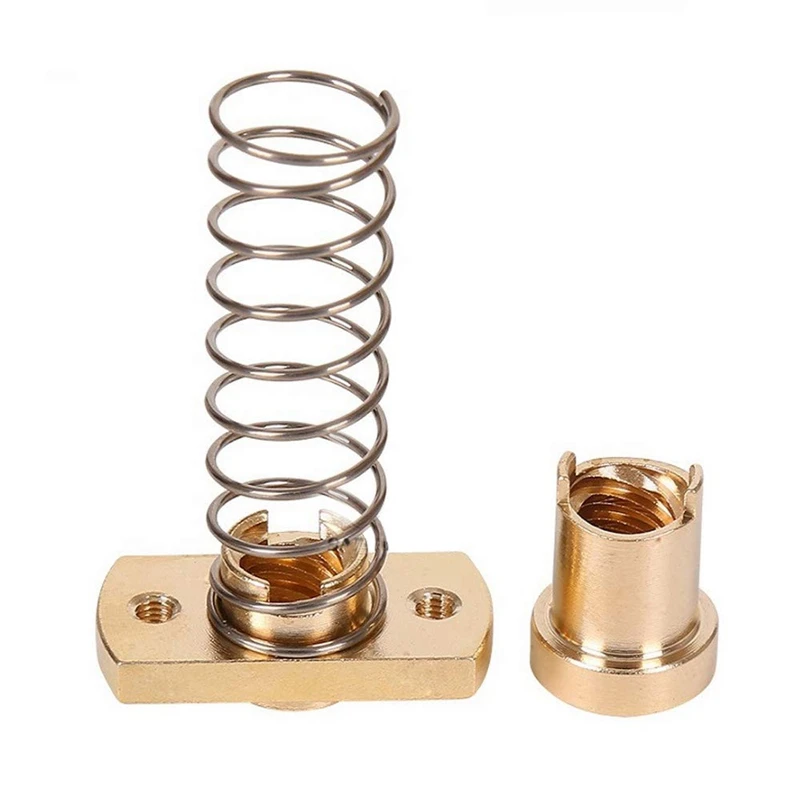 1-0.4 mm 1-0.4 mm |
| Display | 4.3" touch screen |
| Stepper drivers | TMC2208 |
| Quiet operation | yes |
| Filament Break Sensor | yes |
| Resume function | yes |
| Platform Auto Calibration | no |
| Print platform | Carborundum coated glass |
| Housing | semi-closed |
Ender 6 Key Features.
Ender 6 is the first Creality printer to use the Core XY belt drive. The lightweight hot end bowden allows this printer to achieve higher print speeds without losing quality.
It's advertised by Creality as being able to print at ~150mm/s, but their hotend solution slightly contradicts that claim because the plastic won't have time to melt to support printing at that speed.
It is also possible to change the shafts to rails, but this adds to the cost of the printer and is not sure if the cost is worth it.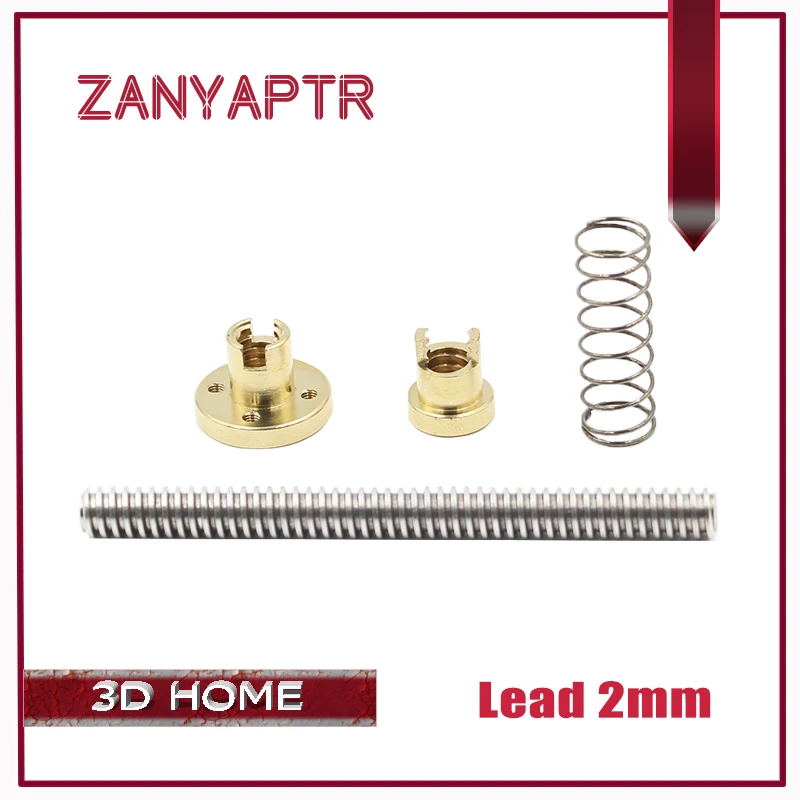
Creality universal hotend.
Ender-6 is equipped with the standard hot end that Creality uses in the Ender line.
Supplied as standard with a 0.4 brass nozzle with a thermal silicone sleeve. The silicone cover eliminates plastic sticking and helps keep the hot end clean, and also stabilizes the temperature of the heating block and prevents the temperature from dropping when the blower is turned on.
There is a mounting solution inside the metal casing of the hot end for adding a BLTouch.
Partially enclosed housing.
As mentioned earlier, the Ender 6 is partially covered with acrylic panels on the sides to make it easier to print with higher temperature materials.
While this does not provide a fully insulated print chamber, the acrylic panels do prevent drafts.
It also makes it easier to completely close the printer because by purchasing some aluminum profiles you can easily add a cover to the Ender 6.
Or use cardboard as a temporary budget solution.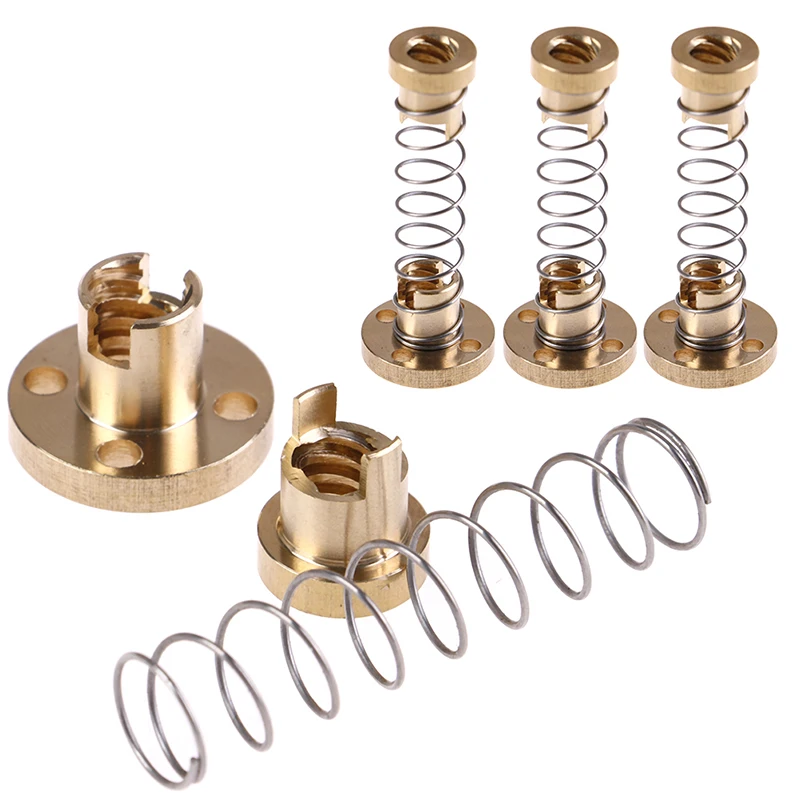
There are two magnetic acrylic doors on the front of the printer.
Creality V4.3.1 - 32-bit board with TMC2209 drivers.
Creality Ender 6 ships with V4.3.1 32-bit board with TMC2209 drivers.
All stepper motor wires have ferrite cores that are installed to minimize electrical noise.
This is a nice addition because on some printers where the interference is not fixed, you may have trouble getting the BLTouch to work properly.
GATES belts 10 mm.
Interestingly, no one mentioned in the marketing promos that the Creality Ender 6 comes with 10mm GATES straps. We haven't seen any budget CoreXY printer on the market that uses wider belts, and we think this is one of the most compelling features.
Having good belts on a CoreXY printer is essential, and having 10mm GATES belts makes the Ender 6 an interesting proposition. You can install a direct drive extruder without worrying too much about the weight.
Of course it's important to keep the weight of the printhead as low as possible, but with 10mm belts you can increase speed.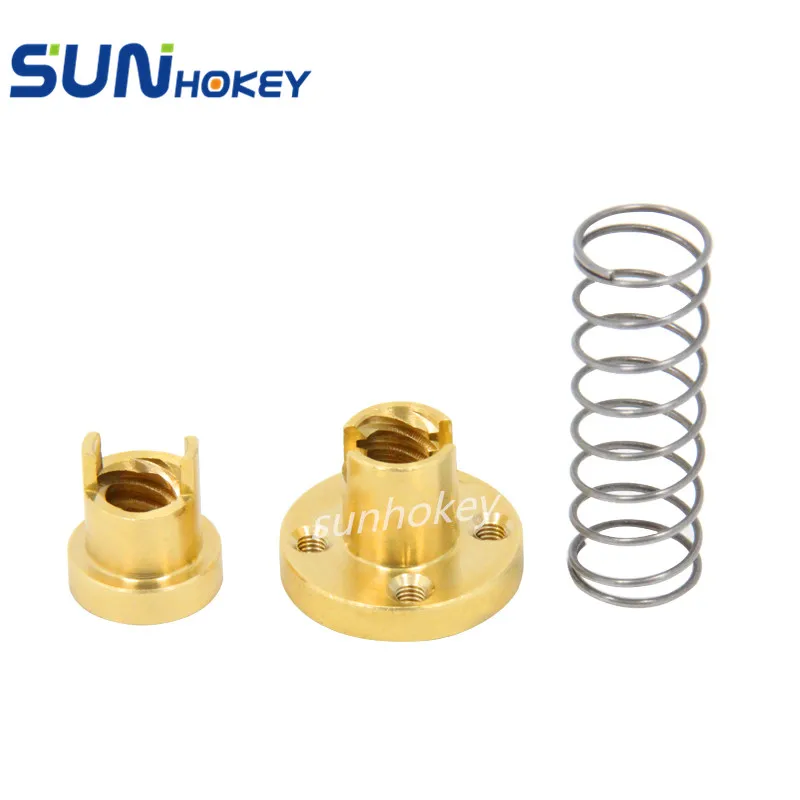
Unfortunately, there is no way to adjust the belt tension, but we are happy to report that the belts are correctly tensioned out of the box, with the same tension for both axles.
Heated platform 250×250.
Carborundum glass print platform is removable. This simplifies the removal of products after 3D printing. Plus, it heats up faster.
The print bed is easy to calibrate with the large rotary knob.
The platform is quite rigid and moves along the Z-axis V-profiles with 8 polyoxymethylene rollers.
The platform has thermal insulation that covers about 70% of the table. Edges and corners are not insulated. Up to 60 °C the table heats up in about 3 minutes, heating up to 100 °C can take about 10 minutes.
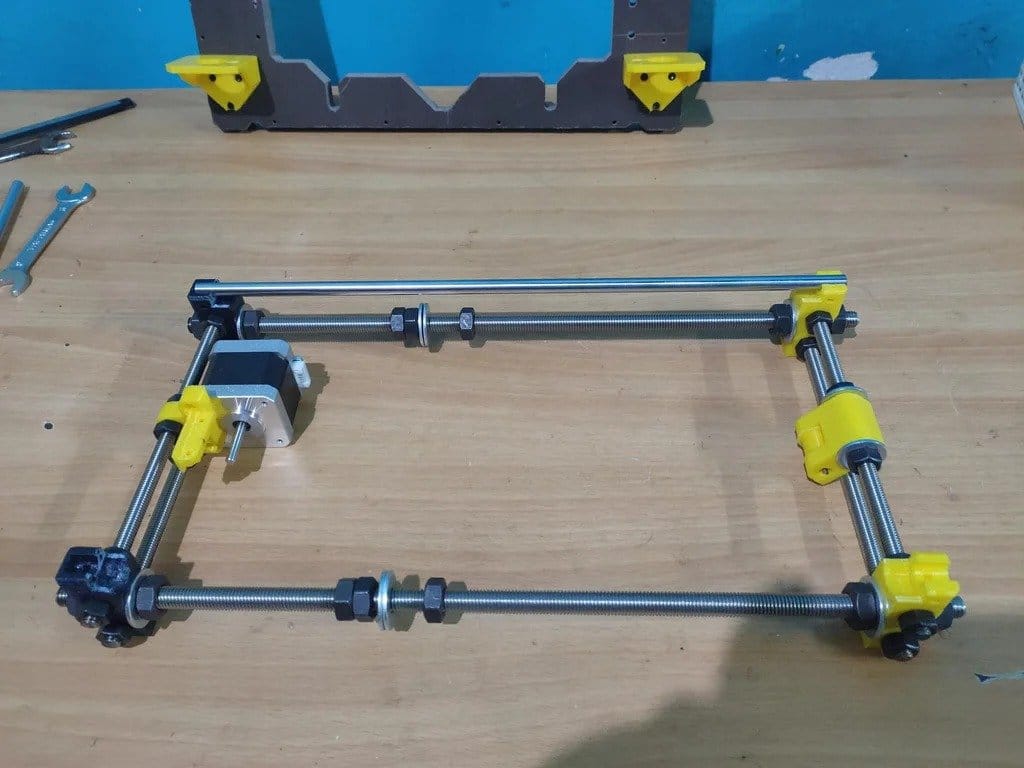
Anti-backlash nut.
Ender 6 has an anti-play nut installed out of the box. These nuts fit the lead screw perfectly and do not need to be lubricated. We hope other companies choose to use them in their printers because they are cheap and offer superior performance.
The installed nut works very well and there is no play during movement. In addition, the presence of a POM nut helps to keep the platform in place when the power is turned off.
Of course, these nuts can wear out and may need to be replaced in the future, but considering all the benefits they provide, as well as their cost, this is not a concern.
Power supply 360 W.
In the datasheet, Creality lists this printer as having a "proprietary power supply". This is a Cheng Liang 360W 24V unit.
The fan runs constantly and is a little noisy but not annoying.
Also worth noting is that the Ender 6 has a mesh filter on the bottom to protect the electronics from dust.
Dual drive extruder.
One of the most important upgrades to Ender 6 is the addition of a metal extruder with two gears. This is a lot better than the old extruder that Creality uses on most of its budget 3D printers. The dual gear setup picks up the filament much better, giving you more precise control when printing.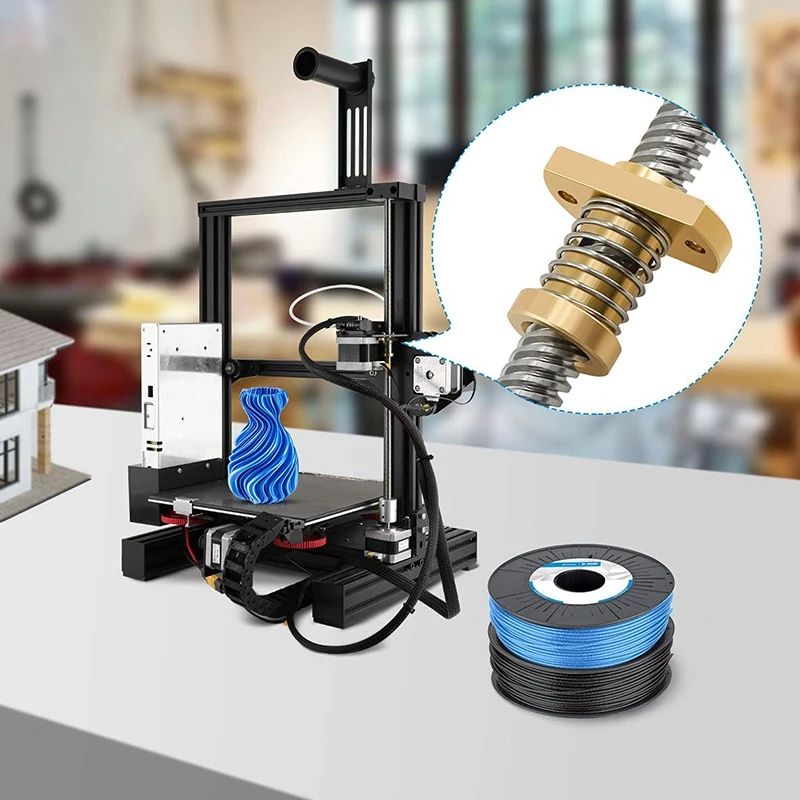
From time to time we have noticed that the plastic can break if the rollback speed is set too high, so we do not recommend exceeding 35-40 mm/s.
Many people might like to see an extruder with a gear ratio like the BMG, but there really is no reason to complain about the performance of a standard extruder.
On all printers that have used this Creality twin gear extruder, the quality has been quite good.
4.3" touch screen.
The 4.3 inch touch screen used in Ender 6 is the same as other Creality printers such as CR-5 Pro, CR-10s Pro, Ender 5 Plus. The user interface is intuitive, but it doesn't have any special features that stand out.
Sometimes a rather loud sound when touching the screen is a bit annoying, but over time you stop paying attention to it.
It's also worth mentioning that Ender-6 does not understand Cyrillic, so name your files in Latin to avoid misunderstandings.
Ender 6 3D printed examples.
- Material: Devil Design PLA hot pink;
- Layer height: 0.2 mm;
- Nozzle temperature: 197 °C;
- Platform temperature: 60°C;
- Print speed: 60 mm/s.
- Material: Devil Design PLA red;
- Layer height: 0.15 mm;
- Nozzle temperature: 195°C;
- Platform temperature: 60°C;
- Print speed: 40 mm/s.
- Material: Devil Design SILK hot pink;
- Layer height: 0.1 mm;
- Nozzle temperature: 225 °C;
- Platform temperature: 60°C;
- Print speed: 60 mm/s.
- Material: Devil Design PETG purple Galaxy;
- Layer height: 0.15 mm;
- Nozzle temperature: 225 °C;
- Platform temperature: 85°C;
- Print speed: 50 mm/s.
Conclusions: is Ender 6 worth buying?
We think the Creality Ender 6 is a worthy evolution of the Ender 5 Pro. It compares favorably with its predecessor with upgrades such as acrylic panels, a stiffer platform, anti-play nuts, improved wiring and wider straps.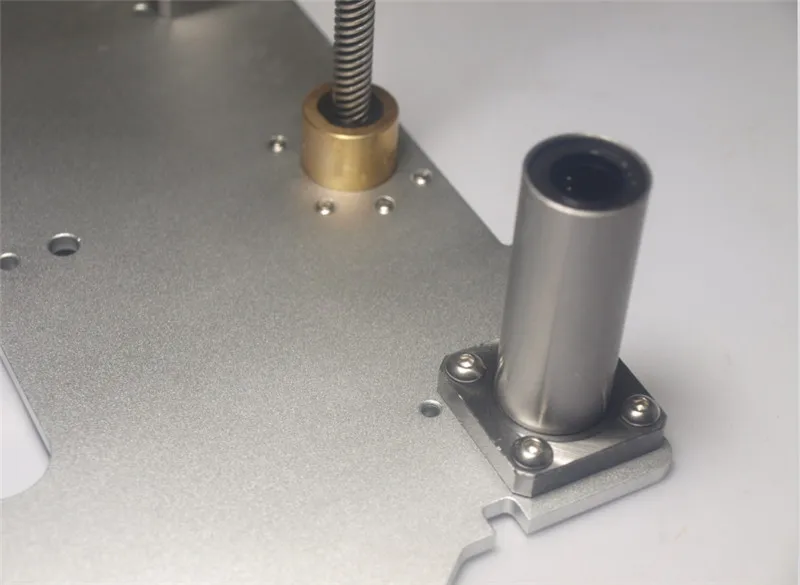 All these upgrades make the printer a good CoreXY machine.
It works well out of the box and is also a great starting point for anyone looking for a well built CoreXY printer for their job.
Considering the printable area, it's safe to say that the Ender 6 is a good printer worthy of your attention.
During the testing period it worked well and became one of our favorite Creality printers.
Happy shopping!
(There is a solution) The portal crashes into the table after printing
I have upgraded my Ender 3 Pro to the point where I am giving myself problems, one of which is this:
My z-axis falls on the table because of everything hanging from it (bltouch sensor added, cable chain) whenever it is idle, example video of what I'm talking about. When this first started happening, I bought a backlash-proof lead screw nut and installed it, and it helped a LOT. The portal did not descend as often and not as far.
But it still happens.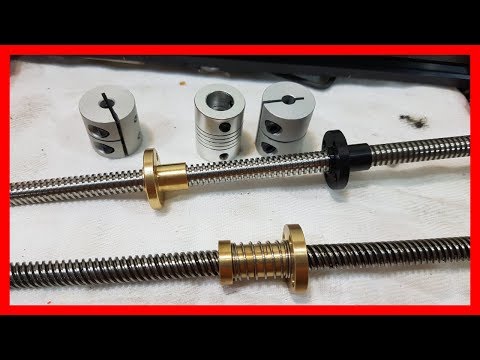 I was thinking about possibly adding a dual z-axis motor and a lead screw anyway (with an extra anti-backlash nut) and I'm wondering if that would help because the gantry would have to overcome friction on both sides..... but at the same time I want to solve a very specific problem that this causes: I just printed a bench and right after the print was done (when I wasn't paying attention and before I noticed) the nozzle crashed right into the print. It must have still been a little hot because it melted right into him. Not far enough to mess it up, but I could see it causing a problem if it was anything other than the Bench.
Is there any code I can run at the end of printing to tell the hotend to step aside? So if he does collapse, will he be lying in a corner or something like that? I use kuru and marlin if that's relevant. I actually saw this question, but I think my even more stupid question is: if this code works, how do I add it? Is it in Kura?
▲ 1
What you're describing sounds more like restarting the last layer machine (or near the last layer) than a z-axis reverse drive problem (although this shouldn't happen just because of the gantry's weight; you may need to tighten things like the reverse nut or the Z rollers).