3D printer abl
Auto Bed Leveling (ABL) Sensor Comparison – 3DMaker Engineering
One of the best upgrades you can add to a 3D printer to improve both performance and ease of use is an auto bed leveling sensor. Although they technically do not level the bed, they create a topological map of your bed and adjust the Z position of the nozzle to follow imperfections of your build surface for a more consistent first layer.
The first upgrade we do to all of our printers is solid mount the bed (remove the bed springs) and add an auto bed leveling sensor. This allows us to level the bed once and never have to worry about it again. When you have a print farm, the last thing you want to have to worry about is adjusting bed leveling knobs on a large number of printers.
Disclaimer: We currently sell a physical, hall effect type probe. We want to be upfront that we have not skewed our opinions based on this. The fact is, we tested each type of sensor extensively in our print farm and came to the conclusion that for our needs this was the most well-rounded option. Because of this, we decided to partner with a sensor manufacture to develop the 3DM Touch. We could have just as easily went with a capacitive or inductive style sensor which typically is much cheaper to manufacture.
If you Google “3D Printer Bed Leveling Sensors” you will find an endless number of manufacturers selling sensors of all shapes and sizes. To help simplify things we will break it down by sensor type instead of sensor brand. If you can understand the pros and cons of each of the technologies available it will help you determine the best one for your application.
Capacitive Sensor (ex. EZABL):
A non-contact sensor that can sense both metallic and non-metallic surfaces. This sensor works by monitoring the capacitance (how much energy the onboard capacitor can hold) which changes when an object is placed near its sensing face. It can detect any surface that has a die electric constant greater than air which should cover every build surface you will use (including glass). Another advantage of this sensor type is that it can probe extremely fast, saving you time during each print. Below is a basic diagram of how the sensor works.
One drawback is that while it can sense almost any surface, the distance at which it reads it will change depending on build surface type, temperature, and humidity. This is no problem if you only have one build surface and do not use an enclosure. If you plan to switch between different surfaces (ex. garolite, glass, PEI, polypropylene, etc.) like us, you will find yourself having to continually tweak your z-offset. Additionally, if you print in an enclosure where ambient temperatures vary, you will again need to adjust your z-offset.
Inductive Sensor (ex. P.I.N.D.A.):
This is another non-contact sensor, however, this type can only detect metallic surfaces. This means when the probe is analyzing a PEI spring sheet, it is actually mapping the spring steel and not the PEI surface you are printing on. This is usually not an issue, however, as the two surfaces should be relatively parallel with each other. If you are someone who likes to print on glass, garolite, or polypropylene—you may want to look for another option as these materials will not be detected. Although these sensors look very similar to a capacitive sensor, they work based on a completely different principle. They use the electrical principal called inductance. In a nutshell, an inductor coil in the sensor creates a magnetic field that changes when a metallic object is within its sensing distance. Non-metallic surfaces do not affect the magnetic field which is why the surface must be metallic.
Similar to the capacitive sensors, their readings are affected by temperature and humidity changes, so be prepared to make adjustments if you expect to see large temperature shifts. Some printer manufacturers, like Prusa, have done their best to use onboard sensors to automatically adjust for ambient temperature changes but in our experience it’s hit-and-miss. We have MK3S printers where we calibrated the z-offset at room temperature, put them in a heated enclosure, and found that the z-offset was then completely incorrect. If you are not printing in an enclosure, the temperature compensation seems to work fairly well for minor changes in room temperature, which is what we think it was really intended to do.
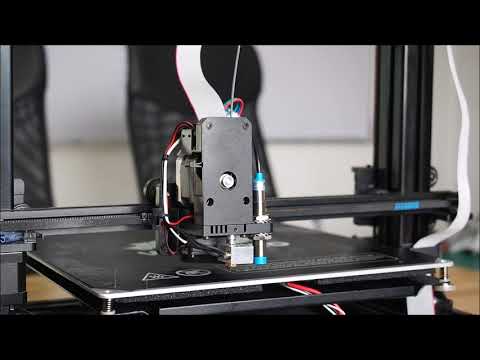
Physical-Hall Effect Sensor (ex. 3DM Touch+):
This is the only sensor on the list that actually makes contact with the bed as a means of detection. Because of this, it is unaffected by temperature and humidity changes like the other two contenders. It functions by using a plastic plunger (pin) and a hall effect sensor to detect your build plate. As soon as the plastic pin makes contact with the bed, it is retracted and registered by the hall effect sensor. Also, there is a built-in solenoid that allows you to extend and retract the probe via g-code which gives you plenty of clearance while printing. Below is a diagram of how a basic hall effect sensor works. Please note, the plastic plunger has a magnet embedded towards the top which is what the hall effect sensor is actually monitoring.
The main drawback of this sensor type is that it is slower compared to the other non-contact types. While there is only a few seconds difference per probe point, this can add up if you are doing a 7X7 (49 points) or greater grid pattern. The good news is that in Marlin 2.0 and newer, there is a feature called HSMode which allows you to probe nearly as fast as the others. The next issue is that it contains moving parts so, in theory, there is more that can break on the sensor. Luckily, the mechanism is extremely simple so there is almost no chance of it actually failing. The new plastic probe tips are also made to bend so if you accidentally crash it, you can simply bend the plunger back in place and get back to printing.
All testing was done with three brand new Prusa MK3S printers modified to accommodate the different sensor types.
Accuracy:
We wanted to test how well the three probes could continually reproduce a 0.24mm, single layer print without any other variables changing such as temperature or build surface types. We tested this by using micrometers to adjust the z-offsets until all three printers were printing a true 0.24mm thick first layer. Once dialed in, we printed the test print 5 more times and measured the thickness in several spots using the same micrometers. All of the probes were able to reproduce a 0.24mm thick first layer consistently without any deviation. If the inductive and capacitive probes are more accurate, they did not translate into any real-world results. Our conclusion: in a controlled environment all three options will provide accurate readings.
Winner: Tie (Inductive/Capacitive/Physical-Hall Effect)
Versatility:
Our expectations: set the z-offset once and continually get a perfect first layer, regardless of the build surface type or ambient temperature. When you have several printers, you don't want to have to think about tweaking z-offsets every time your printer setup changes. This saves both time and frustration which, in our opinion, is the most important function of a bed leveling probe.
On paper, the two non-contact sensors should be the most accurate. Their lack of moving parts and the sensing method give them a leg up (and was shown by Thomas Sanladerer on his YouTube comparison). However, when you throw in real-world variables such as different build surfaces and drastic temperature changes present in an enclosure, the Physical-Hall Effect type sensor comes out head and shoulders above the rest.
Similar to the previous accuracy test, we set our first layer height to 0.24mm and then printed an object that was only one layer thick. We then removed the print and measured it with micrometers and made adjustments until it was exactly 0.24mm. Once the z-offset was adjusted to produce a true 0.24mm first layer, we then heated the enclosure to 35°C and hit print without adjusting anything. The 3DM Touch was the only one that was able to reproduce the same 0.24mm first layer while the other two failed to have a successful first layer. We did this 4 more times and the results were the same each time. The non-contact sensors just weren’t able to give the same z-offset reading with the large change in temperature.
The next test was about switching between build surfaces. We did not test the inductive sensor as it can only sense metal and knew it wouldn’t be able to handle this task. For this test, we again adjusted the z-offsets on the two printers to produce a 0.24mm first layer using a spring steel build surface. After this, we then swapped out the spring steel build surface for a polypropylene plate. As expected, the 3DM Touch printed the same 0.24mm first layer while the capacitive (EZABL) sensor gave us a first layer height of 0.17mm which is an error of 30%. This is because even though the capacitive sensor can detect polypropylene, it detects it at a different distance than spring steel. If you plan on using different build surfaces, we recommend staying away from the inductive sensors as they will fail to detect everything except metal.
Winner: Physical-Hall Effect Sensor
Probing Speed:
Both non-contact sensors are considerably faster than the physical probe. They don’t have any moving parts so no time is required to cycle the probe up and down. As mentioned earlier, Marlin 2.0 has introduced HSMode for the 3DM Touch which has helped increase probing speed, however, even then it will still be ~10% slower to probe the same number of points. If probing speed is extremely critical in your application, an inductive or capacitive sensor might be the best choice for you.
Winner: Tie (Inductive/Capacitive)
Durability:
After testing each sensor type (multiple of each, over several months) none of them showed any signs of having issues with durability. Some argue that the 3DM Touch sensor has moving parts so it, in theory, could wear out. We are confident that your machine would need to be replaced long before the plunger mechanism wears out. The old BLTouch probes had metal tips that would get damaged if you crashed your machine but the newer ones all use “breakaway” plastic tips that deflect if crashed.
Winner: Tie (Inductive/Capacitive/Physical-Hall Effect)
Because the 3DM Touch is a lot more complex in its design, it tends to also be the most expensive. There are also very few manufacturers who produce them which is also a driving factor of cost. Quality capacitive and inductive sensors, on the other hand, can be found for less than $10. This is approximately a third of the cost of 3DM Touch-type probes. If you are on a tight budget and still want to add a bed leveling probe to your machine, both the capacitive and inductive sensors will be a great choice.
Winner: Tie (Inductive/Capacitive)
All three sensors seem to do a more than adequate job as long as you don’t plan on switching build surfaces or changing ambient temperatures drastically. Casual users who are on a tight budget will likely be extremely happy with either a conductive or inductive type sensor.
If you are a 3D printing “super-user” and have the extra budget, we would recommend the 3DM Touch as it requires the least amount of calibration in the long run. It handles everything from build surface changes to large temperature variation without ever needing to do any additional calibration.
Each user is going to have a different set of requirements for their printing needs. For us, the 3DM Touch made the most sense; for others, it may be a capacitive or inductive sensor. We hope that this article helps clear up any uncertainty about the various options available and will help you make an informed decision for your own needs. If you have any questions about areas we did not cover, please feel free to contact us and we will do our best to provide answers.
-3DMaker Engineering
3D Printer Auto Leveling – How Important Is It?
3D Insider is ad supported and earns money from clicks, commissions from sales, and other ways.
Out of the myriad solutions that are proposed for the huge number of common 3D printing problems, the advice of leveling your bed will almost always be mentioned. As many people who are into 3D printing know, the key to a good 3D print is a perfect first layer. It is just logical that a properly leveled bed is a key component to getting that good first layer.
The next question now is – how should the bed be leveled? Is the manual method good enough, or should you always defer to an automatic bed leveling (ABL) feature? Should you even consider getting a 3D printer that does not have ABL?
ABL vs. Manual – the pros and cons
The methods of ABL are very different from that of the manual method. Most 3D printers should have a provision for manual bed level movement through a set of adjustment screws. When this method is done, the print bed is physically moved so that it maintains a set distance from the nozzle at different points.
An ABL method is different in that it does not physically move the bed. Instead, a probe moves around the print bed to take distance measurements. The firmware then makes adjustments based on these measurements by changing the Z settings of the print head as necessary. An ABL method can be described as being more dynamic and able to adjust to minute deviations on the surface of the print bed.
Precision
Bed leveling isn’t a one-time thing – you will have to do it periodically if you want all your 3D prints to come out well. Considering that, you’re bound to get more consistent results with ABL than you would with the manual method. Relying on a pre-programmed leveling algorithm is simply more reliable than sticking a piece of paper between your nozzle and print bed. A sensor can also more readily detect very small deviations on your print bed surface.
Speed
As the name implies, ABL methods run automatically with minimal user intervention. You can run ABL on your 3D printer while you fiddle with your filament or make last-minute preparations. In contrast, you will have to dedicate a few minutes to do a manual bed leveling yourself. There is no contest when it comes to time – ABL wins this hands-down.
Complexity
An argument can be made that manual bed leveling is the simpler option of the two. You just have to do it once to understand how it works, then it becomes a standard routine task. ABL may be an automatic method, but you will need to set it up in your printer’s firmware. This can take a lot of extra work, especially if you’re installing a third-party ABL sensor on your printer. If the technical know-how is beyond your current skill level, you will have to put a lot of effort into setting up an ABL feature.
Cost
Whether you’re buying a third-party ABL sensor or a 3D printer with built-in ABL, you will inevitably be spending about $20 to $80 more. Leveling your bed manually costs almost nothing.
How does auto bed leveling work?
As with any automated process, ABL depends on a pre-set algorithm to make its adjustments. There are different ways of implementing ABL, but they all fall into either of two categories:
Mesh leveling
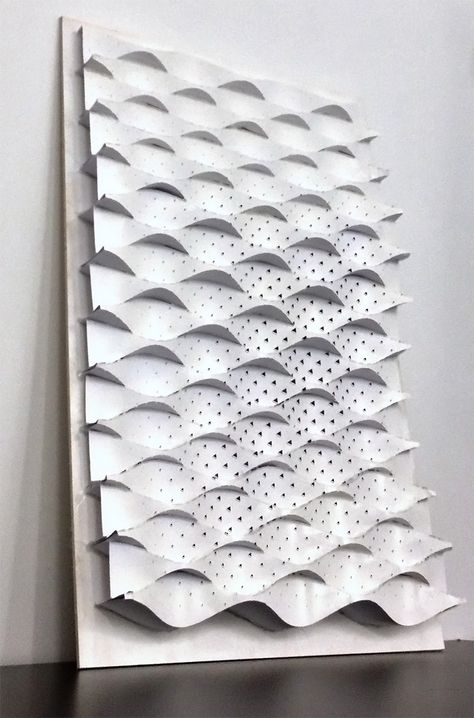
As the name implies, mesh bed leveling involves the printer dividing the print bed into a mesh via evenly spaced grid lines. The height of each grid square is then measured so that deviations can be compensated for. An ABL feature based on a mesh-based method can account for warped sections of a print bed, a common condition in heavily used 3D printers.
Some printers can also use a mesh-based leveling algorithm for a hybrid manual-auto bed leveling technique. The printer probe takes height measurements based on a pre-defined grid and instructs the user on how the print bed height should be adjusted. This works fairly well, especially if you prefer to make actual, physical bed height adjustments.
Matrix leveling
In a matrix-based leveling method, the printer takes measurements at several different points and generates a singular plane based on these measurements. If a tilted plane is detected, the printer compensates by rotating the coordinate axes. This method is best for compensating for tilted print beds. However, you may not get the best results out of it when the bed has been warped.
The objective of a matrix-based leveling method is to adjust the height of the printhead so that the print is perpendicular to the print bed, even if it is tilted. This might mean that the print may not necessarily be aligned to the printer’s Z-axis. Printing on a tilted bed may be problematic if your model has a lot of overhang features.
ABL processes
Now that we understand mesh and matrix-based ABL algorithms, we can see how they are applied to the different methods of ABL that 3D printers implement. The selection may vary based on the 3D printer but these are the most common options available:
3-point leveling
In 3-point leveling, the probe takes measurements at precisely three points of the print bed. These three points are then used to generate a singular plane. The coordinate axes are then rotated to compensate if a tilted print bed is detected. The 3-point leveling method is a classic application of the matrix-based leveling algorithm. It is a quick and simple process, but cannot compensate for warped beds.
Linear
The linear leveling method is quite similar to the 3-point method in that it also generates a single plane that may be tilted in any direction. However, the linear technique has better accuracy on account of a higher number of probe measurements.
In this method, measurements are made at several points according to a pre-defined grid. With more points, the generated plane better represents the actual orientation of the print bed. Similar to other matrix-based methods, the coordinate axes are then rotated to compensate for any tilt.
Bilinear
The measurement step of the bilinear method is almost exactly like that of the linear method – the probe measures the height of the print bed at several points according to a pre-defined grid. However, the bilinear method uses this data to construct a mesh represented by the different data points. This is not necessarily a single plane.
This mesh-based method is an excellent ABL technique for warped print beds. This has made the bilinear method one of the most popular and widely used techniques for ABL, especially in more modern 3D printers.
Which 3D printers have ABL?
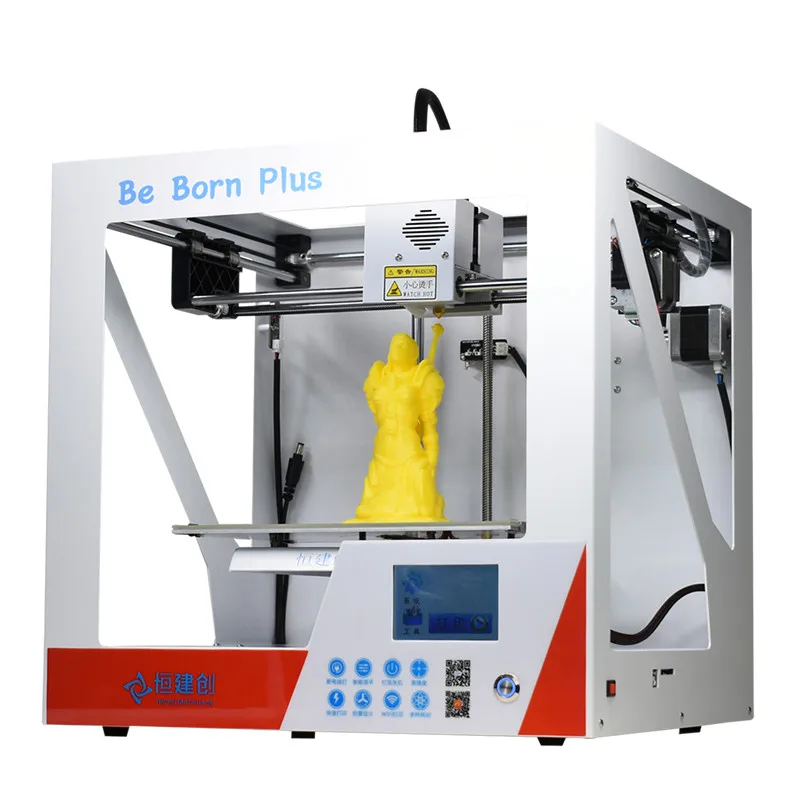
The easiest way to use ABL is to get a 3D printer that already has a built-in ABL feature. These are usually a bit more expensive, so expect to spend $400 or more. Although there are now a lot of 3D printers that fall under this category, they are not all made equally. Here are some of our recommendations for 3D printers with ABL:
- Original Prusa i3 Mk3S+
- Creality CR6 SE
- Flashforge Adventurer 3 Pro
- GEEETECH Mizar S
Other options for upgrading to ABL
If you already own a 3D printer that does not have ABL, you can easily upgrade it with an ABL sensor kit. You can also save money by buying a 3D printer that does not have ABL and just doing the upgrade yourself. You will still end up spending less even with the combined cost of the 3D printer and ABL sensor.
One of the most popular 3D printers with no ABL feature is the Creality Ender 3. This is a relatively inexpensive 3D printer that you can get for less than $200. There is a whole list of ABL sensors that are compatible with the Ender 3, but the best option would be to get the official Creality Ender CR ABL Sensor Kit. This kit is compatible with the Ender 3, 3V2, 3S, 3Pro, and 3-Max.
Conversely, there are more “generic” ABL kits such as the ANTCLABS BLTouch sensor. This is a more versatile kit that should be compatible with most 3D printer brands. It works with the Ender 3 and the CR-10, among a huge list of other 3D printers.
Is ABL necessary for 3D printing?
If your printer doesn’t have an ABL feature, should you be saving up for an upgrade? Do the benefits of ABL justify the additional cost and the skill needed to set it up?
Without a doubt, an ABL feature can be considered “nice to have.” However, 3D printers can work perfectly fine even without it. Manual bed leveling suffices for most applications and is a necessary practice, even for 3D printers that do not have ABL. Prints beds can tilt over time and repeated use and even the best ABL algorithm cannot make up for a severely tilted print bed.
The biggest value of ABL is as a time-saver. If you print a high volume of orders for commercial reasons, then being able to level your bed with a single-button ABL feature saves a lot of time and effort over the long run. This value is not as pronounced for those who only 3D print as a hobby.
Final thoughts
As many of the newer 3D printers come out with ABL features, those who are using the more basic, manual bed leveling methods may feel left out. An ABL feature is nice and may save some time, but it’s not absolutely necessary. The old-fashioned manual bed leveling technique is still useful in any situation.
For those using ABL, an understanding of how ABL works could prove to be valuable knowledge. The effectiveness of ABL techniques may vary based on different scenarios. A badly warped or tilted bed may be beyond what ABL can compensate for.
Warning; 3D printers should never be left unattended. They can pose a firesafety hazard.
(There is a solution) What is ABL or UBL? This is the same?
- What is ABL and UBL?
- ABL means automatic desktop leveling
- UBL means Uniform table leveling
Level the table?
A level table (rotary knobs under the table) or a surface that the nozzle exactly follows is a basic requirement for 3D printing.![]() Without proper desktop setup (not just level, but also the initial gap between the nozzle and the table surface; usually the distance between paper thicknesses, but the probe will do a similar job) adhesion to the print surface may not be optimal and result in print loosening during printing or the fact that the first layer may not stick at all. nine0025
Without proper desktop setup (not just level, but also the initial gap between the nozzle and the table surface; usually the distance between paper thicknesses, but the probe will do a similar job) adhesion to the print surface may not be optimal and result in print loosening during printing or the fact that the first layer may not stick at all. nine0025
Alignment Solution
Over the years, 3D printing hardware and software have evolved to help the 3D print operator. One such solution is to use a sensor (see e.g. Automatic table leveling (ABL) with sensor (BLTouch, inductive, capacitive), how does it work?). But a special sensor is not the main requirement, you can also do it manually.
abl
Automatic table leveling can take many forms. Using a sensor to determine the proximity of the assembly surface (inductive, capacitive, optical or physical touch) allows you to scan the surface of the assembly. The Marlin firmware, more specific in the firmware config. h file (note that this is generic, your printer may need to be adapted!), contains the following information about auto desktop alignment:0025
-
AUTO_BED_LEVELING_3 POINT
Explore 3 arbitrary points on the table (which are not collinear).
You enter the XY coordinates of all 3 points.
The result is one inclined plane. Best suited for a flat bed. -
AUTO_BED_LEVELING_LINEAR
Explore multiple points in the grid.
You specify the rectangle and density of sample points.
The result is one inclined plane. Best suited for a flat bed. nine0043
-
AUTO_BED_LEVELING_BILINEAR
Explore multiple points in the grid.
You specify the rectangle and density of sample points.
The result is a mesh that is best suited for large or uneven tables.
Please note that bilinear alignment is an auto alignment option that does not require you to adjust any of the alignment knobs (but remember that auto leveling is not magic , you still need to ensure the table is as level as possible! see Does automatic alignment result in cut prints?), but this is labor intensive in the sense that you usually have to run multiple probe points before printing, which can take a while depending on the grid size (see How to increase the number of probe points for a sensor BLTouch in Marlin firmware?).
This is where the unified table alignment is used. nine0025
UBL
Unified desk leveling (UBL) is a grid-based software procedure in Marlin firmware, similar to (ABL) bilinear leveling, but with some additional features. From config file.h:
- AUTO_BED_LEVELING_UBL (Unified Table Leveling)
A comprehensive desktop leveling system that combines the features and benefits of
other systems. UBL also includes integrated mesh generation, mesh
Mesh checking and editing systems.
The UBL mesh typically uses more probing points than the ABL equivalent to create a better digital representation (topography) of the build surface being used. Bilinear grids typically use 9-25 probe points, UBL grids typically use 81-100 probe points for a more thorough surface scan. Note that it's up to you how you define it, the bottom line is that UBL is not something you do before every print, so you can get away with having a few more research points. Note. A flat glass surface may not require 100 probing points to select a value that matches the surface (type and size). nine0025
Essentially, it provides the operator with a tool to interact with the 3D printer to control alignment, allowing you to easily store (save up to seven cells), adjust and swap multiple digital alignment cells on your printer to fit the various print surfaces you may be using. , for example, in several prefabricated plates.
The main difference between UBL and ABL systems is that UBL combines the features of other alignment methods to give users more control. When using unified table leveling, it is not technically required to have an automatic table leveling sensor. Through the interface you can manually create a mesh! When the machine is in place, the coordinate system is fixed, movement relative to the reference point is used by each probing point. nine0025
With this many points, UBL meshing can take a long time compared to other systems (without the alignment sensor, of course), but once the process is complete, you don't have to repeat it again, as the UBL functions allow you to change the probe points.
The G26 command is for use with grid-enabled alignment routines (Marlin < 1.1.6 AUTO_BED_LEVELING_UBL and as of Marlin 1.1.7 it also works with MESH_BED_LEVELING and AUTO_BED_LEVELING_BILINEAR ). Various options are described in the implementation of Marlin G26 .
- Are they the same?
To sum it up, ABL and UBL are the same in that some procedure is used to scan the topography of the table surface, but they differ in the sense that for ABL you have to have the sensor auto level and select fewer points, while You can have more points using the UBL Probe, including advanced features like editing and saving multiple meshes. nine0025
the case when "Pro" did not report / 3D printers, machine tools and accessories / iXBT Live
Anet ET4 Pro is 3D printer which I definitely would not recommend to beginners. Before he started typing more or less normal, he drank a lot of blood from me. Table calibration made easy pain. Screws loose during printing, firmware failure, limit switch glitch, not very high quality build. All this you get in full, with the purchase of this models. It took me weeks to get this printer to print more or less bearable. But I still don't trust him to print important models, only drafts, prototypes or parts that do not have requirements for perfect surfaces. But here, rather, the reason is that I have other printers, which out of the box print much better. And all this for $200+. AT in general, right away and at the beginning of the review I can say that this printer is definitely not Suitable for beginners in 3D printing. Although if you tinker a little, then on this printer and you can get normal quality models. But is it necessary to you? This is the question. I personally definitely plan in the future completely remake this printer, leaving only the frame as a base, and on its basis already build a more interesting printer. Perhaps hands will reach and tell about this.
 But now the review is precisely Anet ET4 Pro in stock condition. nine0025
- Model: ET4 PRO
- Print technology: FDM
- Print block type: 1xBowden extruder
- Media Type: plastics PLA, ABS, HIPS and analogues
- Filament diameter: 1.75mm
- Frame material: aluminum
- Print area: 220x220x250mm
- Nozzle diameter: 0.4mm nine0005
- Accuracy: ±0.1mm
- Layer thickness: 0.1-0.3mm
- Model loading options: connection to a computer; off-line with microSD
- LCD display: 2.8 inch color
- Max Speed printing: up to 150mm/s
- Recommended Speed printing: 30-60mm/s
- Table material (HotBed): aluminum platform + tempered glass or thermal pad nine0005
- Extruder temperature: up to 250°C
- HotBed temperature: up to 100°C
- 3D printer size: 510x485x250mm
- Weight: 7.
 6 kg
6 kg
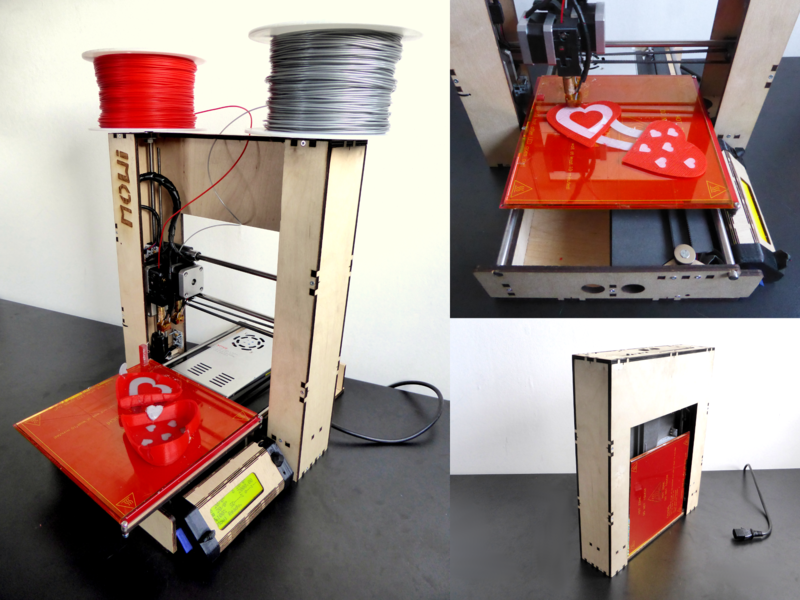
The printer comes in a large, heavy box, already half-assembled. form:
We take out two substrates, one contains the lower part of the printer, and into the second gantry of the Z axis. There are also various accessories between the frame. I also come with the printer was a 1kg PLA plastic spool, but it did not get into the photo. nine0025
I also can't help but show how the box with the printer was damaged, and the presence of soft foam material is clearly not superfluous here. After all, our mail probably it can, as in a joke: when delivering two iron balls from a bearing, one was lost and the other was broken. There was such a hole in the sidewall of the box:
We admired the hole, now let's admire the printer. Let's start with lower part. The motherboard, power supply and one motor are inside the metal body, which is also reinforced from the inside with an additional profile. Heating table implemented from a sandwich in the form of a retaining plate, on which there is an aluminum plate with heating and glass on top. Also included is a sticker for table, which I naturally pasted. The case itself is well made. FROM on the right side it has a switch, a hole for the power cord, MicroSD card slot and Type-B port for connecting the printer to the computer. There is also a grille motherboard
On the left side there is a cooler grill through which the printer blows air:
If you turn the base over, you can see the power supply, a little wires, which are fixed with plastic holders and the Y-axis motor
Now let's take a closer look at the heating table. As I wrote above, this sandwich made of X-shaped plate, aluminum plate and glass:
It is good that the manufacturer has abandoned unreliable plug connections during assembly. Here the heater wire is rigidly fixed with a plastic clamp and soldered to the contact site:
But not happy that the heating plate has no insulation. Although To be honest, the table heats up quickly enough. Up to 60-70 degrees it heats up in about 1-2 minutes. This is enough for printing by most popular filaments.
As for the sticker, it definitely needs to be glued. And not in order to improve the adhesion of the filament, but in order not to crush the glass with a nozzle table. This is easier to do than it seems.
After a couple of test prints, during the calibration process, I have a sticker immediately damaged:
But I'm already getting ahead of myself. Now consider the portal of the Z axis. It has a classic construction. The Z axis moves vertically with a single motor with fixed on it with a rigid hitch pin. The pin itself at the top is not has a latch. This is a plus for some and a minus for others. I personally never I fix the stud on top of the frame, and I think that it is not necessary to do this.
Interestingly, I can also note the presence of an adapter board on the Z axis, which also serves for beauty, and for reliability:
One cable comes from the motherboard, and on this board there is already connection of all necessary elements.
X and Y mechanical end stops:
Bowden extruder. There is a filament end sensor. But they are not placed very conveniently, and replacing plastic you understand.
The print head itself is separate. It moves along the profile due to the wheels in the V-slot profile. When assembling, you need to put it on the frame, place the belt and tension it with the X-axis motor
Now that we have looked at the details, we can start assembling. For Assembly included with the printer has all the necessary tools. Kit hexagons, a wrench for adjusting the table sensor and an open end wrench. And yes, in In the kit there is also a card reader and a non-named MicroSD card. ( by the way, the card turned out to be buggy. At first it lost files, and then it completely died )
Assembly is actually not difficult. First of all, you need to twist both half of the frame with four supplied screws, as well as connect all the plugs in connectors
The second step is to put the print head in place, tighten the belt and connect the cable from the motherboard to the distribution board:
We clamp the cords with ties:
coil holder.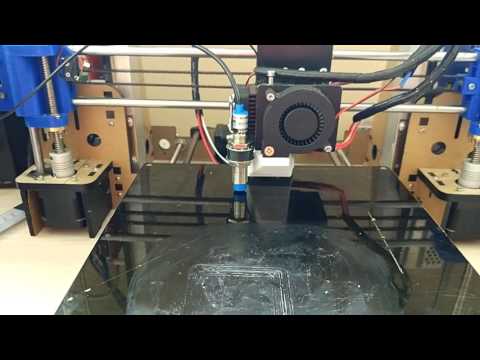 Here the manufacturer did not reinvent the wheel, and, as in most printers just put in a kit a metal leg with a plastic tube:
And on this the printer is ready to go. Sort of. But it's really worth checking out. tightening absolutely all screws, tighten the eccentric nuts on all axles to remove backlash ( and they are here and decent ). My printer is just up between the bedside table and the table where he will work:
And if you think that now you can definitely print, then you are mistaken. Now we need set the automatic table sensor. He's a capacitive ABL. First we need a piece of paper. On sensor there is a screw that needs to be tightened until it stops when the sensor react to the table, but will react to the inserted sheet. Then you can make automatic calibration, and tighten the screws of the table to level it. I got the following:
Real table curve, and no matter how I tried, the photo shows the best calibration that I could receive. By the way, I don’t know if these are jambs of my printer, or everyone has it, but in fact the printer does not remember and does not take into account the nervousness of the table. He is not writes these measurements to memory and does not use them when printing. And this is a joint. Therefore, you can simply use the usual calibration, and then set the desired us the amount of clearance of the Z axis.
Well now you can start printing. But before that, let's get acquainted with the printer software. nine0025
Printer has 2.8 inch color touch screen. The sensor is resistive, and reacts not only to the finger, but also for other things.
When switched on printer, the user sees a screen saver with the manufacturer's logo:
Loading printer is quite fast, it turns on in 15 seconds. This is what the main looks like menu:
Here you can immediately try to select the language we need, but, unfortunately, the Russian language was not delivered:
In the Prepare menu are axis settings and calibration, as well as the menu for changing the filament:
In the Settings menu, you can perform manual calibration, view information about the printer and firmware and also update the firmware from a flash drive:
And like this looks like the Print menu. At pressing it opens the contents of the flash drive, where you can select a file for printing:
True, there is One obvious jamb of the firmware. The file that we need to print must be selected with the arrows up and down. It would be logical to just click on the file name to choose but no. You must first scroll through, and click on the desired selected file OK button. nine0025
After selected a file for printing, we see this menu:
Here, right away, so to speak, on the fly, you can adjust the temperature of the table and nozzles, as well as adjust the fan speed. Come on and stamp on pause or stop it altogether.
Upon completion of printing, the printer displays this window with information about that printing is complete:
And now about printing. As I said above, the printer loves to fail. For example, he can completely forget the gaps, and start pushing the nozzle into the table, or lose limit switches and their directions. At any moment, one or the other can unwind screw, and as a result, one of the axes will loosen. And as a result, left without An oversight print might look like this:
Or like this:
Or like this:
Which, of course, does not add joy. And sometimes it can print two details in a row, but one of them will look normal, and the second not so. As here:
Although if you sit over the printer and watch, you can make quite good details. Here, the same hooks as in the photo above, but this time he decided that he was ready for work:
But, by the way. If you still calibrate the printer before printing, everything will check several times, make sure that the temperature is set correctly, and the gaps did not run away, then you can get normal models. Here are examples:
And this fitting and adjustment before each print, frankly, very annoying. Sit and think, print or not. How to play the lottery.
Either he prints well, then some bug will come out.
In general, you understand. It's pretty nerve-wracking.
Conclusion
To be honest. AnetET4 Pro 3D printer I definitely do not recommend for purchase. Look like that's it smartly done, but poorly implemented. I personally keep this printer only in as a backup printer when my two primary printers are busy printing. Suddenly you urgently need to print something else, and this is something not very complicated and the customer will have no complaints about the quality, only then I start printing. I can to forgive such a printer if it cost 100-130 bucks. But the price of this the printer is now 230-270 bucks. What kind of product is just a frank overprice. For example, I have a Kywoo3D Tycoon Max 3D printer (my review), its price is about $300 and it fully justifies its price. And here is the printer not that he does not pull on his price, he also requires dancing with a tambourine around him. It's better to buy folk Ender, than this share. nine0025
I am personally planning to rebuild this printer. Already looked at the linear guides, but have not yet decided on the motherboard.