3D printed surgical tools
The Next Generation of 3D Printed Surgical Instruments
restor3d is on a mission to empower healthcare providers who repair and reconstruct the human body. It has pursued an approach driven by additive manufacturing due to the design freedom and affordability of 3D printing, which offers a path to disrupt traditional medical markets. The restor3d team drives innovation in precision surgery by changing the way both implants and surgical instruments are developed and delivered.The company was co-founded in 2017 by distinguished entrepreneur, orthopedic surgery professor, and highly-cited materials scientist and engineer Ken Gall.
restor3d leverages 3D printing capabilities to drastically improve surgical care delivery by printing procedure-specific polymer instrumentation that is tailored to cervical spine implants. With over 132,000 anterior cervical discectomy and fusion (ACDF) procedures performed per year in the United States1, this massive market traditionally uses stainless steel instruments. These traditional instrumentation systems are slow to evolve, have significant upfront costs, and often present complications in the surgical workflow.
The lumbar spine with fusion cage insert.
With a fleet of over 25 Formlabs 3D printers in its production line, restor3D is already printing the next generation of surgical tools. This procedure-specific, single packed sterile instrumentation system result in:
- Replacement of large, expensive surgical trays.
- Ability to iterate designs and quickly introduce new tools or features based on surgeon preferences.
- Dramatic reduction of supply chain and sterilization costs for hospitals.
We spoke with Cambre Kelly, VP of Research and Technology at restor3d, to understand how the team tackled this ambitious endeavor, why they invested in Formlabs 3D printers, and understand what is next for restor3d.
restor3d is comprised of a team of highly skilled biomedical engineers and material scientists who initially focused on 3D printed implants for cervical spine surgeries.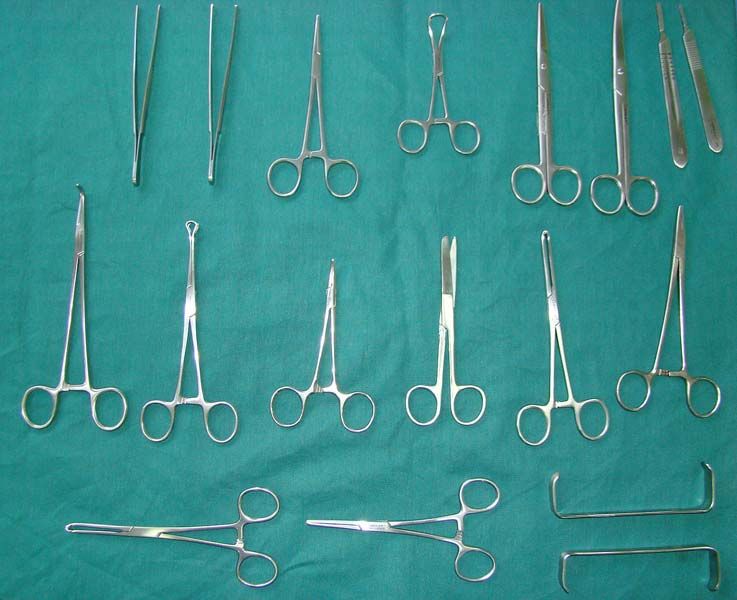 But in developing these new implants, the team kept running up against a recurring issue: traditionally manufactured stainless steel instrument systems.
A traditional surgical tray. Source and © : Zimmer Biomet
Kelly explained the situation, saying, “we were developing an innovative implant that has features that are only achievable with 3D printing, but expecting surgeons to use a very traditional instrument system to deliver the implant. So we realized pretty quickly that evolving the instrument offering alongside the implant innovation was going to be an important differentiator for us.”
Kelly continued, “we are uniquely capable of delivering true just-in-time products because of our in-house manufacturing and the ability to quickly tune design and geometry based on feedback from the field. Traditional instrument trays are typically machined from stainless steel, and cost upwards of $50,000 per tray. As a medical device manufacturer, if you're going to make the investment into buying 10 instrument trays at $50,000 each, you're going to be locked into using those for a really long time. You're really not going to be willing to iterate the design, throw away a tray, and start from scratch or change some seemingly small features. On the other hand, because of what we're doing with directly printing single-use instruments, we're able to iterate and revise our designs pretty nimbly.”
Creating single-use, procedure-specific, surgeon-matched tools required a truly agile development process, closing the gap between surgeon feedback and product development to an extent not previously attempted. restor3D knew surgeons might be hesitant to change their tools; not every surgeon was trained the same way, changing habits is hard, and experienced surgeons may have their own techniques honed over decades of work.
Because of these concerns, restor3D works closely with orthopedic spine surgeons to quickly turn around new tools based on their feedback. By deploying a truly agile and integrated development process, powered by the same in-house 3D printing technology for R&D and manufacturing, the team is able to deliver nimble and precise instrumentation, freeing surgeons from traditional trays that are typically updated every few years at best.
Orthopedic Surgeon
Dr. Westerlund specializes in orthopaedic spinal surgery with an emphasis on minimally invasive techniques. As a fellowship-trained reconstructive spine surgeon, Dr. Westerlund appreciates that every patient is unique and that every neck and back problem requires a special, thoughtful solution.
Learn More
To get a clinical perspective, Formlabs spoke with Dr. Erik Westerlund, a fellowship-trained orthopedic surgeon who specializes in spine. Dr. Westerlund has been highly impressed with the first generation ACDF system created by the restor3d team, saying “the current development process has been the same for the last 20 years. A company has a new implant and/or instrument system. The company shows up, does some prototyping, and a few days or weeks later there is something to look at. Several weeks later a beta instrument shows up. But now, restor3D isn’t turning out a prototype in a few weeks, they’re turning out the real instrument in a few days. To me, that completely changes what is possible.”
He continued, “it’s not just the implants that are important, but the implants and the implant technique. That’s what makes a successful procedure. This new approach by restor3D is a systems approach. Using additive manufacturing, there is integrated parity between the implant and the instrument – the ability to change both to create the best outcome for the patient.”
Dr. Westerlund sees an opportunity to not only replace old instrument systems, but also to create new ones that exceed what was possible before. Working with the restor3D team, his input has been critical in designing and developing the new instruments. What’s exciting for him is not just the use of 3D printing in manufacturing, but the capable team restor3D has assembled around the technology, saying, “I feel like someone just took the handcuffs off of us. Most companies are still approaching this as rapid prototyping, not rapid instrument manufacturing – that mindset is completely disruptive, and you need an engineering team built around it to make it happen.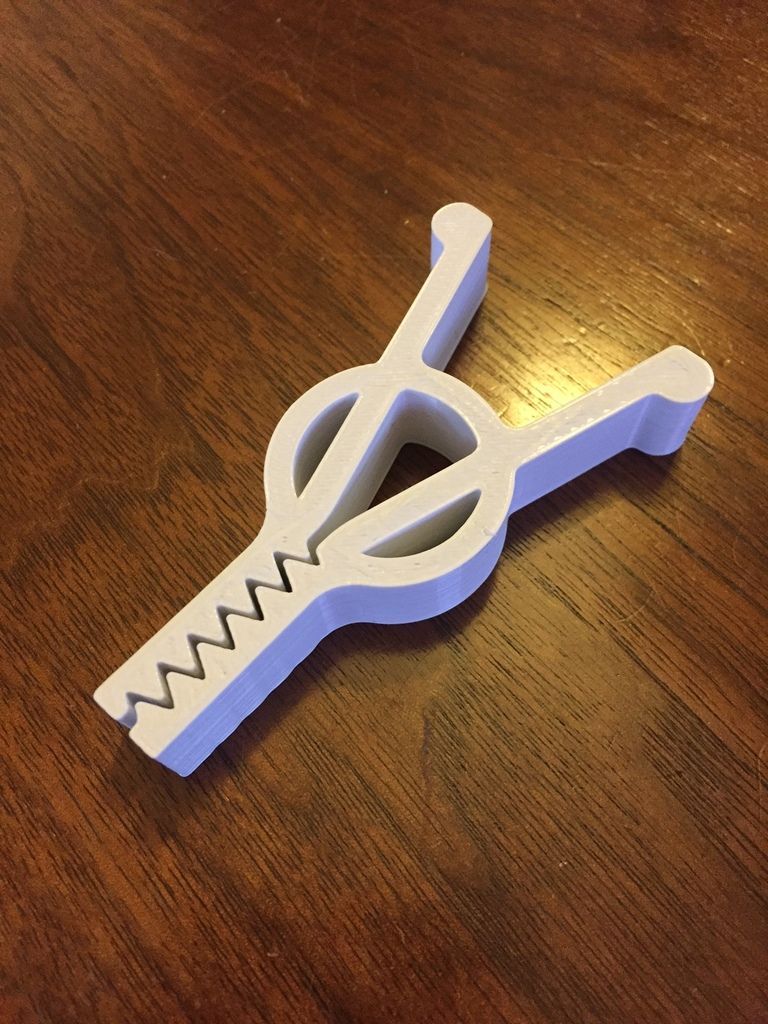 This is very disruptive, from an instrument standpoint, because you can start thinking how this completely changes traditional approaches to implant and instrument systems.”
Most companies are still approaching this as rapid prototyping, not rapid instrument manufacturing – that mindset is completely disruptive, and you need an engineering team built around it to make it happen. This is very disruptive, from an instrument standpoint, because you can start thinking how this completely changes traditional approaches to implant and instrument systems.”
Dr. Erik Westerlund, Orthopedic Surgeon
A major line item for hospitals is sterile processing costs. Each time a surgeon opens a surgical tray, even for a single tool, the entire tray has to be processed and re-sterilized. With hundreds of thousands of surgeries per year, these tools generate significant costs for health systems. This also becomes an issue when tools are accidently dropped in the operating room. Someone will have to run out of the O.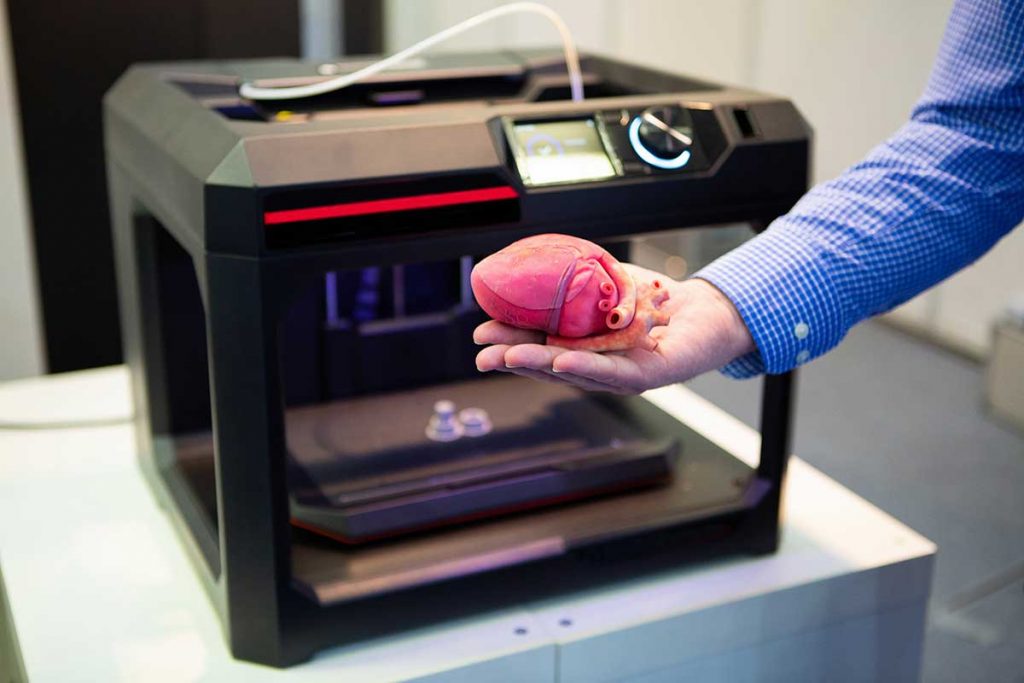 R., down to central sterile, while the patient is under anesthesia, to find an entirely new tray to replace the dropped tool.
This is where the new restor3D tooling system has another major advantage: they are pre-sterilized, one time use tools, completely eliminating the sterile processing costs for hospitals and surgery centers.
Cambre Kelly
“the timeline between Gen One and Gen Two for a typical medical device manufacturer could be on the order of years. We expect that our iterative loop will be on the order of weeks to months.”
Dr. Westerlund said, “there have been attempts at hospitals to implement lean processes to reduce costs. One hospital was able to save $600,000 per month after using a lean program to reduce their sterile processing costs. That money can buy a lot of implants! So if all these tools became nothing more than a lean process to reduce costs, the hospitals would not complain. Operational costs matter to the patient, to the surgeon who may own the practice, and to the hospital system. ”
”
A restor3D instrument being validated at a cadaver lab
Along with the sterilization costs, polymer tools offer further long-term cost savings since they can be easily replaced and upgraded. Under traditional manufacturing methods, surgeons could give feedback and not get access or approval for new tools for years. Kelly expects to see this change, saying “the timeline between Gen One and Gen Two for a typical medical device manufacturer could be on the order of years. We expect that our iterative loop will be on the order of weeks to months.”
One reason for the long upgrade cycle for legacy tooling is costs. Instead of waiting for huge upgrades and the associated injection molds, supply chains, and product launches, additive manufacturing enables constant evolution and the capital expenditure reduction of replacing traditional trays. According to Dr. Westerlund, “the whole idea of a product launch goes out the window. If you have a product that continually evolves without the confetti, at any given time you’re getting the best instruments and the best implant out there. The tools are always evolving. That’s huge.”
Cambre Kelly
“We’re not delivering the bare minimum, but all the ‘nice to haves’ that surgeons are asking for.”
There have been two major developments in recent years that has enabled restor3D to fundamentally change how spine surgeons operate: clinical interest in additive manufacturing solutions, and expanding 3D printing capabilities. Kelly told us, “I think the overall appetite for education from our surgeon users is growing, and they're excited about this technology. I think that they're starting to see the opportunities and the ability to apply this technology in what they're working on to solve some of the clinical problems.”
Growing clinical interest has allowed restor3D to design in parallel or in collaboration with surgeons. Getting input directly from key opinion leaders (KOLs) like Dr. Westerlund is always a benefit in any development process, but it can be vital in healthcare where patient outcomes are on the line. “As the benefits of additive manufacturing have become clear, the old engineer-driven processes are going to become obsolete.” Kelly said that her team “really likes to collaborate directly with our KOLs, get their input, and develop products and instruments that are meeting their clinical needs. We’re not looking to deliver the bare minimum, but all the nice to haves, as well.”
The second advancement is evolving 3D printing capabilities. In recent years, in-house 3D printers have become reliable workhorses for medical device firms, with growing material libraries, quality systems, and ability to scale to production level output.
The continuing development of biocompatible materials for 3D printing exemplifies this progress, and they were an important consideration for restor3D. Its surgical tools are a combination of metal and polymer parts, created to replace the fully stainless steel instruments many surgeons have used for their entire careers. restor3D engineers needed to assess a range of materials, but most importantly one that could handle threading and that would stand up to use during the surgical procedure after either gamma or steam sterilization. Kelly said, “a high toughness 3D printing material was important. The inserters in particular are something that see a lot of impaction force when they're malleting the implant into this space. We needed a material that was not brittle, and would not crack off if it's being malleted, something that could closely replicate what surgeons are used to.” Further, implant trials and sometimes inserters have to be visible under intraoperative fluoroscopy to facilitate sizing testing and implant placement.
Speaking on the feel of the new polymer tools, Dr. Westerlund said “the transition has been completely seamless. The feel is a little different, but the technique is the same.”
3D printers for medical device production have become far more reliable, and industrial level quality is now available at affordable prices. Medical 3D printers are now multi-functional machines, often running 24/7, used across the development process. Kelly commented on this versatility, saying “our goal is to deliver iterative solutions very quickly. And without 3D printing that would not be possible. We’re able to prototype here on the benchtop on the same Formlabs systems that we are using in production.”
restor3D tools being printed, along side their final form.
restor3d has organically expanded their Formlabs printing fleet over the past three years. Today, restor3D has a fleet of 25 Formlabs printers, with 20 of them qualified for use in production full time, and five available for R&D. Using the same machines and materials for R&D and production established a seamless creation process for the engineering team.
Formlabs printers meet the sweet spot for restor3D for a few reasons. One is the ability to scale on their own terms, adding additional printers to their 3D printing fleet over time. The plug and play nature of the Form 3B allows Restor3D to grow their manufacturing capabilities with demand, instead of having to invest a massive amount of capital upfront with a long return on investment. Second, the flexibility that comes with using the same machine and material during the development process allows the team to move machines into production when needed.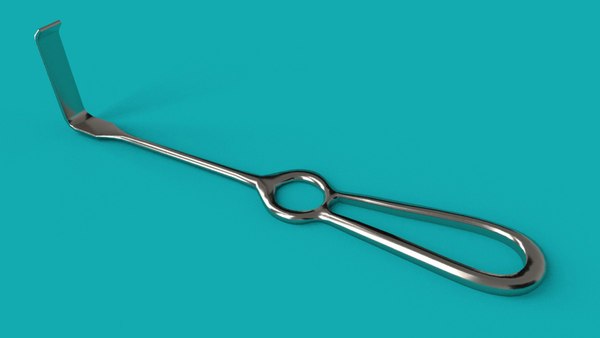
“the two reasons we have stuck with Formlabs are production flexibility and the ability to incrementally scale. The investment into one of your printers is significantly less than investing half a million dollars to buy one metal printer. So over time we can continue to tack on to our Formlabs fleet as we need to scale incrementally, and do so in a sustainable way that doesn't require a huge capital investment upfront.”
Cambre Kelly, VP of Research and Technology
Kelly put it succinctly, saying “the two reasons we have stuck with Formlabs are production flexibility and the ability to incrementally scale. The investment into one of your printers is significantly less than investing half a million dollars to buy one metal printer. So over time we can continue to tack on to our Formlabs fleet as we need to scale incrementally, and do so in a sustainable way that doesn't require a huge capital investment upfront.”
restor3D has customized one of Formlabs’ resins to achieve the perfect properties for their 3D prints. Formlabs customers can gain access to the Materials Settings Editor program to fine-tune the performance of different materials, or work with our Factory Solutions team to develop a new 3D printing resin or manufacturing facility from scratch. While Formlabs offers a growing library of 30+ materials, including multiple biocompatible materials for healthcare, companies such as restor3D will modify materials to meet specific requirements.
restor3D has established itself as a leader using 3D printing to bring innovation to the surgical room. From algorithm-based operative planning, performance-focused implants, and now a groundbreaking polymer instrument kit.
Kelly thinks the company is just getting started: “We’re going to continue to expand in the foot and ankle segment as well as the spine segment while developing our pipeline of products into additional orthopedic segments, including upper extremity, trauma, and probably sports medicine as well. Outside of the orthopedic space there's a lot of opportunity to use 3D printing technologies and evolving materials that we have available.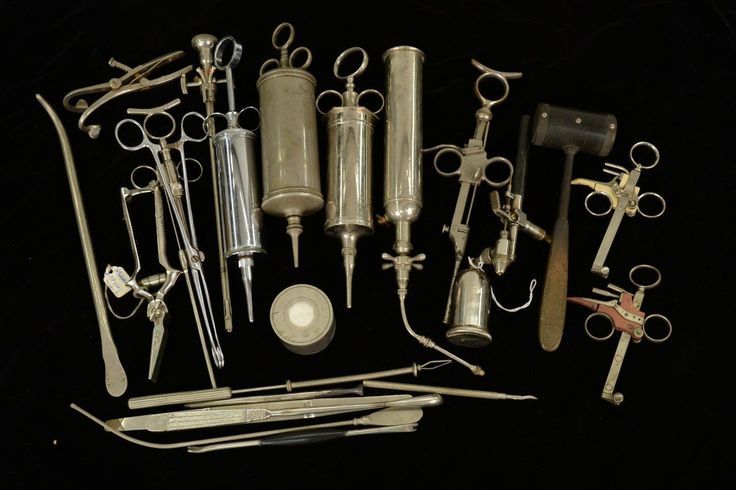 We're really positioning ourselves to have the infrastructure and the foundational technology platforms to support addressing problems all across the body and with multiple segments of medicine. We know that there are rules for design for additive manufacturing and we like to push the bounds of those things and try things that might be fringe cases or may or may not work.”
The medical space has seen a major uptick in the adoption of 3D printing in just the past five years. As costs continue to fall, and material selection expands, additive manufacturing is going to fuel partnerships like those between restor3D and innovative surgeons like Dr. Westerlund. Ultimately, it’s going to be the surgeons and patients who benefit through more affordable, safer, and successful operations. “We don’t need to talk about the disruptive capacity of additive manufacturing, it’s happening now,” said Dr. Westerlund.
To learn more about how 3D printing can be used for medical applications, visit our medical page.
1 https://pubmed.ncbi.nlm.nih.gov/29128581/
3D Printed Surgical Instruments – The Design and Fabrication Process
- Journal List
- HHS Author Manuscripts
- PMC6287965
World J Surg. Author manuscript; available in PMC 2018 Dec 10.
Published in final edited form as:
World J Surg. 2017 Jan; 41(1): 314–319.
doi: 10.1007/s00268-016-3814-5
PMCID: PMC6287965
NIHMSID: NIHMS997787
PMID: 27822724
Mitchell George, BS, Kevin Aroom, MS, Harvey G. Hawes, MD, Brijesh S. Gill, MD, and Joseph Love, DO
Author information Copyright and License information Disclaimer
BACKGROUND:
3D printing is an additive manufacturing process allowing the creation of solid objects directly from a digital file. We believe recent advances in additive manufacturing may be applicable to surgical instrument design. This study investigates the feasibility, design and fabrication process of usable 3D printed surgical instruments.
METHODS:
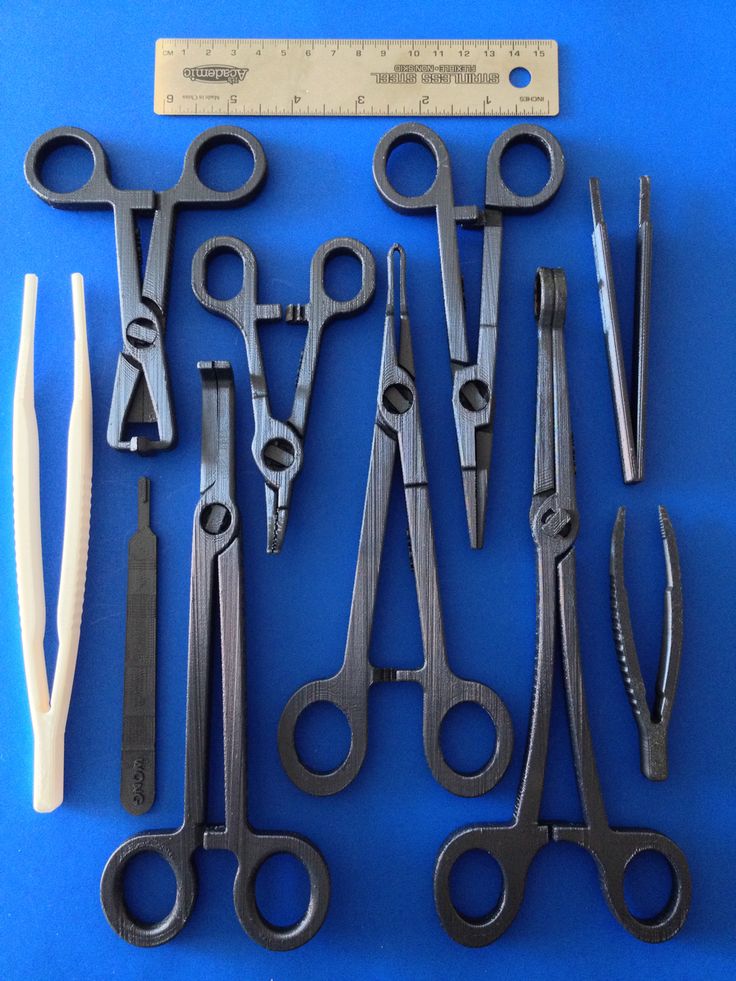
The computer aided design (CAD) package Solid Works (Dassault Systemes SolidWorks Corp., Waltham MA) was used to design a surgical set including hemostats, needle driver, scalpel handle, retractors and forceps. These designs were then printed on a selective laser sintering (SLS) Sinterstation HiQ (3D Systems, Rock Hill SC) using DuraForm EX Plastic. The final printed products were evaluated by practicing general surgeons for ergonomic functionality and performance, this included simulated surgery and inguinal hernia repairs on human cadavers. Improvements were identified and addressed by adjusting design and build metrics.
RESULTS:
Repeated manufacturing processes and redesigns led to the creation of multiple functional and fully reproducible surgical sets utilizing the user feedback of surgeons. Iterative cycles including design, production and testing took an average of 3 days. Each surgical set was built using the SLS Sinterstation HiQ with an average build time of 6 hours per set.
CONCLUSIONS:
Functional 3D printed surgical instruments are feasible. Advantages compared to traditional manufacturing methods include no increase in cost for increased complexity, accelerated design to production times and surgeon specific modifications.
3D printing was born in the early to mid 1980’s and has appreciated a recent resurgence thanks to improved computing power, patent expirations and falling costs of the technology. Three broad categories of 3D printing exist, each unique in its method of creating solid objects from digital data. The earliest form of 3D printing, stereolithography (SLA), was developed by Charles Hull in the early 1980’s [1]. SLA employs liquid curable photopolymer and an activating laser to build solid parts in a layered manner. Hull later founded the company 3D Systems and developed the.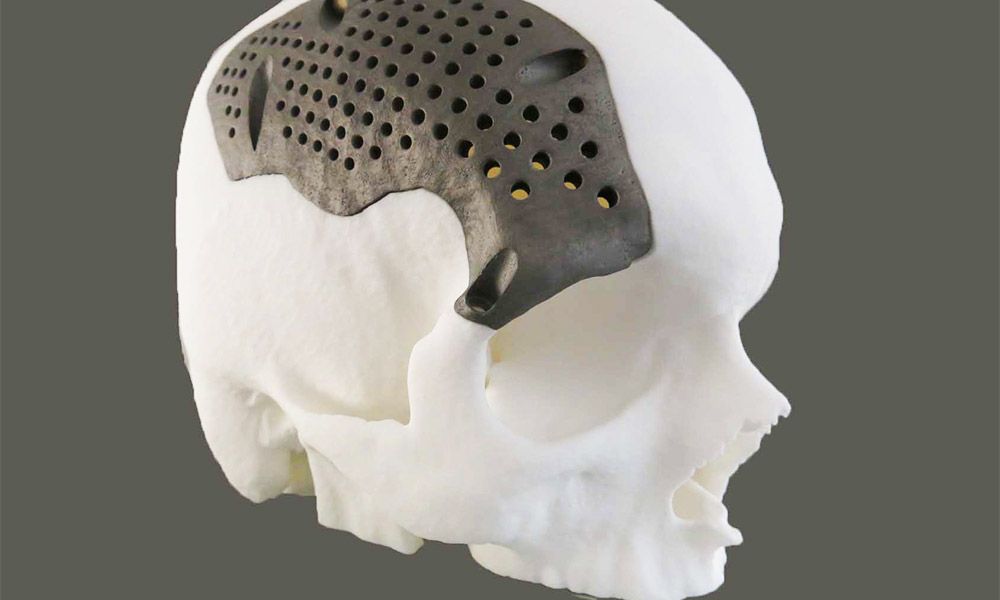 STL file format that allows 3D printing machines to render digital files into a physical embodiment. S. Scott Crump developed fused deposition modeling (FDM) in the late 1980’s, eventually founding the company Stratasys [2]. FDM extrudes spooled printing material through a heated nozzle onto a build platform. The third variant of 3D printing is selective laser sintering (SLS), developed by Dr. Carl Deckard and Dr. Joseph Beaman at the University of Texas in Austin in 1987 [3]. SLS manufactures parts by melting, or sintering, plastic powder with a laser in a layered manner. As one layer is finished, a roller spreads a fresh layer of powder over the build area and the laser sinters the next layer. The powder in the build area acts as a supporting structure for any overhanging features. Once the build is complete, the area is raised and the part is taken to a breakout station for removal of excess powder. Once the excess powder and parts are separated, the powder can be reused in another build.
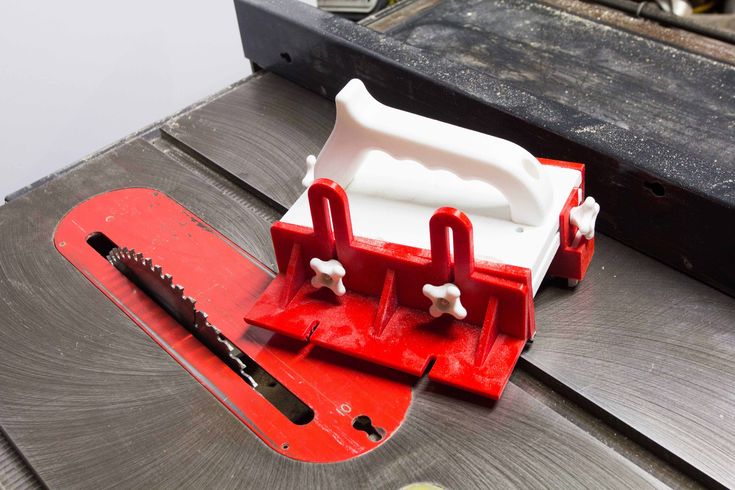
Within the surgical field 3D printing has been used to aid in training, create representative models or build biologic scaffolds [4]. The ease at which 3D imaging data can be converted to .STL file formats has facilitated many of these applications [5]. Fabrication of decellularized organs or scaffolds which accept seeding of live cells was pioneered by Uygun [6]. Built using hydroxyapatite, they are suitable for seeding with murine fibroblasts and support cellular growth [7,8]. By far the most popular and established application of 3D printing in the surgical field is within maxillofacial surgery where numerous reports exist describing surgical planning and production of implants or implant guides for surgical approach [9–13]. Other applications include production of anatomical phantom models to facilitate surgical training [12].
Use of 3D printing to create surgical instruments is limited. Kondor et al were the first to apply 3D printing to developing functional surgical instruments [14,15]. In their study they used a FDM style desktop printer from Stratasys to build a general surgical set. Advantages to 3D printed surgical instruments expressed in their paper were customization and ease of modification according to a clinician’s preferences. Functional testing of the instruments consisted of laparotomy, splenectomy and suturing on a surgical simulator known as a Cut Suit. In this present study the authors use CAD software and SLS to design, build and optimize a general surgical set for use in surgical simulation.
To prove the functionality of the instruments, inguinal hernia repairs were performed on male human cadavers. The Computer Aided Design (CAD) package SolidWorks was used to develop digital models of the surgical instruments (Dassault Systemes SolidWorks Corp., Waltham MA). Total design time was approximately 20 hours and an average of 4 iterations for each instrument was required to optimize functionality. These digital models were converted to the .stl file format and printed using the SLS Sinterstation HiQ (3D Systems, Rock Hill SC) in DuraForm EX Plastic. The instruments were manufactured in single build cycles using a combination of virgin and recycled DuraForm EX Plastic powder. The build envelope of the Sinterstation is W15 x D13 x h28 inches. To decrease build times and build volumes, the instruments were oriented such that build height was minimized. Actual build height for the general surgical set was 3 inches and build time for each set was 6 hours. Post processing included breaking the parts out of part cake and removing excess powder with a bead blaster. The instruments were not sterilized because they were to be tested in human cadavers.
Due to material limitations of the DuraForm EX plastic, design adaptations from existing stainless steel instruments were neccessary. In our experience, the strength of the Duraform material was not sufficient to allow direct adaptation of instruments like a needle driver, hemostat, forcep, or scalpel handle. describes the workflow for adaptation of existing instruments or creation of novel ones to 3D printed instruments and their iterative improvement.
Open in a separate window
Workflow diagram describing the iterative design cycle.
The key to the iterative process in is instrument testing and surgeon feedback. During cadaveric or simulated surgery, the performance of 3D printed surgical instruments is evaluated which drives design. This process is elaborated below in the description of the design processes for each instrument.
Testing trials were done in two ways, simulated surgery and cadaveric inguinal hernia repairs. Simulated surgery consisted of handling the instruments and testing their functionality in a non-surgical setting. Design modifications from these simulations were driven by ergonomics. During the cadaveric surgical cycles, design modifications were driven by their performance during the steps required by the procedure. describes the design iterations with regards to each instrument and how it was tested. There were three iterations of simulated surgery and two cadaveric hernia repairs performed to optimize the instruments. Brief descriptions of the instrument modifications that resulted from the iterative cycle are described.
Table 1.
Description of design modifications resulting from each iterative cycle.
| Iterative Cycle | Iteration Type | Army Navy | Scalpel Handel | Forceps | Hemostats | Needle Driver |
|---|---|---|---|---|---|---|
| 1 | Simulated | Ribs added along length for strength | Multiple designs created | Finger grips added | Locking teeth refined | Tips adjusted for better approximation |
| 2 | Surgical | None | Fully reinforced model chosen | Cross hatched surface added to tips | Hinge modified to ↓ tip crossing | Hinge modified to ↓ tip crossing |
| 3 | Simulated | None | None | Resting position of arms widened | Handel adjusted for ↑ ergonomics | Total redesign |
| 4 | Surgical | Retractor blades strengthened | None | ↑ Thickness and resistance of arms | Arms | Handel hole diameter increased |
| 5 | Simulated | None | None | None | Tips strengthened | None |
Open in a separate window
Needle Driver
The needle driver’s dominant role during surgical testing was mesh placement and closing of skin. Suturing of mesh to the aponeurosis of the pubic tubercle required significant force to be applied to the suture needle by the needle driver. In early iterations of the needle drivers, this step was difficult because the needle driver end effector, or tips, would cross and drop the suture needle. This problem continued despite major design modifications at the instrument hinge. Feedback from attending surgeons and finite element analysis in Solid Works led to a new design iteration of the needle driver. The final design embeds one arm into the other, allowing equal distribution of force along the hinge’s axis of rotation and eliminating tip crossing. Two days after the original surgery this new needle driver design was tested and was found to have improved grasp and no tip crossing. The design time needed for all iterative improvements was about 6 hours. This process is a prime example of the demands of operative technique driving instrument design.
Hemostats
The hemostat’s dominant role during surgical testing was dissection, thus they were required to have appropriate strength and the ability to deal with delicate tissue planes. Like the needle driver, much of its design modifications were related to the hinge. These included addition of a large bearing surface to decrease tip crossing and a recessed central locking stud to enhance the locking mechanism holding the arms together. The tips of the hemostats required thickening and the addition of baffles to limit deflection and maximize visibility. The final product was able to perform functions like occlusion of a hernia sac for excision and manipulation of tissue planes for incision. Total design time for this instrument was 5 hours.
Army Navy
The Army Navy requires increased strength since its primary function is retraction and allowing visualization of the surgical field. Its initial design resembled a standard Army Navy retractor. During surgical and simulated iterations, it was found to be deficient in strength along its length and at the retractor blades. The design modifications applied during the 5 iterative cycles all were to increase strength of the retractor through adding ribs and support material, along the length of the instrument and at the retractor blades. The final instrument design allowed adequate exposure during the procedure when two were used. The design time needed to reach this final design was 2.5 hours.
Scalpel Handel
Direct adaptation of the scalpel handle was originally attempted; however the strength of the blade attachment was not robust enough to support cutting tissues. Multiple design adaptations were created that strengthened this component while still accepting a #10 scalpel blade. The final design featured a standard scalpel handle with a reinforced blade attachment. Scalpel blades could be attached and removed in the same fashion as a normal stainless steel scalpel handle. The instrument functioned as well as a standard stainless steel handle after just two iterations, requiring 3 hours of total design work.
Forceps
Designing acceptable forceps required a great deal of surgeon feedback and iterative changes since during an inguinal hernia repair they are used to manipulate delicate tissues and identify subtle tissue planes. This technical requirement demands accurate tactile feedback and superb ergonomics. The original forceps design was modified after three iterations to have improved gripping surfaces and widen the resting position of the instrument’s arms. After the second surgical iteration, the instrument was tuned to have thicker arms and a rounded crotch to increase stiffness. This series of modifications created an instrument accepted by the surgeons as adequate to perform the procedure, requiring 3.5 hours of total design work.
Instruments in the general surgical set are shown in .
Open in a separate window
Scalpel handle, hemostats, needle drivers, forceps. Scale at bottom is in inches.
In this study the authors present a process to design, build and optimize a general surgical set. A series of 5 iterative cycles led to the creation of instruments accepted by a group of physicians as technically able to perform general surgical procedures. This paper explores this process and elaborates on the workflow presented in . SLS is a new manufacturing method for general surgical instruments, and several key aspects important to its use were identified in this paper.
DuraForm EX plastic has very different material properties than stainless steel. As described in the results section, many of the modifications were made to address this issue. For example, dimensions perpendicular to the major axes of bending had to be increased to stiffen the handles of the needle driver and hemostat, preventing flex that diminishes applied force at the instrument tips. Moments of inertia for the handles were increased by making the handles disproportionately ‘flatter’ than standard metal instruments, which allowed increased stiffness without unnecessary bulk.
Hinged instruments presented two main design challenges: adequate structural strength and easy assembly. Designing a hinge system with the inherent tradeoff of strength versus size was a focal point for the designers. Shear loading at the hinge occurs when a force load is applied by the handles through the hinge to the tips of the instrument. Apart from ultimate strength limits, the hinge must be appropriately sized to avoid excessive deflection that could cause binding and subsequent difficulty in rotation. Additionally, an oversized hinge would present problems to the user by obstructing his or her view of the instrument tips, or physically preventing the instrument from reaching deep targets. Two hinge systems were used in the general surgical set. A ‘snap-lock’ system was designed and implemented with the hemostats with a recessed central locking stud, surrounded by a large surface area bearing surface. This provided adequate fastening along the axis of the hinge, thereby ensuring alignment of the tips. The bearing surfaces included several ribs and grooves to help maintain concentricity and provide feedback when the two parts have successfully locked together. The needle driver featured a hinge similar to what is used in standard surgical practice, with one arm of the driver embedded in another (). Since the tolerance of the SLS printer is not fine enough, the instrument was built in three different pieces and assembled through a one step process requiring epoxy.
 Furthermore, any prospective 3D printer to be used for this application must maintain sufficiently small dimensional tolerances, approximately 0.01 inches, to ensure good form and fit of any hinge. A printer with poor resolution or tolerances may produce parts that will not mate properly, or be too loose to perform delicate tasks.
Open in a separate window
Digital rendering of the needle driver, exploded into its three parts.
A major objective in this study was to build instruments that required little to no post processing and no special tools for final assembly. Virtually all 3D printed parts require post-processing. The SLS machine specifically requires fine tools and brushes to remove gross excess powder, a bead blaster for fine removal of powder and compressed air for part cleaning. Other 3D printing methods such as FDM require fewer steps to break out parts; many only need a hot water bath containing an alkaline solution to remove supporting structures. In the general surgical set, the scalpel handle, forceps and Army Navy were ready for use out of the build.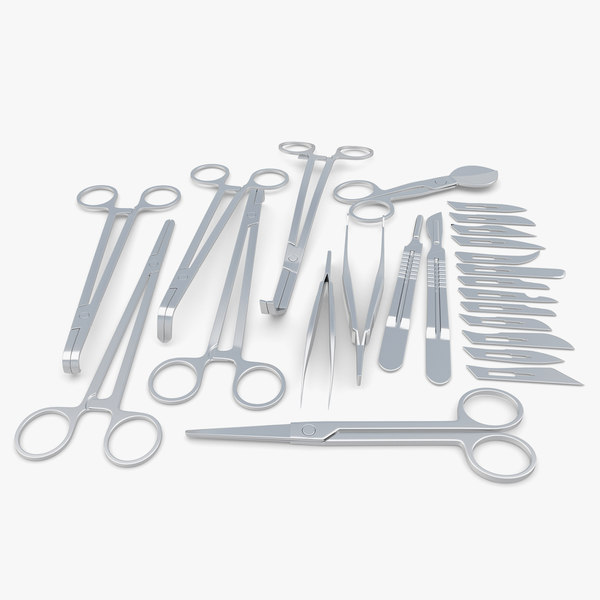 The hemostat assembly was one step consisting of snapping the two arms together. The needle driver required epoxy to assemble the three part instrument seen in .
Finished SLS parts have a porous texture to them, and can be cured to create a fully solid part. Un-infiltrated parts tend to absorb surrounding fluids and stain easily. The instruments used in this study were not sealed. It was noted that these instruments absorbed fluids they came into contact with during the cadaveric surgical procedures.
The advantages of functional 3D printed surgical instruments are enormous. Time constraints on design and instrument production are minimal while physician customization allowed is limitless. The speed of iteration allows next day improvements to the core design of surgical instruments. Furthermore, variations of simple tools like a needle driver or hemostat can be modified based on operative technique demands to optimize function. Future applications include installment of 3D printers where surgical equipment is not readily available, such as forward operating surgical hospitals in combat zones, spacecraft or third world environments. These environments would be supported by on site 3D printers and have access to digital libraries of medical and non-medical parts. The ideal print material still needs to be determined. Further evaluation is needed to find a material which can be printed without additional processing and readily sterilized for surgical use.
Design iteration of the general surgical set will continue. Future design modifications will also investigate the anisotropic effects of build orientation on functionality of the surgical instruments.
1. Hull CW “Apparatus for production of three-dimensional objects by stereolithography.” U.S. Patent 4,575,330, March 11, 1986.
2. Crump SS “Apparatus and method for creating three-dimensional objects.” U.S. Patent 5,121,329, June 9, 1992.
3. Beaman JJ; Deckard CR “Selective laser sintering with assisted powder handling.” U.S. Patent 4,938,816, July 3, 1990.
4. Berry Connell, Craven Brown. “Preliminary experience with medical applications of rapid prototyping by selective laser sintering” Med Eng Phys. 1997. January;19(1):90–6. [PubMed] [Google Scholar]
5. Rosset A, Spadola L, and Ratib O, “OsiriX: an open-source software for navigating in multidimensional DICOM images,” Journal of Digital Imaging, vol. 17, no. 3, pp. 205–216, 2004. [PMC free article] [PubMed] [Google Scholar]
6. Uygun BE. “Organ reengineering through development of a transplantable recellularized liver graft using decellularized liver matrix” Nature Medicine, 16 (7) (2010), pp. 814–820. [PMC free article] [PubMed] [Google Scholar]
7. Petersen TH, TH. “Tissue-engineered lungs for in vivo implantation.” Science, 329 (5991) (2010), pp. 538–541 [PMC free article] [PubMed] [Google Scholar]
8. Leukers B “Hydroxyapatite scaffolds for bone tissue engineering made by 3D printing.” Journal of Materials Science: Materials in Medicine 16 (2005) 1121–1124. [PubMed] [Google Scholar]
9. Solar P, Ulm C, Imhof H et al., “Precision of threedimensional CT-assisted model production in the maxillofacial area,” European Journal of Radiology, vol. 2, no. 5, pp. 473–477, 1992. [Google Scholar]
10. Mavili ME, Canter HI, Saglam-Aydinatay B, Kamaci S, and Kocadereli I, “Use of three- dimensional medical modeling methods for precise planning of orthognathic surgery,” Journal of Craniofacial Surgery, vol. 18, no. 4, pp. 740–747, 2007. [PubMed] [Google Scholar]
11. Meehan M, Teschner M, and Girod S, “Three-dimensional simulation and prediction of craniofacial surgery,” Orthodontics & Craniofacial Research, vol. 6, supplement 1, pp. 102–107,2003. [PubMed] [Google Scholar]
12. Silva DN. “Dimensional error in selective laser sintering and 3D-printing of models for craniomaxillary anatomy reconstruction.” J Craniomaxillofac Surg. 2008. December;36(8):443–9. [PubMed] [Google Scholar]
13. Flugge TV. “Three-Dimensional Plotting and Printing of an Implant Drilling Guide: Simplifying Guided Implant Surgery.” Volume 71, Issue 8, August 2013, Pages 1340–1346. [PubMed] [Google Scholar]
14. Kondor S “On Demand Additive Manufacturing of a Basic Surgical Kit. ” Journal of Medical Devices, ASME September 2013, Vol. 7. [Google Scholar]
15. Kondor S “Personalized surgical instruments.” Journal of Medical Devices, ASME September 2013, Vol. 7. [Google Scholar]
3D surgery and new instruments for operations
Unique surgical instruments on a 3D printer
One of the areas of medicine for which 3D technologies are in high demand is surgery. Innovative developments in this area can open access to incredible opportunities that we can only dream of today. Already now there are more than a dozen such projects that can be attributed to a single area, the name of which is 3D surgery. It was in this branch of innovative medicine that the British company Sutrue recently presented a unique project. nine0005
Its essence lies in the development of unique instruments aimed at radically improving the quality of surgical procedures. More specifically, development has been on a suture device and a cardiac stabilizer.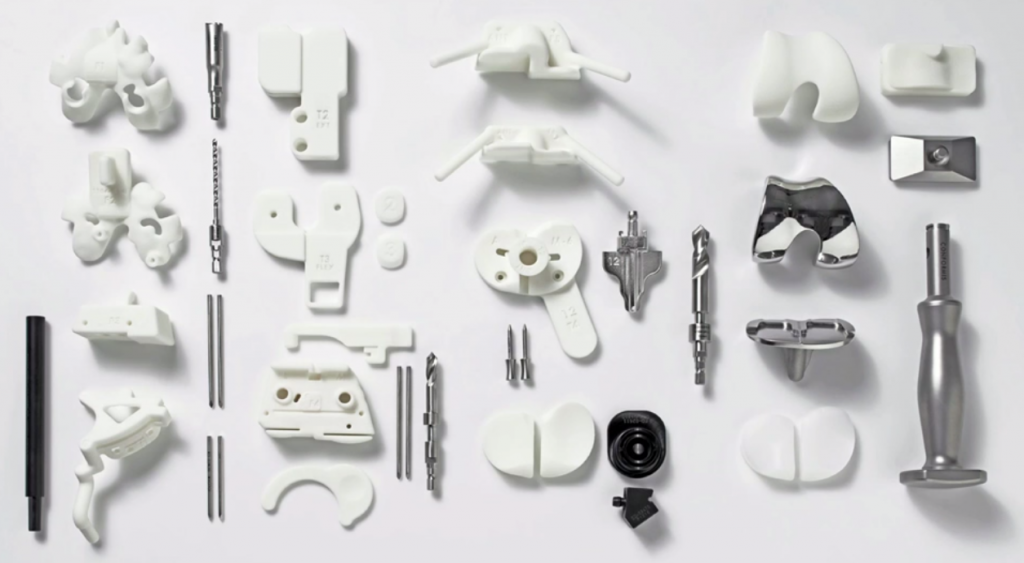 To work on a project of this scale, the organization used the professional additive manufacturing system MLab Cusing from the German company Concept Laser.
What is special about the project
3D surgery is unthinkable without quality instruments. You can even say that they are what make this area so innovative: with the help of 3D printing, it becomes possible to produce much more complex products than with traditional production methods. The advantages of 3D modeling and 3D printing in this regard are so obvious that British developers could not help but use 3D technologies in their project.
Even with the current state of medical development, the procedure for suturing is still not perfect. In view of this, Sutrue engineers decided to develop a special tool that would sew up wounds automatically. Such a device can be especially thin and work even with minor damage. It is controlled by a miniature gearbox printed on a 3D printer. nine0005
The second unique device is the cardiac stabilizer, which is of great importance in open heart surgery.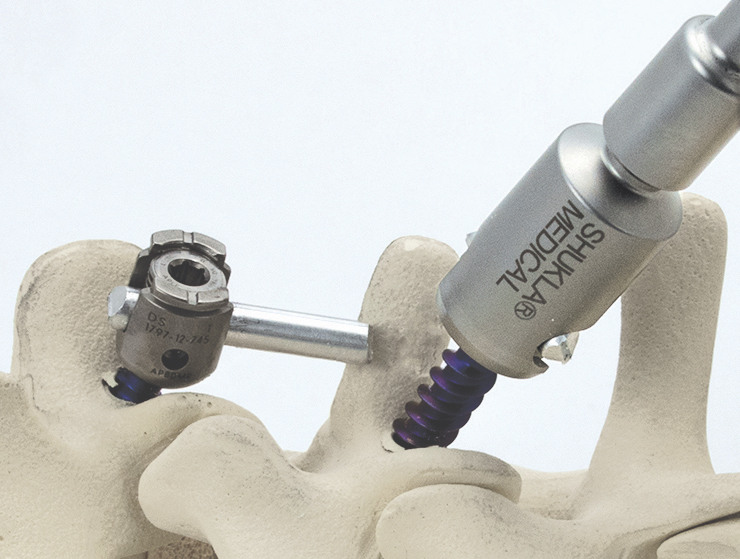 Usually in such cases it is required to control only a small area of the organ, over which manipulations are carried out. For larger operations, conventional devices will do. But when working through a tiny incision, other instruments are required. This is where the special tool comes into play.
Tool benefits
The most important advantage that 3D surgery can offer physicians is the availability of such manipulations, which were previously unimaginable. This is mainly achieved by reducing the size of surgical instruments. Regarding the developments above, the innovative suturing tool will significantly speed up this process compared to manually suturing a wound (3 stitches per second versus one stitch in 25 seconds). In addition, the likelihood of a surgical error and incorrect suturing is eliminated, because the process is automated. nine0005
As for the stabilizer, it's all about personalization. The device can be manufactured and configured for each specific patient individually, and then disposed of. To solve this problem, the developers made a biocompatible prototype from two parts (metal and plastic) printed on a 3D printer. The device consists of a rod and a U-shaped stabilizer that is applied to the desired site and holds it still, allowing surgery to be performed. nine0005
3D surgery and the promise of innovative instruments
Remarkably, thanks to the use of 3D technology, it took Sutrue just three months to produce the instruments. The 3D printing of prototypes itself took just a few hours, followed by their bringing to the required form and direct production. Of the advantages of using such instruments, it should be noted the rapid recovery of patients after surgery.
Thus, when using both devices, full recovery takes only 3-4 weeks, as opposed to six months when using conventional devices. The project will give doctors freedom and new opportunities that were not available before. The potential of instruments is huge, and the use of 3D technologies can lead to an evolution in the field of surgical instruments. nine0005
Back Home
3D Printed Surgical Guides for Medical Applications
The 3D Printed Surgical Guide is a reverse engineered placement tool created using 3D printing technology. According to the patient's computed tomography before spinal surgery, a 3D model of the spine was reconstructed in CAD software, based on the 3D reconstruction model, the best entry point and pedicle screw access were planned, and the optimal length and diameter of the screw was selected. At the same time, according to the anatomical morphology of the spinous process of the spine, lamina, facet joint, etc., the corresponding model was created in reverse order, and the positioning guide channel was designed according to the optimal screw entry channel. The model was equipped with a screw inlet through a Boolean operation. nine0005
Patient information: degenerative disease of the chest (T9 T10).
3D 3D reconstruction of degenerative breast vertebrae
Preoperative planning and design
During the design, designers used a three -dimensional reconstruction system to conduct a three -dimensional reverse modeling on data of computed tomatoes and designed to designed and designed to design screws according to the patient's bone morphology, finally confirming the position, angle and depth of positioning. guide channel. From an engineering point of view, the stability and coordination of the surgical guide has been developed and improved. nine0005
SLS 3D Printed Surgical Template
Preoperative planning was successfully performed using 3D printed models. Before the operation, the medical nylon material was autoclaved with high pressure steam, and the surgical template was attached to the corresponding vertebral posterior bone structure during the operation, so that the screws could be accurately placed on each pedicle along the positioning hole. positioning guide. nine0005
Postoperative Imaging
A 3D printed surgical template can effectively improve the efficiency of pedicle screw placement in the thoracic and dorsal vertebrae. 3D printing technology provides a new approach to the treatment of complex orthopedic spinal incision surgeries such as posterior pedicle screw implantation in the cervical vertebrae and upper thoracic vertebrae, scoliosis protrusion deformity after orthopedic surgery, and chronic thoracolumbar fracture.