Zinter 3d printer
Zinter Pro | Simplify3D Software
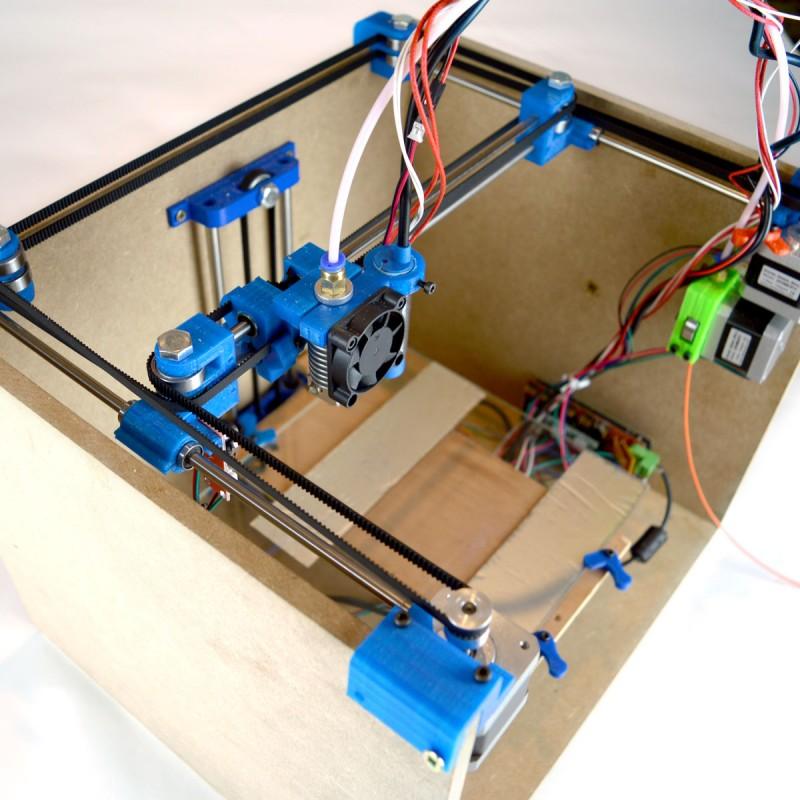
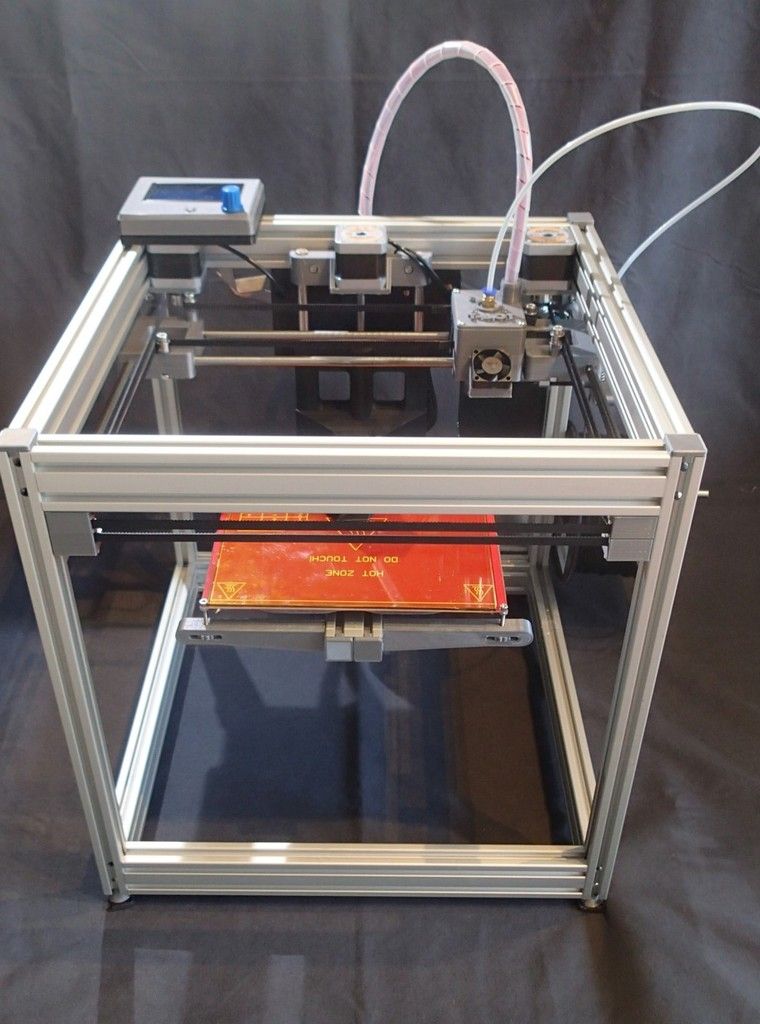
This setup guide will help set up an IonCore Zinter® Pro 3D printer with Simplify3D® All-In-One 3D printing software. The Zinter Pro printer has two extruders and a large build size of 200mm x 200mm x 200mm. The printer is manufactured by Ion Core Ltd, based out of the United Kingdom. This setup guide will walk through the process of unpacking a Zinter Pro machine and starting your first 3D print using Simplify3D.
Final Hardware Checks
Before starting your first print on the Zinter Pro, it is important to ensure that all of the packaging material is removed and that the extruder gantry is able to move freely in the X, Y and Z axes. After ensuring all packaging material is removed, it is time to load the filament. This can be done through the Machine Control Panel in Simplify3D (Tools > Machine Control Panel), or use the LCD menu on the printer itself to select Load Filament from the Utilities menu.
Printing with Simplify3D Software
When starting Simplify3D for the first time, you will be greeted with the Configuration Assistant. Select the IonCore Zinter Pro from this list and the software will be automatically configured for this machine. If this is not your first time using Simplify3D, you can still load the necessary settings by going to Help > Configuration Assistant.
After completing the Configuration Assistant, users are ready to import a 3D model. After importing the model, click “Edit Process Settings”. This will open the FFF Settings window where the slicing settings can be configured. More information is available about this window in the section below.
In the FFF Settings Window, there are 3 different profiles available for the Zinter Pro, depending on what type of printing you will be doing.
- IonCore Zinter Pro (front extruder) – Use this profile for prints involving the front extruder only
- IonCore Zinter Pro (back extruder) – Use this profile for prints involving the back extruder only
- IonCore Zinter Pro (both extruders) – Use this profile for any prints that will involve both extruders.
 For example, when performing dual extrusion or printing with soluble support material.
Simplify3D Process Settings for Zinter Pro
In this same window, there are options to select the material for the print, the preferred quality, infill percentage, and whether to use a raft or generate support material. To customize prints further, click the “Show Advanced” button. For more information on these advanced settings, please have a look at the Simplify3D Tutorial Library. For users wishing to perform dual extrusion, it is highly advisable to view our tutorial on Printing with Multiple Extruders.
After the Process Settings are configured, click “Prepare to Print!”. This will prompt the Simplify3D slicing engine to slice the file and create the necessary toolpaths for the Zinter Pro. Once complete, you can choose “Begin Printing over USB” to stream the files to the printer over USB, or select “Save Toolpaths to Disk” to export the .gcode file to your hard drive or SD card.
Connecting to the Zinter Pro via USB
If you have selected the Zinter Pro from the Configuration Assistant, then everything is already configured for the Zinter Pro and you should see a connection dialog after plugging in the machine to your computer. If the printer does not automatically connect, please open the Machine Control Panel by going to Tools > Machine Control Panel and verify the connection settings. The Baud Rate should be 250000 bps and it is also important to ensure the correct port is selected. After plugging in the printer, you may need to click the Refresh button for the new port to appear. On Windows, the correct port is usually the only one that starts with COM. Mac users should select the port that contains USB in the name.
Alternatively, you can also copy the .gcode files onto the Zinter’s SD card and then plug the card back into the printer to begin printing using the LCD menu.
Troubleshooting
Cannot connect over USB
If you are using Windows, please make sure that you have downloaded and installed the required USB drivers for the Zinter Pro. The easiest way to obtain these drivers is by downloading and installing the Arduino IDE. Please also ensure that no other program is currently connected to the Zinter, as only one program is allowed to connect at a time.
Richard Dinan: From TV to 3D – CADagency
IonCore was established in 2012 with the aim of producing the most advanced and usable 3D printer aimed at the consumer market.
Richard Dinan, star of E4’s Made in Chelsea, entrepreneur and co-founder of the Phantom prepaid dining Card, and his business partner, finance and media expert and fellow co-founder of the Phantom Card, Alexander Nall-Cain, teamed up with CNC and robotics specialist James Marchant, to launch the Zinter® PRO 3D printer at the beginning of January this year.
Richard has been focusing much of his attention on the manufacturing and engineering sectors over the last few years, and is well known for being constantly on the look-out for new and cutting edge technologies, while Alexander’s aptitude for finance and investment, not only in his media and night club businesses, means he has also enjoyed success last year with new and groundbreaking ventures.
Linking together with IonCore CEO James, who has been a leader in design, engineering, manufacturing and 3D technology since 2003, the three businessmen set about creating a product capable of bringing 3D printing to the masses. The Zinter® PRO has had considerable hype thanks in part at least to Richard’s celebrity status, but also to its careful design that clearly marks it out as a stylish, ‘must-have’ gadget as well as a functional piece of technology.
Everyone here at CADagency was very excited to hear more and we managed to get hold of the CEO and Directors and asked them some questions.
With the amount of 3D printers on the market in the ‘affordable’ price bracket now in the dozens, what made you want to join that market, and why does yours stand out?Ion Core was founded by James Marchant who along with his design and research teams has a huge track record of designing bespoke robotic, electrical and CNC control systems. As the patents expired allowing companies to produce low cost 3D printers, James identified his team’s ability and experience to create a product that was perfect in an engineering sense and better than all competitors. James also identified the requirement for a consumer level 3D printer that not only performed the best using the best mechanical, electrical and linear components but it needed to look the best too. Having looked at the more established 3D printers on the market, despite the parent company’s marketing power behind them it is clear to an engineering trained eye some uses of components and configurations are not mechanically sound. In a nutshell the simple answer to your question is that we knew we could make a better 3D printer at this level than anyone else.
It’s quite hard to put a figure on as our 10 years track record in similar industries are not directly towards the Zinter® PRO development but are the foundations IonCore stands on. We have had a team working on Zinter® PRO directly for 18 months. We wanted to ensure our first product launched to the public was as good as it could possibly be in every way.
We looked very closely at reviews of other printer’s, discussions with owners of other 3D printers as well as our own hands on experience to fully understand the elements are weak in the current range of low cost desktop 3D printers. We used this in depth analysis during the development of Zinter® PRO and ensured we produced a product superior to others. One of our designers privately owned a more well-known 3D printer model that he used in his other design work. It has subsequently been returned to the manufacturer as he took on one of our early Zinter® PRO prototypes. A range of weak products currently on the market at the consumer desktop level was a real driving force behind everyone involved with the Zinter® PRO development and our passion to create products in this sector where for too long there has been a real lack of competition.
What was the biggest challenge in creating the Zinter® PRO?Funnily enough unlike most 3D printer startups popping up every day at the moment, with our experience and expertise the machine itself in terms of mechanical movement and electronics, calibration and software was rather straightforward. To scale up eventually you have to start using some outside manufacturers, especially on the initial low volume production runs, and not being in control of their factories/time/quality control is often not fun and was a challenge. As Zinter® PRO production has now greatly stepped up we now control as much manufacturing in house as possible.
In order to take a 3D printer from the early adopters, the tinkerers, to a more mass market consumer level product that aesthetic design was a very important factor. We were careful that, with the added features of Zinter® PRO such as the fully enclosed environment, we integrated these perfectly into the look and feel of the unit, and really concentrated on producing a great looking a machine to compliment the advanced features and superior components and build quality Ion Core products will become known for.
Yes you are correct and again this was a big driving factor behind Zinter’s conception and development. We were frustrated with companies letting customers of this innovative and ground breaking technology down by launching inferior products that did not live up to their hype. Maybe this wasn’t such an issue early on as consumer 3D printers were self-assemble kits and the enjoyment was making the kit as much as using the final product for 3D printing with. With Zinter® PRO we totally moved away from a kit and produced a simple out the box product like you’d expect from a conventional office paper printer. We have spent well over a year testing and calibrating different components from mechanical movement to the extruder technology giving us the confidence to say this is the best consumer level 3D printer on the market. As well as ensuring Zinter® PRO is easy to use and reliable we have made the machine full of features required by those people that really care about that 3D prints.
Zinter® PRO has a fully heated build platform, two extruders, and the easiest and most full featured software for turning CAD models into code used by the machine. We packaged this up as a beautiful product and let it loose over 6 months ago to a large range of private testers from around the world. We have ensured Zinter® PRO was easy to use for the average consumer yet had all the features required of a designer or professional user.
We have teamed up with the makers of Simplfy3D™ software based in the US. This software will turn your 3D CAD design into code that is used by Zinter® PRO. We were very impressed with the software they had created a couple of years ago and have been working with them since to ensure the software and Zinter® PRO work perfectly together and include all the pre-configured settings allowing ease of use by an average consumer yet access to a huge range of advanced features for the professional user. One feature we particular love is the ability to not only automatically add support material for those models that require it, but also giving the user manual control to add and remove additional support material as they wish. The ability to nest multiple designs on the heated build platform and print multiple items during a single print is also a real improvement in efficiency.
Very, we can see the uptake of 3D printers has been huge over the last few years and believe this will only increase as the technology improves both in plastic 3D printing and with the new range of materials we know we will see over the next 12 months.
Even though the Zinter® PRO been on the market for a month, how has public response been so far?Publicly Zinter® PRO has only been available for a month or so however privately Zinter® PRO has been around for a lot longer. During our testing and calibration phase we produced a number of Zinter® PRO units and shipped them around the world to a range of average consumers as well as industry experts so we knew before our public launch a month ago the feedback would be great with regards to the printing capability of the Zinter® PRO. Whilst this testing phase was on going we took our design team and focussed them on the look and feel of the Zinter® PRO. Is was in fact these initial testers that pushed us to release Zinter® PRO for sale early on and start accepting pre-orders whilst we scaled up mass production in January 2014. They kept telling us how we had to release Zinter® PRO to the world now and let people know about it. We published the product renders just before Christmas and the response has been truly amazing. We have had nothing but positive comments from people appreciating the look of Zinter PRO, and the response from reseller applicants and industry experts has also been amazing. Never before have I encountered such a huge number of applications for reseller status in any industry or for any product as we have received for Zinter® PRO.
We’ve spent a long time developing Zinter® PRO so for now our time and focus is launching this product and developing Ion Core’s distribution throughout the world.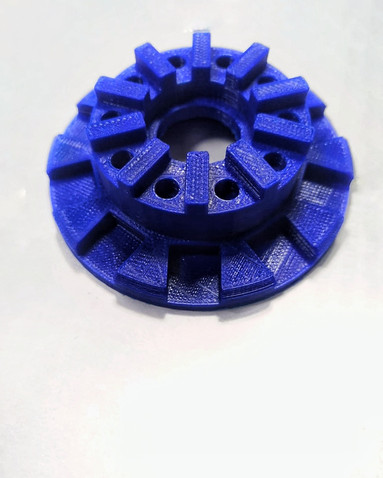 We have a range of initiatives that will soon be announced to help with Zinter PRO’s launch and adoption across the globe. The ZintShare platform is coming early 2014 allowing our customers to exchange 3D printing files easily. Looking further to the future like any technology company we continuously invest a lot in R&D and have a number of products in the additive manufacturing sector to come later in 2014 onwards both from IonCore and some of our partner companies.
The Zinter® PRO 3D Printer £2,350 is available now from the IonCore website with a lead time of 6 weeks.
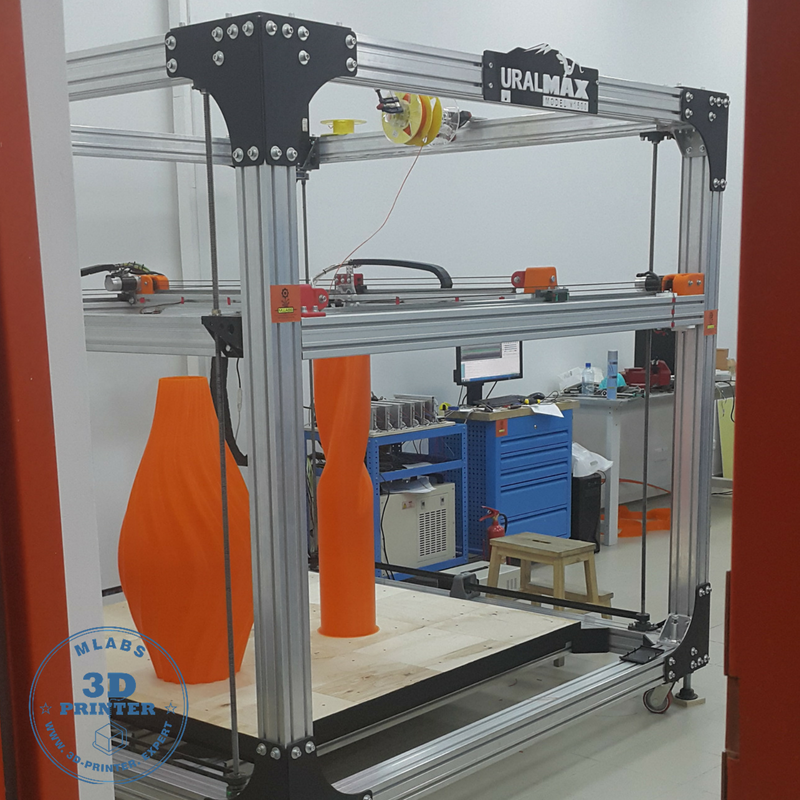
IRNITU-3D printer for printing with snow created by students of IRNITU
IRNITU students Georgy Byzov and Anatoly Semchenko have developed an unusual 3D printer. The device prints three-dimensional models not with standard materials for additive technologies - thermoplastic, metal or concrete, but with real snow. With the help of an innovative device, the Polytechnic University students plan to create art objects, windproof walls, game labyrinths for children's winter playgrounds.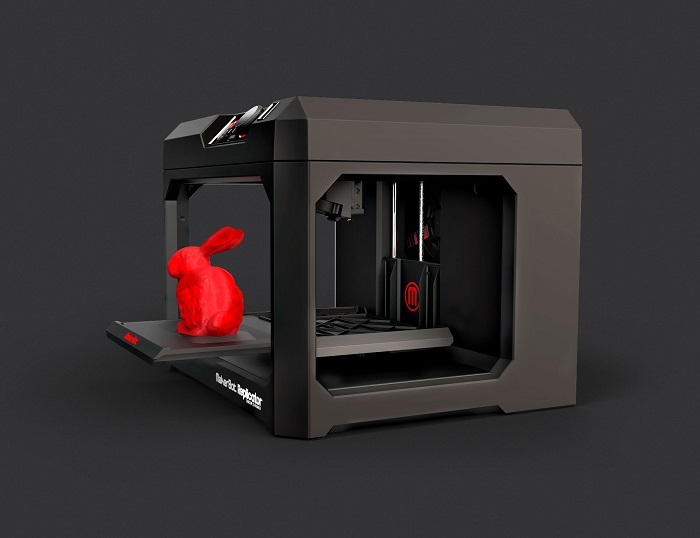
The unusual printer was designed and assembled as part of the discipline "Project activity", which this academic year is included in the schedule of all third- and fourth-year students. nine0005
The team of innovators is led by the head of the Quantum student scientific society Roman Kononenko. The idea of creating a "snow" printer belongs to the director of ANO "Irkutsk Quarters", professor of practice at IRNITU Sergey Mayarenkov. He promotes the Winter City project, which involves the creation of creative public spaces, innovative technologies that provide a comfortable life in winter. Rector Mikhail Kornyakov supported the initiative, and future third-year roboticists Georgy Byzov and Anatoly Semchenko decided to bring the idea to life. nine0005
According to Anatoly, a variety of parts were used to assemble the printer. For example, the frame, work surface and print head (spindle) were taken from an old CNC milling machine. To make it easier to use the printer in the cold, the students purchased a reinforced snow hose.
The key element of the design is a screw screw pump with a funnel, printed on a conventional 3D printer. Like a meat grinder, with the help of an electric motor, it will process snow into a mushy mass, and then feed it into a hose. Taking into account experiments and adjustments, it took the authors three weeks to manufacture the screw screw. nine0005
“The device is controlled by a controller and a laptop. We also modified the Mach4 software, which is usually used in working with CNC machines. The work is exciting, but difficult, because we set up the most non-standard parameters. Thus, the nozzle diameter (a special hole in the cartridge head) in a conventional 3D printer is 0.4 mm, in our device it is 20 mm. In this regard, we had to adapt the Cura Ultimaker program for plastic printing to the project, ”Georgy talks about the functionality. nine0005
The printer has already been tested for the ability to print "through the air" without material. In mid-November, students plan to start testing the device with snow. The developers will have to determine the throughput of the device, print parameters, including the height and width of the snow layer, the speed of rotation of the auger and mass feed.
Note that the authors of the project chose their future profession consciously. For example, Georgy became interested in designing in the Irkutsk robotics club. After graduating from the university, Georgy Byzov and Anatoly Semchenko plan to install, program and adjust robotic systems at large industrial sites, including car factories. Participation in project work is called a kind of industrial practice. nine0005
“It is important for roboticists to understand the structure of parts, to navigate the laws of physics, mechanics, electronics and programming. Therefore, our profession can be compared with medicine, where thorough knowledge of the subject is required, the ability to understand related sciences,” says Georgy Byzov.

The list of current student innovative developments of the Irkutsk Polytechnic University is available on the IRNITU Project Fair digital service.
Photo by Arseniy Chekmarev
| Navigation: home Random Page Feedback TOP Interesting to know Favorites Top: Fundamentals of ensuring the uniformity of measurements: Ensuring the uniformity of measurements is the activity of metrological services aimed at achieving ... Marxist theory of the origin of the state: According to Marx and Engels, the basis for the development of society, the changes taking place in it lies ... nine0005 The problem of the typology of scientific revolutions: Global scientific revolutions and types of scientific rationality... Interesting: Measures to protect against frost heaving of soils: Engineering protection against frost (cryogenic) heaving of soils is necessary for light low-rise buildings and other structures . Approaches to solving the theme of the film: has a lot in common... Engineering protection of territories, buildings and structures from hazardous geological processes: Studying landslide phenomena, assessing the stability of slopes and designing anti-landslide structures are the most urgent tasks facing domestic ... Disciplines: Automatic Entrepreneurship Instrumentation Programming Production Industry Psychology Radio communication Religion Rhetoric Sociology Sport Standardization Statistics Construction Theology Technology Trade Transport Pharmacology Physics Physiology Philosophy Finance Chemistry Household Drawing Ecology Economics Electronics Energy Jurisprudence | What you need to play wargames.. 34 Volumetric fields in Commands & Colors, flat wargames - three-dimensionality! 46 Block storage in Commands & Colors 55 Battle Cry PUP. Do-it-yourself beauty in Commands & Colors. 73
PnP with their claws Author – Mikhail Kropotov Hello friends. For all the time that I have been doing P&P building, subscribers sent me different recipes for making, they all had their pluses and minuses, but I never found the ideal way. So how do you do the PnP of your dreams, it’s up to you to decide, and in this article I will share my experience, and at least you won’t step on my rake. Most likely, those who have been pirating for more than a day will not read anything new. So what are the components of a game? Map of the area, deck of cards, rules + memos, tokens. nine0005 Let's start from simple to complex: rules. The lightest component, we send a file for printing and catch what is printed from the printer. You can do this in two ways: 1. a full-size A4 book, and 2. - half A5. The first way is the most ingenuous, we print, we sew.
1 of 2 I liked the brochures more in use, they are compact, convenient and economical. nine0005
1 of 2 Next, we print a map of the area. Here, too, everything is simple, if there is a breakdown into small sheets - we print, then we glue it together, if not ... well then we knock on the public, good people will not refuse. However, I still recommend printing the card on paper, I personally suffered with glued cards that are constantly moving apart, or glued unevenly, it is much more pleasant to play on a solid card.
1 of 2 Card deck. We do double-sided printing on thick paper, then cut it into separate cards with scissors, everything is simple. However, I strongly advise you not to use an image as a shirt... use a texture fill.
1 out of 3 This is what my face looked like when the printer misprinted cards again. nine0004
And then someone shouts: “Hey! stop with the obvious things, you know why we are all here! How to make fucking COUNTERS!!!???”. First things first! Never mess with glue! It might be obvious to some! But I have to say it! PVA glue is evil! Glue stick fiend! NENADA! We buy self-adhesive A4 paper and print on it. The next step is to choose the basis for the token. Ordinary cardboard will not work, it is too thin and it will not be convenient for them to play. nine0005
1 of 2 So we have two paths. Make expensive-rich, or bum-style. Expensive - rich - we buy printed cardboard 1.5-2 mm thick and glue our printed self-adhesive on it.
1 of 3 I do not recommend cutting such thick cardboard with scissors, because they damage the edge, you need to do this either with a scalpel or a clerical knife. I must say right away that this is not an easy task, and sometimes accidents happen. nine0005
1 of 2 Model scalpel, served me for five years in the modeling hobby, but fell from LnLT.
Homeless style. So, how do you make a token without too much trouble, so that it is thick enough, strong enough, and so that you don’t have to fiddle with complicated cardboard? Sit back, now the old pirate will share his sea secret... Are you ready? It's corrugated cardboard! What are you laughing at? Come on, you ... I know that such cardboard is sold anyway, but I use covers from under office paper (homeless-style). nine0005
1 of 2 In terms of thickness, as can be seen above, it is not inferior to ordinary cardboard, but it is much easier to cut it, without much difficulty it can be cut with scissors.
1 of 3 Another trick that applies to both types of token building - do not try to stick both sides at once. If you try to combine two A4 formats at once, then you will most likely be mistaken. Even if it seems to you that you have adjusted everything exactly, even one degree of error is enough for a fatal shift to appear, which will ruin half of the printed tokens. I do this - I cut out a strip in two rows of counters, stick it on cardboard, then cut off this strip with cardboard and glue the back side. nine0005
That's it, I've taught you everything I know, so you can start your own pirate journey. Doing PnP is quite a troublesome and time-consuming task, sometimes you wonder if it’s easier to buy a game than to mess around with all this nonsense. |
 ..
..  64
64  The second one is also simple, we put the Adobe Acrobat program and print the Brochure, then we bend the leaves in half and sew them in the middle.
  No matter how much I fought with my printer, he doesn’t want to print exactly in any one so that the card matches her shirt, some kind of offset always turns out.
  Then we take something spicy and cut into tokens.
 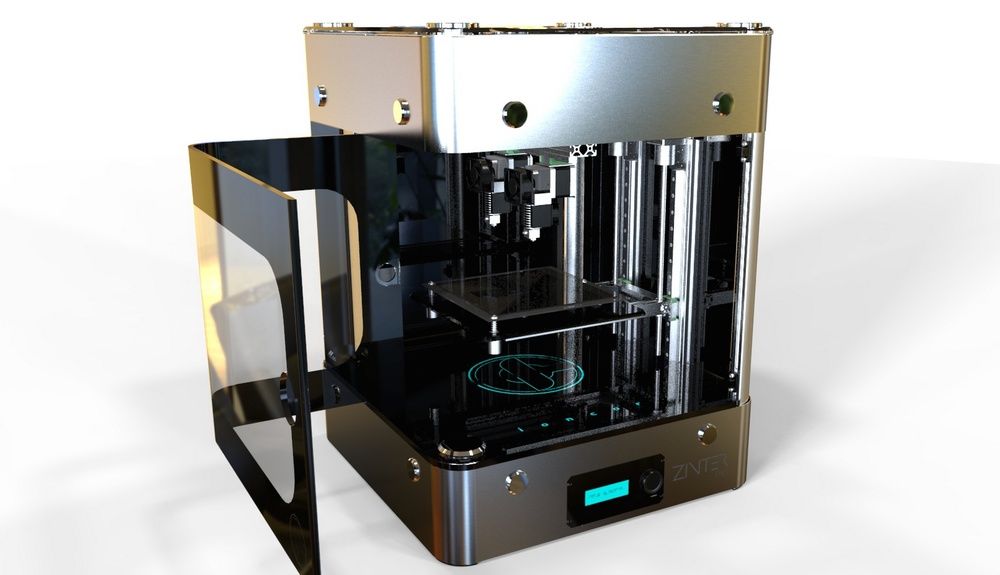 However, tokens with this method are ugly. If someone is afraid that such tokens will delaminate, then I hasten to reassure you, my friends and I played two campaigns in Nuklear Winter 68 and there were no problems with them.