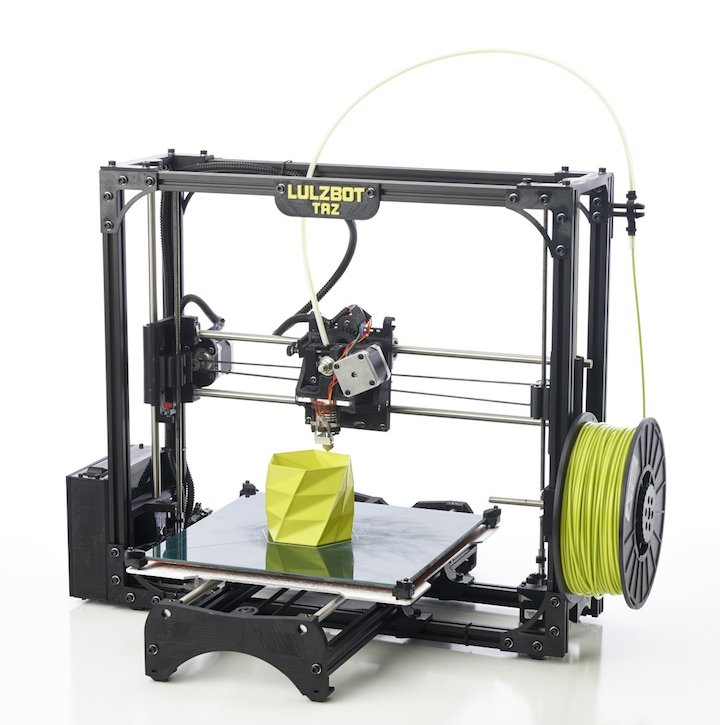
3D printed solutions
3D Printing Solutions by Arkema
A market leading product portfolioLiquid
resinsRadiation curing
3D printerLearn more
Thermoplastic
powdersPower bed fusion
Learn more
Thermoplastic
pelletsFilament extrusion
3D printing filament extrusionLearn more
A better use of material propertiesWe provide support to choose the right material and the right printing technology based on your applications. We offer high-performance materials for 3D printing for highly demanding applications. Check our materials for chemical resistance, transparency, impact resistance, dielectric properties, heat resistance or energy return applications.
Chemical resistance - Kepstan
® PEKK In this video, we tested the reaction of Kepstan® PEKK and PEI to MEK.High Toughness and Impact resistance - N3xtDimension
® liquid resin UV/LED liquid resins are the top choice if you are looking to achieve tough, transparent and highly detailed parts.Impact resistance - Rilsan
® PA11 In this video, we tested SLS printed Rilsan® PA11 with PA12 for impact resistance. Using the vertically installed tube and falling steel ball test, we can see that the PA12 piece has broken while PA11 withstand the impact with the steel ball and the piece remains intact. SLS printed Rilsan® PA11 shows superior impact resistance event -30 °C low temperatures.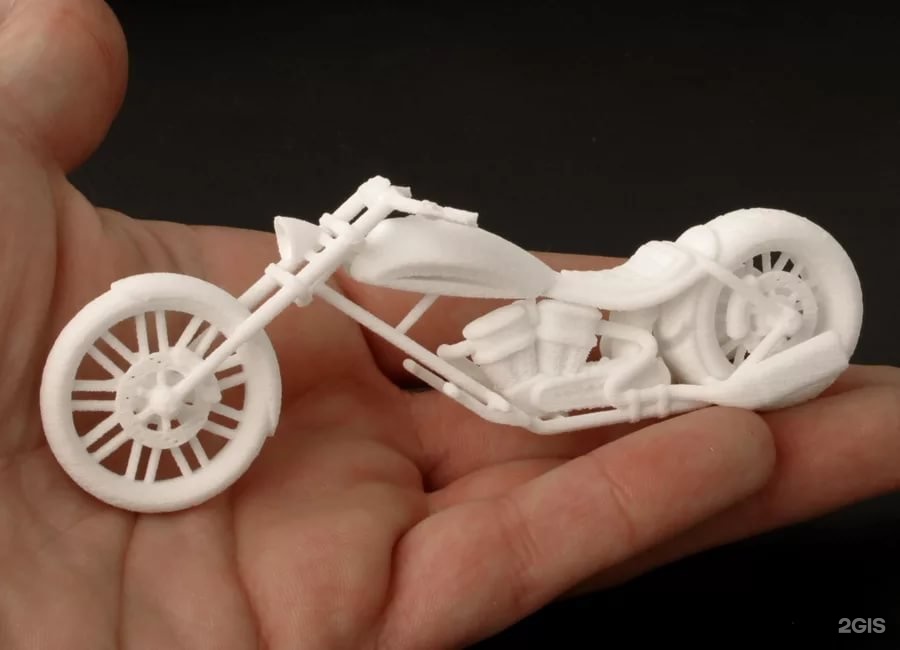
Dielectric resin - N3xtDimension
® liquid resin Our N3xtDimension® UV/LED liquid resins with dielectric properties are the material of choice for radio frequency technology applications.Ductility – Rilsan
® PA11 In this video, we compared 3D-printed pieces of PA11 and PA12 for ductility. After repetitive manipulations like folding and unfolding, we see how the PA11 piece remains tough and flexible without breaking. Use Rilsan ® PA11 powder when you need ductility, rigidity and strength for your 3D printing application.Heat resistance - N3xtDimension
® liquid resin N3xtDimension® heat resistant UV/LED curing resins can resist up to 150°C without compromising on mechanical properties.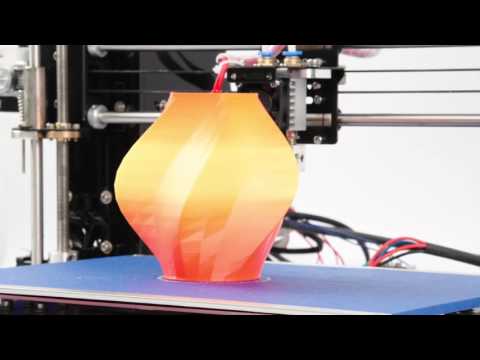
Energy return – Pebax
® TPE Pebax® TPE is an energetic elastomer that is perfect for applications requiring lightweight, flexibility and energy return. High energy return means a high percentage of the energy put into flexing the polymer (i.e. the step of an athlete) is returned during rebound. Compared to TPU polymers, Pebax® elastomers exhibit much lower energy loss, even at very low temperatures. Save time during design phaseThe ability to reliably simulate part behavior is key in predicting an optimal design and making the most of 3D printing. We can recommend to our customers the best trade off between cost and properties for each part, and are dedicated to being at the forefront of simulation tools.
LEARN MORE
Collaborative developmentWe partner with our customers to develop custom materials and resins for their unique end-use applications.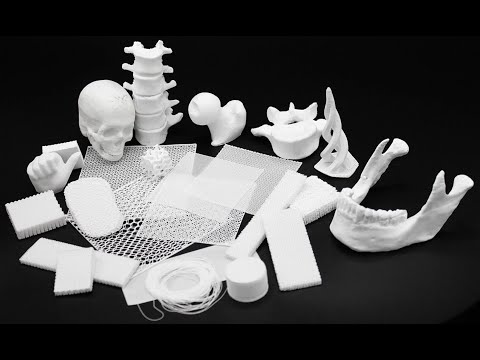 With our dedicated team of scientists and our three global centers of excellence, for each of the printing technologies, we have enabled the success for our customers in numerous markets.
lean more
Global capability, local expertiseWe are ready to support our partners globally. Our teams are actively investing in all three regions – Europe, Asia, and North America – to serve you better. Our worldwide presence enables us to provide quick, local expertise from customized solution design to implementation
Learn more
White paper: Expanding Industrial Applications of Additive Manufacturing with Advanced Material Solutions- Why additive manufacturing is revolutionary for industries?
- What are the highest performing materials for additive manufacturing in industrial application?
- How to democratize additive manufacturing?
The high-performance materials for 3D printing are evolving in tandem with advancement of additive-manufacturing technology.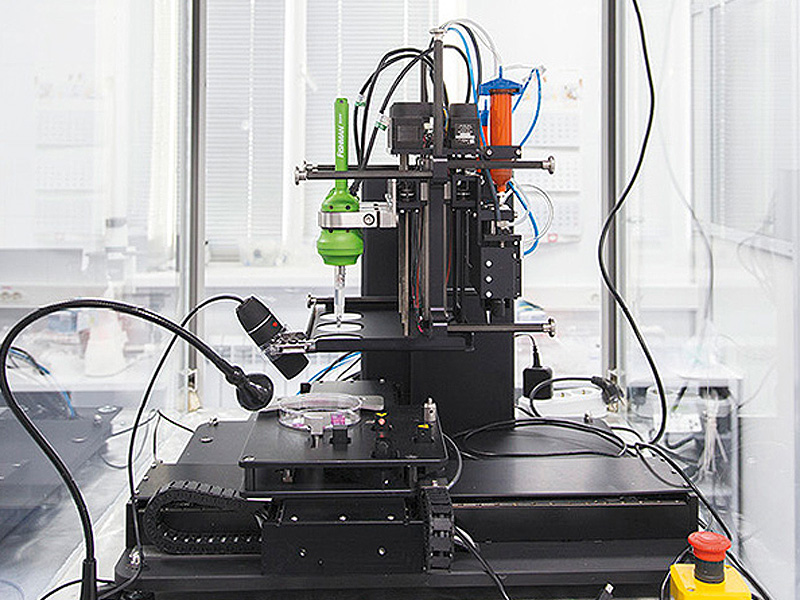 The material research and development in additive manufacturing is rooted in the understanding of the past practices and bridging the gap between traditional and emerging technologies.
dowload white paper
Case study - 3D printing
3D printed and tailor-made: orthopedic insoles made with advanced bio-circular polyamide 11
read the study
Our specific offering for other industries:
3D Printing Solutions - ALSO Holding AG
The solution in a nutshell: 3D printing is being used in many different business areas to create interactive, mechanical and technical solutions. Read about some of them below.
3D Solutions by business segment
3D Solutions by workflow
Overview of 3D Printing Solutions
With our market leading vendors we develop 3D Printing and additive manufacturing solutions for customers in various business segments.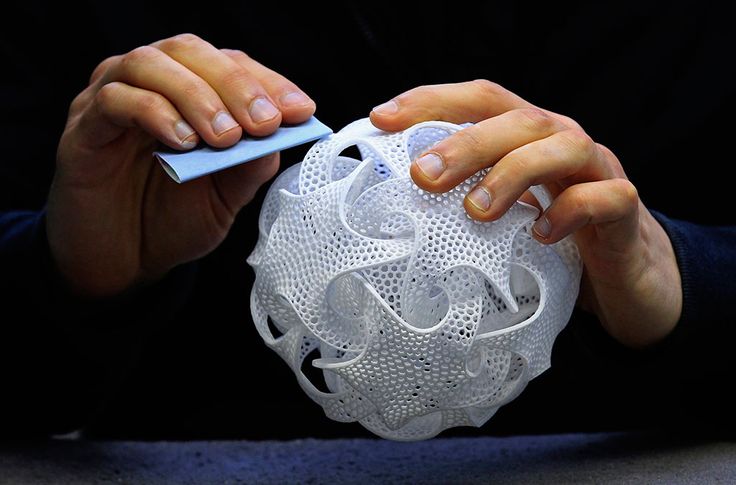
Benefit from expert knowhow
Professional solutions for Additive manufacturing (3D Printing) requires five steps:
- Production of 3D Data
- Preparation of 3D Data
- Manufacturing / Printing of 3D Data
- Post Processing to get a final Object
- Automation and Quality Control
and a good knowledge of traditional manufacturing (processes) and materials.
Solution Power
Identification of the right 3D solution for the customer, by…
Support with the ROI assessment before the implementation of a new workflow.
Help in determining the appropriate tools and resources for creating models for 3D printing.
Optimize and finalize the process with post processing procedures and products.
3D Printing in education offers you wide range of new additional options - you can print a 3D brain, a planet, or anything you want to capture the attention of your class and help them learn
3D printing is being used in many schools to create interactive, mechanical and technical lessons. This inspires young minds and makes learning more fun. Due to 3D printing versatility in school subjects, a 3D printer can be used in any school subject. Here are a few examples:
As soon as they see it, they’ll be captivated. Young minds love the latest technology, and it’s the perfect way to help them learn together and enjoy the process. 3D printing Inspires students with hands-on learning about science, engineering, business, design and technology or whatever you choose to print.
Let us help you on your 3D printing journey, offer you the advice schools require to justify the change from learning, not just from traditional auditory methods, but also visual and kinaesthetic methods with the power of 3D printing.
3D printing sounds like something from science fiction, however its been around for about 30 years.
A 3D printer works by “printing” objects–but instead of using ink uses granular materials to build up the image in layers. The benefits of this is that students can learn though visual and kinaesthetic learning styles.
That’s up to 70% of students default way to learn, compared to the traditional auditory learning style, which is only 30% of students preferred learning style.
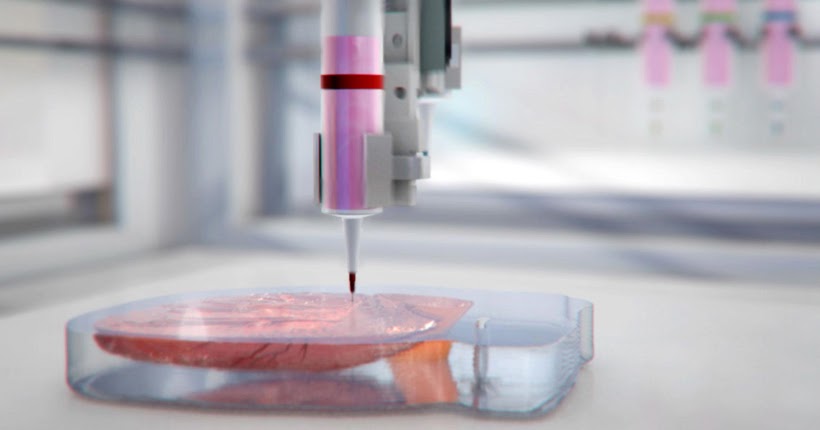
There are several reasons why additive manufacturing works perfectly for medical applications. An on-demand 3D printing service can be used to quickly manufacture medical devices for patients in need.
Surgical implants require complex and organic structures to be accepted by the host tissue. These structures are prohibitively expensive with traditional manufacturing methods, but a 3D printer can create them with no additional cost.
SterilizationMedical devices must be made from sterilizable materials. Most of the materials used for FDM printing or 3D metal printing can be sterilized by steam autoclave or gamma radiation.
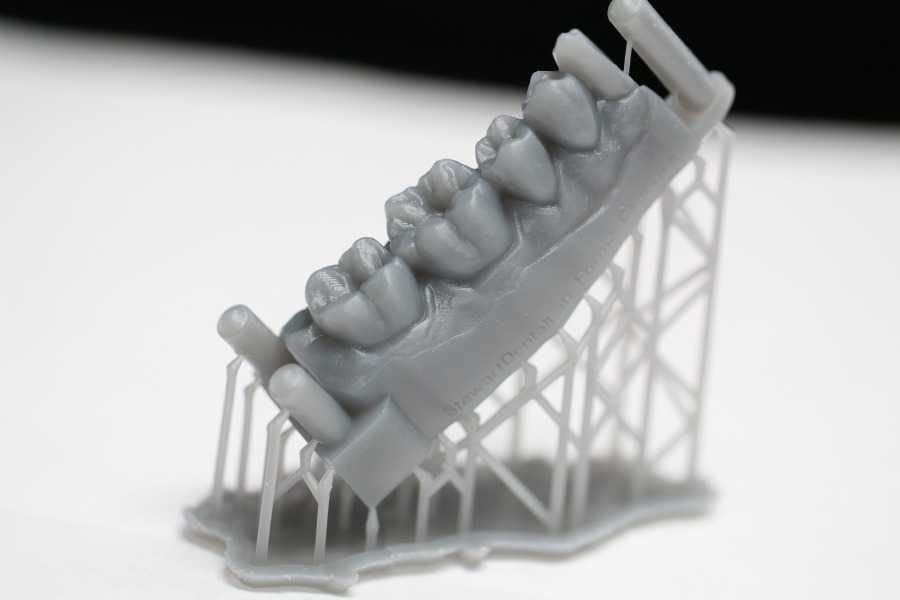
Customization3D printed parts can be shaped to fit perfectly with a patient's anatomy. Dental implants, cosmetic prosthetics, and even scale models can all be created to exact specifications.
Medical procedures seldom happen on a relaxed schedule. On-demand 3D manufacturing lets hospitals source necessary parts that can be completed with an acceptably short lead time.
Additive manufacturing has been used to produce hearing aids, replacement limbs, surgical implants, and detailed models of organs, bones, and blood cells. Access to this technology has greatly advanced the potentials of the medical field.
ProstheticsAdditive manufacturing has completely revolutionized the prosthetics industry. From cosmetic prosthetics to fully-functional replacement limbs, these devices can be customized to each individual and produced for a fraction of the previous cost.
Surgical guidesBoth dental and medical surgeries require extreme precision. A 3D printed guide can help a surgeon line up holes and incisions with a patient's anatomy. Thanks to additive manufacturing, these guides can be produced quickly and to exact specifications.
3D printing can be used to create perfect scale models of patient-specific anatomy and structures. This allows doctors and nurses to study a subject from multiple angles and hopefully find a solution to the medical problem. Additive manufacturing is an affordable way to produce anatomical models; both medical students and experienced professionals take advantage of this technology.
Toys
Production 3D Printing offers a low-cost-of-entry and flexible alternative to injection molding when creating new toys. Allowing designers and businesses to more readily break into the global toy market and scale up. Toys are one of the largest markets for final plastic products in the world.
Toy designers can use 3D printing to create functional models to test and validate among potential users and distributors. This helps to determine the requirements for the final product.
3D printing reduces prototyping time, as it doesn’t require moulds for multiple design iterations. 3D printed prototype toys can be tested for functionality and safety, and the necessary design improvements can be quickly and easily incorporated into the final product design. This way, 3D printing significantly speeds up time-to-market for new toys.
Sports
With the development of advanced Additive Manufacturing materials, the sports industry can enjoy new opportunities for more functional equipment.
Lightweight and durability are two key standards for sports equipment manufacturing. But other than these properties, 3D manufactured sports goods can also enjoy the superior design potential of 3D printing. With lattice structure designs, high-performance sports equipment can be achieved with a much lighter weight than with other manufacturing technique. Along with weight, design for Additive Manufacturing allows to enhance the properties of these high-performance materials, hence to make the most of 3D printed helmets, shinguards, soles, shoes, and much more.
Prototypes
Before launching a new product into the market, a number of steps are required to transform a concept or idea into the final, physical product. Prototyping is a vital stage in this process, giving designers important insights as to how a toy will look and function
To this end, 3D printing is the ideal prototyping method for creating functional, visual prototypes rapidly and cost-effectively.Importantly, 3D printing enables designers to produce multiple prototypes in a very short time – meaning that extensive feedback can be used to formulate the final requirements. The iterative potential of 3D printing therefore enables greater experimentation, leading to greater product innovation, and ultimately better parts.
Spare Parts
Creating spare parts and rethinking the supply chain
As you may know, additive manufacturing is the best technique to manufacture spare parts. While using 3D printing, manufacturing spare parts becomes useful for many different aspects and is starting to be used in some interesting sectors.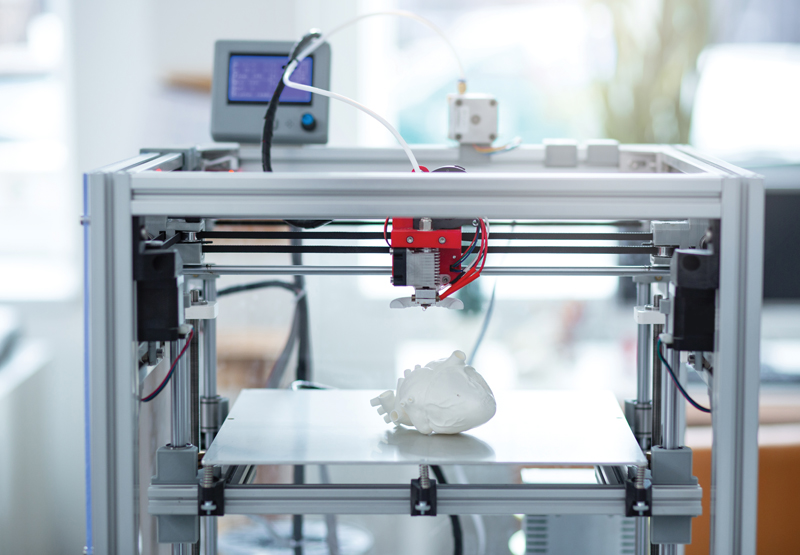
3D printed spare parts can be used to repair broken parts that are no longer produced. The automotive sector is making the most of this technology, some big manufacturers are already using it such as Porsche or Jaguar for their classic cars: this is an opportunity for them to recreate theses old parts identically. This technique is also a great advantage for spare parts as it is adapted to the production of small volumes.
Create 3D data by either an CAD Software, 3D Scanning or downloading 3D models from a web database.
Prepare the 3D model to fix errors, adjust the model for 3D printing or optimize the structure - lightweight construction.
3D Printing with the right technology, the right material and the right parameters.
Post Processing of the 3d object by cleaning, surface finishing or coloring the object to a final product.
Automate 3D printed parts are automatically checked, sorted and packaged for the customer.
More about 3D Pre Processing
More about 3D Post Processing
Let’s find an individual solution together
Please fill out this form
Problems, defects, 3D printing errors and solutions
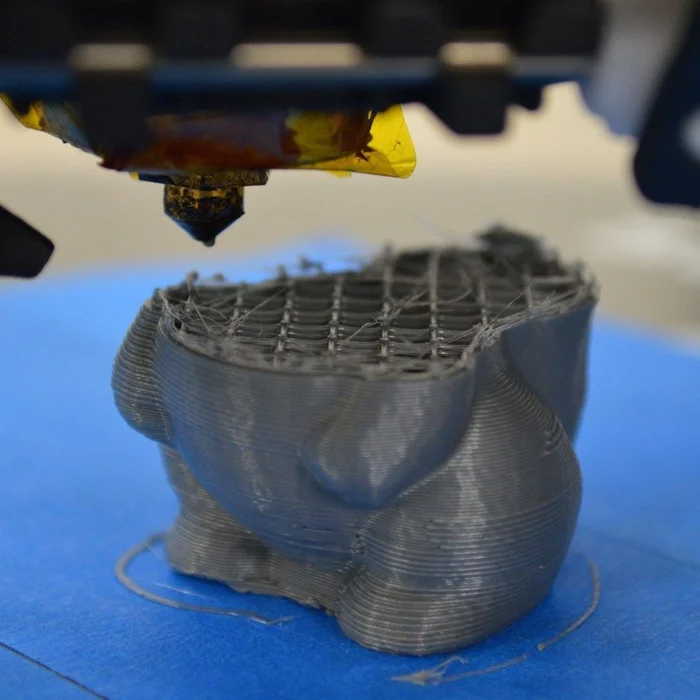
Often during the operation of a 3D printer, problems may arise due to which defects appear on the finished model. Or instead of a neat product, plastic noodles suddenly appear on the table.
In fact, the causes of defects can be conditionally divided into 2 types - these are physical and software.
Physical ones are those that arise due to problems with the mechanics or any other causes that can be eliminated physically. These include problems with printer mechanisms (belt tension, backlash), clogged or deformed nozzle, incorrect table geometry, etc. nine0003
Software - these are defects that occur due to incorrect slicer settings or, less often, errors in the printer firmware. For example, incorrectly selected print speed, retract settings, incorrectly selected temperature for plastic, etc.
Very rarely, the problem may lie in the wrong or “flying” printer firmware (although usually the printer simply will not start then), overheating of some boards during printing, etc. These are rather special cases, so we will not consider them. nine0003
Model peels off or does not stick to the build plate
This is the most common 3D printing problem. Every 3D printer has had a case when the first layer treacherously rolls, clinging to the extruder, or the most offensive - when it tears off a partially printed model from the table. The first layer must stick tightly otherwise nothing will be printed.
Gap between table and nozzle 9 too large0023
This is the most common reason. You just need to set the correct gap between the table and the nozzle.
Modern printers often use an auto-calibration (auto-leveling) table system or an auxiliary table leveling program. To calibrate such printers, use the instructions.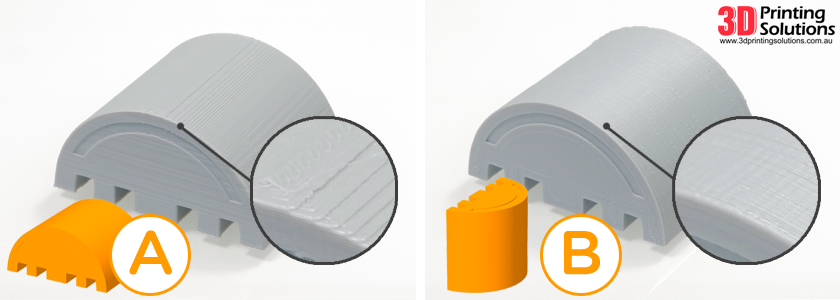 If there is no manual, it can be downloaded from the manufacturer's website.
If you have a simple printer without auto-calibration, a self-assembly or KIT kit, use a probe or a piece of paper folded in half to calibrate. The probe should be slightly pressed against the table by the nozzle. Before calibration, the table and extruder must be heated. Align the table surface over each adjustment screw (there may be 3 or 4) in turn, and only then check the center point. nine0003
If you're having trouble getting your table surface perfectly level, try raft printing. Raft is a thick substrate in several layers that is printed under the model. It will help smooth out the slight curvature of the table.
A small cheat sheet to determine the correct gap on the first layer
Plastic with poor adhesion
Some types of plastic, due to various reasons, such as large shrinkage, do not adhere well to the surface of the printing platform. In this case, try using stickers or special 3D adhesives to improve adhesion between the table and the first layer of plastic. nine0003
In the early days of 3D printing, there were experiments with different homemade 3D adhesive recipes. ABS diluted in acetone, BF glue, sugar syrup and even beer. Some experiments have been successful. Until now, some enthusiasts use some types of hairspray or glue sticks as 3D glue. But still they are inferior in their properties to industrial 3D adhesives.
Some types of high temperature plastics with a high percentage of shrinkage (ABS, Nylon, etc.) may peel off the table during printing. This is due to uneven cooling and “compression” of the model (the lower layers have already cooled down, but the upper ones have not yet). For such plastics, it is imperative to use a 3D printer with a heated table and a closed case. nine0003
Plastic temperature too low
The hotter the plastic is when it exits the nozzle, the better it will adhere to the print platform. It is better to print the first 5-10 layers at a higher temperature (+ 5-10 degrees) and turn off the blower fan.
Wrong first layer settings (speed and thickness)
A thicker layer sticks easier, so the standard first layer is 0.3mm thick. With an increase in print speed, the heating block may simply not have time to heat the plastic to the desired temperature and it will stick to the table worse. Before printing, check the speed and thickness settings of the first layer in the slicer. nine0003
A lot depends on how the 3D printer prints the first layer. Try to control the printing of the first layer and only then leave the printer to work alone.
Plastic does not choke from nozzle
The printer has already begun to print, but the print table remains empty. Or part of the model did not print.
Clogged nozzle
In 3D printing, a nozzle is a consumable. The nozzles are clogged or worn out (frequency depends on the type of plastic). The simplest thing is to replace the nozzle. But if there was no spare at hand, you can try to clean the old one. To do this, there is a whole set of thin needles. Or you can heat a clogged nozzle above the melting point of the plastic and “burn out” the blockage. But later it is still better to replace the nozzle. nine0003
Low temperature nozzle
You need to increase the temperature of the extruder in the slicer settings or check the thermistor and heating block. Sometimes the thermistor may not read the temperature correctly due to a malfunction or incorrect 3D printer firmware settings.
If the problem occurs after replacing the thermistor - contact the manufacturer or read articles about PID tuning.
Empty extruder
As the extruder heats up, plastic begins to ooze out of the nozzle. Because of this, the extruder may start printing half empty. Because of this, part of the first layer is not printed. You can push the plastic manually by simply pushing the bar into the nozzle. Or solve this problem programmatically - in the slicer, add a contour print around the model (one line).
Some manufacturers and 3D enthusiasts add a line print on the edge of the table at the beginning of each GCode. This is done so that there is plastic in the nozzle by the time the model is printed. nine0003
Feed mechanism does not push through plastic
The plastic pushes the feed mechanism to the extruder - a motor with a special pulley put on the shaft. If for some reason the plastic is not pushed through (nozzle clogged, extruder temperature low, etc.), then the pulley “gnaws” through the bar. You need to push the plastic bar with your hands or cut off the damaged piece.
Elephant foot
The first layers of the model are wider and protrude beyond the boundaries of the model. This is due to the fact that the upper layers put pressure on the first ones that have not yet cooled down and flatten them. nine0003
High table temperature
Due to the too high temperature of the table, the lower layers remain soft for a long time. Try lowering the table temperature. It is better to reduce gradually (in increments of 5 degrees). You can try to turn on the blower when printing the first layers.
Small gap between nozzle and platen
If, when printing the first layer, the nozzle is too close to the table, then excess plastic will be forced out. After a few coats, this will not be as noticeable, but can lead to the effect of an “elephant's foot”. nine0003
Plastic re-extrusion
When too much material is squeezed out of the nozzle, the walls of the model are not smooth, but bumpy, with sagging.
The solution is software - in the settings of the slicer, you need to set the material feed rate (fluidity) to a lower value. The average value is 95-98%.
It is worth checking the diameter of the rod.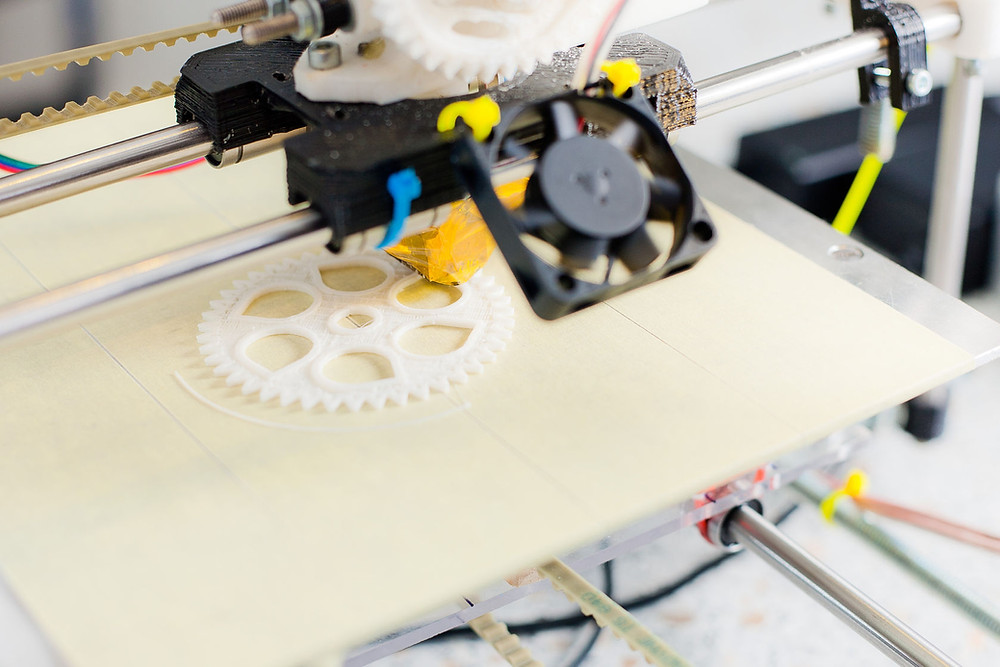 If its size is greater than 1.75, then the plastic will be squeezed out more than necessary. nine0003
Plastic underextrusion
The plastic is squeezed out too little, because of this, gaps may appear between the layer. The finished model will be fragile and fragile.
Wrong thread diameter
Check the filament diameter in the slicer settings. Sometimes, instead of the popular 1.75, the default is 2.85.
Incorrect feed factor settings nine0003
Check the fluidity settings in the slicer. The average should be 95-98%.
Clogged nozzle
Something could get into the nozzle and partially block the exit of the plastic. Visually, the plastic will choke from the nozzle, but in a smaller amount than necessary for printing.
Hairiness or cobwebs on finished model
Thin threads of plastic protrude from the outer wall of the model (most often on one side).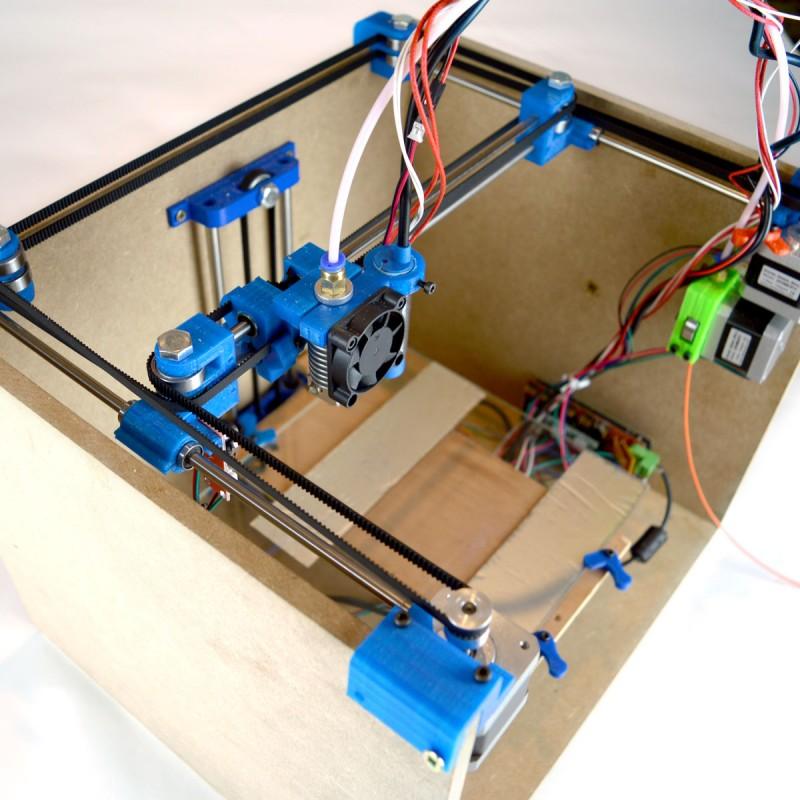 The defect appears due to the flow of plastic from the nozzle during idle movement. nine0003
Insufficient retract
A retract is a slight pull of a plastic filament from an extruder. Due to the retract when the extruder is idle (from layer to layer or from model to model), heated plastic does not drip from the nozzle. For some flowable plastics (eg PETG) the speed and amount of retraction must be increased.
"Hairiness" can be easily removed by grinding or cutting off the threads with a sharp scalpel. nine0003
High temperature extruder
The higher the extruder temperature, the more liquid the plastic becomes. It is important to find a balance so that the plastic is not too liquid and sticks well in layers.
In the selection of the optimal extruder temperature, a test model - a tower - helps a lot. It clearly shows how plastic behaves when printed at different temperatures.
.
Temperature test nine0003
Top "perforated" or uneven
The top of the model is bumpy or with holes. The problem may arise if the top of the model is flat. For example, like a cube.
Insufficient airflow
When printing the top plane (cover), the plastic does not have time to cool down and remains too liquid. Because of this, the threads are torn and holes are formed. Increase the fan speed on the last layers. nine0003
Few top layers
The top of the print may be too thin and deform as a result. Check slicer settings. The number of upper layers is not recommended to be set less than 6.
Low percentage of filling
If the infill percentage is too low, then the top layer will simply have nothing to rely on. Increase the fill percentage in the slicer settings.
Model deformation
Some parts of the model seem to have melted in some places or on one side. The problem most often occurs when printing with PLA plastic. The defect appears due to the fact that the plastic does not have time to cool and deforms.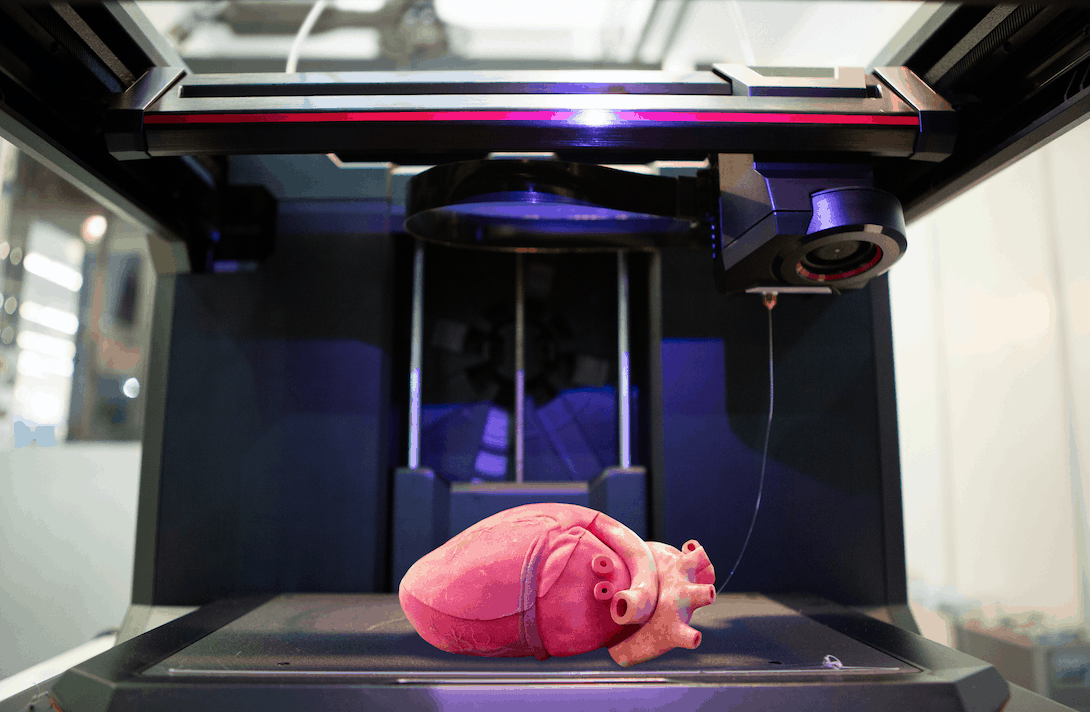
Insufficient airflow model
Turn the fans on to maximum. If their power is not enough (in some printers, the fan is located only on one side), you can put a regular desktop fan and direct it to the 3D printer table. nine0003
Small model
Small models are difficult to blow well. Try to print small pieces alongside larger ones, or place several identical models in different corners of the table. So the plastic will have more time to cool.
Layer offset
Layers shift along the x or y axis during printing.
Print head jam
Turn off the printer and try to move the extruder along the x and y axes with your hands. The extruder must move freely. If there are jams, check the mechanics of the printer. Bearing wear or the curvature of the shafts may be to blame. nine0003
Electronics overheating
Sometimes electronics problems can be to blame for misaligned layers.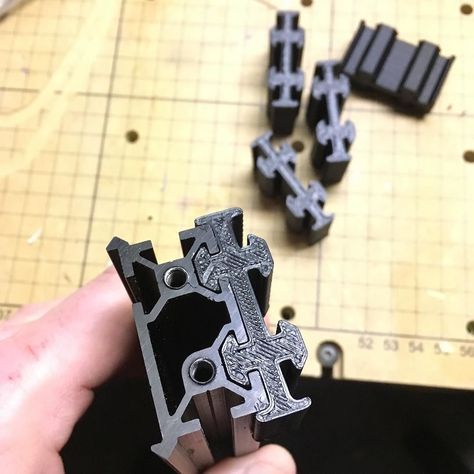 The most common cause is overheating of the drivers or too low current exposed to them.
Table top is loose
This is most often seen in 3D printers with glass. During printing, the nozzle may hit the model and move the glass slightly. Before printing, check if the glass or other printing surface is well fixed on the heating table. nine0003
Skip layers
Small holes are visible on the print, or the shell of the model is not continuous.
Teflon tube deformed
There are 2 types of thermal barriers - all-metal and with a Teflon tube. If overheated, the Teflon tube may deform. Plastic will pass through it, but in a smaller amount.
Low extruder temperature or high print speed
If the extruder is not heated enough, then the plastic will not be liquid enough and simply will not have time to be forced through the nozzle. The higher the print speed, the higher the extruder temperature should be.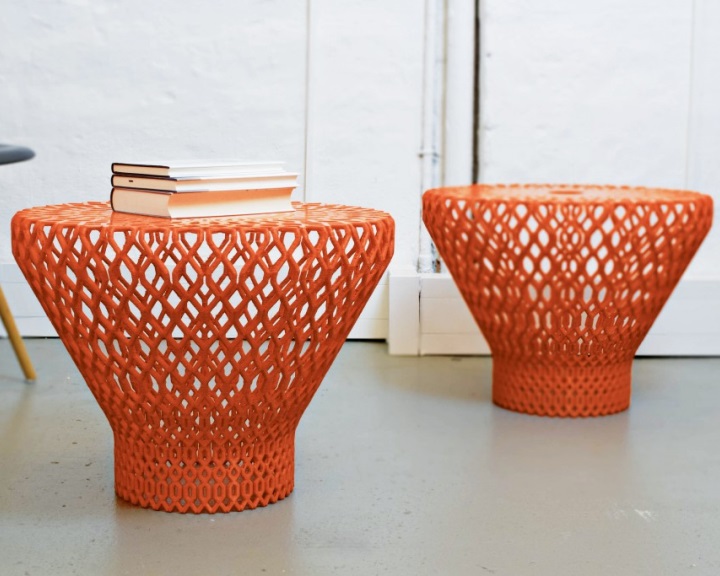
Sometimes the outer walls print well, but the infill is “torn”. In this case, slow down the infill print speed in the slicer.
Model bundle
Cracks form on the surface of the printout during or after printing. Cracks can be large or very small. Most often, this problem occurs with plastics with a high percentage of shrinkage - ABS or Nylon. nine0003
Sudden temperature difference (if model delaminates during printing)
With a sharp temperature difference (for example, a draft), part of the model cools down faster. This leads to uneven shrinkage and incorrect distribution of internal stress. For plastics with low shrinkage, this is not critical. But if the shrinkage percentage is more than a few percent, the model may burst in layers.
For printing with such plastics, it is recommended to use a printer with a closed housing. If this is not possible, try to avoid drafts and sudden temperature changes in the room where the 3D printer prints as much as possible.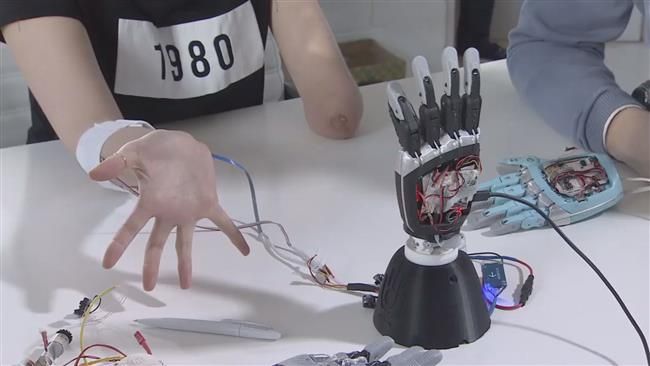 nine0003
Print temperature
Due to too low printing temperatures, the layers may not “stick” well to each other. Raise the print temperature in the slicer settings.
Hardening (if the model cracks after printing)
Sometimes cracks appear on the model a few days after printing. This is due to uneven distribution of internal stress after cooling. You can try to “harden” the finished product. nine0003
For hardening, the model is placed, for example, in an oven, and heated to the softening temperature of the plastic. After that, the heating is turned off and the oven is left to cool slowly with the model inside. Due to this, the stress inside the print is distributed more evenly. But accuracy is very important in this method - if you make a little mistake with the temperature, the finished product can “float”.
Ringing
In places where the extruder changed direction, ripples are visible. Most often it looks like a shadow around the “sharp” protruding elements of the model.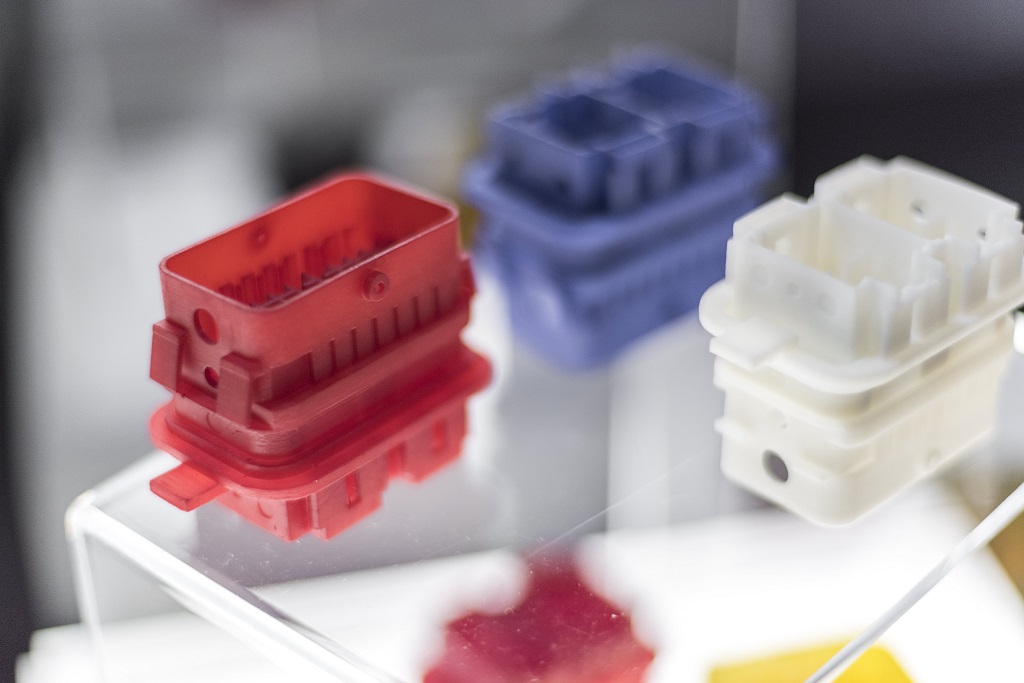 nine0003
Mechanical problems
Sometimes the problem occurs due to extruder play. Check if the extruder mount to the rails is loose. Be sure to check the tension of all belts.
High print speed or high accelerations
Moving the extruder too fast can cause vibrations that cause ripples on the wall of the model. The lighter the weight of the extruder, the less noticeable the ripples will be. To get rid of ringing, simply reduce the print speed in the slicer settings. nine0003
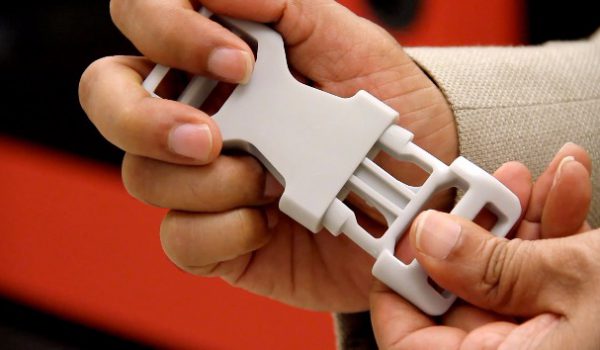
Slits for thin-walled models (not solid shell)
The thin wall of the model is not solid, but consists of two thin walls with a narrow gap between them. This problem is often faced by fans of printing "cutting" for baking.
Left model with wall defect, right without
Wall thickness and nozzle diameter mismatch
If the wall thickness is 1 mm, and the nozzle diameter is 0. 4, it turns out that for a solid wall, 2 nozzle passes are few, and 3 are already many. The result will depend on the slicer algorithm, but most often you will get 2 walls with a thin slot in the middle (the slicer cannot change the wall thickness). The solution to the problem may be a slight refinement of the 3D model or the use of a different slicer. nine0003
Algorithms for calculating 3D models are constantly being improved and refined, and now this problem is less common.
When modeling, take into account not only the thickness of the nozzle, but also the percentage of “overlapping” of lines on each other. If you have a nozzle with a diameter of 0.4 - make the wall in your model not 0.8, but 0.7 - 0.75.
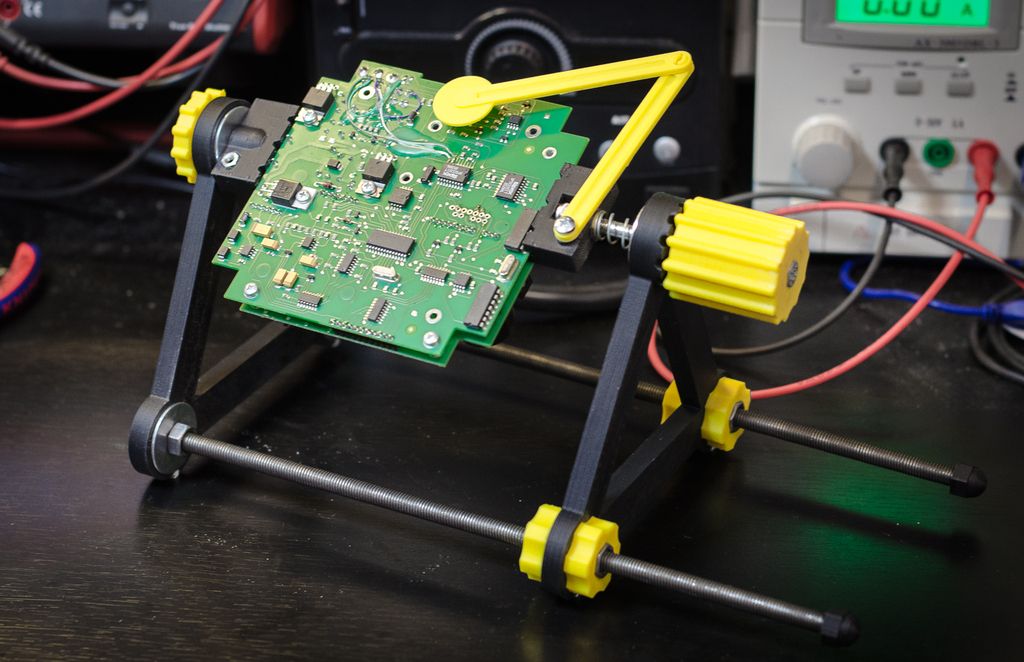
Wrong model geometry
When instead of a circle you get an oval, and instead of a square you get a semblance of a rhombus. nine0003
The main reason is malfunctions in the mechanics of the printer. Be sure to check:
Belts
Check belt tension in x and y. Belts stretch over time and may need to be tightened or replaced. Each 3D printer has its own way of tightening the belt. If the belts are slightly stretched, you can tighten them with the help of a "spring".
Loose pulleys, etc.
Check if all bolts and nuts are tight. Are there backlashes. Pay special attention to tightening the pulleys located on the motors along the x and y axes.
Sagging of some parts of the model
Some parts are not printed, broken, or instead of a neat surface, a swollen plastic snot is obtained.
No support for overhangs
A 3D printer cannot print in the air, so if there are overhanging elements in the model, you need to set supports - supports. The slicer can set the necessary support itself, you need to check the appropriate box in the settings. nine0003
When printing with soluble support, you can set the gap between the model and support - 0. This will make the surface smoother. If the support material and the model are the same, you need to add a small gap. Otherwise, it will be difficult to separate the support from the model.
Split model
Sometimes the supports can take more plastic than the model. In this case, to save material and time, it will be more convenient to cut the model. If you have more than one 3D printer, then the model will print several times faster. nine0003
When cutting the model, you can leave grooves or mortgages so that the pieces of the model are connected without displacement.
Totals
In this article, we talked about the most popular 3D printing defects and how to solve them. Don't be intimidated by such a long list. Some problems are rare and you are unlikely to encounter them.
There is a list of problems that arise due to the design features of a 3D printer, so try to choose a printer that suits your needs. To do this, you need to understand what products and what material you need. nine0003
Problems associated with printing algorithms are quickly eliminated by software developers.
Do not be afraid of possible difficulties and each print will be successful.
(There is a solution) How to achieve dimensional accuracy of printed parts
desktop-printer print-preparation
What precautions can be taken when designing parts that must match either external objects or other printed parts to ensure that the final 3D print is dimensionally accurate and conforms to another object? nine0003
As far as I know, there are at least two options for accounting for inaccuracy and printer shrinkage:
- Adjust the space around the seams in the CAD model
- Adjust size offsets in slicer software
Are there good workflows that can be used to accurately design and print 3D models without trial and error?
@Tormod Haugene, 👍17
5 replies
Best answer:
▲ 10
I think the best way to do this is to calibrate the printer and slicer as best as possible. One of my favorite annoyances is when people upload STLs that have been adjusted to suit their printer/material. There are many material suppliers that vary in quality, and many materials and different printers that tolerances should not be built into the part, because in the end it usually just makes it difficult for others trying to print the model. nine0003
If you don't share models, all I can say is that you're better off calibrating the printer and setting the slicer for your material anyway. You'll have better luck with other people's models, and it will be easier for you to create your own.
If you are still having problems, then modifying the model is probably the last option. I don't know of any CAD software that can handle the problems that 3D printers have, so experience will be your only help. I know that in Inventor you can go around and thicken/offset individual surfaces of the model to compensate, or if you had a shrink percentage you could get creative with the formulas in the sketches. nine0003
, @ tjb1
▲ 7
I think it's important to remember that a 3D printer is both an R&D tool and a piece of manufacturing equipment. Thus, we must treat it and its process in a similar way to other pieces of production equipment (such as mills, saws, etc.). Other (though traditional) manufacturing methods, such as milling, usually require post-processing of the parts to remove any burrs and clean the parts. Because tools like the mill are subtractive technology, they can already handle tight positional/dimensional tolerances. However, since 3D printing is additive manufacturing, it is difficult to keep the same tolerances directly from the machine compared to traditional tools. nine0003
For this reason, I would suggest scheduling a more traditional post-print process when it comes to tolerances and joins. It can be as simple as using a Dremel or a mill/lathe. However, I would recommend increasing the shell/floor/roof settings in your slicer to accommodate the subtraction process.
, @ tbm0115
▲ 14
Unfortunately, different firmware and different slicers require different calibration methods! There are many software recommendations such as single wall calibration box printing and wall thickness measurement. This is a good technique for Slic3r, but not for Simplify3D. This can be very confusing. nine0003
Here is a general outline of what you should do:
- Rough calibration check printer steps/mm. Do the values in the firmware settings for your linear motion equipment make sense? For example, you can calculate theoretical values based on the pitch of the belt and the number of teeth on the pulley. Print something moderately large (~100-200mm) and see if it's correct. +/-1-2%. If it's off more than that, your steps/mm are probably wrong.
 nine0422
 - Check for mechanical play using a play check seal such as this: http://www.thingiverse.com/thing:252490 Tighten the straps and make any other printer adjustments necessary to eliminate play. Backlash will override other calibration steps, so make sure there is no slop!
- Follow the recommended extrusion volume calibration steps for your slicer. This starts by measuring the diameter of the filament with a caliper and inserting it into the slicer. And then you're usually either "print a single wall box and measure the thickness" or "print a series of 100% infill and calibrate boxes and adjust the hood multiplier to the highest value that looks good without bulging." By measuring the diameter of the filament, and then adjusting the calibration of the extrusion setup in the slicer, you will be able to measure the future of the filament and the print will go awry. Giving the slicer fake diameter values will force you to recalibrate each time the diameter changes.
 Note that you must repeat this calibration for each FILAMENT MATERIAL and EXTRUDER DESIGN. Different material/extruder pairs will have different bite depths and effective drive diameters. nine0422
 - Precision calibration is checked by printing different sizes of the object and PUTting the "desired size" as X and the "actual size" as Y. Then find the linear fit equation y=mx+b. (Do this separately for the X, Y, and Z axes of your printer.) The "m" value is your scale error. You can use slicer object scaling to fix this. For example, ABS typically requires a scaling of 100.3-101% to account for shrinkage. If you have a scaling error with a low shrinkage material such as PLA, you can adjust the Pitch/mm value of your firmware to compensate. nine0482 The value "b" is your fixed width error. Assuming you don't have any backlash, this is usually caused by a little melted plastic sticking out to the sides, or an extrusion volume calibration error. You can improve this by fine-tuning the amount of extrusion.
 Many slicers also have "horizontal/XY size compensation" settings that can be used to shrink/expand the part by b/2 to correct the fixed width error. Any residual fixed width error that you can't fix with slicer settings should be added as a tolerance in the part model. nine0422
If you follow these steps, you will get dimensional accuracy of +/-0.1 mm or better.*
*Deltas not included. This is a completely different wax ball.
, @ Ryan Carlyle
▲ 2
A few suggestions that I haven't seen are explicitly stated in other answers.
When exporting STL files, you can increase the resolution. If dimensional accuracy is critical, you need to ensure that the STL conversion process does not resize the curved surfaces beyond your maximum minimum tolerances. i.e. Open the STL file in the CAD program and then re-measure the resulting surfaces. The STL transformation for holes makes the integers a little smaller and the outer curved surfaces a little larger. nine0003
I have noticed with my printer that when printed, the part is usually slightly larger. I was able to account for this in my CAD model by slightly reducing some of the dimensions in the CAD before exporting them. My measurements usually deviate by about 0.1-0.2mm in XY, so if you're doing something with close fits, it's worth adjusting the file before printing.
If I have a part that needs to be perfectly flat, I use a raft with an extra ring (or two) of auxiliary discs surrounding the part. For the flattest side, I will also print this on the assembly. If you have two or more of them, then it's better to judge for yourself. nine0003
If I have a part with flat surfaces that are at an angle to the build platform, I will slow down my extruder, 10mm/s is my speed. Keeping the extruder moving slowly will help ensure that your edges and walls are relatively smooth and have the least amount of distortion.
Everyone has said this, and I will repeat it again. Check the printer before important printing. Any slack in the straps will cause slack, print a test piece to make sure your temperature settings are right for the filament and that the pull distance will minimize stringing. nine0003
I do some test prints with the new filament and again about halfway through the roll to make sure everything still works properly and I will tweak things as needed if necessary.
, @ Diesel
▲ 2
I'm printing a few pets that use 2.5mm "pogo pins" which are spring loaded electrical contacts. I have found that many variables will affect the size of the holes in my design. Consumption, temperature, even different grades of filament will change the final size. nine0003
I create a profile for each piece and specific thread. This way I can make changes without changing other parts/projects.