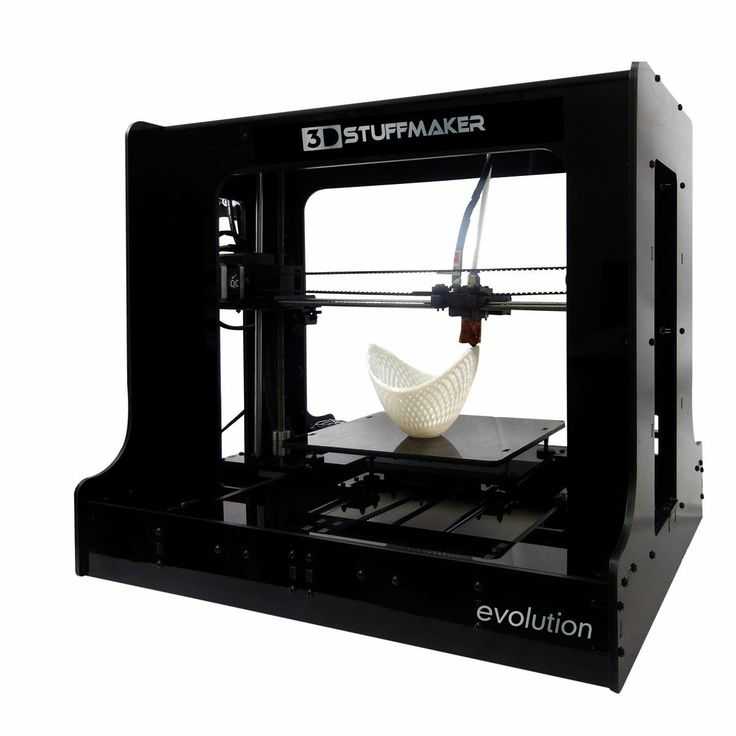
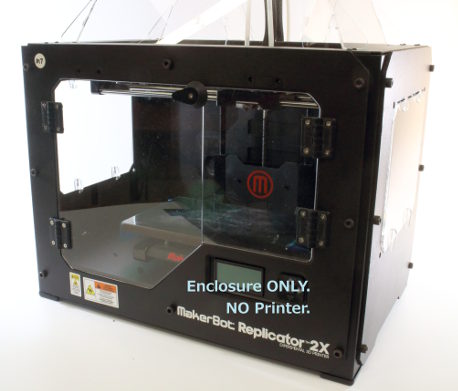
3D printed snowcat
Snowcat — RCTESTFLIGHT
The R/C Snowcat Kickstarter campaign raised $16,500 for injection molds and product development.
Project Scope
The initial goal of this project was to raise $4000 for an injection mold to mass produce tracks. This would be a more durable and less time consuming alternative to 3D printing each track link individually. After the funding goal was significantly exceeded, the scope of the project was increased to develop a full vehicle kit. The kit contains:
The full vehicle kit is not for everybody! Only purchase this kit if you have access to a 3D printer and have experience building things. The kit does not include:
3D printed parts (you’ll need a 3D printer)
R/C radio system (aircraft radio with elevon mixer)
Gear lube, tape, etc.
Kickstarter backers are able to purchase the full vehicle kit or individual track sets at cost. Everyone else can purchase it at a marked-up price.
Purchasing Instructions
Assembly Instructions
Vehicle Details
Physical
17.5 Lbs (no battery)
22*20*6”
Configuration
The base vehicle platform is bi-directional so it can flip upside down and keep driving. This could be useful for search and rescue or inspection type applications. However, the inside of the shell is not easily accessible so batteries can not quickly be swapped out. If you decide to use it in this configuration, you’ll need to route a power switch and charge leads out of the shell.
Users can design and 3D print their own body models to attach on top of the base vehicle platform. Attachment point dimensions can be found here. Bodies can house batteries, electronics, FPV gear, and whatever else you want to put in your snowcat.
Components
Each track is comprised of 52 injection molded links. They are made of Nylon PA6 with a 30% glass fill. The joints use stainless steel M3*30MM shoulder bolts with bronze bushings molded in.
The shell is made of 3mm polycarbonate (the stuff bulletproof glass is made of) so it is very durable. It is vacuum formed over a mold, then post processed with a 4-axis CNC router.
The front and rear axels are 15mm aluminum tubes with ball bearing supports. The mid axels are 12mm aluminum tubes.
It’s powered by two brushless 4240 out runner motors that are available in 300KV and 600KV options. Those wanting more torque for plowing or towing should get the 300KV option. Those wanting higher speeds should get the 600KV option.
The motors are driven by 50A BLHeli32 ESCs. These come ready to go with Bi-directional control enabled and XT60 connectors pre-attached.
The pinion gears are machined steel. The next gear in the train is injection molded nylon with 30% glass fill. The drive gear is printed by the customer in whatever material they choose.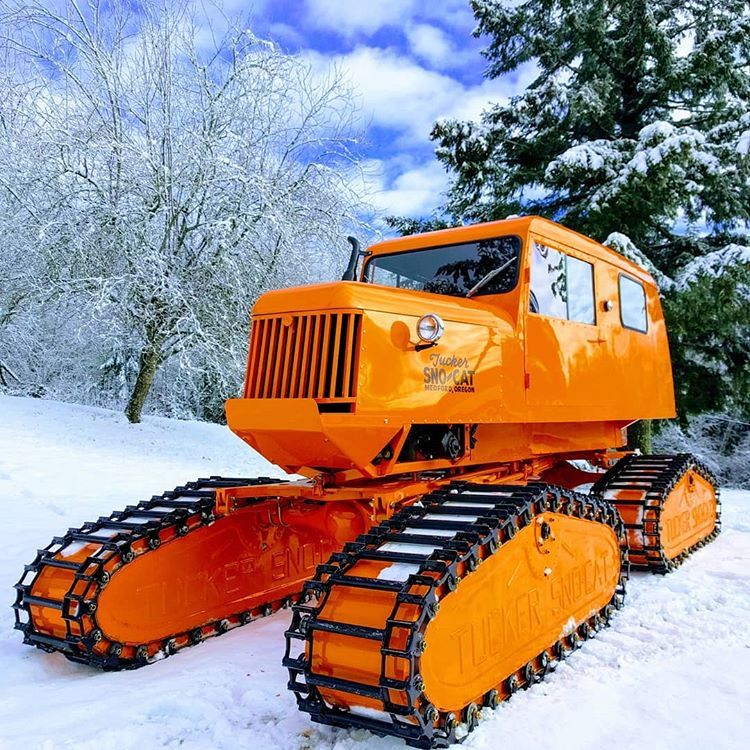 PLA works fine.
Creation Story
For the design, manufacturing, and procurement process, see the Kickstarter Updates. Below are the Snowcat video postings in order from oldest to newest.
Snow Cat Lion Pack Transport Set X3 Miniature 3d Compatible
🔥🔥🔥𝐌𝐀𝐆𝐍𝐄𝐓𝐈𝐂 𝐁𝐀𝐒𝐄 𝐀𝐍𝐃 𝐀𝐍 𝐈𝐍𝐈𝐓𝐈𝐀𝐓𝐈𝐕𝐄 𝐓𝐑𝐀𝐂𝐊𝐄𝐑 𝐅𝐎𝐑 𝐅𝐑𝐄𝐄🔥🔥🔥
Enhance your gaming experience with this high quality resin 3D printed, magnetic miniature.
From Terre Ostili, the perfect miniatures compatible with Dungeons and Dragons (D&D)*, Pathfinder*, Starfinder*, DnD* or any board game or role-playing game.
🚚 𝐅𝐀𝐒𝐓 𝐀𝐍𝐃 𝐓𝐑𝐀𝐂𝐊𝐄𝐃 𝐒𝐇𝐈𝐏𝐏𝐈𝐍𝐆
📐 𝗠𝗶𝗻𝗶𝗮𝘁𝘂𝗿𝗲’𝘀 𝘀𝗶𝘇𝗲 𝗮𝗻𝗱 𝘀𝗰𝗮𝗹𝗲:
- 𝐌 (𝐌𝐞𝐝𝐢𝐮𝐦) approx 30-35mm high, suitable for humanoid figure, characters, NPC, elf, orc... (round base of 2,54 cm diameter)
- 𝐋 (𝐋𝐚𝐫𝐠𝐞) approx 60-65mm high, suitable for Ogres, Monsters, Large Monsters, Massive Beasts... (round base up to 5 cm diameter)
- 𝐇 (𝐇𝐮𝐠𝐞) approx 85-110 high, suitable for Giants, Epic Monsters, Epic Creatures, Dragons, Statues (round base up to 7,6 cm diameter)
- 𝐆 (𝐆𝐚𝐫𝐠𝐚𝐧𝐭𝐮𝐚𝐧) approx 115-. .. high suitable for Colossal Monster, Epic Giants, Ancient Dragons, Massive monsters. (round base up to 10 cm diameter)
✉ If you need a different scale or an exact miniature height please contact us and we will happy sort this out together.
✉ If you'd like your miniature without the base just let me know by message!
Please visit this page to have a more in-depth looks of the sizes available: https://bit.ly/SizeGuideTO
Our miniatures are:
✔ MAGNETIC!?: They have a magnetic base that uses a whole series of accessories to reach a new level of game quality. (Magnetic maps, magnetic painting handle, etc..). You are going to role the first magnetic miniatures in EU!
✔ SOLID: Unlike most 3D printed miniatures on the market, we print our models full (not hollowed) for a more solid end product and a better feeling to the touch.
✔ RESISTANT AND TOP QUALITY: they are printed with the best semi-flexible resins on the market for a durable product that lasts over time and emphasizes even the smallest detail. (Please bear in mind that resin is not flexible like plastic. Be gentle with it and try to don't drop the miniature. Magnets are there for this!)
✔ READY TO PLAY: Each model comes an initiative tracker for free to be used out of the box (You can choose the name of the models so please fill up the field above or send us an email at info [!at] terreostili.it).
✔ READY TO PAINT: All the miniatures are meticulously treated by hand and are ready to be painted when they reach your hands.
✏ PAINTING SERVICE
If you wish, we will paint your models by hand for an even more immersive and complete gaming experience.
Your character or monster will never be the same!
🚀 SHIPMENT
The miniatures are shipped by express courier. The tracking number is always provided.
If the model is broken in the post, please provide images and we’ll see what we can do to help.
Do you need a faster shipping/crafting? Check in the basket if there is an upgrade available!
💖 GIFT BOX
We believe that our package represent us as much as the product they contain. We ensure that our packages are going to be perfect for a gift or simply to be displayed on a shelf. We don't use plastic!
You are gonna love them!
Awesome model created by Printed Obsession (www.rocketpiggames.com) of whom I am a registered merchant.
* All trademarks displayed here are the property of their respective copyright holders; third party brands, product names, trade names, corporate names and companies mentioned may be trademarks of their respective owners or registered trademarks of other companies and their legitimate owners and Terre Ostili is not responsible for these.
How to clear the snow and enjoy it
Creativity
Imagine such a wonderful picture: it is winter outside, it has just snowed. You are sitting in a cozy armchair near the fireplace, sipping mulled wine or enjoying a cup of coffee. And at the same time clear the fallen snow around the porch of your house. Fiction? Not at all! A craftsman from Minnesota named Ryan came up with an interesting solution by creating a radio-controlled snowplow.

We can't say for sure what exactly inspired Ryan to project: perhaps he does not like to swing a shovel in the cold, or perhaps he likes to play with radio-controlled models. We dare to assume that it is both. Be that as it may, our craftsman made snow removal more comfortable, although the project is still far from perfect.
Based on the popular snowcat model called Kyosho Blizzard SR. If one of our readers is not in the know, then the “caterpillar” is a snowplow or snow compactor on a caterpillar track. Such all-terrain vehicles are widely used for clearing mountain roads and preparing ski slopes. The original toy is made in 1:12 scale and equipped with radio control. In addition, the model has a functional bulldozer blade. Although the power and maneuverability of the toy is high enough for racing through snowdrifts, the blade serves more as a decorative element. For real snow removal, the model simply does not have enough strength, and the blade itself is too small.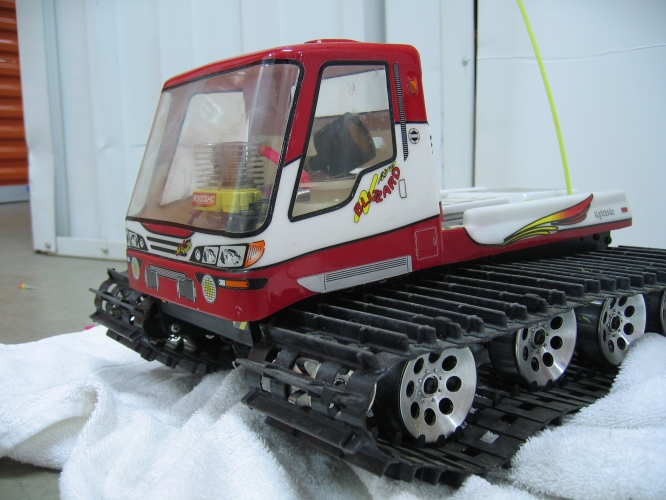
In the end, Ryan decided to improve the design by turning a toy snowcat into a full-fledged snow blower. To do this, the author designed a snow thrower nozzle. Almost all parts of the nozzle, except for the motor, mounting screws and washers, were printed with ABS plastic. “The structure is quite solid. Many people think that 3D printed parts come out brittle, but in reality it all depends on the execution,” says the creator.
Bucket width 355 mm, height 150 mm. The diameter of the snow deflector reaches approximately 50 mm, while the reflector itself is remotely rotated through 360 °, allowing you to throw snow in any direction. The power of the motor is enough to chew even wet snow, although large pieces of ice may be too tough for the car. The main problem is the small mass of the unit, which is about two and a half kilograms: despite the wide tracks, the machine slips when it collides with a fairly thick layer of snow. But, again, the tests captured in the video were carried out against well-deposited wet snow.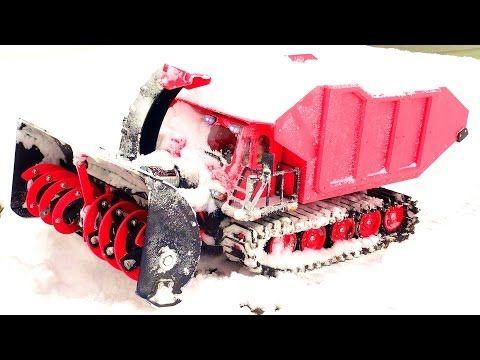 And if the snow blower, albeit with difficulty, copes even with heavy snow, then it will be much easier to fight with loose “powder”.
The results of the experiment are so successful that Ryan is thinking about creating a version for sale. The model of the snowcat, most likely, will have to be bought separately, but the designer estimates a set of STL files and instructions for printing and assembling the attachment at $60. But first, Ryan plans to improve the design a bit. In its current form, the printing of some elements is problematic, given the required margin of safety. Ryan is going to make some parts of the structure out of nylon, and replace the axles with steel bushings instead of plastic ones. So far, all plastic parts have been made of ABS with a layer thickness of 0.2 or 0.4 mm. The XYZ Da Vinci 1.0 3D printer was used for production, and the total printing time was about 40 hours.
But Ryan considers the main difficulty . .. the lack of necessary conditions for testing. “There is very little snow and there are no decent snowfalls in the forecasts. There is usually a lot more snow in Minnesota this time of year,” Ryan complains. Well, perhaps the commercial version of the miniature snow blower will be ready at least by next winter. We advise you to equip the next version with a video camera so that you can remove the snow without leaving the warm fireplace.
Follow the author
Subscribe
Don't want
9
More interesting articles
Egen_M
Loading
11/16/2022
1322
eight
Subscribe to the author
Subscribe
Don't want
The New Year is getting closer and closer, preparations are in full swing, in anticipation of this event, another was born .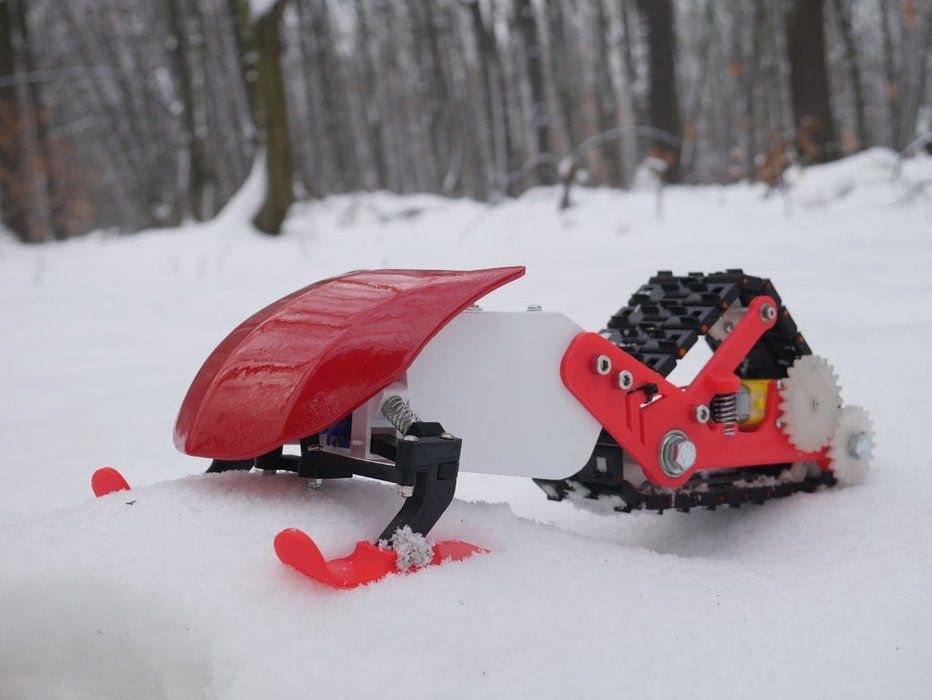 ..
..
Read more
Egen_M
Loading
11/15/2022
575
7
Subscribe to the author
Subscribe
Don't want
2023 according to the Slavic calendar is the year of the Fireman Horse (7031 summer). and not to forget and support...
Read more
NotJes
Loading
14.02.2017
39137
212
Subscribe to the author
Subscribe
Don't want
Greetings to all readers of the portal! After my article, many people asked what paintwork I used...
Read more
Printer. What is a printer. The history of the creation of the printer.
 Types of printers.
Printer - from the English word "print" - printing.
A printer is an external computer peripheral designed to output text or graphic information stored in a computer to a solid medium (paper, polymer film, etc.) without creating printing forms. This printers differ from printing equipment, which is used for large print runs of texts and graphics.
A printer is a high-tech printing device designed primarily to work with a computer.
The printer is designed to convert information stored in a computing device from a digital form into a graphic analog form for an accessible understanding of this information by the user.
The history of the printer.
Often the history of the invention of the prototype "printer" is associated with the name of the mathematician Charles Babbage, who in 1822 began to develop a self-printing machine. He believed that such devices would be effectively used in banking, engineering and other areas.
In 1834, Charles Babbage began work on actually building the machine he had designed, but never completed it. And only 150 years later, the staff of the British Science Museum decided to make Charles Babbage's printing machine according to the surviving drawings. As it turned out, Babbage's machine turned out to be efficient, it could do simple calculations and print the results on paper. But this machine weighed several tons and consisted of thousands of parts!
Pictured is Charles Babbage's Difference Engine,
which is on display at the Science Museum in London.
The history of the printer.
The history of "printers" began its real movement after the invention of the first computers.
Petal printers.
In the 1950s, the first electronic computers appeared, and immediately there was a need to display the results of the calculations for their visual perception and further processing. At that time, the most common device for this purpose was a typewriter, and computer centers had to maintain a whole staff of typists who pounded the keys all day long.
It was then that the inventors thought about how to combine a typewriter with a computer. And in 1953, the Remington-Rand Corporation created the Uniprinter printing device, which in appearance and principle of operation resembled a typewriter, only many times larger than it. Such devices are called petal devices, because of the main printing mechanism, which looks like a flower with petals, at the end of which symbols were applied. The percussion mechanism hit the petal, and through the tape soaked with paint, it left an imprint on the paper. By replacing one "chamomile" with another, it was possible to change the characters or font size.
The photo shows a petal printer.
These printers printed at a speed of 78,000 characters per minute, and naturally no typist could keep up with them: a person has an average typing speed of 200 characters per minute.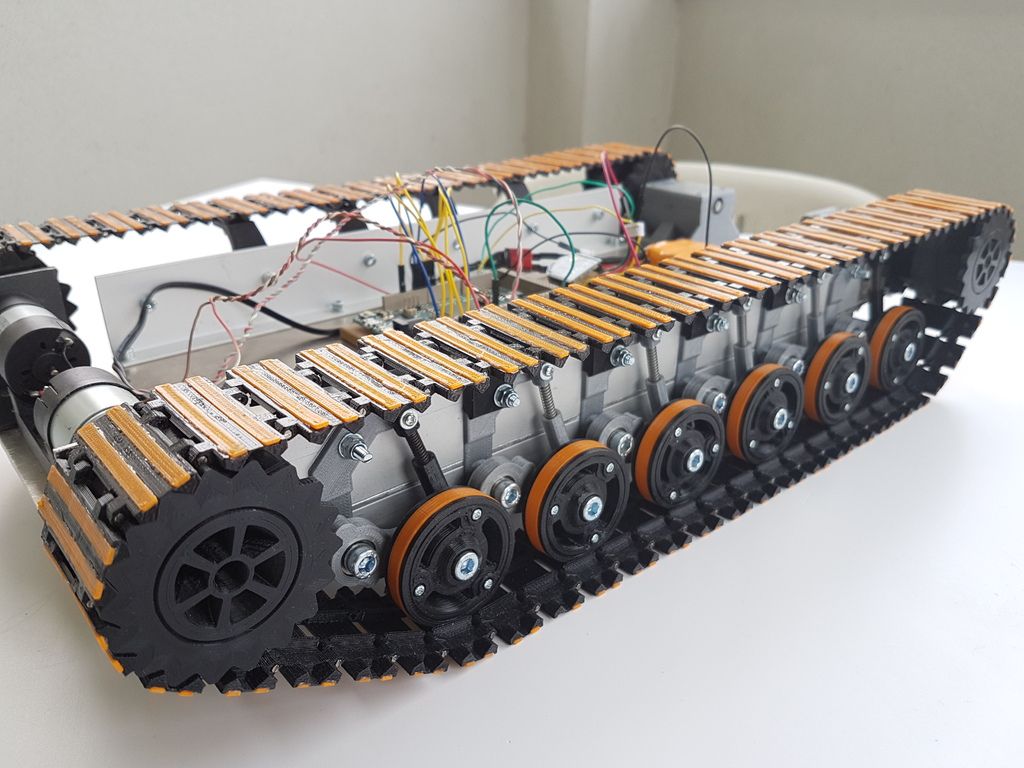
In 1954-1955, IBM Corporation created printers with a print speed of 100 thousand characters per minute, however, they did not differ in reliability and were not widely used. But in 1959, the IBM 1403 printer was released, with a print speed of 184,800 characters per minute. The paper flew out of the printer at such a tremendous speed that they did not have time to collect it. This, however, did not affect the print quality in any way: it was quite high. Such devices were also produced in the Soviet Union, only they were called differently: not printers, but ATsPU - alphanumeric printing devices.
Dot printers.
Dot matrix printers have the same printing principle as petal printers. The only difference is that the print through the ink ribbon on paper leaves not a petal with a letter, but a print head that forms the desired character from a set of small needles.
The first dot matrix printer was created in 1964 by Seiko Epson Corporation, and it was intended for printing accurate time.
In 1970, Centronics Data Computer Corporation develops its dot matrix printer and becomes their largest manufacturer within a decade. The print speed of such printers was low, but they could print any complex graphics and did not need specific petals.
The first printer that could truly be called a home printer was the ImageWriter dot matrix printer, which went on sale in 1983 with an Apple computer and cost "only" $675.
Pictured is a dot matrix printer.
Since then, dot matrix technology has hardly changed, and if petal printers have long left us, dot matrix printers are still successfully used today. This is due to the cheapness of dot matrix printing. All consumables: this is a spool of ink ribbon that costs next to nothing and lasts a long time.
Ink jet printers.
Dot matrix printers produced good printing results, but were very noisy, and their print quality still leaves much to be desired.
The dream of a quiet, low-cost, high-quality printer never left the minds of computer inventors.
A new step in the improvement of printers was made possible by the invention of the physicist John William Strett (Lord Rayleigh), who studied the formation of drops in a decaying liquid jet. These studies formed the basis of inkjet printing technology, which was developed in parallel with petal and matrix printing.
So, in 1948, a prototype printing device was created in the Siemens laboratory, capable of printing with controlled ink jets. But before really normally functioning inkjet printers appeared in the world, almost a quarter of a century passed. All these long years, scientists have been improving the method of inkjet printing, putting theoretical ideas into practice.
In the early 1970s and mid-1980s, engineers from leading companies such as Epson, Brother, Canon and Hewlett-Packard invented three main inkjet printing methods, which differ in the way ink is applied to paper.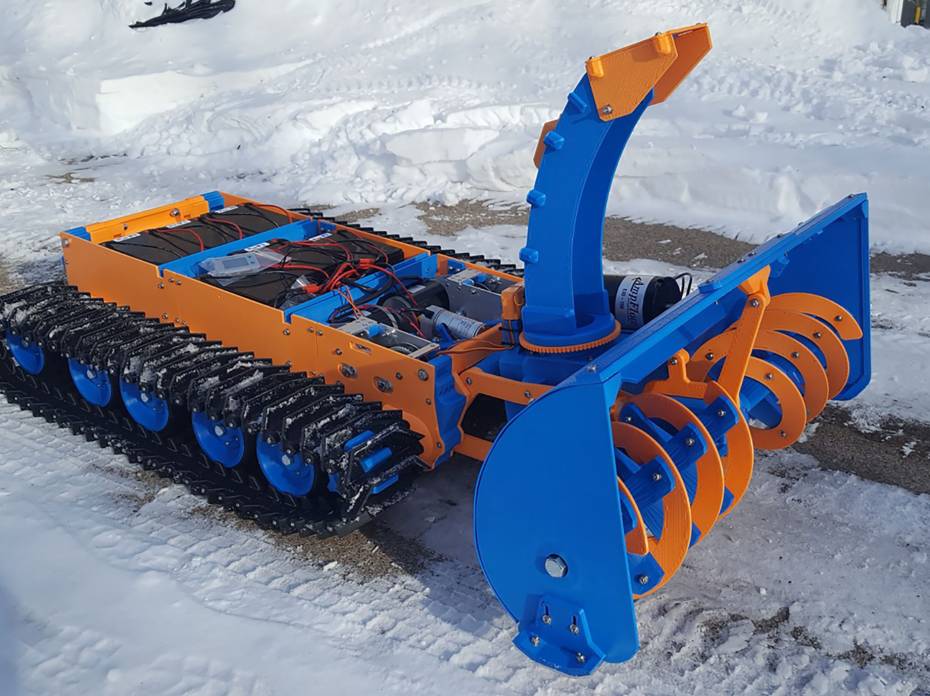
All these methods are related by the fact that all printers have a container with ink, at the bottom of which there is a small nozzle in which a drop of ink is formed. Then, with the help of the piezoelectric effect or heating to high temperatures, this drop, formed in a special way, is fired onto the paper.
The first single color inkjet printer was released by IBM in 1976 (Model 6640), and in 1977 a personal computer inkjet printer was released by Siemens.
In the early 1990s, Hewlett-Packard Company patented color inkjet technology. A color image was obtained by mixing inks of three colors during printing: cyan, magenta and yellow, which resulted in a large number of shades of all colors.
Since that time, printers began to print not only black-and-white, but also full-color images.
Color inkjet printer shown.
Laser printers.
The first laser printers, which hit the market in the 1980s, cost over $10,000, which was very expensive for the average consumer.
Laser printing technology began to develop in 1938, when the American physicist and inventor Chester Carlson invented the electrographic printing method, which is still used in all modern laser printers and copiers.
The essence of the laser printing method is that a negative electrostatic charge is applied to the photoconductor, which is an aluminum tube coated with a light-sensitive layer. Then the laser beam, passing over the surface of the drum, removes part of this charge in those places where printing is required. Then the photoconductor is covered with a thin layer of toner (dry dust-like paint), but only in those places where the laser beam has removed the charge. Then comes the final part of printing: the drum rolls over the paper, leaves all the toner stuck to it on it, the paper passes through the oven, in which the toner is tightly baked with its surface.
If a laser printer needs to print in color, then four colors of toner are applied to the drum unit in turn: black, cyan, magenta and yellow, or four passes are required to obtain a color image.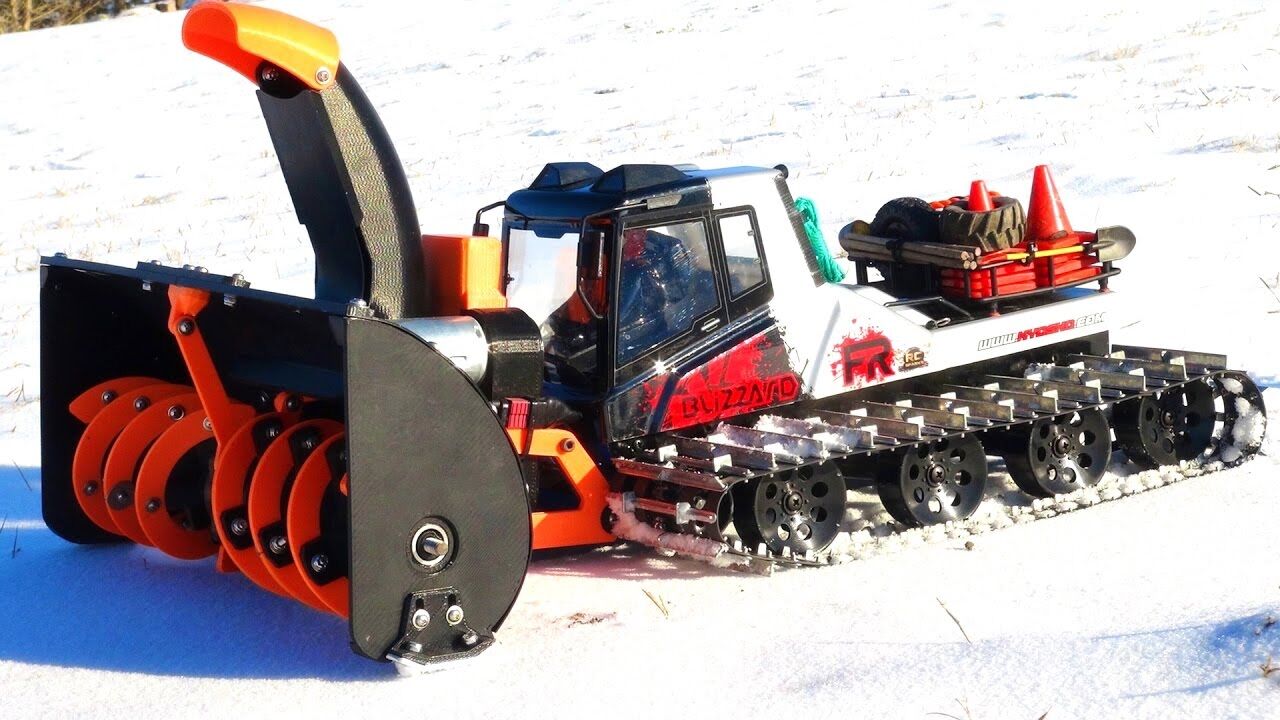 This is how copiers and some fax machines are arranged, to which the laser printer owes its appearance.
In 1969, Xerox employee Gary Starkweater came up with the idea of using the original laser scanning mechanism in the copier, thereby turning an ordinary copier into a printer. At 19In 71, such a printer was created, but it was not put into mass production, but remained within the walls of the laboratory.
Xerox and IBM are still arguing about the primacy of the release of the first laser printer. Xerox claims to have launched a laser printer in 1977, while IBM claims to have made it a year earlier.
So, in the 1980s, many manufacturers began producing black-and-white laser printers, which initially cost more than 10 thousand dollars and had poor print quality. Top 19In the 90s, the price-performance ratio became more or less acceptable, and the price of laser black-and-white printers dropped to $1,000.
In 1993, the first $12,500 color laser printer developed by QMS appeared, and just two years later, Apple released a $7,000 color printer.
Nowadays, laser printers have become affordable for the average consumer.
Color laser printer shown.
LED printers.
With the advent and development of LED technology, models of LED printers began to be produced.
The printing technology of LED printers is also electrographic, only the laser scanning device is replaced by a line of LEDs that stretches along the photoconductor. LED printers are easier to manufacture, smaller and cheaper than their laser counterparts, however, their print speed is almost half as much.
The photo shows an LED printer.
3D printers. 3D printing printers.
A revolutionary new idea in the field of printer printing is, of course, the so-called "3D printers" capable of reproducing three-dimensional objects. The development of "3D printers" began back in the 1980s, and then they were able to grind the workpiece layer by layer, according to the principle of a milling machine, to give it the proper look.


