Creator bot 3d printer
CreatorBot 3D Pro Series II – 3dprinterworks-dev
3D Printers
$2,795.00
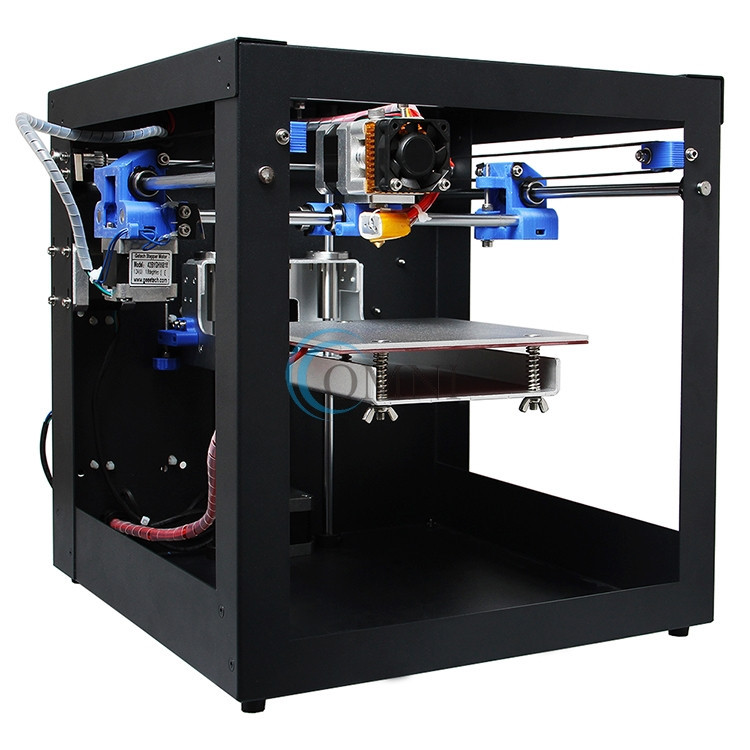
The Largest Desktop 3D Printer in its class with a 12”x12”x18” print area and a maximum resolution of 360 microns, the CreatorBot 3D Pro Series II takes desktop 3D printing to the next level.
Standard up to 270c
High-Temperature up to 425c
Standard up to 270c - $2,795. 00 USDHigh-Temperature up to 425c - $3,195.00 USD
Quantity
Product Description
Specifications
- Printing technology – Fused Filament Fabrication (FFF)
- Print volume – 12”x12”x18” (2592 in3)/305x305x457 mm
- Print heads – Dual
- Nozzle temp – 120°C to 260°C, optional 220°C to 400°C
- Bed leveling – Auto compensation
- Display – 5” color touchscreen
- Heated platform – Up to 160°C
- Build platform – 4 mm borosilicate
- Build surface – GRIP Technology
- Build chamber – Enclosed
- Nozzle diameter – 0.4 mm
- Resolution – 40 to 360 micron
- Filament monitoring – Out detection
- Connectivity – Wi-Fi and Ethernet
- USB thumb drive – Included
- Construction – Aluminum
- Filtered exhaust – Charcoal
- Filament diameter – 1.
 75mm
75mm - Filament spool – 1 kg spools
- Printer dimensions – 22”x22”x36”
- Printer weight – 65 lbs. (30 kg)
- Shipping weight – 75 lbs.
- Cabinet base – Optional (No wheels)
- Warranty – One-year plan
- Service agreement – Optional plans
- Delivery – Ground shipping
Dual Extruder
CreatorBot 3D printers are built with the second printing nozzle standard and are designed to give you benefits of dual extrusion without losing any print area. Dual extrusion lets you use soluble support material to make incredibly detailed, eye-catching prototypes.
Automated Platform Leveling
Also called Auto Platform Distortion Compensation, results in equal and accurate distribution of material during the first layer of the printing process. A sensor built into the printer head travels across the print plate to probe the surface to compensate for any skew distortion from the print plate, giving you a flawless print.
Enhanced User Interface
A 5” LCD color touchscreen provides an advanced user interface with features that include:
- On-board tutorials for easy calibration
- Access to temperature controls
- On-board Wi-Fi for network file sharing and remote print via desktop or mobile device
Filament Out Detection
Helps to maintain the temperature during prints to ensure product quality and precision. The enclosure is easily removed for maintenance and cleaning.
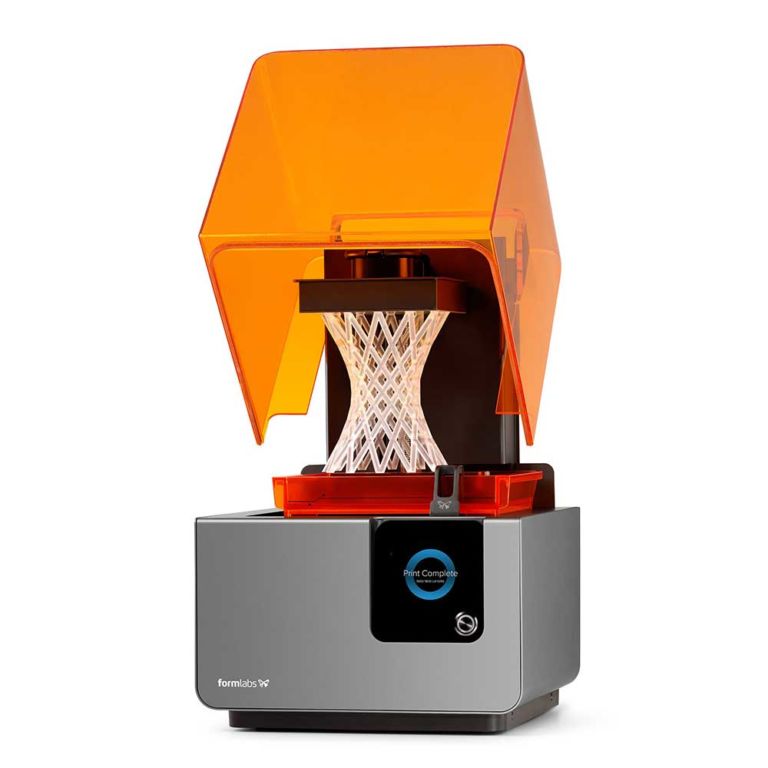
Clear Top Enclosure
Helps to maintain the temperature during prints to ensure product quality and precision. The enclosure is easily removed for maintenance and cleaning.
Machine Grade Construction
Printer frames are built with extruded aluminum alloy with a hard-anodized layer to protect the surface from oxidation and withstand the constant high temperatures and vibrations during long print jobs. All electronics and mechanical features are assembled using precision laser-cut aluminum fabrications and 3D-printed components.
Quick Change Build Plate
Manufactured from Borosilicate plate glass and attached magnetically to the platform, the build plate is easily removable to bring your print safely outside of the machine enclosure. The build plate can be heated to 160°C making it easy to print high-quality materials.
GRIP Technology
When heated, GRIP surface technology holds your print in place without the need for glue, spray, or other messy alternatives. Once cooled, the print is easily removed.
Ethernet Security
CreatorBot 3D printers are built standard with USB interface. But for added security when needed, we can build yours with a secure Ethernet connections.
International Customers:
Taxes, import duties and additional charges are NOT included in the price. Please contact us for a proper shipping quote. To determine what additional costs are required, please contact your country's customs office.
Add to Cart
3D Printing Software & Apps
Cloud-Powered 3D Printing
MAKERBOT CLOUDPRINT™
Print and monitor your project - from your browser straight to your MakerBot 3D Printer. Add the Print from CAD integration for your favorite CAD program and start a print in just two clicks.
PREPARE AND LAUNCH 3D PRINTS FROM ANYWHERE
Open a native CAD file in MakerBot Cloud, adjust your print settings, and start a print on your connected MakerBot 3D printer. No downloads or updates required.
Cloud-Powered 3D Printing
MAKERBOT CLOUDPRINT™
Print and monitor your project - from your browser straight to your MakerBot 3D Printer. Add the Print from CAD integration for your favorite CAD program and print in just two clicks.
PREPARE AND LAUNCH 3D PRINTS FROM ANYWHERE
Open a native CAD file in MakerBot Cloud, adjust your print settings, and start a print on your connected MakerBot 3D printer. No downloads or updates required.
Streamline Your 3D Printing
Discover, import, prepare, manage, monitor, and share your 3D prints. MakerBot’s software and apps optimize and streamline the 3D printing process for any workflow or environment.
Streamline Your 3D Printing
MAKERBOT 3D PRINTING
SOFTWARE + APPS
Discover, import, prepare, manage, monitor, and share your 3D prints. MakerBot’s software and apps optimize and streamline the 3D printing process for any workflow or environment.
Best-in-class 3D printing software
MAKERBOT PRINT
MakerBot Print is the best and easiest way to prepare, manage, monitor, and share your 3D print files. Enjoy the best of everything that 3D printing has to offer on your Mac, PC or in the Cloud.
PREPARE AND PREVIEW 3D PRINTS
Import design files and fine-tune settings for optimum results when printing.
IMPORT NATIVE CAD FILES
Streamline print preparation and file management with native CAD file support.
CLOUD-ENABLED 3D PRINTER MANAGEMENT
Control and monitor multiple 3D printers via live camera feeds and print status updates.
Discover millions of free 3D printable Things
THINGIVERSE
Thingiverse is the world’s largest 3D printing community with over 1.7 million 3D printable models. Browse all of the designs, remix them using Thingiverse apps, or share your work with the world!
EXPLORE THINGIVERSE
Discover millions of free 3D printable Things
THINGIVERSE
Thingiverse is the world’s largest 3D printing community with over 1.7 million 3D printable models. Browse all of the designs, remix them using Thingiverse apps, or share your work with the world!
EXPLORE THINGIVERSE
Hundreds of free 3D printing lessons
THINGIVERSE EDUCATION
Thingiverse Education provides hundreds of free 3D printing lessons that make teaching with a 3D printer easier and more effective for a variety of grade levels and subjects.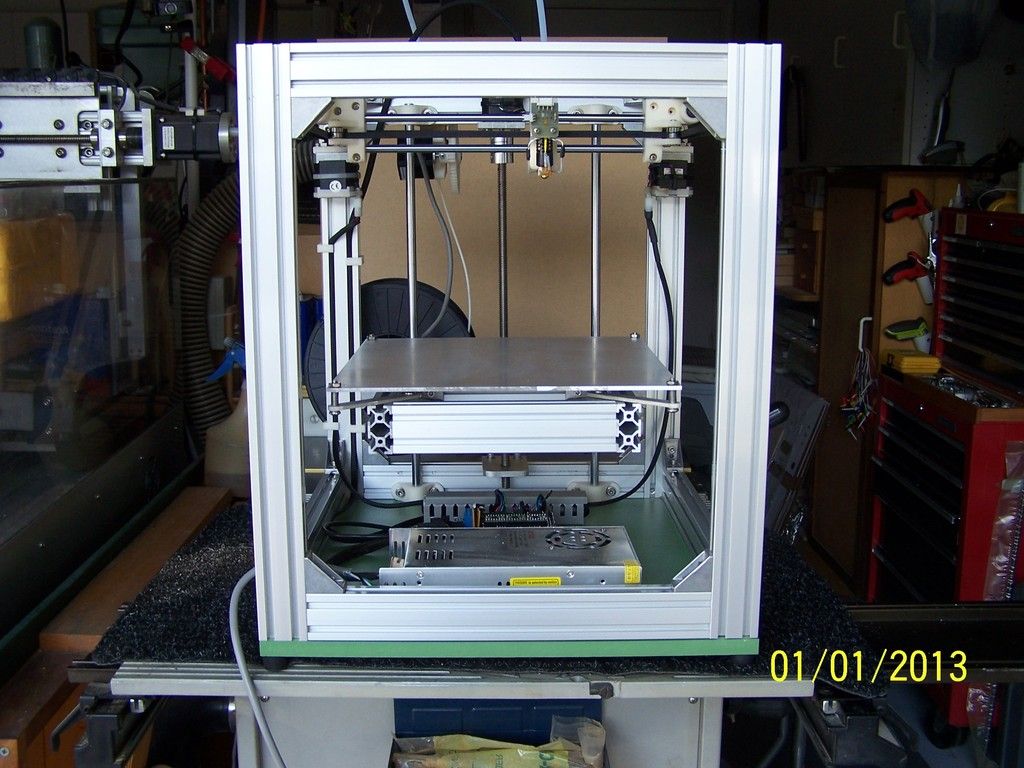 It also provides a community where educators can exchange best practices or remix projects.
EXPLORE THINGIVERSE EDUCATION
METHOD
INDUSTRIAL 3D PRINTING FOR EVERY ENGINEERNext-Generation desktop 3D printing platform that delivers manufacturing-grade parts with advanced engineering materials.
SKETCH CLASSROOM
THE IDEAL CLASSROOM SETUP
The most reliable classroom 3D printing setup, giving your students the access they need and setting you up for classroom success.
A manufacturing workstation
METHOD
Print real, production-grade ABS with a 100°C chamber—powered by Stratasys®.
SKETCH CLASSROOM
THE IDEAL CLASSROOM SETUP
The most reliable classroom 3D printing setup, giving your students the access they need and setting you up for classroom success.
Industry-Leading Quality
MAKERBOT 3D PRINTING MATERIALS
Materials optimized to give you the best results and highest quality with MakerBot 3D Printers.
Bot - CoreXY 3D printer project
Hello!
Today I want to talk about a printer project called Yo-Bot. Our project is freely available and you can learn more about it on our website e-bot.org. I’ll make a reservation right away that I’m talking about the project, but the number of its implementations has already exceeded a dozen, and these are only those that we were told or we know from somewhere else, most likely there are more implementations.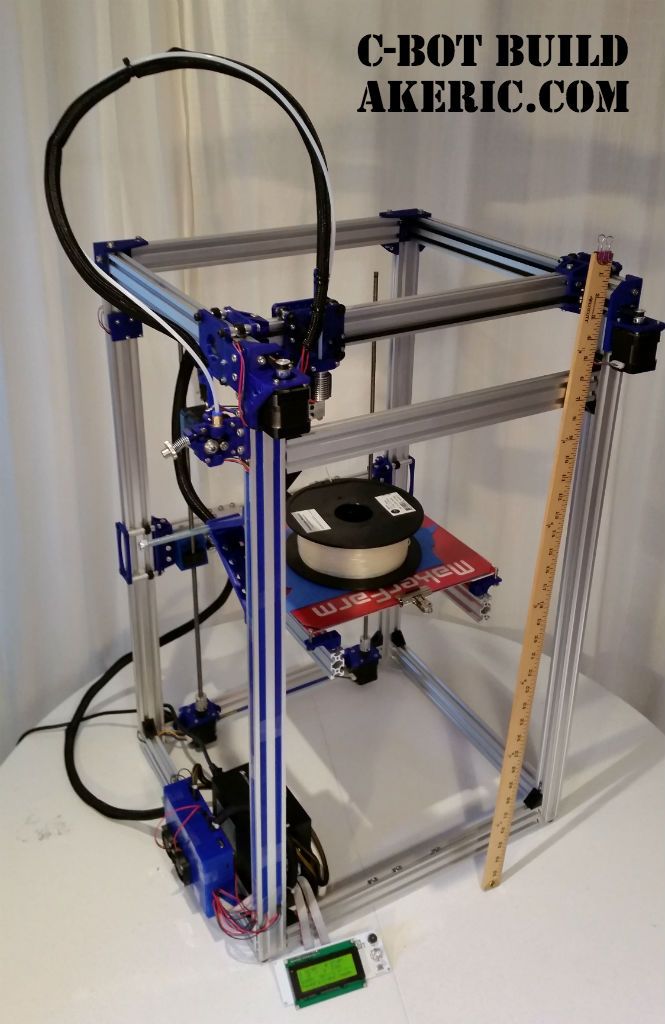 But the printer project itself is not everything! Separately, I would like to mention its assembly manual, and the configurator inextricably linked with it, in which anyone can assemble a printer for themselves, choose the options they need and get a complete list of parts, printed parts, links to trusted stores with the necessary spare parts - everything that is required in order to, with a little work and patience, get an excellent unit that prints quickly and efficiently.
Actually, this manual is very detailed. Moreover, in addition to the assembly instructions themselves, a lot of attention is paid to related topics - the choice of components, modifications, some points that will help during assembly and use. There is an article about the Cura slicer, connecting to Octoprint. The reasons for the choice of kinematics and components are disclosed in detail.
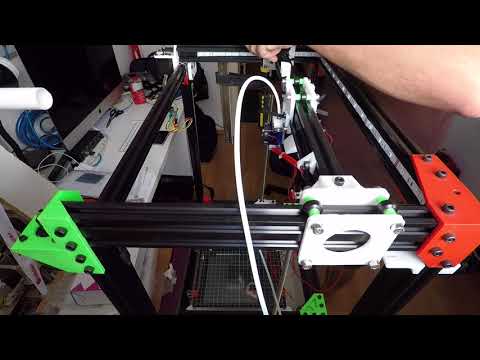
Yo-Bot is a cube printer with V-slot compatible extruded aluminum profile frame on CoreXY kinematics with cantilever table on shafts and 1204 ball screw (or T12 trapezoid screw) and XY axes on rails.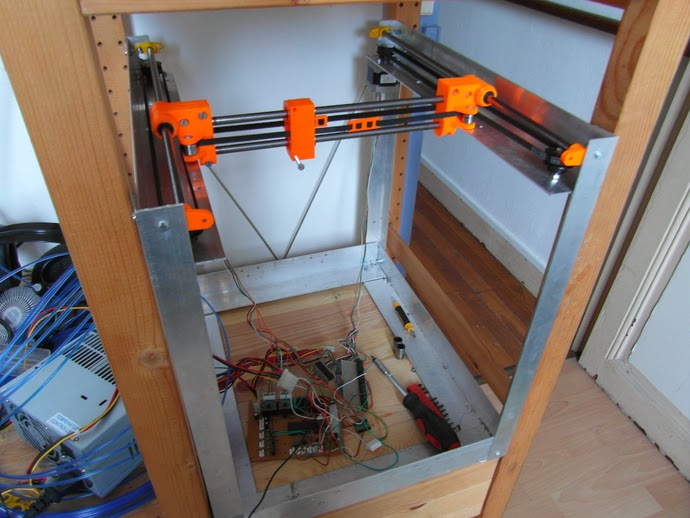 The classic “sandwich” Arduino MEGA + RAMPS is used as a control board.
The main priorities of the project are print quality, modular design and reasonable cost.
Our project has a lot in common with previous implementations of cube printers, so I'll focus on the features.
Firstly, all printed models are modified to use not only common square nuts (subjectively, I don't like them very much) but also swivel t-nuts, which makes assembly very easy.
The structure is assembled on an extrusion profile, metal corners can be used for rigidity, which is what we recommend. The installed corners do not interfere with the installation of wooden sheathing, files for cutting it can be downloaded from our website in the configurator section.
The XY motor holders are in the front, the motors themselves are placed outside the cube. We recommend using upper support bearings on the motor shafts in order to minimize the risk of deformation of the motor mount and not to disturb the geometry of the kinematics when the belts are under high tension. Also, the Z-axis motor and all electronics are placed outside the printing area - under the raised floor, as a result, it is possible to assemble a thermal chamber that will not heat the engines. Raised floor cutting files, as well as other details, can also be downloaded from our website. Another advantage of having a raised floor is the spaciousness and the ability to neatly organize the electronics compartment, which has a good effect on the stability of its operation. Of course, a cooling unit is also provided.
In order to ensure that the drive belts are always parallel to the axles, it is possible to choose a set of parts for using 16- and 20-tooth drive pulleys.
The frame itself, assembled from an extruded profile, is not always obtained in the form of a parallelepiped. We paid maximum attention to the important process of alignment of the structure, because it is the quality of the structure that allows us to avoid unnecessary problems associated with the geometry of the parts to be printed.
The Z-axis lead screw is mounted on a support bearing, which eliminates longitudinal loads on the Z-axis motor shaft and guarantees it a long and trouble-free service life. The manual describes in detail the options for using any lead screws - from M8, M12 construction studs, T8 and T12 trapezoidal screws and up to SFU1204 ball screws, for each option the configurator provides its own bearings and printed fasteners.
The table cantilever frame can be assembled from 2020 and 2040 profiles. The 16mm shafts are mated with extended linear bearings - all this allows the table to be quite rigid.
To heat a rather large table 300x300, a silicone heating pad was chosen, which is connected to the 220V network via a triac (the use of a grounding contact is mandatory! in general, in this project, all parts are carefully grounded - my own experience confirms how important this is). As a result, it is possible to use a less powerful power supply for the printer, we recommend using a silent small 24V 200W power supply. Quiet and angry!
We recommend using a PT100 thermocouple for the hot end temperature sensor - as a result we get the temperature in “real Celsius”. This thermocouple requires an amplifier to operate.
Attention is paid to the amplification of the power converter on the Arduino MEGA board. We recommend that you replace the standard converter soldered on this board with a separate step-down module.
Mains power 220V through a socket with a fuse and earthing contact.
Cable management uses printed parts that allow cables to be placed on the underside of the raised plywood floor in the desired order. If you get confused, it will turn out not only neat, but also beautiful!
Outside the electronics compartment, the cables can be hidden in a corrugated tube.
We recommend hiding the bundle of cables leading to the print head in a snakeskin braid. With proper tension on this braid, the bundle becomes rigid and does not fold inward. Yes, and it looks nice.
Together with the cables, we recommend to hide the plastic feed tube in this braid - it can be used in both bowden and direct delivery options. You can fix this sausage anywhere on the printer frame; a special part is provided for this. On the head of the mount there are mounts for both a single bundle and a separate bundle of cables and a separate plastic supply tube.
This bundle can also include a cable to the direct extruder motor. To minimize interference, it is highly recommended to use shielded motor cables and install ferrite cores on them. For the same reason, we recommend using twisted pair.
For the convenience of replacing elements on the print head, we have developed a switching board. The input connector is single - Molex Micro Fit 9x2, at the output there are Wago 218 terminal blocks, which are not only small in size, but also designed for the passage of current up to 6A. The board also has an RC filter installed in order to more flexibly control the model's fans using the PWM output of the control board.
Printing is standardly controlled by a modular screen + encoder + card reader. We use common screens 0.96 inches with I2C bus connection.
It is possible to organize both illumination of the working area with a single-color LED strip, and indication of the printer status with an RGB LED strip. This feature has long appeared in common firmware, and in Octoprint, and for this we offer a special transistor board. As a result, using the signal outputs of the control board, you can control the backlight, additional fans, heater, etc.
To give the printer a more finished look, we prepared models of plugs for the profile ends, to mask the gaps of the holes in the raised floor for the shafts and fastening the lead screw bearing.
To increase the chances of a successful first start of the printer, we provide a checklist.
Well, we consider the list of required tools, which is also in our manual, to be a good form.
Finally, but not least, I want to note the attention we pay to following safety rules. In particular, we strongly recommend that the cables to the silicone heater be double insulated, and it is recommended that all electrical parts of the printer be grounded, for which there is a separate grounding block.
In general, I think our project is useful and interesting, I'm waiting for your questions and comments, welcome to the site of our project e-bot.org!
You can get acquainted with the project and ask questions at the 3Dtoday Fest, where we will take part. Don't miss it - https://fest.3dtoday.ru
PS: I don't want it to look like this project is run by one person. A whole team is involved in the development, testing and promotion of the project, all of us can be found in the Yo-Bot support telegram chat!
Free STL file of D-Bot Core-XY 3D Printer・3D printer design for download・Cults
Common Gear set
Free
3D Printed Case for Arduino Uno, Leonardo.
Free
Beefy Glock Sight Pusher Remix
Free
Cable Chain for 20mm Rail
Free
Modular Support (Case) for Arduino and Raspberry Pi - CustoBlocks
Free
Gazebo
Free
Super Pi Boy - Raspberry Pi 3 Game Boy
Free
Arduino PH Meter
Free
The best files for 3D printers in the Tools category
Beer Crowler Cap
Free
Door and Lock No Touch Opener
Free
Wing Knob for Photo Light Stand
Free
Egyptian Floral Clay Punching Wheel
Free
Table stand for T series I IN001
Free
BCN3D MOVEO - open source 3D printed robotic arm
Free
stone can hookah
2. 23 €
23 €
Desk organizer
0,99 €
Bestsellers in the Tools category
BMG E3D V6 direct drive for Creality Ender 3 (Pro/V2) & CR-10
4.49 €
PRECISION CALIPER 3D PRINT DIY
3,11 €
Phone holder
2.49 €
Paint stand with scissors
€5.30
Fire hydrant container
1.92 €
Printer boxes for Ikea Lack Table
1,99 €
INDICATOR FOR BETTER BED LEVELING FOR ENDER 3 V2
2.87 €
Case for Chill Buddy lighter
0. 95 €
95 €
Cooling system Minimus Hotend
€2.38 -60% 0.95 €
Fast print paint bottle rack (6 sizes)
2.91 €
PRECISE DIAL INDICATOR 3D PRINT DIY
1,90 €
Business card embossing system
3 €
ARTEMIS -> Shop for Alligator 2 || 6.5" arrows || Repeating crossbow
6.25 €
Cut-Man - PET bottle cutter with handle!
€3.49
Ender 3 S1 Air duct for stock fan
1 €
ENDER 3 S1/PRO SPRITE, HOTEND 4020 OR 5015 FAN PROBE NO Y OFFSET
€1.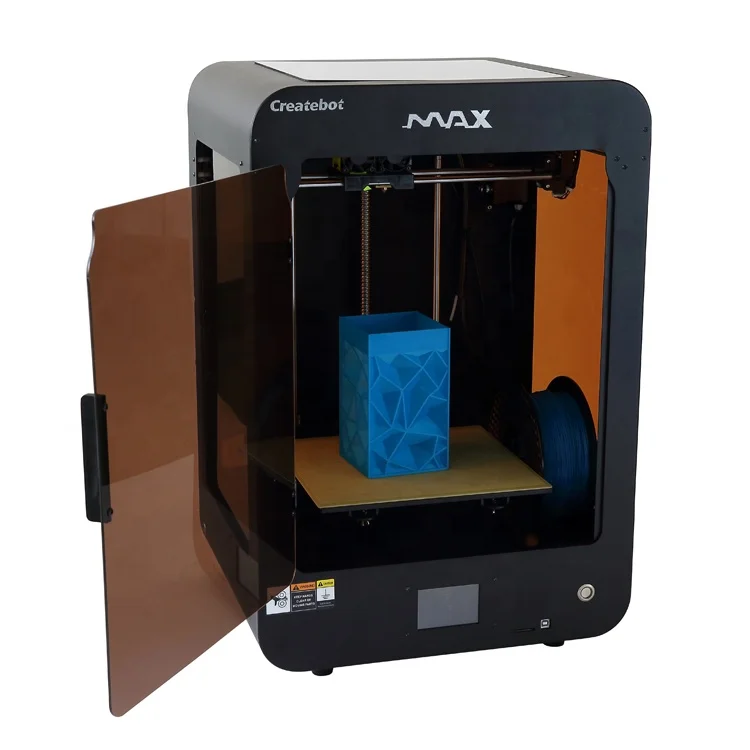
Learn more