3D printer temp tower
How to Use a Temperature Tower for 3D Printing – Clever Creations
Improper nozzle temperatures on your 3D printer can lead to a variety of problems. Oozing and stringing filament on your 3D printed models are some of the most noticeable. Similarly, you might run into your extruder skipping steps randomly when trying out a new filament.
So, how do you figure out the optimal temperature for your 3D printing filaments? The answer is a temperature tower. It is an easy 3D print that can help you accurately figure out the perfect printing temperature for each of your filaments.
Let’s see how you can use a temperature tower to optimize your print settings and get perfect-looking 3D prints.
What is a Temperature Tower?
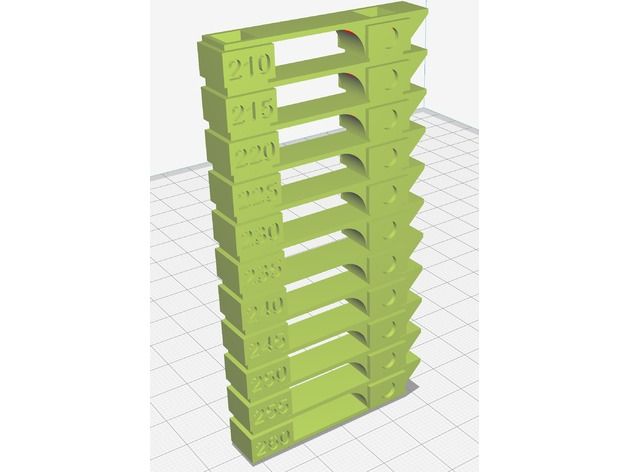
A temperature tower is a vertical structure that consists of multiple horizontal slabs. Each slab is 3D printed with a different temperature. This way, you can quickly pinpoint the temperature that gives you the best result with a specific filament. You can even use these towers to fine-tune your bridging and retraction settings.
Image: krpavlu via Thingiverse
Temperature towers for PLA and ABSTypically, the temperature decreases in descending order from the bottom to the top. For example, if the bottom slab has a temperature of 240°C, the second slab will have a reading of 235°C, the third will have 230°C, and so on.
That way, if your nozzle stops extruding due to low temperatures, this happens at the top of the temperature tower instead of at the bottom and does not ruin your temp tower.
Why use a temperature tower in 3D printing?
A temp tower lets you evaluate the performance of a particular filament at different printing temperatures. By looking at the final 3D printed temperature tower, it is easy to figure out at which temperature you get optimal results.
Temp towers help eliminate any defects that might be caused by sub-optimal printing temperatures. For example, low printing temperatures are the most common issue behind under extrusion on fused deposition modeling (FDM) 3D printers.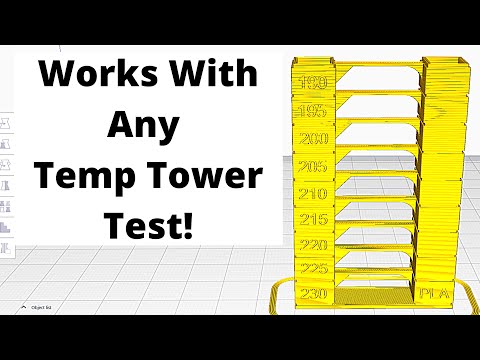 On the other hand, if the printing temperature for a specific filament is too high, you will notice a lot of oozing of filament and stringing during the 3D printing process.
Stringing can be a particularly stubborn problem with PETG, which is why we have an entire article on dealing with PETG stringing.
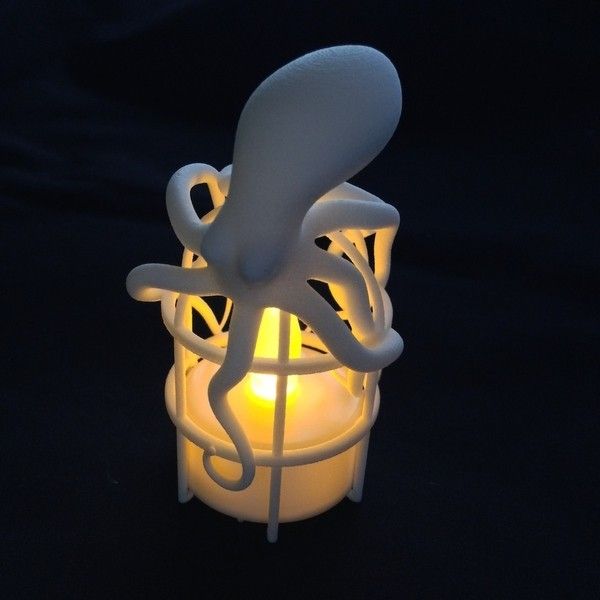
Image: gaaZolee via Thingiverse
Temperature towers test a variety of 3D print featuresIf you plan on selling your 3D prints and making money with your 3D printer, producing high-quality prints without visual defects is a big key to your success.
When should you print a temp tower?
The best time to print a temperature tower is when you change filaments and when you’re altering any crucial components of your 3D printer.
Each filament manufacturer uses a slightly different blend of materials to produce the filaments. PLA filament from manufacturer A may give you optimal results at 190°C, and PLA from manufacturer B might print beautifully at 215°C, despite being the same material.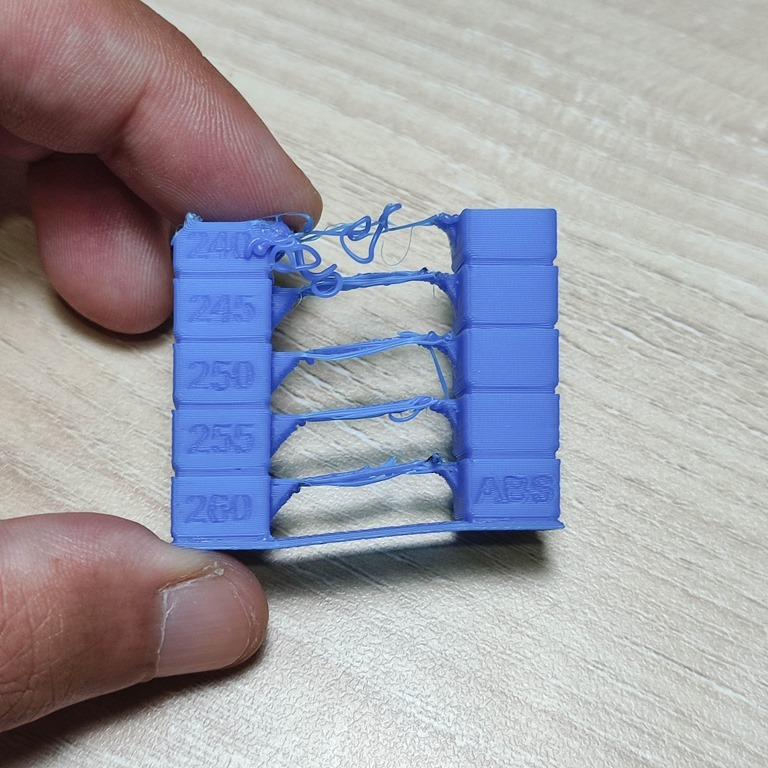
Even if you have perfectly dialed in your PLA filament print settings and made sure to only use the best PLA filament brands, you can get a completely different result when swapping to a different brand of filament.
At the same time, changing any component of your 3D printer, such as the hot end, cooling fan, cooling fan shroud, or even the heater cartridge directly affects the results with the extruded filament. Printing a temp tower helps you evaluate the effects of these changes on the extruded material and allows you to dial in your temperature and print settings for your filaments.
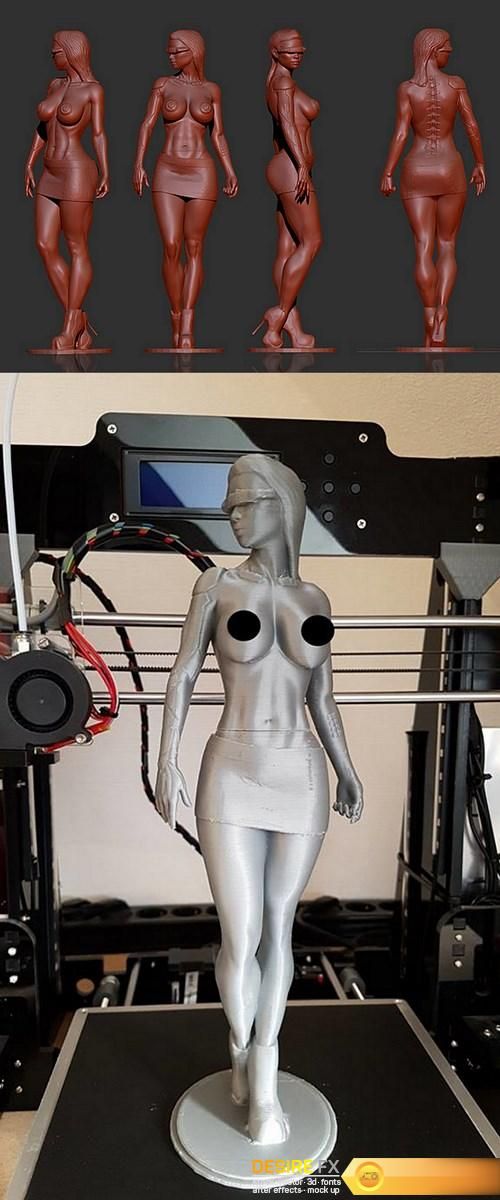
Image: s1ckopsycho via Reddit
Definitely use a temperature tower when your 3D prints look like thisHow to print a temperature tower?
Temp towers are quick and easy to 3D print. Let’s find out how you can print one for yourself.
1. Get a temperature tower model
There are many free temp towers available for download on Thingiverse and other Thingiverse alternatives.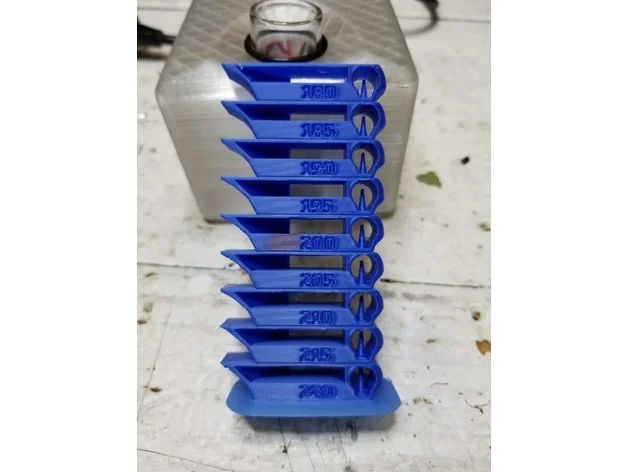 Some are filament-specific temp towers, some are extra quick and easy to 3D print, whereas others have bridging and retractions tests built-in.
Image: Toster256 via Thingiverse
Temperature towers come in a variety of shapes and sizesThere’s no single best temperature towel model, but if we were to choose one for you to start with, it would be the smart compact temperature calibration tower by gaaZolee. There are temp towers with temperature ranges for PLA, PETG, and ABS. Along with finding optimal temperatures, you can test bridging, stringing overhangs, and even curvy shapes with these.
2. Set up slicer settings and generate GCode
Printing the temperature tower without preparing it in the slicer will cause it to 3D print at a constant temperature. Therefore, the basic procedure for preparing the temp tower for 3D printing involves post-processing the GCode file. Let’s take a look at how to set up the gaaZolee’s temperature tower for printing in three different slicers.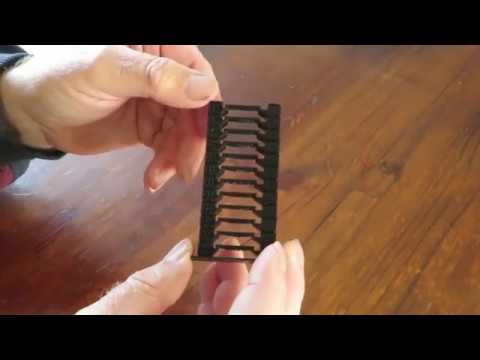
Cura
In Cura, once you slice the temp tower, you’ll have to modify the G-code in post-processing.
In the menu bar, select Extensions→Post Processing→Modify the Gcode. Then select the “Change at Z” option. This will let you set different temperatures for different heights of the temp tower.
Image: Pranav Gharge
Depending upon the temp tower, you set the trigger height and the temperature for that particular height. For gaaZolee’s PLA temp tower, you’ll have to slice the model at a 0.2 mm layer height with 225°C as the initial temperature (This will be the same in all the slicers mentioned).
Then accounting for the 1.4 mm base and a 10 mm floor height, you’ll set the first trigger at 11.4 mm and the extruder temperature to 220°C. Like this, set the rest of the triggers at 10 mm height intervals and decrease the nozzle temperature by 5°C for each trigger. Slice the model and export the file for 3D printing.
PrusaSlicer
Modifying GCode in PrusaSlicer is slightly easier than Cura. Before slicing the tower in PrusaSlicer, in the Gcode preview, you’ll see a layer height ruler at the right side of the preview window. We’ll use this ruler to navigate and select the various layer heights of the temp tower.
Image: Pranav Gharge
For the first temp change, slide the ruler to 11.4 mm height. Right-click on the ‘+’ symbol and select the ‘Add custom GCode” option. In the pop-up window, type the G-code M104 S220. The ‘M104’ will trigger the temperature change command at the set layer height, and the ‘S220’ part of the G-code will set the temperature to 220°C.
Do this at every height interval of 10 mm. Each time set the temp 5°C less than the previous trigger and reslice the model, and you’re ready to 3D print it.
Simplify3D
Simplify3D makes it slightly easier to set the temperature change. Under the Temperature section, select ‘Primary Extruder Temperature.’ Add setpoints denoting the various layer numbers.
In this case, the first set point for the 1st layer and the temp will be 225°C.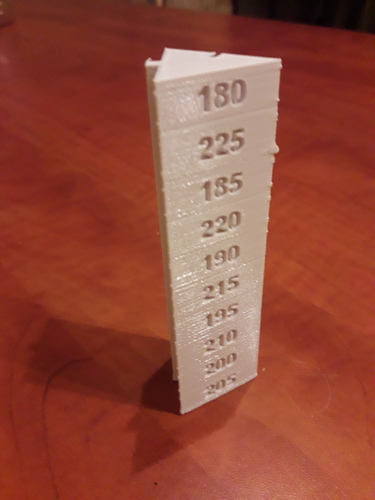 The second point will be at layer number 57 (0.2 mm layer height and total 11.4 mm height of the first floor), and the temp will be 220°C.
After that, every other set point will be at successive intervals of 50 layers, i.e., the next setpoints will be at 107, 157, 207, and so on. And each time, the temperature will decrease by 5°C. Once you’ve done this, slice the tower and 3D print it.
How to read the results?
After 3D printing the temp tower, it is crucial to interpret the results. The most basic method is to visually inspect the tower and evaluate which temperature setting gives the best-looking results. Check for defects, retraction issues, bridging results, blobs, stringing, and other visual cues.
Then, to check the layer adhesion, try to separate the layers by hand. This lets you know the temperature at which the layers bond to each other strongly. You’ll notice that layers at lower temperatures do not stick to each other well, as the heat is not enough to melt and bind these layers together.
Filaments from brands such as Overture, Hatchbox, Esun, and especially Prusaments are some of the best materials you can use if you’re struggling to get good quality results due to poor material.
Recommended:
The 10 Best PLA Filaments for 3D Printing
Once you’ve evaluated the results, make sure to document them for future purposes. This allows you to look up the optimal temperature settings the next time you print with the same spool.
Conclusion
Temperature towers are a great way to save yourself time and figure out the best 3D printing temperatures for a particular filament. They take out any guesswork, and you can be confident of the results and expect the best printing quality each time from your favorite material.
Let us know your results and experiences with these temp towers. If you have any additional questions or would like to add something, feel free to comment below.
How To Use A 3D Print Temperature Tower « Fabbaloo
A 3D printed temperature tower [Source: Fabbaloo]
One of the key techniques that should be used by 3D printer operators is the “Temperature Tower”.
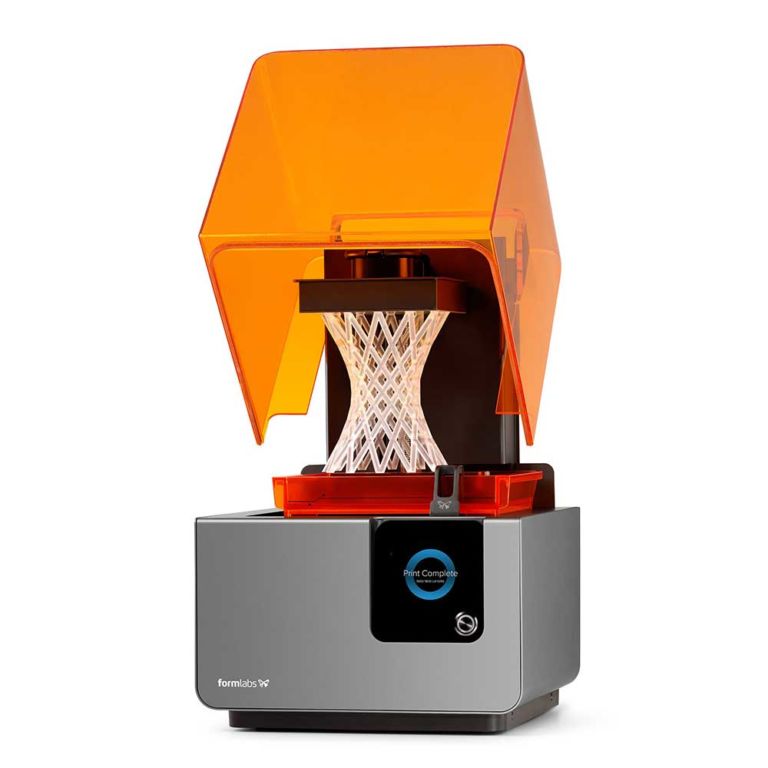
It’s an essential tool for using and optimizing print settings for filament-based 3D printers. This technique works only for filament devices, and is of no use for resin printers, for example.
When you receive a spool of filament the manufacturer will often paste a sticker on the side with recommended nozzle temperatures. This is quite a tricky thing to declare by the manufacturer, because in an open materials world they have literally no idea what type of 3D printer it will be used on. The chemistry of the filament needs to be matched to the thermal properties of the specific 3D printer.
Thus the print temperature recommendations are often a range. For example, I’m looking at some handy spools here and they say things like:
-
Print temperature: 255-270C
-
Range can be 220-235C
-
Nozzle temperature 205-225C
-
Print temp: 205-225C
Sometimes you don’t even get that.
The bottom line here is that basically you have no idea what the optimum temperature will be for a given combination of filament and printer, unless you’ve done some testing.
That’s often the first thing I do when I encounter a foreign spool: perform some test prints within the recommended range to identify which level is best. Sometimes it’s right in the middle, but not very often. Recently I even had one material that would only print outside of the recommended range!
But that’s the exception. Nevertheless, you should always perform a simple experiment with your material to understand exactly how it performs with your specific 3D printer configuration.
I’ve found the best way to do this is through what’s called a “temperature tower”. It is a curious structure that looks somewhat like a small open-air apartment block, with multiple levels.
The idea is to 3D print the entire tower, but vary the temperature on each “floor”. That way you can very easily visually compare the print results between the two temperatures.
How exactly do you configure a 3D print job to do this? Most slicing systems offer a way to change print parameters at specified layers. I can’t get into the details here as it depends on which slicing system you use. It is sometimes a bit tedious, but usually you have to do it once for reasons that will become clear later.
Once configured, the 3D printer will simply adjust temperatures as it encounters the designated layers accordingly.
Normally the highest temperature is to be tested first, so it will be set at the lowest level. Then, as the layers proceed upwards, the temperature will drop, typically by 5C.
Why go from hot to cold? The answer is simple: at some lower temperature the material will cease to flow, and printing will jam. That doesn’t happen at hotter temperatures; the print just gets sloppy.
I’ve encountered this effect several times where a temperature tower print actually fails before it gets to the top. Then you know for sure where the softening temperature is located.
Well-designed filament chemistries will offer a wide range of printable temperatures, so you will sometimes encounter a material that varies very little between temperatures.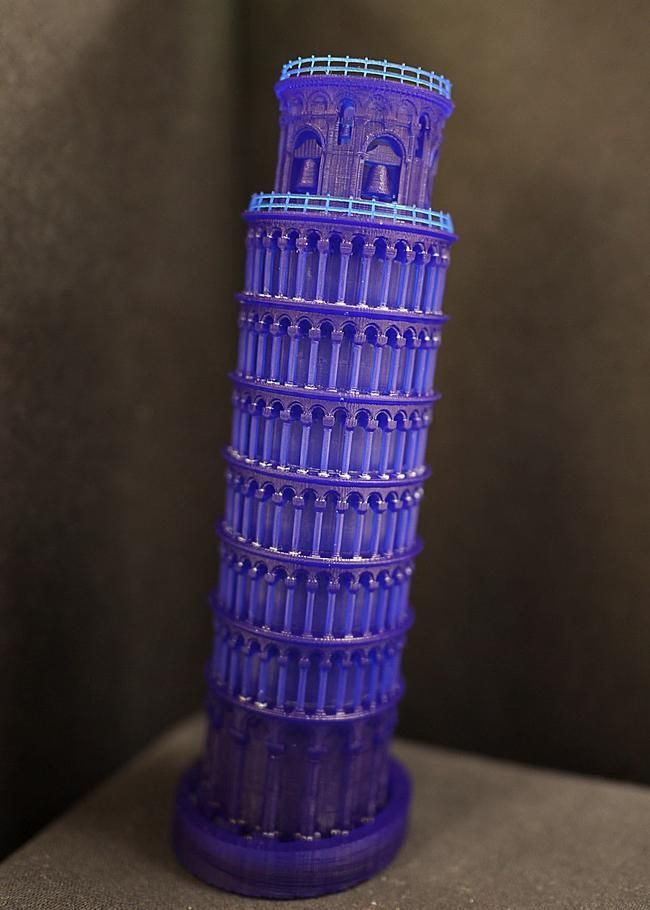
More frequently, however, you will see differences in the print quality from layer to layer. Most temperature tower designs offer some basic geometry that you can compare between layers. Look for slumping overhangs, poor bridging, ringing (wobbly echoes near corners), blobs and other print artifacts. If you look closely you will usually see some difference.
Another factor that changes by temperature is the surface quality. Some materials, particularly the “silk” style materials and PETG, offer more or less shine depending on the set temperature.
Pick the temperature that offers the best combination of look and function.
There are plenty of temperature tower 3D models available on public repositories. For example, as of this writing there seem to be over 50 designs on Thingiverse.
But there is a problem. When you examine the printed tower you may see a particular level is optimal, but then you might not recall what temperature was used for that level. Was it 210C or 215C? Sometimes you have to refer back to your slicing profile to figure it out.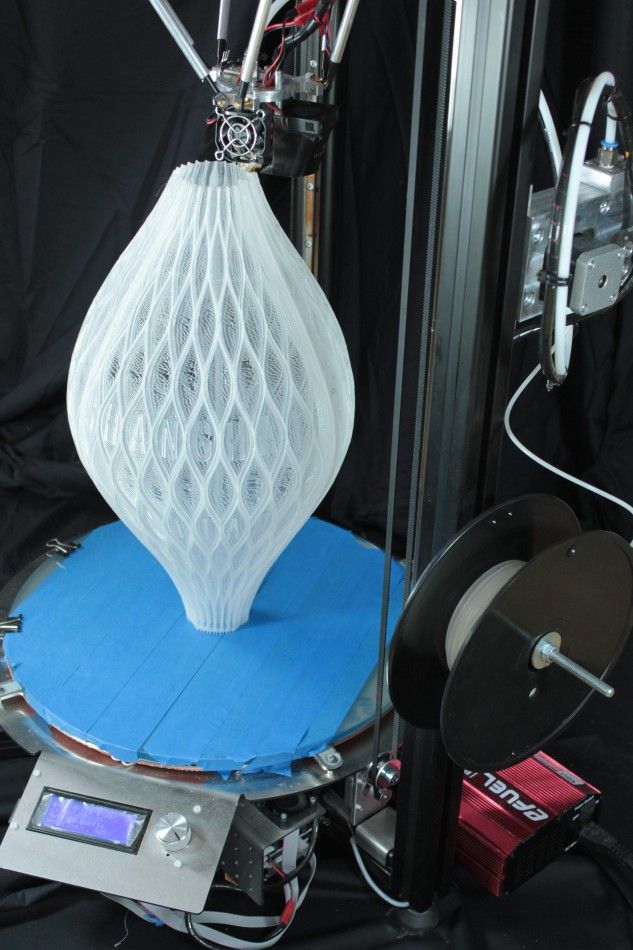
But there is an easier way! There are extremely useful temperature tower 3D models that are customizable. These are 3D models that can be generated to have as many levels as you wish — and even label each layer with the temperature! How handy can that be!
One design I’ve tried is the “Customizable Better Temperature Tower” by Thingiverse contributor KM SD.
It may seem tricky to use one of these, but actually it’s quite straightforward. Rather than providing a static 3D model, which cannot be changed, KM SD provides an OpenSCAD script.
OpenSCAD is a free tool to generate 3D shapes from command line — code. Its tagline is “The Programmers Solid 3D CAD Modeller”.
Now, before you freak out, you don’t have to know any software coding before trying this. It’s incredibly simple. First, download a copy of OpenSCAD for your platform. It’s available in Windows, Mac OS and Linux.
View of OpenSCAD code generating a temperature tower [Source: Fabbaloo]
Open OpenSCAD and then open the script from Thingiverse. You’ll see some code on the left, as seen in this image, and a rendering of what it generates on the right.
Now, this is the trickiest part: simply adjust the start and stop temperatures in the code by typing over top of the existing values, which by default are 210-280C. Probably you want different temperatures, so just replace these two numbers:
Only two parameters to change to generate a different temperature tower 3D model [Source: Fabbaloo]
Then hit the render button (“>>”) and you should see and updated tower with your specifications. Hit the “STL” button to download this 3D model and you’re all set to configure your temperature tower 3D print job.
Here’s the best part: once you have a 3D print job configured for a particular temperature range, keep it. Whenever you get a new filament, just print that same job and you’ll get a tower printed with the temperature ranges for inspection.
If you’re not using temperature towers, you should be.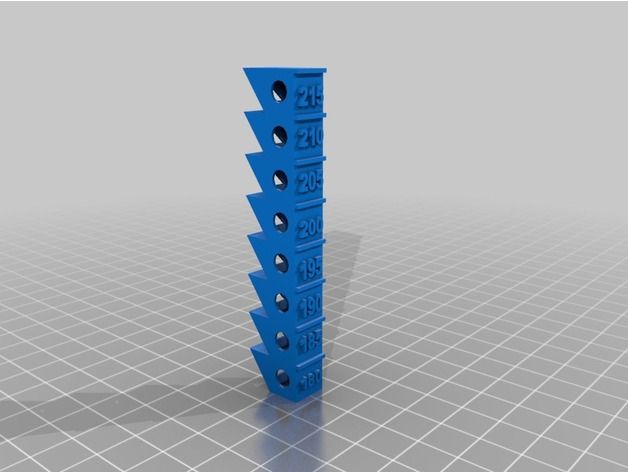
🏛️ Best 3D Printing STL Files for World Landmarks, Historical Monuments・Cults
🏛️ Best 3D Printing STL Files for World Landmarks, Historical Monuments
Download Printable 3D Models Landmarks - World Historical Monuments
files of the most beautiful buildings around the world. 3D designers will make you travel and discover all the wonders of the world with these 3D architectural files of world famous, national and regional monuments.
Eiffel Tower Model
Free
Eiffel Tower
Free
615 mm Eiffel Tower
Free
Moai statue - no canopy
Free
Medieval castle
Free
Statue of Liberty in Manhattan, New York
Free
Roman Colosseum Full detailed view of the world
Free
Famous buildings in Paris
Free
Eiffel Tower HD
Free
Place de la République, Paris
Free
Egyptian Sphinx
Free
Low Poly Moai
Free
Mont Saint Michel
Free
Big Ben
Free
Reims Cathedral Kitset
Free
Eiffel Tower - Color (French Flag)
Free
Stylized Mount Rushmore
Free
Leaning Tower of Pisa
2. 50 €
50 €
Nicely detailed model of the Taj Mahal
Free
The Capitol - Legislative
Free
Simple Eiffel Tower - 10mins Modeling
Free
Lion de Belfort
Free
Burj Khalifa
Free
Oogaki Castle
Free
The Great Pyramid of Giza
Free
Sioux Falls Cathedral - South Dakota, USA
Free
Statue Of Liberty / 1:1000 / 1:700
Free
Statue of Liberty - Repaired
Free
Hagia Sophia
Free
Brandenburg Gate - Berlin
Free
St.
 Basil's Cathedral
 Free
Empire State Building 87cm height (87cm height) + LED
Free
Le Moulin-Rouge
Free
Sydney Opera House
Free
Frauenkirche Dresden
Free
Burj Khalifa
1.50 €
Gifu Castle
Free
Lowpoly Moai remix
Free
taj mahal
Free
Vienna Giant Wheel (Riesenrad)
Free
Clermont-Ferrand Cathedral
Free
Supreme Court Building
Free
Basilica Notre-Dame de la Garde
Free
St Basil Cathedral Moscow
Free
Simple Tower of Pisa with Tinkercad
Free
Sevilla's Cathedral
Free
Torre Latinoamericana
Free
The Library of Congress
Free
Le Moulin Rouge
Medieval castle
Multicolor Sphinx
Medieval castle
Here is our selection of best files for 3D printers of landmarks, historical monuments of the world , all these creations are created on the STL file platform Cults and are beautifully printed in 3D .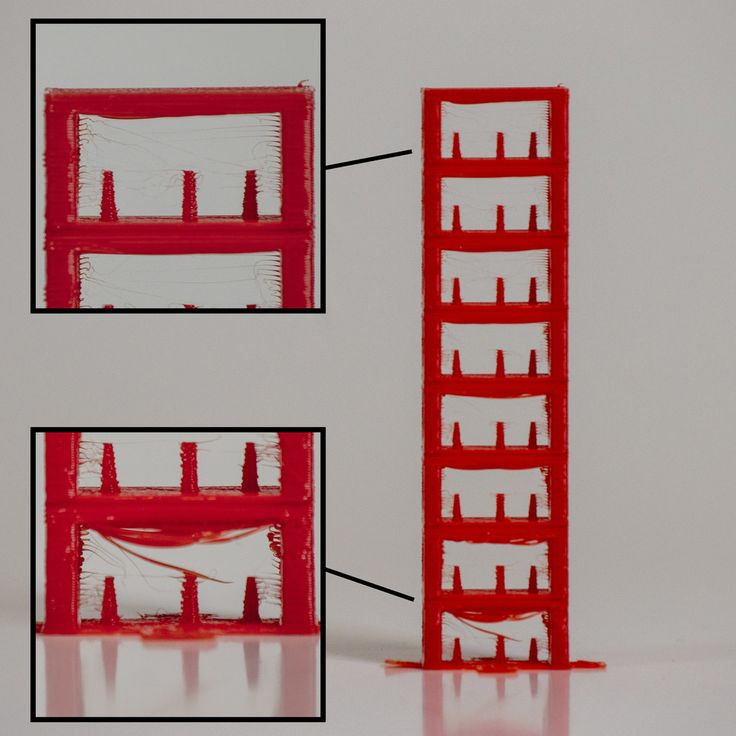
This collection contains free and paid 3D files of many famous monuments of the world. Since the beginning of time, man has sought to build and, above all, to pass on to the descendants of incredible monuments. This applies to both ancient monuments such as Colosseum of Rome or Great Pyramids of Egypt or more modern structures such as Eiffel Tower or Statue of Liberty . More recently, oversized buildings have appeared in developing countries such as Abu Dhabi and China.
It's fascinating that the 3D designers of were able to create these digital monuments perfectly. So you can 3D print the world's most beautiful monuments from the comfort of your home. This will allow you to get to know their architecture in detail or, for example, help your children study geography lessons. 3D print a lot of monuments from all over the world and then try to map them all to work on the geography, or you can also try to plot them on the timeline to date their construction and thus work on the history lessons.
Printing these excellent 3D Architectural 3D Models of Historic Monuments will also allow you to pay homage to the incredible monuments and their builders and architects. Don't forget to share photos of your creations with us!
3D scanning of the Shukhov Tower on Shabolovka
Share on Facebook Share on Twitter Share on Vkontakte
Shabolovskaya or Shukhov Tower, which is located in Moscow near the metro station Shabolovskaya, is a very unique building. It is unique not only in terms of appearance, but also in design.
One of the interesting features of Shukhov's hyperboloid towers is that, due to its mesh construction, it is subjected to minimal wind load. Because of the same unusual design, the Shukhov Tower “follows” the sun less. When the metal is heated by the sun's rays, it expands, and it turns out that during the day the metal structures deviate following the sun. For example, for the Ostankino tower, this deviation is about seven meters, while for Shukhovskaya it is only 1.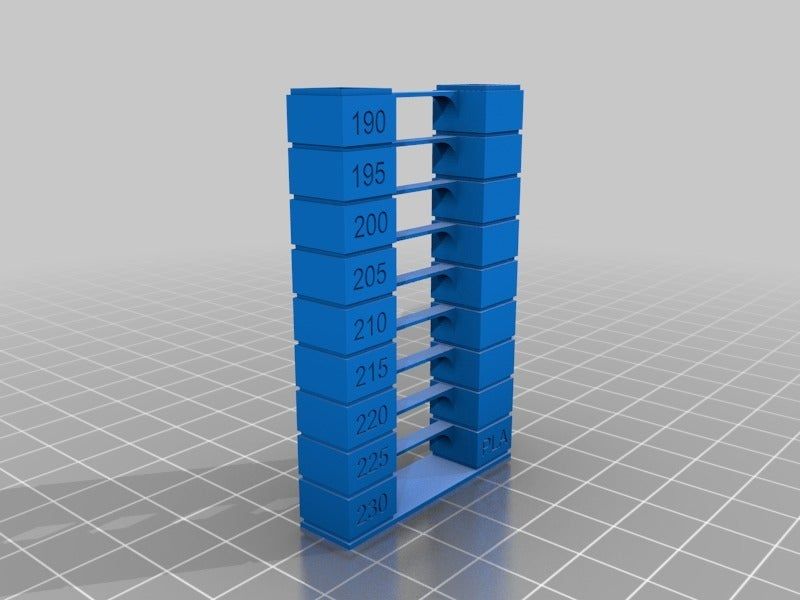 5-2 centimeters.
In 2006, the Shukhov Tower, a masterpiece of the Russian avant-garde, was included in the UNESCO World Heritage List. And in 2011, it was scanned by the Institute of the History of Natural Science and Technology. S.I. Vavilov RAS.
3D SCANNING OF THE SHUKHOV TOWER
Project 3D scanning of the Shukhov Tower began in 2011. The reason was several facts:
- the tower was in a pre-emergency condition
- there was no modern complete documentation for the tower
- according to plans in 2011-2013 it was planned to restore the tower
3D laser scanning was used for 3D scanning of the tower.
The laser scanner itself weighed about 17 kilograms, and one can only imagine how difficult it was to lift and lower it from the tower:
It took the team that did this two days to scan directly.
Much more time was spent processing the received data, creating an interactive 3D presentation for stereo-visualization of three-dimensional data.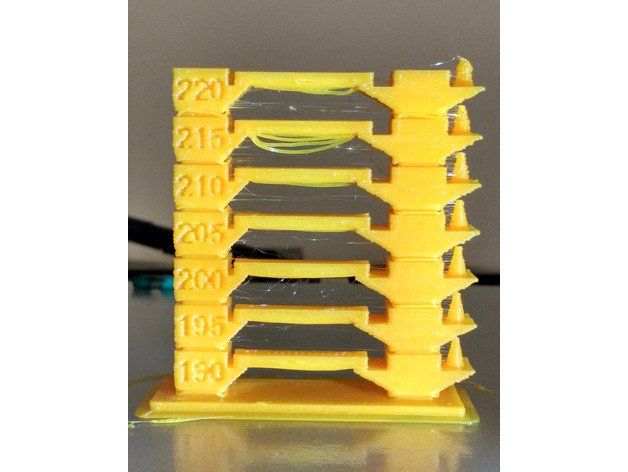
The 3D scan was carried out from seven points: four of them were located on the ground, and three were above.
According to Andrey Leonov, who was involved in 3D scanning, ideally it would be good to have more points for scanning, but at that time it was impossible to ignore the time and financial constraints. Nevertheless, the specialists managed to obtain the general geometry of the structure with a fairly high accuracy, even some rivets on the structures are visible.
Now the obtained model contains the most complete information about the design of the hyperboloid tower. Considering that some data were missing from archival documentation, 3D scanning performed a very important job, which will speed up and simplify further historical research and, hopefully, restoration.
ADVANTAGES OF 3D SCANNING
In this case, the use of 3D scanning technologies once again confirmed some of the advantages of 3D scanning:
☑
preservation of information about a unique building of historical value research and preservation
☑
popularization of science and technology
Another important fact is that access to viewing the 3D model of the Shukhov tower is absolutely free, which can attract the attention of researchers from all over the world.