Best 3d printer for dnd
6 Best 3D Printers For Miniatures in November 2022 (D&D & More)
The rise of video games has pushed tabletop games to the fringes, but those who enjoy these games are often die-hard fans. With custom characters and models for games becoming so pricey, many have decided that buying a 3D printer for miniatures and printing their own custom models is the way forward.
Miniatures commonly refer to games like Warhammer, Dungeons & Dragons and 28mm miniatures, but 3D printing miniatures can mean any kind of small model.
This article gives advice about the best 3D printers for miniatures for both models and terrain you can buy based on your priorities, preferences, and budget, as well as key tips for printing miniatures – and beyond the specs, the factors that actually make a difference to miniature print quality.
BUDGET PICK
Anycubic Photon M3
High quality 4K screen for low price
Larger build volume than Photon Mono 4K and Elegoo Mars 3
Available at anycubic here Amazon here
QUALITY PICK
Anycubic Mono X 6K
Higher-quality 6K LCD screen
Much larger print area for printing many miniatures in one job
Available at anycubic here amazon here
FOR TERRAIN
Creality Ender 3 V2
Lower quality than a resin printer, but ideal for terrain
Great low-cost entry-level printer
Available At Creality here Amazon here
Why 3D Print Your Own Miniatures?
Rather than being limited by the models featured in the catalogs of miniatures companies, and having to pay in excess of $10 per model, with a 3D printer you can print whatever you want, and also save up to 90% on the purchase price!
Some designers online publish their miniature files for free online (we include the best places later on), but even premium models are extremely cheap – often just a few dollars. And when you buy these, you get to keep the STL file, so you can print the model over and over again.
Some premium files even come with their slicer profiles pre-made so that you just need to import the file, and print.
So for deciding whether to buy or 3D print your tabletop miniatures, the main two factors are choice, and price.
The Best 3D Printers for Miniatures
| Name | Printer type | Build volume (mm) | XY Resolution | Price | Where to buy for best price? |
|---|---|---|---|---|---|
| Elegoo Mars 2 Pro | Resin | 129 x 80 x 160 | 50μm | $220 | Elegoo here |
| Anycubic Photon M3 | Resin | 163 x 103 x 180 | 40μm | $300 | Anycubic here |
| Elegoo Mars 3 | Resin | 143 x 90 x 175 | 35μm | $300 | Elegoo here |
| Anycubic Mono X 6K | Resin | 197 x 122 x 250 | 34μm | $569 | Anycubic here |
| Phrozen Sonic Mini 8K | Resin | 165 x 72 x 180 | 22μm | $699 | Phrozen here |
| Creality Ender 3 V2 | FDM | 220 x 220 x 250 | $279 | Creality Store here | |
| Ender 5 Plus | FDM | 350 x 350 x 400 | $579 | Creality Store here |
How Much Does It Cost to 3D Print Miniatures?
It costs around $1 per miniature 3D print on average, though this will vary depending on the size of the model, and the type of resin used.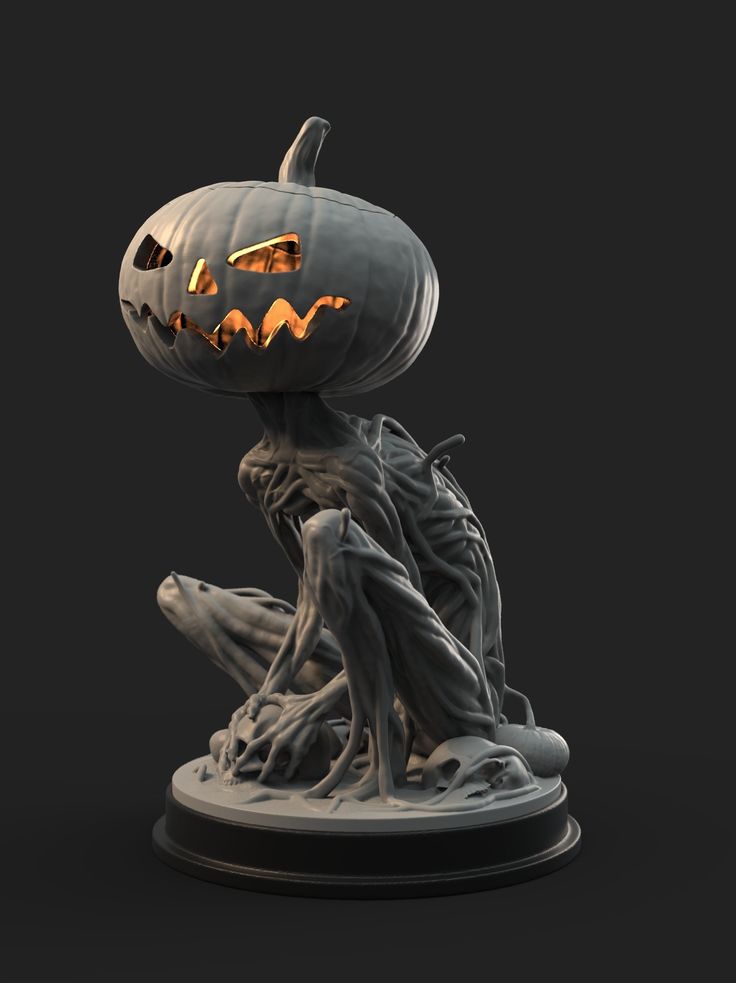 A 1L bottle of resin will print between 30-35 miniatures of a reasonable size, with hobbyist resins costing $20-40.
Remember however that you’ll use some resin on miniatures on supports, so only around two-thirds of your resin goes into the actual models.
Why Not To Use FDM For 3D Printing Miniatures (But You Should For Terrain)
While FDM 3D printers have larger print areas, and the filament is cheaper and non-toxic, you can’t get anywhere near the same level of detail. And minuscule details are the key to amazing-looking miniatures.
You’ll see the layer lines on the model, and will need a fair amount of finishing and post-processing to reach your quality standards. To put it into perspective, if you saw an FDM-printed miniature in a shop, you probably wouldn’t buy it.
But, you can print the larger, rougher parts with an FDM printer, such as terrain, backgrounds, and accessories like towers, bridges, and other cool add-ons. Often these parts will be wider than desktop LCD printers can fit, but an FDM printer like the Ender 3 should be able to print it, and if not, a larger printer like the Ender 5 Plus surely can.
Overall, we recommend buying a resin printer for miniature models, and an FDM printer for terrain and accessories. However, if you’re a complete beginner and resin printing is intimidating, then you can still print adequate quality miniatures with an FDM printer.FDM printed terrain for miniatures. Source
The Best 3D Printers For Miniatures 2022 – Reviews
We picked both FDM and resin printers depending your preferences. The first part features the best resin printers for miniatures in every price range, and then the best FDM 3D printers for miniatures we recommend are listed.
3DSourced is reader-supported. When you buy through links on our site, we may earn an affiliate commission. Learn more
Best Resin 3D Printers For Miniatures
Elegoo Mars 2 Pro Mono — best low cost resin 3D printer for miniatures
- Price: $250 — Available at Elegoo store here / Also available on Amazon here
- Maximum print volume: 5.1″ x 3.1″ x 6.3″
An LCD 3D printer capable of fast speeds and very fine details despite the low price, the Elegoo Mars 2 Pro has fast become a mainstay in desktop 3D printing.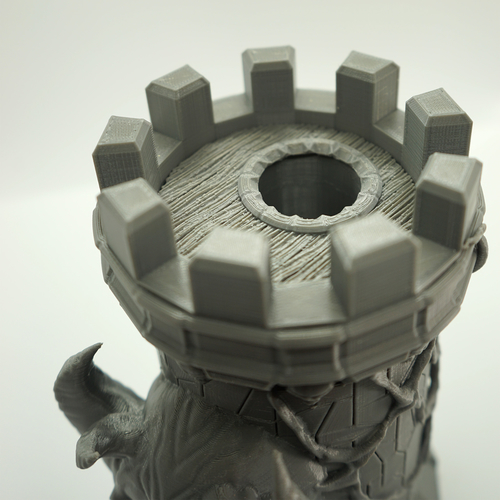 When we tested it for our Elegoo Mars 2 Pro review, we were very impressed with the quality it delivered at such a low price.Clank 3D print we printed on the Elegoo Mars 2 Pro
For makers who have experience with 3D printing and are comfortable with the added complexities of resin printing, the Elegoo Mars could be your perfect 3D printer for miniatures and tabletop models. It can print smoother models with clearer, crisper finishes than FDM printers, and the resins used do not cost as much as they used to.
- We also recommend an Elegoo washing and curing station — Available on Amazon here
The 2K 6″ LCD screen gives the printer great precision for solidifying resins, with layer resolutions between 0.01-0.2mm available. It comes with CHITUBOX, the highly-praised resin 3D slicer which slices models quickly to save you time, and also includes useful features such as tools that hollow out models before you print to lower material costs, if you don’t mind slightly less durable parts.
Overall, the Elegoo Mars 2 Pro Mono is one of the best low cost resin printers around, and for creating miniatures, if you have the tech know-how, you may find resin printing meets your needs best.
Top value: If you’re happy with a 2K LCD, the Mars 2 Pro is your best option. If you have the money, opt for the Elegoo Mars 3 or Photon M3.
We were impressed with the details of the miniatures we printed with it.
Cons
Newer, higher-spec printers have since been released – however, most cost more.
Anycubic Photon M3
- Price: Check latest price at Anycubic here
- Build Volume: 163 x 103 x 180 mm
- XY Resolution: 40 microns
- Minimum Layer Height: 10 microns
The newly released Anycubic Photon M3 hits its stride in miniature making by bundling in better specs at the same price as its predecessors, the Photon Mono and Mono 4K.
These enhancements are most pronounced with a larger 163 x 103 x 180 mm build volume. This might not seem like much on paper, but means the Anycubic Photon M3 can produce much larger single models or batch print more copies of the same in one sitting than the Mono 4K, let alone the original Mono.
The extra z-height lends itself well to taller models, excellent if you’re working to produce large figurines for display purposes.
The Anycubic Photon M3 and Mono 4K both use a monochrome 4K LCD, but the Photon M3’s larger 7.6” screen handles the larger build volume. In numbers, this means a slight downgrade to a 40 micron XY resolution compared to the Mono 4 K’s 35 microns, but at these low numbers, the difference is indistinguishable to the naked eye, even for veteran miniature aficionados.
We still recommend the Photon M3 over the Mono 4K for the larger build volume – at this level, a 5-micron difference is not going to make a difference, even in the most precise of miniatures.
Against the standard Mono’s 2K LCD, there’s no competition: the Anycubic Photon M3 delivers far better fine details and features on even the most complex Warhammer and D&D figures.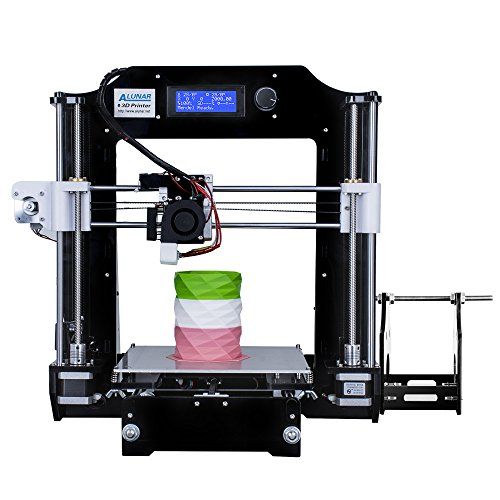 It does so fast as well, with a solid 50 mm/h print speed, which equates to roughly 30 minutes per 28 mm model.
Extremely affordable.
Perfect for larger miniatures – especially taller models.
Cons
Slightly lower resolution than the Mono 4K – but this is because of the larger screen and build volume on the Photon M3.
Anycubic Mono X 6K
- Price: Check latest price at Anycubic here / Amazon here
- Build Volume: 197 x 122 x 250 mm
- XY Resolution: 34 microns
- Minimum Layer Height: 10 microns
Positioned as an upgrade to the popular budget Mono X, the Anycubic Mono X 6K doesn’t reinvent the wheel as much as building upon those solid foundations and fantastic build quality.
Leading this is a jump to a 6K display, an enhanced light matrix to improve curing uniformity, and a larger 9.25″ LCD. In practice, this means a high level of print quality and a sharper 34 micron XY resolution across a larger surface.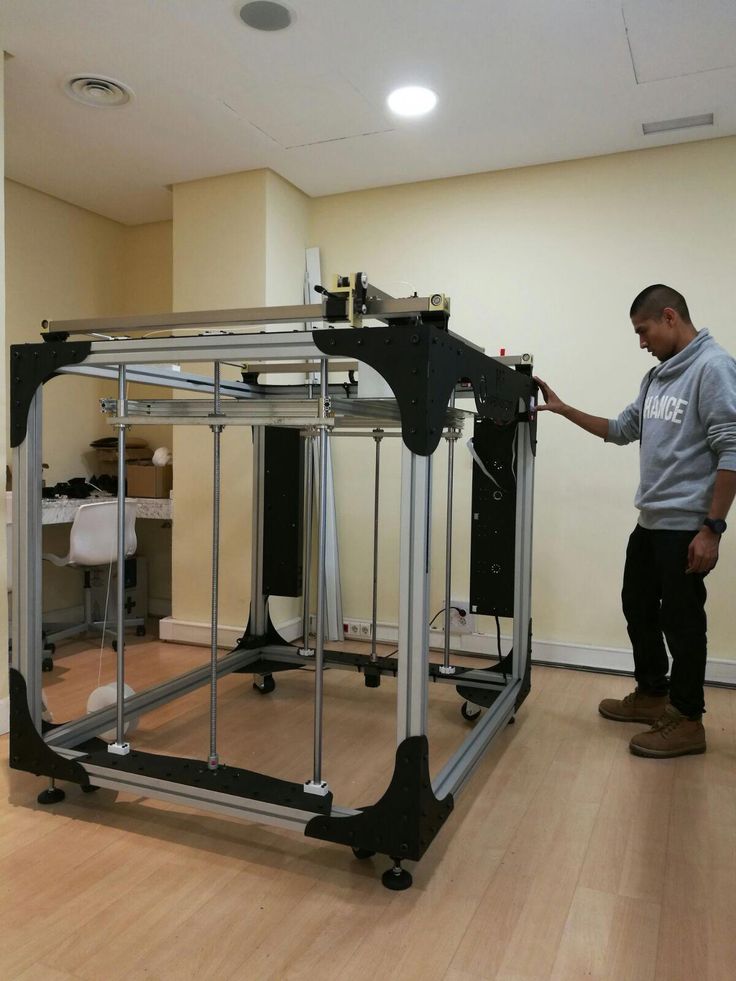
For miniature makers, this means a noticeable jump in quality over the Mono X, especially on finer parts such as hairs, scales, horns, armor detail, and facial features.Printed on the Mono X 6K. Credit: u/MaxHereticus66
This applies to large and small figures or models thanks to the Anycubic Mono X 6K having a roomy 197 x 122 x 250 mm build volume for a resin printer. In other words, the Anycubic Mono X 6K is as suited to printing large Warhammer tanks, knights, and warhounds as classic space marine 28 mm miniatures.
We highly recommended the Mono X when it was the best-quality mid-range resin printer around, and the Mono X 6K builds on this wonderfully. However, if you want to save money, the Photon M3 is a great shout if you’re comfortable with 4K resolution, as the Mono X 6K costs double the price.
For amateur Warhammer players and those partial to the occasional Friday night D&D session, the Photon M3 remains the most cost-effective option. But, for next-level resolution, the Mono X 6K is the best out there.
The Mono X was already a top pick – now it’s upgraded.
6K LCD offers superb rendering of intricate details.
Even larger build volume for producing many miniatures at once.
Cons
Expensive compared to budget 3D printers for miniatures.
If you don’t need all 6K quality, opt for a Photon M3, Photon Mono 4K, or Elegoo Mars 3.
Phrozen Sonic Mini 8K
- Price: Check latest price at Phrozen here
- Build Volume: 165 x 72 x 180 mm
- XY Resolution: 22 microns
- Minimum Layer Height: 10 microns
Widely considered one of the best consumer-grade resin 3D printers on the market, the Phrozen Sonic Mini 8K is ideal for super high-quality miniatures, whether for tabletop gaming, display, or war gaming.
If you can stomach the price tag, the Phrozen Sonic Mini 8K is as premium as the best 3D printers for miniatures get – unless you go full industrial.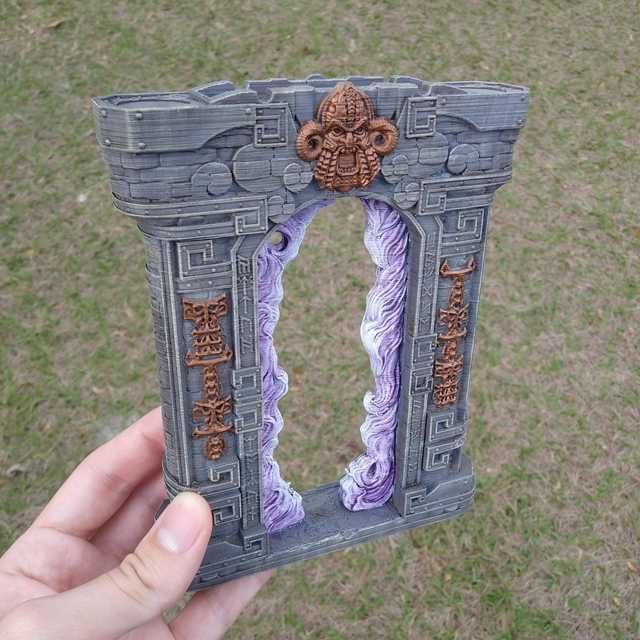
The Phrozen Sonic Mini 8K offers a best-in-class 22 micron XY resolution. It outperforms much-loved resin printers such as Elegoo Mars family and Anycubic Photon Mono X 6K and Mono 4K. In action, this type of resolution renders even the tiniest features in exquisite detail, even on small 28 mm miniatures.A 4K print on the left, and 8K on the right. Source: Geek Gaming Scenics
Now, for all its ability to create superb miniatures, the Phrozen Sonic Mini 8K does have one major drawback compared to other resin printers – a smallish build volume.
It sits at 165 x 72 x 180 mm, putting it on par with much cheaper alternatives like the Anycubic Photon Mono 4K.
This is necessarily a downside if you’re printing single large figures, but it does reduce the scope for batch printing multiples simultaneously, so if you want to produce large volumes for your business or home games, consider Phrozen’s Sonic Mighty range, the Anycubic Mono X 6K, or Elegoo Saturn S.
Overall, if you’re looking for the best quality miniatures, and aren’t too worried about a slightly smaller build volume, the Phrozen Sonic Mini 8K is largely unrivaled.
Best-in-class 22 micron XY resolution.
Perfect for small 28 mm figures with precise features and details.
Cons
Small-ish build volume for the price.
Best FDM 3D printers for miniatures
Creality Ender 3 V2 — Best 3D printer for miniature terrain
- Price: Check price at Creality Official Store here / Available on Amazon here
- Size: 220 x 220 x 250 mm
- Resolution: 100 microns
Considered one of the best cheap 3D printers around, the Ender 3 is famed for its reliability and effectiveness for the price. It comes as a 3D printer kit, but takes under an hour to assemble and it’s really easy – just 20 screws.
It’s an FDM printer, so it cannot reach the same level of precision as an Elegoo or Anycubic resin printer. However, it’s one of the best FDM 3D printers for terrain for miniatures, as it prints reliably, cheaply, and has a decent print volume of 220 x 220 x 250 mm.
If you want to avoid resin printing you can use it to print miniatures, but they won’t have the same level of precision, and you’ll need to do some sanding and general post-processing to get them closer to the level you’re happy with.
But, the Ender 3 V2 is the best printer in its price range for terrain, and PLA filament is very cheap and super easy to print with. The only issue could be if you want to print large towers or terrain that doesn’t fit within the build volume.
Best low-cost FDM kit – easy to build and print with, and it’s reliable and durable.
Very upgradable: many extruder, bed, hotend, and other upgrades available.
Cons
Not well suited to miniatures – stick to terrain, and strongly consider a resin printer instead.
Ender 5 Plus – best 3D printer for miniatures terrain
- Price: Check latest price at Creality here / Amazon here
- Build Volume: 350 x 350 x 400 mm
- Printing Accuracy: 100 microns
- Layer Thickness: 100-400 microns
If you’re leaning towards a budget FDM printer like the popular Ender 3, but its build volume doesn’t quite measure up to the size of terrain you’re planning to print, the Ender 5 Plus is a great alternative.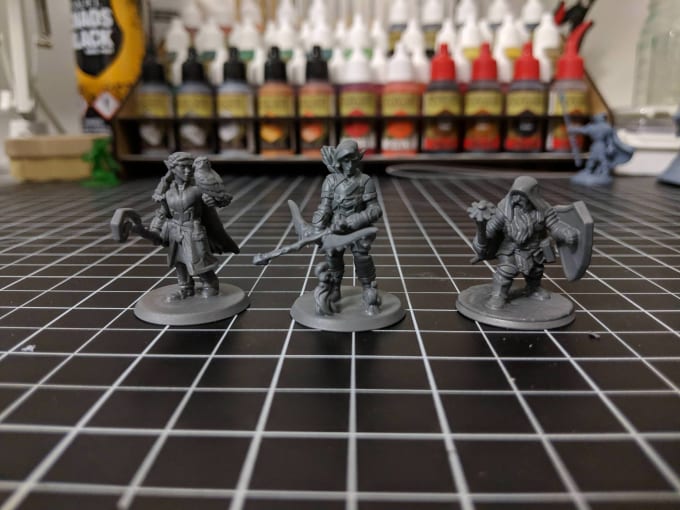
It supersizes the build volume to a generous 350 x 350 x 400 mm, ideal for those sprawling backdrops for your tabletop and D&D adventures that simply won’t fit on a stock Ender 3.
As low-cost consumer-grade printers go, this volume size is up there and should cover all your terrain needs. It’s particularly suited to intricate ruins, battlefields, towers, rocky outcrops, dungeons, and the like – perfect for heightening that crucial sense of immersion.
Aside from the large format, Ender 5 Plus also features some handy benefits over the Ender 3. It comes with a BLTouch automatic bed leveling probe to save time and effort, so you can concentrate on bringing to life terrain.
There are also dual z-axis lead screws to improve stability and, by extension, overall print quality. Elsewhere, it boasts a filament sensor that alerts you if the filament runs out or breaks, so you won’t waste any more time than you need on a print that won’t complete.
The Ender 5 Plus is priced over double what you’d expect to pay for the Ender 3, but if you can stretch your budget, it’s a do-it-all terrain printer that’s well worth the extra money.
Massive 350 x 350 x 400 mm build volume.
Convenience features like automatic bed leveling and filament sensor.
Ideal for large backdrops and terrain models.
Cons
More than double the price of the Ender 3 and Ender 3 V2.
Important Specs & Factors To Consider Buying a 3D Printer For Miniatures
Layer Height
Different 3D printers have different minimum layer heights, for example the Elegoo Mars 3 has a minimum layer height of 0.01mm, or 10 microns. The Creality Ender 3 V2 has a minimum layer height of 0.1mm, or 100 microns.
The smaller the layer height you choose for your models, the better the quality, and the less visible the layer lines will be.
However, the lower the layer height, the more layers you’ll have in your model, which increases the time it takes to print, and also increases the chance of a failed print.
We advise that you don’t need to go all the way down to 0.01mm on your resin 3D printer with miniatures – 0.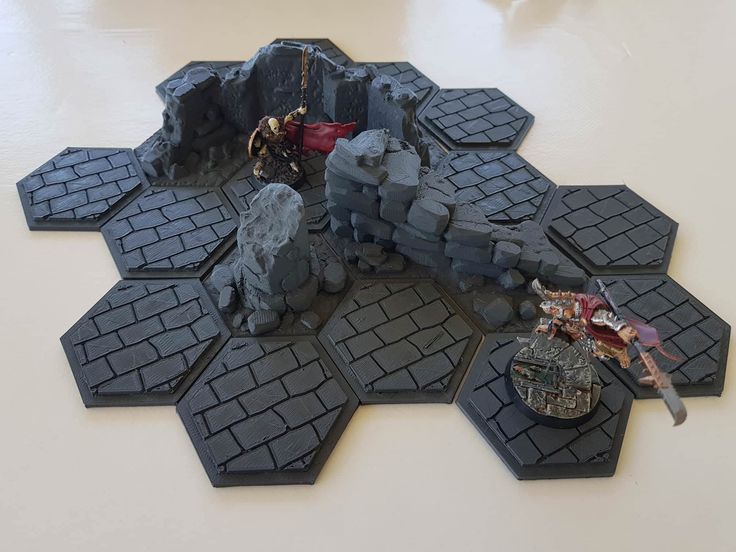 03-0.04mm is a good range for great quality. To put that into perspective, in a 6cm tall resin miniature print, with 0.05mm layers, that is 1200 layers to print.
Screen Quality and Precision: Do you need a 4K, 6K, or 8K Screen? And Should You Buy a Mono 3D Printer?
The most important thing is to pick a mono 3D printer. They cure and print resin layers often 3x faster, and often last up to 4x longer, too, so they’ll save you money and hassle replacing parts continuously.
We recommend you opt for a 4K resin printer if you can afford it, as they’re not too much more expensive than 2K MSLA printers now, and you will notice an improvement in precision, especially on details like hair and beards, or hands and fingers on your models. If you have the money, go for an 8K printer – but it isn’t a necessity.
However, do not look solely at the specs when determining if a printer is high quality.
A 2K screen with a printer made from high-quality parts – such as build plate bolts and resin vat locks that can handle low layer heights and retain accuracy and aren’t prone to threading – will produce better miniature models than a shoddily built 4K printer.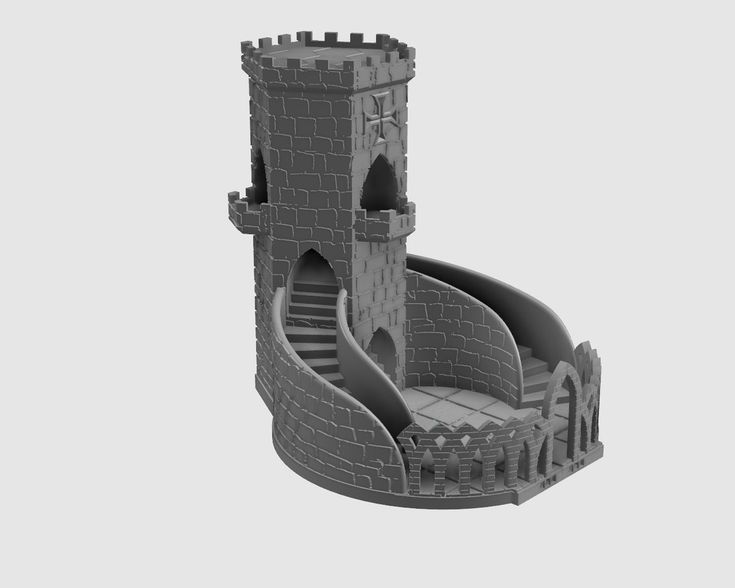
Focus on buying a well-made printer made by a reputable company with a high-quality screen.
High-quality brands include Anycubic, Elegoo and Phrozen in these lower price ranges, and we highly recommend these if you’re printing miniatures at home or other precise resin models.
That being said, there are noticeable differences at each resin quality level – mostly after you’ve primed the models.
Corners will look a bit sharper, and certain facial features and muscle definitions will come out better generally – but you can still create very good models on 4K or even 2K LCD screen resin printers, you just get that extra sharpness when you go up to 6K or 8K.
How Speed and Size Works with a Resin Printer
Resin printers work differently from FDM printers. Instead of printing one part at a time as an FDM printer’s extruder traces the layer, LCD printers flash an entire layer at once, so no matter how many models are being printed within the build plate, they’ll all print in the same amount of time.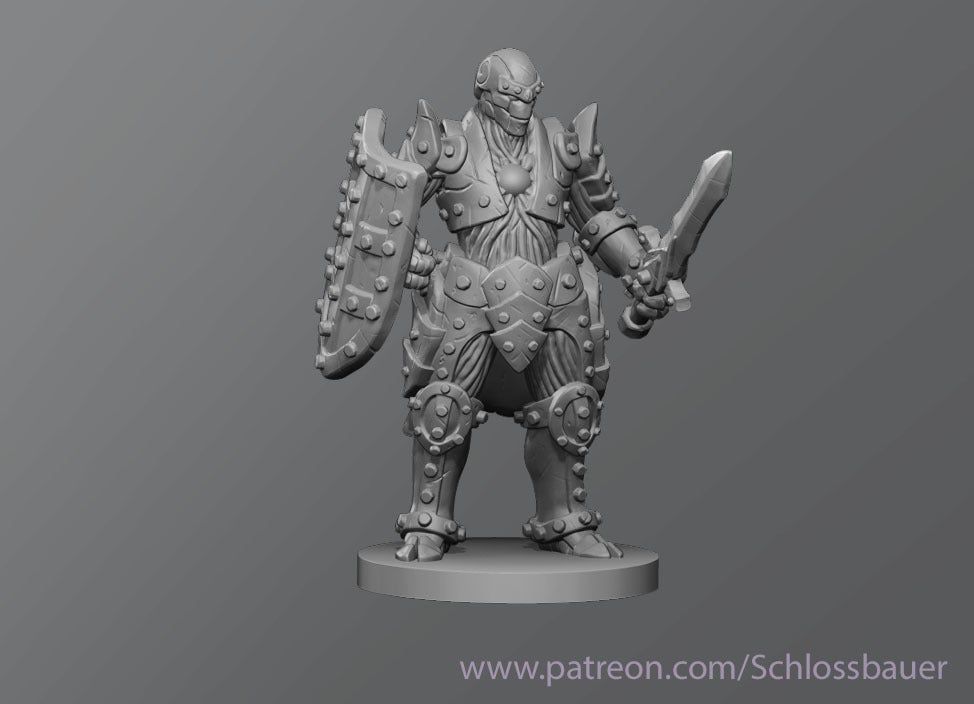
So, the only factor that determines how long a resin print job will take is the height of the tallest model.
This makes the build size of a resin printer important, as the more models you can pack into the area, the more models you can print in one job – in the same amount of time. Large 3D printers can print potentially 20+ miniatures at once – though most hobbyist printers can print around 3-4 reasonably sized miniature models.
Things to Remember When 3D Printing Resin Miniatures
Resin is toxic and irritant – never touch it directly, and if you do, wash your hands thoroughly with soap and water. Wear a mask to avoid the fumes, generally try to avoid the room when printing, and if possible put the printer near ventilation.
There is post-processing involved after printing – you’ll need to scrape the resin prints off the build plate, remove the supports (wear gloves), wash the resin off of the prints with isopropyl alcohol, dry them, and cure them in UV light. Then, optionally you can fix any imperfections, prime and paint them for your custom look. We recommend buying your brand’s wash and cure station to save you time and hassle.
You will need to replace parts – the two main culprits are FEP films, and screens, which will need to be replaced over time. This puts you out of action for a while, and costs money.
Read more: is 3D printing miniatures cheaper (we calculated the exact cost for FDM and resin printing miniatures)
What makes a good 3D printer for miniatures
- Precision: measured in microns, this is key for how detailed even the smallest features of your models will be. The best resin 3D printers for miniatures often reach 35 microns, for great details. FDM printers can’t reach these same resolutions.
- Print area: since MSLA printers cure entire layers of resin at once, larger build areas mean you can print even more models in the same amount of time.
- Stable, metal frame: a heavy frame is less influenced by other variables such as the vibrations that can affect model quality, even slightly. High-quality parts are key to accurate miniatures, so pick up a printer by a reputed brand known for making well-built products.
Best Practices for FDM 3D Printing Miniatures
- Nozzle size: using a small nozzle makes for better precision on printers, and though they print slower, this isn’t a big problem when printing small models that do not take long anyway.
- Slow printing speed settings: if you have the fastest 3D printer around, such as a delta 3D printer, you should slow it down when printing small, precise models. You may want to reduce speed to as low as 20-30mm/s.
- Infill percentage: you may want to change this based on how strong you want your miniatures to be. If you want to save on material costs and don’t mind giving up some part strength, you can reduce infill to 10%, though some hobbyists who want solid models may go for a higher infill percentage.

- Retraction settings: optimize retraction settings to prevent oozing and stringing of filament, which can occur especially often with PLA.
- Post-processing: not directly related to your printer, but you can decide whether to paint your model, sand or polish it to enhance its finish.
Where to find files for miniature 3D prints?
Here are some sites that host free and paid files:
- MyMiniFactory
- Cults3D
- Thingiverse (all free)
- Gambody (specialized in video game/comic book models)
- Pinshape
And here are some articles where we recommend miniature-related prints:
- Dungeons and Dragons 3D print files
- Warhammer 40K 3D prints
- 3D printed figurine files
- 3D printed anime figure files
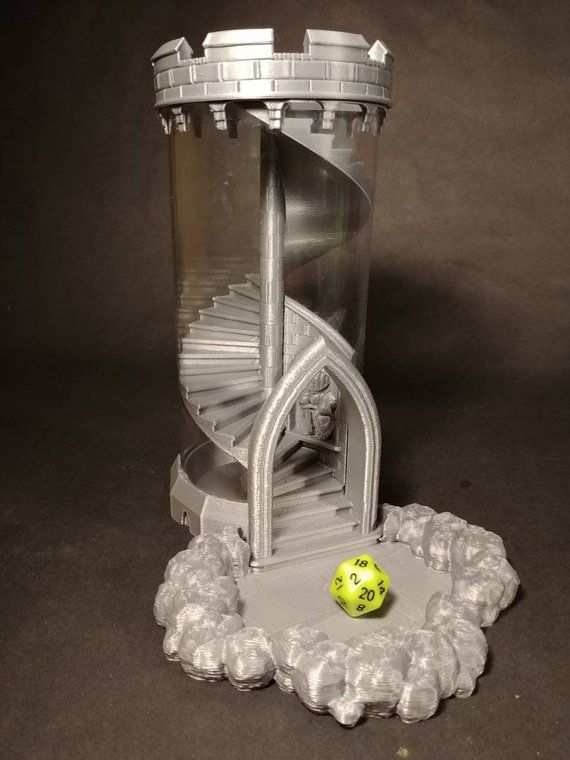
- 3D printed dice towers
- 3D printed dragon files
Post-Processing and Painting Miniature Prints
Really, a miniature isn’t truly finished without some post-processing love and attention. After all, 3D printers can only go so far when it comes to bringing out the lush detail and intricacies of a model.
Support Removal
First, remove any support structures by either removing them by hand or using clippers, or in the case of soluble supports, immersing them in the appropriate liquid, usually water.
Cleaning and Sanding
Next, you’ll want to clean and improve the print surface to remove blemishes, blobs, marks from the supports, and other imperfections.
We recommend ordinary sandpaper or a sand sponge – they are cheap, effective, and come with grit coarseness levels for quick sanding, smoother finish, etc.
Alternatively, you can buy a small nail grinder with different attachments suited to miniature post-processing. You can also use a hobby knife, scalpel, or precision needle files for those hard-to-reach places.
Glue Parts Together (If Multiple Parts) and Fill In Holes
After cleaning up the print, glue or attach parts of the mini using a bonding agent (you can also do this after painting if you prefer), and fill in any drainage holes, seams, gaps, and cracks using a brush and a mix of resin and baby powder.
Be sure to cure the newly-applied resin mixture afterward. You can use non-cure products like the excellent Apoxie Sculpt to fill in gaps.
Priming and Painting
Next stop, we have painting. First, we’ll need to prime the minis to create a strong first layer for successive layers of paint to adhere well.
Both spray and brush paint options are viable – any old primer from your hardware store will do. If you’re looking for a brand name, we recommend Tamiya Surface Primer.
Two light coats are a good option to be on the safe side. Allow plenty of time for the primer to dry properly.
Finally, paint your miniature. Standard miniature etiquette and techniques apply here. We recommend using regular acrylic paints found at any hobby store such as Vallejo Game Color. We recommend investing in different brush sizes to cover the painting of everything from large single-color portions to small intricate details.
From there, take your time painting, and remember, practice makes perfect.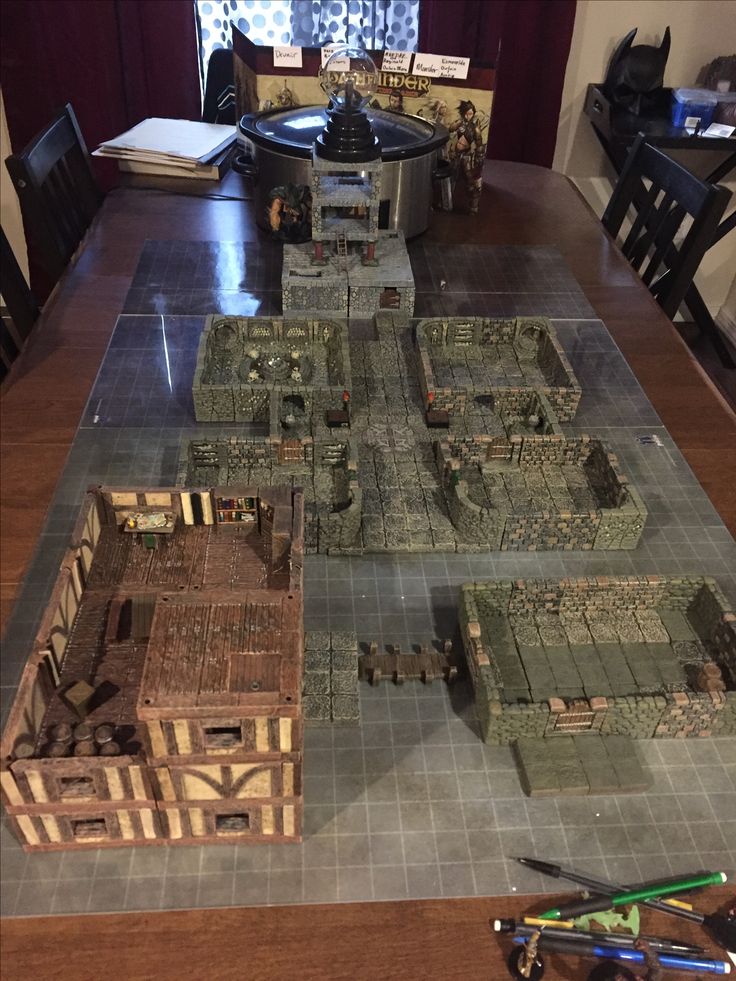 Your first minis might not look perfect, but stick with it, and they start coming out great in no time.
Is it legal to 3D print Warhammer models?
It is legal to 3D print Warhammer figures as long as you do not try to sell them or use them for any other kind of commercial use. Patent laws prevent anyone from selling any object based on someone else’s intellectual property. If you design the model yourself however, if it isn’t identical or a total imitation of another’s copyrighted work, then you aren’t infringing on their copyright or patents.
However, keep abreast to new changes in laws that affect where creators and IP holders stand legally. For example, the 2021 Appropriations Act changed the way holders of IP and perceived infringers interact. This article is also useful for a general understanding of where you stand with 3D printing and intellectual property.
We would like to conclude this article by reminding readers to be careful, as intellectual property (IP) laws prevents the creation, download or 3D printing of trademarked characters.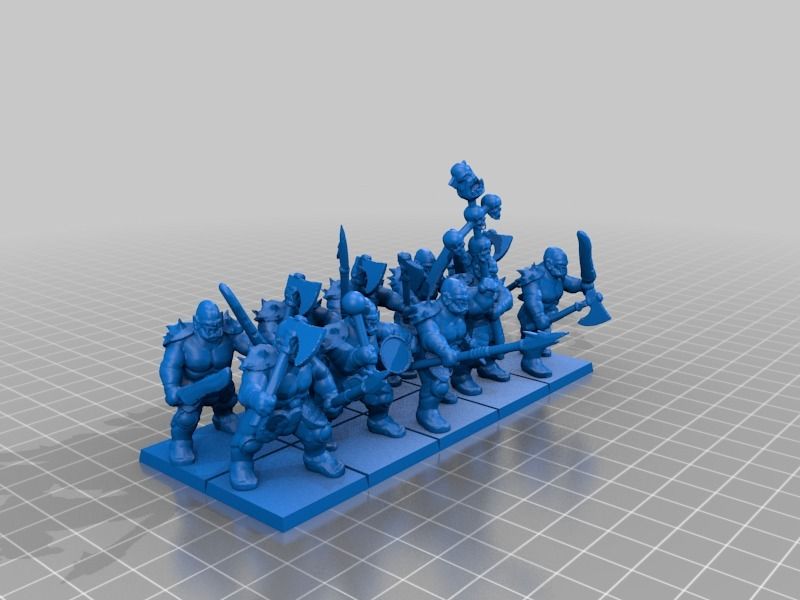 You can get into trouble if you print a trademarked character such as a Pokémon, with some large companies becoming increasingly studious in pursuing people breaking these laws.
Is it worth buying a 3D printer for miniatures?
If you plan on printing large numbers of miniatures, it is definitely worth buying a 3D printer for miniatures. You can print any model you want rather than buying whatever’s available, and for a fraction of the price. You can get started for cheap by spending under $300 on an Anycubic Photon M3 or Elegoo Mars 3.
What is the best material for 3D printing miniatures?
Resins are the best material for 3D printing miniatures, as they have fine details like faces and weapons that filament won’t be able to match. Some of the best affordable resin materials are made by companies like Siraya Tech, Anycubic, and Elegoo, letting you print fantastic details on your miniatures within your budget.
The best 3D printer for miniatures in 2021
Looking for the best 3D printer to spice up your tabletop games? You've come to the right place. We've narrowed down a list of the best 3d printers for miniatures.
If you want the TLDR. Here's our findings:
| Top miniature 3D printers | Our verdict |
| Anycubic Photon Mono S | Budget-friendly 3D printer for miniatures |
| Creality Ender 3 | Best for terrains |
| Phrozen Sonic Mini 4k | Best in details, quality accuracy and speed |
How did we come up with this list?
We've collected a bunch of pain points and things that people like about their miniature 3D printer from these following sources.
/r/PrintedMinis subreddit
3D printing miniature facebook group
Online reviews
And our own experience as a 3D printing company
Without further ado, let's get started.![]()
Top 3D printers for miniatures
1. Anycubic Photo Mono
Best Budget 3D Printer
Anycubic Photon Mono
The Photon Mono is the best LCD 3D printer that we've gotten our hands on. We own 8 of these machines and use it as part of our manufacturing process. It's cheap but the print quality is almost the same as the ones that we get from our Formlabs 3. If you're looking to buy your first 3D printer, we recommend going for a resin 3D printer like this one instead of buying an FDM printer.
$229.00 from Anycubic
Commisions earned
The Anycubic Photon Mono is the best budget-friendly 3D printer for D&D miniatures because it offers the best print quality at a budget price.
So what's so special about this 3D printer better that it blew away the competition?
Pros
- Ease of use
- Beginner-friendly
- High quality
- High resolution 3D prints
- Almost invisible print lines
- Very fast printing time
- One of the cheapest resin 3D printers in the market
Background info
The Anycubic Photon Mono is an LCD 3D printer. LCD 3D printers are a subset of SLA 3D printing and uses resin as it's main material. For those who don't know what SLA 3D printing is, SLA 3D printers use UV laser to selectively harden parts of resin. [1] This makes SLA 3D printers highly accurate with almost no visible layer lines.
What makes LCD 3D printer a little different is that it uses an LCD screen to mask the UV light onto to the resin to the form the shape, layer by layer. This makes LCD 3D printers a lot faster than SLA but a bit less accurate and a bit limited in size. LCD 3D printers also way cheaper compared to SLA 3D printers.
Technical Specs
| Build volume | 130mm(L)*80mm(W)*165mm(H) |
| XY resolution | 51 microns |
| 3D printing technology | LCD-based SLA |
| Connectivity | USB |
Sample 3D prints
We 3d printed these miniatures using our own Anycubic Photon Mono.
- 3d printed wallstreet bets
- On the left, printed on the Anycubic Photon Mono
How much does it cost to 3D print a miniature with the Anycubic Photon Mono?
It depends on the volume of your 3D model. Their resin costs about $40/kg. Assuming, a model volume of 1000 mm³ = 1 gram of resin. We're looking. at $0.04 per 1000 mm³ or simply $0.04/gram.
Our formula looks something like this:
Model volume (in grams) X $0.040 = Total material cost
Note however that this doesn't include any overhead cost. So if you're planning to start your own 3D printing business selling miniatures, you need to account for those as well.
Here's what each model's material cost would look like.
| Hero Forge Miniature | Ogre miniature - Thingiverse | |
| Height | 28mm | 130mm |
| Volume | 50grams | 142. 5grams 5grams |
| Material cost | $2 | $5.7 |
Is it worth it?
Hell yeah! If you want great looking miniatures for your tabletop games then you should get a 3D printer that can produce high resolution prints. The level of detail that you get from this price point is insane.
Our verdict
We own industrial SLA printers, Formlabs 3 and many more, but when it comes to 3D printing miniatures, the Anycubic Photon Mono has been our go to machine. Not only is it the right tool for the job, but it blows away all the other LCD and DLP printers on the market.
We've tested a bunch of LCD and DLP printers but we were never satisfied with them because of the amount of failed 3D prints that we get from them. As seasoned 3D printing professionals, we and we think this is the best 3d printer for miniatures especially if you're a beginner.
2. Creality Ender 3 v2
The Creality Ender 3 is one of the many FDM printers on the market.
What caught our attention is its immense popularity among the tabletop and gaming miniatures community. Every Facebook or Reddit post that we see, everyone seems to mention the Creality Ender 3.
So what makes this 3D printer so popular among the miniatures printing community?
First off, it's cheap. The Ender 3 v2 costs around $200. The material cost is also cheap compared to its resin counterpart.
The Creality Ender 3 has become the entry level 3D printer for many beginners.
We personally don't own one because we've sworn off FDM 3D printers for life. We hate cleaning FDM supports an the print quality doesn't reach our standards. It would take hours of polishing to get a smooth surface with an FDM 3D printer. And when printing larger models, FDM 3D printing has a tendency to warp. We'd rather use our industrial SLA 3D printer for that. (Slight flex).
Technical Specs
| Build volume | 192mm(L)*120mm(W)*245mm(H) |
| XY Resolution | 100 microns |
Pros
- Easy to use
- Cheap
- Large build volume
- Great for 3D printing miniature terrains
Unlike the other 3d printers listed here, the Creality Ender 3 does not use a touch screen interface.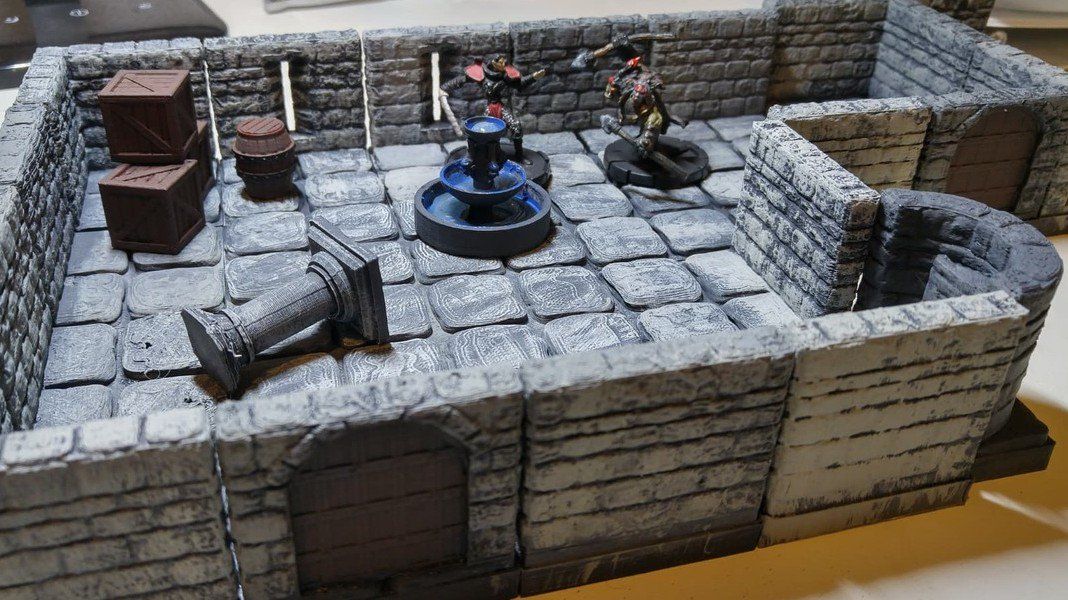 It uses a knob to navigate your 3D printer settings. Some people actually prefer this method over touch screen because its more responsive and less susceptible to glitches.
Best 3d printer for terrains
Where the Creality Ender 3 shines is on 3d printing terrains. Most of the miniature community actually owns both a resin 3D printer and FDM 3D printer. They use their FDM 3D printers to print their terrain models because it's cheaper and it has a larger build volume compared to their resin counterpart. Terrains are less complex in design and don't necessarily need a smooth surface finish so you can get away with 3D printing them in FDM.
Here's an image of a 3D printed terrain using the Creality Ender 3 courtesy of /u/Singuy888
Our verdict
If you're on a tight budget, the Creality Ender 3 might be a good option for you. The Creality Ender 3 v2 is actually more expensive than the Photon Mono S but the materials used on these machines are cheaper compared to resin printing.
For miniature printing, you might be able to get away with it but the quality is relatively bad compared to resin 3D printers that we mentioned here. If you're making a large miniature, then this would be a lot cheaper compared to its resin counter part.
3. Phrozen Sonic Mini 4k
Best overall 3D printer for miniatures
Phrozen Sonic Mini 4k 3D Printer
The Phrozen Sonic Mini 4k produces high resolution miniatures and costs only a $100 more than the Anycubic Mono.
If you're beginner, jumping into a 4k resin printer shouldn't be an issue. And for seasoned veterans, a 4k 3D printer should be in one of your bucket lists.
$349.99 from Phrozen3D
Commisions earned
The Phrozen Sonic Mini 4k is what you should buy if you want fast printing, highly detailed prints all at a friendly price. The Sonic Mini has an XY resolution of a whopping 35 microns.
It's getting a lot of love from the tabletop miniature community because of it's price and the high resolution that you can get from it.
Here's a video of how it compares to super expensive industrial 3D printers out there.
Sample 3D prints
- courtesy of Phrozen
- courtesy of Phrozen3D
Our thoughts on professional SLA and DLP 3D printers for miniatures
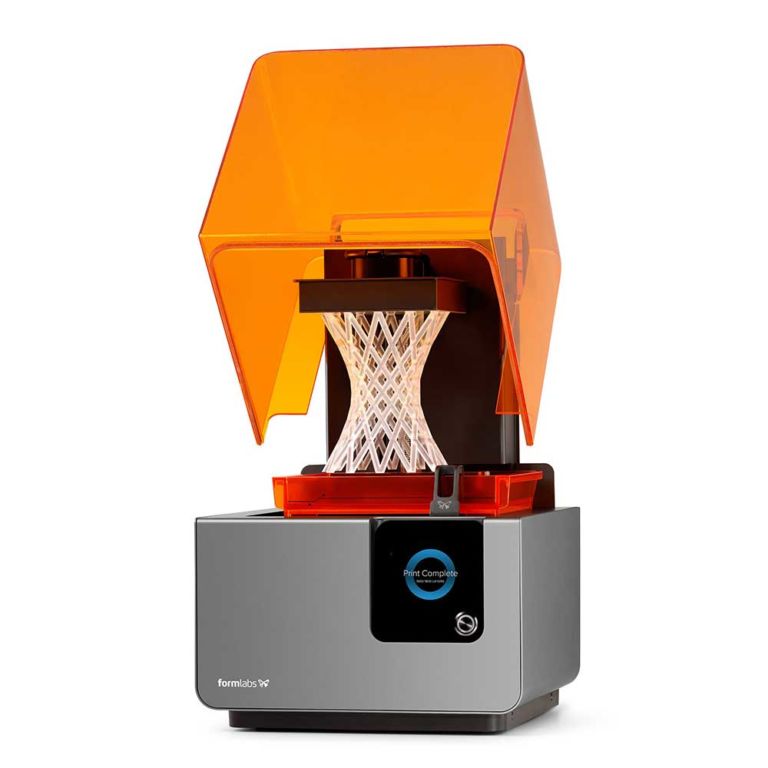
Formlabs Form 3
Before we fell in love with the Anycubic Photon, Formlabs 3 was our bread and butter when it comes to 3D printing miniatures. Unlike the Anycubic, Formlabs is a full on SLA 3D printer. This makes it more accurate, but at the same time, slower to 3D print compared to LCD 3D printers.
Technical Specs
| Build volume | 14.5 × 14.5 × 18.5 cm (5.7 × 5.7 × 7.3 in) |
| XY resolution | 25 microns |
| 3D printing technology | SLA |
| Connectivity | USB/WiFi |
Sample 3D prints
Pros
- High accuracy
- Versatile, not limited to miniatures
Is the Form 3 worth it for printing miniatures?
Unless you have the money to spend, we don't think it's worth it. Both the Form 3 and Anycbuic 3D printers have almost the same build volume and the quality doesn't seem to be that far off, at least, when it comes to miniatures. And you can probably purchase 10 Anycubic Photon Mono with the price of one Formlabs 3.
If you're planning to do more than miniature 3D printing, then maybe it is. We use our Formlabs 3 for our 3D printing service and it has been reliable for quite some time now. (We started with the Formlabs 2). But over time, we've seen less value in it. It can't 3D print large objects and it's too slow to 3D print miniatures or other regular sized 3D prints. We've come to a point where we use the Photon Mono to do most of the jobs that the Form 3 used to do.
Asiga Pro 4k
The Asiga Pro 4k cost at least $25,000. It wasn't intended for miniatures but we still gave it a try.
Here's a really complex tabletop miniature that we 3D printed on the Asiga Pro 4k.
We don't think the images do justice on how insane the quality is.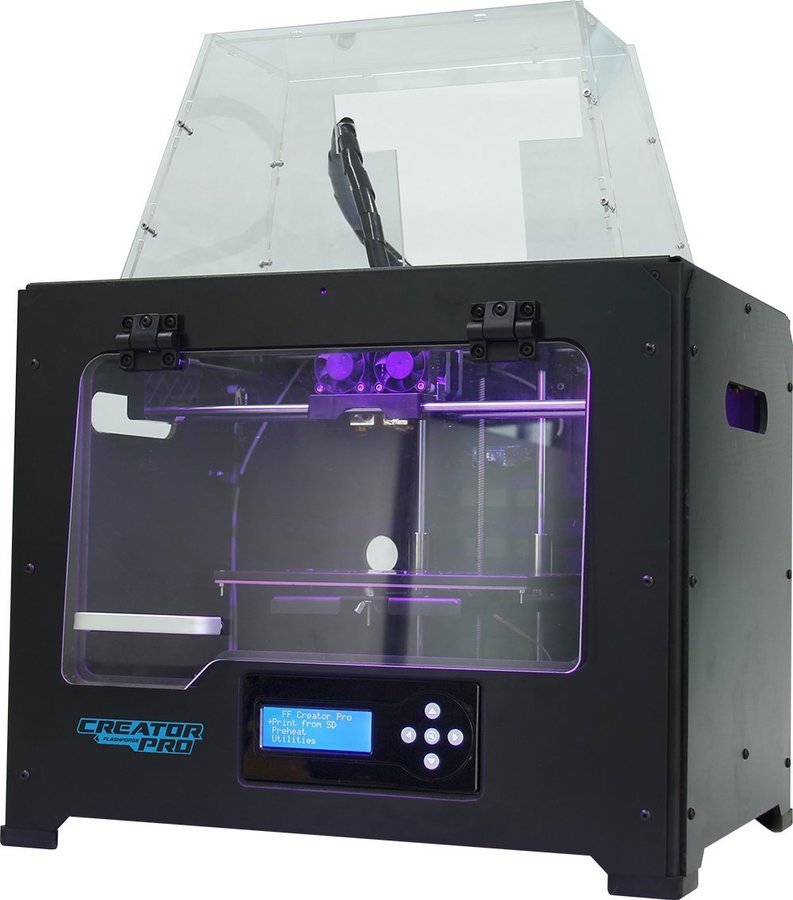 It also only took 4 hours to print this masterpiece.
Should you buy an Asiga Pro 4k for miniatures?
To be honest, it's an overkill. You're probably better off with the Phrozen Sonic Mini 4k.
We bought the Asiga Pro 4k because we need it for our industrial 3D printing services. It's fast and reliable, as we don't have the time for failed prints so for us this is worth it.
If you run a 3d printing business or if you have the money to spend, it might be a good choice for you. But you should probably get the Asiga Max X as that offers an even higher resolution at 27 microns, cheaper at $10k, but with a smaller bed size.
Our final thoughts
So what is the best 3d printer for miniatures?
The Anycubic Photon Mono is hands down the best affordable 3D printer for tabletop miniatures. It's cheap, reliable, easy to use, and it produces high quality 3D prints. For 3D printing terrain, our top choice is the Creality Ender 3. And if you want high resolution 3D prints that blows even the Anycubic out of the water, then you should go with the Phrozen Sonic Mini 4k.
If you're a beginner and thinking of buying a 3D printer that fits your budget, you can't go wrong with this 3D printer. Heck, it's even cheaper than an FDM printer but with 10x the print quality.
90,000 manufacturing miniatures 28mm, dioram, game locations using 3D printer09.03.2022
Content
- How to choose a 3D printer for miniatures
- Advantage of 3D printing for miniatures 9000 9000 FDM 9000 LCD/ DLP
- FDM
- LCD
Miniature figurines with amazing detail attract the eye. A little grotesqueness and slightly wrong proportions (otherwise it would be inconvenient to play or transport such a “little one”) are more than compensated by detailed elaboration and an abundance of small, at first glance, insignificant details. These are no longer just small table soldiers, but heroes with their own unique history.
Warhammer 40k 9 miniature soldier0044
Miniatures come in different sizes: from 6mm and more. The most popular today is the 28mm format. The creation of such figurines is really almost jewelry work.
A 3D printer will help not only in the production of miniatures, but also in related areas, such as the creation of figurines, details of game locations, or, for example, elements of dioramas. To understand the advantages of 3D printing over classical manufacturing methods, it is worth remembering how such models are usually made at home.
Advantage of 3D printing for miniatures
Not everyone was ready to shell out a substantial amount for the purchase of a set of table soldiers, and sometimes the necessary heroes simply were not on sale. Then baked and self-hardening plastics for modeling were used.
First you need to make a wire frame, so the finished figure will turn out to be more durable, and it will be much easier to keep all the proportions. The wire frame can be attached to the stand, which will make the miniature statue more stable, and it can be easily fixed in any position without fear of smearing small parts with your fingers.
Wire frame for miniature
Gradually, layer by layer, the volume of plastic increases on the frame. Each layer must be baked or dried well, depending on which plastic is used - self-hardening or baked.
Gradually, we begin to add small details and work out the details. In fact, this is a very painstaking process that requires perseverance and some sculpting abilities. For a convenient study of small details, you may need special stacks for modeling, but they can be successfully replaced with improvised tools.
Sculpting tool set
The result is such a miniature statue.
Miniature 28mm baked plastic
By the same principle, large table figures, or some elements of dioramas, can be made.
Sometimes a sculptor is more accustomed to working with plasticine. Then, after sculpting, the stage of preparation and casting of the figurine into a silicone mold is added. This method is suitable for small-scale production of a small desktop army.
But it is necessary to properly prepare the figurine for casting. The finished "warrior", most likely, will have to be divided into several parts, so that it would be more convenient for the caster to remove the molds and make castings. During the cutting process, it is worth adding a few locks so that the finished castings can be easily assembled, like pieces of a puzzle.
Molded figurine against silicone mold
Some craftsmen have learned to cast metal copies. Such soldiers are usually made of low-melting metals (for example, lead) and cast in plaster molds. Sometimes a special silicone is used, but it is a little more difficult to achieve good shedding of a small product in a silicone mold.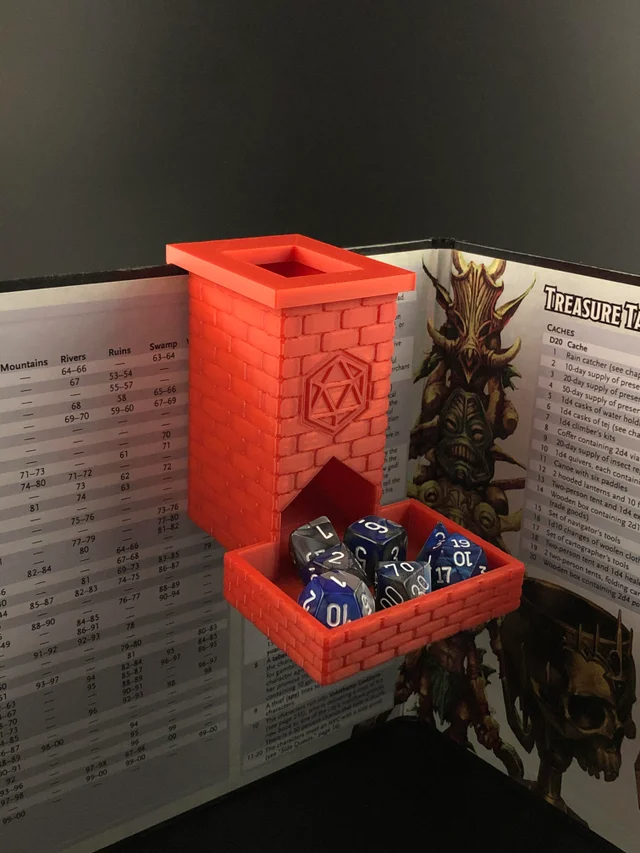
Cast metal soldier
In addition to making figurines from scratch, some craftsmen remake ready-made miniatures. This is called conversion.
Conversion in miniatures is a refinement, stylization or alteration of a finished figure. Unfortunately, not every hobbyist has good sculpting skills, and this alteration helps to achieve good results regardless of artistic skills. The main thing is to act very carefully.
Conversion helps enthusiasts achieve amazing figurine detail, add some detail, change the pose, or create a new character that is not yet on sale.
Lord of the Astral Claws turned to Chaos
In addition to making the figures themselves, modelers create colorful locations to immerse themselves in the world of their favorite game. This is true not only for 28mm miniatures, but for example for DND games. Such voluminous locations allow you to immerse yourself in the world of your favorite game much better and make the game more exciting.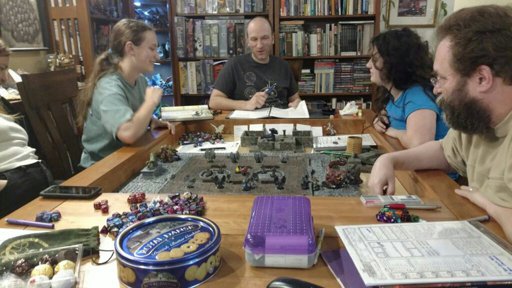
Game location for board game Warhammer40k
The creation of such locations is painstaking work, and both improvised and special equipment are used as material.
Role play location
A 3D printer allows you to produce miniature figures and game locations much faster. On the Internet you can find many paid and free models of 28mm figures from different universes or various elements of locations - houses, fences, mechanisms, etc. Adapting or slightly changing the finished 3D model for yourself is much easier than cutting and gluing a finished figure. And creative people with modeling skills are unlikely to have difficulties with the transition to “digital clay”.
Warhammer40k universe 3D miniature model
And of course, dioramas are worth noting. This is a separate art form with a scene or location frozen in time. Dioramas come in different sizes, but each of them impresses with its detail and careful study.
Diorama based on the game STALKER
Each diorama is unique, so the craftsmen use improvised materials to make it. Everything is limited only by the imagination and ingenuity of the artist.
Diorama “Desert Hero”
The main advantage of 3D printing is high detail and repeatability. If you need to make a small batch of miniatures, it will be much easier to print them than to cast, for example. Casting small items is a painstaking process that requires some skill and equipment. It is very difficult to achieve good pourability of small products the first time.
From model to finished figure
And for the manufacture of piece products, such as a diorama element, a 3D printer can replace many materials and tools for modeling. In addition, by using and combining different materials, it is possible to create models that are difficult or almost impossible to create manually.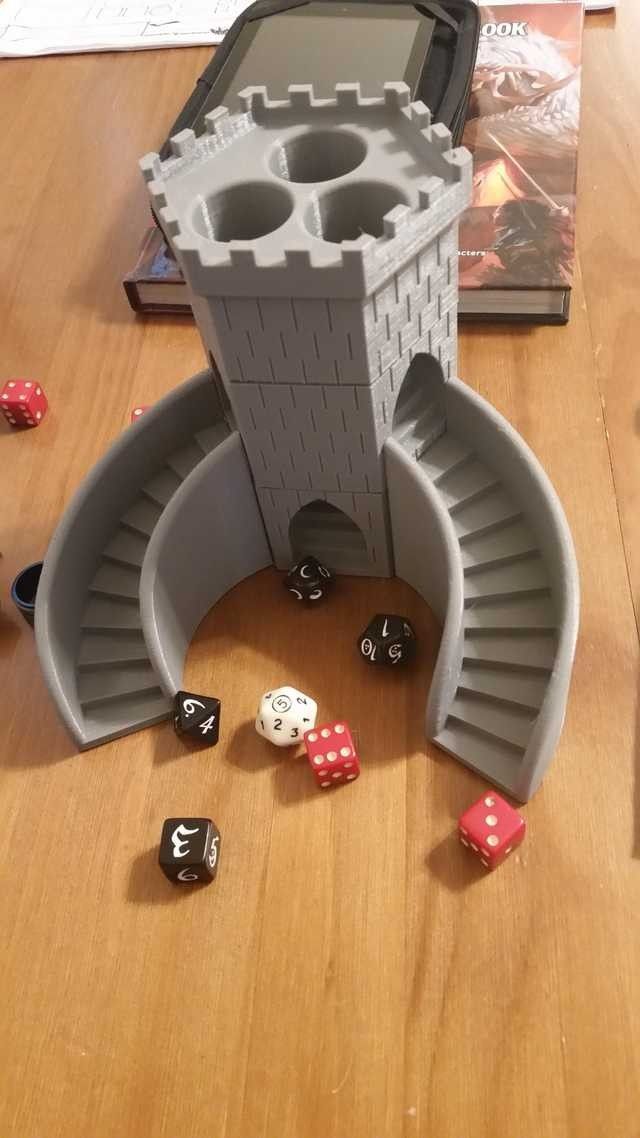 For example, using a special polymer, you can print optically transparent products that can imitate glass.
Which technology to choose
To begin with, it is important to determine the requirements for the printer - will it be used only for the manufacture of 28mm personal army or should it be a universal printing machine? It is important to understand what size the finished model will be, how detailed it should be, and how much time can be spent on post-processing.
Depending on this, it is worth deciding on the technology by which the 3D printer will work. You can choose one of two technologies - FDM or photopolymer printing (there are several technologies, but DLP and LCD printers are currently popular).
FDM
FDM 3D printers use a plastic filament as a material. In a heated extruder, the filament is melted and extruded through a thin nozzle, so layer by layer, a three-dimensional model is grown.
Working principle of FDM 3D printer
Layer thickness and nozzle diameter can be changed in some printer models. The minimum layer is usually 0.1 mm. In some models of 3D printers, a layer of 0.05 is available, but for printing with such a layer, it is important to choose the right many settings and the print speed will be quite slow.
Pros:
-
Large print area
-
Many different materials are available for every “taste and budget”
-
Inexpensive Consumables
Cons:
Of course, FDM printers are hardly suitable for making miniature figures, but they can be successfully used to print large souvenir figures, create game locations and some parts of dioramas.
LCD/DLP
The principles of operation of LCD and DLP printers are very similar. The material used is polymers that harden under the action of UV light. The only difference is that an LCD printer uses an LED matrix in conjunction with an LCD screen as a source of UV radiation, while a DLP uses a projector.
Working principle of photopolymer 3D printer
Pros:
-
The ideal surface of the finished figure
-
Many different materials available
-
High print accuracy even for the smallest items
Cons:
Photopolymer 3D printers are able to create miniature products that cannot be made using FDM technology. This technology will be an ideal choice for creating miniatures, small poster models, etc.
Print examples
Robot printed on Asiga Pro 4k
Figurine made with Phrozen Sonic Mini 4k
28mm 3D printed miniatures
3D Printed Halloween Miniature
3D printed play models
FDM Cube Thrower
Figure making process from 3D model to painting
Best Printer Ranking
FDM
Creality3D Ender 3 (Build Kit)
Features:
Print technology: FDM/FFF
Working area size: 220x220x250 mm
Number of extruders: 1
Max. extruder temperature: max. 255℃
Closed Camera: No
Heated table: Yes
Plastic type: ABS, PLA, PETG, Flex, Decorative plastics, others
A popular and unpretentious 3D printer that many makers liked. Creality3D Ender 3 is sold as a kit (assembly kit), but thanks to the detailed instructions, there should be no problems with assembly.
Wanhao Duplicator 6 Plus
Features:
Print technology: FDM/FFF
Working area size: 200*200*180mm
Number of extruders: 1
Max. extruder temperature: max. 260°C
Closed Camera: Optional
Heated table: Yes
Plastic type: ABS, PLA, PETG, Flex, Decorative plastics, others
Wanhao Duplicator 6 Plus is an updated version of the Duplicator 6. The new modification adds automatic calibration, printing resume after a power outage, and others. You can immediately purchase a printer with a closed case, this will allow you to easily print with composites. Wanhao Duplicator 6 Plus will become a trouble-free workhorse, and thanks to the “omnivorous” extruder, even a beginner will be able to print exotic materials without any problems, such as soft flexes or rubbers.
FlashForge Creator Pro 2
Features:
Print technology: FDM/FFF
Working area size: 200x148x150 mm
Number of extruders: 2
Max. extruder temperature: max. 240°C
Closed Camera: Yes
Heated table: Yes
Plastic type: ABS, PLA, PETG, Flex, Decorative plastics, others
FlashForge Creator Pro 2 is an almost professional dual extruder 3D printer. Thanks to the closed body, Creator Pro 2 has no problem even with composite materials, and two extruders allow the use of soluble support for complex models. Moreover, FlashForge extruders are independent, this allows you to print 2 mirror or identical models at the same time. This allows you to speed up the production of the same type of models. FlashForge Creator Pro 2 will not only be a good home printer, but also a great helper for a workshop or small production.
LCD
Anycubic Photon Mono 4K
Features:
LCD display resolution: 3840x2400 (4K)
UV wavelength: 405 nm
Working area size: 132x80x165 mm
Layer thickness: 0.01-0.15mm
Inexpensive, but fairly modern 3D printer with a 4K monochrome display. Anycubic Photon Mono 4K will be a good tool for printing miniature models.
Phrozen Sonic Mini 4K
Features:
LCD resolution: 6.1" 4K Mono LCD
XY positioning accuracy: 35 microns
UV wavelength: 405 nm
Working area size: 134x75x130 mm
Layer thickness: 0.01-0.30mm
The Phrozen Sonic Mini 4K is a compact high resolution 3D printer. It allows you to get accurate models even with an abundance of small details. Sonic Mini 4K is a good choice for those who need to print quickly and accurately.
Phrozen Sonic Mighty 4K
Features:
LCD resolution: 9.3" 4K Mono LCD
XY positioning accuracy: 52 microns
UV wavelength: 405 nm
Working area size: 200x125x220 mm
Layer thickness: 0.01-0.3mm
With a larger work area, the Phrozen Sonic Mighty 4K allows you to quickly produce large models or small batches of small items. Such a 3D printer will be a good help for a small workshop or a hobby circle.
Phrozen Sonic Mini 8K
Features:
LCD resolution: 7.1" 8K Mono LCD
XY Positioning Accuracy: 22 µm
UV wavelength: 405 nm
Working area size: 165x72x180 mm
Layer thickness: 0.01-0.3mm
Phrozen Sonic Mini 8K is one of the representatives of 8K photopolymer printers, which can still be counted on the fingers of one hand. The high resolution LCD-matrix allows you to print figures with amazing surface quality and amazing detail.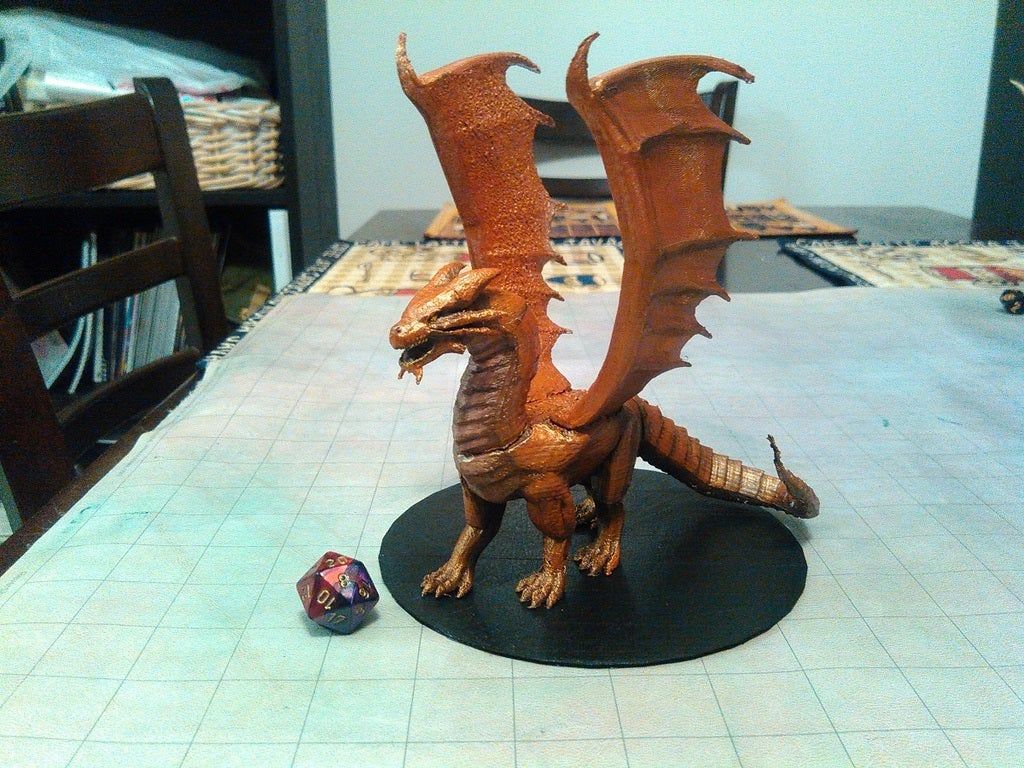 Such a printer is suitable for demanding printers who care about accuracy and the perfect surface of the finished model.
Totals
3D printers are gradually showing themselves to be great helpers in many areas, not only in medicine and industry, but also in home hobbies. Thanks to 3D printing, it is possible to produce small figurines or elements of dioramas much faster, paying more attention to the elaboration of details, rather than painstaking modeling or the search for exotic materials.
And digitalization makes it much easier to share your work and finished models in the community or adjust them to your needs, for example, change the scale or adjust the pose.
Free Shipping
Add to compare
Item added to compare Go
| Manufacturer | Phrozen
Free Shipping
Add to compare
Product added to compare Go
| Manufacturer | Anycubic |
Free Shipping
Add to compare
Product added to compare Go
| Manufacturer | Phrozen
Free Shipping
Add to compare
Product added to compare Go
| Manufacturer | Phrozen
Free Shipping
Add to compare
Product added to compare Go
| Manufacturer | FlashForge |
Add to compare
Product added to compare Go
| Manufacturer | Creality |
Free Shipping
Add to compare
Product added to compare Go
| Manufacturer | Wanhao |
#Application
Share
all materials
Best Dual Extruder 3D Printers & 2022 Updates
Dual extruder 3D printers take the mono-color slumber away. 3D printing using multiple colors, multiple materials to reinforce specific areas, or using dissolvable filaments such as PVA or HIPS to achieve a smooth finish.
We've been lucky enough to try a few dual extruder 3D printers first hand and have come up with our recommendations for the best dual extruder printers available in 2022. We also explain the differences between different types of dual extruders (IDEX, mixed color 3D printing, dual extruder upgrade) and whether you should upgrade your printer.
Contents
- What are the advantages of a dual extruder 3D printer?
- What is the best dual extruder 3D printer?
- Budget Dual Extruder 3D Printers (under $1,000)
- 1. Geeetech A20M / A10M - Best Budget Dual Extruder 3D Printers
- 2. BIBO 3D Printer (Touch Laser if purchased with laser engraver) 3. Flashforge Creator Pro 2 - Affordable IDEX
- 3D Printer 4. BCN3D Sigma D25 - IDEX
- 3D Printer 5. Ultimaker S3 - Highly Accurate Dual Extruder 3D Printer
- 6.
 Raise3D Pro2 / Pro2 Plus
 - 7. Ultimaker S5
- Best Dual Extruder Upgrades
- 8. Mosaic Palette 2S / 2S Pro - Best Upgrades for Dual Extrusion Filament Splicer
- Prusa Material Upgrade 9. Prusa2 Material Upgrade 9. Prusa2 Material Upgrade 9. Upgrade Kit
- Dual Extruder 3D Printer Q&A
What are the advantages of a dual extruder 3D printer?
The main advantages of the dual extruder 3D printer include:
Better for supports: one extruder prints your material of choice, such as ABS or PLA, while a second extruder prints water-soluble supports, such as PVA filament. These supports dissolve easily in water and produce smoother prints without having to manually remove them.
Multiple colors: Dual filament 3D printers can print multiple colors of the same filament type such as PLA for stunning multi-color details.
Multiple parts at the same time (IDEX): IDEX 3D printers such as the BCN3D Sigma D25 have two extruders that work completely separately and can print different parts at the same time.
What is the best dual extruder 3D printer?
That's why we've ranked the best dual extruder 3D printers on the market. We rated these printers for value for money, reliability, build volume, ease of use, and various other features.
Budget Dual Extruder 3D Printers (under $1,000)
These amazing 3D printers break the rules of the definition of "dual extruder 3D printing". To be clear, they can be loaded with two separate filaments, such as red and yellow PLA, but they will come out of the same nozzle, mixing the two colors during the printing process. Some call it dual nozzle 3D printing.
The results are amazing. Connect red, orange and yellow threads and watch your printed vase look like an exotic cocktail. The printers offer four dual 3D printing modes: single color, dual color, gradient and mixed. This provides a huge selection of print designs for such an inexpensive dual extruder 3D printer.
In terms of specifications, the A20M has a good working volume of 255 x 255 x 255 mm, while the A10M is only slightly smaller. The A20M also boasts improved stability as it is better anchored. Overall, this is an accurate (layer resolution down to 0.1 mm), interesting and inexpensive two-color 3D printer that combines colors and filaments through a single nozzle.
single nozzle geeetech a20m filament mixer.
2. BIBO 3D printer (touch laser if purchased with laser engraver)
- Dual extruder 3D printer cost: $599
- Assembly volume: 214 x 180 x 160
How do we get started with the BIBO eccentric printer? Well, the most important thing is that it also performs another function. It can be used as a laser engraver! The engraver can permanently carve your favorite designs on wood, as well as cut paper or felt materials - and print in 3D!
You can purchase BIBO as a 3D printer kit or pre-assembled, with or without a laser engraver. And if he performs another function, this does not mean that he cannot succeed in both. In fact, this is a very efficient multi-extruder 3D printer with a minimum layer height of 0.05 mm and stable printing in a closed working chamber.
This is a great printer, crazy and ambitious. Even the product images on Amazon showcase the machine's character and personality. We love it.
3. Flashforge Creator Pro 2 - affordable 3D printer IDEX
- Creator Pro 2 price: $649
- Assembly volume: 200 x 148 x 150 mm
The popular and loved Flashforge Creator Pro has started to show its age since it was released in 2016, so Flashforge followed it up with the vastly improved Creator Pro 2. assembly volume on the x-axis. It retained a minimum resolution of 100 microns and a Teflon tube extruder for 3D printing of PLA, ABS and nylon in a closed working chamber.
However, the main change that makes this printer so profitable is undoubtedly the IDEX upgrade. In the IDEX 3D printer, the nozzles work independently, unlike the dependent, attached nozzles on the original Creator Pro, with different modes such as Mirror Mode for 3D printing multiple identical models at the same time - a big time saver, trust me.
Other quality-of-life improvements include an improved touch screen interface, as well as important nozzle updates that prevent unused nozzles from oozing out and messing up the print bed or even causing errors. You won't find a more affordable IDEX printer.
4. BCN3D Sigma D25 — IDEX 3D printer
- Manufacturer: Spain
- Price: $3,995
- Assembly volume: 210 x 297 x 210 mm
Spanish 3D printer manufacturer BCN3D has made a name for itself with reliable dual extruder 3D printers. All of their printers, including the Sigma and Epsilon series, use BCN3D's IDEX (Independent Dual Extruder System) 3D printing technology, a unique and key advantage.
IDEX 3D printing allows each extruder to move completely independently, not limited to working on the same model at the same time as in other 3D printers.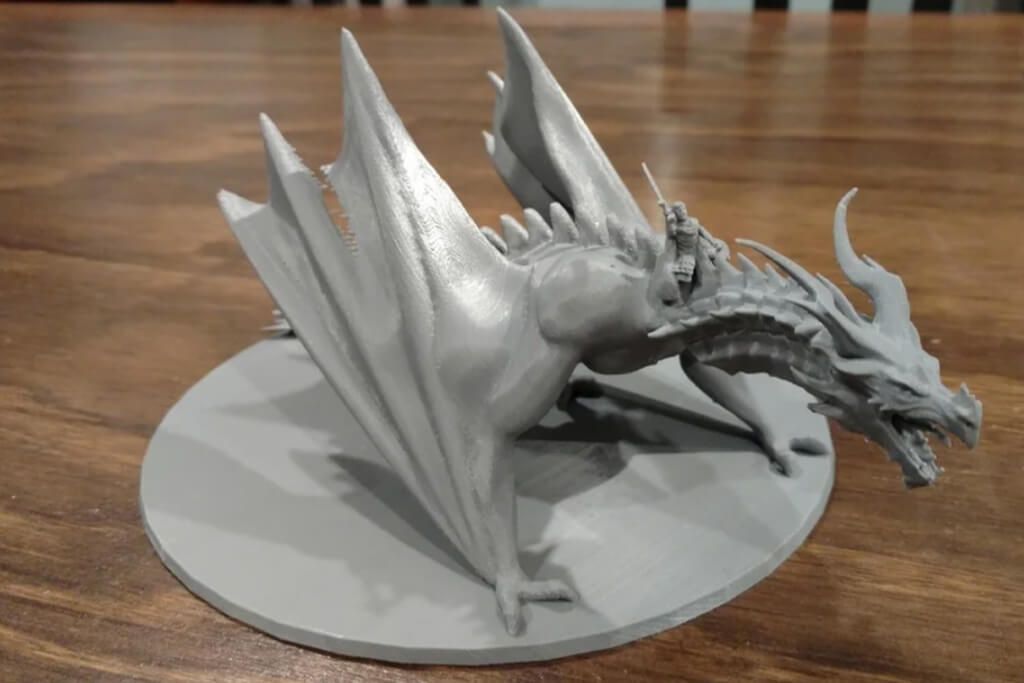 Two different parts can be created at the same time, cutting the time required to create several small parts in half. The Sigma D25 also features high quality E3D hot ends for quality printing on a variety of materials, including stiffer filaments, and a filament low sensor informs you when the filament has run out.
For those who need a 3D printer for rapid prototyping, being able to print multiple parts for testing at the same time is a huge advantage. The BCN3D Sigma D25 uses 2.85mm filaments instead of the standard 1.75mm so be aware of this, but is compatible with any 2.85mm filament. You can use a variety of 3D printer nozzle sizes, from 0.3mm to 1.0mm, and a clear and easy-to-navigate touch screen interface.
Interestingly, Sigma D25 is also an open source 3D printer: printer firmware, workflow, software and other files are available on BCN3D GitHub. It works seamlessly with the Cura 3D slicer and is easy to set up and use right from the start. Overall this is a great, reliable and efficient dual extruder 3D printer. With a resolution of 50 microns, this is a high quality, high resolution 3D printer for accurate rapid prototyping.
5. Ultimaker S3 - very precise dual extruder 3D printer
- Manufacturer company Holland
- Ultimaker S3 price: $3,850
- Assembly volume: 230 x 190 x 200 mm
Ultimaker is another behemoth of desktop 3D printing, producing award-winning deposition modeling printers. With a dual extruder and incredible precision down to 20 microns, the Ultimaker S3 is a fantastic option for small businesses, manufacturers and prosumers.
For precision multi-material 3D printing, nothing beats the Ultimaker S3. It is widely used to create accurate architectural models as building design prototypes, to create accurate industrial and engineering prototypes, and in many other industries. Upon release, it won dozens of awards and is still one of the best dual extruder 3D printers.
With a print volume of 230 x 190 x 200 mm, the Ultimaker S3 can handle most printing needs. It also has a built-in camera that allows you to monitor the printing process remotely.
Connected via WiFi, Ethernet or USB stick, the Ultimaker S3 is designed to be easy to use. While the Ultimaker 3 doesn't come cheap at $3,850, it's accurate, fast, reliable, and easy to use. This makes it overall one of the best dual extruder 3D printers on the market today.
6. Raise3D Pro2 / Pro2 Plus
- Price: $3,999
- Assembly volume: 305 x 305 x 300 mm
Also featured in our overall ranking of the best 3D printers, the Raise3D Pro2 series impresses with its reliability, size and range of printable materials. In addition to standard PLA, ABS, and PETG printing, the Pro2 and Pro2 Plus 3D print with nylon, polycarbonate, carbon fiber, ASA, and metal-filled filaments on either of the two extruders.
Its big brother, the Raise3D Pro2 Plus, costs $5,999
The Raise3D Pro2 also boasts a fantastic build volume of 305 x 305 x 300mm, enough for everyday and industrial printing. The printer is also very accurate, with a minimum layer height of 0.01mm, and is equipped with a 7-inch touch screen for easy printer control. The Raise3D Pro2 costs just under $4,000 and overall is a fantastic dual-extruder printer for the price.
7. Ultimaker S5
- Price: $5,995 - Available at Dynamism Store
- Assembly volume: 330 x 240 x 300 mm
Ultimaker is highly regarded, and for good reason - the company can't go wrong. After the Ultimaker 3, the Ultimaker S5 is an updated, improved and slightly more expensive dual extruder 3D printer that will compete with the Makerbot Method.
A 330 x 250 x 300mm large-format 3D printer built for more scalable production, the Ultimaker S5 already has satisfied customers at Volkswagen, Decathlon and many more. It features a very advanced print leveling system, an improved touch screen, and can be connected to a phone via the Ultimaker app, which notifies you when a print is complete. The Ultimaker S5 is undoubtedly a great dual extruder 3D printer.
Best Dual Extruder Upgrades
8. Mosaic Palette 2S / 2S Pro - Best Upgrades for Dual Extrusion Filament Splicer
- Palette 2S Price: $599
- Palette 2S Pro Price: $799
If you want to print multiple colors without a dual extruder, consider Palette as well. Instead of 3D printing with two multi-colored filaments from separate extruders, the Palette 2S and 2S Pro fuse up to four multi-colored filaments - or different materials - together during printing to create multi-color or multi-material parts.
They work by running your model through specially designed software - CANVAS for Palette - to assign different colors to different areas of your model before printing. When a particular area needs to be printed, the Palette software splices the colored filaments to print that particular area in the material or color you choose.
This makes Palette ideal for creating architectural models for construction projects, colorful desktop models of your favorite designs or D&D models, and multicolor prototyping businesses. The standard Palette 2S model includes all of these features, while the Palette 2S Pro can also splice up to 20% faster and comes with an extended 2-year warranty and replacement parts.
Palette is compatible with hundreds of 3D printers, including almost all of the most popular options. For more information, you can check your printer's compatibility here, and as for choosing between the Palette 2S and 2S Pro: The 2S Pro cuts filament 20% faster and comes with a longer warranty - so if that's important to you, spend the extra money on 2S Pro.
9. Prusa Multi Material Upgrade 2S - Prusa Upgrade Kit
- Price: $299
While you can upgrade the palette for most 3D printers, Prusa printer owners can purchase a similar Multi Material Upgrade kit that allows you to print up to 5 different materials at the same time. Prusa printers are some of the best 3D printers under $1,000 and this upgrade turns your Prusa into a multi-color or multi-material 3D printer.
MMU2S is an improvement over the previous version of the Multi Material Upgrade Kit 2.0, key changes include a material feed sensor, buffer and a much improved overall calibration process.
The Filament Sensor goes further, checking not only for the presence of filament, but also to see if it has reached the Bondtech gears for printing. This provides much more reliable extrusion and makes filament calibration and loading easier.
The filament buffer also saves you the hassle because each of your filaments (especially if you're using all 5!) won't get tangled or tangled. Organizing and separating each filament also saves space on your desk or 3D printer table.
Q&A for Dual Extruder 3D Printers
What is a dual extruder 3D printer?
Dual extruder 3D printers have two print heads or nozzles instead of one print head like standard FDM 3D printers. Dual printing frees you from the limitations of using only one type of 3D printer filament and allows you to create multicolored parts with ease.
Dual-head 3D printing improves printing with soluble supports such as HIPS and PVA and also allows multi-color parts to be printed.
Most budget dual extruder 3D printers are dual nozzle printers, meaning they have two nozzles but extrude from a single head, but we also include more advanced printers. These advanced options include IDEX 3D printers with two printheads that move completely independently for efficient and versatile printing.
What are the main types of dual extruder 3D printers?
The main types are:
1. Dependent Dual Extruder 3D Printers - Most low-cost multi-extruder 3D printers are dependent, that is, two nozzles that extrude separate filaments are attached to one print head. They follow the same path, filling areas (such as a support or main part) in turn.
2. Dual Extruder Independent 3D Printers (IDEX 3D Printers) - IDEX extruders use two printheads independently of each other, doubling productivity when printing multiple parts at the same time.
3. Dual Extruder Printer Upgrades - These upgrade kits, such as the Palette 2S series and Prusa Multi Material Upgrade 2.0, transform a single extruder 3D printer into a printer that can print up to 5 colors at once using splicing systems and dedicated software and plans for filling 3D models.
4. Mixed color 3D printers are some of the cheapest dual extruder 3D printers, and maybe not even dual extruders. They use one printhead and one nozzle, but two filaments to mix the colors while melting. You can print models in half color, or mix colors like red and blue to create a purple hue.
Can the 3D printer be upgraded with a dual extruder?
Yes, you can. Dual extruder upgrades such as Palette 2S (compatible with most popular 3D printers) and Prusa Multi Material Upgrade 2.0 (for Prusa 3D printers) will turn your standard FDM printer into a multi-color 3D printer.
However, manually modifying a 3D printer and adding a second extruder is more difficult.