3D printed quest 2 head strap
▷ oculus quest head strap 3d models 【 STLFinder 】
Oculus Quest Head Strap
thingiverse
Simple easy to print head strap for the Oculus Quest. The pattern comes from the infill + no top bottom layers. ...Print with TPU or other flexible filament.
Oculus Quest Head Strap
thingiverse
A Quick Rework of thatdude902's work. ... Now with Oculus logo. -Added the V2 with the centre strap hole.
Oculus Quest 2 Head strap Brace - Upgrade
thingiverse
So the Quest 2's stock head strap has some flaws. This Brace helps resolve those issues.
The Quest 2's elastic straps loosens during use due to lubrication issues. This brace keeps the section of the strap off your head avoiding the sweat that can...
Oculus Quest Front Head Strap Attachment (Stock & DAS)
thingiverse
This will take the pressure from the weight of the Quest off of your cheeks without needing to use a counter weight attached to the rear of the Quest strap. This is similar to how the original Vive attached their strap before the weight reduction of...
Replacement stronger mounts for Oculus Quest Halo head strap
thingiverse
These are stronger replacement brackets for the Halo headstrap for the Oculus Quest. ...
Just use 2 M3 screws and nuts to connect the 2 parts together.
...
Just use 2 M3 screws and nuts to connect the 2 parts together.
Oculus Quest Front Head Strap Attachment All In One
thingiverse
... the rod into a capsule-like shape to give it more grip / durability. Printed this without support, no inflill (more lightwight), and a wall line count of 3. I used Carbonfil PLA to give it a nice grip on the Quest, but anything stiff should work.
Oculus_Quest_Front_Head_Strap_Mount Stronger (remix) and many usable parts
thingiverse
Build a stronger connections and
many usable parts (from other users)
thank you:
https://www. thingiverse.com/thing:4087197
https://www.thingiverse.com/thing:4082885
https://www.thingiverse.com/thing:4070533
...
thingiverse.com/thing:4087197
https://www.thingiverse.com/thing:4082885
https://www.thingiverse.com/thing:4070533
...
DAS Oculus Quest 2 Front Stock Head Strap Buckle Replacement
thingiverse
... since it was too tight of a fit for my oculus. Lastly, the gap for the DAS buckle was made 1mm wider and the location of the strap attachment was angled up and extended back 1cm to make it a little easier to attach the strap without extensions. ...
Head strap upgrade for Oculus Quest 2
thingiverse
... This print allows me to have a very good fit with no gaps and keeps the headset well secured.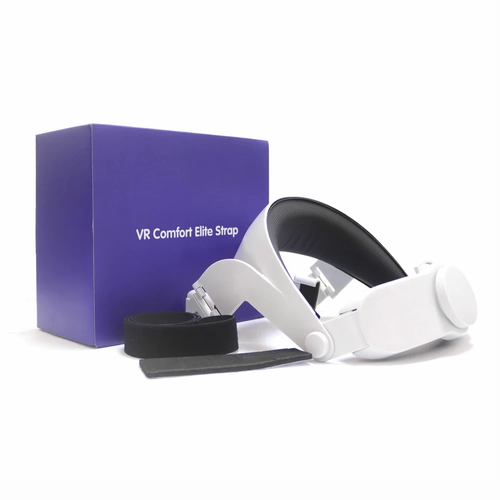 Prints flat and then snaps together. As printed it is for a XXL head size but was designed so it can be adjusted by cutting off chevrons as needed.
Oculus CV1 head strap to Quest 2 adapter
prusaprinters
I decided to mod my (dead) CV1 head strap with audio and use it with Quest 2 which has pretty mediocre build-in sound system. My model uses interface provided by tanvach here: https://www.thingiverse.com/thing:4626664You will need to...
Sturdy Oculus Quest 2 Headphone Mount for Orzero Head Strap
thingiverse
. .. for the original clip designed by fortinmike. ...The pin hole remains the same so all original pieces should work.
The Clip is resized to fit 3rd party straps similar to the Orzero head strap (found on Amazon) Make sure to print the clip vertically!
.. for the original clip designed by fortinmike. ...The pin hole remains the same so all original pieces should work.
The Clip is resized to fit 3rd party straps similar to the Orzero head strap (found on Amazon) Make sure to print the clip vertically!
Oculus Quest 2 Elite Strap Skull Candy Head phone mounts
thingiverse
Advantages: 1) it was free to me 2) Sounds better over the ZX110s (can almost guarantee that) 3) Head phone length adjustment is between the ear piece and the band Things to know: 1) the metal hoop is made of a spring steel that work hardens very...
Oculus Quest 2 Front Stock and DAS Head Strap Buckle Replacement
thingiverse
Oculus Quest 2 strap rentention buckle. Remixed from the Quest 1 version by Sekazi.
There's space in the retenetion rod for a nut and bolt for extra strength. M3 nut and M3x35 bolt. Highly recommend you use a bolt. If you have a spare one...
Remixed from the Quest 1 version by Sekazi.
There's space in the retenetion rod for a nut and bolt for extra strength. M3 nut and M3x35 bolt. Highly recommend you use a bolt. If you have a spare one...
Oculus Quest 2 Battery Strap for NEWZEROL Head Strap
thingiverse
Just a Battery Holder for my Headstrap I've printed it in TPU to give it a bit more flex
Oculus Quest 2 power bank clip for BOBOVR M2 Head Strap
thingiverse
... ... **Select your head strap version:** - Original Oculus head strap - **clip_original_head_strap. stl** - [BOBOVR M2 Head Strap](https://www.bobovr.com/support/m2/) - **clip_bobovr_m2.stl**
Oculus Quest 2 power bank clip for BOBOVR M2 Head Strap
prusaprinters
Power bank clip is designed for Oculus Quest 2 and AlzaPower Carbon 10.000mAh Fast Charge + PD3.0 White. Select your head strap version: Original Oculus head strap -clip_original_head_strap.stl BOBOVR M2 Head Strap -clip_bobovr_m2.stl Print...
Updated design for a battery holder to hold the Anker PowerCore 10000mAh on to the stock head strap of the Oculus Quest 2
thingiverse
Updated design for a battery holder to hold the Anker PowerCore 10000mAh on to the stock head strap of the Oculus Quest 2.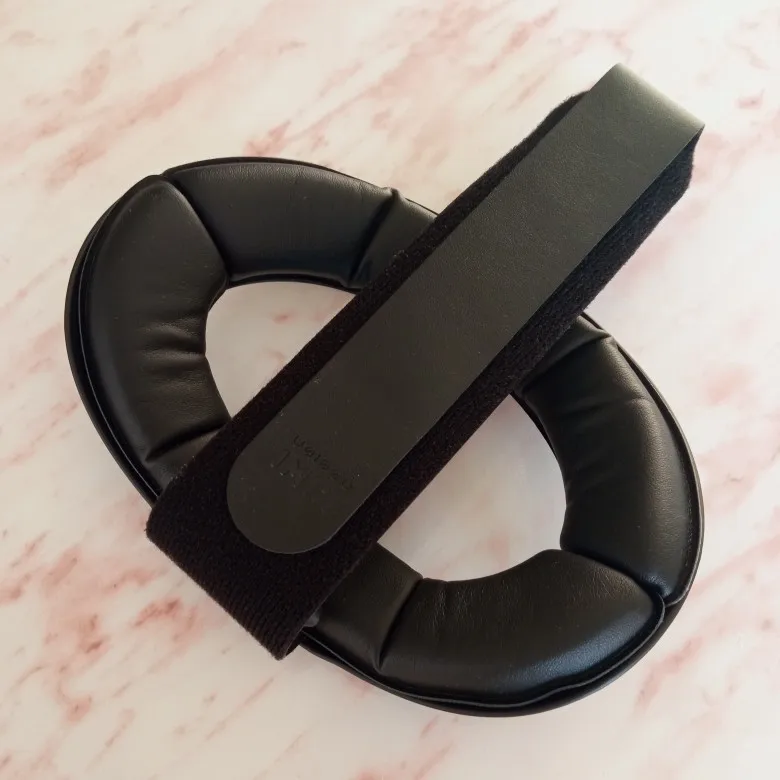 My previous model eventually lost it's grip on the battery over time. ... This version has addressed this issue.
Oculus Quest Simple Grip
thingiverse
Simple side grip to swap with original Oculus Quest head strap and the arms. This is suitable for VR beginners, developers and evangelists. ... I will add the installation guide soon.
Oculus Quest Head Band and Cable Organizer
thingiverse
I used these velcro ties to attach the headband: https://www.homedepot.com/p/VELCRO-Brand-8-in-x-1-2-in-Reusable-Ties-50-Pack-90924HD/202261940?MERCH=REC-_-PLP_Search-_-202261928;203307537;308309107;308309749;308309584;-_-202261940-_-N If you want a.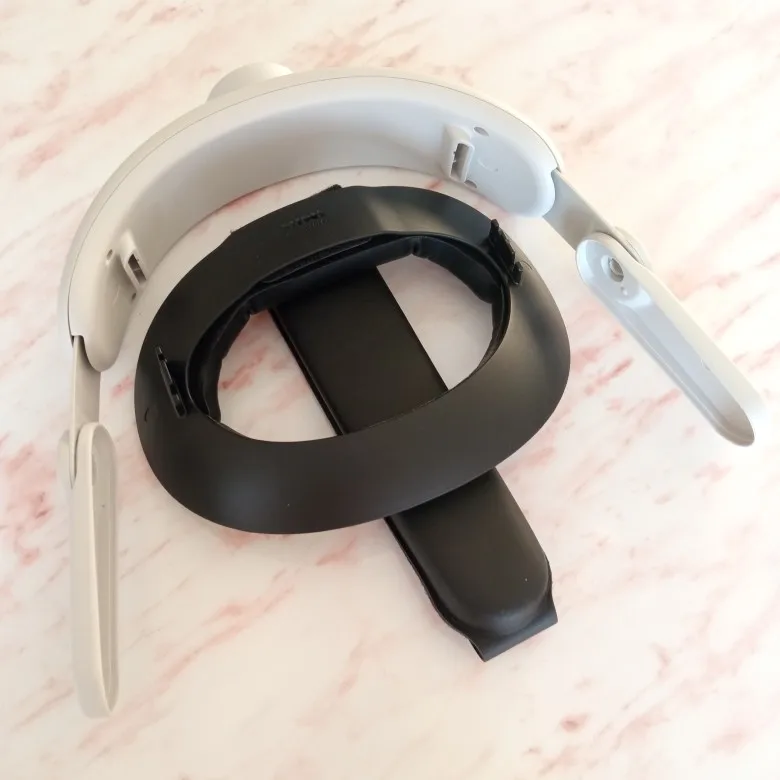 ..
..
Oculus Quest 2 power bank attachment Xiaomi 3 and generic
thingiverse
This thing is to attach your power bank to the back of your oculus quest head strap. I can recommend this not just for charging, but also for counterweight. I made one for my power bank xiaomi 3 but you can also use the generic plate and glue or...
Oculus Quest 2 power bank attachment Xiaomi wbp15zm and generic
thingiverse
Summary This thing is to attach your power bank to the back of your oculus quest head strap. I can recommend this not just for charging, but also for counterweight.
I remix this one for my power bank xiaomi wbp15zm but you can also find more...
I can recommend this not just for charging, but also for counterweight.
I remix this one for my power bank xiaomi wbp15zm but you can also find more...
Oculus Quest Strap Holder
thingiverse
Somehow we lost the small plastic piece that holds the Oculus Quest strap together so I created a replacement. ...Prints pretty easily.
Oculus Quest 2 strap lightweight
thingiverse
Oculus Quest 2 strap lightweight 35g 頭戴輕量化 TPU 注意螺絲位置 少了35公克
Oculus Quest 2 Double Strap
thingiverse
BOM: - printed parts (from PETG +-200g = 3$) - koss porta pro replacement drivers (2pcs 7$ from ali) - headgears double cable replacement (1,5$ from ali or scraped from old cheap headgear) - Replacement oculus helo Cushion Pads (5$ from ali, or. ..
..
Oculus Quest Controller Strap Adapter
thingiverse
This model is a strap adapter for the Oculus Quest Touch Controllers. When I played on my Oculus Quest for a little bit, the straps started to feel a little bit uncomfortable, and they kept loosening off of my wrist. ...I thought about replacing the...
Oculus Quest 2 Hand Strap
thingiverse
Heres a adjustable hand strap designed for the oculus quest 2 to replace the standard wrist strap! This strap allows you to adjust the strap to best fit your hand and allows you to open your hand and not drop your controller. ... This allows for better...
Oculus Quest 2 Knuckle Strap
thingiverse
My design for knuckle straps for Oculus Quest 2 Controllers. There are two different strap designs. One holds by friction and the other similar to a zip-tie. The friction model takes a bit of effort to pass the strap through the clip on the base...
Oculus Quest Halostrap Strap Holder
thingiverse
Hi There, I made this One here for my GoQuest VR Halostrap for the Oculus Quest. It has to be clipped on to the Backpart of the Headstrap. ...
Best Oculus Quest Hand Strap
thingiverse
When testing the various Oculus Quest hand straps, I found that [this](https://www. thingiverse.com/thing:3663463) design was the best, but I found that the clip at the bottom would break easily, and may not even be necessary.
So I came up with...
thingiverse.com/thing:3663463) design was the best, but I found that the clip at the bottom would break easily, and may not even be necessary.
So I came up with...
Oculus Quest 2 Elite Strap
thingiverse
I have a list of the settings for each item I've printed: Item Infill Layer Height (mm) # of Walls Quantity Weight (grams) Supports Time to print (minutes) Rachet Clicker 100% 0.1 Any 1 2 None 17 Rachet Clicker 25% and 100% 0.1 2 1 7 None 72 ...
Best Quest 2 Head Strap
Virtual reality is fast becoming the next big space in video games. The Meta Quest 2 -- formerly the Oculus Quest 2 -- is the current leader among VR headsets that don't require a PC to run, but it does have issues (not least a recent price hike). My biggest gripe is the Quest 2's head strap. It is aggressively average, which means it can and should be replaced with something more pleasant to use for long periods of time.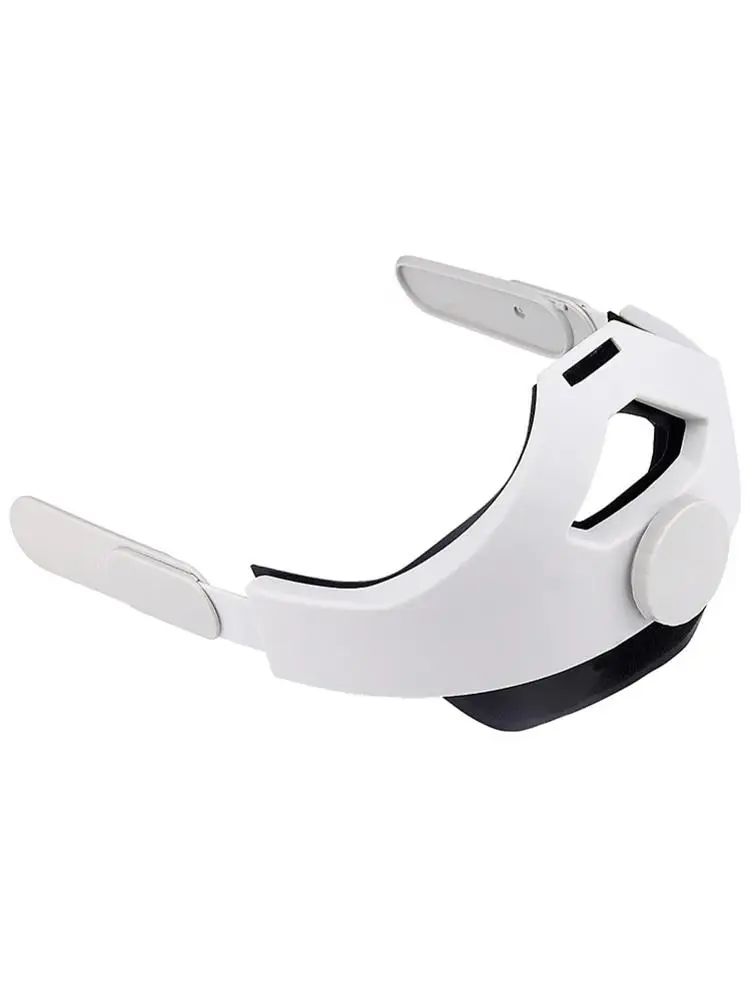
The best head straps have plenty of support around the back of your head, as well as firm fittings to the front. In order to test out these Quest 2 head straps, I spent a lot of time playing in VR. It's not easy playing games for a living, but I endured it for you. Here's a list of my favorites.
James Bricknell/CNET
Yoges Quest 2 head strap
Yo dawg, I heard you like padding
A new version of this headset was recently released with a new ratchet on the back and a more comfortable front shape. The extra comfort now makes this my go-to head strap.
One of the most important parts of a head strap is the padding, as it keeps your head secure while maintaining a good comfort level. This head strap from Yoges took that importance onboard and went all-in on making sure your head is padded everywhere. The strap even has extra pads that offer a counter to the pull from the back as the ratchet is tightened.
For long-term use, the Yoges offers one of the most comfortable experiences I've had so far. My only gripe is the center strap. It's a little too short for my head, so it doesn't feel as secure across the top.
$25 at Amazon
Kiwi
Kiwi Design head strap
Comfort strap
The Kiwi head strap is a great budget alternative to the Elite strap, with a few nice editions that make it stand out from the competition. My son loves using this for long Beat Saber sessions, so it's a firm favorite in our house.
Often when you're wearing glasses with VR, the headset can often be uncomfortable to remove. I've banged my glasses and knocked them off a few times. The Kiwi head strap can tilt at an extreme angle, allowing you to put the headset on without knocking it into your face. It's a far more comfortable experience than the Elite strap.
$44 at Amazon
Amazon
Esimen K3 Accessories Set
Bundles of fun
When I was looking to upgrade to an "elite" head strap for my virtual reality experience, I didn't necessarily want to spend the cash for the official Oculus Elite version. I was looking for an Oculus Quest bundle that combined accessories, and I found this one from Esimen.
It includes a nice carrying case, which is what sold me on this. The strap is as good as others on this list, but the case is a bonus that the others lack.
$64 at Amazon
James Bricknell/CNET
I bought the Elite strap as a bundle with my Oculus Quest 2 at launch, and while some people have suffered from breakages in that first batch, mine has performed admirably. This latest run of the Elite strap has removed the flaw altogether, so if you want to have a fully branded head strap, this is your best choice.
I've used my Elite strap for more hours than I count. From playing sweaty and energetic games like Supernatural to sitting in VR for an eight-hour workday, the only time the Elite strap felt uncomfortable was when I tightened it too much. If you can get it dialed in, it's great.
Colohas via Amazon
Elite Battery head strap
Keep it juiced
One of the best things about a wireless VR headset like the Quest 2 is sharing it with others. Having brought my headset to a number of parties, I can say that hearing a disappointed "aww, OK" when you tell someone they can't play because the battery died is a real bummer. I've used third-party battery packs that clip to your belt in the past to keep other headsets going, but the Oculus-made battery strap for the Quest 2 is something entirely different.
For starters, the added weight of the battery strap is a good thing -- because it's in the back of the headset, it causes a balancing effect that removes pressure from your nose and forehead. The battery also adds 2 hours of gameplay, and you never have to take it off. If you want to charge the headset, you just charge the battery. The power will flow through to both with no noticeable performance differences. It's such a joy to use that I genuinely can't imagine using a Quest 2 without one at this point.
$119 at Walmart
Helpful head strap accessories
Having a better head strap is going to improve your VR experience, but there are also ways to improve your new head strap that will make it even better than that. Here are some of our favorite add-ons.
Anker
Anker PowerCore 10000 PD Redux
Portable power
I've used Anker battery banks for my phones for years now, so it makes sense that I'd favor them for my Oculus, too. You could just put it in your pocket and attach the cable, but it works much better when connected to your head strap in any number of ways. I've even used velcro.
The bank isn't too heavy, but it has enough bulk to help offset the Quest 2 headset and plenty of power to top up your Quest 2.
$42 at Amazon
Amazon
Kiwi Design headset strap pad
Budget conversion
While I think it is a better idea to buy a complete head strap replacement, it can cost more than you might have.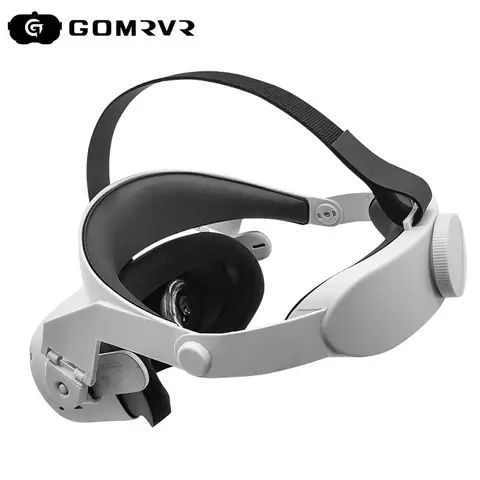 After all, the headset wasn't cheap in the first place. This cool little add-on from Kiwi adds a halo ring to the existing head strap to increase your comfort.
Adding a halo to the back of your head distributes the weight more evenly and makes it much more comfortable over long periods.
$13 at Amazon
What should you look for in a head strap?
There are a few essential things to look at when choosing a head strap.
- A good halo that sits comfortably around the back of your head will help keep some of the weight away from your neck, making the Quest 2 feel lighter than it is.
- Padding is essential. Your skull is hard with minimal padding, so that padding needs to come from the head strap, not you.
- A ratchet to tighten up the Quest 2 is helpful as well. You don't always want the head strap to be as tight as possible, but you need it to stay at the right tightness despite your jumping around.
- Lastly, it would be best if you had a strap that can twist but not break.
 You will be putting the head strap through the wringer, so the side pieces need to hold up to that.
Tale of the legendary Ender 3...
Personal diaries
Subscribe to the author
Subscribe
Don't want
11
Greetings. I want to make a point right now. This is my point of view. Don't take it to heart.
So, due to some coincidence, I had to take the ender as a 2nd printer. The machine of the gods was screaming all over YouTube .... okay. The cost of this printer has jumped significantly in recent years in our region. To go nuts how cheap it is no longer possible to say the language. I'm not a hand-ass in life, but I got sick of collecting it. Only for 2 hours I broke the head before the puzzle .... how to clamp the x-axis on the carriages evenly.
Frame:
The frame set fire to my butt because of the unevenness of the portal z .
I had to install spacers to level it.
Fixed. move on. The H shaped frame structure and the floating table beam did not seem like a good solution to me.
Bottom bracket metal and motor holders from some soft shit. The motor holder y simply bends stupidly from the tension of a normal belt. The belt slides stupidly onto the edge of the pulley and begins to eat it. I also can’t help but note the finished belt tensioners in the printer. Using this solution on the knee normally does not work.
Motors taken as if it were a change. If their power is still somehow enough for x and z .... then on the table the baby boils to the state not to be touched by hand.
Joyful, I ran for the 48 motor. I bet ..... my fart is heating up again ..... it prevents the table from moving forward.
Finally did so.
The printed part removes the motor from the table.
So our adventures never end. Ender 3 pro magnetic table pad swollen after 3 blistering heats. For a long time I solved the quest in Nubasi - WHAT THE FUCK IS NOT POSSIBLE TO START PRINTING. As a result, the mind was enough to tear off this misunderstanding and throw it away. Glass is our everything.
Separately, I want to pay attention to the z-axis limit switch. This tiny bastard still drank my nerves for a month and a half. I began to lower the z-axis home 10-20 times and measured the gap with probes. In general, it worked randomly at different distances. I put the optics .... the table is not calibrated for a month.
There was no money left from the change for the table insulation. Buy for your own and recommend.
Adjusting the z-axis generally deserves a separate topic, probably ..... there are vidos at Chuchi TV. I advise you to look.
You can't figure it out without a glass).
I decided to get confused and made a rise of the z-axis on the belts.
Holds beam x reinforced concrete. Moreover, from 2 sides.
Hotend on this and similar printers is not successful. Performance is not so hot. This gimor is permanent with a Teflon tube and fittings . ... I switched from it to v6 direct quite a long time ago. I sighed with relief. In addition, the design of the hot end case directs a strong air flow to the heating block, cooling it down.
Cooling part on the tender for show. There is almost no point.
Extruder:
Not without some gags. On the very first spool, the petg from stopped pushing the thread through normally. It wasn't about traffic jams. There was a feeling that he was stupidly lacking in strength. I put some pressure on the motor, but it didn't help much. The solution was to replace it with a BMG extruder.
Forgot about the problem forever.
Fittings on the tender are changed immediately to normal ones during assembly. Relatives backlash ...... hand face.
Screen. Simple antediluvian ... nothing to say about him. Although it works ahaha.
Brains:
Well, everything is bad here ..... there is a board with a processor from the time of the development of the October Revolution.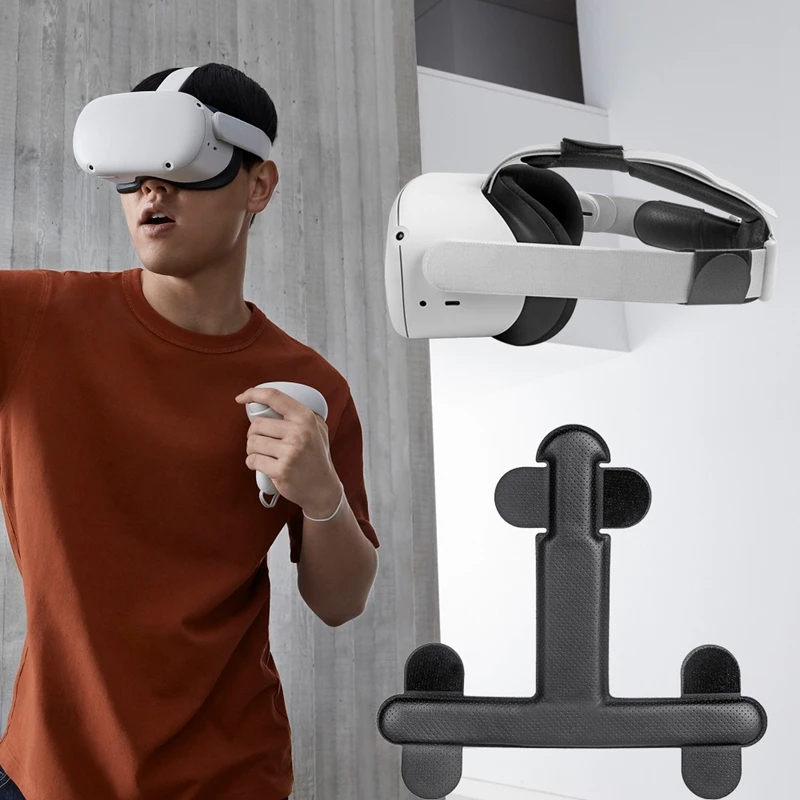 The firmware is cut to the limit. You open the mattress and buy a normal 32-bit board. There are copies of these boards in the Middle Kingdom to choose from. For example:
It is sewn normally from a flash drive without alcohol. On it you will implement everything that comes to mind within the limits of ender 3. Pleased ... this board also controls the hot-end fan in terms of speed. I missed it a lot.
The power supply is really good in the pro version. Is it really something good ....
Well, something like that guys. Please add if you forgot anything. good luck
ender 3 pro
Follow author
Follow
Don't want
11
More interesting articles
eight
Subscribe to the author
Subscribe
Don't want
Good afternoon, forum users!
A lot of water has flown under the bridge since I first met. ..
..
Read more
2
Subscribe to the author
Subscribe
Don't want
A small video review after visiting #3Dtoday Fest 2022 St. Petersburg.
Read more
ski
Loading
17.04.2018
23367
89
Follow author
Follow
Don't want
Greetings!
Recently there have been several threads on bar splicing,
and to start. ..
..
Read more
Custom 3D printer with ToolChanger (Part 2)
Hello everyone.
In one of my previous posts, I talked about my 3D printer with ToolChanger. A year and a half has passed since then (how time flies). Now I would like to share my impressions of the operation of this design, as well as talk about the modifications that have been made during this time, and the results of their implementation.
First of all, there are no complaints during operation. Everything works clearly and without problems. The heads are removed without errors, the positioning of the table does not go astray (even automatic compensation for unevenness of the table is not needed). This is very good, because the calibration of the table is doubly important for a printer with interchangeable print heads (PH). The only thing that was planned to be modified initially was the design of the print head and the type of print head lock mechanism.
Both of these modifications were made at the same time. I really wanted to try a cable drive as a locking mechanism. More details about this design can be found in the project https://www.thingiverse.com/thing:3805144. I took it as a basis, slightly altered. I posted a video about the operation of this system in the last topic, just in case I will duplicate it.
As for the operation of the cable drive itself, I can say that it is quite working, no failures were noticed. But still, I liked him less than the server. This is due to the massiveness of the drive itself on the frame (motor plus pulleys with limit switches inside), as well as the peculiarity of the operation of this mechanism (Figure 1). The fact is that the force of pressing the head to the carriage in it is regulated by a spring wound on the pulleys, and this spring, as for me, does not provide such a good pressure as a servo. Plus, in a mechanism with a servo, this pressure could be easily adjusted, and in a wide range.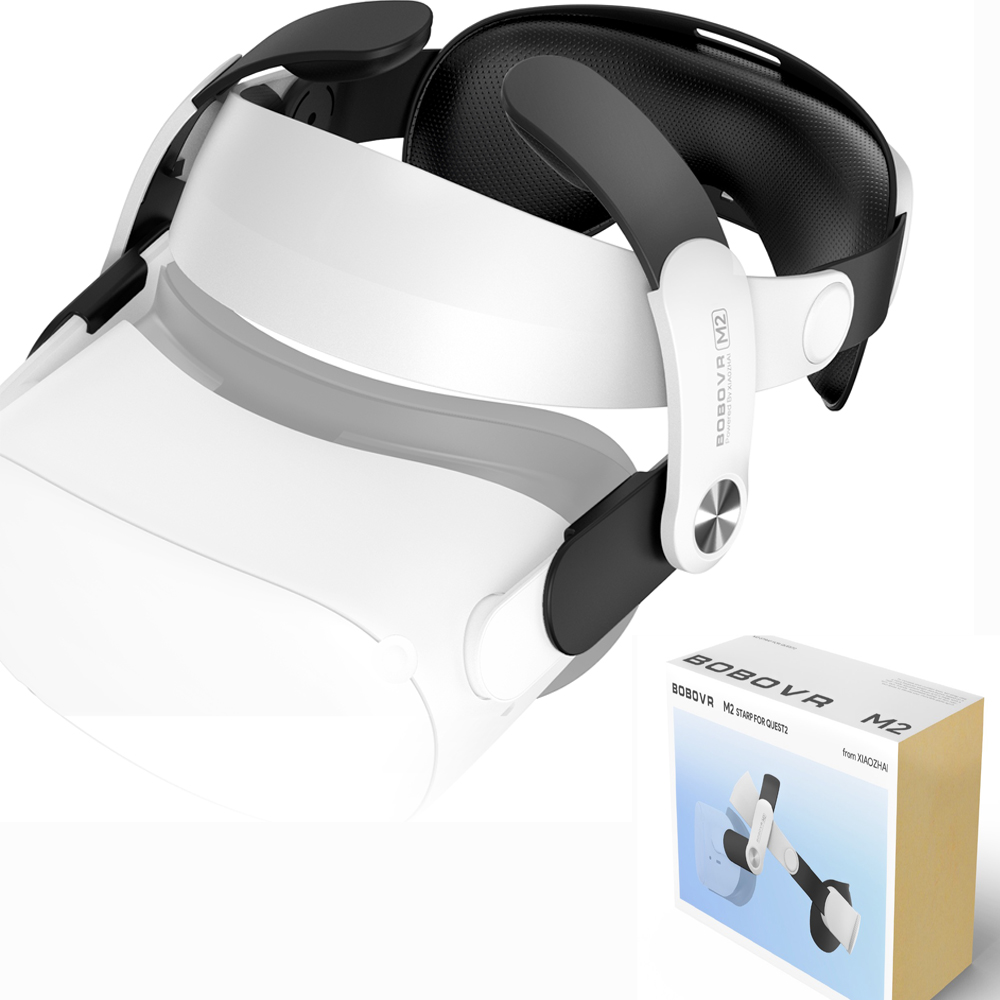 If the head is heavier than it is now, it may not be possible to securely attach it to the carriage.
Figure 1 – Drive of the SG locking cable mechanism.
Also redid the print head. This time, the possibility was considered to abandon the standard E3D hotend, and make the radiator combined with the blocking mechanism in one piece. In principle, such a head also worked perfectly without any complaints.
Figure 2 – Milled part of PG.
As a result, in the Direct modification, I decided to return to the server and the standard E3D hotend. Well, now, in fact, more about this modification.
ToolChanger: Direct Drive version
Since the rest of the printer components work fine for me, the modification only affected the X-axis carriage and the print head. They will be discussed.
E3D developed a special head with Direct filament feed for its concept, calling it Hemera (not to be confused with Himera). The bottom line is that the extruder is part of the motor, and for the motor, all this is attached to the head. Personally, I don’t really like the idea of \u200b\u200bfencing the motor on a replaceable head. But in the concept of the E3D multifunctional device, where a replaceable head can have either a PG, or a milling cutter, or a laser, or something else, such a variant of the head is justified.
Figure 3 - E3D Hemera Direct Drive Hotend
details. I took the rear milled part from the first version, the front one was completely designed from scratch.
Figure 4 - Milled carriage and head parts
Figure 5 - Front and rear X-axis bottom bracket assembly.
Otherwise, the design of the carriage is the same as in the first version. Except that it now houses the extruder motor. Well, and all the wires going to the carriage are now laid in the cable channel. I took an average NEMA 17 motor in size, its weight is about 250 grams. In principle, you can try the smallest size of the motor, if it does not skip steps.
Figure 6 - X-axis carriage assembly.
As for the design of the PG, now each of them is a standard BMG Extruder and E3D V6 hotend, which were used in the first version of the printer. I redid the milled part, but took a replaceable locker from the first model - a part that engages with a shaft with a pin of the locking mechanism. And now, as it turned out, the manufacture of this part separately was a very good decision. And you can change it if it suddenly wears out, and you don’t need to make it every time you change the design of the head.
Figure 7 - Milled part of the PG assembly and locker.
Fans for blowing hot end and printed model with air ducts, as well as a system for fixing the head on the docking station, are attached to the printed part. The weight of the head assembly is 255 grams.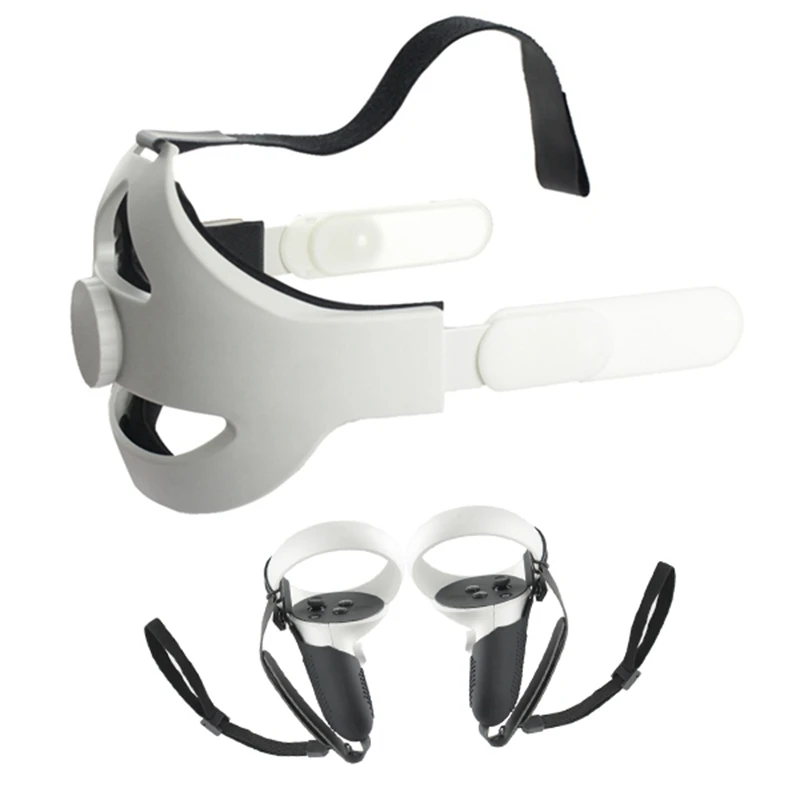
Figure 8 - Appearance of the print head.
Figure 9 - Print head weighing.
The principle of capturing the head remains the same as in the first version. But there is a peculiarity in the design with Direct drive. Those who assembled the BMG extruder probably know that the gaps in the gears on the shaft of the motor and the driven extruder are minimal and there is no backlash. In the design of the change of heads, which I did, an unpleasant situation can arise when the carriage tries to grab the head. Namely, the gear of the motor shaft can rest against the driven gear of the extruder with all the ensuing consequences - skipping steps along the Y axis, false head capture and, as a result, damaged printing. To avoid such situations, the design of the head seat on the docking station was made in the form of a special profile with a spring-loaded element, and the position of the head on the docking station was 1 mm lower than its design position on the carriage. Thus, when capturing the head, the gears engage with a gap of 1 mm, which excludes their contact, and when the fixing shaft is turned, the head is attracted to the carriage in two directions simultaneously - along the Y axis and along the Z axis. In this case, the gears do not engage in longitudinal direction, but in the transverse direction.
After all the necessary settings, I naturally started printing. And already on this option I decided to try full-fledged color printing. Prior to that, I had practically never printed anything multicolored. And faced with an unexpected moment. Namely, the Cura slicer in multi-color printing prints a cleaning tower for all extruders that are in the printer, even if the extruder is disabled in the program itself. Because of this, it is not possible to properly clean the nozzle when changing the head with all the consequences. While the head is at the station, plastic leaks a little from it and then this snot gets on the model. Also, due to leaked plastic, there is a local underflow on the model at the start of printing.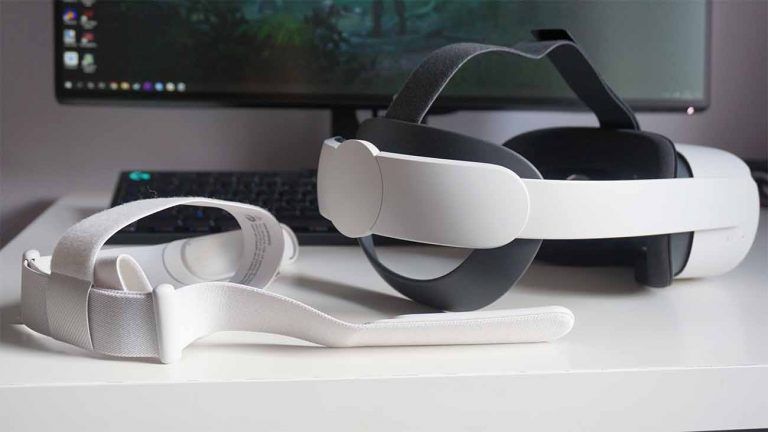 In general, I will deal with the settings of the slicer, or I will make a system for mechanical cleaning of the nozzle - it has been asking for a long time already, but still my hands do not reach.
The second problem I encountered was the servo. During multi-color printing, there is a frequent change of tool, respectively, a large load on the servo with frequent switching. So, printing a colored lizard, a cheap serva died. It died gradually - losing power, and as a result, in one of the switching cycles, it simply could not capture its head. The problem was solved by replacing the servo with a more powerful one. It was not easy to find one in this format. There is also the same one, but for 10 kg, I will take a reserve just in case.
Figure 10 - New servo.
I immediately filmed the video of the work. The principle of operation remains the same as before.
But now it's a direct extruder.