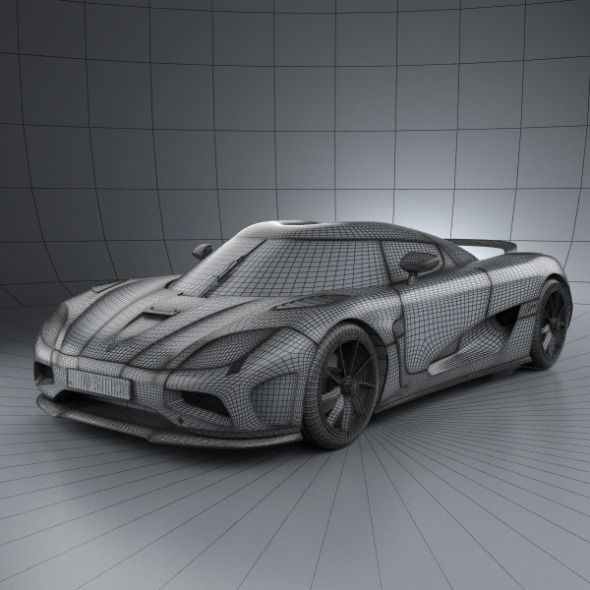
3D printed koenigsegg
The 3D-printed Koenigsegg Agera RS – Depronized
Koenigsegg has always fascinated me even though I’m not particularly interested in cars in general. My interest is more technical. What they have achieved is amazing and has probably not escaped any car enthusiasts notice, but one more unusual aspect stands out – the openness about the process. Not many companies – especially not in highest of high-end – share as much of the process as they do:
https://www.koenigsegg.com/build128-agera-rs-station-2-body-alignment/
Seeing this together with Doug DeMuro’s in-depth review of a particular Keonigsegg Agera RS called the “RS1” got me totally hooked in trying to build a functional scale model using 3D-printing.
Some may debate the need for 4K-videos on Youtube and so did I, until I could walk through this video in dumping screen shot after screen shot!
The aim of my project was to create something that not only is scale like on the outside, but also on the inside. This was possible only because of the awesome blog posted by Keonigsegg showing the different structural elements.
The entire project has been done using Autodesks Fusion 360. It has besides traditional CAD-tools an awesome sculpting feature that let’s you create shapes by draging, pulling, pushing lines and points with the mouse rather than entering exact dimensions in sketches. Although this is a process that is more artistic and needs to be learned differently than traditional CAD, once you’re up’n’running with it, it saves an enormous amount of time. The picture above shows a very early stage of modeling.
Many people give up at this point because they are working in the rounded mode where one cannot really see what is going on with the individual points and lines in the surface and it’s easy to end up with a lot of errors. In the picture above, display is instead set to box-mode which shows the shapes in polygons with flat surfaces and sharp edges instead. This is the single most important feature I’ve learned and by toggling between box-mode and rounded mode, you can easily figure out what is wrong in the model and sort it out.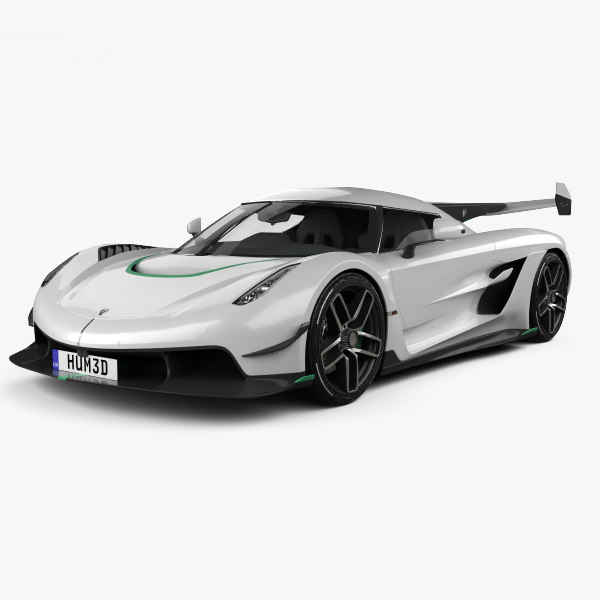 I work mainly in box mode when creating shapes. The picture below shows rounded mode.
I started modeling the project during our Christmas vacation in Thailand. Working on a small laptop with basically no internet-access most of the time was no problem. The laptop has touchscreen so panning and zooming was possible with my fingers. Not the most time efficient way of modeling, but hard to do it in any other way beside the pool!
I started with the core structure and worked my way out with the different body segments. Each divided into it’s own component. This is also an important step in order to manage the project. Modeling the entire body in one piece is not convenient, nor practical.
The suspension and transmission is designed more for functionality an the possibility to print as much as possible, rather than exact scale. It is of course a balance between taste and interest. Carbon fiber rods and more hans-on-work could of course be incorporated if one wants also the inside to look as scale-like as possible.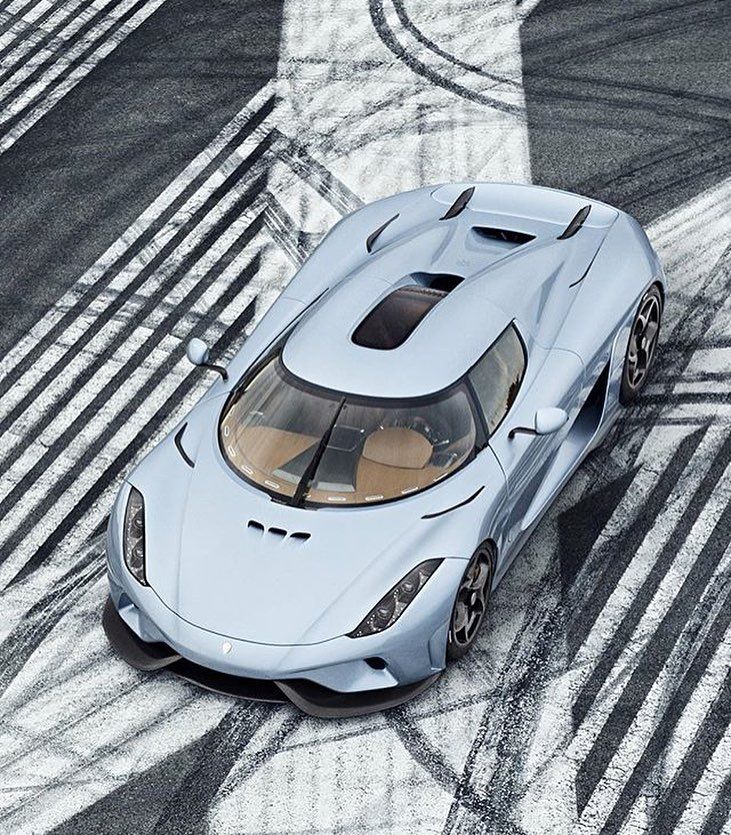
The car is powered by a brushless DC-motor from Hobbyking, and the differential is 3D-printed. I designed two version so it before I was happy. The first one shown in the picture below was too big and way too complicated.
First differential version, deemed too big and over-complicated.Instead I placed the 4 transfer-gears into the main wheel itself, which saved a lot of space. The ball bearings were removed from the small transfer gears also to be able to make them smaller.
The first set of gears and shafts were printed in PLA. Even though it works, the pinion gear (located on the motor shaft) started to show some visible wear after a couple of high-speed runs in the garage.
However, https://3dverkstan.se/ was kind enough to print these parts in Onyx on their Markforged X7. With these new gears and some adjustments, the car is almost completely silent! No rumbling gear-noise. It is going to be very interesting to see how they keep up after some more intense driving.
The front suspension is modeled around small metal ball-joints with cavities drawn in the suspension arms. Thanks to the Prusa MK2’s awesome precision, the ball joints work perfectly! Both front and rear suspension uses shock absorbers baught from Hobbyking. All the parts in the picture above except the tires are printed in PLA.
The first se of tires has been printed in TPU95A on the Ultimaker 3. This is a polyurethane based flexible material, but not as flexible as rubber so the grip on flat floor is terrible. Traction on carpet is somewhat drivable, but for it to be really useful, I’m going to have to cast rubber tires. I will post separate posts about this later!
The internal structure nearing completion. On criteria for the build was to be able to hide equipment at least from showing inside the “cockpit”. To be able to do this, I had to place the battery under the seats and the receiver inside the middle console.
The batteyr is a 3 cell Litium Polymer battery at 1500mAh capacity.
Testing the fiber opticsThe headlights have a unique shape and one that actually suites this project quite well. Many cars today have extremely complex shapes molded into clear plastics, but the Agera RS has not. Instead it has a lot of small illuminated dots around the perimeter of the light. This was something I wanted to incorporate and the choice of method fell on fiberoptics. The picture above shows the first test using fibers cut from a medusa lamp.
Head light body right out of the Prusa MK2Printing the headlight houses on an FDM printer with good result was a real challenge! it was achieved by careful orientation. The plate visible to the left in the picture was added in the CAD and used as a base, placed on the print bed and then cut off after printing. The first prototype in the earlier picture was placed horizontally and as you can see the difference in quality of the prints is huge!
Headlights with fiberoptics installed.
The main beam is produced by a standard white 5mm LED.
The key to achieve good print results with complex shapes like the body parts above lay in splitting and orienting them correctly on the print bed. A general rule is that vertical surfaces are mostly better than horizontal ones. This might sound counter-intuitive as the layers are stacked vertically, but for horizontal contours with very low angle, the layer edges are very clearly visible compared to a vertical surface where they are so close to each other that they blend into the shape. Another rule is to place the parts with the split to the print bed. This is the most flat “flat” surface you can get, so by doing this you will get a nice and tight fit when you glue the parts together.
Some really big parts can be in need of extra supports. In this picture you can see the rear hood, and that vertical supporting elements has been added to the CAD in order to prevent the piece to sway back and forth when the print bed moves, and also to prevent it from completely be knocked off the print bed completely.
The door hinges called the “Dihedral synchro-helix” was indeed a challenge to model and to get functional using 3D-printed parts. I feel that they require a blog post of their own so I will not describe them more in detail here than to say that the principle is that they provide both swing and rotation in the same motion using an arm and a gear joint. It is a remarkably simple solution technically, with a beautifully complex geometrical movement as a result!
I know there are a lot of details that need more explanations and I’ll try to write more posts about specific topics, this is only the first blog entry about this model, more will come! I will also make the files available one way or the other, so stay tuned!
Previous Post
Next Post
3D Printed Koenigsegg Agera RC Car by Depronized.com - Should you build it?
com youtube channel and another episode of. Should i build it. Im your host jordan visco today were reviewing this beautiful, looking one tenth scale, koenigsegg aguera, that was designed by ali shkold. You can find this design and all of ollies designs at deprines.com in this video were going to talk about what some of the positives of this design are, and maybe what some of the negatives are and were going to help you decide for yourself. If this is something that you might want to build and remember, if youre looking for ideas of fun, rc projects to build instructions on how to build them kits or parts check us out at rcprinter.com, okay, so this model was again designed by a swedish designer and Academic named ali skold and from what i could find online, he has a lot of experience with 3d printing a lot of experience with 3d design, but this was the first foray into 3d printed rc cars. Now, according to one video that i watched, ollies had a fascination with the aguero rs1 for a long time, but it wasnt until a guy named doug domoro did a full 30 minute walkthrough of the aguera in 4k, that that ollie was able to actually to see All the details that he needed in order to create this model now, obviously the car looks amazing.
 It is definitely one of the prettiest models weve ever built. It looks very similar to the aguero rs1, but in making the model ollie wasnt interested in just making a car that looked like an rs1.
He wanted one that functioned that way as well, and so everything in the design is as close as possible to scale all. He really wanted the structure of the car to resemble the rs1s structure as closely as possible, so hes actually gone with that monocoque design here and the entire cockpit is one piece in and of itself and then the front end and the rear end actually just bolt Onto this center console so theyre actually completely separate pieces, unlike a regular rc car, which normally youll have a flat bottom frame and then everything else is just kind of bolted. On top of that, so lets go ahead and give you a little tour: Music, Music, Music, Music. All right so lets go over some of the cool engineering feats that always included in this design. First of all, i want to start with these doors here.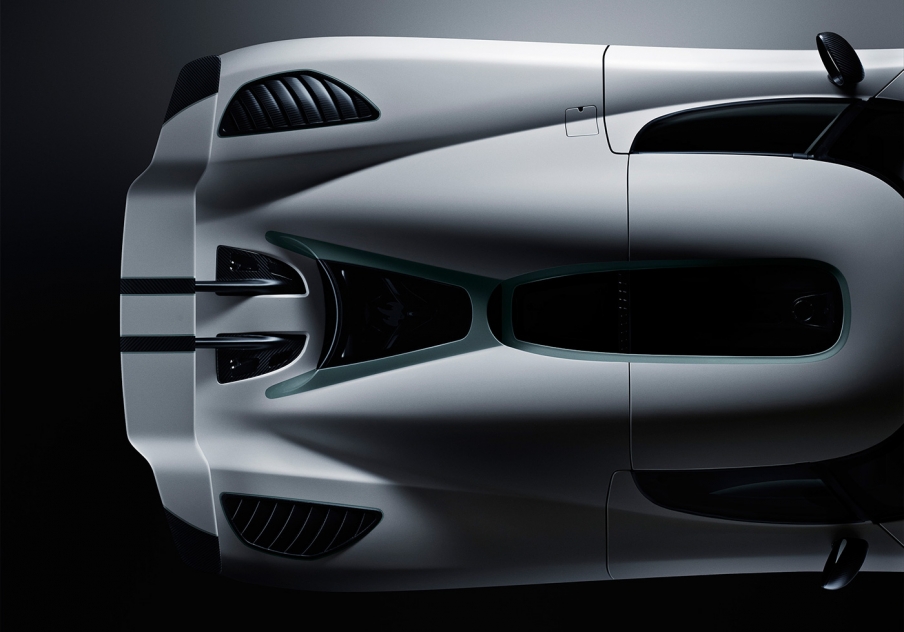 These doors use a dihedral, synchro helix hinge, which allows the doors to not only lift up but also come away from the vehicle to get out of the way of the driver when the driver wants to get in. So they work like this and theyre fully 3d printed with just some screws in them and they work really amazingly well. I can close them here as well, nice and easily. You can see theres a little bit of play, but its pretty good for a 3d printed dihedral synchro helix hinge, which is something ive never built before, and something that was like really cool to play around with so the hood and this rear hood here.
They both open up. Unfortunately, they dont stay up, but they do open up and down like this and again, they dont just open in one direction. They come up and then also forwards a bit just to get it a little bit more realistic. Looking and the same thing with the rear one, it comes up and then back as well, just like that, and then we also have this top cover. It just gets placed on top like that. Theres, nothing really locking it down, so it will fall off as youre driving. So normally i just leave it off, but you can put that on top next, we should talk about the lights on the vehicle. First ill. Show you what i done, which is a really simple version, so you can see here, ive just put in some small five millimeter leds and ive done it. The really really simple, regular rc type way, but what all hes done and its actually best to see it in his video so ill put a link to the video down below if youre interested in in checking out a much more complicated lighting version of this car. But hes actually used fiber optics in all of these little holes around the light here to have them all light up in a sequence when the car turns on, and so they light up and they flash, and he also has these little side lights hooked up to The turn signals and you can also put tiny little lights in the side view mirrors as well, and those can light up and blink if you want as well now.
Another interesting feature is this steering wheel.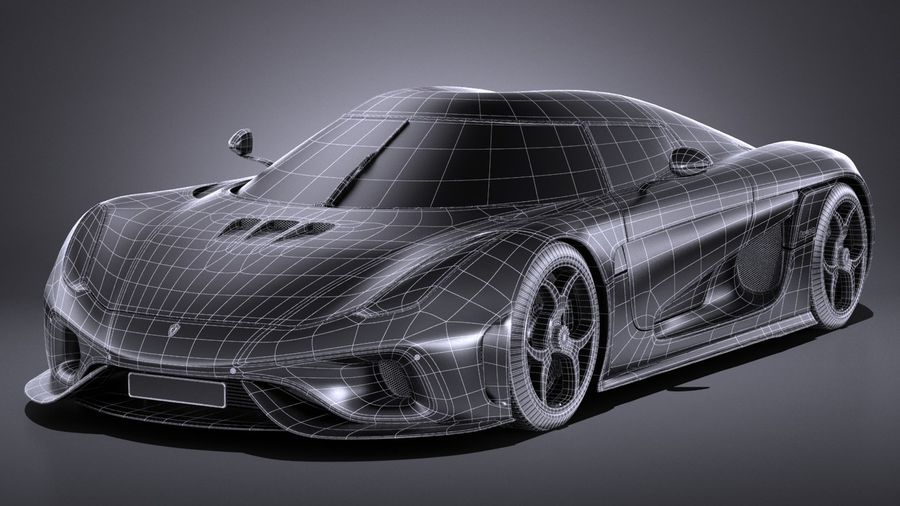 You can actually set the steering wheel to turn whenever you turn your steering and it does require another servo. I wasnt able to find a servo of the right size that would make it turn so ive built my model without that, but if youre interested, that is something you can add as well. My interior also is pretty plain. You can see. Ive opted to go with silver seats and a black dashboard, but you can add all kinds of things there theres decals you can put in there and those are available with some of the modded design files. Now this car is a rear. Wheel, drive car with the motor in a mid location, so ill take this back hood off here and then we can peer around a little bit closer at some of the electronics okay. So here we are looking in the back end of our koenigsegg era. The motor is located in here. The space fits for a 540 size, motor and ive just used a cheap, brushless motor off banggood. The motor came as a kit with this esc and i actually had to modify these rear arms. So this is the regular rear arm.
 Here and ive had to create this new one just to fit over the fan on my giantly oversized esc. Here, ive mounted my on off switch right there. The battery comes up from the bottom here and you can see the cable plugs in right here, and the battery itself is actually accessed from underneath the vehicle and theres a little plate that covers it with six m2 screws and its actually a bit of a pain To get the battery in and out and get this cable up and routed over top of the motor each time and heres a quick shot of what the undercarriage looks like along with the battery compartment.
And you can see the motor there as well. The motor drive shaft comes out here and it uses a 3d printed open differential to drive the power to the wheels from here. Theres 3d printed diff cups in there, and then these drive shafts are actually made out of a carbon fiber shaft. So you take this carbon fiber shaft and then you print little 3d balls that sit on the end and you can see in here the little rod so that rod goes through the 3d printed part that gets attached to the drive, shaft and thats.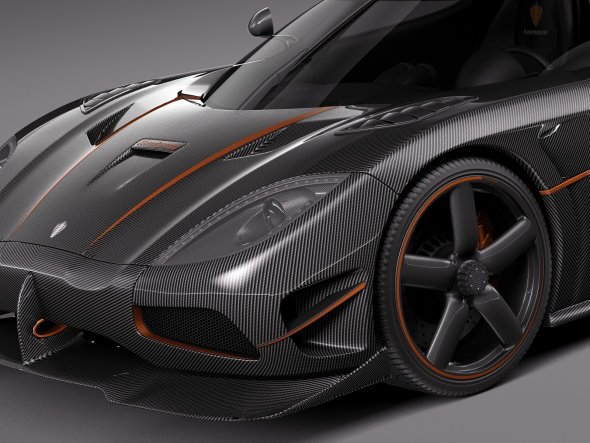 Actually, what drives the wheels these clear pieces in here? He calls them the shaft hubs and ive actually broken those numerous times, and so i printed that little circle at the end that goes around the shaft hub just to try and give it a little bit more rigidity and it seems to have worked fairly well. However, im pretty sure that the drive shafts are also wearing into the diff cups that run through here into the differential, and i think, before long thats, something thats going to fail as well. So the card doesnt use 3d printed shocks, it uses standard, purchased ones and i wasnt able to find ones of the size that he actually recommended. So i ended up using these ones that i found off aliexpress and then i just shortened them a bit by inserting a small piece of tube inside the body of the shaft and it works.
Okay, you can see here i get a little bit of flex, but its not perfect for sure. Okay now lets take a quick look at the front of the vehicle. So here you can see inside the front.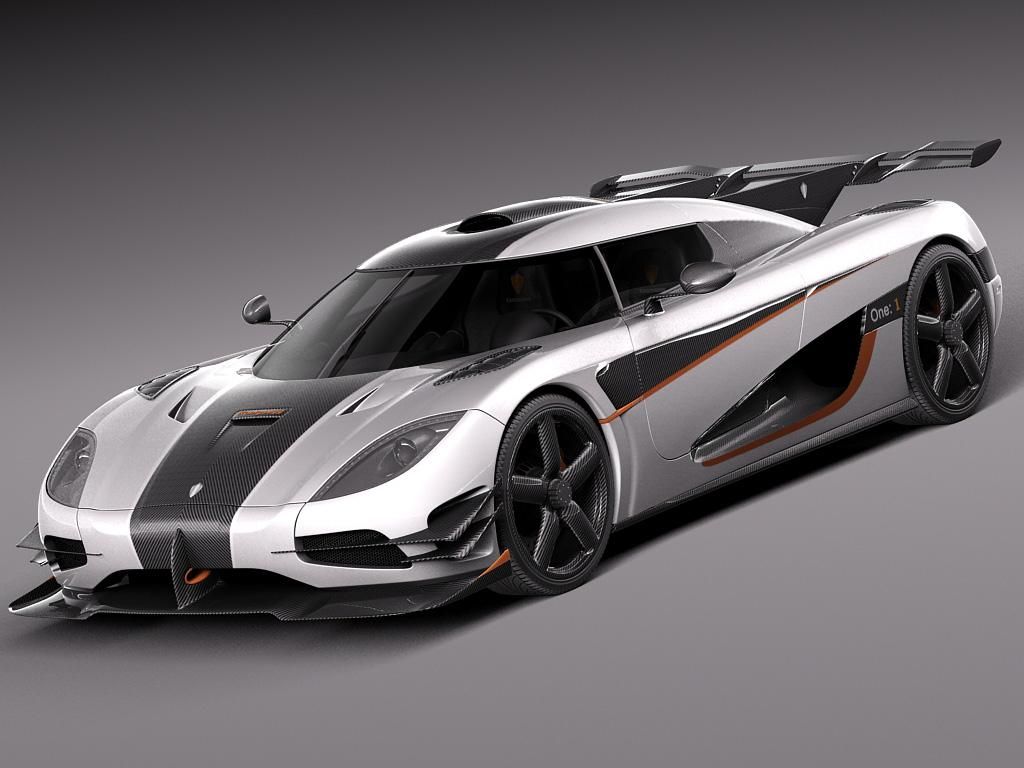 You can see how all of these front bars here are just connected to this middle section and then the front nosing actually just bolts right onto those bars again. We have the little mini shocks up front and it has a little bit of a suspension here. So one of the coolest features of this car is these front wheels and the steering hubs are actually located on the inside of the wheel and what that actually does is it allows these wheels to turn with an axis of rotation that begins right about here and So you can actually have a lot less clearance. So if we go to the side here – and i put the hood down – you can see, the clearance around the wheels is much more like a like a the real version of the automobile and the wheels can kind of turn within that. He also has created these 3d printable disc brakes, and these calipers here, which add a pretty cool aesthetic to the car. The wheels and tires are both 3d printed. The wheels themselves are made out of pla and the tires are made out of tpu.
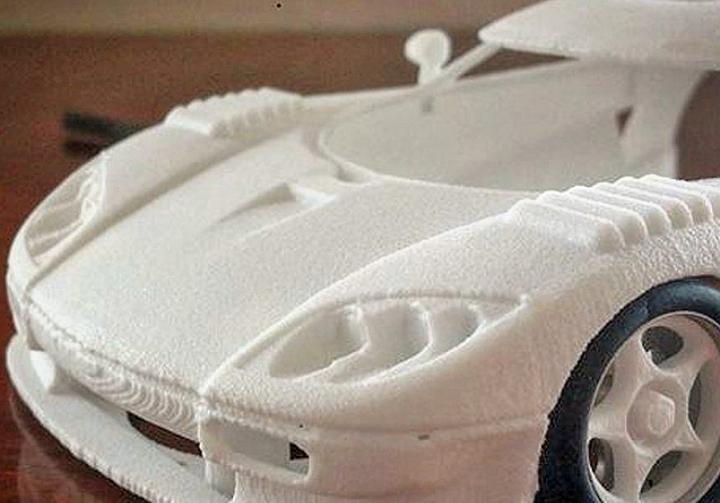 Unfortunately, tpu tires, while they look amazing and they fit this model perfectly. They dont really have very much grip.
So, as you can see with the back tires here, ive ended up putting some rubber bands around there just to get a little bit of traction and it works a bit, but definitely rubber tires would be the way to go. Unfortunately, finding off the shelf rubber tires for this car is virtually impossible. Okay lets talk a little bit about how the build actually went. Printing the pieces themselves wasnt actually too hard. The designers taken some pretty good care to make sure that all pieces of the car can print uh quite easily. However, building it isnt so easy, theres, unfortunately not great instructions online. He has some images you can follow of how things go together, but a lot of it uh is a bit of trial and error. Now. Another issue that youre going to run into is that a bunch of the stuff isnt in stock online and youre gon na have problems finding something so like i said, i have problems finding the correct shocks. He also recommends metal ball studs for the steering in the front. I wasnt able to find those, so i ended up 3d printing them. The 3d printed ones actually work pretty well um after a little while they loosen up and they start to pop off. So i just glued some washers to the top of the balls, and that seems to have held things on pretty well and, like i said earlier as well, i wasnt able to find that mini servo that was going to control the steering wheel.
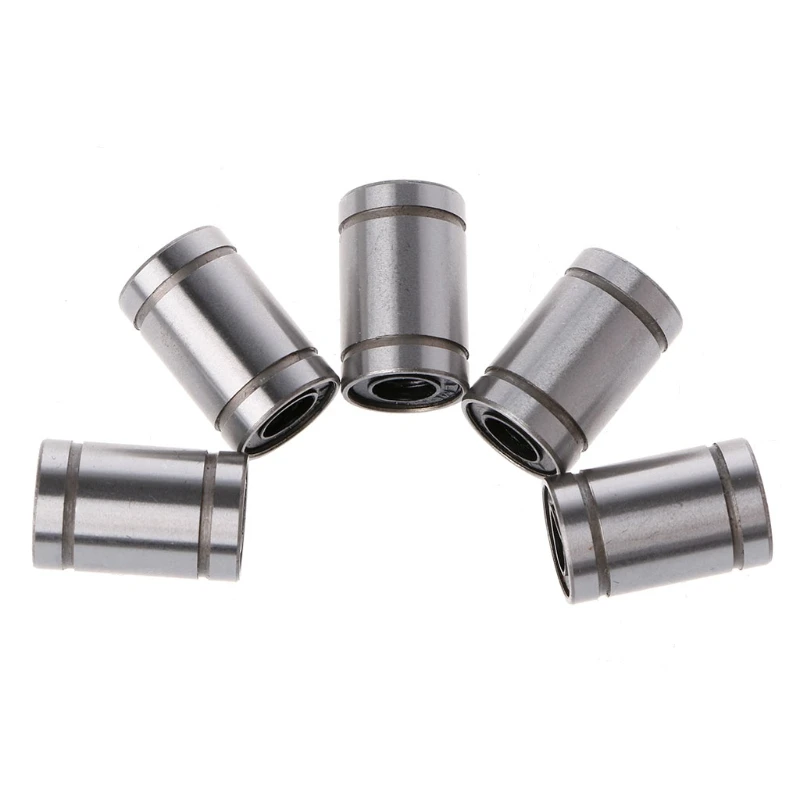
You know a couple other things um. He actually uses four different sizes of bearings in this model and uses carbon fiber for the drive shafts and, if thats stuff, that you have lying around thats great. But if you have to go and buy like multi packs of carbon, fiber, shafts and four different bearing sizes, its going to end up costing a little bit extra id have to say the coolest thing for me about building this was was actually building these doors again. Ive never printed anything like them or built anything like them. Okay, so obviously theres a ton of cool features that have been included in this rc car, but lets maybe talk about some of the stuff thats, a little less cool. Any issue that i do have with this car comes down to reliability, so you should be aware of a few of these things. If this is something youre hoping to build, the front steering seems a bit light and i dont think itll hold up to the kind of abuse that youre normally going to put an rc car through as well the rear, shafts and diff cups. I dont think those are going to hold up for you and thats an area of the car that youre going to end up working on quite a bit. I know ive replaced those shaft hubs, six or seven times already and im sure i have some more times in my future as well.
These 3d printed tpu tires. They look great, but unfortunately, the grip just totally sucks and theyre, not really usable for a fully functional rc car. Unfortunately, you dont really have a ton of option when it comes to tires for this car, just based on how it was designed it doesnt fit any standard off the shelf. Rc car tires. One option would be casting your own tires at a rubber but thats a whole nother ball of wax that you got to get into one other thing is that i get some crazy squeaking coming from my front, wheels and im, not exactly sure what its from it Might be some of these pla paces here rubbing together, but other peoples, cars seem to be fine, so that might be something thats just unique to my build now.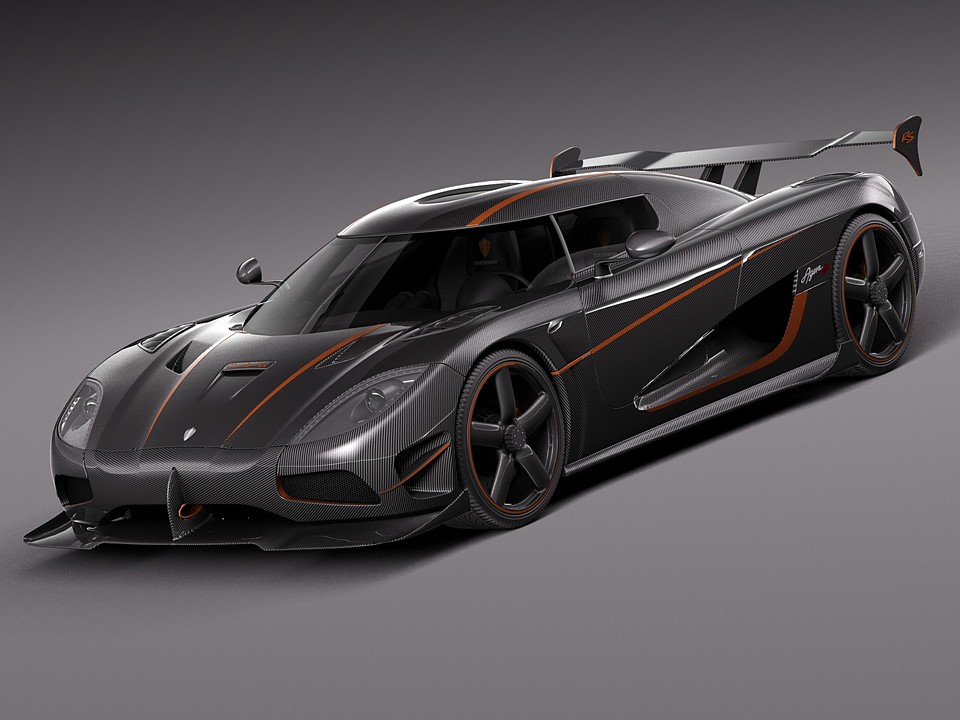 Another thing to note is there have been a bunch of people over at all these forums at deprines.com whove, taken it upon themselves to make modifications for this, and hes got a whole subform there about mods, and one user in particular, whose username is i want to Be the guy 1980 has actually gone through and fixed a lot of these issues that im talking about here, hes replaced these rear axles with cvds hes, completely redone the front steering and hes actually developed molds, so that you can cast your own tires at a rubber And thats all super cool and hes done a lot of work as well on a manual on how to put it together.
So that brings us back to answering our initial question. Is this an rc model that you should build? Well id say it really depends if this is your first rc project, this is probably not a great one for you. This is something where youre going to need to have a bit of experience in order to get through it. I also dont think you should build it if youre looking for an rc car thats going to be reliable right out of the box and something thats going to be, you know fun to drive right away.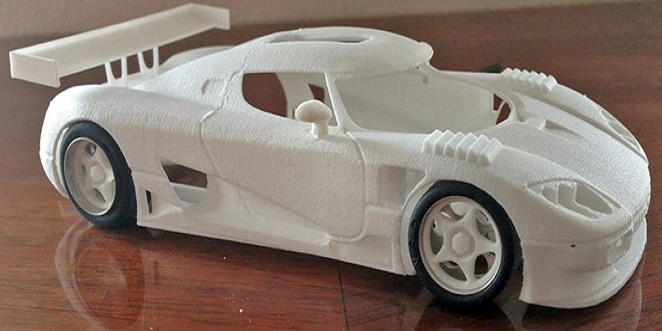 However, if youre looking to tinker a little bit – and you love the idea of having a 3d printable aguera rs model that also moves drives and has you know, awesome, flashy lights and dihedral, synchro, helix doors and youre excited about getting all of these features tuned up Properly to where theyre working perfectly – and maybe the idea of you know casting your own tires appeals to you and youre excited about trying out some of the mods that the community has available, then yeah. This might be the right model for you to build. Now, if you are looking to build it, the way that you get the stls is a bit different than normal. Ollie doesnt actually sell them. But if you head over to his forums at deprines.com and you click on the aguerra rs forum and look for a post entitled about the project, how to get the stls itll tell you that the files are free with a donation to the forums and its a Donation of any amount, so you can base that on how much you think its worth and also how much you can afford.
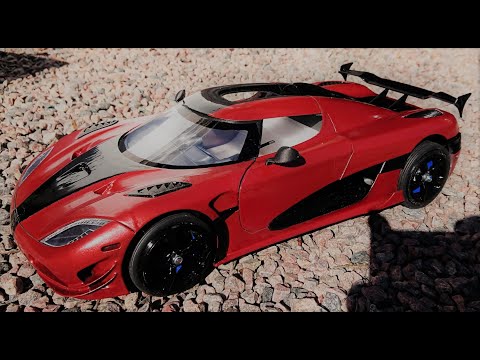
And then you can just contact the user named min and thats ollie and hell give you his email address and you can just send him a paypal for whatever amount you feel is fair. Once the paypal is received, hell give you access to a private, subforum and thats, where all of the build files and instructions and mods are all located. Well, thats it for this time. We hope you found this useful and well see you in the next video and remember if youre looking for ideas on cool rc projects to build instructions, how to build them kits or parts check us out: rcprinter.
https://www.youtube.com/watch?v=8hurhA_sPjY
3D file Koenigsegg Regera 2017 Printed car body・3D printing template to download・Cults
Ferrari 458 Italia 2011 Printed car body
8.33 €
Volkswagen XL Sport 2014 Printed car body
8. 33 €
33 €
Nissan Cedric Mk6 Y30 Sedan 1984 Printed car body
8.33 €
Ford Super Duty 2011 Printed Car body
8.33 €
Ford Falcon GT Coupe Interceptor Mad Max 1979 Typewriter
12.50 €
Mercedes Unimog 406 Printable Truck
12.50 €
Toyota Land Cruiser Pickup 1979 Printable Body Car
8.33 €
Nissan Patrol GR Printable Body Car
8.33 €
Jeep Comanche 1984 Printable Body Car
8.33 €
Ford Mustang Shelby GT500 Eleanor 1967 Eleanor Printed car body
8.33 €
Mercedes Benz Sprinter 2014 Printable Body Van
8.33 €
Nissan Tsuru 2004 Printable Car
12.50 €
Best 3D printer files in Game category
Panzer 38t for Flames of War
Free
Model Rocket Display Bases
Free
Deathloc's Laser Pistol
Free
in the chimney
Free
Multi-Color Connect Four
Free
Sawtooth beetle
Free
Steampunk Soldier 22 cm
€4.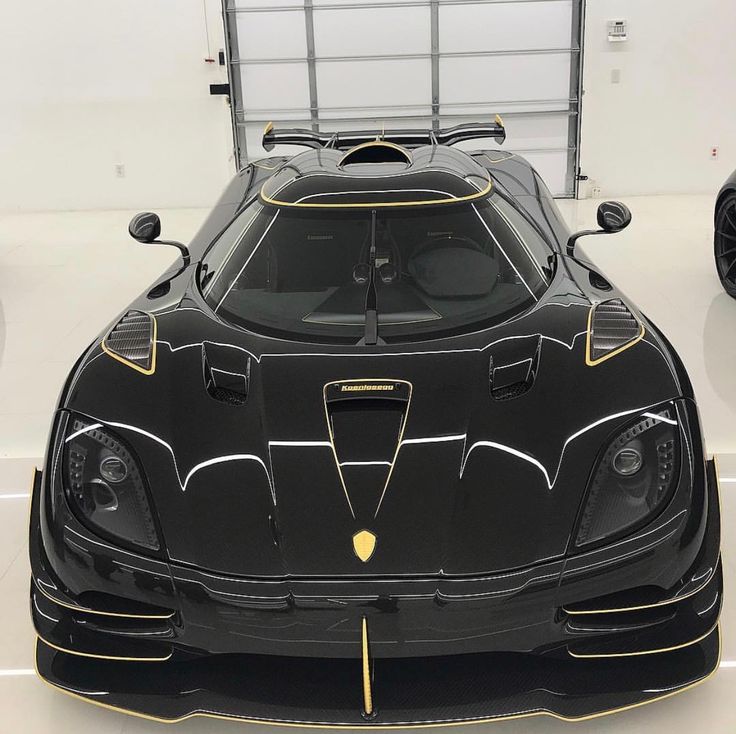 50
50
Flexi Cat with hidden links
Free
Bestsellers in the Game category
Vodfolk Explorer
10.12 €
Exolotreftes Truescal
5 €
Pistol weapon Gen 6 (correction version 1)
5.06 €
Octopus 2.0
4.04 €
Cute flexi unicorn
1.05 €
Lazy Cat
4.04 €
Heavily Armored Cataphrac Warriors - Season 9 Weapon Set
3.10 €
Marines EC Mk IV (now pre-supported)
10.11 €
Dancing Skeleton
3.54 €
VoTank : Heck'o'tons Mobile Fortress
5.73 €
Champion Alteira
5. 06 €
06 €
SPACE GNOME SQUAD
6.07 €
Heavily armored warriors Catafrac - set of limbs
1,85 €
Squataur
5.56 €
Lev Fu
€5.50 -twenty% 4.40 €
Flying unicorn
1.05 €
Do you want to support Cults?
Do you like Cults and want to help us continue our journey on our own ? Please note that we are a small team of 3 people , so support us in maintaining the activities of and creating future developments is very simple. Here are 4 solutions available to everyone:
-
AD: Disable your AdBlock banner blocker and click on our banner ads.

-
AFFILIATION: Shop online with our affiliate links here Amazon.
-
DONATIONS: If you want, you can donate via PayPal here.
-
* INVITE FRIENDS: * Invite your friends, discover the platform and great 3D files shared by the community!
Koenigsegg uses 3D printing to build its Agera One:1 megacar
Archive
Follow author
Subscribe
Don't want
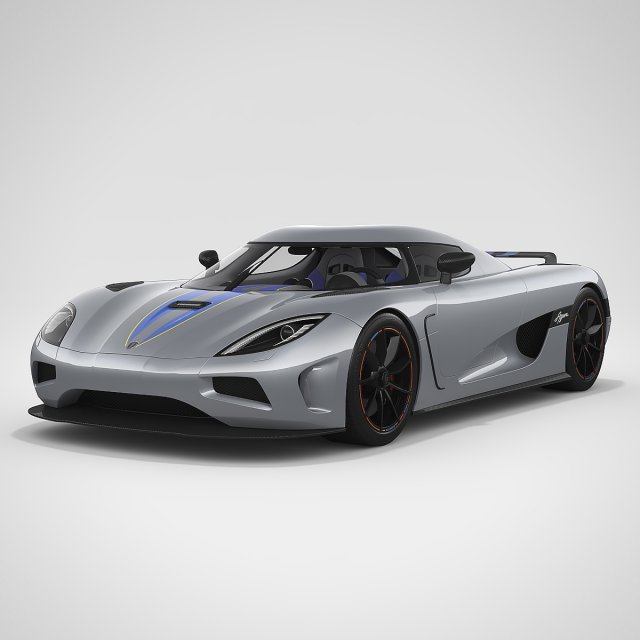
Swedish automaker Koenigsegg is celebrating its 20th anniversary this year. On this occasion, the company has unveiled its latest creation, the Agera One:1, and this hyper-bolide, according to the company, will be "the world's first megacar." After all, this is the first mass-produced car that has a power-to-weight ratio of 1:1 - it weighs 1340 kg and produces 1322 British horsepower (1340 metric horsepower). That's even more than the 1,184 British horsepower of the Bugatti Veyron Super Sport, the world's fastest mass-produced car to date, according to Guinness World Records. It is planned to produce five units of the Agera One:1 model, the retail price of which will be about $2 million (€1.45 million).
Koenigsegg's Agera One:1
efficiency.
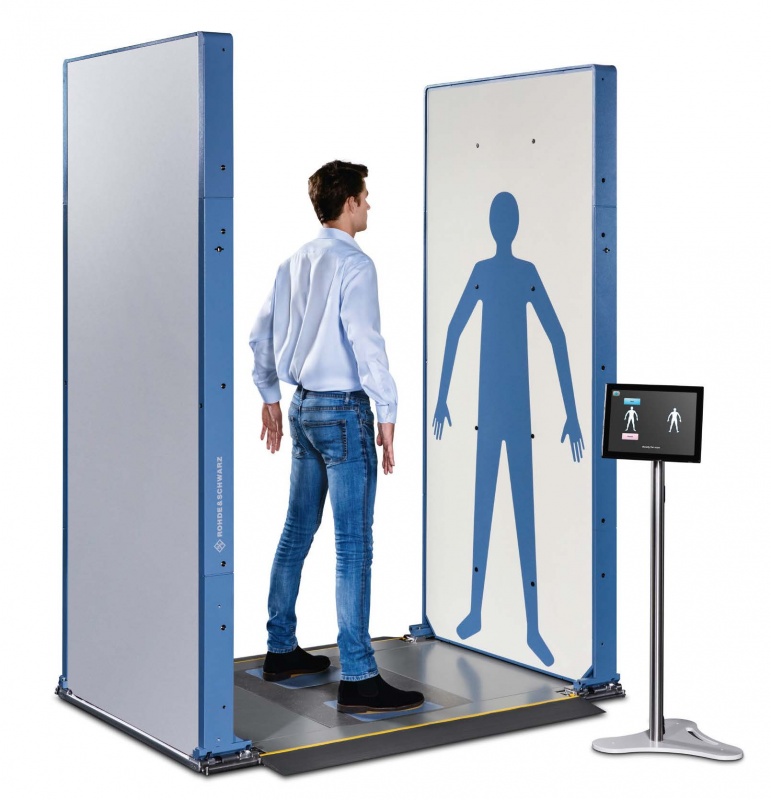
Koenigsegg said designers use 3D laser scanning technology to digitize the shape of a prototype chair, and then they can create a leather seat cover and perfect its surface and shape on the computer. Many of the parts were first 3D printed at 1:1 scale, allowing the company to test their shape and feel how comfortable they are before approving their production for a real car. In addition, some of the parts of the finished car are produced on a 3D printer from ABS plastic and titanium. With the help of 3D printing, the engineers were able to quickly make changes and thereby significantly speed up the development of car design and at the same time reduce the costs associated with this stage of work.
The new Agera One:1 features 3D printed adjustable body parts for increased efficiency and maximum torque at low rpms.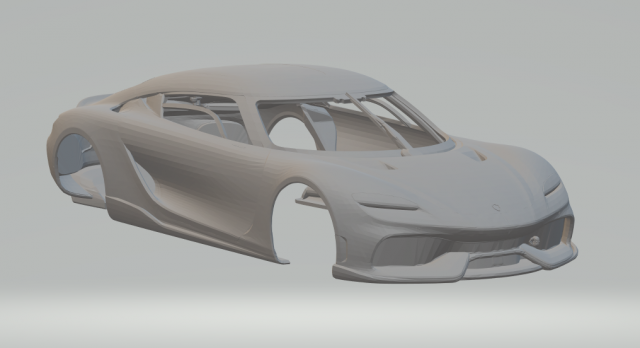 Koenigsegg has 3D printed a titanium tailpipe tip, which has resulted in a 14 oz (400 grams/0.88 lb) weight reduction. Another solution that made the car even lighter was to make the body parts from lighter carbon fiber, using a new high-modulus fibre. Koenigsegg argues that for the production of parts with low volumes and light weight, 3D printing is much more cost-effective than machining. And besides, this technology allows you to create parts of the most complex shapes.
Close-up of the rear of the Agera One:1 megacar, showing the titanium 3D printed exhaust pipes using traditional methods, and then 3D scan the already modified part to create a new 3D model. According to Koenigsegg, it is in this direction that the automotive industry will develop further.
Article prepared for 3DToday.