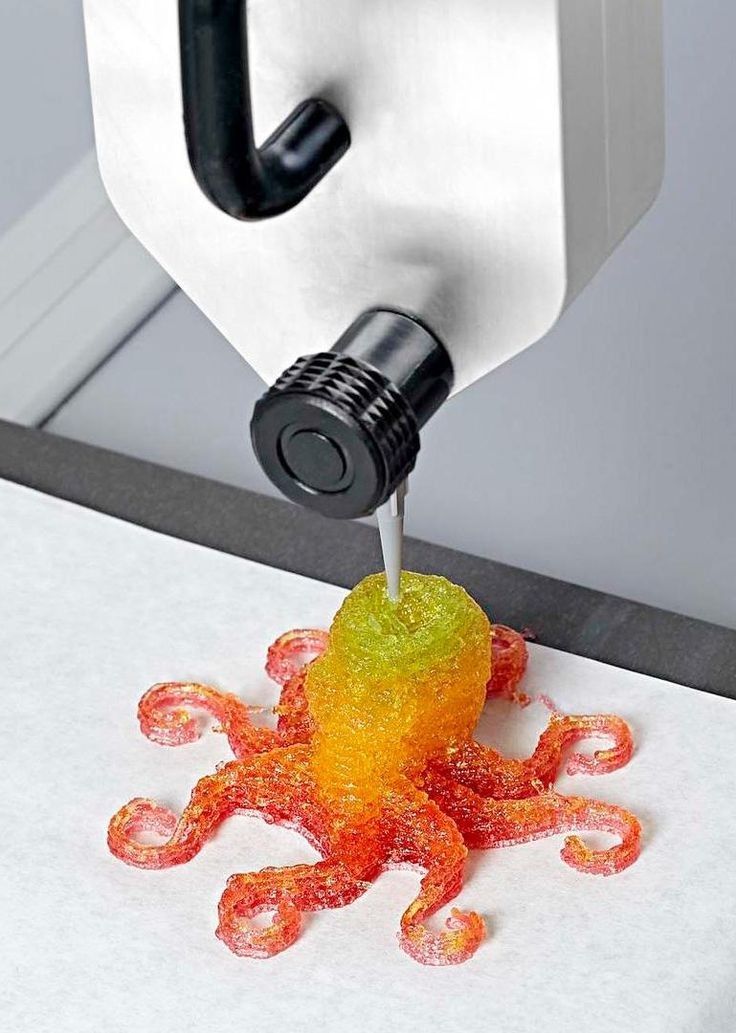
3D printed interlocking panels
Easy guide to 3D printed interlocking parts
Posted By Kat Plewa on Oct 10, 2018 |
With 3D printing technologies, the design freedom is just endless. Additive Manufacturing allows for the absolutely new use of design tools, such as interlocking tools. Thanks to 3D printing you are not able to combine different technologies and materials. Discover the benefits of 3D printed interlocking parts now!
In this blog post, we will go over the advantages of 3D printing interlocking parts, we will advise you which 3D technology will the best for different production needs and our 3D printing experts will show you our own study case of designing interlocking parts.
What are the benefits of 3D printing interlocking parts?
First of all, Additive Manufacturing gives you a wide range of materials, providing you with the best choice for your production needs. Every product you design is different, and to give you the best 3D printing experience we offer 18 materials across 8 3D technologies. Surely, one of them will perfectly fit your manufacturing preferences, whether you need your parts to be flexible or heat resistant.
Additive Manufacturing gives you amazing design freedom as the technology is capable of much more than traditional manufacturing methods. Your products can reach a new level of complexity allowing for better solutions for your production needs. Indeed, with 3D printing, you can easily design interlocking parts thanks to the high accuracy of 3D printing.
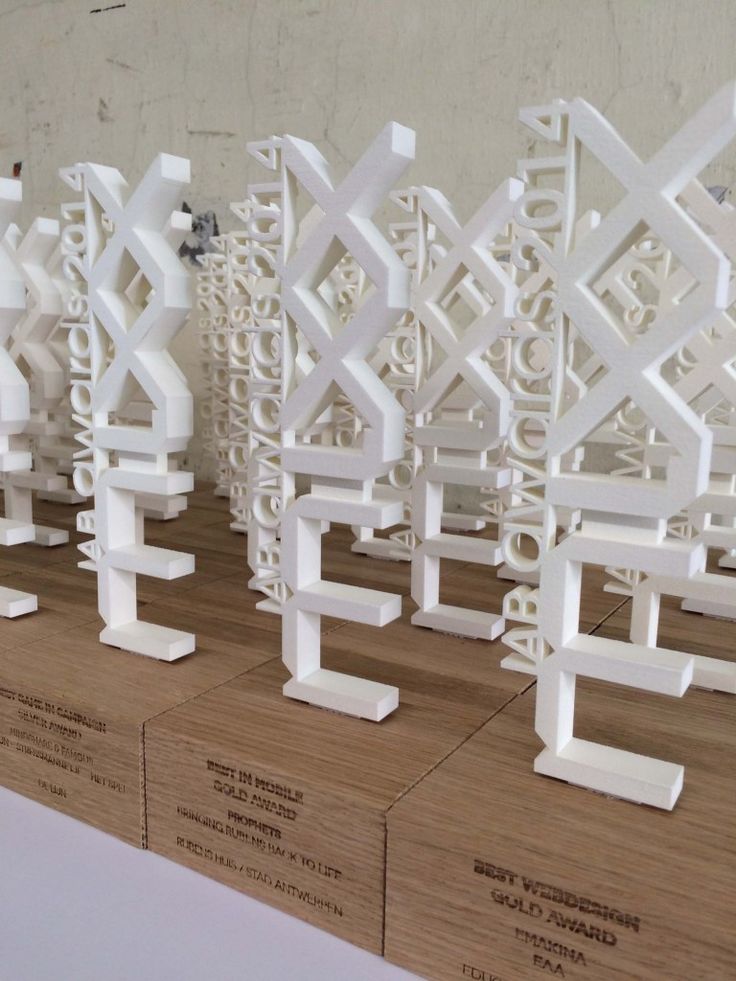
With 3D technologies, you will also be able to combine various interlocking parts if such need occurs. You can mix various 3D printing methods as well as materials and colors. For instance, in our case study, which we will introduce later on, we used SLS and MultiJet Fusion as well as different colors to show you how many possibilities Additive Manufacturing gives you to improve your production.
On top of all of that, production with 3D technologies is much faster than traditional techniques. Additive Manufacturing can shorten the production process from weeks to days and not only that, but your 3D printed parts will also be cheaper! Learn more how 3D printing stands compared to CNC machining or Metal Casting with our previous blog posts.
How to design interlocking parts for 3D printing?
In this chapter, we will move to the creation of interlocking parts in 3 easy steps. We used 3D modeling software FreeCAD, which is more suitable for engineering projects and allows for designing highly accurate parts. If you’re unfamiliar with the software, you can easily learn it with our tutorial.
The 0.15 mm difference
We started with highly precise measurements. Each of our parts is 50 mm high. However, what is absolutely essential to keep in mind is the 0.15 mm difference between each wall of two parts. It is crucial for the parts to fit together. See the picture below for further explanation.
As you noticed, we kept the left part with the same measurements, letting the teeth be 10 mm wide and high. However, keeping that in mind the right part had to be altered. All three teeth of the right component are 9.85 mm wide leaving the 0.15 mm difference in between the walls when the two parts connect.
However, the middle tooth had to be 9.7 mm high as connected it is attached to two walls of the first part, on the top and bottom, whereas the top and bottom teeth only touch 2 walls of the other part. Remembering the 0.15 mm space needed for the parts to fit, we also had to shorten the top and bottom wall of the whole part from 30 mm to 28.85 mm.
Thickening the parts
Next step was to thicken our parts. We decided to go for 5 mm for the use of this blog post. And the model is ready! Export it as an STL or any other compatible format.
Remember that for the best 3D printing results you need to prepare a separate file for each component!
Final step: 3D printing
With our online 3D printing service starting the production of your parts is as easy as uploading the files to our website. Remember that you need one file for each component.
For 3D printing, we used Nylon PA12 for SLS technology and MultiJet Fusion PA12 for HP Additive Manufacturing method. As you can see, this is a real-life example of interlocking parts, which perfectly fit despite the different material being used. Thanks to 3D printing we can achieve a new level of design freedom and totally unknown solutions for your production needs.
Which technology will be best for your production?
Different 3D technologies wary in the 3D printing methods which affect the materials’ properties. Make sure you know what stress your parts have to withstand, think about the main purpose of your product and prioritize they qualities it has to have. It is crucial for you to understand the properties your object has to have to choose the right technology for interlocking parts.
When you’re sure about your manufacturing needs you can move on to choosing the right 3D printing technology. In the table below you will find all the technologies available through our website and the main benefits of them. Click on the technology to get more information, and if you still have doubts, don’t hesitate to contact our 3D printing experts.
| Technology | Benefits | |
| SLS | plastic | A wide range of strong materials, some are flexible. |
| MultiJet Fusion | plastic | Fairly flexible material, very high precision and level of details, resistance to chemicals. |
| PolyJet | resin | Very smooth surface look, highly complex prints, a wide range of colors. |
| ColorJet | plastic | Fully colorful prints, however fragile. |
| SLM | metal | Very strong and lightweight parts, however, the technology is not as precise. |
| DMLS | metal | Strong resistance to corrosion, high ductility and very accurate. Also can handle a lot of stress. Also can handle a lot of stress. |
| Binder Jetting | metal | Smooth surface look, recommended for more decorative uses. |
| Casting | metal | High level of complexity, recommended for jewelry and decorative uses. |
Let’s have a look at a few examples for better understanding of the materials’ properties.
Our Grey Nylon PA11/12 for SLS
VeroWhite Resin for PolyJet
Last but not least, DMLS technology and Stainless Steel 316L
3D print your interlocking parts now!
After reading this blog post, it should be more clear for you to understand how to 3D print interlocking parts. With 3D printing, you can design totally new solutions for your production needs and improve the efficiency of your manufacturing process at a lower cost. Not only that, Additive Manufacturing allows you to combine different materials and technologies for the ultimate product development.
Are you considering using 3D printing for your project now? It’s as easy as uploading your file to our online 3D printing service. And if you still doubt, go ahead and contact our sales team or ask for help our Design Studio. We are always here to answer any of your questions, at any stage of your product development.
Don’t forget to sign up for our Newsletter and follow us on Facebook to stay on top of your production game!
3D Printed Joinery: Simplifying Assembly
Joinery is a term usually found in woodworking, referring to the practice of joining two pieces of wood together by geometrically constraining them. Good joinery provides strong connections with little-to-no help from fasteners like nails or screws. Joinery is useful because it ensures a strong connection with a less complicated assembly process. However, it usually involves complicated shapes that take time to design and create, while bolts and screws just require a hole and a mass-manufactured fastener.
A classic T-bridle joint, printed in Onyx
3D printing is in an interesting position as a fabrication method because printing complicated geometry is often no more expensive than printing a block. Instead, FDM printing is limited by material properties and the process of building in layers. Thus designing for 3D printing requires a new mindset, and part of that mindset is leveraging the geometric freedom of a 3D printer to reduce the complexity and cost of the final assembly. One way to do that is to look at joinery invented for wood working and injection molding and apply that to the constraints of 3D printing. In this blog, I discuss leveraging simple joints like dovetails and snap fits to improve your 3D printed joint designs, supplemented by some examples.
Dovetails
A classic dovetail joint
When it comes to constraining two parts, many people think in right angles. And this is efficient, especially when thinking about machining; right angles are generally much easier and faster to make than odd angles, requiring fewer setups and no special bits or indexing tables. To a 3D printer, however, dovetails and straight walls are all the same. With no extra effort, you can constrain another degree of freedom. This comes in handy everywhere, whether you want a sliding assembly or a fastener-less T-joint.
Sliding dovetail box, disassembled
The flared walls and tight tolerances allow this box to slide smoothly
When thinking in angles, bear in mind that the established dovetail shape isn’t the only application. The two-part sliding box shown above accomplishes the same restraint as a dovetail, but looks more like a plate with angled sides. This allows it to slide together with the other half of the box easily, and even includes a little detent at the end to snap it shut. This shape would be very hard to manufacture by most other means, but the Mark Two was able to 3D print joints without supporting materials and achieve a great fit.
Check out our Composites Design Guide
Exploring even further, angled geometry in general can help in 3D printing. For instance, printing a sideways V profile, shown below on the left, can create a constraint that would be difficult to machine, but is trivial to print. Meanwhile, a classic tongue and groove joint, as shown on the right, is hard for most printers to make because of the overhang it creates. This overhang results in a poorly supported bottom face with bad dimensional accuracy, and should be avoided if possible.
Profiles of a sideways V wall (left) and a tongue-and-groove joint (right)
Snap Fits
Snap fits are a commonly used method for cheaply joining injection molded parts. These are good shapes for plastics because they stay within the geometric constraints of mold making and use plastic’s ability to elastically deform and then snap back into shape. Because snap fits are designed for plastic, they are easily adopted for 3D printing…on the XY plane. Most 3D printer users know that objects printed on desktop FDM printers are significantly more susceptible to failure in tension along the Z axis (pointing out of the build plate) than in X and Y, because of the inter-layer boundaries. Since snap fits usually have thin cross-sections (to reduce bending moment of the clip), 3D printed snap fits must be printed “laying down” on the build plate, lest they risk shearing after repeated use.
Diagram of cantilever snap joint, printed in three possible orientations
This diagram shows an exaggerated visualization of the layers of a printed snap fit. When printed upright (pictured at left), the forces that deflect the snap fit also put tension between the layers, making it significantly more likely to break. Printed on its back (pictured at center), a snap fit will definitely be stronger, but still has a shear plane running between the tooth and the arm. Printed laying down on its side (pictured at right), however, the snap fit has no layer boundaries within its cross-section, giving it more predictable strength. And, if the snap fit is big enough, printing it on its side would allow fiber to be routed into the tooth, thereby utilizing the full strength of a Markforged part. This same rule applies for gear teeth, ratchet teeth, and any other protrusion that needs to hold significant load.
Request a free sample part
Bear in mind also that snap fits can take many forms based on application, and that the design and orientation of the snap fit may change based on your project. In particular, snap fits coming out of 3D printer are not constrained by thicknesses or mold shapes, so you can get creative with where you put them (see below). Printers make it quick and easy to prototype, so try a few geometries before settling on the final shape.
A flush snap fit mortise a ndtenon joint
Cross section of flush snap fit mortise and tenon
Putting it Together: Phone Holder
To exhibit sliding fits and snap mechanisms, I designed this cell phone holder that hooks over the hood of the Mark Two and holds any cell phone between 2.5 and 4 inches wide, so that an operator could take a time lapse video or monitor a sensitive print.
The phone holder with a phone in its grasp
This phone holder has just three parts, two interfaces. One of those interfaces is a twisting joint that acts as a hinge. Though it doesn’t look much like a dovetail, it serves the same purpose: it allows for an easily printable sliding fit, thanks to complementary angles.
Disassembled phone holder (left) and hook (right)
Rotating joint locking into place
The other interface works like a linear ratchet with angled walls (to keep them from slipping apart) and teeth to set the width of the holder. This would be a very difficult interface to machine make by most other means, but it was quite easy and quick to print!
The teeth of the linear ratchet with the corresponding face (right)
The linear ratchet for adjusting to phone width, engaged
The phone case in use, watching a Mark Two print
A Note on Tolerances
As with anything, joinery requires designing in your tolerances. On the Mark Two composite 3D printer, for most general purposes, a .08mm gap between each wall (.16mm diametrically) is enough to allow two pieces to consistently achieve a sliding fit. If one of your surfaces is held up by support material, try bumping up the gap to .15mm or so. Of course, 3D printed parts tend to vary widely, so make sure to unit test and prototype to achieve the fit you want.
This is just one small example of how designing with joinery in mind can lead to designs that are simpler and better-fit for your 3D printer. As you find good joints for printing, tweet at us @MarkForged to share your designs!
Dashboards
With the advent of 3D printers in our lives, the problem of manufacturing cases for all kinds of devices, devices and other "gadgets" has practically disappeared. However, judging by the materials published on this forum, the task of designing products - applying inscriptions, pictograms, icons, at least "for oneself" - is not being solved effectively enough.
I would like to share my modest experience in this direction, using the example of a simple power supply, made as a friendly help to one young talent, according to his terms of reference.
Everything was designed in CAD Compass-3d Home v18. Despite this, for sure, it can be repeated on any more or less serious CAD.
Power supply Uout. \u003d 5 volts _ + 1%, I max. \u003d 2 amperes, it turned out like this:
This is an assembly drawing of the power supply. As you noticed, the front panel, on the assembly drawing, is already framed in accordance with the customer's request. In finished form it looks like this:
Dimensions WxHxD = 125x37x146 mm
- Seal:
- standard branded ABS, "green"
- temperature ratings - 235/105
- nozzle - 0.4 mm
- layer thickness 0.2 mm
- wall thickness - 0.2 mm - 40%
- sticking to the table - hairspray
- supports everywhere, without blowing.
The idea of product design is as follows:
- on the selected surface, with CAD tools, a picture is drawn or text is applied
- the resulting image is extruded by cutting out a small amount
- the resulting surface is painted in the desired color
- the image of the panel with finished drawings is converted into graphics format
- the image is printed on paper or film with an adhesive surface fabricated surface
. Ol000 image sizes to graphic formats. for example in .png. We convert the image of the panel into a graphic format with a scale of 1:1 and print it on a laser printer.
I don't have a color laser printer, I use all kinds of "Copy *****" services, not expensive.
When printing panels on a printer, the product may “shrink”, which can critically affect the combination of the panel and the pattern. To solve this problem, it is more convenient to make a panel, take all measurements, and then adjust the print scale of the image.
We cut off everything unnecessary, stick it on the panel and everything that happened - that's what happened. You can cut and paste, you can stick a picture and cut out unnecessary in place.
Note to the article: The manufacture of the panel was carried out by a person, let's say - "with a little accumulated experience in technical skills", for the first time. I did this on purpose to show standard errors and how to fix them.
Important:
- print patterns on a laser printer, the resulting image on paper or film is resistant to wear.
- When working with adhesive paper or film, use a very sharp cutting tool such as a craft knife or safety razor blade. Otherwise, pile or irregularities will be noticeable on the cut.
- the surface on which the pattern will be glued must be carefully prepared - it must be smooth, all bumps and dust particles removed. Otherwise, everything will appear through paper or film. Printing the panel "face down", processing the side surfaces, the edges of the holes with a brush dipped in solvent - solves this problem.
Disadvantages:
- difficult to cut small holes.
- it is difficult to stick drawings on large surfaces.
All these difficulties are overcome by desire and practice. Irregularities of paper cuts on holes can be masked by frames, bushings. Large printed surfaces, can be cut and segmented and so on.
There are other design options for crafts: - look - "children's toy" and also - "example of design".
Maccabeus.
How to choose a 3D printer for dental applications
3D printing is making its way into more and more products around us. Sculptures, shoes, even food. Well, the happiest ones can already use the achievements of additive technologies for more comfortable treatment of their teeth.
The increasing popularization of new methods of treatment leads to the fact that new market niches appear, which are still very easy to occupy in our time. Accordingly, there is the prospect of a quick return on investment, obtaining a valuable asset, diversifying the sources of income for individual businesses.
In such a favorable situation, more and more investors decide to invest in this particular area - the production of dental products using 3D printing. And the question arises, how to spend these attracted investments? Or, to paraphrase, what kind of 3D printer to buy for use in a dental clinic?
Which 3D printers are in demand in dentistry
Printing multiple impressions of the jaw at the same time on the Phrozen Sonic 4K printer
The situation on the market is so favorable that even those who previously were either very remotely or not at all connected with dentistry decide for themselves to enter this niche. Sometimes it is not even related to medicine at all. Therefore, I want to start with what actually needs to be made and how.
Variety of popular dental products
Only a small part of the range of 3D printed products
Most likely I will not be mistaken if I assume that absolutely anyone reading these lines has gone to the dentist. In recent years, dentists have ceased to scare children, visiting the dentist has become less stressful. And already without negative thoughts, we can choose dental products presented in catalogs, presentations or which experts talk about personally.
There are several groups of products that can be produced with a 3D printer. The most innovative can be called products for bite correction - aligners.
Less obvious is the use of additive technologies for the creation of surgical templates, the transfer of checks.
It may seem surprising, but a temporary crown, a temporary bridge can be printed on a 3D printer.
The ability to print a prototype of the jaw, in particular, to check the fit of implants, is of great help to dentists.
For those who are familiar with jewelry, it will be clear that products that are produced by casting using a burnt model created on a 3D printer will work well. It can be crowns and bridges and liners and many other metal products.
You can also print a matrix for later use in the thermoforming process.
3D printing technologies used in dentistry
In FDM dentistry, 3D printers are used less often, but it happens. FDM 3D printer Stratasys
To a large extent, it is precisely such a wide range of products that are profitable to manufacture using a 3D printer that leads to a high demand for 3D printing in dentistry. Just by looking at this incomplete list, it becomes approximately clear which technology is used most often in dentistry.
SLA and LCD 3D printers can print with enough precision, suitable materials and are easy to use, so dentists are more likely to use them.
FDM 3D printers are less commonly used. Basically, enlarged models of jaws, presentation models are printed on them. Occasional auxiliary tools.
Let's take a closer look at the use of SLA and LCD 3D printers. The main difference between these technologies, from the point of view of application in dentistry, is that the LCD printer is designed to print small models with high resolution, while the SLA 3D printer can print a relatively large model without quality loss. Products required by dentists are not often large. The demand for SLA 3D printers, although it exists, cannot be compared with the demand for LCD models. LCD 3D printers have a printable area large enough to produce both aligners and jaw models. In terms of size, most dental products are not large. At the same time, the accuracy of such printers is sufficient - it is important to mention here that this is the case if we are talking about 4K or higher resolution print screens of such printers. LCD printers are more compact, easier to maintain, and cheaper.
In general, the choice of a printer for dentistry in 95 percent of cases will result in the purchase of an LCD 3D printer, so we will concentrate on machines using this technology.
Denote the initial conditions
Having familiarized ourselves a little with the niche that we will occupy, it is necessary to pay attention to who will use these 3D printers.
First of all, equipping a dental clinic with 3D printers should be profitable - we will pay considerable attention to issues related to the rate of return on investment and the optimal use of equipment.
Newcomers to dentistry, although they have the potential to gain a foothold in the 3D printing niche for dentists, will pick up all the bumps along the way, they are more likely to need advice about dentistry in general than advice on how to use 3D printing. Therefore, we will cover, for example, an already existing dental clinic or dental office.
At the same time, those who already use 3D printing most likely know what they lack and what is not very necessary. I suggest that such a reader go straight to the description of the advantages of individual models - most likely you will be able to find offers that are interesting to you.
Equipment of the new 3D printing laboratory
A 3D printed lab might look like this
So, it turns out that we are discussing the choice of a 3D printer for a new 3D printed laboratory in an existing dental clinic or dental office.
The level of investment should be relatively low - for an individual dentist who runs his own practice, the investment should be minimal.
A large dental clinic will be able to afford not only to allocate a separate, well-equipped room for a 3D printed laboratory, but also to hire specialists who will serve the laboratory without combining this activity with anything else.
In addition to an LCD 3D printer, a 3D scanner, a washing and backlighting station will be useful. When creating a 3D printed laboratory in a large clinic, you can immediately plan the purchase of machines for creating products by casting according to a burnout model and by thermoforming.
Both LCD and SLA 3D printers require a separate, well-ventilated area with a desktop. If for a small office it can be a separate closet-sized room, then in a large clinic it is worth thinking about allocating an appropriate area not only for the printers themselves, but also for post-processing tables, for storage racks for materials, for service jobs.
Who is an expert in dental 3D printing
Only a doctor can be an expert in 3D printing in dentistry
A separate question is who will work directly with 3D printers.
It would be more profitable for a large clinic to immediately hire specialists with experience in using 3D printing in dentistry. At the same time, in a small clinic or in the case of a private dental practice, the dentist or dental technician himself can relatively quickly learn how to use and maintain a 3D printer.
The dentist must still evaluate and accept the products. It is quite common to hold joint seminars for dental technicians and dentists at the same clinic.
It is very important to understand that only a dentist can be an expert in dental 3D printing, evaluate the quality of printouts, and set criteria! Even the most experienced 3D printer can't do this alone.
Key criteria for choosing a 3D printer for a dental lab
When selecting any machine for commercial use, the selection criteria must be clearly defined. Often it is the clarity of such criteria that determines the payback period and the overall value of the machine.
Earlier, we touched on issues related to what exactly dentists require from the 3D printers they use. Let's cover these requirements more fully and arrange them in order of priority.
Imprint accuracy is the main criterion
Rough model of the jaw. The color shows the deviation in dimensions from the original (mm)
The main criterion for choosing a modern 3D printer for use in a dental clinic is accuracy, or rather resolution. The tasks of modern dentistry, which specialists are ready to delegate to machines, require the ability to manufacture high-precision products. For LCD 3D printers, a resolution of 2K nominally may be suitable - the accuracy of aligners, for example, is allowed up to 50 microns - but the actual quality of the resulting printouts may be lower than declared by the manufacturer of the 3D printer, both due to the characteristics of the materials used, and in connection with the presence of the human factor. Therefore, dentists use LCD printers with a print screen resolution of at least 4K.
The accuracy of the prints will be higher, with a shorter illumination time of the photopolymer. The Mono LCD screen will help reduce the time needed to expose one layer. The presence of such a screen will not only increase accuracy, but also speed up the printing process.
Print area - rate of return on investment
Even the largest laboratories use groups of identical 3D printers
A very important criterion that can be assessed by the passport of a 3D printer is the printable area. The larger the printable area, the faster you can produce a series of printouts - this is the peculiarity of using an LCD 3D printer. Due to the fact that a client of a dental clinic quite often needs to receive a series of products on hand during a visit - again, aligners, or immediately need to print a complex model with small details, the total print area will help to carry out the service faster.
At the same time, the print area of one printer may not be so large - remember that products for dentistry are rarely large. To speed up the production process, most often they buy several identical or very similar printers. Most often the same manufacturer.
Such a 3D printing farm will not only be cheaper than a single printer of a comparable printing area, but will also allow you to accept multiple clients at the same time. Maintenance and repair of printers is also simplified - one or a pair can be taken out of operation without stopping all production.
The choice in favor of several printers with a smaller print area is also justified in terms of the fact that it is recommended to invest in 3D printing gradually. Buying a dozen 3D printers at once is justified only when you know for sure that you have a large flow of customers and the total workload of the 3D printing laboratory will be about 60 percent.
In general, buying multiple 3D printers will reduce your initial costs and risks, while the overall larger printable area will allow you to make more profit.
Usability, reliability, ease of maintenance
Unfortunately, most of the mistakes when choosing a 3D printer for a dental clinic are associated with underestimating the importance of the usability of a 3D printer. These machines will be serviced by a person, which means there is a human factor. You know from experience that work is more productive when you work comfortably. Research confirms the validity of this personal experience. The more convenient it is to work on a 3D printer, the fewer mistakes the operator will make, which means less money will be spent - both material and time.
The reliability of a 3D printer - design, electronics, individual elements - will be economically justified. Less breakdowns - less downtime - less costs.
Ease of maintenance reduces costs in the same way
Post-processing
The process of removing supports is not easy
It must be borne in mind that after printing, absolutely all printed models require post-processing. At a minimum, this is flushing and backlighting. As a maximum, a printed, washed, illuminated part, from which the supports were removed, can be a semi-finished product that has yet to be worked on. A 3D printer should provide the ability to not be a stand-alone device, but to work in an ecosystem.
What might be useful but not worth emphasizing
The standard marketing policy of any retailer is to try to convince you to buy a product based not so much on direct value as on features that sound and look good on paper, but do not greatly affect the quality of the product itself. A good example is the color of a delivery vehicle. If you do not take the possibility of applying advertising images and colors from the brand book, the delivery vehicle can be of any color. But the seller may try to convince you to buy this particular car by appealing to its color.
Similarly, when choosing a 3D printer for a dental clinic, some criteria are not as valuable as they sound.
Range of materials used
Most modern LCD 3D printers use ultraviolet wavelengths of 380nm-405nm to illuminate the photopolymer. The ability to use specific materials seems like a very useful feature, but in fact, you either know for sure that you will use such materials, or you will not use them. It is enough to understand what range of tasks the 3D printer will solve and choose accordingly. At the same time, it will be useful to be able to use the selected materials more conveniently, for example, a system of material profiles.
It is important to expand the range of materials used unnecessarily - it is not economically feasible.
Additional software - pros and cons
Software that helps you print. FormWare Phrozen Edition.
The whole process of creating printouts involves the use of several software products. And, if software that will allow you to facilitate or speed up printing without loss of quality is useful, then different programs for modeling or, for example, creating print time-lapses will never be used. The specialist models in the environment he is used to, and time-lapses are just a beautiful feature.
Remote printing and control
When you think of 3D printing, there is often an assumption that I pressed a button, an hour later I came, and everything is ready. It's actually not that automated. In principle, it is better to keep the machine under supervision at least during the start of printing. This means that remote printing will not be so popular. At the same time, I note that after the operator of a 3D printer gets used to working with a particular machine, he will know most of its features, the ability to transfer files to the device remotely, or even remotely control printing will be useful.
Remote control will bring more benefit to an experienced operator, although a beginner in 3D printing will gain experience quickly if desired.
Top Best Dental 3D Printers
Based on what I have outlined, I will try to create a rating of the value of 3D printers for dentists.
Phrozen Sonic 4K
This 3D printer is specially designed for use in dental clinics. A good price/quality ratio makes this 3D printer an excellent choice for both a small clinic and as one of several printers in a large 3D printing laboratory. Mono LCD allows you to reduce the exposure time of the layer to 1 second, and the large area of \u200b\u200bthe 6.1” matrix allows you to print more models at the same time, making the production process even faster! With the FormWare Phrozen Edition software, post-processing can be facilitated by optimally positioning supports, and reduce printer control time by arranging more models in the same print volume. If you have a dedicated 3D printer operator, the function of remotely sending files to print will be useful.
Phrozen Sonic Mini 4K
Mini version of the popular printer. At a lower price, it has the same resolution and matrix size - 6.1” @ 4K. It will be a good choice for a private practice dentist's office. Also one of the options for entering 3D printing for a medium-sized clinic is that it performs well both as a single 3D printer and as an additional printer, if there are several more advanced ones. A fairly high print speed is achieved due to Mono LCD, which allows you to reduce the exposure time to 2 seconds.
Peopoly Phenom
Large Format - 276 x 155 x 400mm build area - MSLA 3D printer (LCD+LED). The use of MSLA technology allows you to get high-precision prints on a 12.1” @ 4K matrix without distortion. Well suited for large clinics that want to increase their 3D printing capacity. At the same time, the extended life of the LCD panel will significantly reduce the overall cost of maintaining this machine.