3D print upgrades for ender 3 pro
The Best Creality Ender 3/Pro Upgrades and Mods – Creality 3D
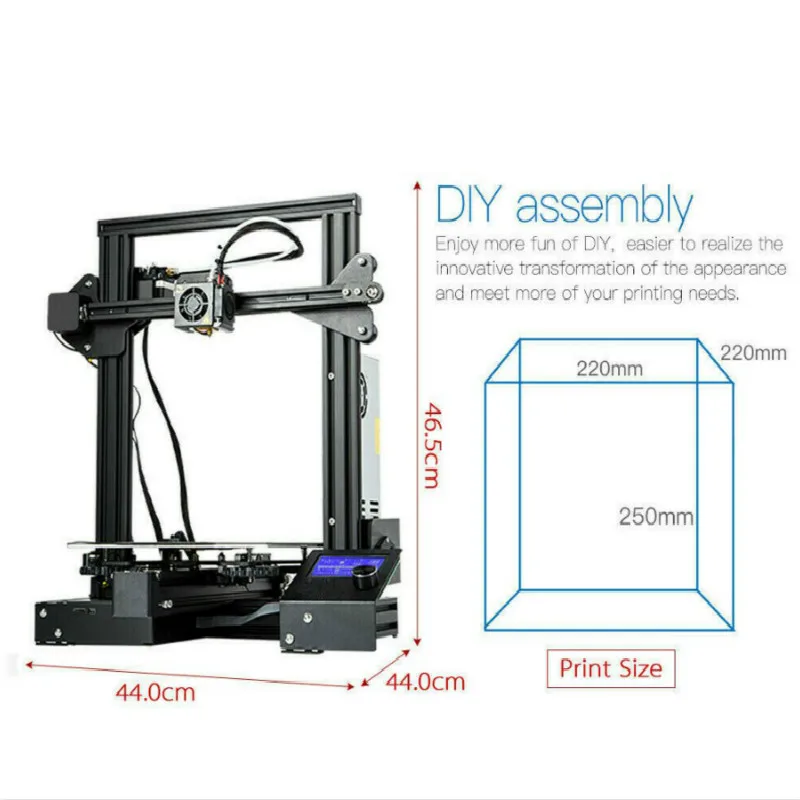
The Ender 3 is an amazing 3D printer. For the money, it's hard to find one that will give you better prints right out of the box. However, it's far from perfect.
In this guide, I'll show you the top must-have upgrades and mods for the Ender 3 and Ender 3 Pro—both 3D-printable and purchased upgrades/mods.
A note on this guide:
In researching this guide, I found a lot of others with massive lists containing every upgrade and mod under the sun—unfortunately, many of those upgrades are pointless wastes of time and money. So, in this guide, I'll cut through the BS and cover the most impactful items that will give you better prints while also improving your overall printing experience.
- Upgrades and mods to 3D print
- Silent mainboard v1.1.5
- MeanWell power supply (PSU) upgrade
- Glass print bed
- BLTouch auto-leveling sensor
- LED strip
- Bed springs
- Metal feeder assembly
- Stepper motor dampers
- Direct Drive Extruder
- Firmware upgrade
Below are the top 3D-printable Ender 3 mods and upgrades you can perform. Tons of other printable mods exist, but this is the core list that will give you the best bang for your print time.
Board fan guard
Before you print anything else, print this mod. The location of the mainboard fan is directly beneath the build plate, meaning bits of filament can fall in and damage the fan or board. The model is available on Thingiverse.
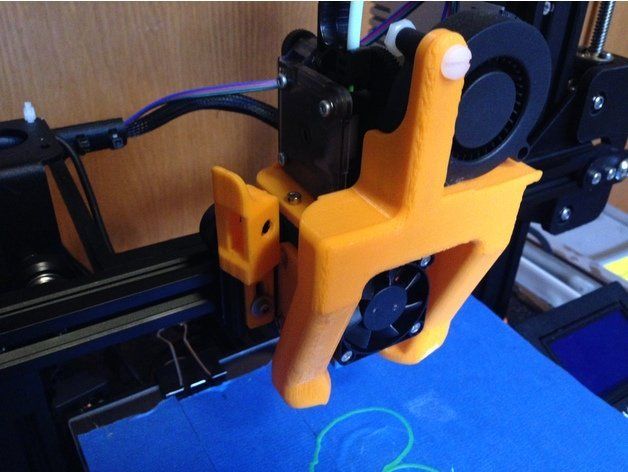
Filament guide
This filament guide holds the filament away from the feeder, allowing for a more consistent feed rate and less skipping. It snaps directly into the side of the upper support.
Cable chain
This cable chain is a must-have for preventing dangerous cable snags when the bed moves along the Y-axis.
Display PCB cover
This simple screen cover protects your Ender 3 display's PCB (printed circuit board) from damage.
Bowden tube fitting fix
If your Bowden tube has popped out of place or if you're having print quality issues, you might want to print these pressure fitting shims that will prevent your Bowden tubes from shifting or popping out during printing.
Beeper silencer
You've probably noticed how loud the Ender 3 beeps when navigating the menu interface. This beep can level villages and knock satellites out of orbit. This 10-minute print mutes the beep quite a bit, getting rid of that annoyance and protecting our countrysides and space assets.
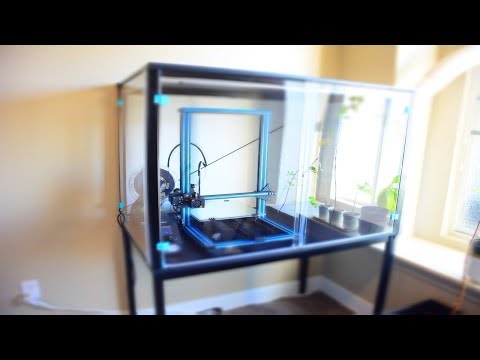
If you're using a 3D printer enclosure, I recommend printing these mods using ABS or PETG filament; ambient enclosure temperatures can cause PLA to warp and deform over time.
There are two main sources of noise on your printer: 1) fans, and 2) the drivers (chips) that run your stepper motors. The "whirring" noise you associate with printing is caused by the cheap stepper motor drivers used on the stock Ender 3 board.
Enter the Creality Silent Mainboard (v1.1.5). This board directly replaces your existing Ender 3 mainboard, upgrading your printer to the silent TMC2208 stepper motor drivers. This is the biggest "sound" upgrade you can make. It reduces your printer's noise from approximately 48dB to 36dB, with the remaining sound coming from the Ender 3's fans (which can also be upgraded to quieter fans).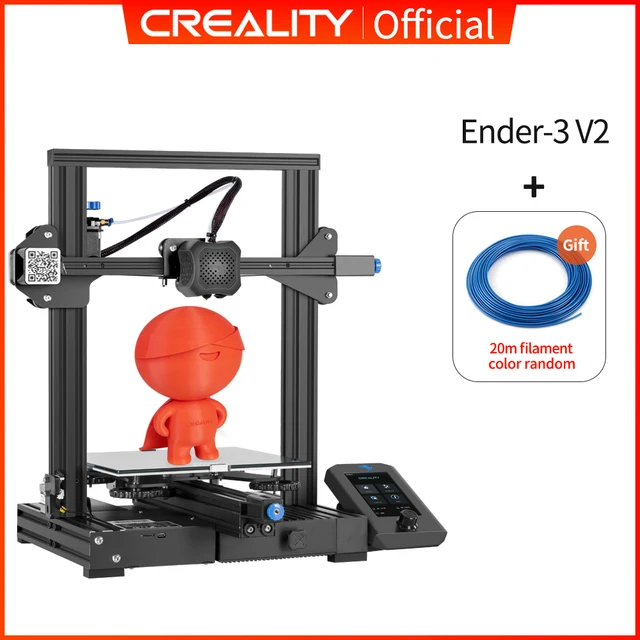
If I had to choose a single upgrade from this guide (other than OctoPrint), it would be this one. Combined with the MeanWell PSU upgrade also mentioned in this guide, I often forget my printer is running since it now generates so little noise.
Of course, in addition to decreasing noise, this board and its upgraded stepper motor drivers improve the quality of your prints.
There are several reasons to upgrade your Ender 3 to a MeanWell PSU including noise, safety, and even reducing bed-leveling issues.
Noise
Compared to the stock PSU whose fan runs continuously, the MeanWell PSU only runs when it needs to—usually less than 20% of the time. This means a much quieter printer, especially when paired with the silent board upgrade. This reason alone made the upgrade worth it to me. I work in the same room as my printer, so noise is a huge issue.
Safety
MeanWell PSUs use higher quality components than the cheap stock unit, providing cleaner power with fewer of the electrical spikes and sags that could pose a safety hazard.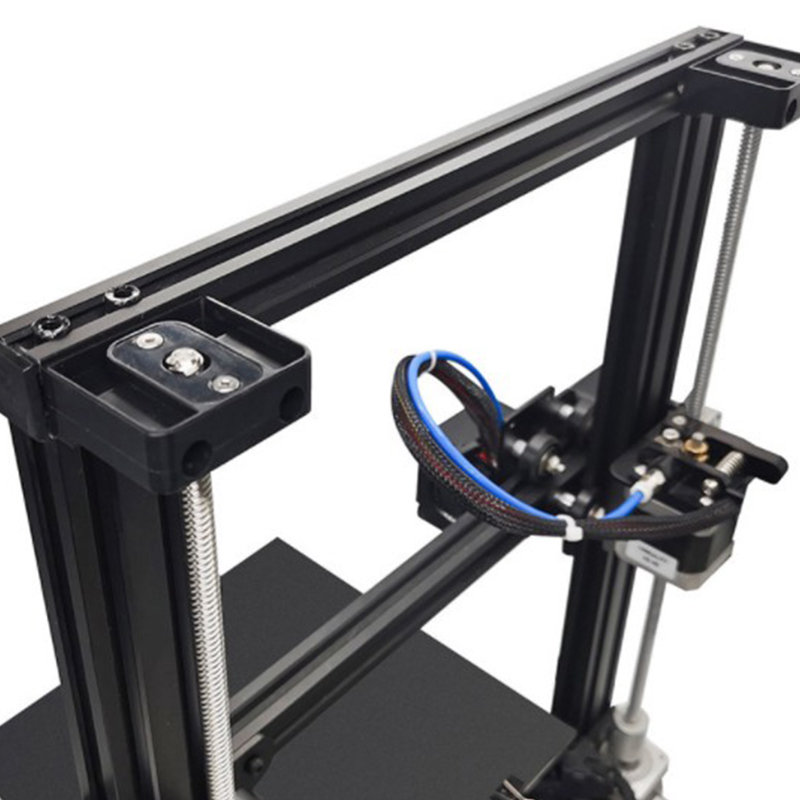
Reduce auto-bed-leveling issues
If you're using an auto-leveling sensor such as the BLTouch or EZABL, the MeanWell PSU's consistent, clean power reduces issues related to power ripples and grounding.
Form factor
The MeanWell PSU is noticeably thinner than the stock unit, which is handy if you're using an enclosure and need to relocate it.
Which one to buy (and where)
The MeanWell LRS-3500-25 PSU is the correct 24V MeanWell power supply for the Ender 3, and this upgrade takes about 20 minutes to perform, excluding PSU housing print time.
There are tons of different build plate surfaces out there: metal, magnetic, BuildTak, painter's tape, and tons more. But after printing for many years on several different printers, I've always had the best experience with glass.
Glass beds are supremely flat, fixing the all-too-common "warped Ender 3 bed" issue that many of us experience. Glass beds also save on prep time, are easy to clean, and offer effortless print removal with a semi-glossy print finish.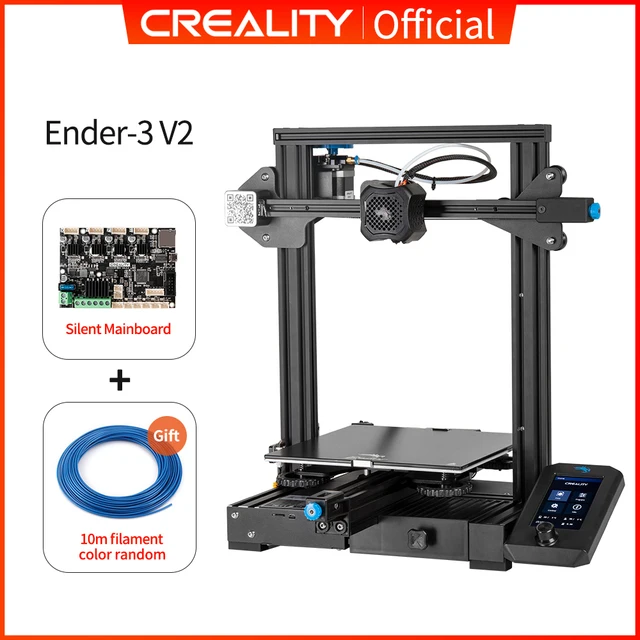
Choosing a bed
I wrote a comprehensive guide to 3D printing on a glass bed if you'd like to dive into the details. tl;dr; Choose a thin borosilicate glass bed, and adhere it directly to the existing build plate using small binder clips. This 235x235mm glass bed is the one I recommend for the Ender 3.
Bed leveling the Ender series 3D printers is key to the perfect first layer and overall print quality. Unfortunately, it's also one of the most annoying "chores" in 3D printing. Just when things are going well, you realize you forgot to relevel your bed and things look terrible.
But what if a simple sensor, installed in just 45 minutes, could automatically level your bed for you every time? That's what BLTouch does.
How BLTouch works
BLTouch uses a small probe to build a mesh of points at the beginning of each print to determine exactly how unlevel (or warped) your bed is, and in which directions. It then takes that into account when performing a print, altering each GCODE instruction as needed to account for the imperfect build surface.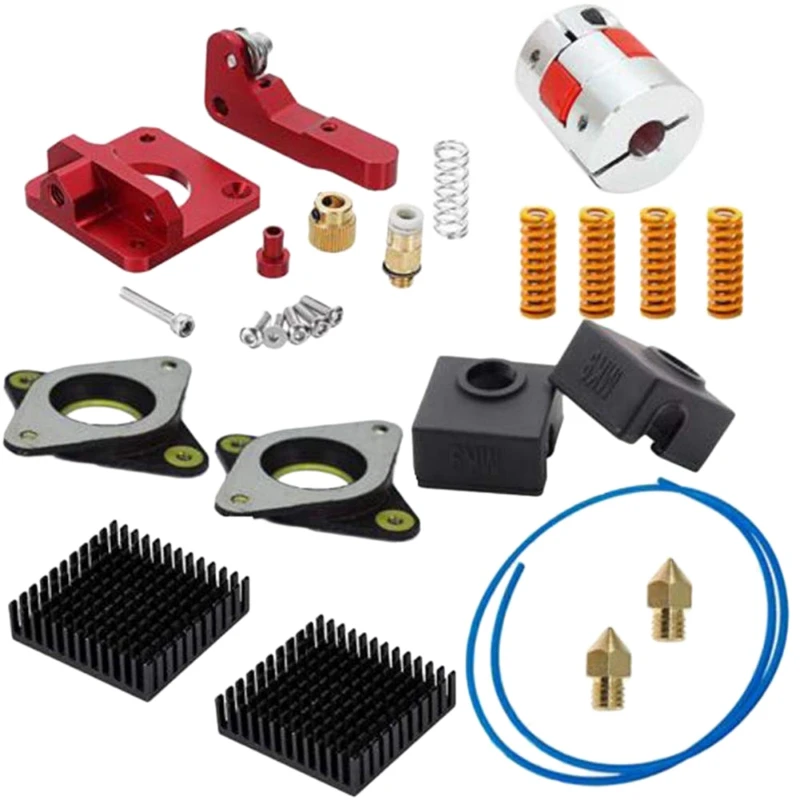
The process
Here's a breakdown of what goes into this upgrade:
Hardware: The probe mounts next to your print head assembly and connects to the existing Ender 3 mainboard.
Software: A slight firmware modification is needed to allow BLTouch to work.
Slicer/OctoPrint: You'll need to insert a few lines into your slicer (and OctoPrint, if equipped) so that each GCODE file you generate will include some BLTouch instructions at the top.
This Instructables guide does a good job of explaining how to do this on the CR-10, though the process is similar for the Ender 3.
Which one to buy (and where)
I recommend this BLTouch sensor (V3.1 or newer) since older versions won't work with newer Marlin firmware.
Proper print illumination allows you to identify issues with your prints early—it's also nice to be able to see what's happening clearly. There are tons of methods for adding an LED strip to your 3D printer. I prefer one that places the light source as high as possible in order to illuminate the entire print bed, not just the current print area.
I wrote a comprehensive guide on adding an LED strip to your 3D printer, featuring the Ender 3 specifically. Using the method outlined there, you can even power your LED strip directly from your Ender 3 by regulating the voltage using this buck converter in conjunction with this XT60 splitter cable.
Your bed springs might seem like an insignificant part of your 3D printer, but they're actually quite important to bed leveling and stability.
The stock Ender 3 bed springs are terrible and can lead to print issues and frequent bed leveling. These issues are largely caused by:
The cheap metal used to manufacture the springs, and
The rounded design of the springs themselves
In fact, if you compare the stock and upgraded springs side by side, you can see only the upgraded ones feature a flat surface on the top and bottom. This leads to less shifting compared to the stock springs.
Upgraded Ender 3 springs take minutes to install and mean less frequent bed leveling between prints.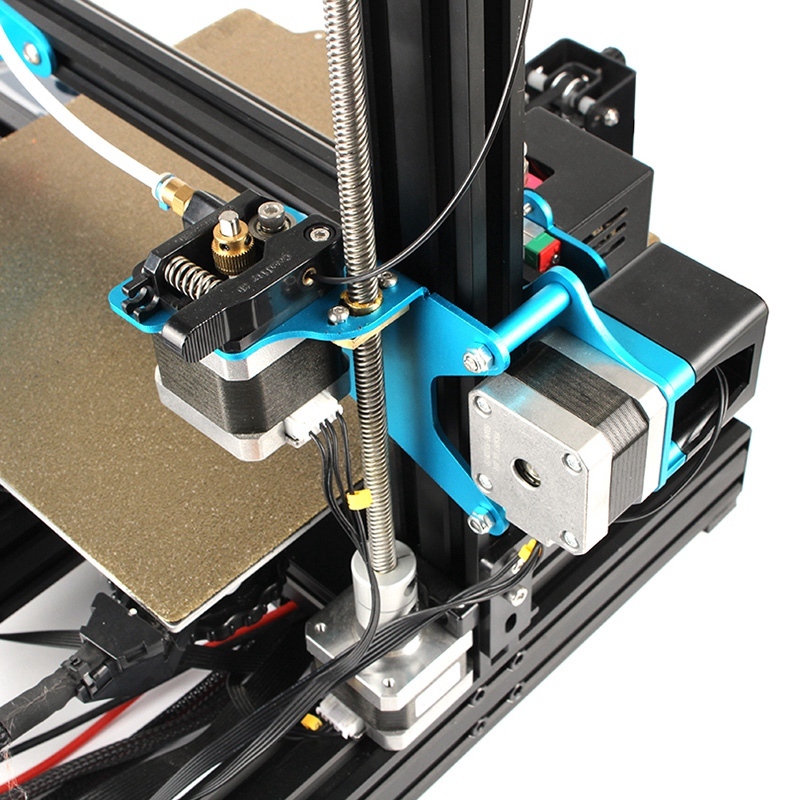 This upgrade costs about $10, making it one of the least expensive Ender 3 upgrades out there.
The plastic metal feeder assembly on the Ender 3 leaves something to be desired, and improper tension can even cause feeder gear skips, leaving gaps in the layers of your print. Installing an all-metal feeder assembly such as this one will add durability and stability to your printer.
Yet another noise mod—adding these dampers to your X- and Y-axis stepper motors decreases the noise they generate by 5-10dB. This is a simple, inexpensive mod with a measurable noise reduction impact.
- All-metal case, sturdy and wearable
- Direct extruding, more precise feed-in
- Compatible with more filament. such as TPU, PLA, ABS, etc
- Easy to install and use
- Suitable for Ender-3 Series
- Output voltage: 24V
Get the latest Firmware
SOURCE: howchoo.com
Ender 3 Upgrades: The 11 Best Free & Paid Upgrades 2022
If you’re just getting started with 3D printers, Creality’s Ender 3 series is well worth a look, and has plenty of upgrades available — both paid and open-source — so there’s a way to modify your 3D printer to suit any budget.
3D printer modification may seem like a daunting task for beginners, but it’s much simpler than many would assume. There are plenty of upgrades for the Ender 3 available and many of them are far less expensive than you’d think — and there are many you can print yourself at home.
Starting small is sensible, especially as a first-time modifier. Using smaller, simpler modifications not only ease you in, but also give you the freedom to expand as you get more comfortable with upgrading your Ender 3.
The Creality Ender 3 – Why is it a Good Choice for Upgrades?
The three main models in the Ender 3 series are the original Ender 3, the Ender 3 Pro, the Ender 3 V2, and the Ender 3 Max.
3DSourced is reader-supported. When you buy through links on our site, we may earn an affiliate commission. Learn more
If you haven’t bought your Ender 3 yet, you can buy them at Creality’s store:
- Ender 3
- Ender 3 V2
- Ender 3 Pro
- Ender 3 Max
We also have an article comparing every Ender 3 model.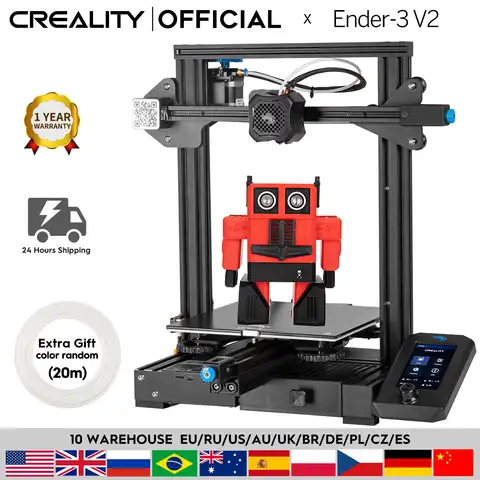
Also: Ender 3 vs Ender 5 compared.
The Ender 3 is a great choice if you have high-school-age children who are looking to get into 3D printing, or are taking your own first steps in 3D printing.
Sent partially assembled, with tools and instructions included, the Ender 3 is engaging, easy to understand, and affordable.
Ender 3 printers are also easy to upgrade, allowing your printer to grow and develop along with your skills.
Best of all, the Ender 3 range is fully open-source, further simplifying the modification process. 3D printing modifications allow you to be sure you’re getting exactly the parts you need, from board covers to cable chains.
3D Printing with the Ender 3 V2
While it’s good to go straight out of the box, the Ender 3 V2 can be made even better with some simple upgrades.
From the basics, such as making your 3D printer less noisy, or more efficient, to the engaging complexities of 3D printing in a wider range of materials, a few simple mods and add-ons can make all the difference.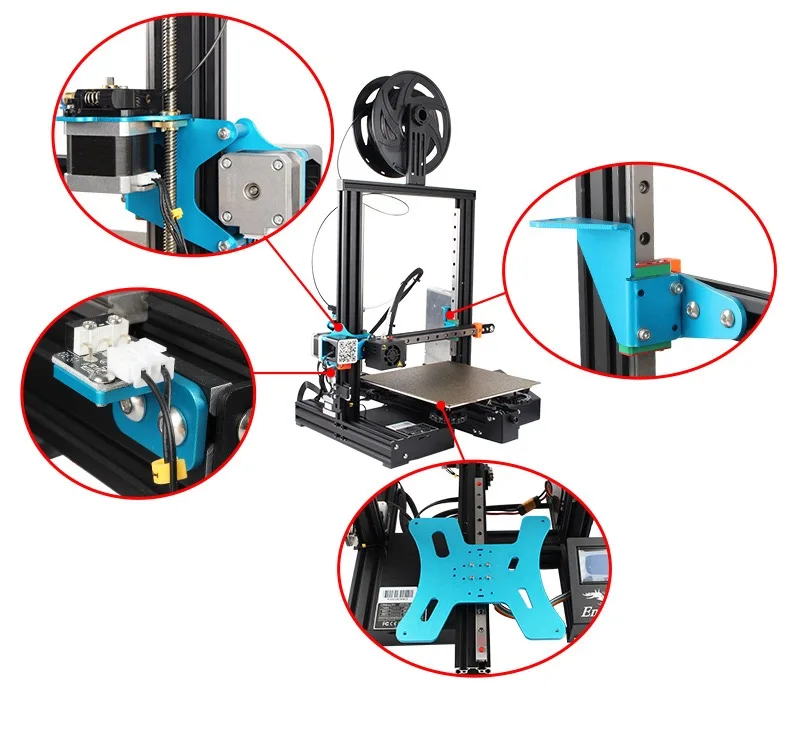
This means that STL files for your own hardware mods, accessories, and simple upgrades can be found for free on sites like Thingiverse.
Why Upgrade Your Ender 3 Printer?
If you’re just starting out with 3D printing, you may wonder whether you need to worry about upgrades and mods just yet.
Upgrading an Ender 3 printer isn’t complicated, even for a beginner, and it’s well worth it. Boosting your printer’s performance capabilities from the start means you won’t find yourself becoming frustrated with limitations as your 3D printing skills improve.
Ender 3 Upgrades You Can Buy
While 3D printing your own Ender 3 upgrades is a fun way to improve your 3D printer’s capabilities, you can also buy improved performance.
Purchasing an affordable 3D printer and then buying pro mods as you need them is easier and cheaper than spending money on a more professional 3D printer, which you may never use to its fullest potential.
The Ender 3 range of 3D printers are widely compatible as far as upgrades are concerned.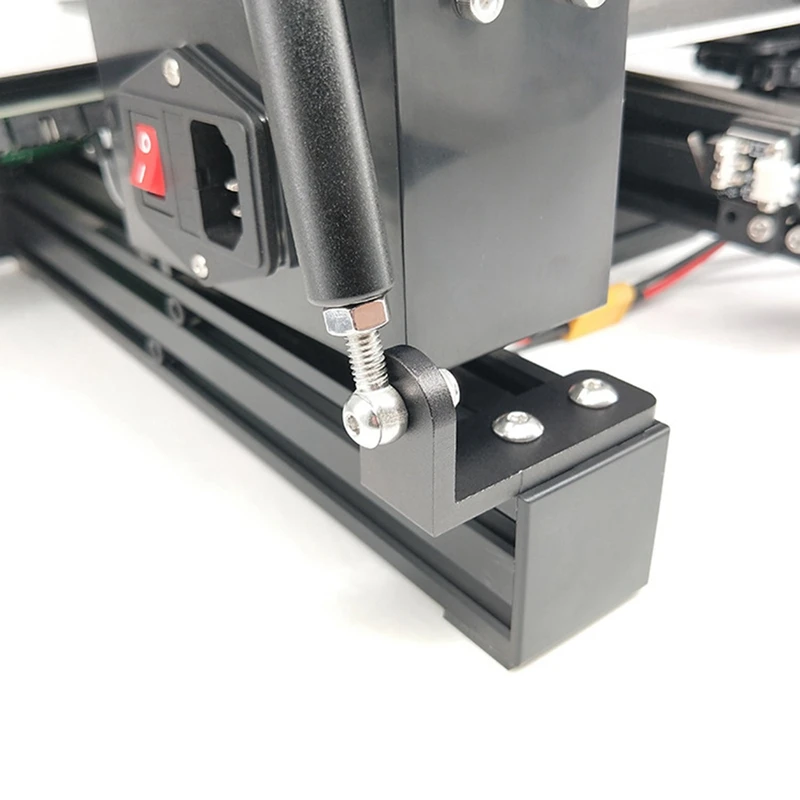 Full compatibility exists between the Ender 3 and Ender 3 Pro for the most common upgrades, while the Ender 3 V2 has some differences, and isn’t compatible with all Ender 3 upgrades.
There are a wide range of upgrades that will help you get a better-finished print product. From glass print beds (supplied as standard on the Creality Ender 3 V2 model) to the Raspberry Pi board which gives you all the benefits of OctoPrint, improving your 3D print quality has never been easier.
However, there are some simple steps you can take to ensure top-quality prints for a long time to come.
Here are the three upgrades we’d suggest giving serious thought to if you’re looking to quickly boost your print performance.
Raspberry Pi
- Price: Depends on model — Available on Amazon here
The Raspberry Pi circuit board allows you to run OctoPrint, a browser control interface that lets you monitor and control every aspect of your 3D print experience.
Installing a Raspberry Pi is a simple process, and mainly involves printing a case, the size of which depends on which Raspberry Pi you’ve purchased. Since Raspberry Pis range from $20 – $140, so you’ll want to think well about which one you want to upgrade your Ender 3.
With the case built and the Raspberry Pi installed, all you need is a firmware update before you can see and alter the print temperature, get print status feedback, and even stop and start your print job from anywhere there’s an internet connection.
E3D Titan Aero Extrusion Mechanism
- Price: $120-190 — Available on Amazon here
Featuring a tight filament path, this extrusion upgrade allows you to use a wider range of filaments, including specialty filaments. The all-metal design of the Creality printers means it can be used even when printing temperatures over 300℃.
Read more: Ender 3 (Pro, V2 and S1) hot end upgrades
CR Touch Auto Bed Leveling Kit
- Price: $39 — Available on Amazon here
While Ender 3 models don’t have auto-leveling features by default, you can cheaply upgrade the Ender 3 to auto-level with the CR Touch upgrade kit.
Manual leveling adds extra time, hassle, and generally having auto-leveling makes your 3D printing experience more pleasant. Having to re-level the printer every few prints is an annoyance, and human error can affect prints.
- We also have a ranking of some of the best auto-leveling 3D printers.
- We have a dedicated guide to the best Ender 3 auto-leveling kits
Glass Print Bed (Upgrade for the Ender 3, not V2)
- Price: ~$20 — Available on Amazon here
The main problem that keeps cropping up with Ender 3 models is print bed warping. Fortunately, this has been resolved with the Ender 3 V2, which comes with a glass print bed as standard.
If you have the Ender 3 Pro, or an original Ender 3, then replacing the original aluminum print bed with a tempered glass version means you never have to worry about warped print beds again. It also gives you a smoother print finish on the bottom of your printed items.
It can be difficult to get the print bed level on Creality Ender 3 printers. A set of bed leveling wheels takes the effort out of this part of setting up your Creality 3D printer, and makes your 3D printing journey an instantly smoother experience.
- We have a dedicated article to the best Ender 3 glass bed options
Platform Spring
A small component with a big impact! Offering greater stability on the print bed, a stronger spring mitigates the swing impact of printing at higher speeds.
Print Your Own Upgrades
The obvious place to start upgrading an Ender 3 3D printer is with printable mods. As all models of the Ender 3 series are fully open-source, the designs for a range of upgrades and mods you can print at home are readily available online.
Ender 3 V2 users have found that there are some common printable mods that immediately improve its performance.
Here we’ll take a look at the best printable upgrades, all of which are available for free on Thingiverse.
Board Fan Guard
A board fan guard prevents pieces of filament coming off and falling into the build plate, where they could damage the mainboard or fan.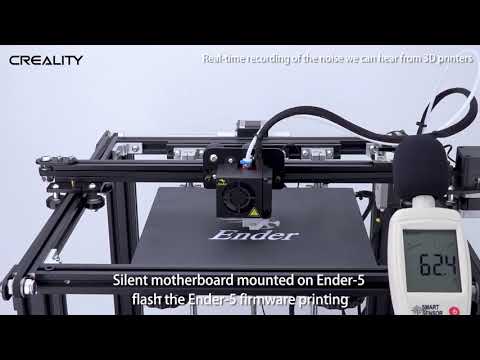
Filament Guide Tubes
Filament guide tubing protects your filament material from being exposed to the air, as well as ensures the filament transfer process is as smooth and efficient as possible. This reduces the waste filament in 3D printing, and gives you a better-finished print.
Cable Chain
A near-essential little piece of operational organization. Also known as cable carriers or drag chains, cable chains help prevent your cables getting tangled, and ensures they run smoothly through your 3D printer.
An important design element for 3D printed drag chains is strain relief; this can be achieved through spiral wrap build, additional support where the cable joins the connector, and using thin cables in a wide radius, rather than thicker cabling on a tighter radius.
PCB Cover
A quick and simple way to protect your 3D printer’s printed circuit board from impact or spill damage, as well as corrosion from moisture in the atmosphere. You can find free files to print your own here.
Bowden Tube
Adding tubing to the Bowden extruder allows you to print with flexible filaments such as TPU. Flexible filaments give a higher quality print finish, and open up a wider range of printing possibilities.
Beep Silencer
A particularly annoying aspect of the Ender 3 V2 is that it emits beeping sounds throughout the printing process.
If you’re doing a lot of printing, working late into the evening, or have to share your space with those who are not necessarily 3D printing fans, this noise can quickly become quite intrusive.
A simple bleep silencer is an easy printable upgrade, and one that will improve your quality of life and save your ears.
Firm Up Your Firmware
In 3D printing, firmware is what enables information and instructions to be sent through the various elements of your 3D printer.
Ender 3 V2 3D printers use Marlin 2.0 firmware, which is much more efficient than the firmware on earlier Ender printers. Upgrading firmware might sound way above your tech level, but it’s actually pretty straightforward, with easy-to-follow steps
3D Printing: Step In, and Step Up
The range of possibilities 3D printing offers should feel exciting, not overwhelming. With the solid, reliable entry-level performance of Creality’s Ender 3 printer range, and easy upgrades and mods you can either buy online or print at home, excitement definitely takes the lead.
If you already own a Creality Ender 3D printer and are keen to improve on an effective starting base, or you’re completely new to 3D printing and evaluating all possible options, upgrading your 3D printer is far easier and cheaper than many assume.
Other upgrades articles we have written:
- Ender 5 Plus upgrades
- Ender 5 Pro upgrades
- Creality CR-10 upgrades (including V2, S, V3)
Other articles you may be interested in:
- Ender 3 vs Ender 3 Pro vs Ender 3 V2 vs Ender 3 Max: compared
- Ender 3 vs Ender 5
- Ender 3 dual extruder – all your options
- Ender 3 laser engraver options
- Ender 3 print speed settings
- Ender 3 direct drive extruder
- Creality Ender 3 fan upgrade options
- Ender Extender – Ender 3 print area increase
(Resolved) Ender 3 V2 Updates and Additions
creality-ender-3
I'm new to 3D printing. I'm about to get an Ender 3 V2, but before I do, I'd appreciate some advice on what to get as upgrades/add-ons for it. I'm not sure what I need for V2 as most of the sites are for the original Ender 3 so I don't know if V2 already has this update/addons or not compared to the original. I'd rather get all the upgrades/addons and Ender 3 V2 at the same time to save on shipping and everything else.
Pretty much the only update/addons I've ever seen is the auto leveling table.
If someone can help a newbie with 3D printers, that would be great!
@stealthrt, ±
In my research, the biggest differences between the original and V2 are as follows:
- Tempered carborundum glass table
- HD color screen instead of the old LCD character display
- Upgraded, 32-bit, self-evolving, “silent” motherboard
- Ability to resume printing after a power failure
- XY tensioner
- Manual filament feed
- Tool kit built into the base of the printer
For more information, you can check all3dp and Creality websites for more information.
Next, there are several YouTube videos on updates/additions that you can do:
- Firmware update
- Double Gear Extruder
- Table springs
- Another update for table glass
- Octopi
There are a few extras that you can print yourself once you get your printer (some of which are not included with the Ender 3 V2). Of course, you will have to decide which ones you want to add. Here are just a few of them:
- First 24 updates on my Ender 3 Pro
- Ender 3 Pro Updates
- Ender 3 Updates
I would suggest, like others, that you first get the printer and take it for a "test drive". Once you see its capabilities and if, again, IF something needs to be fixed/updated/upgraded, then do what your budget allows. And be sure to do extensive research, ask questions on the forums and here, and most importantly, have fun!
(Sorry, I don't have enough reputation to create more links.)
. @ agarza
▲ 5
IMHO it's probably best to get the printer as is first. This way you can get familiar with the printer and 3D printing in general before being overwhelmed by all the extra introduced variables from your updates.
The new model already has many features that were considered upgrades on the old model, and you can already get very good results.
Upgrading the printer is part of the 3D printing hobby and you'll probably never be done with it :)
. @ Rik
▲ 2
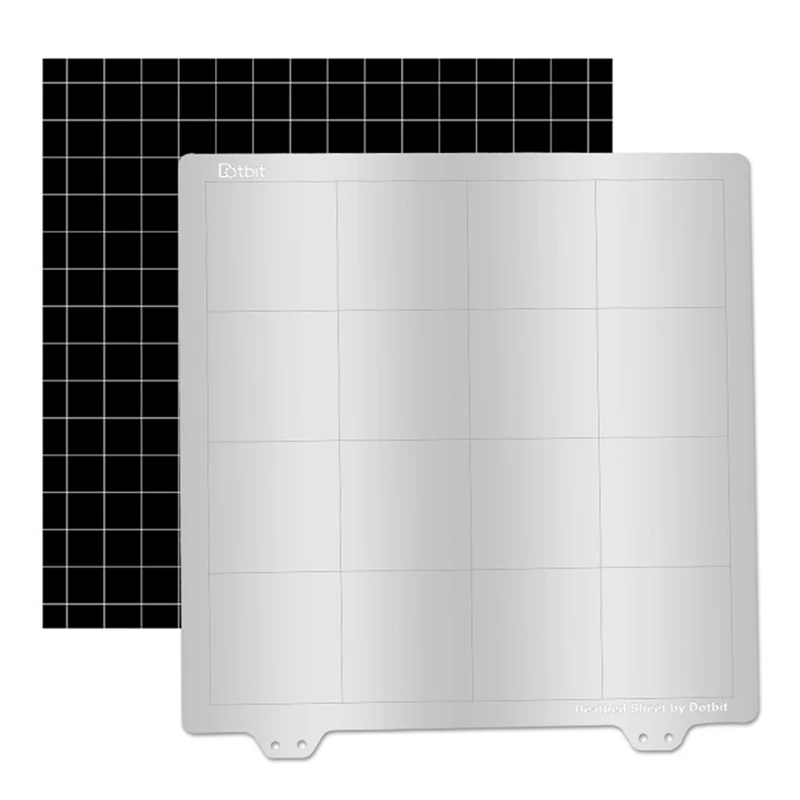
The first things I bought for my V2 within the first week of its release was a magnetic flex type plate as the prints were a pain in the ass to get them off the glass and update aluminum extruder. I didn't use the double gear because, frankly, I didn't pay attention to it at the time. however, the aluminum set has a more positive feeding feel compared to the stock plastic. I just felt like I was going to break my arm if I tried harder than I should have, whereas having an aluminum arm feels better. Also, maybe a BLTouch alignment sensor so you can fix things easier than with a piece of paper, but that's really all I can offer at the moment. I've been using my phone quite a lot lately and enjoying it as is. I realize this post is over a couple months old, but I just saw it and thought I'd contribute if you haven't made your purchase(s) yet.
, @ Milton
▲ 0
I have an Ender 3 v2 and haven't updated anything other than a firmware update. The first thing I suggest is to update the firmware and change the hotend to an all-metal one. This will allow you to print at higher temperatures, and the addition of a BLTouch for automatic table leveling will make your life a little easier.
, @ hfjim super
▲ 0
Agree with the approach of using V2 as is.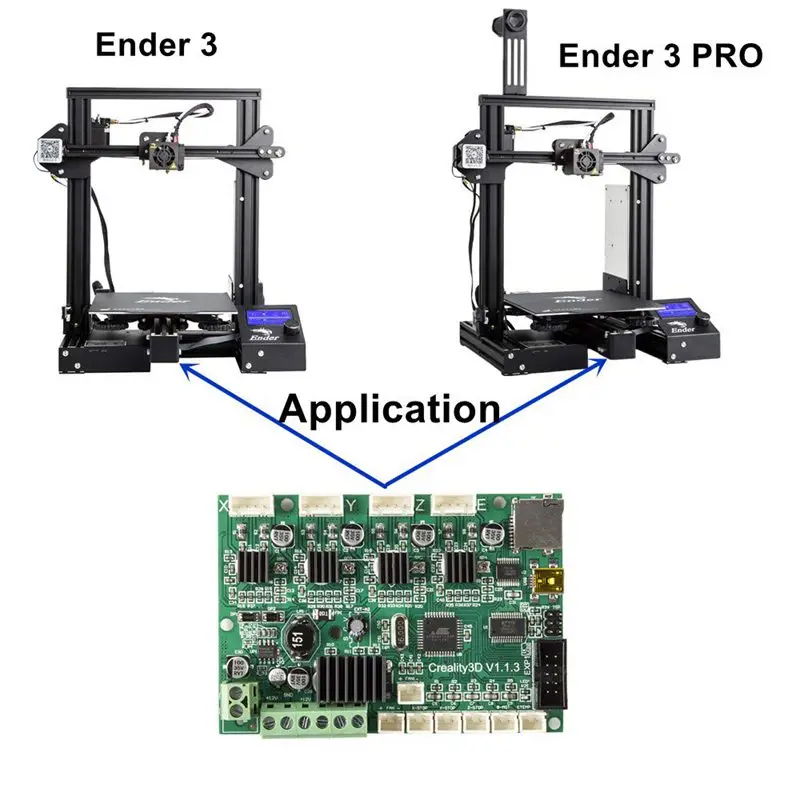 Watch some YouTube videos about initial setup and calibration. Determine the type of printing you will be doing and determine where it falls short. This will be the driver of what you want to start updating from.
Updates I have made to date:
BLTouch Table springs (should have come with BLTouch spacers) Borosilicate glass printing table (OEM tempered glass table has been shaped into a cup in the middle) Bowden tube (lower friction) X-axle belt (original crushed) All fans for extra reliability Filament guide
Between calibration and the above updates, I consistently print dimensionally accurate parts. But your situation may change as quality and tolerances change in economical parts. Would highly recommend the V2 though as the prints out of the box were much better than the quality of the draft.
, @ matt.warfield
▲ 0
According to my information, you don't need to upgrade your 3D printer, but some of the following steps to keep in mind to make your Ender 3 print better:
- Level the table.
- Set nozzle height.
- Try different build plates for different effects.
- Keep it in the sweet spot for your table temperature.
- Printer setup and maintenance is a priority.
, @ Tommy Digal
STL File Ender 3 Update Z
Ender 3 Bracket Z Motor
1 €
ENDER 3_Z-axis handle rotation
1 €
Clip for D.I.Y cable for phone charger
Free
Best 3D Printer Files in the Miscellaneous Category
2 PIECE ARROW QUIVERS
Free
HYPR "Sten" yoke - Lazy Iron sight delete
Free
Opus
Free
CZ ASG P09 | COMPENSATOR
2,50 €
Prosopocoilus zebra
Free
Horse new BJD
12. 73 €
73 €
Rubber gun with recoil and cartridge case ejection (Sig Sauer P226)
7 €
geocache post end
Free
Bestsellers in Miscellaneous category
Stand FLSUN V400
3 €
RS-X-Bow "Government - 1911" style
6,25 €
Christmas house
6.97 €
Articulated Raykuaza Flexible Dragon Pokémon
1 €
ItsLitho "Creamy" personalized lithophane Christmas ball
1,90 €
Adderini - 3D printed repeating slingbow / crossbow pistol
12.50 €
Predator-inspired movable mask
€6. -twenty% 4.96 €  20
20
TING Addams
8.65 €
Mickey Christmas night light Litophane
3,50 €
HAND OF THE ADDAMS FAMILY
5 €
Gengar - pokemon with flexible articulation (seal in place, without supports)
2 €
Bunch of Christmas balls ItsLitho
€7.60 -thirty% 5.32 €
Wednesday item
3.97 €
MMPR Dragon Dagger
€4.80
Speeder-Pad support on FLSUN V400 and FLSUN SuperRacer
3 €
Addams Thing
1.