3D printing on glass bed
Tips for 3D Printing on Glass: How to Do It
3D Insider is ad supported and earns money from clicks, commissions from sales, and other ways.
While most desktop 3D printers don’t come with glass beds by default, a glass print bed is one of the first upgrades that 3D printing hobbyists and professionals make. A glass bed just makes a 3D printer feel more premium and professional. When used right, a glass bed will give you results that will reflect this impression quite accurately.
Before you go to a hardware store and buy a piece of glass for your print bed, make sure to read through our list of tips first. A glass bed isn’t a silver bullet for solving all your 3D printing woes – it has to be used according to a few guidelines.
What are the advantages of using a glass print bed?
A glass bed is practically a no-brainer addition to anyone’s 3D printing accessories. However, if you still aren’t convinced that converting to a glass bed is worth the bother and the expenses, then are a few points which may make you change your mind:
1.
Despite appearances, the build plate that comes with your 3D printer is probably not 100% flat. If it’s made of thin aluminum, then there are probably sections of it that bow down even when brand new. These deformations will worsen as you use your 3D printer, which will soon enough cause problems with bed adhesion.
Compared to aluminum, glass has a much higher modulus of elasticity. What this means is that it has less of tendency to deform under stress, whether mechanical or thermal. A glass bed will be flat when you buy it and will remain flat even after hundred of heating and cooling cycles. A high-quality tempered glass bed even has good scratch resistance, so its quality will not deteriorate even if you use a scraper or razor to remove residual adhesives.
2. Easier to clean
The clarity and chemical stability of a glass bed makes cleanup a breeze. After printing, your bed will likely end up with a lot of excess adhesive. Even while stored and during handling, the bed can pick up dust and oils that can severely compromise the quality of bed adhesion.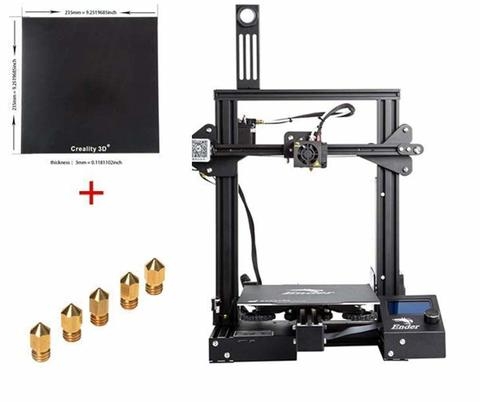 Since glass does not corrode, you can safely clean it with some soap and water or even a quick wipe down with acetone. It’s also very easy to spot any dirt you’ve missed with glass – a task that’s a lot harder with an aluminum bed that’s been painted black.
3. Prints remove cleanly
By its very nature, the surface of a glass is very smooth. This smoothness transfers to the bottom of your print, making sure that they come out with very clean and flat bottom surfaces. When done right, removing your finished print from a bed should also be nearly effortless. With the struggle of removing your print eliminated, you can be sure to preserve the quality produced by several arduous hours of printing.
4. More controlled behavior when heated
Glass has two properties that make it an excellent material for a heated bed: a low thermal conductivity and a high thermal shock resistance. A low thermal conductivity means that a glass bed heats slowly and evenly. As long as you’re patient while your glass bed heats up, you should end up with a bed that with a consistent temperature all throughout. Better yet, the temperature of a glass heated bed doesn’t drop drastically because of drafts or changes in the temperature of the environment.
The second property is more important for giving glass beds longevity. When a glass bed is used on a heated build platform, its temperature increases quite rapidly. When the molten filament comes in contact with the glass bed, there could be more than 100 °C between the two, which can be quite the thermal shock for the glass material.
What makes glass an excellent choice for a heated bed is that it has a greater capacity for withstanding sudden changes in temperature. Not all types of glass are created equally in this aspect. You need to pick the right type of glass if you want the optimum thermal shock resistance, as we shall discuss in further detail later.
5. Inexpensive
A glass bed may seem like a fancy addition to your 3D printer assembly, but it’s really not that expensive. You likely won’t need a huge piece of glass, especially if you just have a desktop-scale 3D printer. The price can depend on the size of your print bed, but you shouldn’t have to spend more than $30 even for a very large piece of glass.
In the long term, making the switch to a glass bed can even end up saving you money. Your prints will have better bed adhesion and will come off easier, resulting in less filament wasted due to failed prints. A glass bed will last a very long time and you won’t need to worry about replacing it frequently, like PEI or BuildTak surfaces.
Tips to get the best results when printing on glass
Getting a glass bed is no guarantee that your prints will come out perfectly every time. Not all glass panels are made equally and there are still proper techniques that you need to follow. To make the most out of a glass bed, make sure to follow these tips:
1. Use glass that is about 3 to 4 millimeters thick
Bring your caliper with you when you go shopping for a glass panel to make sure that the thickness falls somewhere within this range.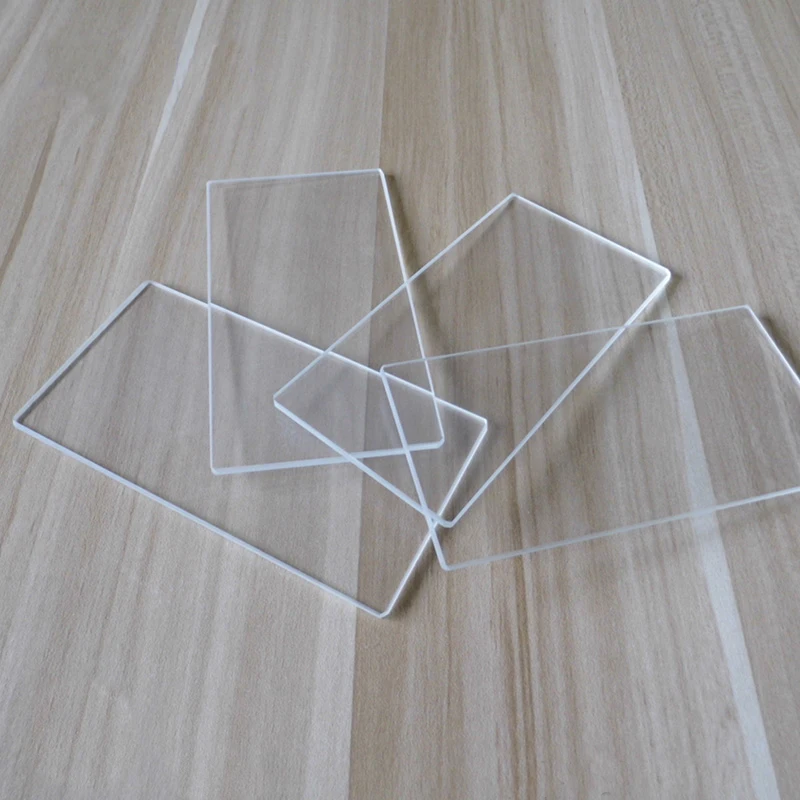 This value is a good compromise that makes sure that your glass bed is durable enough to withstand the thermal shock but not so thick that it heats up too slowly.
An exception to this rule of thumb would be if your print bed is exceptionally large. You’ll have to get a thicker glass bed (close to 6 millimeters in thickness) to make up for the added stress on the glass due to its own weight.
2. Make sure you buy borosilicate glass
The cheapest glass you can find is the soda-lime silicate variety. It’s cheap because it may contain entrapped air bubbles which may end up expanding when heated and creating cracks on the glass. Phosphate-based glass also has the same vulnerability on top of a low chemical resistance, which means that you can’t clean it with the usual solvents.
For the most reliable option, we recommend going only with borosilicate glass. This is the same glass used in cookware or the glassware used in laboratories. They are chemically resistant, have no air bubbles, and are manufactured to be consistently flat and smooth. There’s really no other option when it comes to this aspect.
3. Use tempered glass or ceramic glass, if possible
There are only two ways to do better than borosilicate glass – tempered glass or ceramic glass. Both these options might be more expensive, but they offer advantages which could prove useful for glass print beds.
Tempered glass is simply glass that has been treated to give it better thermal stability. This means that they can be heated to higher temperatures with no ill effects. Most tempered glass can be heated to around 240 °C. If you plan to print with extremely high-temperature filament such as PEEK or ULTEM, then you may need to get a tempered glass bed.
Ceramic glass, the most popular brands of which is NeoCeram, actually isn’t glass – its composition is closer to a transparent ceramic. Unlike real glass, ceramic glass can go through repeated heating and cooling cycles without losing any of its mechanical integrity. For this reason, ceramic glass is often found in glass covers of stoves and fireplaces.
As a print bed, ceramic glass will last much longer. If you use your 3D printer at a very high output rate, you should consider investing in ceramic glass.
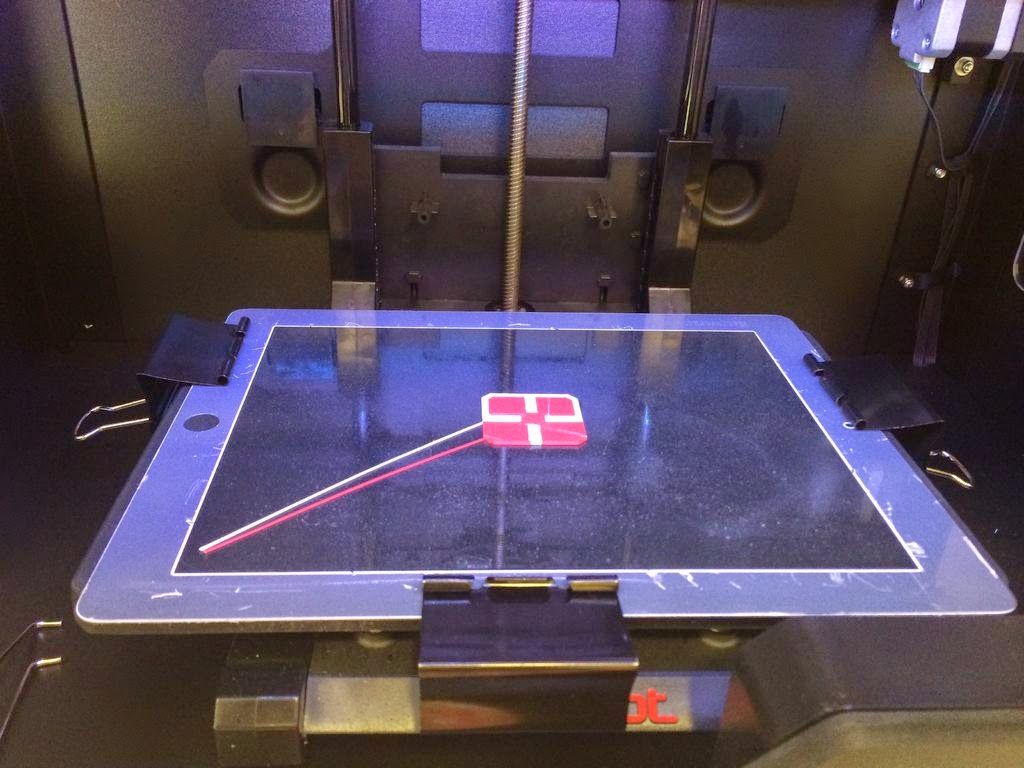
4. Use binder clips to affix the glass bed to your platform
Once you have your glass bed perfectly cut to the size of your build platform, affixing it to your 3D printer is a job for the humble binder clips. This is a widely used practice by the 3D printing community that manages to hold the glass panel in place while still allowing it to be removed without a fuss. Make sure to use small binder clips that will stretch out almost fully to accommodate the thickness of your print bed. This will ensure that the binder clips will not come into contact with any of the parts of your 3D printer.
5. Try to use glue stick for adhesion
Glue stick is the go-to adhesive of the 3D printing community. It’s often the first option because of how cheap it is and how easy it is to apply. You can even rub some glue stick on your glass bed even when it’s already mounted on your 3D printer.
The advantage of using glue stick on glass is that you can simply wash off the excess glue with water when you’re done printing. Glue does tend to make print removal difficult, especially if you set the bed temperature at high values. However, you can use the same technique of running the glass bed under water for a few second to loosen the glue after the print has cooled down.
6. If glue stick doesn’t work, try hairspray
Hairspray is another favorite adhesion aid among the community because how easily you can get it and how reliably it performs. Unlike glue stick, applying hairspray can get a bit messy, so it’s best to remove your glass bed from your 3D printer and apply the hairspray a good distance away. The spray application method should make it easier to get a nice, even coat. Let it dry for a few minutes before you install the glass bed.
As the glass bed heats up, the adhesive power of the hairspray reactivates and provides excellent bed adhesion. When you’re done printing and the glass bed starts to cool down again, the hairspray reverts to its dried state.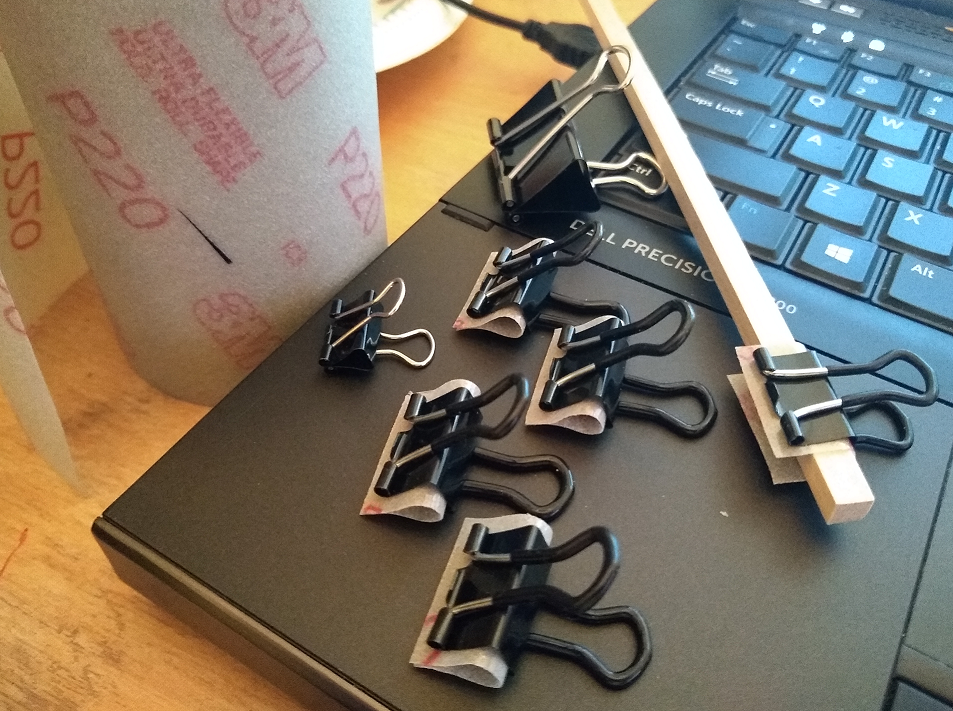
If you’re lucky, your finished print should come right off the glass bed when it’s cool enough without any prodding. Even if it doesn’t come off by itself, removing a print from hairspray adhesive should still be easier than if you used glue stick.
7. Make sure your glass bed is completely dry before you use it
We recommend cleaning your glass bed after every use with water and soap. What’s even more important is that you let it dry completely before you put it on your build platform. The most dangerous thing you can do is to let drops of moisture be trapped between the build platform and the glass bed. When the glass bed heats up, this moisture will turn to steam and will easily crack the glass.
Final thoughts
3D printing on a glass bed is a luxury that gives you better options in bed adhesion and results in overall better quality of your finished prints. Thankfully, you don’t need to spend a lot of money to get one. Since a glass bed lasts for so long and should save you from a lot of wasted filament, it’s well worth the investment.
Just keep in mind that printing on glass won’t magically solve all the problems you’re encountering. Much like any other aspect of 3D printing, printing on glass requires technique and a deep understanding of the science behind its use. If you can harness the benefits of 3D printing in glass, you can open the possibilities of printing with more types of filaments.
Warning; 3D printers should never be left unattended. They can pose a firesafety hazard.
Can You 3D Print Directly on Glass? Best Glass for 3D Printing – 3D Printerly
3D printing on glass is something that works really well for build plate adhesion and getting a great finish on the bottom of 3D prints, but some people can’t figure out how to do it right.
I decided to write an article about 3D printing directly on glass, answering the basic questions that should set you in the right direction to 3D print like the professionals out there!
Keep on reading to get some useful information that you can put to use straight away in your printing process.
Can You 3D Print Directly on Glass?
3D printing directly on glass is possible and is popular with many users out there. Adhesion can be difficult on a glass bed, so it’s recommended that you use adhesives to help your 3D prints stick to the glass and not warp around the edges. A good bed temperature is fundamental for 3D printing on glass.
You’ll see plenty of 3D printer beds that are made out of glass because it has many characteristics which make it ideal for 3D printing. One of the main benefits is how glass tends to stay flat and not warp like other bed surfaces out there.
The bottom layer of your 3D prints also look better when printed on a glass bed, giving a smooth, shiny look. You can produce certain effects at the bottom of your 3D prints depending on what surface you use.
How Do You Make a 3D Prints Stick on Glass?
When we talk about 3D printing in general, the issue of bed adhesion arises. Often, bed adhesion can make or break your print and I remember how it feels to have a 3D print going successful for hours, then failing out of nowhere.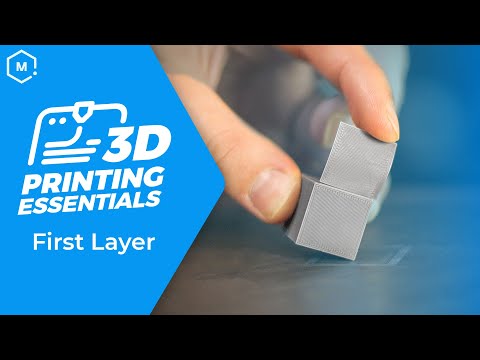
There are multiple ways to make your 3D print stick to the glass bed better so take these tips on and implement them in your own routine as you see fit.
The good thing is glass bed adhesion is quite easy to figure out, let’s see how.
Leveling Your Bed Surface
Leveling the bed is the foremost thing you should do before beginning your printing process. Level the bed in such a way that any point on the build plate is the same distance away from the nozzle.
It may seem minor, but it plays a critical role in glass bed adhesion and determining the quality of your print.
Ideally, you implement a strategy which means your bed doesn’t move very much in the first place. One thing I found to help reduce the need to level your bed so often are Marketty Bed Leveling Springs from Amazon.
These work so well because they are much stiffer than your stock bed springs, meaning they don’t move as much. It helps your overall stability during the printing process, and means you don’t have to level your bed all the time.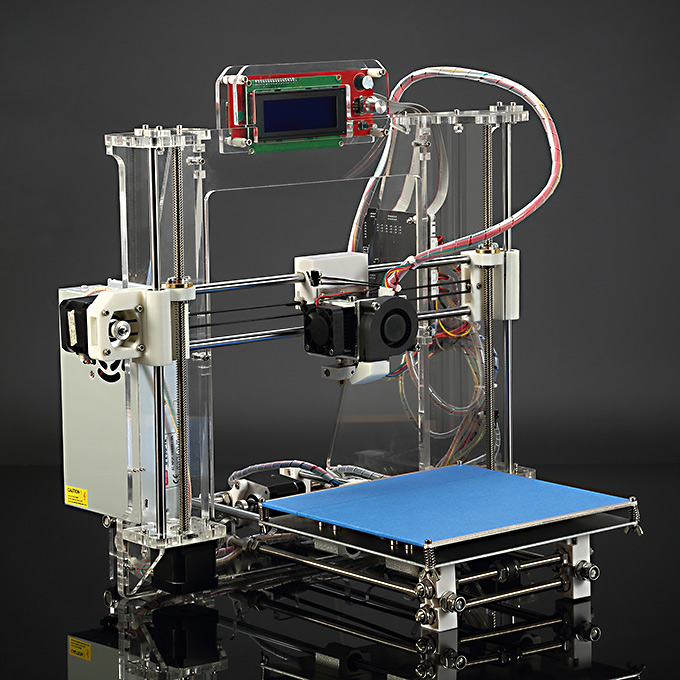
Many people who were first reluctant to change their bed springs changed over and were very happy with the results.
One user even said that after 20 prints, they still didn’t need to level the bed!
You can also get yourself an automatic bed leveling system to help correctly level your bed. The ANTCLABS BLTouch Auto Bed Leveling Sensor from Amazon is a pretty good choice for this.
It works with any kind of bed surface and is pretty easy to apply. You do need to gather up some basic information and firmware settings to get it working, but there are some great tutorials you can follow to get there properly.
Once you calibrate your Z-offset, you shouldn’t really have to level your bed in the future, and it even accounts for a warped surface (glass is usually flat so this doesn’t matter too much).
Cleaning Your Print Surface
Cleaning the bed paves way for good adhesion and a successful print. Make sure you clean the bed before printing and in between if the need arises. Often, dirt, oil, or grease can be present on your glass bed.
It will create a layer on the bed thereby not allowing the print to stick to it. By ensuring your glass bed is clean at all times, bed adhesion won’t be an issue anymore. You can use a glass cleaner or isopropyl alcohol for this purpose.
Using an alcohol-based cleaner works to break down the dirt and easily remove it from the bed. I’d recommend going with the Dynarex Alcohol Prep Pads from Amazon, which is saturated with 70% isopropyl alcohol.
Check out this video below for some great tips for making prints stick on glass just using dishwasher liquid! He says you can wash your bed every 10-20 prints and it should work well, but if the bed gets dusty it can mess with adhesion.
Add an Extra Build Surface to the Glass
Users suggest investing in a PEI (Polyetherimide) sheet if you’re aiming for large prints.
You’ll love the Gizmo Dorks PEI Sheet with Preapplied Laminated 3M Adhesive from Amazon. Thousands of users are making use of this premium bed surface for good reason.
It installs quickly onto your 3D printer with a bubble-free application, and is endlessly reuseable for multiple prints. ABS and PLA filaments can easily print directly on this PEI surface without the need of extra adhesives.
Using Adhesives
If you do want to go the adhesives route, like plenty of 3D printer hobbyists out there, then you have many options.
When using adhesives, people tend to go for products like glue sticks, hairsprays, or specialized 3D printer bed adhesives for the task.
For glue sticks, tons of people recommend the Elmer’s Purple Disappearing Glue Sticks from Amazon because they work so well. It is non-toxic, easily washable, and let’s you easily see where you applied it.
After applying, the purple marks disappear which is a really cool feature.
Figure out why plenty of people love these glue sticks and get a set from Amazon for yourself.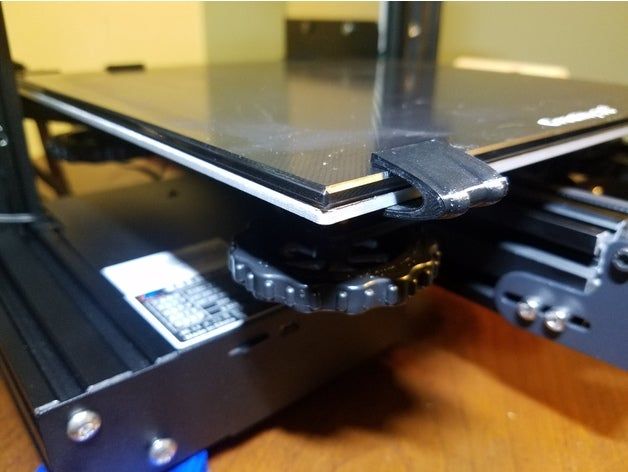
For hairsprays to use on your glass 3D printer bed, I’d recommend the L’Oreal Paris Advanced Control Hairspray from Amazon. It’s the hold aspect of the hairspray that provides the great adhesive plenty of people use for their bed surfaces.
Reviewers that have used this for 3D printing mention that say it is fantastic for having your 3D prints stick down with no warping. The prints even “pop out easily once your build plate cools”, and on top of all that, it’s very affordable.
One of the most popular specialized 3D printer adhesives has to be the Layerneer 3D Printer Adhesive Bed Glue from Amazon. Using glue sticks can be quite messy, as one user mentioned, but after changing over to this, he was very pleased.
The great thing about this adhesive is that you don’t need to keep on reapplying it, and one single coat can be recharged with a wet sponge to get more uses. Over time, although the price is higher, it is really cheap in the long run.
You aren’t getting any harsh smells since it is low-odor, and it’s water soluble also. The built-in foam tip makes application to your glass bed very simple, and spill-proof.
On top of all of this, you get a full 3 months or 90 days manufacturer guarantee so you can ensure that it works just as you desire.
You’ll be joining plenty of users who have transformed their 3D printing experience with the Layerneer Bed Adhesive Glue, so get yourself a bottle today.
Regulating Z-Offset
Proper distance between the nozzle and print bed is fundamental for good adhesion and successful prints. The filament won’t stick to the glass bed if the nozzle is far away.
Likewise, if the nozzle is too close to the bed, your first layer may not look so good. You want to adjust your Z-offset in a way that leaves just enough room for your printing filament to stick to the glass bed.
This can usually be solved with leveling your bed surface, but if you add a glass bed to your 3D printer, you’ll either need to move your Z-endstops or increase your Z-offset.
Adjust Your Bed Temperature
Adjusting your bed temperature can definitely improve your results when it comes to bed adhesion. When you increase your bed temperature, it usually helps with adhesion due to not letting filament cool too rapidly.
I’d recommend increasing your bed temperature in 5-10°C increments to combat bed adhesion issues.
A lot of warping issues come from quick changes in temperature, so having a more consistent bed temperature helps out.
One product that helps out with improving your bed temperature through faster heating, and keeping temperatures consistent is the HWAKUNG Heated Bed Insulation Mat from Amazon.
Print Speed and Fan Settings
Print speed can also be responsible for glass bed adhesion issues. A print speed too fast can cause ringing and under extrusion, leading to poor glass bed adhesion.
Make sure you slow down your first few layers in your slicer to give it a better success rate of sticking to your glass bed.
For your fan settings, your slicer usually defaults to having the fan off, so double-check that your fan is off during the first few layers.
Add Rafts or Brims to the Print
Within your slicer software, you can add some build plate adhesion in the form of a raft or brim to make your 3D prints stick to glass better. They are created with an air gap, so the extra material can easily be separated from your actual model.
You don’t use much plastic for rafts and brims depending on the size of your 3D print, but you can reduce how much it extends out. The default “Raft Extra Margin” in Cura is 15mm, but you can reduce this to about 5mm.
It is simply how far out the raft extends out from your model.
What Types of Glass is Used for 3D Printing?
3D printing involves printing on surfaces of various kinds, ranging from acrylic to aluminum to glass beds. Glass beds are increasingly gaining popularity among creators and 3D printing enthusiasts alike.
3D printing on glass offers plenty of advantages over its traditional counterparts. Now let’s look at the types of glass used for 3D printing.
- Borosilicate Glass
- Tempered Glass
- Regular Glass (Mirrors, Picture Frame Glass)
Borosilicate Glass
A blend of boron trioxide and silica, Borosilicate is highly durable, has an extremely low coefficient of thermal expansion, and is resistant to thermal shock as well.
Unlike regular glass, Borosilicate glass does not crack under extreme and sudden temperature change, minimal to no physical changes occur during the printing process.
These properties make Borosilicate glass an optimal choice for industrial and technical applications, laboratories, and wineries, etc.
Borosilicate glass when paired with a heated bed largely helps reduce the possibility of warping, as the heated bed slows down the cooling process of the printed item.
Borosilicate glass offers an immaculate surface quality in addition to having good thermal and chemical resistance, no air bubbles, and high durability. This makes it an ideal choice for 3D printing.
Creators worldwide swear by Borosilicate glass, have received exceptional results consistently, and highly recommend it to users.
Tempered Glass
Tempered glass, in simple terms, is glass treated to provide better thermal stability. It means that this glass can be subjected to higher temperatures with no adverse effects to deal with. It is possible to heat tempered glass up to 240°C.
If you intend on printing with extremely high-temperature filaments like PEEK or ULTEM, tempered glass is your ideal choice.
With tempered glass, you can’t cut it to size because the way it’s manufactured means it will pop. Tempering the glass provides it with more mechanical strength, and is good protection against mechanical shocks.
Regular Glass or Mirrors
Apart from the above mentioned types of glass, users also 3D print with regular glass, mirrors, and glass used in photo frames, etc. This has more of a tendency to break since it is not treated to withstand those higher temperatures and print removal.
Some people have mentioned that they get pretty good success with them though. Many people have reported getting 3D prints sticking a little too well to these types of glass, requiring them to put it in the fridge to detatch the print.
What is the Best Glass Surface for a 3D Printer?
Borosilicate glass is the best glass surface for 3D printing. With low thermal expansion, high heat and temperature shock resistance, Borosilicate glass makes for an ideal choice for 3D printing.
Its smooth, flat, and strong surface provides consistent results with great bed adhesion and little to no warping issues.
Incredibly easy to clean and maintain, 3D printing on this glass will give you a delightful experience.
If you’re looking to invest in a glass surface that will not only give you excellent prints, immaculate surface quality, and minimal adhesion issues but also help you save money, time, and energy, Borosilicate glass is for you.
I’d recommend getting yourself the Dcreate Borosilicate Glass from Amazon for a respectable price. It comes in at a 235 x 235 x 3.8mm size and a weight of 1.1 lbs.
One user who implemented this bed had trouble at first, but with some good hairspray, they got their PLA 3D prints sticking very well.
Since these beds don’t warp, you don’t need a raft as much as with a warped 3D print bed since it doesn’t have to account for those uneven surfaces, but it can still help out if you choose to.
Rather than continuing with window glass, a reviewer said it cracked and scratched easily. Since getting theirselves a borosilicate glass bed, they noticed how thick the glass is and how it holds and distributes heat effectively.
This fits an Ender 3 just perfectly according to many people, so I’d definitely look to getting this as an upgrade to your 3D printer today.
You’re also getting an 18-month warranty and a 100% hassle-free replacement for quality issues.
Cleaning the 3D printer table. Tips and Tricks.
3D printing is a very unstable process, I think everyone who is at least slightly familiar with plastic filament printing technology will agree with this. Unpleasant crashes in the 3D printer can occur for various reasons, and one of the most common reasons is the detachment of the model being grown from the desktop surface. And as a rule, this happens in the middle of printing, when you are already convinced of the stability of the press and are distracted by another activity. It is precisely for this reason that ensuring good adhesion of the first layer to the platform is very important for the successful completion of 3D printing.
Today there are many ways to improve the adhesion of the first layer to the bed. A lot of articles and recommendations have been written about this, so we will not talk about them. It is worth noting one of the simplest methods - is keeping the desktop of a 3D printer clean . Regular and thorough cleaning of the platform will not only improve adhesion, but will make printed models more beautiful and smooth.
In this article we will look at the best way to clean the 3D printer table, using the example of popular coatings:
Remember to be careful when using the methods below, as spilled liquid may damage the 3D printer. We recommend removing the bed from the printer before cleaning (if possible).
PEI sheet surface cleaning
Recently, PEI sheet has become a very popular material for improving adhesion in 3D printers. It provides excellent adhesion to various materials, and when it cools down, the printed model lags behind it very easily. The sheets are very simple and not fussy to use, and most often it does not require additional application of glue or adhesive tape.
Unfortunately, in order to achieve maximum efficiency, the PEI surface also requires regular and high-quality cleaning. If PEI is touched frequently, it can develop greasy spots that reduce adhesion to the material. Rough cleaning can also damage the surface and reduce sticking. Regular cleaning and maintenance of PEI will ensure that your models do not come off.
How to clean the surface of PEI
To clean this surface, we recommend using isopropyl alcohol (Chemical pure, odorless) with a concentration of more than 70%.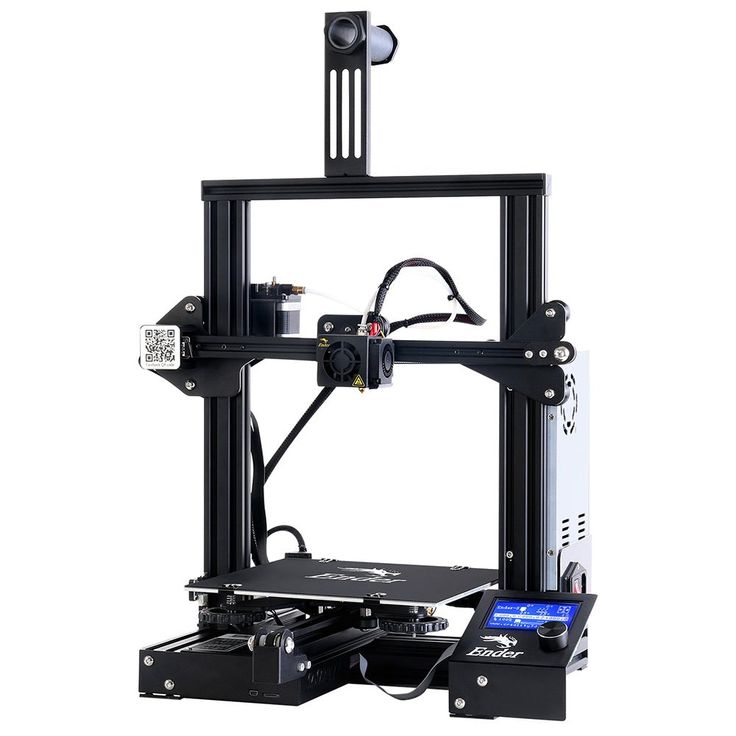 You can use it with a smell, but it is very caustic and unpleasant, the room will need to be ventilated.
Wait for the platform to cool, then liberally soak a dry cloth or paper towel with alcohol and wipe the surface. This will remove a significant portion of the fats and oils from the bed.
Acetone is also good at dissolving plastic residues on the surface. In the same way, liberally moisten the cloth with liquid, then gently wipe the surface of the 3D printer desktop. We strongly recommend doing this work in a well-ventilated area, as acetone is highly flammable and its vapors can penetrate the electronics of the device
If you have been using PEI sheet for quite a long time, and visually its resource has been significantly used up, then we recommend using fine grit sandpaper (1500+). With gentle, circular motions, sand the surface until light scratches and depressions are removed.
When should I clean?
Most manufacturers recommend cleaning the surface with isopropyl alcohol every 2 to 3 prints.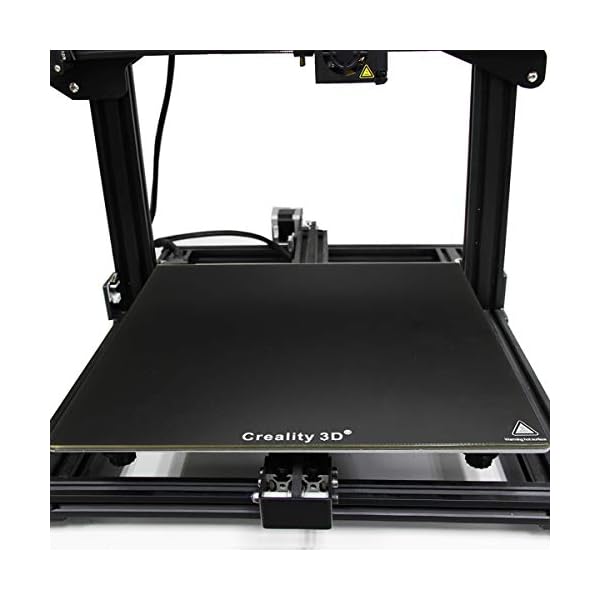 After a few months of use, sand the surface and wipe thoroughly with acetone. If it is no longer possible to restore the surface by the listed methods, then replace it with a new sheet from PEI. The lifespan of such material varies depending on the brand and frequency of use of the 3D printer.
Glass Surface Cleaning
Glass is another very common 3D printer desktop material. Much more durable than PEI and similar surfaces. The glass plates provide a smooth and level surface at the bottom of the model.
This surface is usually used in combination with other aids (eg glue stick or hairspray) to improve the adhesion of the first layer. Such products are especially popular on tables that are not equipped with heating. Therefore, regular cleaning of the glass is necessary to prevent adhesive or varnish from sticking.
How to clean the glass platform
The easiest way to clean a glass plate is to use a scraper or a non-metal spatula. If the table is heated, then heat it until the material remains soft, after which they should be easily removed with a scraper.
Be careful when scraping. Depending on the scraper, the blade can be very sharp, so be careful not to scratch the surface. We recommend that you put your hand on the handle of the scraper, and with the other hand press down on its middle, so that the greatest force is directed downwards.
If this does not work, try wiping the glass with warm soapy water. Although simple, this method is very effective for removing hairspray, glue, and other adhesives. Keep in mind that this method is only recommended if the 3D printer allows you to remove the platform. Spilled water can seriously damage the heating element, power supply or other electronics of the device.
Dirt can also be removed with specialized cleaning products. For example, wet alcohol wipes, window cleaner, isopropyl alcohol will also effectively wash away adhesive residue and restore the glass surface. However, do not take too strong cleaners. Such substances can severely damage the surface or even the 3D printer. In order to be sure to select a cleaning agent for your particular 3D printer, it is best to contact its manufacturer. Most often, they willingly make contact with users and willingly give advice.
When to clean the glass surface
Again, this will depend on how often you use the printer. We recommend cleaning the surface after each print to prevent buildup of glue or varnish. Such a procedure will not take much time, but the print will be more stable, and the resulting prints will have a beautiful and even surface. Once the models stop sticking (usually after a month), try washing the surface with soap and water. After about two to four months, you will have to resort to isopropyl alcohol or other specialty drugs. substances.
Cleaning adhesive tapes
Adhesive tape is another proven way to increase adhesion to the print platform.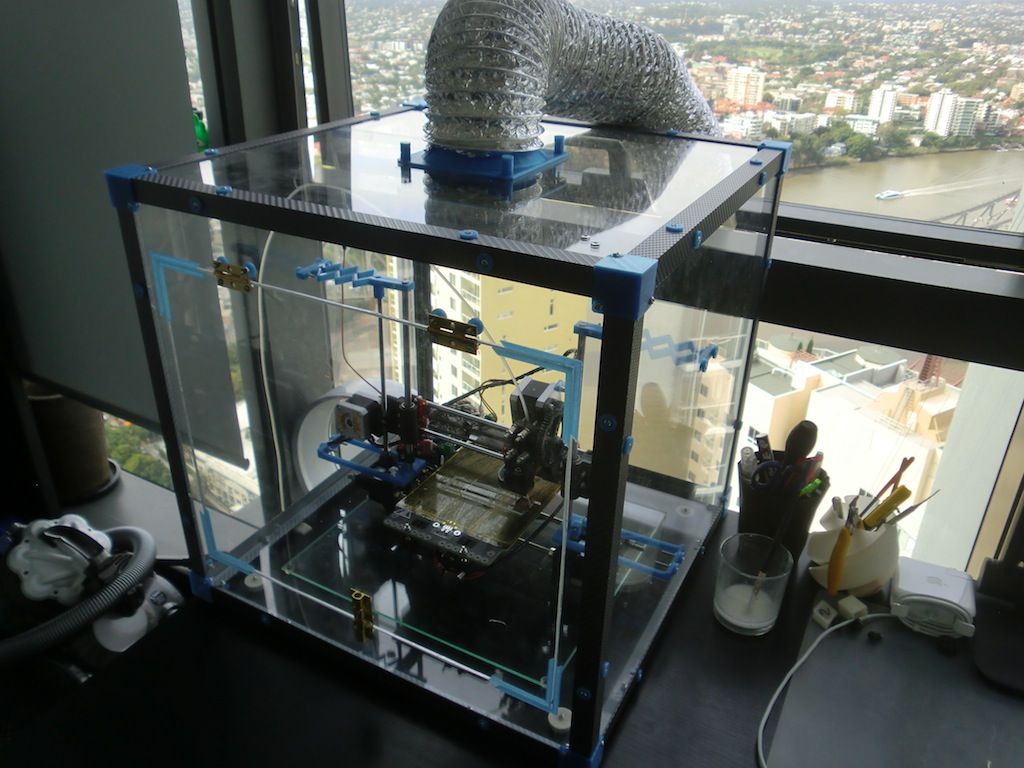 Today, this method is more common on 3D printers without the function of heating the desktop. Masking tape is the most common remedy, but so are Kapton and others.
One of the reasons for the popularity of such linens is their ease of use and relatively inexpensive cost. They are easy to stick to the surface and are available at almost any hardware store. However, there are also disadvantages: the tape quite often peels off when the printed model is removed, so it must be reapplied regularly.
How to clean?
Unfortunately masking tape is one of the most difficult to clean due to its fragility. however, we have found that gentle scraping is one of the most effective ways to clean it. With light pressure, evenly scrape off the remaining plastic thread from the surface, being careful not to tear it.
If the tape does break during cleaning, replace this area with a new strip. The main thing is not to overdo it and do not apply a thick layer, this can adversely affect the quality of the print. If the tape is full of holes and looks like Swiss cheese, then it needs to be completely replaced. Strip and scrape the old tape from the surface. Then wash the platform with warm soapy water to remove adhesive residue.
Once the old tape has been removed and the surface has been thoroughly washed, apply a new layer of masking tape or Kapton. Squeeze out any air bubbles if necessary.
When should I clean?
Masking tape wears out quickly and needs to be replaced much more frequently than PEi for example. We recommend lightly scraping off any plastic that has stuck to it after each print. Depending on the frequency of printing, you will need to change such a surface daily, weekly or once a month.
everything you need to know
Many 3D printer owners experience parts coming off the table during 3D printing. Let's take a look at the causes and solutions.
What is adhesion?
The very concept of "adhesion" means the adhesion of surfaces of dissimilar bodies. In 3D printing, platform adhesion is the ability of the plastic that a part is made of to adhere to the surface of the stage during printing.
If the adhesion is insufficient, then the manufactured parts may be deformed or even come off the table. During 3D printing, the part must be firmly attached to the platform, and after completion, it should be easy to remove. Filament manufacturers typically recommend adhesives for their filaments, and 3D printer manufacturers offer worktables in aluminium, glass, stainless steel, or even with specialty coatings. All this helps the plastics stick better during printing, but there are no working surfaces that are equally well suited for all types of plastics.
Also, do not forget about thermal expansion, which causes a change in the dimensions of manufactured parts at different temperatures. The difference in temperature between the bottom and top of a part can cause the edges of the part to peel off during 3D printing. This mainly applies to materials such as ABS, which require a heated worktable to work with. When printing with these materials, the layers need to cool down a bit to be able to build a 3D object at all, but not so much as to cause peeling at the edges.
In this article we will look at what affects adhesion and how to solve many problems in terms of adhesion of products to work surfaces.
3D Printer Enclosed Chamber
For high heat shrink materials, the best option is to use 3D printers with an enclosed chamber to keep out drafts and retain heat. Many printers are equipped with an active chamber heater that maintains the desired temperature and does not allow the parts to cool. A uniform background temperature during 3D printing reduces warping and ensures better adhesion.
Owners of open printers are left to come up with various devices (for example, boxes) that cover the 3D printer to keep heat, or build heat-retaining walls around the printed model, which increases printing time and filament consumption.
First coat adhesion
The first thing to look at is first coat adhesion. This is one of the most common problems faced by almost all printers. If the first layer is laid unevenly, then the percentage of rejects for the rest of the part increases very much, so it is very important to solve the issue of adhesion of the first layer before 3D printing. In most cases, the problem is solved by calibrating the work table and adjusting the distance between the nozzle and the work surface.
It is important to correctly set the distance between the nozzle and the stage surface
Brim and Raft methods table. Brim or Raft increase the contact surface of the plastic with the work surface around the lower layers and thereby increase traction.
Underlays or Rafts consist of several layers and are horizontal grids of filament located under the model. The raft is used as a base for the first layers of the product and is designed to increase the level of adhesion. In addition, the raft helps to level the surface of the table: if there are irregularities on the surface, they are leveled to a certain extent by the substrate, and the model is printed already on a flat base. Another advantage of rafting is that it reduces the chance of problems due to too much or too little gap between the nozzle and the table when laying the first layer.
Brim is used to stabilize small patterns or "islands" (separated areas of the printed product). Brims increase the contact area and help the model stay on the table if it comes into contact with the surface in small areas.
Stage temperature and adhesion promoter
After calibrating the platform and adjusting the gap between the nozzle and the stage surface, let's move on to the next question. The next reasons for poor adhesion may be the wrong stage temperature (if the 3D printer has a heating option) and the wrong selection of adhesion promoters for a particular filament.
Working stage temperature selection
One of the common causes of poor adhesion is the wrong stage temperature selection for a particular material. When the molten filament is applied to the table and then cools, deformation occurs. If the temperature of the stage is incorrectly selected, the outer edges of the printed product are compressed, and we get warpage: the edge of the product comes off, clings to the nozzle, and the product completely comes off the platform.
Usually, 3D printing filament manufacturers list the recommended heating temperature for the stage on their website or boxes. For the most common materials, you can use average values.
Example worktable temperatures for some materials:
- PLA: 60°C
- ABS: 100-110°C
- PETG: 85°C
- Nylon: 100°C (depending on material composition)
- Polycarbonate: 110°C (the warmer the better)
Worktable temperatures for each plastic manufacturer may vary. You can choose the optimal temperature only empirically.
The table below shows the recommended temperatures for 3D printing with REC 3D plastics:
| PLA | ABS | Relax (PETG) | TPU D70 | PP+ | Eternal (ASA) | RUBBER (SEBS) | Easy Flex (TPU A95) | Flex (TPEE) | PBA |
| 0-60°C | 90-110°C | 20-60°C | 20-60°C | 20-40°C | 80-110°C | 90-110°C | 30-60°C | 60-80°C | 50°C |
Scroll →
| HIPS | Cast (PMMA) | PSU | PEEK | Friction (PA12+GF12) | Biocide PETG | rPETG | FormaX | GF MAX | UltraX | Clotho ABS |
| 90 110°C | 90-110°C | 140-160°C | 130-145°C | 100-110°C | 60-80°C | 60-80°C | 95-110°C | 90°C | 120-135°C | 110-115°C |
Adhesion aids
Additional agents are often used to improve adhesion and reduce the risk of damage to the glass surface of the worktable, such as varnish or 3D printing glue, PVA glue, stationery glue stick, dissolved ABS plastic (the so-called "ABS juice"), blue tape, etc. One tool for printing all types of plastics will not be enough. In our article, we will not consider such folk remedies as beer or sugar syrup, but will focus on more traditional methods.
Primary adhesives:
Varnish or adhesive for printing 3 D-
The days of hair sprays are long gone, and now almost no one uses them due to low efficiency. More effective adhesives for 3D printing have come to replace.
Typically, 3D printing lacquers and adhesives are formulated to take into account the properties of different filaments and allow the first layer of the printed model to be reliably adhered to the worktable. Simply put, these are universal tools suitable for working with multiple types of filaments.
There are already quite a few manufacturers of 3D printing varnishes and adhesives on the market in various volumes and for any budget. It's not worth saving - one bottle will be enough for several months of printing, and you will save your nerves and time spent on reprinting damaged parts.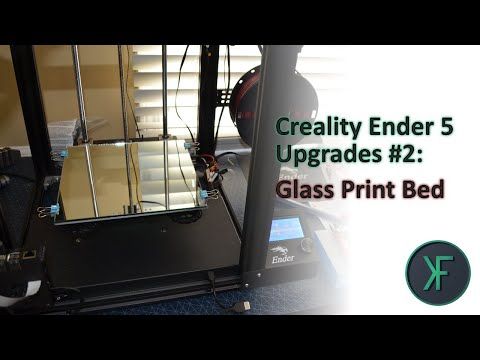
Easy to use: spray varnish or glue on the platform and spread it evenly over the surface with a clean, soft cloth.
ABS - juice
Composition for those who like to save money or who do not have glue or varnish on hand. It is made simply: finely chopped ABS rod or the remnants of a previous printing with ABS plastic are immersed in acetone and after a few hours a thick solution is obtained that can be applied with a brush even on a cold platform.
This method is very reliable as an additional adhesive, but when 3D printed, the acetone evaporates and creates an unpleasant odor.
PVA glue , stationery glue stick
PVA glue is applied to the work surface with a brush and rubbed until a uniform thin layer is obtained. As a rule, when hardening, the glue becomes transparent. After drying, you can start 3D printing. The method is not bad, but the reliability of such a method is doubtful.
Stationery glue stick is mainly used when there is nothing else to hand. The most popular option is Kalyaka-Malyaka glue. The glue is applied in one layer, after the platform cools down, the part is easily separated, and the glue itself is easily washed off the glass and from the printed part.
Kapton film, blue masking tape and film Lomond
Masking tape is more suitable for 3D printers without bed heating. The adhesive tape is carefully glued to the entire area of the table and allows you to print small details without heating the table. This option is especially suitable when working with PLA plastic, however, with an increase in the area of \u200b\u200bproducts, the edges of the parts can come off along with the adhesive tape, so the relevance of this method is limited. More often, Kapton tape or Lomond film is used.
On Kapton tape, the lower surface (the sole of the product) is very smooth, the parts are well separated after cooling, but you can’t leave the product on the cooled table, as the plastic pulls the tape together and air bubbles form under it. When 3D printing on Kapton tape, it is necessary to heat the platform and additionally smear the adhesive tape with glue. Suitable for 3D printing of medium-sized products.
Lomond film was popular until various adhesives appeared. After gluing, the top layer on the film itself must be washed off for better adhesion. Details after printing on such a film are quite difficult to tear off. Over time, bubbles also form under the film, so the film must be changed regularly. Suitable for 3D printing large items.
Additional points to remember:
PLA- plastic is the most unpretentious polymer. For stable printing with polylactide, it is not necessary to treat the surface of the table with additional adhesives, a clean glass surface is sufficient. A prerequisite is that the platform is heated to 60°C. If the platform is not heated, then it is better to print using adhesive agents - varnish, 3D printing glue or blue tape for small parts.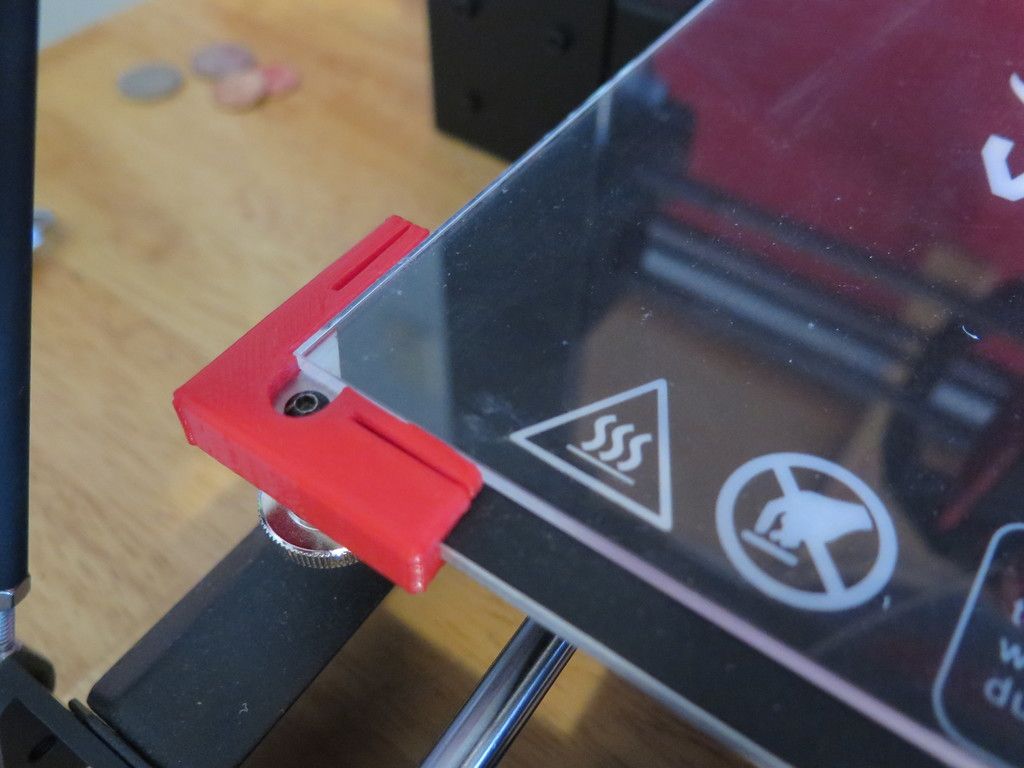
PLA also loves airflow, so keep the fans on full.
ABS- plastic is highly shrinkable and needs help to better adhere to the surface. The main types of additional tools are varnish or glue for 3D printing, ABS glue, stationery glue stick, PVA glue.
When working with ABS, the platform must be heated to 100-110°C. It is advisable to use 3D printers with closed cameras that support high background temperatures. When 3D printing on open printers, it is necessary to use a heat-retaining cocoon around the model. Many slicers already offer this feature. Blowing of products made of ABS plastic is highly undesirable, as cracking of parts in layers and detachment from the working surface due to shrinkage can occur.
PETG is a very easy to work material that does not require high temperatures or fine print settings. Plastic has excellent adhesive properties and adheres very strongly to clean surfaces. On the other hand, high adhesion can lead to separation of pieces from glass tables when products are separated, so it is advisable to apply separating layers on the work surface - the same glue or varnish for 3D printing.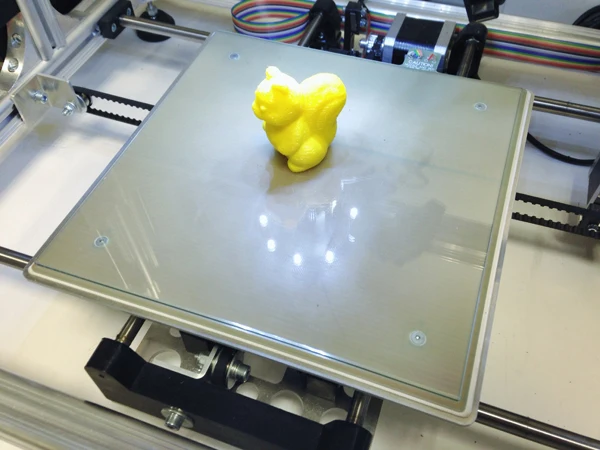 This will help both separate products and prevent damage to the glass.
Flex has high adhesive properties, bonding well not only between coats, but also to work surfaces. Again, it is advisable to use 3D printing varnish or glue to avoid damaging the glass. Film coatings are not recommended.
In the case of composite adhesive materials , the choice of adhesive agents is mainly determined by the type of material serving as the base. Usually recommendations for preparing for 3D printing with composites can be found on the manufacturer's website. If not, please contact technical support for advice.
For example, the FormaX composite from the X-line range is based on ABS plastic, but the properties of the composite material differ from pure ABS due to the presence of carbon fiber filler. Formax is not characterized by cracking in layers, but the composite requires the use of additional adhesive agents, so the manufacturer recommends using varnish or glue for 3D printing
Material storage and drying
The effect of moisture on filaments can be both cosmetic and functional.