3D print thorn
▷ destiny thorn 3d models 【 STLFinder 】
Destiny Thorn Hand Cannon
thingiverse
This is a downloadable 3D printing file of the Thorn Exotic Hand Cannon from Destiny.
Destiny Thorn Handle Split
myminifactory
This is a modified version of the handle from Kriby Downey's excellent Thorn Hand Cannon model, from the game Destiny. I had problems printing the handle because of the complex geometry and overhangs. Supports just didn't do the trick, so I split...
Destiny - Thorn Pistol V4. 0
thingiverse
Destiny - Thorn Pistol V4.0 (Full size) - further updated shells (3 v4.0 & 4 v4.0) - Parts (shell 3) & (shell 4) have been trimmed to fit better that's parts: Thorn_Shell_3_V3.3.stl and Thorn_Shell_4_V3.3.stl -Included original .blend Blender file -...
Destiny Thorn exotic year 3
thingiverse
AKA i did not like how the destinystl generator made the thorn not to scale so i scaled this one so it fits your hand well. I have a few more destiny 3d objects to post this one by far took the longest. Thanks for the support. If anyone would like to...
Destiny 2 - Thorn Cup
thingiverse
This is a cup themed from Destiny 2 - Thorn chamber. Enjoy it for idk, like playing with some dice or just for drinking.
Whatch out for the scale it may be a little bit to large for some applications.
Update 04.07.2019:
-added more triangles...
Enjoy it for idk, like playing with some dice or just for drinking.
Whatch out for the scale it may be a little bit to large for some applications.
Update 04.07.2019:
-added more triangles...
Destiny Thorn Hand Cannon - split into 9
thingiverse
Destiny Thorn Hand Cannon split into 9 parts to print on 20cm x 20cm x 20cm build area.
Destiny Thorn Hand Cannon
thingiverse
THIS WAS NOT MY OWN CREATION this is simply an edit so that people can print these props in parts Enjoy
Destiny Thorn Hand Cannon: Cut for Printing
thingiverse
Exactly the same file as from DestingStlGenerator, but just split in half for easier printing.
Thorn from Destiny 2
myminifactory
Thorn from Destiny 2
Thorn from Destiny
prusaprinters
Thorn is a hand-cannon from Bungie's latest game: Destiny. It is said to be the hardest weapon to grind for in the game. I designed the gun in 10 hours using solidworks. The printing took 24 hours and all the parts stick together with a glue free...
Thorn from Destiny
myminifactory
Thorn is a hand-cannon from Bungie's latest game: Destiny. It is said to be the hardest weapon to grind for in the game. I designed the gun in 10 hours using solidworks. The printing took 24 hours and all the parts stick together with a glue free...
Thorn Hand Cannon Destiny Splitted
thingiverse
Remix thorn hand cannon
Thorn Destiny 2 Hand Cannon
thingiverse
Thorn Hand Cannon from Destiny 2. Did some mesh fixing and cleanup. Not perfect but it is printable. I have not cut it in half but in the slicer I put half the model below the bed to print each half separately. ...The file is quite large so I...
Thorn_destiny
thingiverse
This thing was made with Tinkercad. ...Edit it online https://www.tinkercad.com/things/13cpz0WilTA
Thorn
thingiverse
Thorn
thorn
thingiverse
thorn
Destiny 2 Semi-functional Thorn Handcannon mashup
thingiverse
A combination of a few models found, essentially resulting in a shorter Thorn (Destiny 2) than from the actual game.
It's based on a semi-functional printable revolver, which rotates the cartridge when the hammer is pulled down and the trigger is. ..
..
Thorn - Destiny 2 3D print model
cgtrader
Thorn exotic hand cannon from the video game Destiny 2. OBJ Files 1:1 Scale 16long x 7 tall x 3" wide If you have any questions, email me at [email protected] For Personal Use Only. Do Not Copy or Redistribute. ...
Thorn
thingiverse
This is my version of Thorn from Destiny 2. Will update with the final prints when completed. ... Included are two versions of the grip with and without the wrapping.
Thorn
prusaprinters
This is my version of Thorn from Destiny 2. Will update with the final prints when completed.</p> <p>Included are two versions of the grip with and without the wrapping.</p> <h4> Print Settings</h4> <p><strong>Printer:</strong></p> <p>FLSUN Super...
Thorn Destiny Pendant
myminifactory
An Exotic Hand-Cannon from the game Destiny! ...Made as a necklace pendant.
Destiny Exotic Hand Cannon Thorn 1:1 Scale
thingiverse
This is a 1:1 scale model of the Destiny exotic hand cannon Thorn. ...The model was generated from DestinyStlGenerator.com and cleaned up using NetFabb cloud.
Thorn's Thorn/Bullet
thingiverse
The thorn,s thorn model looked good, but had many cracks/gaps that when printing lead to the print looking kind of crappy and or not printing correctly at true in game scale about 2x the original size. I cleaned it up the best I could (still a rookie...
Thorn,s Thorn
thingiverse
this is the closest I could get to the projectile fired from the Thorn (Destiny/D2) This thing was made with Tinkercad. ...Edit it online https://www.tinkercad.com/things/7UOe0whNMDF EDIT: User 'Flatliner' did a good job trimming it up to make it...
Thorn Ball
grabcad
Thorn Ball
Thorn ball
thingiverse
Thorn ball
thorn
grabcad
Solid Works 2016
Thorn
thingiverse
Gun from Destiny cut for ease of printing
Thorn
sketchfab
This model was procedurally generated as a part of a concept
thorn
sketchfab
No description provided.
How to make your own 3D printed coronavirus model » inside corona
The instructions and files below will allow you to create your own model of the virus! All you need is some spare time and a 3D printer. In addition, those without access to a 3D printer can still use the STL files to request printing from external services and then follow the instructions on painting and assembling the same way. We do hope that this model will make the virus more tangible, and that the model will not only be printed as a private project, but also be used for outreach activities and in educational institutions.
Our design is based on the best scientific evidence available. Not only are the shapes of the various proteins as true as we can make them, but their numbers as well as the overall size of the virion match experimental results on a scale of 1:1,000,000. If you want to know more about it, please look here. Once you have built a model from our design you will have a good representation of what one of these virions is expected to look like, after being scaled up by a factor of 1,000,000. Therefore 1 mm on the model represents 1 nm (10 Å). (By the way, this would make the RNA that is inside the virus hull 10 metres long and 1 mm thick, and the nucleocapsid around which the RNA is coiled would be about 1 metre and 1 cm in diameter.
We have also designed a scale model of the human anti-body that binds to the spike protein. This is available alongside the virus model and can be attached to the spike protein as desired. For easier printing, painting, and assembly, the virus structure has been broken down into 4 unique components:
To date the structures have been printed successfully on several Fused Deposition Modelling (FDM) printers (Rostok MAX v2 & Prusa I3 MK3 printers), and we anticipate the even higher quality structures will be feasible with alternate methods, such as stereolithography (watch this space). Let us know in the comments! Each of the parts is available in STL format and should be printable through any suitable slicer software. Personal discretion is advised when setting up the prints, as the exact details may differ depending on conditions and equipment. The procedure outlined below will serve as a good starting point.
The first step is to print the individual components. For the virion parts this is very straight forward as the flat surface negates the need for supports. The virion objects can be printed with the minimum infill for support, though infill of 10% is recommended for rigidity.
The other parts (spike proteins and antibodies) provide a more challenging print. The spike protein must be printed 95 times to complete the model, and users can arrange these individually, or using 4 prints of 25x STL file. It is recommended that the spike protein is printed with the crown facing towards the print bed to maximize the support between the bed and eliminating the need to remove supports from the thin delicate stem.
A dual extruder printer would be ideal for spike printing as it would allow supports to be printed in a water soluble plastic, speeding up post-processing. In either case, printing individual or at least fewer spikes with greater spacing generally produces nicer objects that are easier to work with at the price of longer printing time. Indeed, there is a general trade-off between the convenience of the print set-up and the amount of post-processing and tidying needed for all 3D printing tasks, and one must find a compromise which satisfies them.
As stated above, we used FDM printing and ubiquitous poly-lactic acid (PLA), which made the post-processing easier.
Post-processingRegardless of the approach taken for printing, some amount of tidying will typically be needed to get the objects ready for assembly. Removing the supports can be done with a pair of plyers, while the smaller artifacts and issues will need brushing off or sanding. A dental pick can be quite useful.
Fig. 1. Virion and Spike object surfaces after printing with layer lines and artifacts, such as plastic webbing, clearly visible across surfaces. On the right: Virion after fusing top and bottom and rubbing surfaces with ethyl acetate. Pictures by Ferdinand Kirsten, Matt Reeves.
For PLA, we found the best thing to clean and smooth the surfaces (after support removal), is ethyl acetate. Ethyl acetate dissolves the plastic, breaking down the small extrusion artifacts on the surfaces. This can be used in many ways. We found it best to leave the parts in a sealed ethyl acetate vapour environment, such as a stainless steel pot, which should be cleaned carefully afterwards. This technique results in the most even and clean results, though will take up to a few days to fully smooth each object. The faster method, is to simply submerge the small objects in ethyl acetate for 10-30 seconds, and then remove each object, leaving them to dry out on a surface. For the larger virion parts, the surface can be smoothed by rubbing it down with a cloth damped with ethyl acetate. Ethyl acetate was also used to “weld” the two virion parts together. A small amount was dropped onto the flat surfaces on each section, before the two were pressed together until the plastic fused to become a single object. The seam was then smoothed down using the same process as before. Where one cannot get ethyl acetate from a lab or pharmacy, acetone-free nail-polish remover offers a commercially accessible alternative. you should be using safety glasses and suitable (!) gloves when handling ethyl acetate, ventilate the room well and if there was skin contact use a skin cream after hand washing.
It is worth noting that for the other common 3D printing material acrylonitrile butadiene styrene (ABS) or acetone may produce the same results.
Painting and GluingFig. 3 Computer rendered image of corona virus by Thomas Splettstoesser (left), and finished 3D print by Thorn Lab (right).As with printing, painting methods and colours is down to personal preference, and here we outline our attempt, which was guided by the illustration by Thomas Splettstoesser as close as possible (see Fig. 3).
3).
The parts were first treated with a primer to help the paint stick to the model. This also acts as a nice even Basecoat. When working with either primer or, as discussed later, an airbrush, one should consider safety: try to do as much as you can in a ventilated space, wearing safety goggles, gloves and a mask. Paint spraying produces a great number of fine particles which you don`t want to breathe in.
For us, the painting process was performed largely with an airbrush, and we highly recommend using one where available, due to the amount of painting required and surface complexity. Where not available, it can of course be done with just a simple brush which will take more time and a higher skill level.
All layer colours, medium thinner, base colours, primer and varnish we used were from Citadel painting. Here is an outline of the specific Citadel colours and materials we used for the model in the figures:
- Lime: “Moot green”
- Yellow: “Yriel Yellow”
- Grey: “Dawnstone”
- Wheat: “Baneblade Brown”
- Chocolate: “Doombull Brown”
- Aqua: “Gauss Blaster Green”
- Teal: “Kabalite Green”
 4 Sorting the spike proteins (up left). Spike protein after basecoat (left) and spike protein after highlight with lime green (right). Pictures by Kristopher Nolte.
The spikes were sorted into four sets in order to produce a graded lighting affect, with those on top brighter than those lower down. If you do not plan to use a base and do not have a fixed top and bottom you can skip this part.
We highlighted each Spike Protein with a brighter lime green to achieve more contrast to create depth, which makes the surface topology easier to distinguish. Finally, the highlighting of each spike was intensified by dry-brushing the protein with the “Aqua” colour.
Fig 5. Virion sphere with a zenithal highlight (top right). Virion with features painted by brush (bottom right). Final version on the left. Pictures by Kristopher Nolte.After painting was complete the spikes and virion were sealed with gloss varnish and matte finish, respectively. This step is optional; however, the varnish protects the paints against damage and wear when being handled.
Finally, the 3D model was assembled. If highlighting was used in the painting step, one should ensure the spikes are placed so that brighter spikes go on top while darker ones at the bottom. Standard modeling glue was used to hold the spikes in place, though superglue or ethyl acetate would also work fine. Because we are planning on mounting this on a stand, we have left a hole at the bottom empty where the rod of our base will go in.
Figure 6. Assembly of virus with spikes individually glued into virion holes using modeling glue. Pictures by Kristopher Nolte.We hope that our adventure in 3D printing the Corona virus inspires you to give it a try! The process we described was completed in a little over a week. The printing jobs were completed in just over two days, the cleaning and post processing took another two days, while the painting was done over the course of a weekend. This article provides a description of our technique and should provide enough detail on how, with the outlined necessary tools, you could create a similar result. The files have been distributed through Thingiverse, and are distributed under a Creative Commons BY-NC license: You may remix, adapt, and build upon this work non-commercially and acknowledge the "Coronavirus Structural Task Force" as original author.
As with every 3D printed model, there are many different ways this could be tackled and achieved, and we look forward to seeing the many creative ways explored by others in this endeavor. Please do share experiences and results with us, either through the comments Thingiverse or on Twitter (you can tag us @thornlab or #insidecorona).
For a sense of perspective, we have also produced a model of the highly common rhinovirus, which is available in .stl format at the same scale as the corona virus objects. This is available at: https://www.thingiverse.com/thing:4556845.
Authors
We want to emphasize that the writing of this blog entry was a collaboration of a several people:
Dale Tronrud and Thomas Splettstoesser worked together to create the STL files for the 3D model. Dale was the person to suggest it first (with Andrea Thorn picking up on the idea). Thomas then selected the experimental models and placed all the parts to form a realistic representation. Dale provided the knowledge about the limitations imposed by the nature of 3D printing and broke up Thomas' model into printable parts that can be assembled without too much difficulty. He printed and assembled the first virion from this design.
Matt Reeves was responsible for improving the non-spherical virion model and the printing of the Würzburg model. He also determined the most suitable post-print processing techniques suitable for this project and, along with Dale and others on the team, contributed to many general technical discussions on how the model can be altered or improved further in the future.
Kristopher Nolte took part in the preprocessing and refining of the model together with Ferdinand Kirsten. Kristopher was also responsible for planning and carrying out the assembly and painting process of the Würzburg model.
3D printing from negative to positive / Sudo Null IT News
When the trees were big and there were no digital cameras yet, everyone used conventional film cameras. These are the ones that are now shown to children in museums. And our parents, and their parents, and so on, all used such cameras, and then developed films and printed photographs. Many have accumulated rolls of these films that they did not have time to print, and now, sorting through old boxes, many want to transfer these negatives, aging witnesses of history, into digital form for posterity.
This happened to our buyer of a 3D printer from Kostroma. He looked on the Internet for several devices made of cardboard and decided to make a similar device on his own, but using a 3D printer. He designed everything himself, but there was a problem with this very ability to print. In general, he sent a letter with a request to help him solve this problem now, and how not to get into such situations with future work.
His work sent to us, and all the background, of course, published with the permission of our buyer.
We were sent a *stl file, which was loaded into the print program, and we saw the thinnest rectangular hole. We read further the letter and understand the purpose of this hole and, in general, the whole structure, and then we delve into its problem and understand that in this variant one cannot do without supports, and they clog this gap with him.
The photo below shows the detail. It's simple at first glance, but when it comes to supports, it's where the little details are always a problem. Therefore, we try to make our various parts in the style of "without supports". And we save plastic and time on peeling.
The source was sent to us, we cut it with a section, designed a spike and a groove for pairing the two halves, as well as protrusions that prevent vertical displacement.
The part turned out to be asymmetric, but when printing two copies, they should fit perfectly.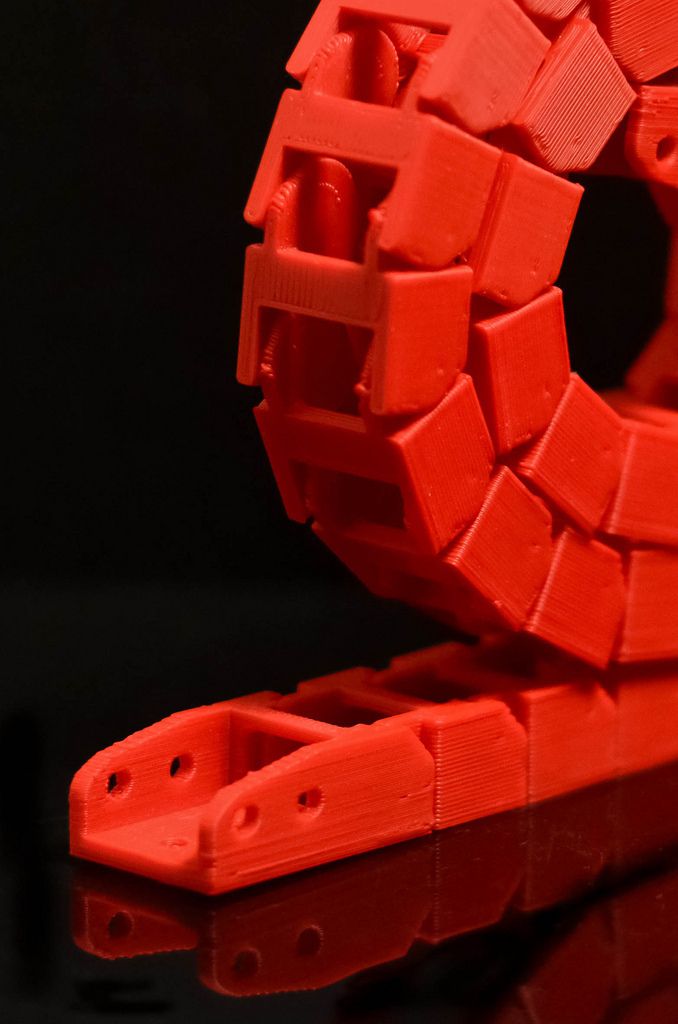
Everything is printed without supports, and the body halves are oriented horizontally during printing so that the tongue and groove look up. The total weight is about 35-40 grams of plastic and 2 hours of printer operation. When assembling, if the SPIN will not enter the groove, then in order for it to enter, it (the thorn) must be scraped (you can use the edge of a clerical knife) along the entire length on both sides so that it decreases in thickness so that it enters without much effort groove. Then we put on the ring, and on top we put on an extension cord, which fixes the two halves on top and raises the lens to the minimum required height of the “macro mode”. The outer diameter of our model is 50 mm, so if you want to make your own extension, you can focus on this size and make the inner diameter of the extension 50.2 mm.
Assembling the body of the device is a crucial moment. It is important to take packaging from high-quality ABS or PLA plastic, because. only high-quality plastic has high-quality cardboard packaging :)
We mark the place where the light from the lamp will pass and cut it out. Pay attention, in our case we cut exactly the bottom. Next, we lay a sheet of white paper for diffusion and try on a light bulb (here E14, 10W) with a cartridge and a wire. A wire with a plug in this design from IKEA.
Since we have a cartridge with a holder, we cut a lid under it and secured it due to this, and between it and the cardboard we laid a tin from a can to dissipate heat from the lamp.
Everything, the assembly is completed, you can try.
We don’t have films at all in our office, and it was this negative that someone recently showed to someone as a relic from the past, that’s how he waited for it to be used.
After that, any graphics program is used, where there is an INVERT COLORS or MAKE NEGATIVE mode, etc. We used the free PAINT.NET program from the getpaint.net project website
Good luck with turning the NEGATIVE into a POSITIVE, and you can get the stl of all the details on our website :) And you could also make a model of a different shape to do without cutting and supports, but we were asked to make it possible to assemble such a named geometry.
REC Wiki » Getting Started with FDM 3D Printing: A Beginner's Guide
Especially for those who are just starting to comprehend the basics of 3D printing, we offer a selection of useful tips to solve the most common problems when working with FDM 3D printers.
1. Increasing 3D printing speed
Quality 3D printing is, among other things, a balanced combination of filament feed speed, fuser power, nozzle diameter and layer height. If you try to increase the print speed too high without correspondingly changing the heating settings and nozzle diameter, the result will be unstable material feeding with gaps in the layers.
Points to consider:
- A longer hot end will be required for a significant increase in speed. Simply raising the temperature above the values recommended by the filament manufacturer will not lead to anything good: damage to the material itself and the formation of carbon deposits are most likely.
 The key role is played not by temperature, but by the length of the hot section of the hot end - the longer it is, the more time the plastic has to heat up and the higher the melt supply rate can be.
 - The higher the speed and the smaller the nozzle diameter, the higher the load on the extruder feed mechanism. Accordingly, with a significant increase in the laying speed of the thread, it is advisable to use a nozzle with a larger diameter.
- Increasing the diameter of the nozzle and the length of the hot end of the hot end negatively affects the efficiency of the retract, so do not be surprised if smudges form when the head is idle.
- For good layering, try to keep the ratio between nozzle diameter and layer thickness around 3:1.
2. 3D printing of oversized items
Sooner or later, each user faces a situation when a part does not fit into the working volume of a 3D printer. If there is no access to larger format equipment, there is only one way out - to print the product in parts. Of course, to do this, you will have to divide the digital model, and after 3D printing, assemble it - either with glue, or integrated mounts, or both.
With 3D division - models, it is recommended to adhere to the following rules:
- If the part is symmetrical, cut into symmetrical parts if possible.
- If the part has a complex geometry that complicates gluing, you can add tenon-groove joints to facilitate assembly at the joints. At the same time, such connections will increase the strength of the product after gluing, which is important for functional, loaded parts.
- Fewer supports means easier post-processing and less waste, so try to divide your models so that the component parts can be printed with a minimum of support structures.
3. Proper positioning of the model on the stage
Minimization of support structures is always desirable as it reduces post-processing effort. On the other hand, when 3D printing functional parts, strength can play a more important role, and then the part will have to be installed on the table in a way that is not the most advantageous in terms of removing supports.
3D models of loaded parts should be positioned so that they can withstand maximum loads. It is worth remembering here that FDM 3D printing is a layer-by-layer process, and finished products withstand higher tensile loads along the layers than across them. Orient the model on the table appropriately, taking into account the load vector.
If you need to further increase the strength of the product, use composites, such as our glass- and carbon-filled polymers of the X-Line, Clotho and Technika ranges.
4. Support Structures
Support Structures are essential for correct 3D printing of complex parts. This is due to the fact that conventional three-axis FDM 3D printers are limited in their ability to build inclined segments. If the permissible angles of inclination are exceeded, subsidence of the laid material will occur. A similar problem manifests itself in the construction of so-called "bridges" - sections connecting two vertical structures, but without their own support. If a bridge is built too long without supports, sagging will occur.
Simply put, FDM 3D printers can't print over the air. If the part has a complex shape, and dividing the model into parts (see point 2) is not practical, the problem of 3D printing of areas with a strong inclination is solved using removable support structures.
Almost all existing slicers (programs for preparing 3D models for 3D printing) have the ability to automatically add supports. Algorithms are not flawless, so if necessary, automatically generated supports can usually be edited manually or even take over the entire process.
When placing the support structures, it is necessary to take into account such moments as the distance between the workpiece and the table at the locations of the supports and the saturation of the support structures. Proper settings will make it easier to remove supports and reduce waste.
This last point is especially important when using convenient but relatively expensive water soluble support resins such as polyvinyl alcohol (PVA). With a dual-extruder 3D printer, many slicers allow you to build the model and supports with a basic, often cheaper material, and use PVA either for supports or for spacers between the model and supports. Upon completion of the 3D printing, the result can be soaked in water, after which the PVA will dissolve and the supports will fall off the model without the risk of surface damage caused by mechanical separation of the supports. Using PVA to 3D print the interlayers (see illustration above) instead of the supports themselves is often much more profitable, so take note.
For effective and economical placement of supports, try to adhere to the following rules:
- Supports are needed where overhang angles exceed 45 degrees.
- Supports are optional for bridges less than 5 mm in length.

- If possible, try to orient the part in such a way as to minimize the number of supports (see illustration above).
- Make sure that supports do not touch adjacent vertical sections of the model.
5. Cleaning the nozzle
The easiest way to clear a clogged nozzle is to heat the hot end to the extrusion temperature of the plastic being used, turn on the feed mechanism and pierce the cork with a thin needle.
This method is effective in most cases and does not require disassembly of the extruder.
6. 3D printing with flexible resins
Flexible resins, often referred to as "flexes", require special handling. Our range includes Rubber (synthetic rubber), Flex (thermoplastic polyester elastomer), Easy Flex and TPU D70 (both thermoplastic polyurethane, but with different hardness) filaments.
Elasticity can create certain problems during extrusion, therefore, when working with these materials, we recommend that you take into account the following points:
- above).

- When increasing the speed of 3D printing, make sure that the hot end has time to melt the material, otherwise, again, you can get entangled filament in the feeder.
- Take care of the effective cooling of the thermal barrier - a clear difference between the cold and hot sections of the hot end will help to avoid traffic jams due to the thermal expansion of the filament.
- When working with flex, it is desirable to use direct extruders, since it is more difficult to set up an effective retract on extruders with Bowden filament feed (through a long tube between the feeder and the head with a hot end). Retract values must be set to generous tolerances, allowing for filament expansion and contraction—two to three times greater than when working with solid polymers. Alternatively, the retract can be turned off: although this will lead to the formation of abundant "snot", in most cases (depending on the material and complexity of the model) they are easily cut off with a sharp knife.

- If you are using a glass or metal table, before 3D printing, do not forget to apply varnish or glue to the surface - not so much for additional adhesion, but as a separating layer, otherwise some types of flex will be very difficult to tear off.
- As a rule, flexes are difficult to glue, which must be taken into account when planning 3D printing. In other words, flex parts are best printed as a whole.
Learn more about working with flexible filaments in this article.
7. Uneven first layer
The first layer is the most important, as the rest of the model will be built on it. The layer should be even and adhere well to the table surface:
- If the 3D printer lays uneven first layers despite the table adjustment, the problem is most likely a curvature of the table itself. One popular solution is to use mirrored glass as a table. You should not use window, it just does not shine with evenness.
- If this does not solve the problem, it is necessary to check the mechanics: the evenness of the shafts, the tension of the belts, the smooth running of the carriages.

- Finally, check to see if the table is tilted by the adjustment screws - this can happen if the table is tilted at four points.
8. Adhesion
Adhesion is a complex issue depending on the filament used, stage material and temperature, and background temperature. In some cases, such as when 3D printing PLA on glass, additional adhesive agents may not be required at all. The most popular options are stationery glue stick or diluted PVA glue.
As mentioned above, in some cases the glue is needed not even to set the plastic with the table, but on the contrary, to facilitate the separation of the model from the surface. In addition, shrinkage must be taken into account: when working with some materials, such as the popular ABS, glue alone may not be enough, and then a 3D printer with a thermal camera is required.
This topic deserves a separate article, and we already have a detailed manual.
9. Infill
In order not to waste plastic, but at the same time save time, you can print parts with partial infill.