3D print resolution
What Does Resolution Mean in 3D Printing?
Looking for a high resolution 3D printer? “Resolution” is an often discussed but seldom understood value in the world of 3D printing and additive manufacturing. How does XY and Z resolution influence on the quality of your 3D prints? What's minimum feature size and what layer thickness should you choose?
In this comprehensive guide, you'll learn how 3D printer resolution affects your 3D prints and how it differs between SLA, FDM, and DLP 3D printers.
Technology has been in a resolution war for decades. Televisions recently quadrupled pixel counts from HD to 4K and are poised to do it again soon to 8K. Cell phones, tablets, and anything with a screen will have its resolution as the lead on the spec sheet, provided that it’s something to boast about. But this is nothing new. Resolution wars have been waged since digital technology became popular, and the printing industry was one of the first battlegrounds.
If you were around in the 80’s and 90’s, you remember Canon, Brother, HP, Epson, and Lexmark (among others) battling it out for print speed and resolution. What started at 100x100 dots per inch (DPI) quickly escalated to 300x300, then 600x600, and finally the current industry standard of 1200x1200 DPI. Back then, the meaning of these values was clearly understandable; even the units made perfect sense. Unfortunately, things get more complicated when you add another dimension to printing.
A print’s level of detail is impacted by the 3D printer's resolution in all three dimensions.
In 3D printing and additive manufacturing, there are three dimensions to consider: the two planar 2D dimensions (X and Y) and the Z dimension that makes it 3D printing. Since the planar and Z dimensions are generally controlled via very different mechanisms, their resolutions are going to be different and need to be treated separately. As a result, there is a lot of confusion about what the term “3D printing resolution” means and what level of print quality to expect.
Sample part
See and feel Formlabs quality firsthand.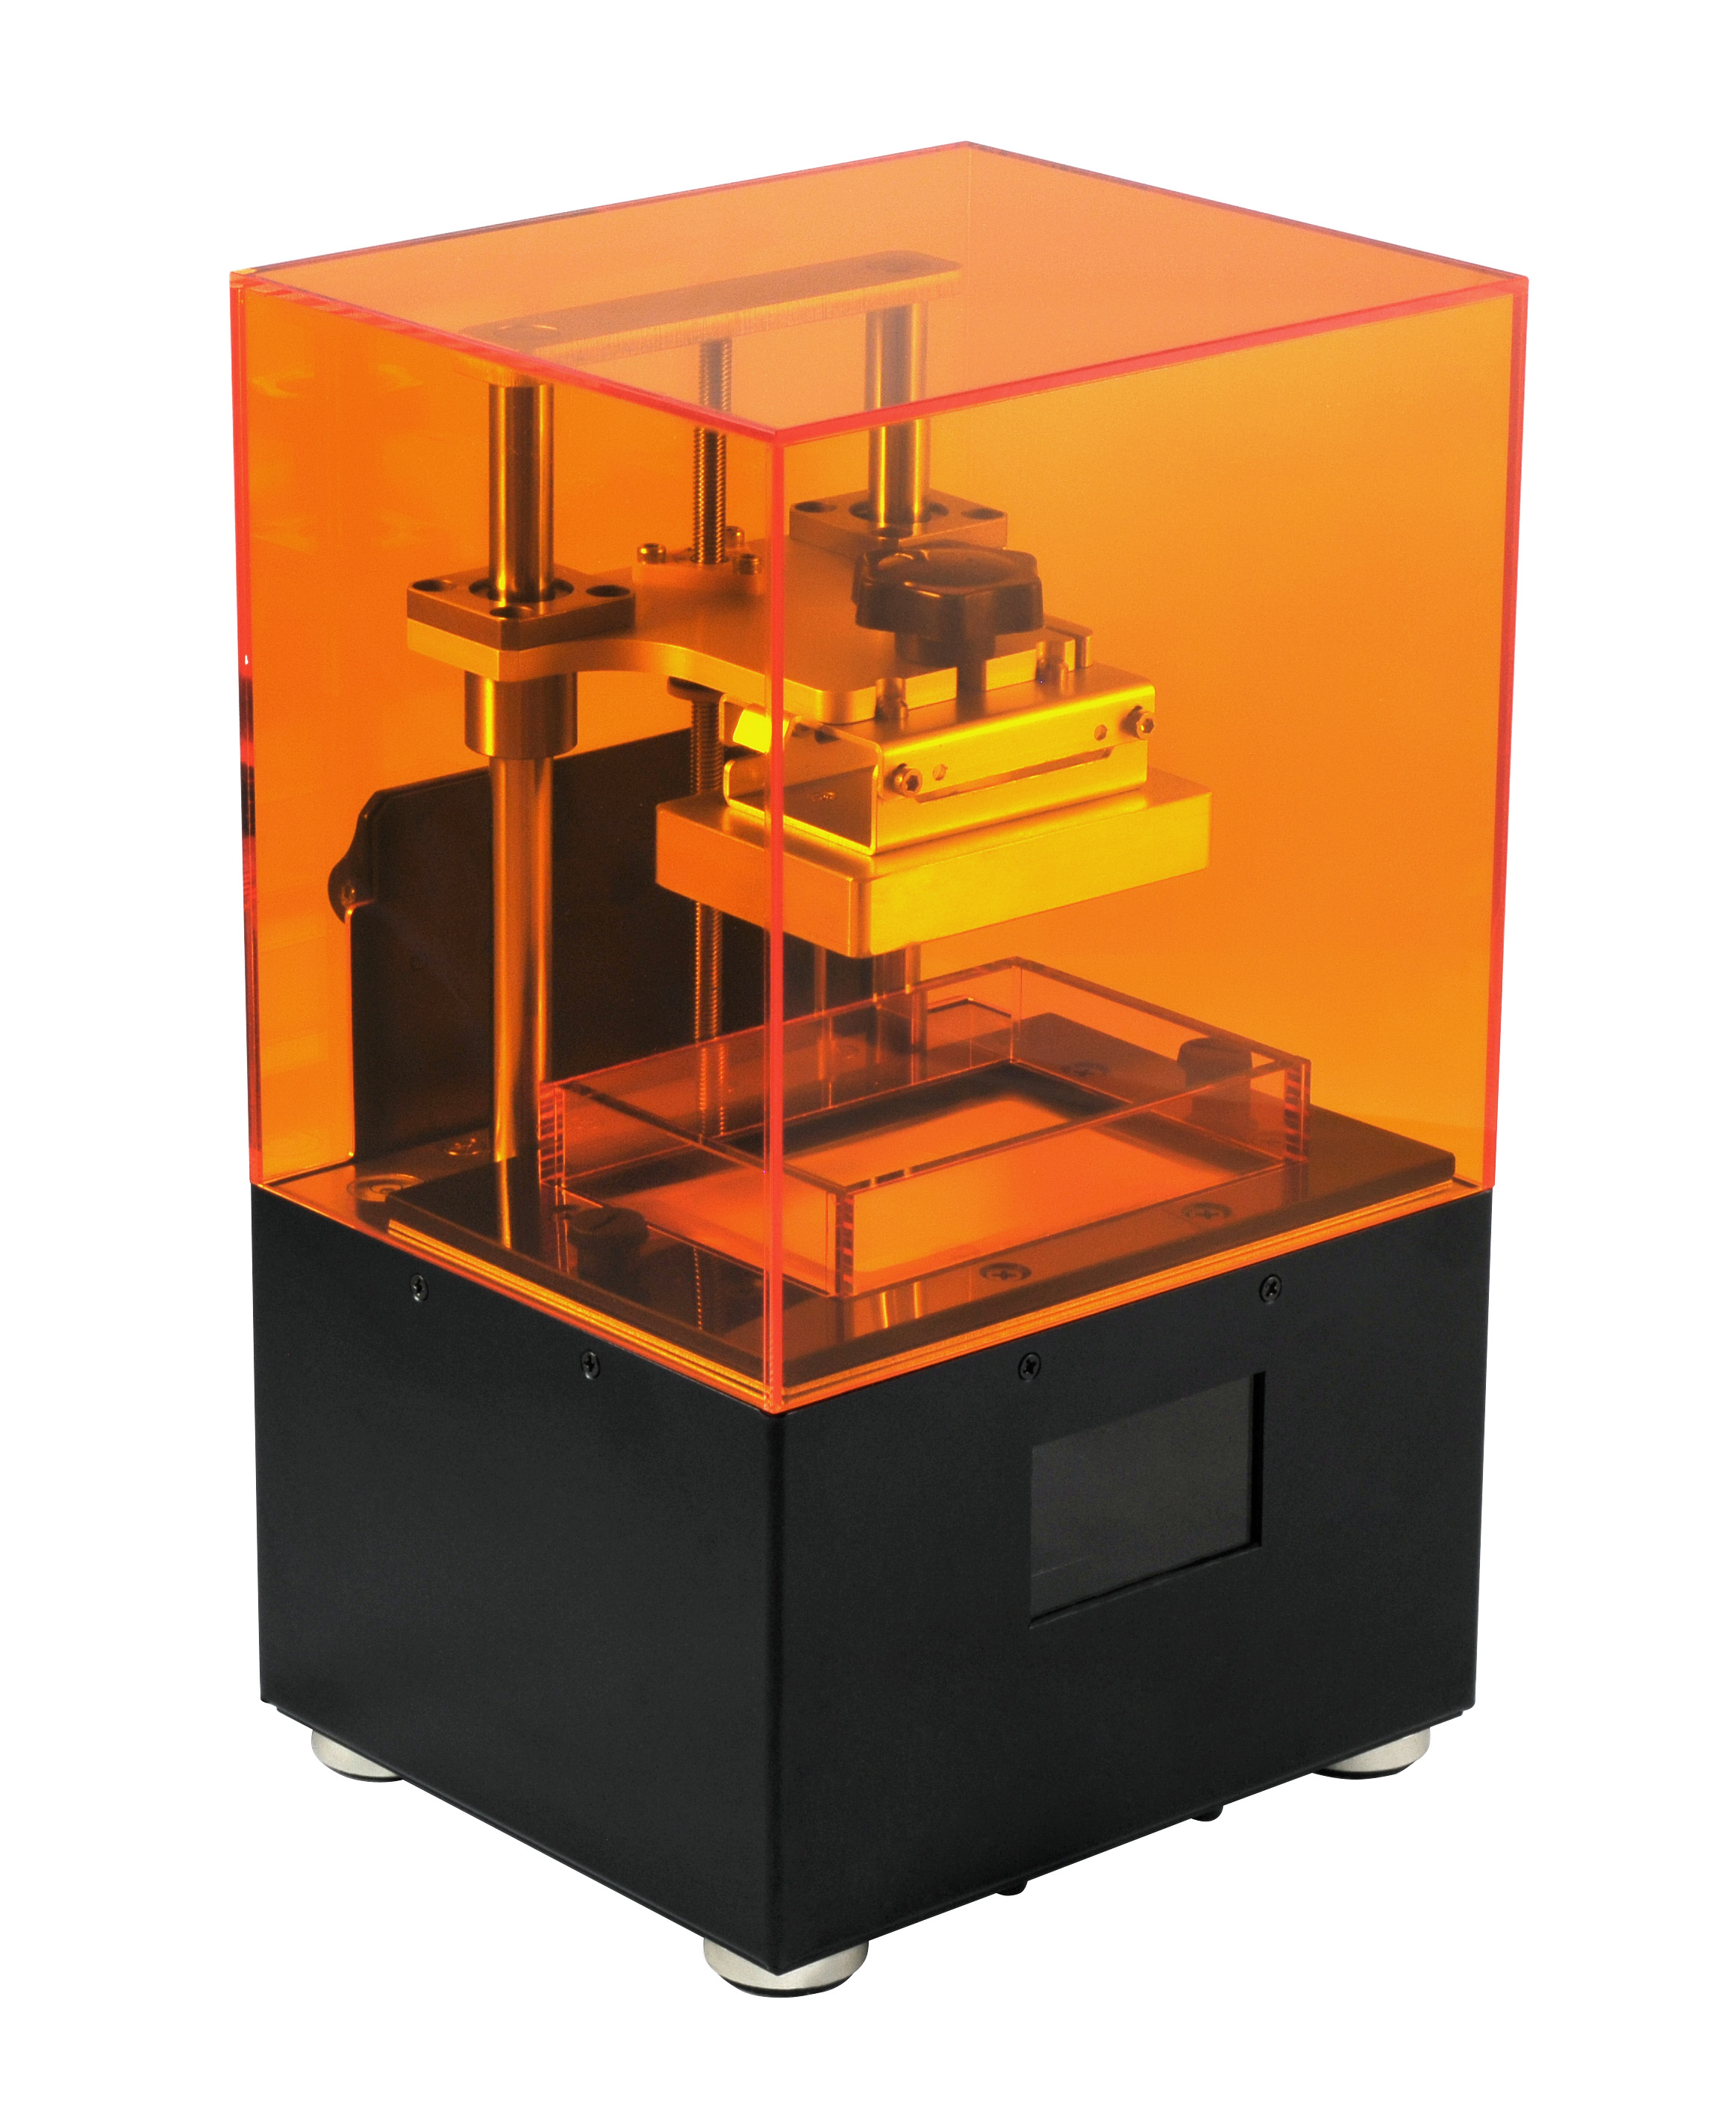 We’ll ship a free sample part to your office.
Request a Free Sample Part
Formlabs' high resolution SLA 3D printers have high Z-axis resolution and a low minimum feature size on the XY plane, allowing them to produce fine details
What makes a 3D printer high resolution? There’s not a one-number answer. Since 3D printers produce parts in 3 dimensions, you will have to consider at least two numbers: the minimum feature size of the XY plane and the Z-axis resolution (layer thickness or layer height). The Z-axis resolution is easily determined and therefore widely reported even though it is less related to print quality and surface finish. The more important XY resolution (minimum feature size) is measured via microscopic imaging and is therefore not always found in spec sheets.
Practically, it means that you should pick a 3D printer that performs well in both categories (in all 3 dimensions).
White Paper
Looking for a 3D printer to realize your 3D models in high resolution? Download our white paper to learn how SLA printing works and why it's the most popular 3D printing process for creating models with increadible details.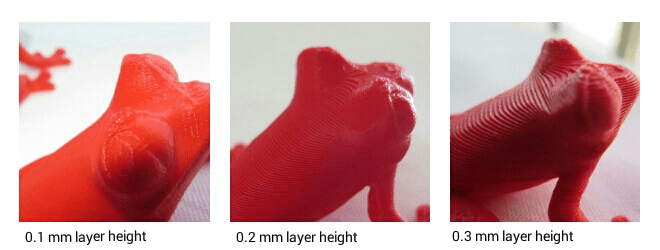
Download the White Paper
White Paper
Download this report for an internal test that Formlabs created to determine the dimensional accuracy of the Form 3 and Form 3B.
Download the White Paper
A lot has changed since the first desktop 3D printers became available to the public. Now stereolithography (SLA) 3D printers, like the Form 3+, are competing for the same desktop spots as fused deposition modeling (FDM) 3D printers. One of the main advantages that resin-based SLA 3D printers hold over their plastic-melting cousins is print quality: SLA 3D printers produce significantly smoother and more detailed prints. While SLA printers can usually also achieve significantly smaller layer thicknesses, the reason for the improved print quality lies in their much higher XY-resolution.
SLA 3D printers (right) offer higher resolution and can produce significantly smoother and more detailed prints than FDM 3D printer (left).
Unlike on FDM 3D printers, minimum feature size in the XY plane on SLA 3D printers is not limited by molten plastic flow dynamics but rather optics and radical polymerization kinetics. While the math is complicated (and outside the scope of this post), it shakes out to this: features on SLA prints can be approximately as small as the diameter of their laser spots. And laser spots can be really small, especially compared to the nozzle size of FDM printers' extruders.
Read our in-depth guide about FDM vs. SLA 3D printers to learn how they compare in terms of print quality, materials, applications, workflow, speed, costs, and more.
Resin 3D printers like SLA, LFS and DLP technologies offer the highest resolutions of all 3D printing processes available on the desktop. The basic units of the these processes are different shapes, making it difficult to compare the different machines by numerical specifications alone.
DLP 3D printers have a fixed matrix of pixels relative to the build area, while laser-based SLA and LFS 3D printers can focus the laser beam on any XY coordinate. This means that laser-based machines, given high-quality optics, can more accurately reproduce the surface of a part even if the laser spot size is larger than the DLP pixel size.
Whichever resin 3D printing process you choose, however, professional resin 3D printers should be able to capture the finest details of your creations, from photorealistic models to intricate jewelry.
In SLA and LFS 3D printing (left), layer lines are close to invisible. As a result, surface roughness is reduced, which ultimately leads to smooth surfaces, and for clear materials, more translucent parts. DLP 3D printers render images using rectangular voxels, which causes an effect of vertical voxel lines (right).
Learn more about the differences between SLA and DLP 3D printers and see how they compare in terms of resolution, accuracy, precision, build volume, surface finish, speed, and workflow.
In the world of 3D printing, no factor influences print quality more than XY resolution.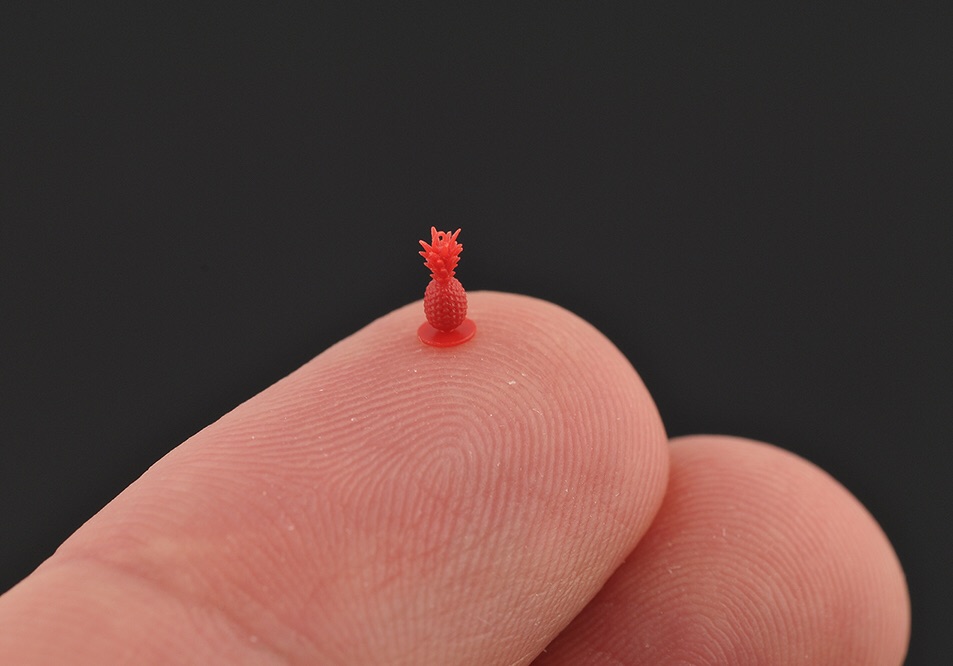 Often discussed but seldom understood, the definition of XY resolution (also called horizontal resolution) varies by 3D printing technology:
- SLA and LFS 3D printers: a combination of the laser’s spot size and the increments by which the laser beam can be controlled
- DLP 3D printers: the pixel size, the smallest feature the projector can reproduce within a single layer
- FDM 3D printers: the smallest movement the extruder can make within a single layer
As a rule of thumb, the lower the number, the better the details. Yet this number is not always included in spec sheets, and when it is, the published value is not always accurate. To truly know a printer’s XY resolution, it’s important to understand the science behind the number.
Practically, how does XY resolution affect your 3D prints? In order to find out, we decided to test the Form 2 SLA 3D printer. The Form 2 has a laser spot size of 140 microns (FWHM), which should allow it to print fine details on the XY plane. We put it to the test to see if this ideal resolution holds true.
To test the Form 2’s minimum feature size on the XY plane, we designed a model (left) with lines ranging from 10 to 200 microns and printed it in Clear Resin (right).
First, we designed and printed a model to test the minimum feature size on the XY plane. The model is a rectangular block with lines of varying widths in horizontal, vertical, and diagonal directions to avoid directional bias. The line widths range from 10 to 200 microns in 10 micron steps and are 200 microns tall, which equates to two layers when printed at 100-micron Z resolution. The model was printed in Clear Resin, washed twice in an IPA bath, and post-cured for 30 minutes.
The model was photographed and tinted green to improve visibility. On the right side of the window, the vertical yellow line with black points measures the width of a photographed line.
After post-curing, we put the model under a microscope and took high-resolution photos for analysis. Using ImageJ, the NIH’s free image analysis software, we first scaled the pixels of the images and then measured the actual widths of the lines printed. We collected over 50 data points per line width to eliminate measuring errors and variability. In total, we printed and analyzed three models on two different printers.
The results indicate that the Form 2 has the same ideal and actual XY resolution for features that are 150 microns and larger.
As the print’s line width decreases from 200 to 150 microns, the ideal values are within the 95% confidence interval of the measured value. As the intended line widths get smaller than 150 microns, the measured interval starts to deviate significantly from the ideal. This means that the printer can reliably produce XY features as small as 150 microns, about the size of a human hair.
The Form 2’s minimum feature size on the XY plane is about 150 microns—only 10 microns larger than its 140-micron laser. The minimum feature size can never be smaller than the laser spot size, and there are many factors that affect this value: laser refraction, microscopic contaminants, resin chemistry, and much more.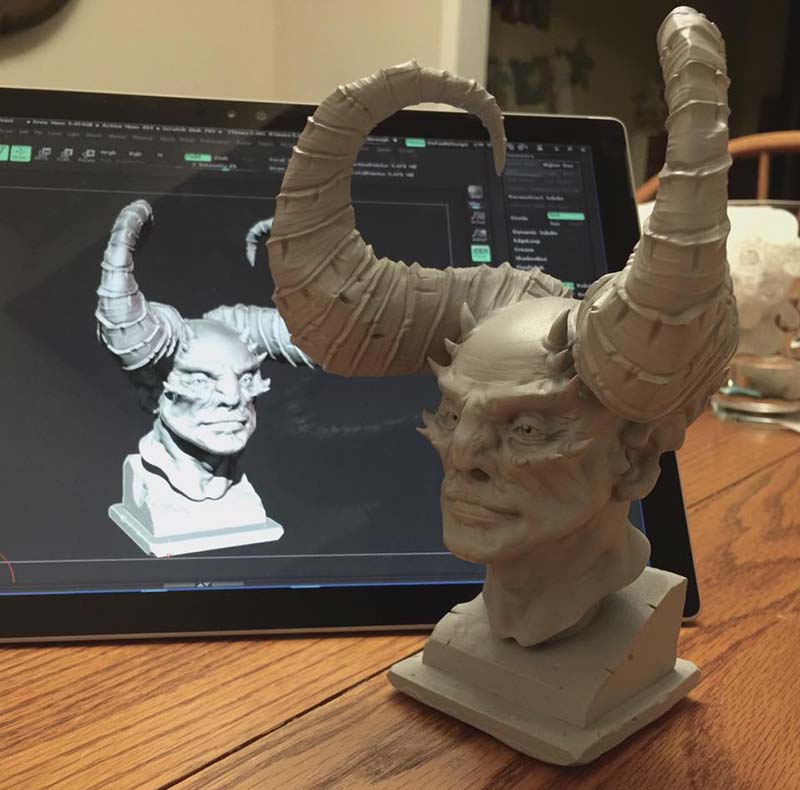 Considering the printer’s entire ecosystem, a 10-micron difference is nominal. Not every 3D printer’s published resolution holds true, so it’s a good idea to do plenty of research before choosing the one that's right for your project.
If your work calls for prints with intricate details, look for a printer with an XY resolution that’s backed by measurable data, not just a number.
When you read 3D printer spec sheets, you’ll see one value show up more than any else: Z resolution. Also known as layer thickness or layer height, the vertical resolution was the first major numerical differentiation between early 3D printers. Early machines struggled to break the 1 mm barrier, but now layer thicknesses on FDM 3D printers can be sub-0.1 mm thin, while LFS and SLA 3D printers are even more precise.
Formlabs 3D printers support layer thicknesses between 25 to 300 microns, depending on the material. This selection of layer heights gives you the ideal balance of speed and resolution. The main question is: what is the best layer thickness for your print?
High resolution 3D printing comes with a tradeoff. Thinner layers mean more repetitions, which in turn means longer times: printing at 25 microns vs. 100 usually increases the print time four-fold. More repetitions also mean more opportunities for something to go wrong. For example, even at a 99.99% success rate per layer, quadrupling the resolution lowers the chance of print success from 90% to 67% if one assumes that a failed layer causes total print failure.
Lower layer thickness equals more time, artifacts, and errors.
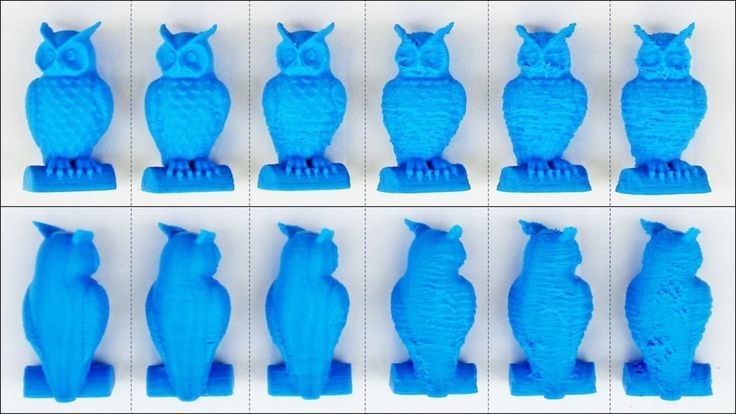
Does higher resolution (thinner layers) result in better prints? Not always—it depends on the model to be printed and the 3D printer’s XY resolution. In general, thinner layers equals more time, artifacts, and errors. In some cases, printing models at lower resolutions (i.e. thicker layers) can actually result in higher-quality prints.
Thinner layers are typically associated with smoother transitions on diagonals, which leads many users to generalize and push Z resolution to the limits. But what if the model consists mostly of vertical and horizontal edges, with 90-degree angles and few diagonals? In those cases, additional layers don’t improve the quality of the model.
The issue is compounded if the XY resolution of the printer in question is not perfect and “colors outside the lines” when drawing the outside edges. More layers means more mismatched ridges on the surface. While the Z resolution is higher, the model will look like it is significantly lower quality in this case.
That being said, there are times when you want higher resolution. Given a printer with good XY resolution and a model with intricate features and many diagonal edges, dialing down the thickness of the layers will yield a much better model. In addition, if that model is short (200 or fewer layers) upping the Z-axis resolution can really improve the quality.
Certain designs benefit from a higher Z resolution: organic forms, rounded arches, small embossings, and intricate engravings.
Intricate models with elaborate details call for a higher Z resolution. SLA 3D printed parts have sharp edges, sleek surfaces, and minimal visible layer lines. This example part was printed on the Formlabs Form 3 desktop SLA 3D printer.
As a general guideline, err on the side of thicker layers and only bump up the Z resolution when completely necessary. With the right printer and a certain type of model, higher Z resolution will capture the intricate details of your design.
Draft Resin, the fastest 3D printing resin available for a Formlabs SLA printers, prints at 200 microns and 100 microns, while retaining the a smooth surface finish.
In PreForm, Formlabs provides users with the choice of different layer thicknesses. Depending on the material and the requirements of the application, parts can be printed in the following layer heights: 200, 160, 100, 50, and 25 microns.
The desktop Form 3+ and the large format Form 3L SLA printers are ideal for high resolution 3D printing.
After learning about 3D printing resolution and sorting out the differences in technology and outcomes, we hope it’s much easier to select 3D printer that best matches your workflow and output needs.
To explore the next generation of SLA 3D printing, learn more about the Form 3 and Form 3L LFS 3D printers.
Curious to see the what high resolution 3D printing looks like firsthand? Order a sample part shipped to your office.
Request a Free Sample Part
3D printer resolution - what does it really mean?
Back
In the world of 3D printing we often speak of the 3D printer resolution of the machines. Because 3D printing is such an accurate procedure, the accuracy of 3D printers is in the size of microns. A micron is one thousandth of a millimeter, so it is extremely small. By displaying the 3D printer resolution, the buyer has a general idea of what the printer is capable of. There is more to the story, however.
A 3D printer resolution example:
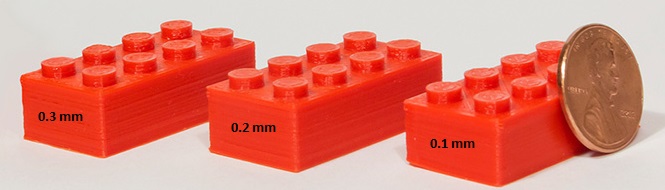
If the 3D printer resolution is set to 200 microns and we want to print 2mm height over a distance of 10 cm, it would mean we need 10 layers in order to achieve the desired height .
However, if printed at 100 microns, it would mean that there would be 20 layers used to create the height of 2mm and that would mean 0.1mm step between each layer and a smoother surface delivering a better-looking acute angle.
3 types of deviation
While the 3D printer resolution is very important, you also need to use the best material for your design. Even when you have the most accurate 3D printer on the market, it’s possible that there’s a slight deviation. It might be too small to spot with the human eye, but it might make the difference between a functional print and one you can’t use. Therefore it’s important to know that there are three types of possible deviations when we speak of the 3D printer resolution: machine-, material- and end result deviation.
Machine deviation
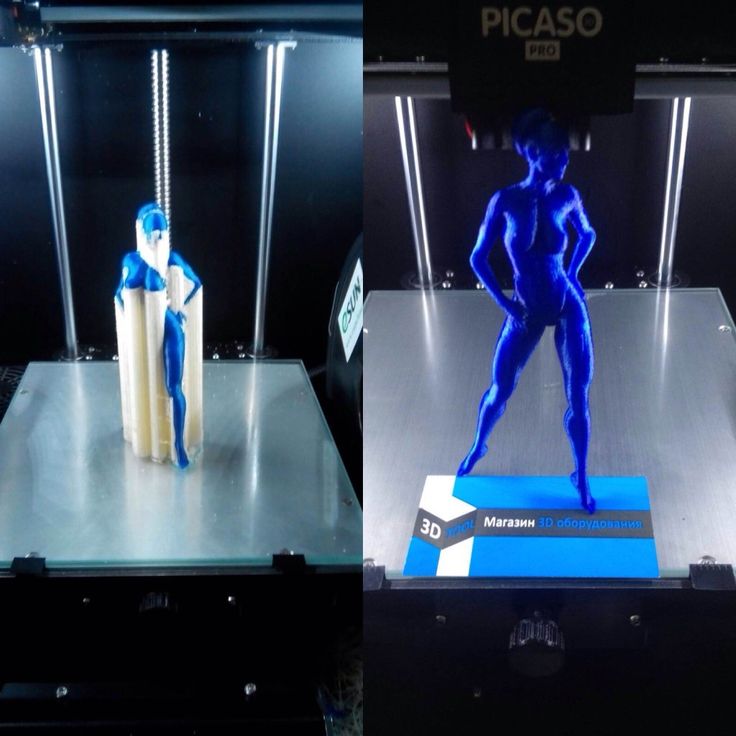
Manufacturers of 3D printers can only promise that their machine resolution is what they claim it is. Therefore they advertise with this factor, as do we. The accuracy of our 3D printers is 10 microns, which we’re very proud of.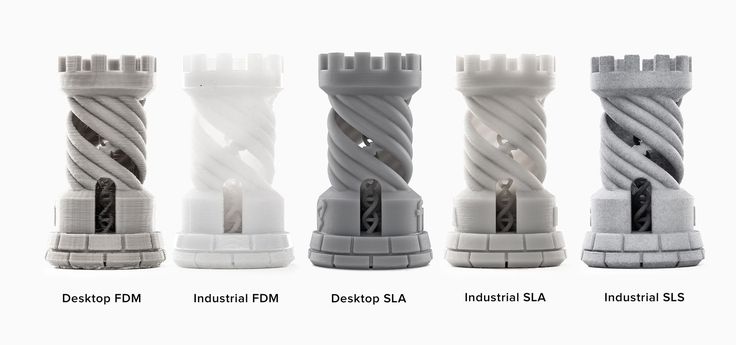 However, it is normal that there is a possible deviation on the Z axis, as gravity pulls the material down. Therefore, we differentiate the resolutions of the X and Y axes (2D) and the Z axis which makes it 3D.
While the 3D printer resolution of the X and Y axes is easy to pinpoint, the Z axis falls victim to gravity. When printing in height, gravity can cause more material to come out of the printer than is intended. Therefore the 3D printer resolution is often a bit lower than is said on a manufacturer’s website. As stated, the accuracy ofTractus3D printers is 10 microns on the X and Y axes. On the Z axis we recommend not printing below 50 microns to make sure your prints are as you desire.
Material deviation
The material can play a significant role in the resolution and outcome of a print. Every material is different and will shrink in its own way and this occurs when it turns from a fluid to a solid – also known as warping. The contraction process takes place when a synthetic material starts to cool down and this can cause the print to bend from the build plate. Of course, as mentioned, each material is different and some will shrink more than others such as PC, which shrinks more than PLA. Therefore, to avoid this, you should ensure that a heated build plate is used, which ensures that the object does not solidify quickly. At Tractus3D, our printers also come with a heated build plate and closed chamber which ensures prevents temperatures from fluctuating, as the warmth is not released.
End result deviation
Last, but certainly not least, is the end result deviation. Everyone purchases a 3D printer to get the most accurate print possible. Even the tiniest deviation can cause a print to not be implemented at all. The end result deviation weighs the machine- and material deviation against each other. This factor can thus be partially influenced by the manufacturer of the machine. Tractus3D printers know which materials have a certain deviation and automatically adapt the machine deviation so the end result is as desired.
How can you test the 3D printer resolution?
3DBenchy as the model for testing and benchmarking the 3D printer resolution
It is important to test the resolution of the 3D printer, so that you can determine the geometrical features that play a part in the outcome.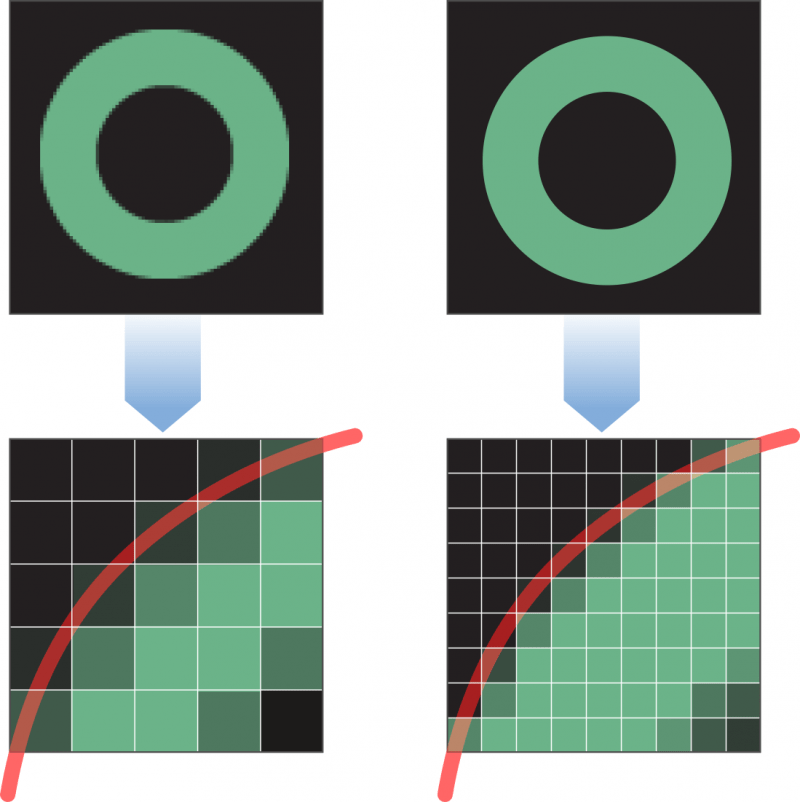 3DBenchy is used as a way of testing and benchmarking 3D printers. The 3DBenchy is a little boat that has been designed to print at a scale of 1:1 without support material. This makes it possible to look at the different surfaces of the model in order to determine any issues associated with the finish of the surface, warping and accuracy.
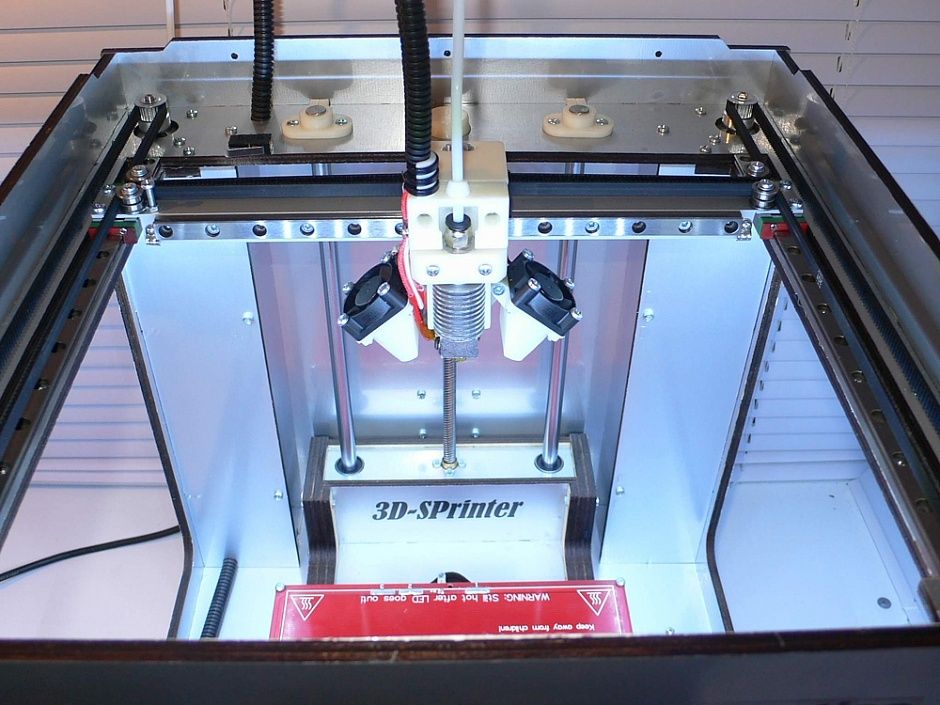
3DBenchy on a Tractus3D printer
In the video above a Tractus3D printer is subjected to the test. The 3DBenchy (from bow to stern measures 60 mm) was printed on our smallest 3D printer, the T650. During printing we did not experience warping or bridging difficulties or any other of the aforementioned possible problems. It took less than 2 hours to complete the 3D print and pass the test!
How the 3D printer resolution can affect the outcome
Just like any other type of printing, the type that you use can affect the final outcome of the print job. This is particularly true for 3D printing and so, you can see just why it is important to consider the 3D printer resolution as part of the decision making process.
Size
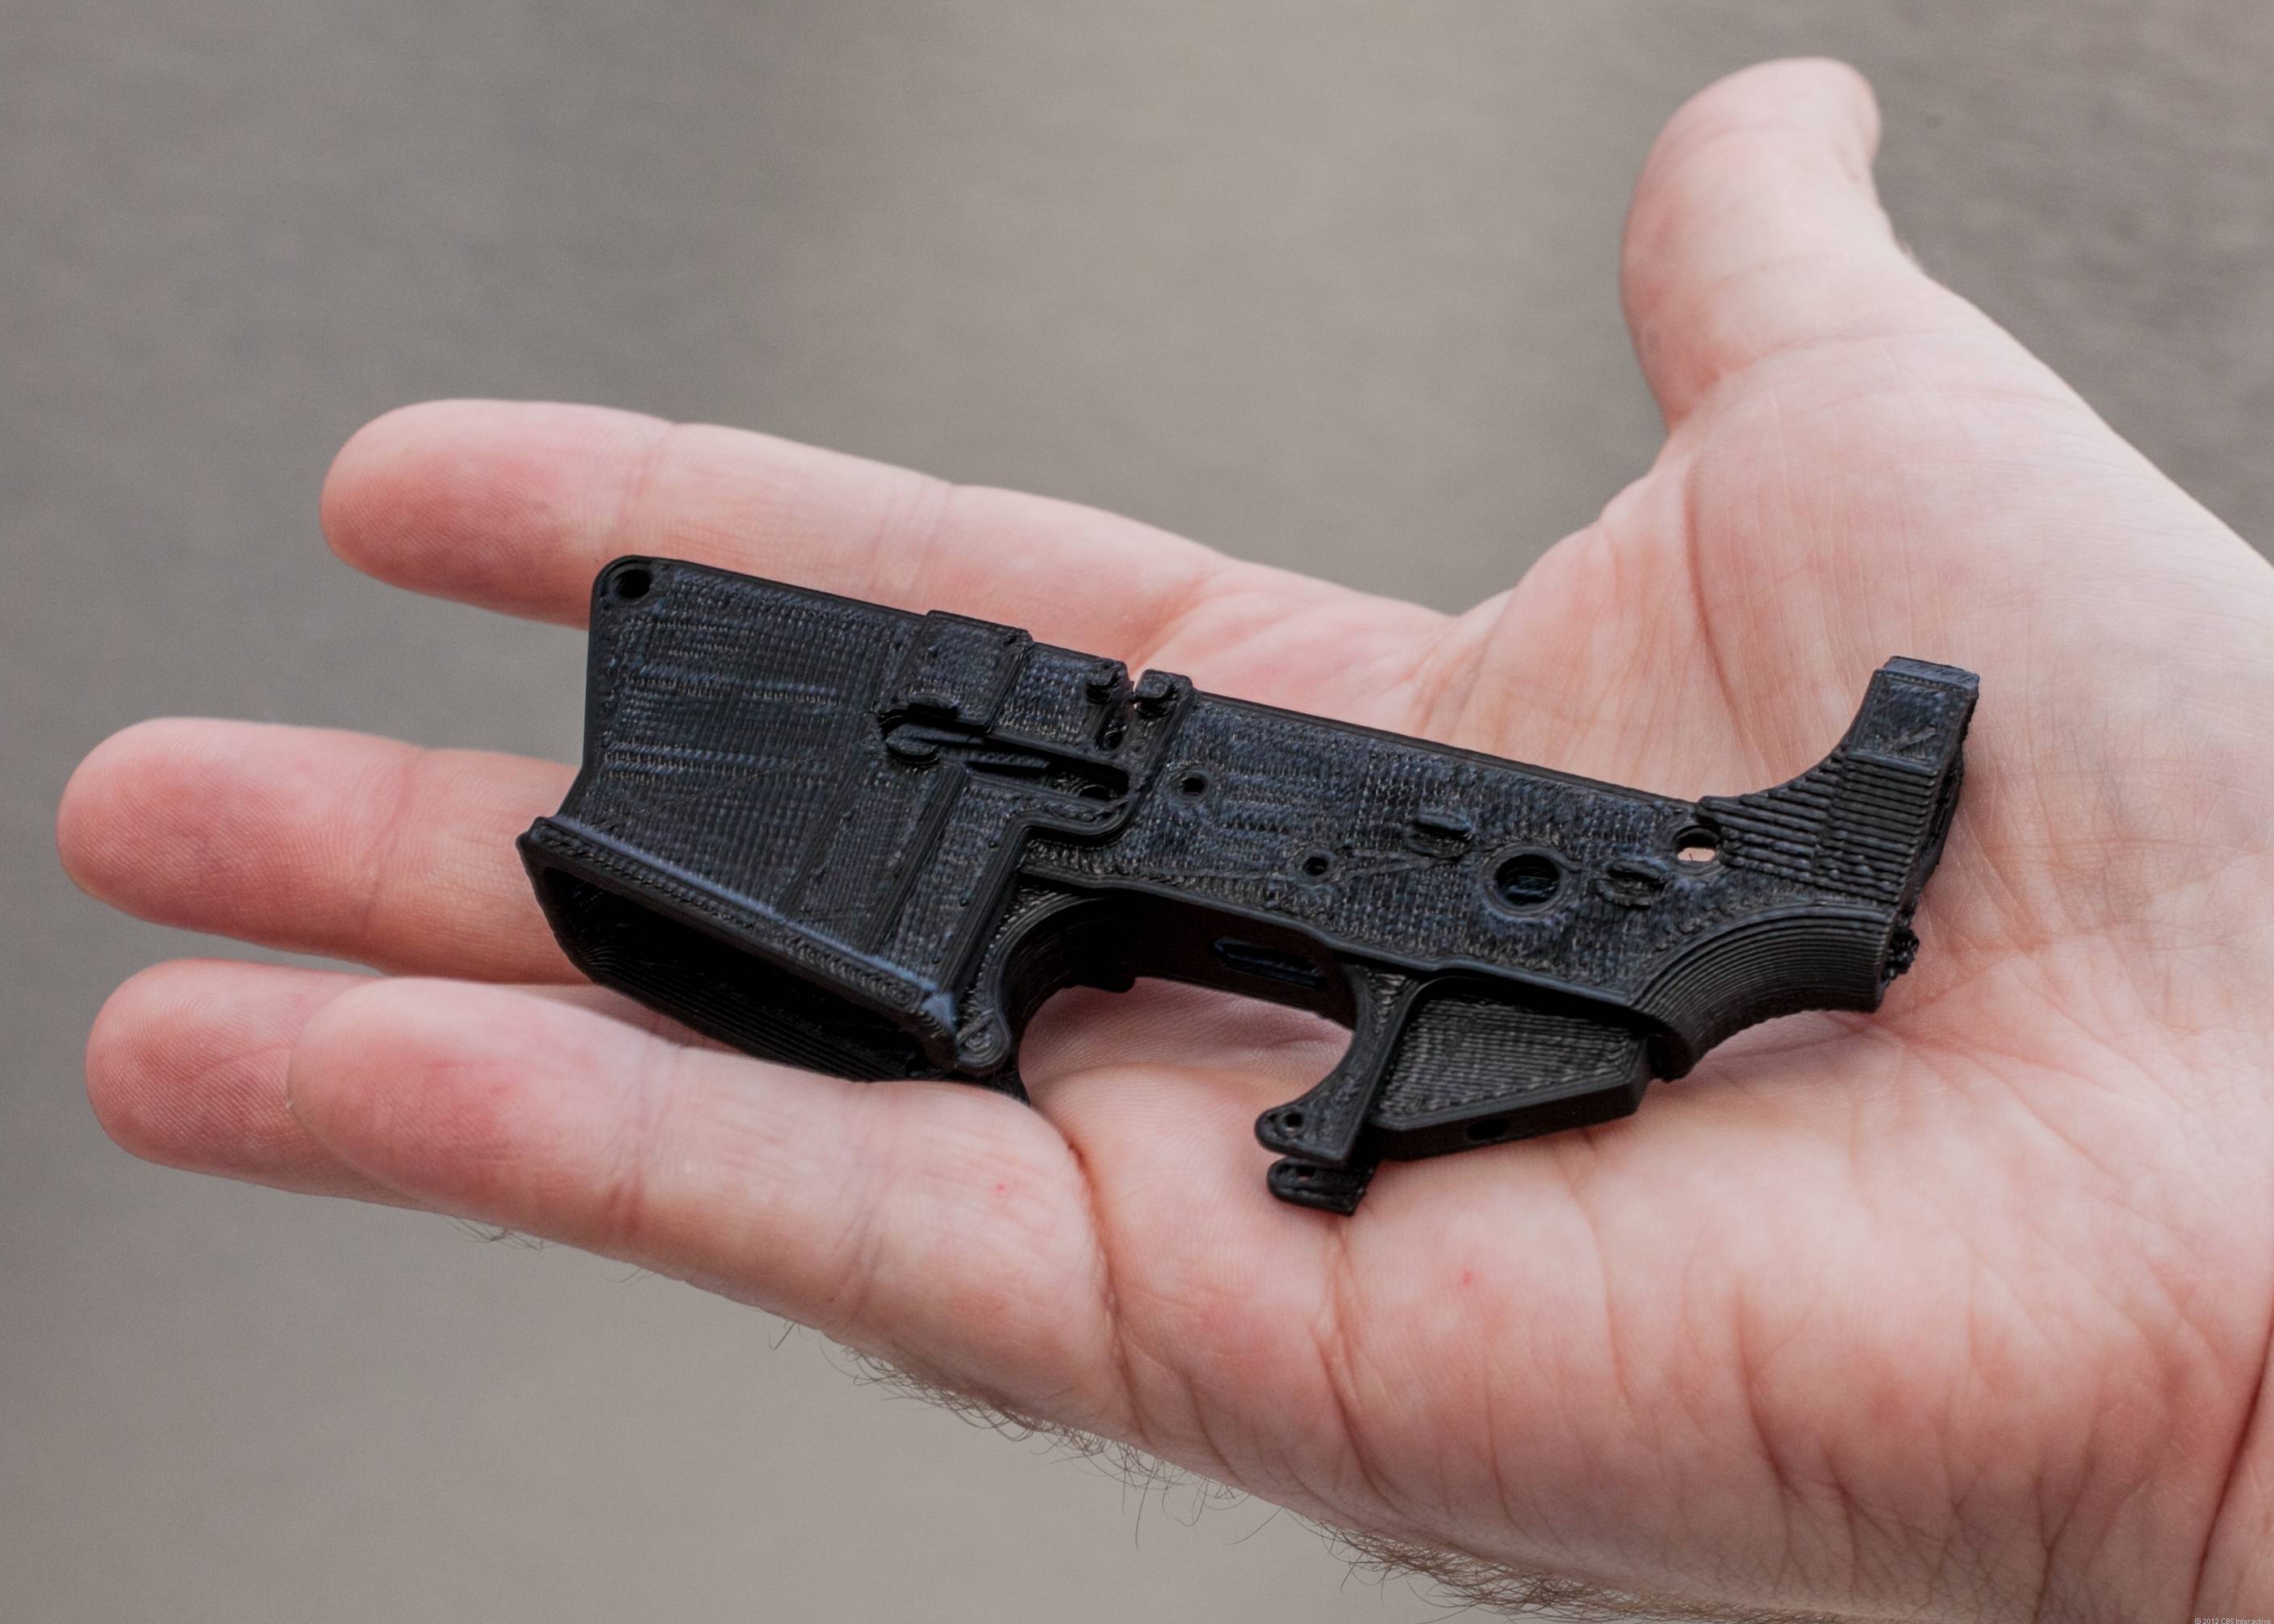
When it comes to industrial 3D printers, as they evolve, the desire to printer larger objects will grow, and with this will come an increase in the need for the quality. For large objects, there might not always be a need for that level of resolution but in the case of small or detailed objects such as those that have interlocking or connecting parts, accuracy is vital and so, high resolution is an absolute must.
Curves
For those printers that have a lower 3D printer resolution, they will print thicker and so, in those particular objects that have a curve, they edges will be rougher and will have a stepped appearance to it. As the thickness of each layer increases, the step between them increases. Thinner layers would give a larger number of smaller steps, making the curve appear smoother.
Horizontal angles
In the same way as those objects that have curves, when 3D printing objects that have angles horizontally, the number of steps in the printed object will be determined by the 3D printer resolution. If the 3D printer resolution is set to 200 microns and we want to print 2mm height over a distance of 10 cm, it would mean we need 10 layers in order to achieve the desired height and there will be a layer thickness of 1 cm. However, if printed at 100 microns, it would mean that there would be 20 layers used to create the height of 2mm and that would mean 0.5mm step between each layer and a far smoother surface delivering a better-looking acute angle.
How high resolution is achieved
Filament choice
The first thing about ensuring that high resolution is achieved is down to the ability to take care of the filaments in the correct way. The whole printing process is influenced by the filament and so, it is important that great care is taken over it. The filament has to be correctly wound onto the spool and it is crucial that the temperature is set correct for a heated platform to prevent the objects from sticking to it. An example of this would be ABS which requires a temperature of 100 degree Celsius while PLA only requires a temperature of 60 degrees Celsius.
Temperature regulation
As touched upon already, the quality in 3D printed objects as well as the resolution will often come down to the temperature of the extruder or the heated platform. Of course, every material will come with a desired extrusion temperature such as ABS which has the most successful melting point at around 240 degrees Celsius. This can vary depending on the manufacturer so it worth taking that into consideration.
Support
Where complex and highly detailed objects are being printed with a high 3D printer resolution, it is crucial that rafts and support structures are used. The key to getting this right is to ensure that the correct thickness is set for the raft, the right distance between the object and the support and the density. However, the denser the support is, the more difficult it can be to remove once the print job has been completed.
Software
The software that is used can also play a part on the final outcome and quality of the 3D print. Different programs can cause better or less adjoining structures and that can have a significant impact on the overall quality of the final print.
Nozzle
The layer height is extremely influential on the quality of 3D prints. Often, standard 3D printing heights are set between 0.1 and 0.3 mm but with the correct nozzle and the right filament, it is possible to increase the height range to 0.05 to 0.35mm. It is worth remembering that the layer height should not be more than the diameter of the nozzle and less than that of half the path width. The lower the layer, the easier it is to create a 3D print that is detailed and accurate with fewer visible layers.
In contrast to this, the path width does depend on the size of the nozzle as most nozzles are around 0.3 and 0.4mm. The minimum width can equate to that of the diameter of the nozzle but it can be increase by around 0.1 to 0.2mm. Commonly, the path width should equate to twice that of the layer height and so, a safe path width can be considered to be between 0.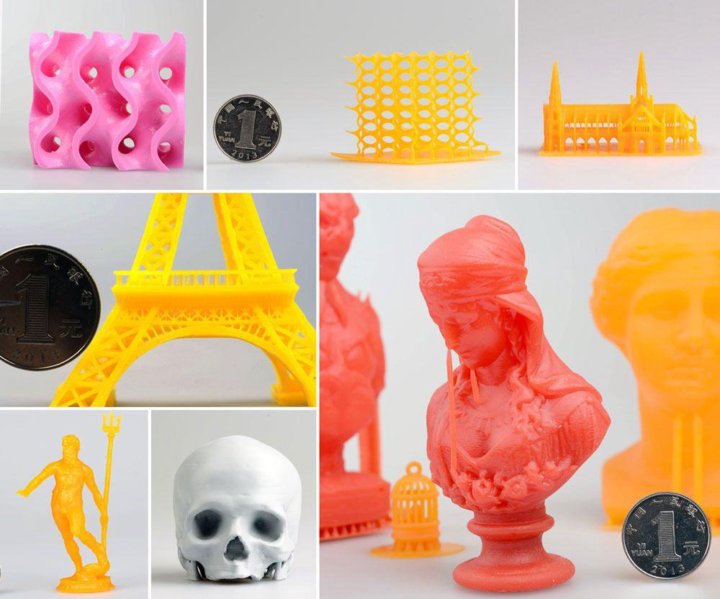 3mm and 0.6mm.
3D printing speed
The speed of the 3D printer and print job can have a significant impact on the quality and resolution of the final object in FDM printing. When the print job is carried out in more time it means better finishes on corners or edges. Most filaments will also adhere better and have more time to cool down.
Whether you are opting to print with one or two material extruders, retraction is a crucial part of the process. This is down to the fact that it is responsible for retracting the filament when it is not in use. If the speed and distance of retraction is increased then this can prevent the filament from blobbing on the object as well as prevent any unintentional mixing. It will also mean that filament does not hang from the nozzle. In this case when the extruder moves over the object, it does not leave behind thin hairs of plastic on the printed object.
When resolution is not important
Obviously, design engineers want to achieve the very best printing results and that means that they should consider everything to achieve this.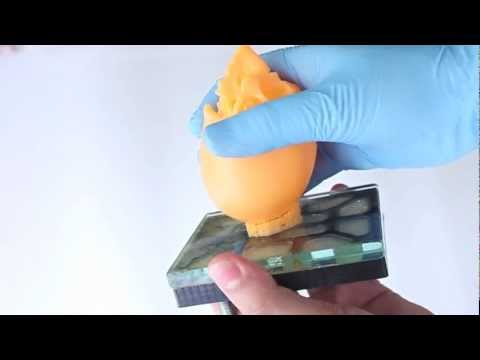 However, not every situation requires a high resolution finish. This is down to the part geometries, the parts that are being produced and how they will be used. In some cases, a high resolution is great but where there are time constraints and less of a requirement to print in high resolution then less care or concern can be taken to the final product. Of course, cost can also play a part in this, particularly where costs need to be kept to a minimum as this can mean that low quality resolution objects can be created without any concerns.
The 3D printer resolution of Tractus3D industrial printers
When designing exquisite models for FDM 3D printing, you want them to be as detailed as possible so that you can truly see the expertise put into it. With a 3D printer resolution of 0,01 millimeter (10 microns) on the XY-axis and a resolution 0,05 millimeter (50 microns) on the Z-axis, the Tractus3D DESK printers can print even the finest details. When your objects do not require such detail, you can print at a lower resolution up to 1000 micron.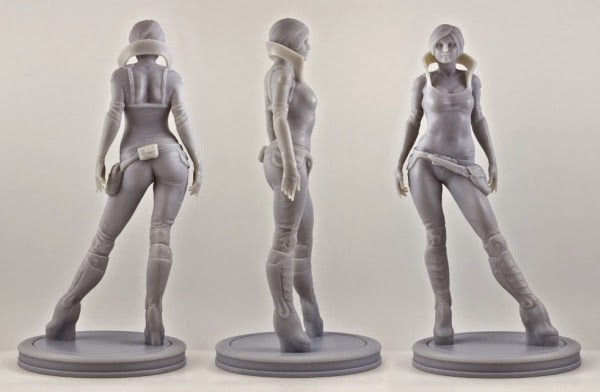
In the end, Tractus3D systems are capable of the 3D printer resolution we say they can. It is up to the user to make sure they choose the right material for the endproduct. We choose to not set you free into the wild when you buy our industrial 3D printers. We will advise you on what is and is not possible before you purchase our product, so you can get the most out of your printer. This is why our industrial 3D printers have profiles of all the materials, so you know which settings are right for each material. With the help of these profiles, the printer automatically chooses the right temperature and accounts for things such as shrinkage. As a wise man once said: with a great 3D printer, comes great responsibility.
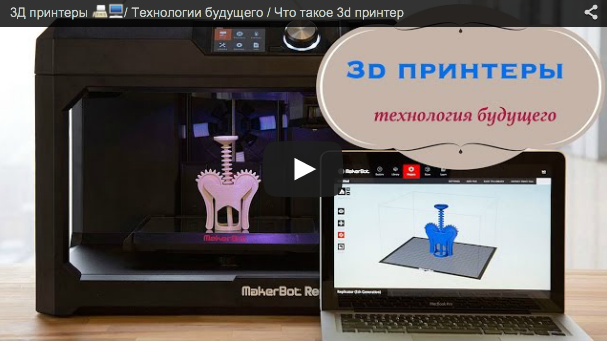
What is the resolution of a 3D printer? What does it affect. How to setup!.
In many technical descriptions, one can come across such a characteristic of a 3D printer as resolution. This parameter is changeable and therefore it is also important to understand what it is and what values it can take, since this will be reflected in the print results.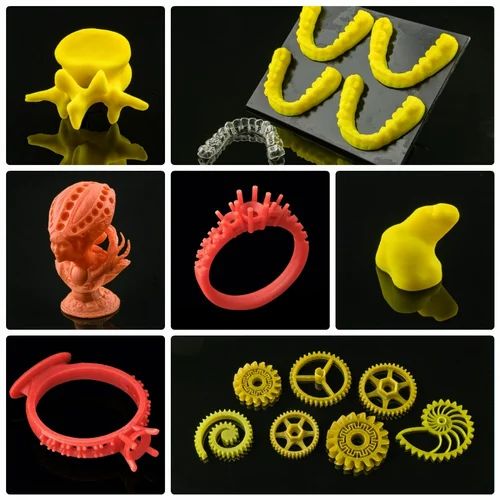
An analogy can be made with an ordinary image, that is, a picture. The higher the resolution, the better the picture will be, the higher the detail. However, the size of such an image will be larger. This is natural for any devices (phones, tablets, TV screens, etc.). It's the same with a 3D printer.
Any 3D model is formed by slicing. This is the process of cutting into separate horizontal layers, from which a physical model is formed.
The 3D printer has two types of resolutions:
• along the X and Y axes;
• Z-axis.
The first will be the resolution in the 3D plane, and the second will be the height of the layer.
In the specifications of a 3D printer, the maximum resolution is the minimum layer height value. The lower the layer height, the better the detail will be. At the same time, the number of layers will also increase, which will affect the printing time - it will increase.
For comparison, we can take FDM, SLA printers. Printing technologies are different, as are the specifications.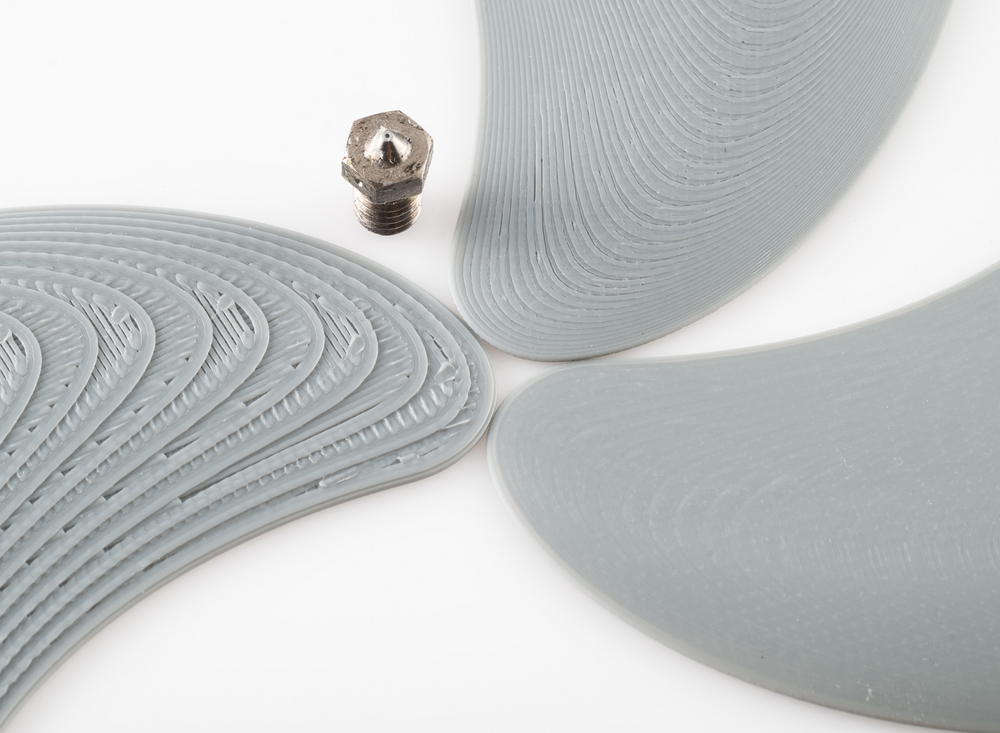 For an FDM printer, the minimum layer height is 0.05mm. The indicator less does not make sense, since these devices are not suitable for printing highly detailed products, as well as small models. And a smaller value of resolution along the Z axis will not affect the print quality. In SLA 3D printers, the layer thickness can be 0.005mm. Therefore, such devices are used to print small parts, such as jewelry, dental products.
A legitimate question arises: “Is high resolution always required?” If you set the layer thickness to the minimum value, then the print time will always increase. For example, if you print a product not at 100 microns, but at 25 microns of layer height, then the printing time will increase by 4 times, that is, in direct proportion.
If your model is a flat wall at a right angle, the resolution increase will not affect the quality. At least substantially accurate. In the event that your 3D printer is not well calibrated, then the layers may shift relative to each other. And it turns out that the more layers there are, the greater the displacement and, accordingly, the irregularities. And as a result, at high resolution, you can get a detail of worse quality.
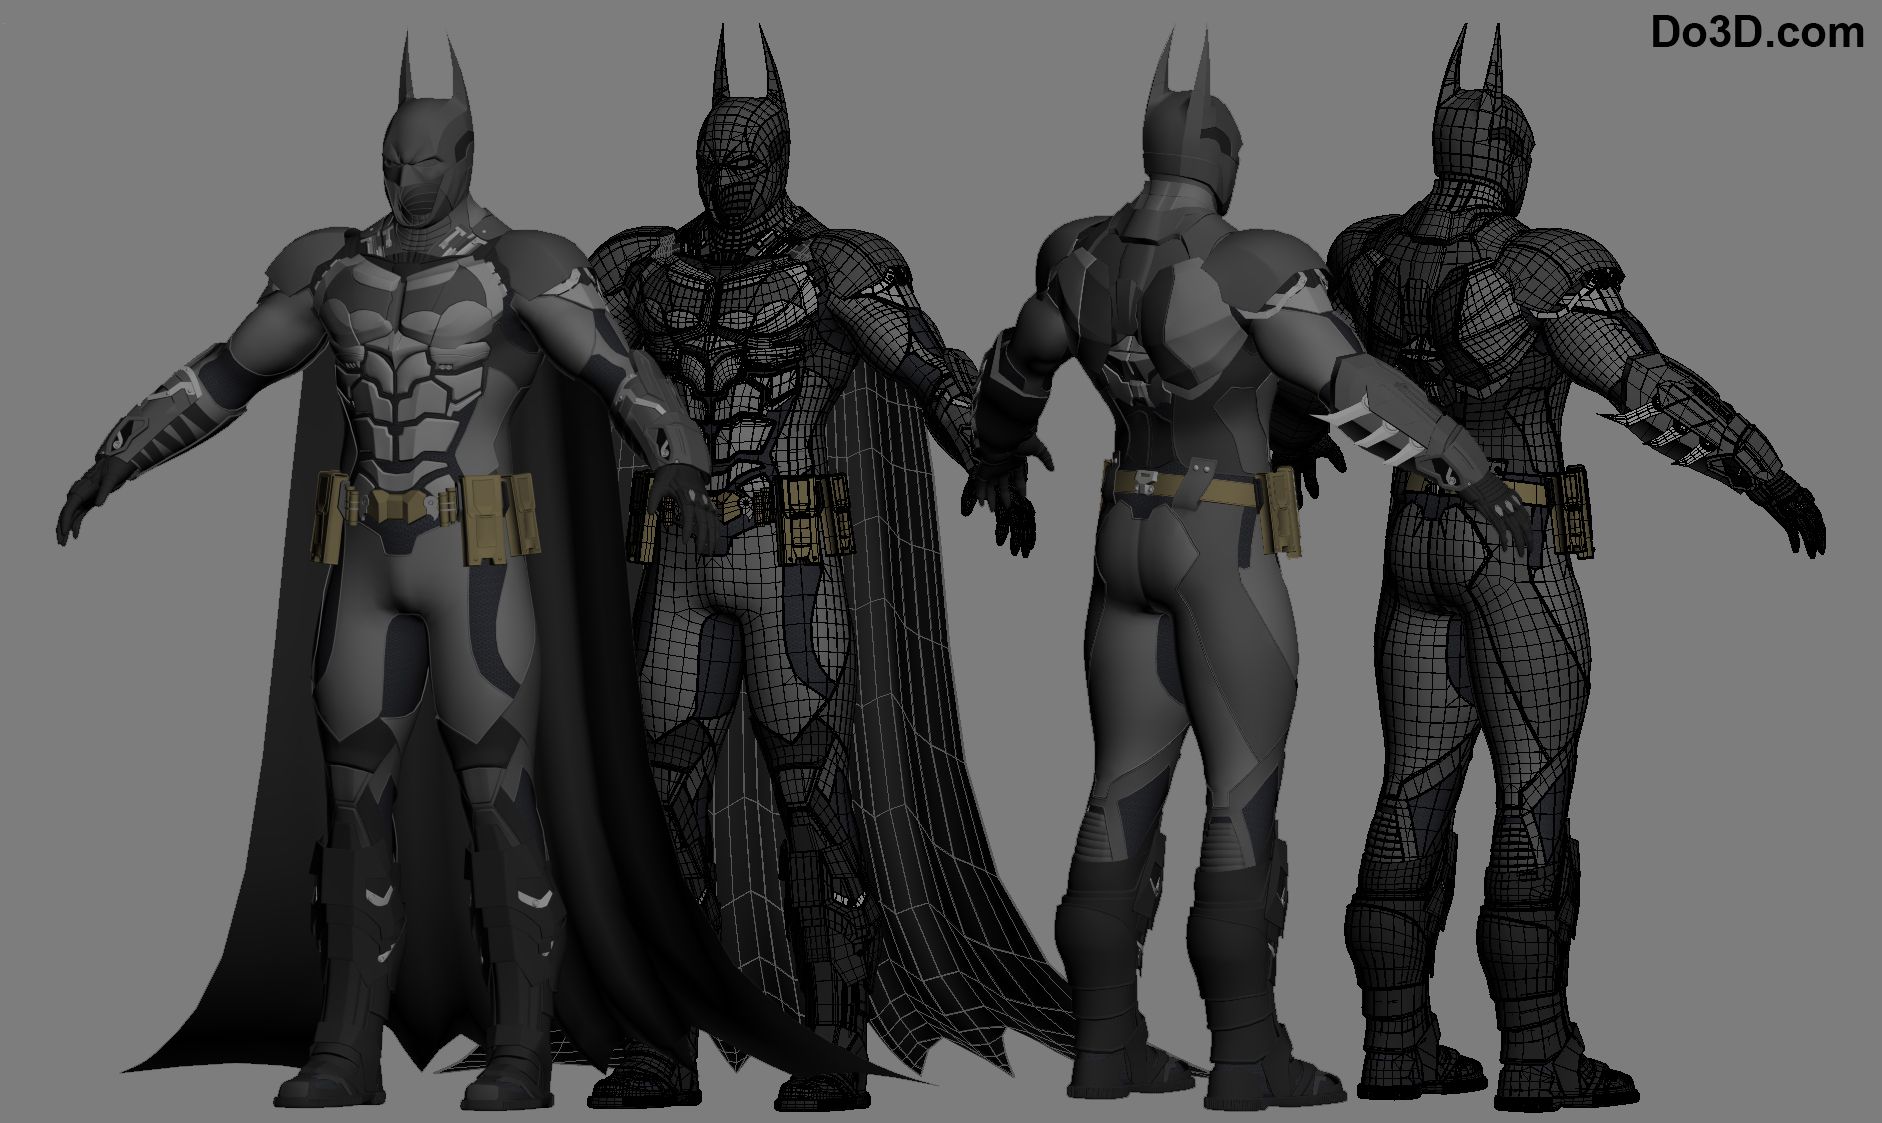
If you need to print miniature products with complex elements: engravings, roundness, arches, a large number of complex shapes, then high resolution will be a must, because otherwise no elements will be clearly printed, and they may simply be invisible.
Z-axis resolution will be limited by the design of the printer. For FDM devices, this will be the nozzle diameter. It is impossible to set the layer thickness greater than the nozzle diameter, since this would be impossible from a physical point of view. For SLA printers, it is also impossible to supply more than 100 microns, since the layer must be well cured by the laser. The higher the layer height, the longer it will take to illuminate the laser. In addition, due to the high layer thickness, various defects and artifacts can occur, that is, the quality of the product will suffer greatly.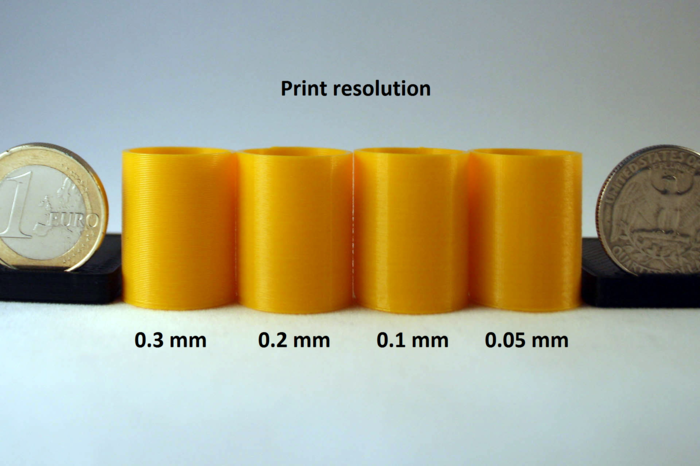
The X and Y resolution will depend on the design of the printer. When viewed from the point of view of prints, then this indicator will affect the last layers of the product. For an FDM printer, it will also depend on the nozzle diameter, and the smaller it is, the higher the resolution will be. In this case, the fills will be less noticeable, and the quality of the product will be higher. For SLA printers, this characteristic will be determined by the diameter of the laser spot. This value will always be constant and does not change. For DLP printers, this characteristic will depend on the pixel size and projector resolution.
What quality can 3D printers print?
As with laser and inkjet printers, resolution is an indicator of quality for 3D printers as well. However, if we are talking about resolution in 3D printing, we should be talking about all three dimensions - along the X, Y and Z axes.
- Easily!
3D printer resolution facts and figures
Horizontal resolution (XY) is the smallest movement of the printer's extruder that it can make along the layer on the X and Y axes.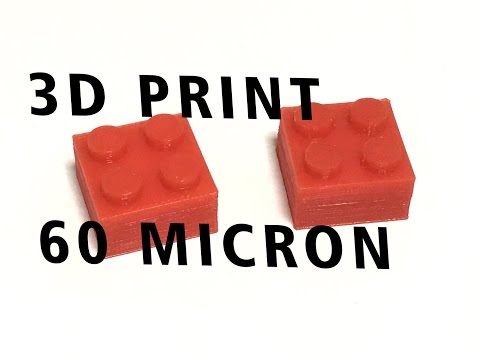 The smaller this parameter, the more accurate the detail the printer can produce.
The vertical resolution (or layer thickness or layer height) is the minimum layer thickness the printer can produce in a single pass. The thinner the layer thickness, the smoother the printed surface. At the same time, with a thinner layer, the printing process takes more time, since more layers need to be laid out.
Typical consumer FDM printers have a layer thickness of 0.2 to 0.3 mm. One of today's best desktop models, the Ultimaker 2 delivers horizontal resolution as low as 0.02mm. SLA printers such as the Form 2 print in layers down to 0.025mm.
The quality of 3D printing depends on the method used
You can simply compare numbers only if we have printers operating on the same technology, FDM printers, for example. Comparing FDM printers to SLA printers is pointless. In this case, both the printing method and the material come into play.
In the FDM 3D printer, the resolution is determined by the size of the nozzle and the precision of the extruder movements in the horizontal plane. Other factors also affect the accuracy and smoothness of printed models - the adhesive force between layers is less than with SLA printing, the upper layers can crush the lower ones. As a result, a number of problems can affect print quality.
See also: Largest catalogs of 3D printed models
Please also note that the thickness of the filament used in FDM printing does not affect the XY resolution. Plastic filament comes in two thicknesses: 1.75 mm or 3 mm. The nozzle is much smaller: the nozzle size in the Ultimaker 2, for example, is 0.8 mm.
SLA 3D printers produce objects at a higher resolution and more accurately than FDM printers. The resolution of 3D printing using SLA technology is determined by the size of the optical spot of the laser or projector. The Form 2 has a spot size of 140 microns (0.14 mm), its predecessor, the Form 1+, has a spot size of 155 microns, which is a completely different league from the 0.8 mm Ultimaker nozzle.