3D print ar lower
3D Printed AR15 Lower (5 Best)
3D printed AR-15 lowers used to be the thing of pipe dreams.
However, those dreams have become a reality with the invention of 3D printed AR-15 platforms like the UBAR, U-Bolt Vanguard, Hoffman Tactical, and Firebolt lower frames.
In the last 2 to 3 years, 3D printed gun design has skyrocketed and opened the floodgates for many excellent gun printing options.
80% AR15 | In Stock
When the first 3D printed AR-15 lower came online, it took the internet by storm and helped to inspire other 3D gun developers to push what was thought possible even further.
In 2022 there is now a wide range of 3D printed AR options, from the customizable to the reinforced, and even meme options like the double-barreled AR-15.
Print 100+ Guns
3D Gun Printer Starter Kit
5.0
Custom 3D Printer optimized for 3D printing firearms
Pros:
- 3D Printer Designed & Tested for Firearms
- 100+ Firearm Designs
- 100% Legal
- Ships to All 50 States
Build Starter Kit
If you are trying to decide which AR-15 lower to print for your needs, continue reading as we deep dive and cover all of the AR lower 3D printing options available today.
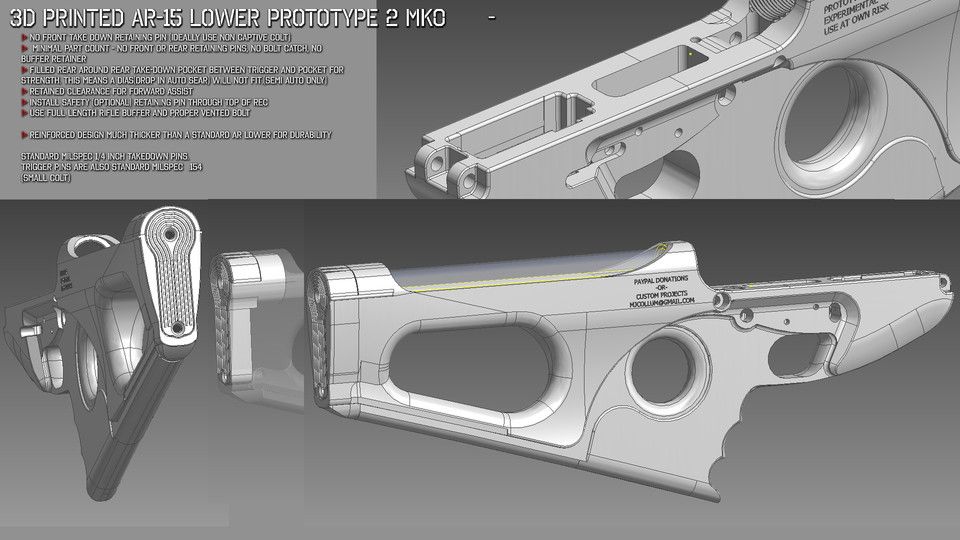
UBAR 2 3D Printable AR15 Lower
UBAR 2 STL FilesDownload
The UBAR 2 is a 3D printable AR15 lower receiver. It is an evolved version of the U-Bolt Vanguard lower – more straightforward to assemble, more robust, and compatible with a wider variety of AR15 parts.
The UBAR is a guaranteed solid choice designed by Ivan the Troll, one of the best 3D printed gun developers to hit the scene.
At the core of the UBAR’s design is its simple reinforcements – using hardware store metal parts solves the major design concerns that printed AR15 lowers face.
Using a U-Bolt to reinforce the rear tower and rod end eye bolts to reinforce the front takedown lug, the UBAR is a contender for the strongest printable AR15 lower design at its time of publication.
Printed Parts Checklist:
UBAR2 Lower Receiver
Four variants are the UBAR2, and four are the UBAR2C – the “C” designation indicates that the lower has a little extra clearance required for some side charging/billet/nonstandard uppers.
UBAR2 and UBAR2C have four sub-variants: high-shelf options and low-shelf options. Print one of the low-shelf models if you use an FRT trigger or other device requiring a low-shelf receiver.
Otherwise, the standard lowers will be more robust (since lowering the shelf increases a stress concentration in the lower).
For all the high and low-shelf variants, there are two sub-variants – lowers that have a cutout for the forward assist, and lowers that do not. Print the forward assist version if you have a forward assist installed on your rifle.
80% AR15 | In Stock
If you have a side charging AR, one without a forward assist, or you removed/plugged your forward assist, you can print the no forward assist version, as it will be slightly stronger.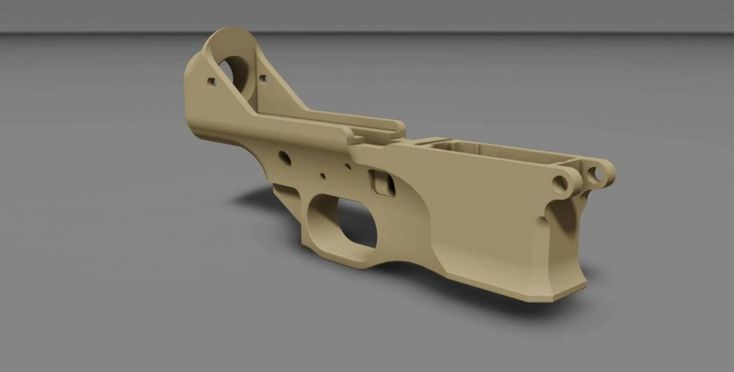
General Print Settings:
The UBAR 3D printed lower AR receiver has been tested to work well in eSun PLA+. This receiver should also work in any material similar to or superior to PLA+.
Recommended print settings for PLA+ were as follows:
Walls: I used 8, but you can use whatever works best for your setup.
Nozzle: 0.4mm
Layer Height: 0.15mm or 0.16mm
Temp: 230/60C
Infill: 100% Recommended – while the UBAR might not need 100% fill, this ensures that you won’t end up hurting the lower if you overtighten anything.
Supports: On/full (tree supports are ok)
Cooling fan: 20% normal, 50% on bridges. Off for the first 10 layers. Keep the fan speed low to prevent warp.
Bed Adhesion: gluestick or hairspray recommended
All other settings can/should be left as default or whatever you know works best with your printing setup.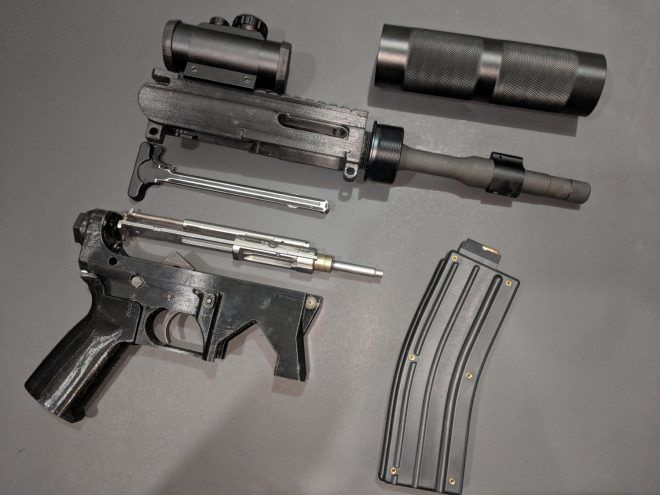
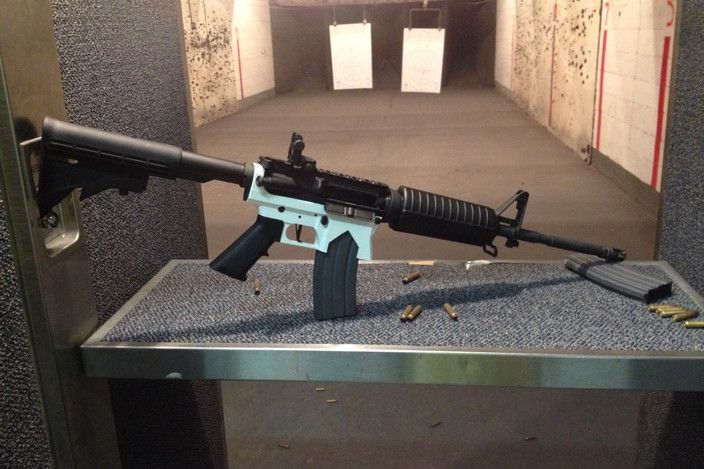
U-Bolt Vanguard AR-15
U-Bolt VanguardDownload
The U-Bolt Vanguard is yet another 3D printed AR-15 lower designed by Ivan the Troll.
The U-Bolt Vanguard is updated and modeled after the original Fosscad V5.1 GS AR design.
This AR lower tested up to 2000 rounds of 5.56 ammunition and showed no signs of structural integrity loss.
This AR frame only works with carbine and pistol buffer tubes.
While the U-Bolt is quite bulky for your typical AR-15 lower, it is reinforced, bulked up, and modeled for maximum compatibility with the Colt M4 TDP, which helps assembly go a little smoother.
Also, note that the buffer tube threads modeled here are NOT to spec but are instead modeled so that they can be printed and used without tapping.
If you want a choker of an AR-15 that will hold up and sh** on the funds who claim 3D guns will blow your hand off, the U-Bolt Vanguard is a great AR lower printed pick.
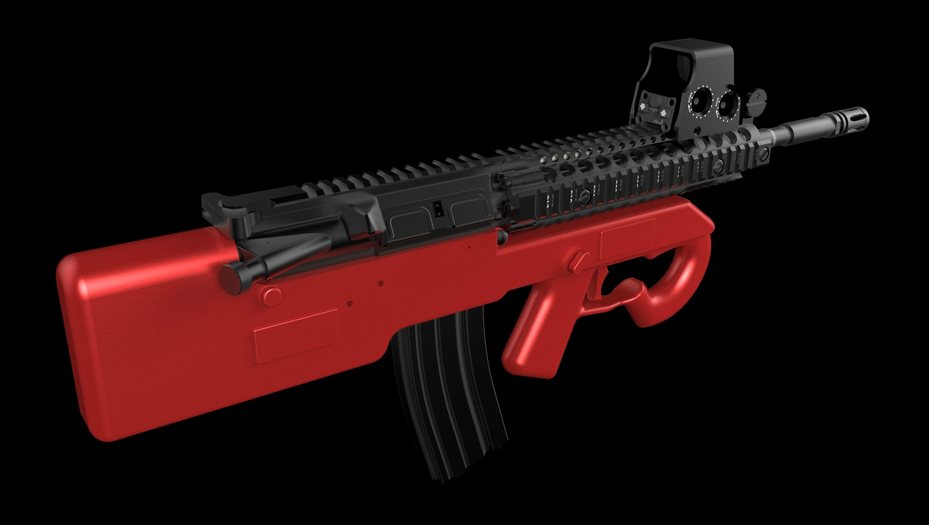
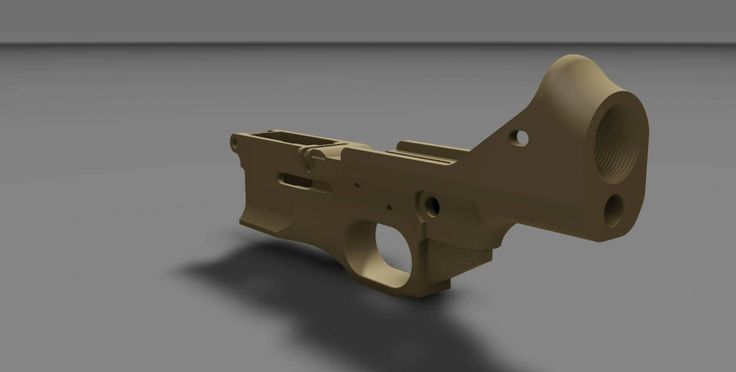
Firebolt AR Lower
Firebolt AR LowerDownload
The Firebolt AR-15 lower is one of the go-to choices for those that want both durability, modularity, and customization.
The Firebolt is printed in several different pieces and then bolted together. Hence the name “Firebolt”.
The Firebolt AR lower is totally 3D printed and compatible with a ton of uppers/calibers, including .223 (AR-15), 9mm (AR-9), and .45 (AR-45).
The “buffer tower” also allows for many options on the Firebolt, including the standard buffer tube reinforced with a “U” bolt and a 100% printed buffer tube.
The Firebolt, its predecessor, the thunderbolt, and the AR-15 waffle magazine were all designed, printed, and tested initially by 3D gun developer SpookySpectre.
If you are looking for reliability, strength, and a bit of customization, the Firebolt AR lower has you covered.
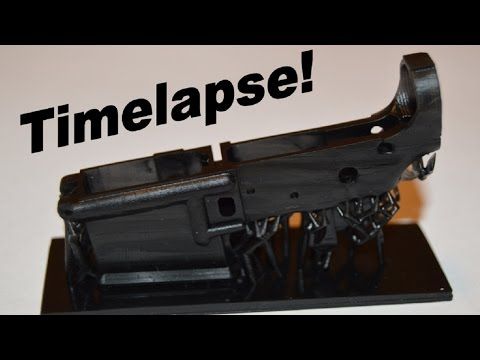
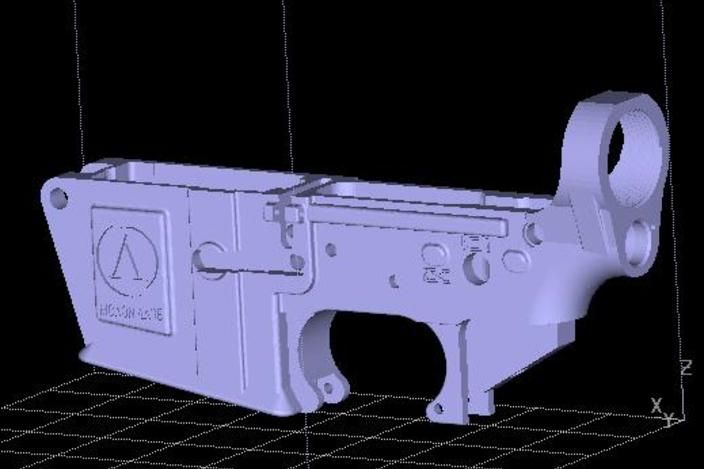
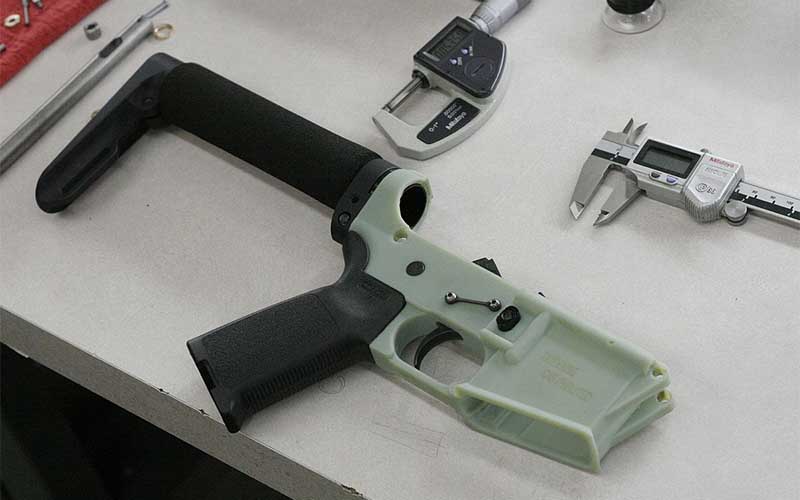
Hoffman Tactical 3D Printed AR-15
3D Printed AR-15Download
Hoffman Tactical launched in mid-2019 focussing on mostly unrelated manufactured parts for various applications.
With the rise of 3D printing in 2020, Hoffman Tactical transitioned into 3D printing, which was soon followed by a focus on AR builds.
Hoffman Tactical, to date, has mainly worked on perfecting the AR-15, AR-9, and LR-308 3D printed lower receivers.
The Hoffman Tactical AR-15 lower is their “flagship” design. The HT AR-15 lower print files contain the Super AR-15 Lower(STL and STEP files), designed to be paired with their reinforcement kit. This 3D print download also includes the Basic AR-15 Lower, which requires some parts and a 2″ hose clamp.
Hoffman Tactical AR-9
AR-9Download
The AR-9 lower(AR-15 style lower chambered in 9mm) is based on the Hoffman Tactical V3.0 Super AR-15 Lower.
The AR-9 utilized Glock-style magazines and a 3D printed mag catch/ejector. The only non-AR-15 part required is the 3/32″ x 1″ roll pin for the mag catch.
Hoffman Tactical DOUBLE RIB AR-15
DOUBLE RIB AR-15Download
The Hoffman Tactical Double Rib AR-15 Super Lower is named for its two ribs(stronger than one) and has an open right side for ambidextrous AR enthusiasts.
The Double Rib AR-15 will not work with upper AR receivers that include a forward assist. A hose claim is also needed for this 3D printed AR-15 frame, but a bit larger at 28″. Slick sides and side chargers only.
Hoffman Tactical LR-308
LR-308Download
If you prefer to shoot bullets in 308 or 6.5 Creedmoor, the Hoffman Tactical LR-308 is the gun for you.
This 3D printed frame accepts LR-308 / DPMS Gen 1 / SR-25 upper. It is currently in version 2.6 and has stood up to a large amount of durability testing.
Double Barrel AR
The Double Barrel 3D printed AR may be in the running for meme gun of the year(although competition is high…looking at you, Ivan the Troll).
This print runs 2 3D printed AR-15 lowers and uppers in tandem with a connector making this the ultimate in-home defense.
Need mo’ firepower? The Double Barrel AR may be for you!
Conclusion
We hope you have learned something and gotten a bit closer to finally cranking up that Ender 3 and printing your own AR-15 lower at home.
Innovation is constant, and new 3D printed STL files are hitting the internet daily.
If you have a favorite AR-15 lower design or think we missed one of the great 3D prints, please drop a comment below.
Happy AR-15 building, blasting, and, most of all, meeting!
Hoffman Tactical – Home of the Super Lower !
We design firearms that you can print at home. The AR-15 is the primary focus, though we do lots of other things. You can see some of them below.
Current designs include AR-15, AR-9, and LR-308 lower receivers, as well as stocks and grips. All of our designs can be printed on basic printers from PLA+.
To get started head over to the downloads page and grab your files. Pick up a printer and some filament. Read up on guns and 3D printing as much as you can. Check out our information pages. you can even get some parts from us. And remember, always read the README!
You can find Hoffman Tactical on YouTube, Instagram, Twitter, Rumble, and Odysee.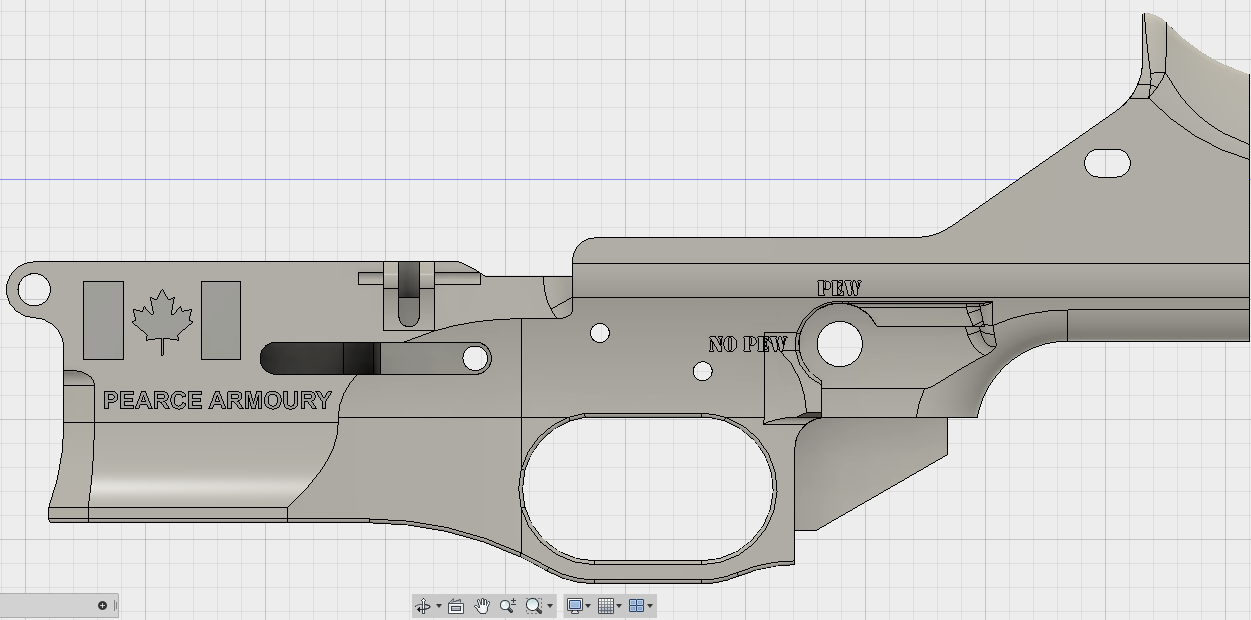 To stay up to date, be sure to subscribe to the email list at the bottom of the page!
New stock system is ergonomically correct and has a positive retention method.
Lazy little follow.
Taulman Glass Fiber Nylon Test Samples. Impact and tensile. Other then it's creep issue, I really like this Nylon.
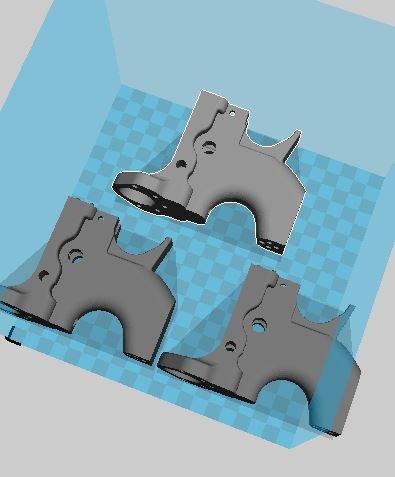
Nice doggie.
AR-9 Prototype with built in support.
A separated 9 MM case. This is the result of a too light buffer in an AR-9.
Creep test with Overture Easy Nylon. Annealing almost completely eliminated the creep problem.
Buffer Bands fresh from the plating shop.
An LR-308 Prototype. I did not like the VO3D PLA that it was printed from.
Double Rib Lower after a range day. Taulman Glass Fiber Nylon.
Overture Easy Nylon waiting to be creep tested.
PLA test samples used to evaluate the new impact tester.
Test piece for testing different design parameters.
An attempt at more accurate printer calibration.
COEX Nylon. I have actually had a lot of clogging issue with the carbon fiber. I think it has too high of a fiber content.
TPU butt pad prototype for Gen 3 Stocks.
Playing with tree support. I still think built in support is much better, and will design some for a Glock frame sooner then later.
COEX CF Nylon. You can see the results of a nozzle clog on the right.
Printing a TPU butt pad for a Gen 2 Stock.
Old style Gen 1 AR-15 swivel pin plates.
Grip Prototype. I have found that an inverted honeycomb is a better texture then plain honeycomb.
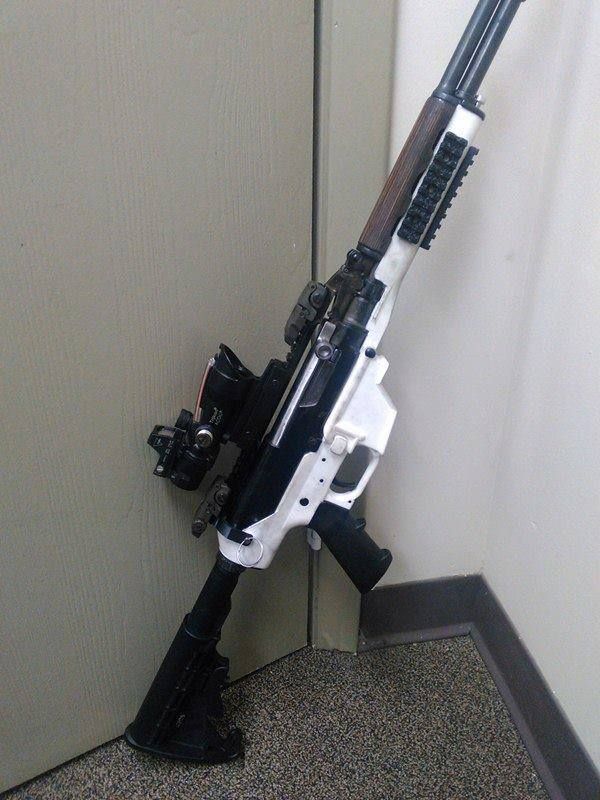
3D printed AR-15 Upper and Lower prototype.
Chilling in the snow with the Double Rib Super Lower.
I bought this nozzle to use with fiber filled Nylon. The larger 0.5 MM orifice should help prevent clogging, but still provide good detail.
5.56 x 45 spent casings after a day at the range.
Triggers waiting to be packed into kits.
Nozzle Temp vs. Layer adhesion eSun PLA+
AR-9 Heavy Buffer.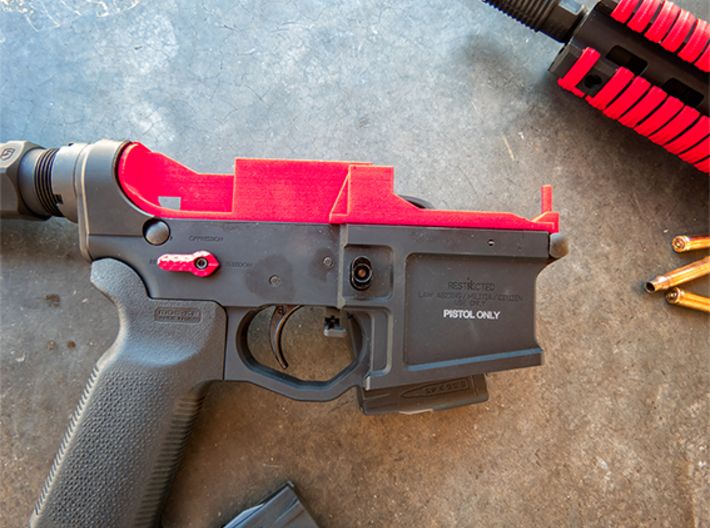 These are a must for a good AR-9 build.
My Ender 3. It's a capable little machine that comes at a ridiculously low cost.
A collection of 3D printed AR lowers. LR-308, Double Rib, AR-15, and AR-9.
A bushing comes to life.
Brass Bushings for the Reinforcement Kits.
V2.5 LR-308 Lower. This is a great lower, the V3.0 grip is nice as well.
Assembled V2.5 LR-308 Super Lower waiting for it's upper to be built up. KAK bolt and Aero Precision upper and handguard.
Annealing small glass filled Nylon parts in an oil bath.
Number Crunching Gizmo.
V1.4 LR-308 Super Lower with the Gen one stock and grip.
Broken 80% lower.
Cool guy sent me these.
Ghost Guns.
3D Printed AR-15 and LR-308 lowers with the Gen 1 Stocks.
Square nut insert shortly before being imbedded in the print.
V3 Chairmanwon G17 frame. Pretty cool.
Lots of broken samples. Tensile and impact testing.
Fun under white phosphor.
This is an awesome lower.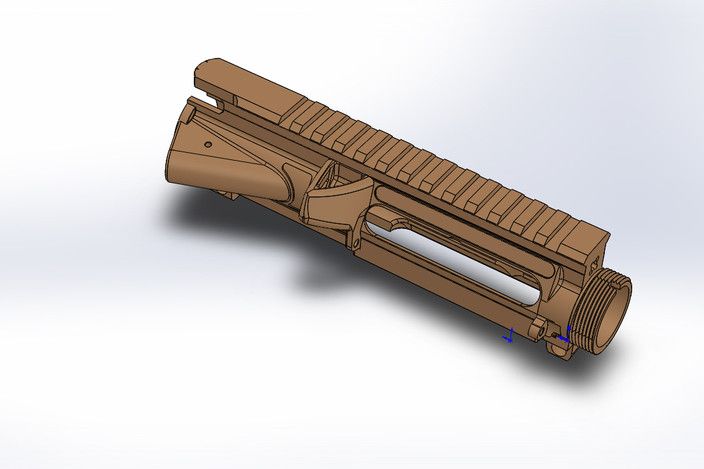 Push Plastic Carbon Fiber Nylon.
New buffer band prototype.
Cleaning the Prusa V6 Hot End.
Hell Fire Lower.
AR-9 Super Lower with a KAK bolt and barrel.
308 Ammo with the V1.4 LR-308 Lower in the background.
The first functional AR-15 Lower printed by Hoffman Tactical.
LR-308 First Print Ever.
I've had a lot of issues printing with the Push Plastic Carbon Fiber Nylon recently, but it makes for great prints when it works.
An interesting experiment. AR-15 Super Lower printed on a resin printer from eSun Hard Tough resin.
The first lower printed with a buffer band.
Gen Two Stock installed on an LR-308 Lower V1.4.
The 20 Most Common 3D Printing Problems (Part 1)
Good afternoon dear 3D Today community! I would like to present you a translation of the article Troubleshooting Guide to 20 Common 3D Printing Problems, which will be divided into 2 parts.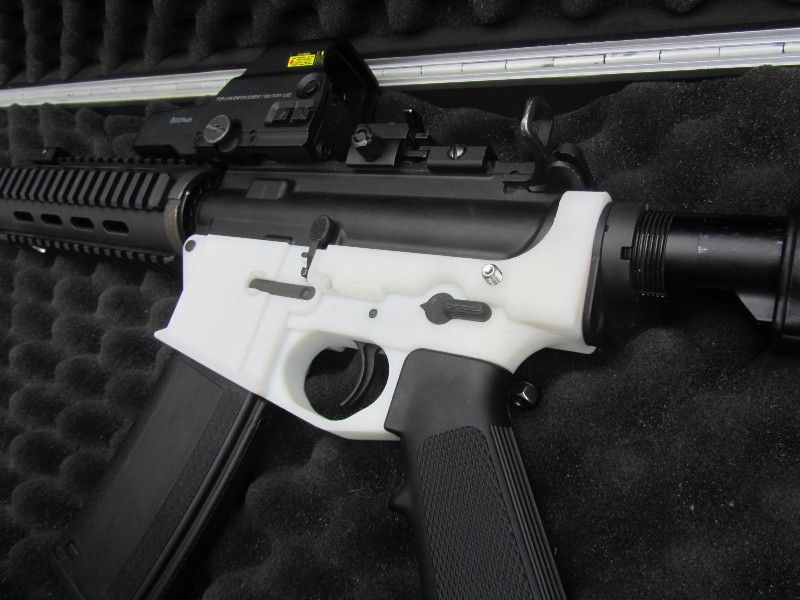
Everyone has problems with printing. We had enough of them to analyze and find solutions for the 20 most common 3D printing problems. In this article, we share our experience and hope that now you do not have to spend extra time diagnosing and solving problems that have arisen. nine0003
If you cannot determine what the problem is, compare it with the description.
3D Printing Issue #1: Warp - First Layer Peeling
Issue Description
The print is lifting up on the base of the model and does not stick to the platform. This problem can also cause horizontal cracks in the top sections of the printout.
Why did the problem occur?
Deformation of the print base is due to the nature of the plastic. ABS and PLA plastic cools very quickly and this is what can cause the first layer to come off. nine0003
Solve 3D printing problem: Printout warped
1. Use heated bed. The easiest solution to this problem is to use a heatbed and set the temperature just below the melting temperature of the plastic. If you set the temperature correctly, the first layer will not come off the platform. The printer bed temperature is often set automatically by the slicer. The recommended temperature for your plastic is listed on the side of the package or reel. nine0003
2. Use adhesive . If your printout is lifting around the edges, apply a thin layer of glue (or hairspray) to the platform to increase adhesion.
3. Try another platform. Change the platform to a platform with more adhesion. Manufacturers like Lulzbot use a PEI (Polyetherimide) coating that provides a good grip even without the use of glue. XYZPrinting Some printers include a few pieces of thermal tape for the liner. This is a good solution for cool platforms. Zortrax 3D choose a different solution - a perforated backing to which the printout adheres, thereby relieving the user of the problem of deformation at the base.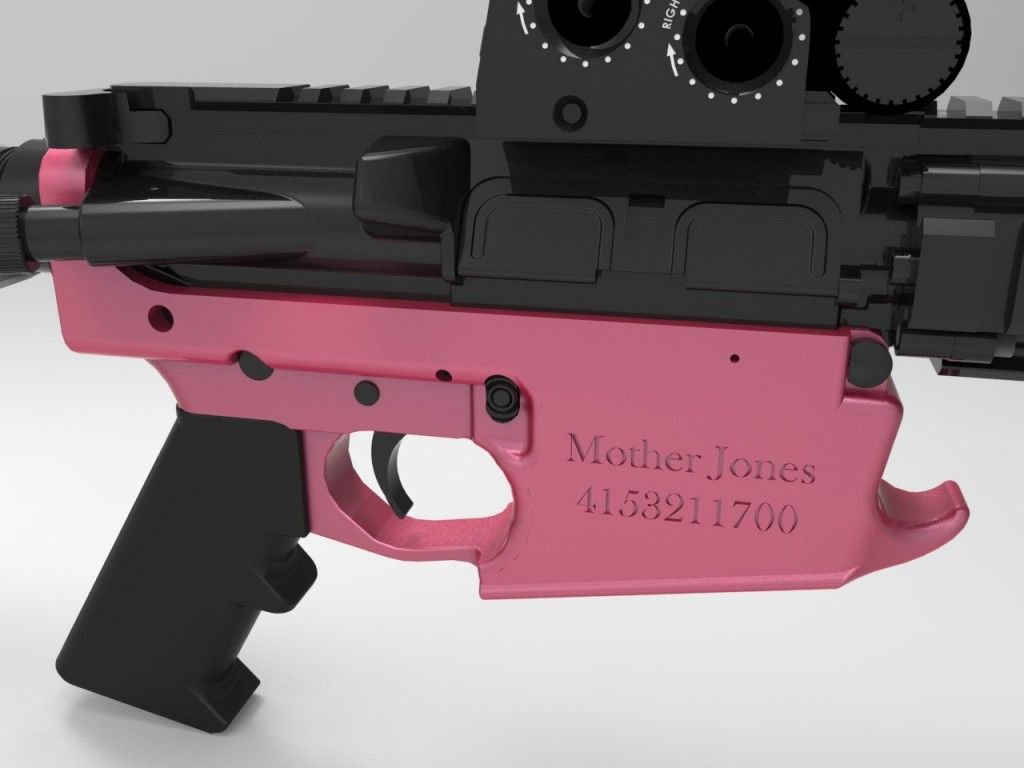 nine0003
4. Calibrate the platform. Improper platform calibration can also affect the print quality of the first layer. Check the level of the platform and correct the height if necessary.
5. Increase contact between printout and platform. Often this problem also occurs due to insufficient contact between the model and the substrate. It can be easily corrected using the printer software by adding a skirt or backing.
6. Optimize temperature settings. nine0010 If none of the methods worked, check the advanced settings of the printer software and the printer itself. Try increasing the platform temperature by 5 degrees.
7. Pay attention to the fan settings. As a general rule, the fans should switch to full power as soon as the print reaches a height of 0.5 millimeters, but you can increase the height to 0.75 millimeters to allow the layers to cool naturally.
8. Even if your printer has a heated bed, it is recommended that you use glue (or varnish) and constantly adjust the bed level.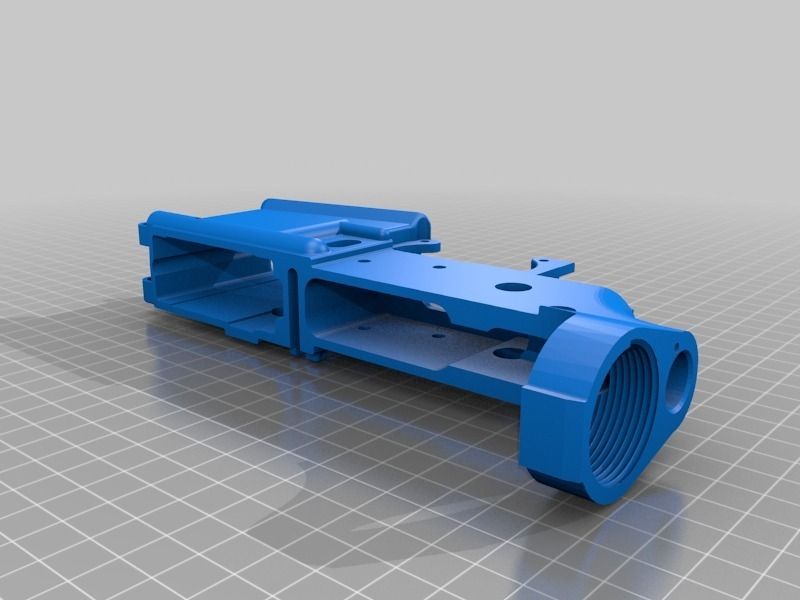 nine0003
3D Print Warping: Checklist to Avoid Problems
- Use Heated Platform
- Use Glue (Varnish) for More Adhesion
- Instead of Glass Platform, Use Kapton/Heat Tape/Adhesive/Varnish
- Calibrate Platform or substrate
- Adjust temperature and fan settings
3D printing issue #2: First layer misalignment (Elephant foot)
Problem description
The base of the model is slightly off.
Why did the problem occur?
Typically, the base of the model shifts due to the weight of the print, which puts pressure on the first layer when the lower layers have not yet had time to cool. Often happens with heated bed printers.
3D Printing Solution: First Layer Offset
1. Correct balance. To get rid of the problem of first layer displacement, the printed models must be cooled enough to support the weight of the entire structure. Here you should be careful: excessive hypothermia can lead to deformation of the first layer. Finding a balance is hard enough. Start by lowering the platform temperature 5 degrees (but no more than 20 degrees below the recommended temperature). If Bottom / Top Thickness is set to 0.6 millimeters, turn on the fan immediately at a height slightly lower. nine0003
2. Platform level. Most 3D printing problems are related to the wrong platform level. For each printer, there is a specific approach for platform level calibration. Check the manufacturer's recommendations to determine what you need. Print out a calibration cube and look at the quality of the plastic feed. The calibration cube will help you determine if the plastic has been laid flat, and if the nozzle is too close to the platform and scrapes the melted plastic, or too high causing the plastic to bubble. nine0003
3. Raise the nozzle. Raising the nozzle a little can often help. The main thing is not to raise it too high.
4. Smoothen the corners of the model. If all else fails, try chamfering the corners of the model base. Of course, this is only possible if you created the model yourself or if you have access to the source file. Start with 5mm and 45º bevel and experiment to get the best result.
First Layer Offset in 3D Printing: Checklist to Avoid Problems
- Balance Platform Temperature and Fan Speed
- Raise Printer Platform
- Check Floor Height
- Make model corners smoother : Other problems with the first layer
- Check the level of platform
- Check the height of the nozzle
- Clean the platform
- Use the adhesive 4: Offset layers in model
Problem Description
Layers shift in the middle of the printout.
The printer straps are not tight enough. The top plate is not attached and moves independently of the bottom plate. One of the rods in the Z-axis is not perfectly aligned
3D printing solution: Layers misalignment in the model
1. Check the belts. First of all, check how tight the straps are: they shouldn't hang loose, but they shouldn't be too tight either.
 If you pull on the straps, you should feel a slight resistance. If you feel that the top strap is tighter than the bottom strap, this is a sure sign that they are not tight enough. nine0003
 2. Check the cover. Check the cover, rods and other parts on top of the printer (if you have coreXY). Make sure all parts are properly fastened.
3. Check the z-axis screws. Many printer manufacturers use threaded studs more often than trapezoid screws, and while both do the job, the studs tend to bend over time. No need to disassemble the printer to check if the rods are straight. Simply use software such as Printrun to move the print head up and down. If one of the Z axis bars is bent, you will definitely notice it. Unfortunately, it is almost impossible to straighten a bent stud, but on the other hand, this is a great reason to replace old threaded rods with trapezoidal screws. nine0003
Supreme displacement: Checklist
- Check belts tension
- Check if the upper cover is moving
- Evil that the stilettos of the zis are even
description problems
Gaps in the model appear due to the fact that some layers are missing (partially or completely).
The printer was unable to produce the required amount of plastic to print the missing layers. In 3D printing, this problem is also known as under-extruding. The essence of the problem may lie in the plastic itself (for example, a different diameter of the material), in the coil, in the feed mechanism (extruder) or in a clogged nozzle. nine0003
Friction can cause plastic to get stuck. It could also be that the z-axis screws (studs) are not properly aligned with the linear bearings.
There may also be a problem with the screws (studs) in the Z axis and with the bearings themselves.
3D Printing Solution: Missing Layers
1. Mechanical Check . If suddenly you find missing layers in the print - it's time to take a little care of your printer. Start by checking the screws (studs) and make sure they are firmly attached to the bearings or clamps. nine0003
2. Check rod alignment. Check that all screws (studs) are aligned and not misaligned.
 Turn off the power and gently move the print head along the X and Y axes. If there is any resistance, then there is some problem. It is easy enough to understand what exactly the problem lies in - a slightly bent rod or bearings.
 3. Worn bearings. Worn bearings make noise. You may also feel the rattle of the print head, while the printer vibrates slightly. In this case, turn off the power and move the print head along the X and Y axes to find out where the worn bearing is. nine0003
4. Check the oil. Remember to regularly lubricate the moving parts of the printer. Sewing machine oil is ideal for lubrication - you can buy it at any hardware store at an affordable price. Before applying oil, make sure the studs (screws) are clean. If the studs(screws) have dirt or print material residue, clean them.
Then connect to the printer via a program (eg Pronterface) to move the print head in the X and Y axes and check that the studs are evenly lubricated. If you apply a little more oil, just wipe off the excess.
 nine0003
 5. Underextruded . The last cause of the problem may be insufficient extrusion. There can be many solutions to this problem, and all of them are described in Section 9.
Checklist
- Check the printer mechanism to make sure the moving parts are tight.
- Recheck printer design and alignment
- Check for worn bearings and bent pins
- Use some oil to lubricate parts
3D printing issue #6: Cracks in tall objects
Problem description
Cracks on the sides of the model, most commonly in tall models.
The problem can occur unexpectedly, and most often occurs in large printers, especially if you do not monitor their work.
The material cools faster on the upper layers, because the heat from the platform does not reach the required height. Because of this, the adhesion of the upper layers is lower.
3D Printing Solution: Cracks in Tall Objects
1. Extruder Temperature . Start by increasing the extruder temperature - 5-10ºC is best. On the side of the plastic box you will find the highest temperature for plastic, try not to raise the temperature to this value.
2. Fan direction and speed . Double check your fans and make sure they are pointed at the model. If the direction is correct, reduce their speed. nine0003
Checklist
- Check the maximum possible temperature of the extruder and increase the current temperature by 10ºC in one attempt.
- Check the direction and speed of the cooling fans.
3D Printing Issue #7: Holes in the top layer
Description of the issue
Holes and gaps in the top surface of the printout.
The two most common causes of this problem are improper top coat cooling and top coat not thick enough.
 nine0003
 Solution to 3D printing problem: Holes on the top layer
1. Thread (filament) diameter . Often the problem happens with plastic with a diameter of 1.75 mm. Holes in the top layer are a problem with all 3D printers, but they happen more often with printers that use 1.75mm filament than with printers that print with filament larger than 2.85mm.
2. Check the location of the fan . Cooling can cause this problem, so check the fans first. When the printer starts printing, the fans are at their lowest speed or off. After printing the first layer, the fans start to work. Check if they start working and also check if they continue working when printing is finished. If all is well, double-check if the direction of the fan is set correctly - they should blow over the model. nine0003
3. Set fan speed in G-Code. Another cooling issue is related to excessive plastic in the top layer. It must cool quickly so as not to fall between the already printed supporting elements.
 The fan speed can be adjusted with G-Code ( is usually G-Code for Fan On is M106 and M107 Fan Off ). Also set the fan speed to maximum for the upper layers.
 For example, for a 1cm x 1cm cube, the height of the top layer would be 0.1mm. In this case, when generating a G-code through CURA for Prusa i3, the G-code indicates that the number of layers for the cube is 100. Considering that we specified heights of 0.6 mm for the top and bottom layers, it is worth editing the value to LAYER: 94
4. Increase the thickness of the top layer . One of the simplest solutions to the problem is to increase the thickness of the top layer. In most applications, you will be able to adjust the thickness using the ‘Bottom / Top Thickness setting’ advanced settings. You need to increase the thickness of the top and bottom layers up to 6 times the other layers and up to 8 times for smaller nozzles and plastics. If the layer height is 0.1mm, then the height of the top and bottom layers should be 0.
 6mm. If there are still holes and bald spots in the top layer, increase the thickness to 0.8mm. nine0003
 Cheklist:
- Use a larger diameter
- Mrive that the direction and speed of the fans are correct
- manually set the speed of fans
- increase the thickness of the upper layer
Description of the problem
Cobwebs or hairs appear between model elements when printing.
When the printer head moves across an open surface (without extrusion), i.e. from one object to another, the plastic flows out of the nozzle. nine0003
3D printing solution: Hairs, webs
1. Turn on retract . Retraction is an important factor for the quality of the finished model and can be enabled in the slicer. It functions quite simply and works by pulling the filament back into the nozzle before the head starts to move.
 The bottom line is that it prevents plastic from flowing out of the nozzle, which creates a "spider web" between objects.
 2. Retraction activation in settings . Most apps like Cura offer pull activation in settings and this is set by default. However, if you want more options, you can customize them further. For example, you can set the minimum head path before activating retraction.
3. Minimum distance (mm) . If retraction is not working correctly, the easiest way to fix this is to reduce the minimum distance. Reduce it by 0.5mm until hairiness disappears. Activate retraction (retract) to increase the speed of printing. nine0003
4. Just cut them off. Not the most sophisticated solution, but it has the right to life. Carefully cut the web.
Cheklist:
- Turn on pulling
- Set up the minimum distance before pulling
- Cut with a scalpel
Problem with 3D extruding
description of the problem.
 Description the extruder cannot extrude enough material (or cannot do it fast enough). This leads to the fact that the layers are too thin, unwanted bald spots appear in the layers or the layers are completely absent). nine0003
 This problem has several causes. First of all, the thread diameter may not match the diameter set in the slicer. Also, the amount of extruded material may be lower due to incorrectly configured firmware. Another problem is that the nozzle can become clogged and this will cause under extrusion.
3D Printing Solution: Underextruding
1. Check filament diameter . Start with the simplest solution - check the filament diameter settings in your slicer. If you are not sure about the filament diameter and the recommended temperature, check the information on the packaging. nine0003
2. Measure thread . If you still can't get the desired result and filament separation remains a problem, use a caliper to check the filament diameter.
 After measurement, adjust the settings of the slicing software. ( author's note - if you have a bowden hotend, then you need to unscrew the fitting from the hotend, enter the command (for example, in Pronterface) M302 : Allow cold extrudes and extrude a meter of plastic. If more or less is extruded, then you have an incorrect number steps per mm for the extruder If you have a direct hotend, then you need to unscrew the nozzle ( the nozzle can only be unscrewed when it is hot! ). It is also worth noting that even with the correctly set steps per mm value, when retracting, the distance traveled will be less than when extruding. This is because more resistance is experienced when retracting )
 3. Check print head . After starting printing, most printers lift the print head off the model base. Check if the nozzle is clean.
4. Set the extrusion factor to . If there is no difference between the actual extrusion diameter and the software settings, check the extrusion multiplier settings (or flow rate or flow compensation), they may be too low.
 Each slicing application solves the problem differently, but try increasing the ratio by 5% and restarting the print process.
 5. Open the Edit Process Settings window in Simplify3D and go to the Extruder tab - the extrusion factor should be set to 1.0 which corresponds to 100%. Open the Material tab in Cura and increase the Flow settings (you may need to enable Flow in the Preferences window). nine0003
Cheklist:
- Check the diameter of the Philiment
- Use the caliper to double -check the diameter of the Philament
- Check whether
- EXTRICATION CLEADICTION by 5%
Description of the problem
Excessive extrusion means that the printer is supplying more material than needed. This affects the fact that the printout has excess filament. nine0003
Solution to 3D printing problem: Overextruding
This problem is usually caused by the slicer's extrusion or flow ratio being too high.
1. Extrusion ratio . Open the slicer and check that you have selected the correct extrusion ratio.
2. Flow settings. If everything is correct with the extrusion ratio, reduce the Flow parameter in your printer software settings. nine0003
Checklist :
- Check if the extrusion factor is set correctly
- Reduce the flow settings of the filament
We are waiting for your comments on the translation.
Happy New Year everyone!
10 industries that 3D printing is starting to change
3D printing has come a long way from printing small prototype buildings out of plastic. Today, 3D printing is fulfilling its potential in a range of industries, from aerospace to apparel and footwear. nine0515 This technology not only allows you to create items with incredible precision, but also saves money.
Today, there are many materials that allow you to make a wide variety of objects using 3D printing.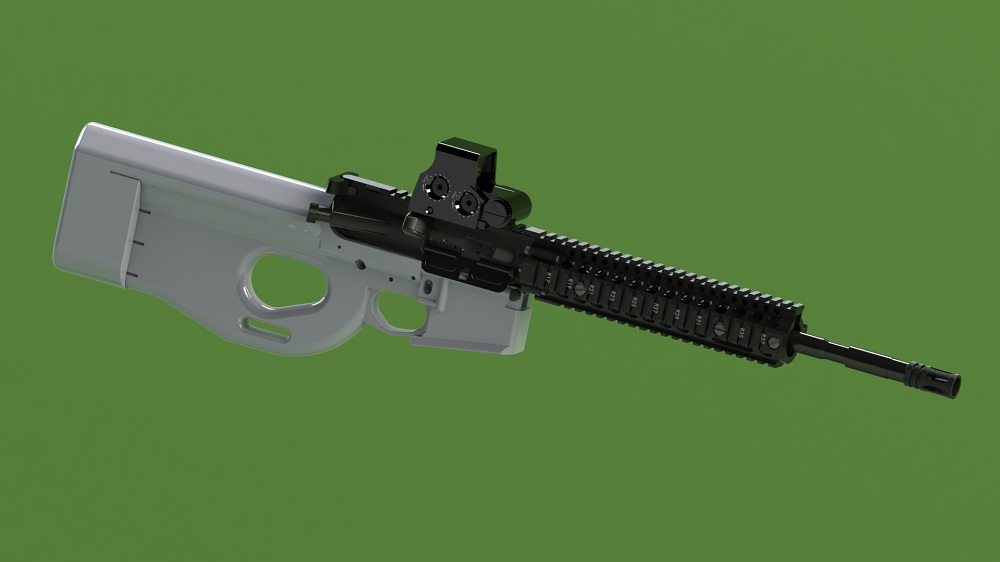
Below we describe the industries in which this technology is applied.
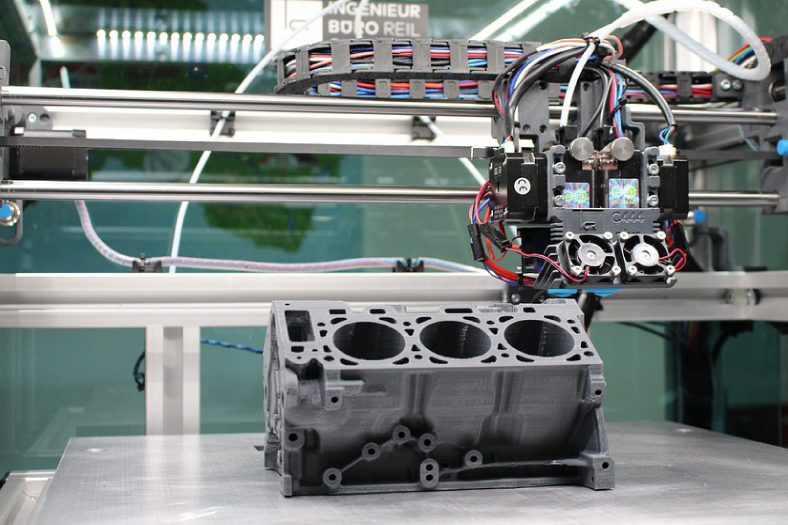
1. Aerospace
In the aerospace industry, everything must be made with high precision. Precision plays a very important role here in the execution of every space mission, and the industry itself is extremely important for the development of mankind. nine0003
3D printing has already begun to change the industry, it is used to replace many parts that have become too expensive to produce. In addition, the technology is used to test prototypes.
ULTEM 9085 is a thermoplastic commonly used in aircraft construction that can be melted down and used in 3D printing.
2. Architecture
3D printing technology saves time in building construction. nine0003
With this technology, printing houses is as fast as printing documents.
And when creating a design, you can share it with other users by placing an object in the database.
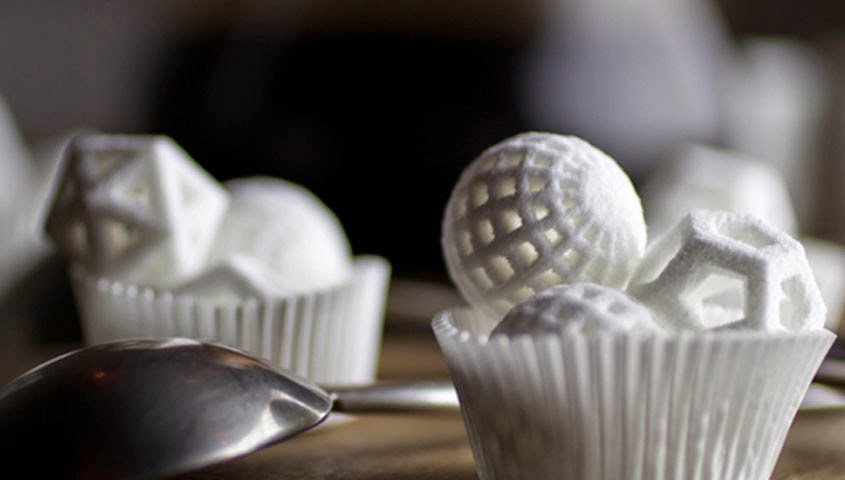
3. Food
While 3D printing doesn't save lives, it could change the way we think about food.
Nevertheless, experts note that in the future humanity will face a shortage of food, it is already becoming increasingly difficult to feed the growing population of the planet. nine0003
However, science is looking for ways to grow meat and use alternative materials to produce food.
4. Product Design
Technology allows you to design something on a computer, then print it in an hour, test it, find flaws, redesign, print a second prototype - all in just half a day.
Previously, concepts were produced, but now 3D printing technology makes it possible to get closer to an almost identical product representation in a very short amount of time. nine0003
5. Medicine
3D printing plays an important role in almost every aspect of medicine. When it comes to prototyping, technology allows you to create ready-made models that will cost less and take less time to create, and these will be ready-made models that are completely usable.
Clarity and precision produce ultra-thin lines that make it possible to create the smallest tools. nine0003
In addition, 3D printing technology makes it possible to recreate parts of the human body using various materials. Scientists are constantly working to create new materials and textures.
6. Dentistry
Making dental models is very useful, but it is not always possible to make them taking into account the individual characteristics of a person.
3D printing technology makes it possible to make exact replicas of a patient's teeth to replace them, or crowns that can last longer. nine0003
Objet Digital is a dedicated 3D printer designed for use in the field of dentistry.
He uses materials that are very similar in structure to bone to print teeth.
7. Construction
In Dubai, 3D printing is an increasingly common way to construct buildings. Cazza, a 3D printed construction company, plans to build the world's first 3D printed skyscraper.
 nine0003
 They created special machines that can build buildings from the bottom up.
Companies around the world have expressed interest in such machines.
In addition, this method of building construction leaves less debris. During construction, environmentally friendly materials can be used.
8. Agriculture
It may seem strange to use this technology in agriculture, but it is true. Many farms need specialized tools, which cost between $8,000 and $12,000 and can take months to complete. nine0003
PLA, or polylactic acid, is a material that is used for 3D printing and costs $0.25 per 1.5 cu. m. This can significantly save money and time for farmers who are looking to upgrade their machines.
9. Making clothes and shoes
So far, 3D printed clothes have not entered the mass market, but the idea of such clothes has been developed since 2013.
The idea is that in the future, customers can print clothes, which suits their individual sizes.
Learn more
Description of the problem
The first layer does not look right, some fragments are missing. There are unnecessary lines at the bottom. nine0003
Why did the problem occur?
Such 3D printing problems usually indicate that the platform level has not been set correctly. If the nozzle is too far from the platform, unnecessary lines often appear at the bottom of the printout or the first layer does not stick. If the nozzle is too close to the platform, this can cause formation bubbling.
Also note that the platform must be clean. Fingerprints on the platform may cause the first layer to not adhere to the platform. nine0144
3D printing problem solution: Other first layer problems
1. Set the platform level. Each printer has its own platform level configuration process. For example, the latest Lulzbots use auto-calibration, while Ultimaker offers step-by-step manual calibration. But to set up the Prusa i3 platform level, you will need to spend a lot of time studying the issue.
2. Set nozzle height. nine0010 If the nozzle is too high, the plastic will not stick to the platform, if too low, the nozzle will scrape the printout.
3. Clean the platform. Be sure to clean the printer platform regularly, especially if you are using adhesive. Fingerprints, dust and adhesive residue affect how well the model sticks to the platform.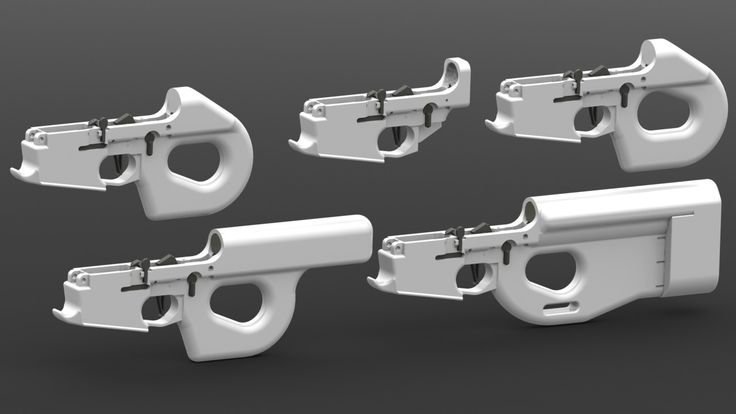
4. Use glue (varnish). Apply a thin layer of adhesive to the platform to increase the adhesion of the model to the platform. Remember to clean the platform regularly as excess glue can cause the opposite effect. nine0003
5. Use textured underlay for non-heated printer platforms.
Other problems with 3D seal: Cheklist to avoid problems