3D printer extruder test
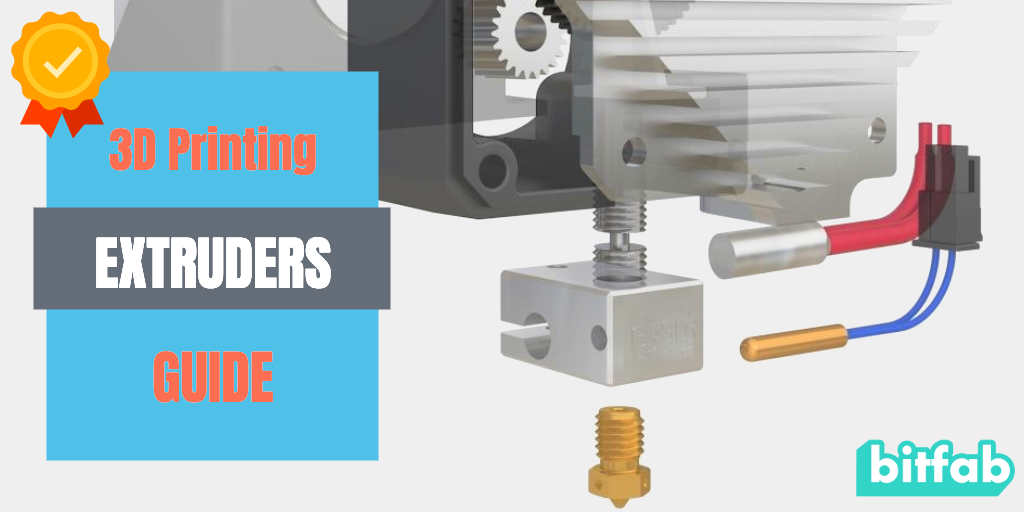
How To Calibrate Your 3D Printer's Extruder
This quick and informative guide will help you calibrate your extruder perfectly, resulting in accurate, quality prints.
Updated on September 19, 2022
by
Taylor Landry
Your 3D printer extrudes and retracts precise amounts of filaments in order to create your printed masterpieces. Well, it does if it’s properly calibrated. Calibrating your extruder is one of the most important, as well as one of the most overlooked, things you can do to your machine.
If you’ve been unhappy with your printing results or have noticed either under or over-extrusion, this calibration will help resolve some or all of these issues.
Before we begin, let’s identify the components on your printer that we’ll be covering, as well as the 2 different types of extruder setups.
Direct vs. Bowden ExtruderDirect extruders are mounted directly onto the hotend. They are the most common type of extruder on Cartesian-style printers.
This is a picture of the Lulzbot Taz Mini Wade’s style direct extruder and hot end assembly.
Bowden extruders are not mounted directly on the extruder. Instead, they are typically mounted on the body of the printer in a stationary position. They are connected to the hot end with a PTFE, or other similar low-friction tubing. Bowden extruders are most commonly found on delta style printers like the Rostock Max v2 by SeeMeCNC and the KosselPro by OpenBeam.
This is a picture of the SeeMeCNC Rostock Max v2 which uses a Bowden extruder:
Direct and Bowden extruders are very different, but calibration is similar for both.
Bowden Extruder Calibration:
-
Connect your printer to MatterControl. Ensure hot end and heated bed (if applicable) are turned off and cool to the touch.
-
Remove Bowden tube from the hot end side.
 Leave it attached on extruder side.
 -
Feed filament (any filament except flexible filaments like Ninjaflex) through your extruder until it just starts to come out of the Bowden tube.
-
Using a razor blade or sharp scissors, cut the filament flush/square with the Bowden tube. You want a nice, flat cut so that it’s more easily measurable in the next steps. Make sure filament is flush with the opening of Bowden tube.
Correct:
Incorrect: -
In MatterControl, go to Advanced Controls and click on the Controls tab. Select “100mm” under the Extrude/Retract buttons, and Extrude 100mm.*
* Please note that some firmware will not extrude if the nozzle temperature is too cold. If the filament does not feed when clicking the Extrude button, heat the nozzle to at least 200C and try again.
-
When the filament is done extruding, measure from the end of the filament to the end of the Bowden tube.
 Write your measured amount down. For best results, repeat this process 3-4 times – align filament with edge of Bowden tube, extrude 100mm, measure – and take the average.
 -
If the measured amount is MORE than 100mm, then you are overextruding.
If the measured amount is LESS than 100mm, then you are underextruding. -
Now we need to locate the current value your printer is using to calculate extrusion distance – Extruder Steps per MM. If you have a dual extrusion machine, this can be named Extruder 0, Extruder 1, or Extruder 2, depending on your printer.
-
Open MatterControl. Advanced Controls > Configuration > EEProm Settings Configure
Every printer/firmware combination will look a little different in this window. We are looking for the “Extruder Steps/MM” box. It can be shortened to “Extr0” or “Extr1”, but it should be easy enough to locate.For this example, I’m using a Rostock Max by SeeMeCNC and the field is “Extr1 Steps/MM”.
 The current value is 93 steps/mm.
 -
We need to do some basic math to calculate the proper steps/mm for your machine
The formula is simple:
- New Steps/mm = (Old/Current steps/mm) x [100 / (measured distance filament traveled)]
- I measured 101.3mm on this Rostock max. My current steps/mm is 93.So, 93 x (100 / 101.3) = 91.80
Now we just need to enter our new value into our EEProm settings and we’re done.
In MatterControl go to Advanced Controls > Configuration > EEProm Settings Configure
Enter the new value in the proper box, click Save in the bottom left corner.
The last step is simply confirming our new value. Set the filament back flush with the Bowden tube and extrude 100mm. Measure, and you should be right at 100mm. If not, you can repeat the same process, paying special attention to getting as accurate a measurement as possible.
Direct Extruder Calibration
For Direct extruders, the process is a little different since you must extrude the filament through the hot end.
-
Bring your hot end up to temperature for the filament you will be using.
-
Feed filament into your extruder/hot end.
-
Using some stationary point on your extruder, measure 110mm on your filament and mark it with a felt tip pen.
-
In MatterControl, extrude 100mm of filament.
-
Measure where the mark on the filament is in relation to where you measured from.
If the mark is 10mm away, then your extruder is properly calibrated. Chances are it will be more or less than 10mm away. -
If the mark is 6mm away, then 104mm was extruded and your machine is overextruding.
If the mark is 14mm away, then 96mm was extruded and your machine is underextruding. -
Follow Steps 8-10 from the Bowden extruder guide to complete the calibration.
There’s no substitute for having a perfectly calibrated extruder. If you follow our simple guide, you can ensure your printer is putting out the correct amount of filament every time.
-
Note: Most printers have EEProm enabled in the firmware. If your machine does not, you will need to change your firmware. If you are unsure how to do this, see our article on How To Successfully Flash Your 3D Printer's Firmware.
Article Tags
- 3D Printing
- Firmware
- 3D Design
- MatterControl
- Press Releases
- Small Business
- Automotive
- E3D
- Jewelry Making
- Engineering
- Entertainment Industry
- MatterControl Touch
- ESD Materials
- NylonX
- BCN3D
- Open Source
- Crafty Pen
- Digital Fabrication Anatomy
- How To
- Hardware and Upgrades
- Tips and Tricks
- Weekend Builds
- Top Ten
- Education
- Tech Breakdown
- Women in 3D Printing
- Project Ideas
- Advanced Materials
- Reference
- Pulse Dual Extrusion
- Product Spotlight
- Aerospace
- Jobs
- Military & Government
- Multi-Tool Machines
- Getting Started
- Healthcare
- How To Succeed With Any 3D Printing Material
- Creality3D
- Architecture
- 3D Printer Reviews
- Hacker of the Month
Related Products
View all related productsHow to Calibrate Your Extruder E-Steps & Flow Rate Perfectly – 3D Printerly
Learning how to calibrate your flow rate and extruder e-steps is something every 3D printer user should know. It’s essential to getting optimal quality, so I decided to write an article about it to teach other users.
To calibrate your flow rate & e-steps, you’ll have to go through quite a few steps. First, you have to extrude or print a calibration model with the current values and measure the print.
Using the values gotten from the calibration print, you’ll then calculate and set a new optimal value.
This is the simple answer of how to get it done, but keep on reading through this article to get more details on how to get it perfect.
It’s essential to calibrate your E-steps first before you get into calibrating your flow rate, so let’s detail how we can do this.
But first, let’s see why getting these settings right is so important.
What are E-Steps and Flow Rate?
The flow rate and the E-steps per mm are different parameters, but they play considerable roles in how the final 3D print comes out.
Let’s take a good look at them.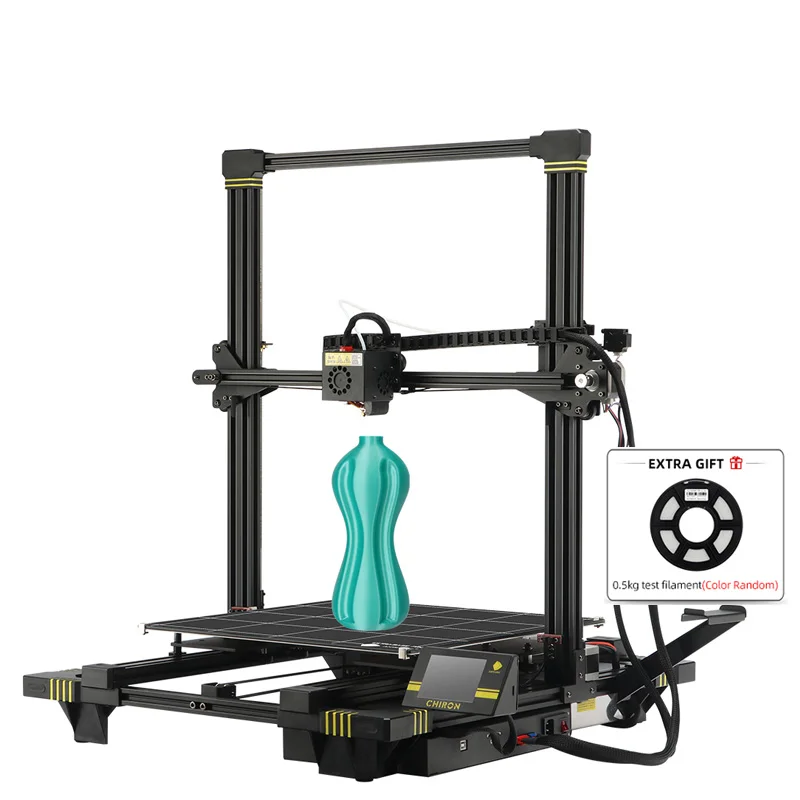
E-Steps is short for Extruder Steps. It is a 3D printer firmware setting that controls the number of steps the extruder’s stepper motor takes to extrude 1mm of filament. The E-step setting makes sure the right amount of filament goes into the hotend by counting off the number of steps the stepper motor takes for 1mm of filament.
The value for the E-steps is usually preset in the firmware from the factory. However, while operating the 3D printer, many things can happen to throw off the accuracy of the E-steps.
Thus, calibration is needed to ensure the number of steps the extruder motor is taking and the amount of filament being extruded is in proper harmony.
What is the Flow Rate?
The flow rate, also known as extrusion multiplier, is a slicer setting that determines the amount of plastic a 3D printer will extrude. Using these settings, the 3D printer figures out how fast to run the extruder motors to send enough filament for printing through the hotend.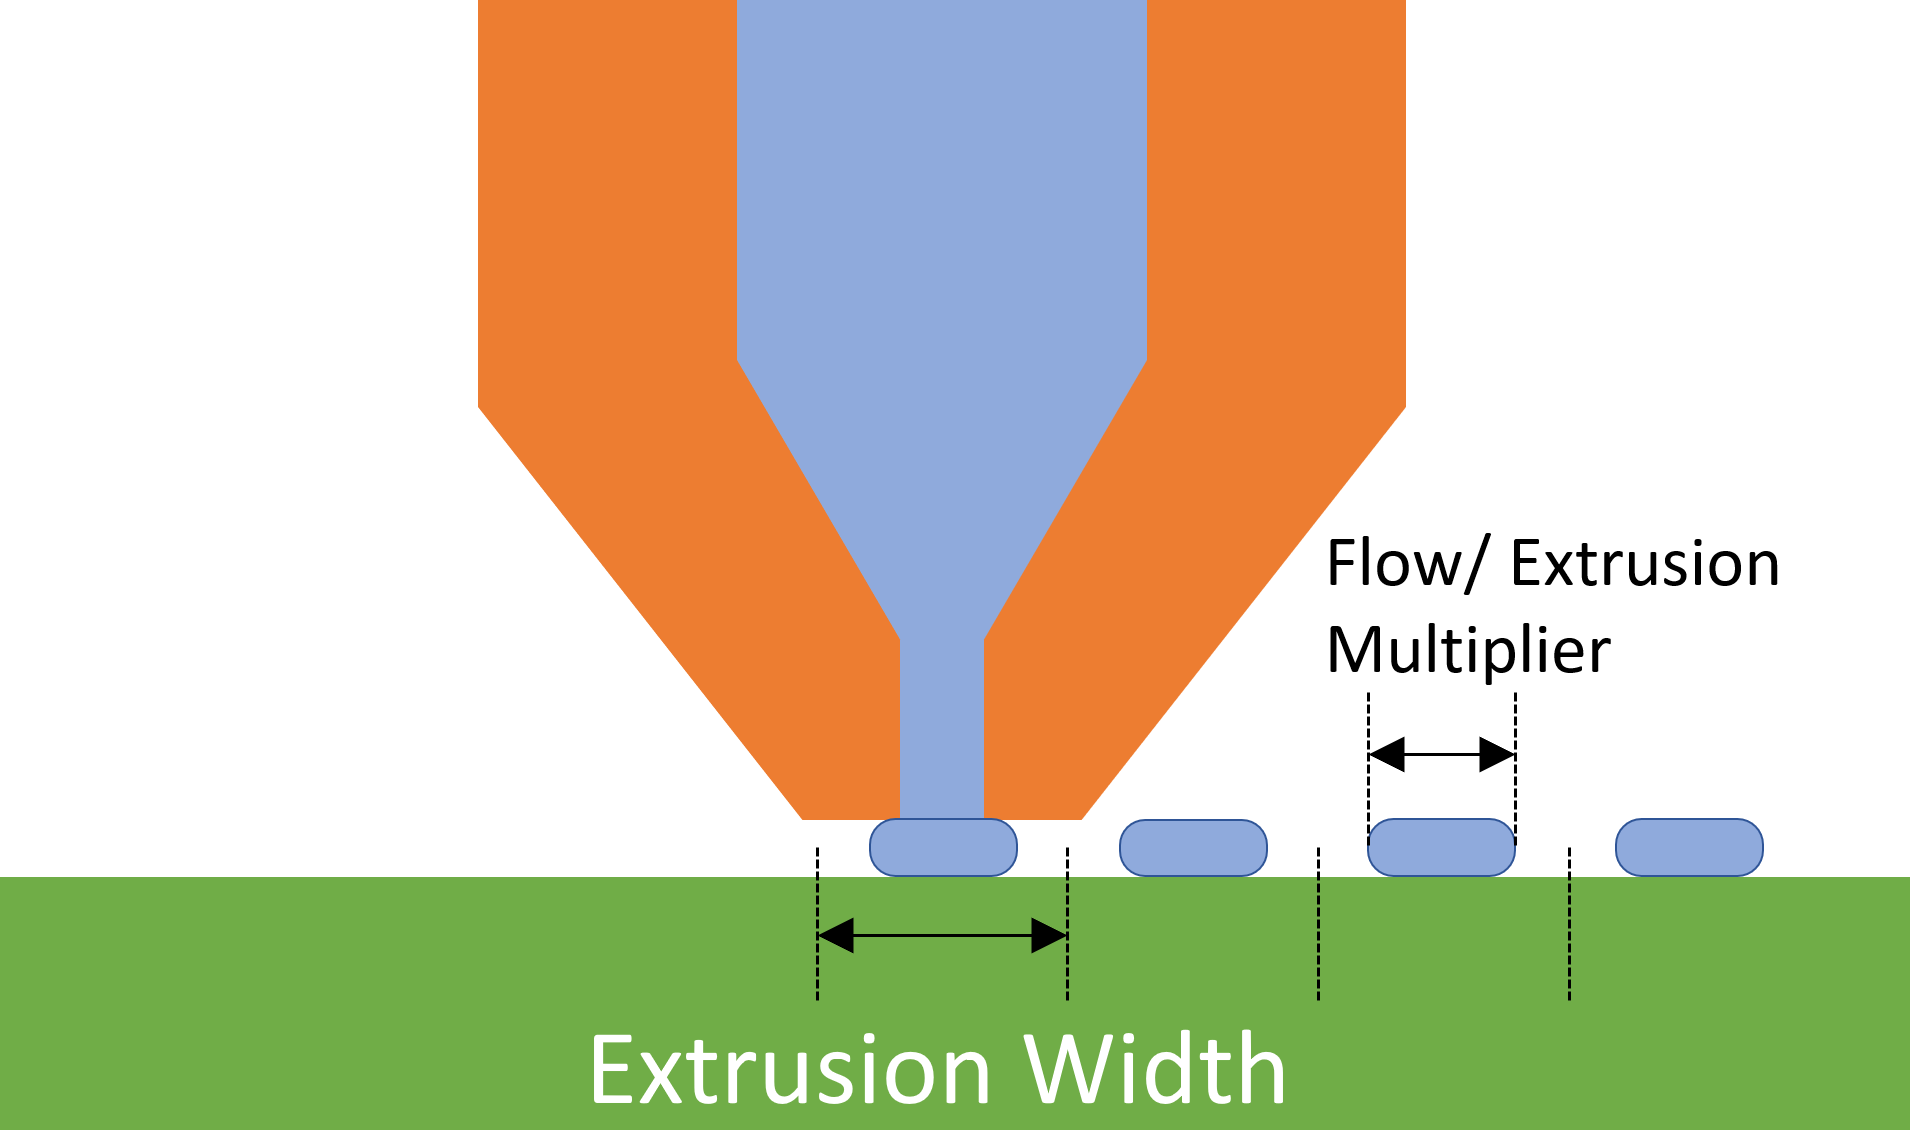
The default value for the flow rate is usually 100%. However, due to variations between filaments and hotends, this value is generally not optimal for printing.
So, you have to calibrate the flow rate and set it to values like 92% or 109% to compensate for this.
What are the Consequences of Poorly Calibrated E-Steps and Flow rates?
When these values are poorly calibrated, it can cause many issues during printing. These issues stem from the printer sending not enough material or too much material to the hotend.
These problems include:
- Under-extrusion
- Over-extrusion
- Poor first layer adhesion
- Clogged nozzles
- Stringing, oozing, etc.
Calibrating these settings properly helps get rid of all these issues. It also results in more dimensionally accurate prints.
To calibrate these settings, you’ll have to figure out the proper values and reset the settings. First, let’s look at how we can calibrate the E-steps and flow rate settings properly.
How Do You Calibrate Extruder E-Steps Per mm?
It’s crucial to note that you have to calibrate the extruder before you can calibrate the flow rate. This is because poorly calibrated extruder E-steps can lead to inaccurate flow rate calibration.
So, let’s look at how to calibrate the E-steps first.
You’ll need the following:
- A meter rule/tape rule
- A sharpie or any permanent marker
- A non-flexible 3D printing filament
- A computer with a machine control slicer software (OctoPrint, Pronterface, Simplify3D) installed
- A 3D printer with Marlin firmware
You can calibrate the E-steps using the control interface of some printers like the Ender 3, Ender 3 V2, the Ender 5, and plenty more.
However, you’ll have to use the connected slicer software to send the G-Code to the printer for others.
How to Calibrate Extruder E-Steps
Step 1: Run out any remaining filament in the printer’s hotend.
Step 2: Retrieve the previous E-steps settings from the 3D printer
- Using the Ender 3’s control interface, go to” Control > Motion > E-steps/mm”. The value there is the “E-steps/mm.”
- If you can’t access the value using the control interface, don’t worry. Using the slicer software connected to the printer, send an M503 command to the printer.
- The command will return a block of text. Find the line that starts with “echo: M92”.
- At the end of the line, there should be a value starting with “E.” This value is the steps/mm.
Step 3: Set the printer to relative mode using the “M83” command.
Step 4: Preheat the printer to the printing temperature of the test filament.
Step 5: Load the test filament into the printer.
Step 6: Using a meter rule, measure a 110mm segment on the filament from where it enters the extruder. Mark the point using a sharpie.
Step 7: Now, extrude 100mm of filament through the printer.
- To do this on the Marlin firmware, click on “Prepare > Extruder > Move 10mm”.
- In the menu that pops up, set the value to 100 using the control knob.
- We can also do this by sending G-Code to the printer via the computer.
- If the slicer software has an extrude tool, you can type in 100 there. Otherwise, send the G-Code command “G1 E100 F100” to the printer.
After the printer finishes extruding what it defines as 100mm through the hotend, it’s time to remeasure the filament.
Step 9: Measure the filament from the entrance of the extruder to the 110m point marked earlier.
- If the measurement is 10mm precisely (110-100), then the printer is calibrated correctly.
- If the measurement is over or under 10mm, then the printer is respectively under-extruding or over-extruding.
- To solve under-extrusion, we’ll need to increase the E-steps, while to solve over-extrusion, we’ll need to reduce the E-steps.
Let’s look at how to get the new value for the steps/mm.
Step 10: Find the new accurate value for the E-steps.
- Find the actual length extruded:
Actual length extruded = 110mm – (Length from the extruder to mark after extruding)
- Use this formula to get the new accurate steps per mm:
Accurate steps/mm = (Old steps/mm × 100) Actual length extruded
- Viola, you have the accurate steps/mm value for your printer.
Step 11: Set the accurate value as the printer’s new E-steps.
- Using the printer’s control interface go to “Control > Motion > E-steps/mm”.
 Click on “E-steps/mm” and input the new value there.
 - Using the computer interface, send this G-Code command “M92 E [Insert accurate E-steps/mm value here]”.
Step 12: Save the new value to the printer’s memory.
- On the 3D printer’s interface, go to “Control > Store memory/settings.” Then, click on “Store memory/settings” and save the new value to the computer memory.
- Using G-Code, send the “M500” command to the printer. Using this, the new value saves to the printer’s memory.
Congratulations, you’ve calibrated your printer’s E-steps successfully.
Switch the printer on and off before you start using it again. Repeat step 2 to be sure the values have been properly saved. You can also go through steps 6 – 9 to verify the accuracy of your new E-steps value.
Now that you’ve calibrated the E-steps, you can now calibrate the flow rate. Let’s look at how to do that in the next section.
How Do You Calibrate Your Flow Rate in Cura
As I mentioned earlier, the flow rate is a slicer setting, so I will perform the calibration using Cura. So, let’s get down to it.
You’ll need the following:
- A PC with slicer software (Cura) installed.
- A test STL file
- A digital caliper for accurate measurement.
Step 1: Download the test file from Thingiverse and import it into Cura.
Step 2: Slice the file.
Step 3: Open the custom print settings and make the following adjustments.
- Set the layer height to 0.2mm.
- Set the Line Width- wall thickness to 0.
 4mm
4mm - Set the wall line count to 1
- Set the infill density to 0%
- Set the top layers to 0 to make the cube hollow
- Slice the file and preview it
Note: If some settings aren’t showing, go to the toolbar, click “Preferences > Settings,” and check the “Show all” box in settings visibility.
Step 4: Print out the file.
Step 5: Using the digital caliper, measure the four sides of the print. Note down the values of the measurements.
Step 6: Find the average of the values on the four sides.
Step 7: Calculate the new flow rate using this formula:
New flow rate (%) = (0.4 ÷ average wall width) × 100
For example, if you measured 0.44, 0.47, 0.49, and 0.46, you would add that up to equal 1.86. Divide 1.86 by 4 to get the average, which is 0.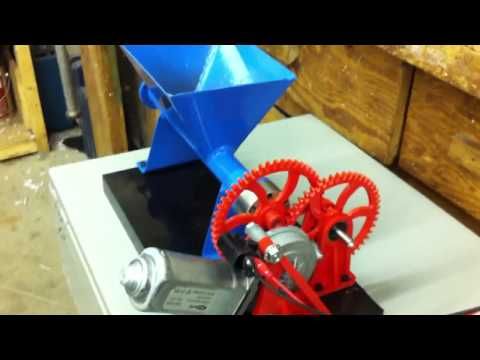 465.
465.
Now you do (0.4 ÷ 0.465) × 100 = 86.02
With an average value so high compared to the original (0.4 to 0.465), it’s likely that you’re over extruding by quite a lot. This is where you might want to recalibrate your extruder steps to ensure it is working as expected.
Step 8: Update the slicer’s settings with the new flow rate value.
- Under the custom settings, go to “Material > Flow” and put the new value there.
If you want to know how to adjust flow rate, you can simply search for “Flow” and scroll down if you don’t see the option. You can then right-click and select “keep this setting visible” so it shows up with your current visibility settings.
Step 9: Slice and save the new profile.
You can repeat Step 4 – Step 9 to get values closer to the wall width of 0.4mm for better accuracy.
You can also increase the wall line count to 2 or 3 to get more accurate values, as these are the line values you’ll be using during printing.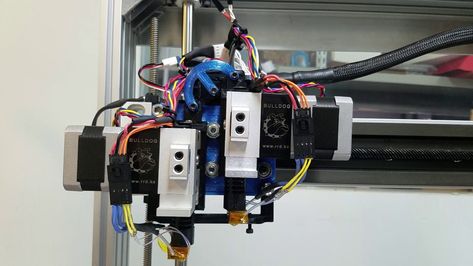
So, there you have it. This is how you can configure and calibrate your E-steps and Flow rate in a few simple steps. Remember to calibrate your E-steps every time you change extruders and your flow rate every time you change filaments.
If recalibrating these settings doesn’t solve your under-extrusion and over-extrusion problems, you might want to consider other troubleshooting methods.
There is a great flow rate calculator that you can use – Polygno Flow Rate Calculator to determine the limits of your hotend and extruder combination, though this is on a more technical basis than most people need.
According to Polygno, most 40W heater-based hotends see a flow rate of 10-17 (mm)3/s, while Volcano-type hotends have around a 20-30(mm)3/s flow, and claims of 110 (mm)3/s for the Super Volcano.
How Do You Calculate Steps Per mm Lead Screw
To calculate steps per mm with your specific lead screw, you can use Prusa’s calculator and input the relevant values to get an accurate result. You’ll need to know your motor step angle, driver microstepping, leadscrew pitch, pitch presets, and the gear ratio.
Good luck and happy printing!
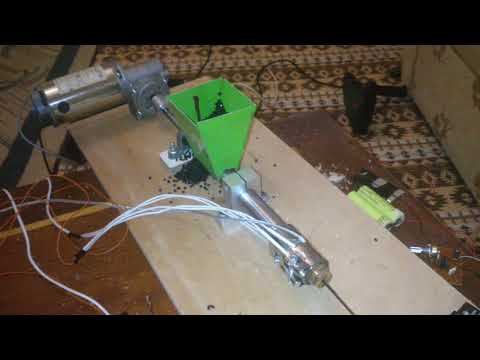
3D Printer Extruder (Feeder) Test, BMG Extruder Review from Mellow Store from China
Hello friends.
I decided to please you with a comparative review of extruders.
Today we will compare standard plastic, metal and BMG extruder from Mellow Store.
But first, let's weigh the stock motor from Creality Ender 3 and the short motor from Mellow Store:
Now let's weigh the motors + extruders: It should be noted that the installation of light short motors is not possible on a standard extruder and a metal extruder due to design features, namely the absence of a gearbox, unlike the BMG extruder, which has a gearbox. nine0003
Let's start the review with a regular extruder from Creality:
It has only one plus - it's low cost at the factory, but at the same time, when buying a new one, you will overpay a significant amount for the brand, and he not worth it.
After all, it has a huge number of minuses:
- Acrylic body, which bursts very often, namely the clamping lever itself.
- Acrylic body has no rigidity, which sometimes leads to print defects. Underextrusion when using harder plastics. nine0003
- No plastic preload adjustment mechanism, like the BMG extruder
- Spur gear, which is not designed to work with soft and very hard plastics.
- Poor body geometry, due to which, when printing with soft plastics, the filament is squeezed out, and not forced through the Teflon tube.
- There is no gearbox, which means that it is not possible to use short motors, since they simply do not pull such loads
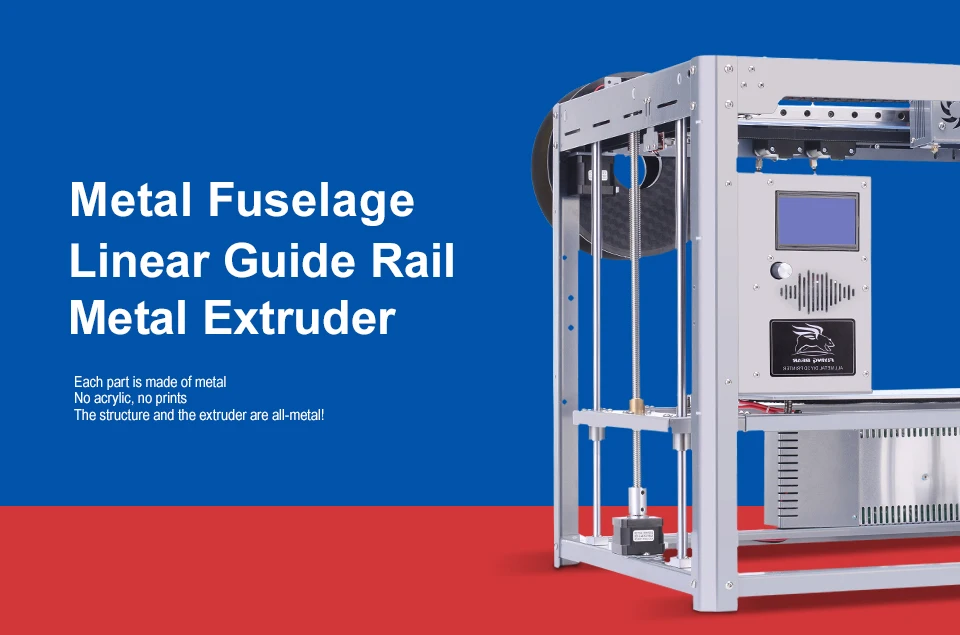
Moving on to the metal extruder review:
Here, the situation is better.
Pluses:
- high reliability due to metal
- high structural rigidity
- correct body geometry, which allows printing with soft plastics
like a BMG extruder
- A spur gear that is not designed to work on soft and very hard plastics.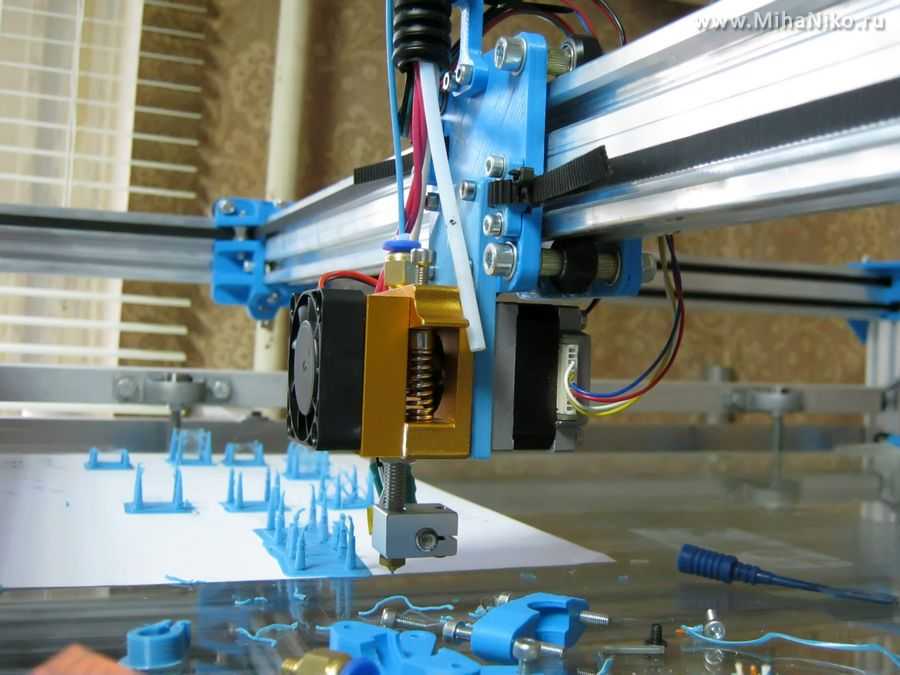 nine0003
- No gearbox, which means there is no way to use short motors, since they simply do not pull such loads
Let's look at the Mellow Store BMG extruder:
Pros:
1) high-quality NYLON body. Unlike cheaper clones, which have thin walls, the construction here is very reliable and rigid.
2) A gearbox is used, which allows you to install less powerful but lighter motors. nine0003
3) High versatility, for example, there is a bolt for adjusting the pressure of the plastic, which allows you to print with both hard and soft plastics.
4) Two plastic feed gears are used, which are synchronized with each other by a gear train. This reduces the pressure on the plastic itself and prevents its deformation, even with slight pressure, the plastic is pressed through better than on any other extruder, including the well-known Titanium. nine0003
5) The gears have the correct geometry, the plastic feed notches are made in a video circle, due to which the plastic is wrapped around from all sides and fed smoothly.
6) This BMG extruder has a universal adapter, that is, it can be used as a BOWDEN, or you can put it on an E3D V6 hotend or even as a direct extruder.
7) High-quality roller bearings are used on the gears, while there are no backlashes and all shafts are seated on ball bearings. nine0003
Of the minuses, only the price, but given such a high quality, this is the best extruder to date.
But I understand that there will be SKEPTS, there is a video for you on the English channel, which confirms my words about the uniqueness of the BMG extruder:
, white is ABS and black is FLEX (imitation rubber, very soft) from plexiwire.
I tied the loop and we will check the maximum tension load at which the plastic will begin to break off the gear, while I want to note that I fixed the gear so that it does not spin. nine0003
We put it on the stand, put it on the scales (I checked the accuracy of the scales), and thread it through the extruder.
We start to stretch until the plastic breaks.
Creality stock extruder:
- ABS white did not exceed 0.9 kg and began to break off the gear
- FLEX (rubber) gave a maximum of 0.6 kg
These are very low values.
Red metal extruder, slightly better results:
- ABS white - max 2.7kg
- FLEX (rubber) gave out a maximum of 0.67 kg
As you can see, it delivers standard plastic like ABS well, but as for FLEX, everything is sad here (
BMG extruder from Mellow Store, it's SONG)))
- ABS white - max. 6.6kg
- FLEX (rubber) gave out 1.3 kg
IMPORTANT! I did the pressing of the plastic in the test with little effort, and if I press harder, the figures will be twice as high. nine0003
And now some Printing))
Don't laugh, I don't prepare the printer for sleigh rides. This is a temporary place, because the other day I designed the THERMAL CHAMBER and already sent the materials for cutting.
There will be a separate review on my YouTube channel ChuchaTV)
Installed an extruder as Bowden. Got up like a cast.
Printed on PLA and FLEX plastic
PLA plastic (blue), printed with great pleasure, the quality is simply gorgeous. nine0003
But most of all I was pleased with the FLEX plastic. The part was printed without problems, the part turned out soft.
At the same time, the quality of the fusion of the layers is simply AWESOME, a monolithic structure.
In the next video, I will do a detailed review of this plastic.
I recommend Mellow Store in China, where I bought this wonderful device:
Mellow Store aliexpress.com/store/1531088
Kit Mellow Drivegear Kit 9$ https://www.aliexpress.com/item/32958065801.html
Metal MK8 extruder 10 $ https://www.aliexpress.com/item/32958337720.html
BMG extruder Btech 22 $ https://en.aliexpress.com/item/32958337720.html . aliexpress.com/item/32966821963.html
BMG extruder with reducer 29$ https://ru.aliexpress.com/item/4000072198732.html
Motor short TITAN https://ru.aliexpress.com/item/32806789343.html nine0003
Motor from Mellow Store https://ru.aliexpress.com/item/32675848057.html
A set of quality motors 5pcs https://ru.aliexpress.com/item/32252636591.html
You can also see a more detailed review of extruders on my YouTube channel ChuchaTV
8 models for test printing
Test models for 3D -printers are needed for:
- When you bought a new printer and need to test it on your favorite media
- When you have purchased new media and need to check the print specifications
- When you have been using a material for a long time, but do not know its tensile strength
We will talk about the 8 models most used for testing in 3D printing.
1. 3D Benchy
3D Benchy is one of the most popular 3D printer test models. The boat figurine perfectly demonstrates the capabilities of FDM printers in any price category. Such a model will help you determine exactly the settings you need to set in order to get the perfect 3D print. nine0205 Printing 3D Benchy - will allow you to see how the printer copes with the "rendering" of curved surfaces, inclined planes, arcs, holes. The model is available in several versions, including multi-color. It takes approximately one hour to print a standard size 3D Benchy.
Download model on Thingiverse
2. All-in-one 3D printer test
A comprehensive test model for a 3D printer will allow you to check the quality of printed overhangs, bridges, extrusion stability, the possibility of “snot” and the dependence of the result on temperature. An important advantage of this model is the instructions for it, which indicate potential solutions to various problems. nine0205 Quite a complex model in terms of setting all the parameters, but it's worth it, try it.
Download Thingiverse model
3. XYZ 20mm Calibration Cube
The main purpose of the XYZ 20 mm calibration cube is to establish the dependence of the movement of the extruder on the step of the motor. A test model for a 3D printer helps to make sure that 20 mm in the drawing corresponds to 20 mm of the printed product. At the same time, the calibration cube helps to establish the dependence of the degree of extrusion and print quality on the temperature of the extruder. nine0205 Download Thingiverse Model
4. Matter Hackers' Mascot Phil A. Ment
This is a small astronaut figurine that has elements designed to test 3D printing.
These are small inserts, small relief details, overhangs, vertical and horizontal cylinders, fillets, chamfers, lintels and a perfectly domed helmet.
A feature of the model is the ability to obtain accurate data for different dimensions of the printed product. nine0205 Download model on Thingiverse
5. Smart compact temperature calibration tower
The calibration scale demonstrates the capabilities of the 3D printer when printing at different temperatures with one filament. The test model clearly shows the quality of overhangs, lintels, tensions, and the product can also be used to judge the ability of a 3D printer to print curved surfaces with a certain plastic. nine0205 A simple and intuitive tool allows you to find out the possibilities of materials that have not previously been used in work or printed with only one temperature.
It is important to consider that the print temperature setting for each signed element (floor) must be set in the slicer or manually in Gcode.
Download model on Thingiverse
6. Open-Source Printer Evaluation
This is a universal print model from Kickstarter and Autodesk. It was created taking into account the experience of using other models for testing. It contains bridges, overhangs, fine detailing and elements for assessing the spatial accuracy of 3D printing. nine0205 Download model on Github
7. Economical Stringing Test
When printing complex-shaped objects, without knowing the capabilities of the filament and the printer, the user may encounter stringing (from string - string), and in Russian simply “snot” - when plastic reaches for the extruder, forming thin plastic fibers in the air. Such “snot” appears when the extruder is idle. To avoid this, the retract function is used - the retraction of the filament during idle movement. Correct setting of the retract level requires consideration of extruder speed, extruder temperature and filament properties. nine0205 This test model is used to quickly check the correct setting of the 3D printer. If the strings between the vertical pyramids do not form, then the settings are correct. If horizontal plastic filaments appear, then some of the 3D printing parameters should be changed.
Download Thingiverse Model
8. PolyPearl Tower
The design features of the model allow you to check the quality of jumpers, bends, protrusions, fix the appearance of “snot” and establish the strength of the model as a whole.