3D paper tole prints
What is Paper Tole? (with pictures)
`;
Crafts
Fact Checked
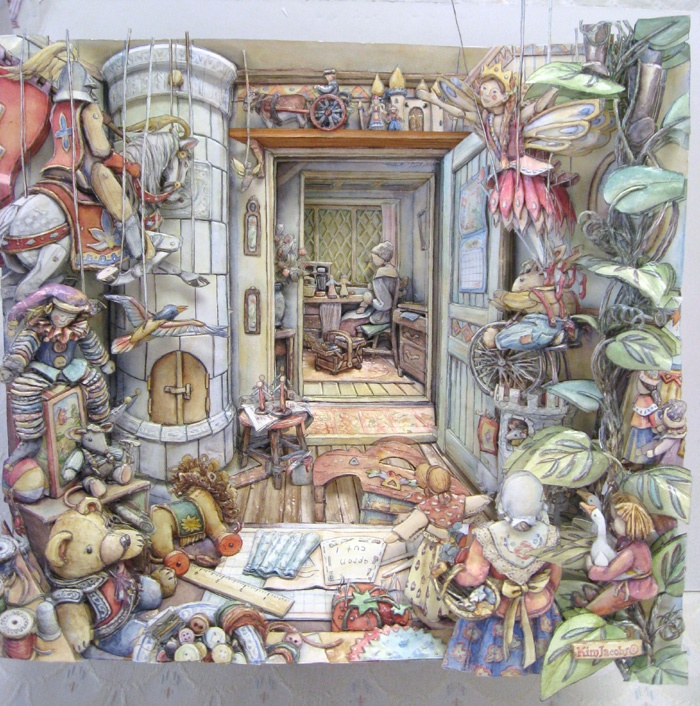
J. BeamPaper tole, also known as three-dimensional decoupage, is the art of handcrafting three-dimensional pictures from flat prints. This art is created by skillfully cutting, shaping, and assembling pieces of paper layered onto an image until a three-dimensional version of the image emerges. Though there are a number of ways to use paper tole, one of the most popular is to frame the image in a deep wall frame and display it as wall art.
Though it stems from decoupage, a paper craft that originated sometime in the 18th century involving cut pieces of paper shellacked onto wooden furniture and other objects, paper tole has reemerged over the years in several different forms. While framed prints are most popular, people often employ the same techniques used in making paper tole when creating handmade greeting cards and other paper crafts.
The techniques used in paper tole are specific and quality projects involve specific skills.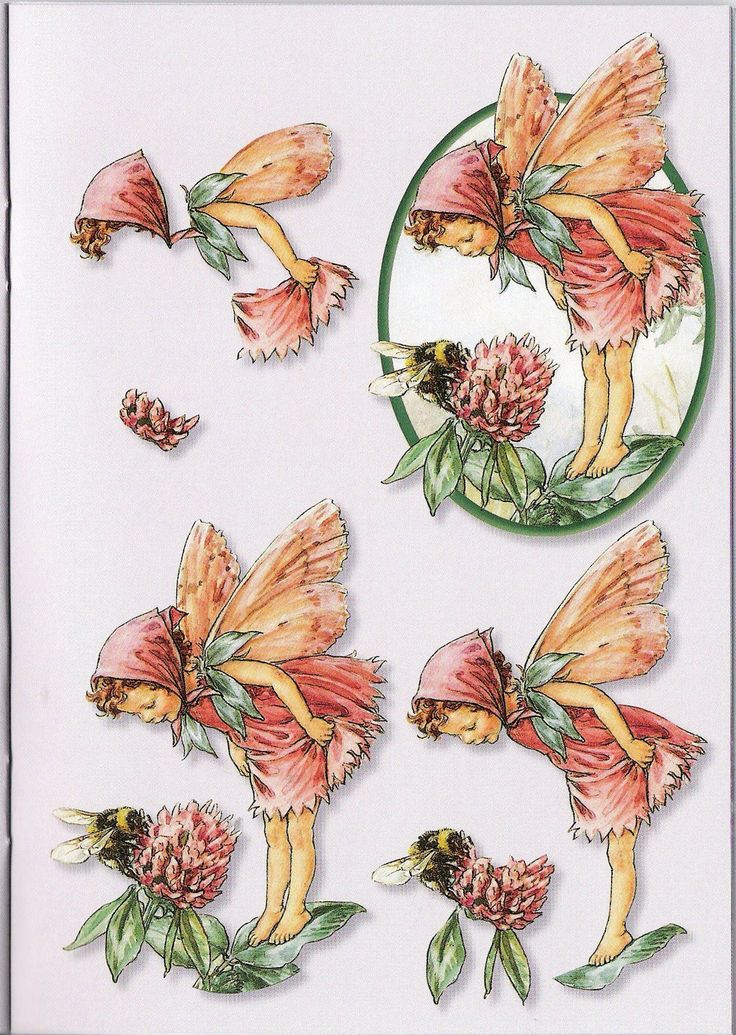 Precise cutting with no tattered or cracked edges is the key to creating the pieces that are reassembled onto the project. Cutting is thus generally done with an Exacto® knife or other precision cutting tool. Assembly requires patience while the artisan carefully attaches the separate pieces onto the print. An understanding and knowledge of perspective is also an important skill.
Learning paper tole takes time and attention to detail along with patience. Many arts and crafts centers offer classes for both beginning and intermediate level artists.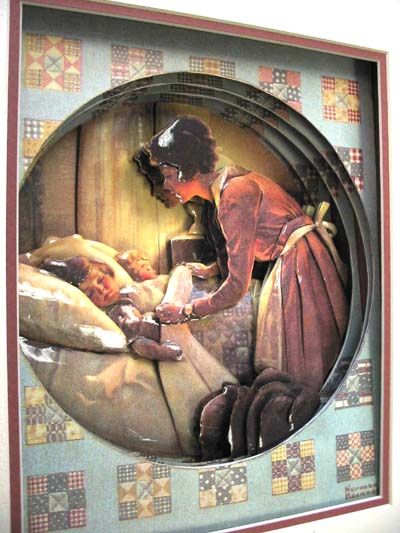 Projects can range from basic, such as a single flower, to extremely detailed and layered scenes such as landscapes. Buildings, people, animals, and nearly any other image imaginable can be crafted in this artform.
In addition to classes, there are an abundance of books available that demonstrate paper tole through explicit instructions and photos. The basic tools needed for beginning a project include a precision cutting tool, a cutting mat, paper in varying colors and textures, and glue. There are many more tools that can be used to create advanced projects.
You might also Like
Recommended
AS FEATURED ON:
How to Do 3D Paper Tole Beginner Tutorial
Paper or Papier Tole is a visually stunning and beautiful paper craft that is in danger of being forgotten about and dying out as new crafts spring to life.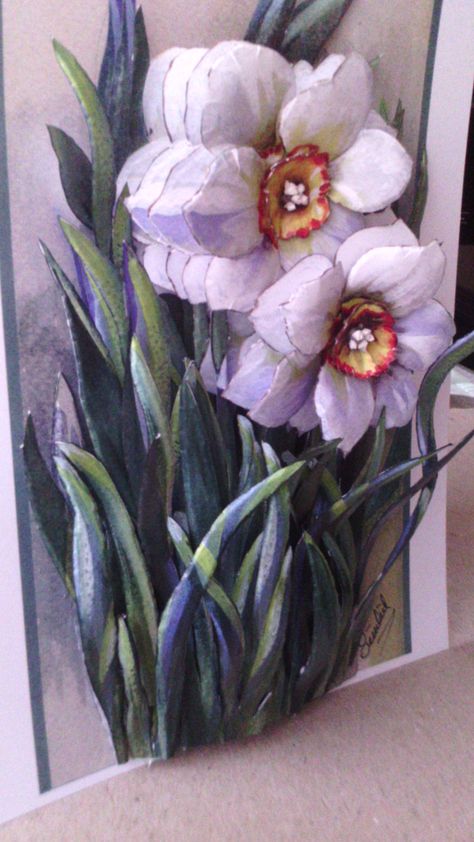 I want to get more people interested in taking up this wonderful art form with this how to do 3D paper tole beginner tutorial.
This paper craft can be as simple or as complex as you choose to make it. If you love cutting, either with scissors or a craft knife, this is something you should really enjoy. Even if you don't enjoy cutting, there are pre-cut die cuts that you can buy and use instead.
What is paper tole? Paper tole or 3D decoupage is a traditional paper craft. It involves cutting out sections taken from identical printed designs and layering these cutouts up using 3D foam squares or silicone glue. In this way, a three dimensional picture is created. This craft is often used to make special greeting cards.
Note: This post may contain affiliate links for which I can be compensated.
What You Need to Start Paper Tole
✔️ 1: You may need a range of different sized scissors. I suggest a medium sized pair and a very small pair of decoupage scissors for starters.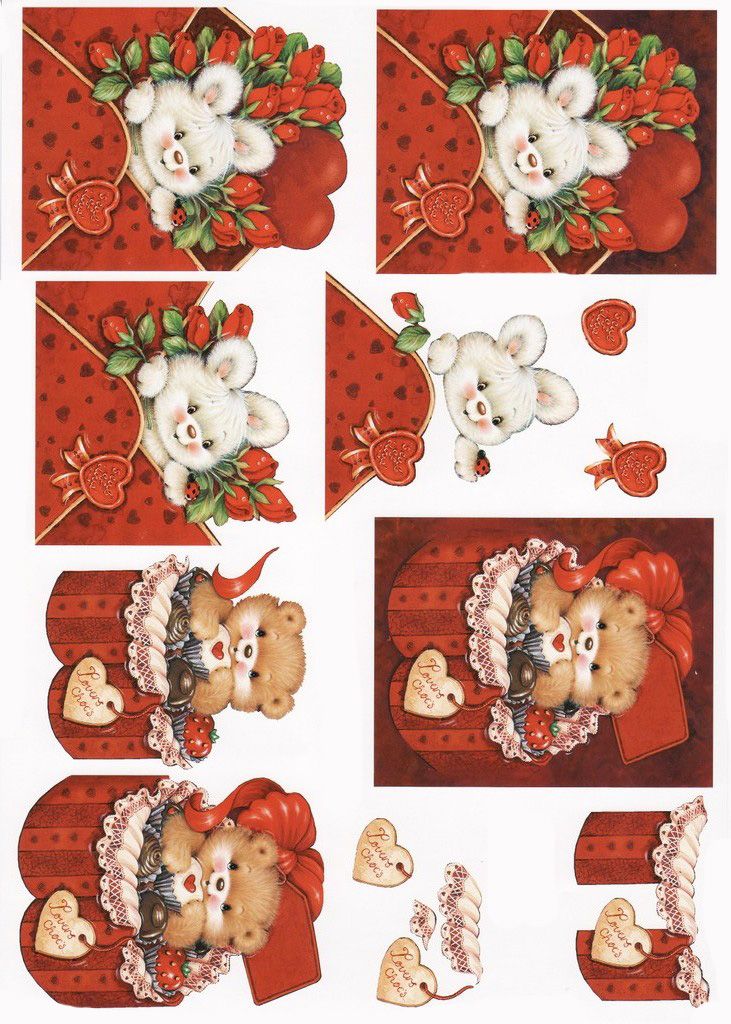 Alternatively, you can opt for a craft knife and cutting mat if that's what you're more comfortable with using.
✔️ 2: You need some 3D foam squares or silicone glue adhesive. For beginners, I recommend getting the foam squares which are very easy to use.
✔️ 3: If you really loathe cutting or find it too difficult, then look for the Papier Tole 3D Die Cut Decoupage Sheets to buy. These die cut decoupage sheets have die cut pieces that you just punch out instead of needing to cut anything.
Part of the real joy in this craft is with the relaxing time spent cutting out intricate designs. However, when you are in a hurry to make a dimensional card, die cut decoupage makes it so easy to get the look much faster.
✔️ 4: If you love cutting things out, you can use pre-printed paper tole design sheets. Alternatively, if you want to try out this craft without resorting to much of an expense, you can always print off 3-5 copies of the same image to practice with.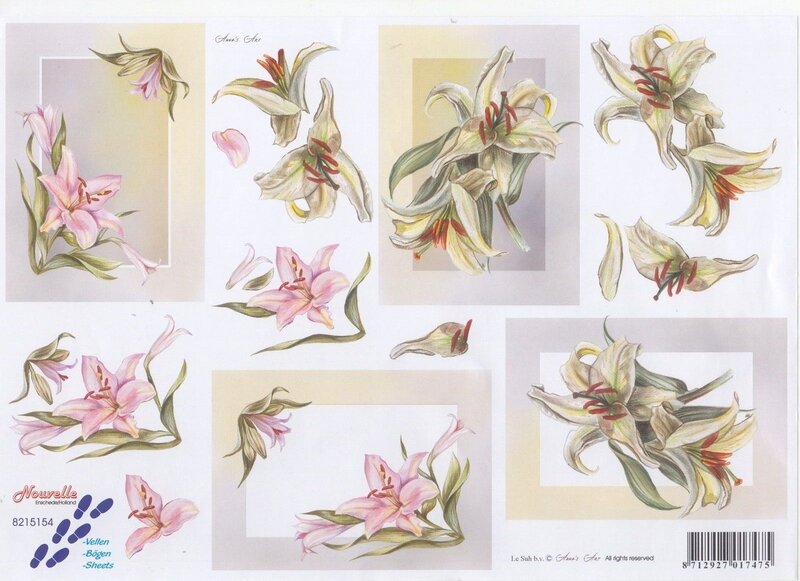
If using your own printouts, look to use a large floral design, butterflies with a large petal flower and designs that will look good layered up.
⭐ Learn Exactly What You Need to Start this Craft with My Paper Tole Equipment Page
Tutorial and Step by Step Instructions on Beginning Paper Tole
Pre-printed paper tole sheets ready to cut and layer
Step 1: The photo above shows are range of my pre-printed paper tole and decoupage sheets. These are not die cuts which you punch out as I prefer to cut all my pieces by hand. The cutting is a big part of the fun for me.
Paper Tole Kits with 6 Identical Prints
This simple to do craft requires that you use a minimum of two copies of the same image which can be a photograph, specially made Papier Tole sheets and die cuts, or free printables that you may discover online.
You cut out parts of an image with a large background section as the base.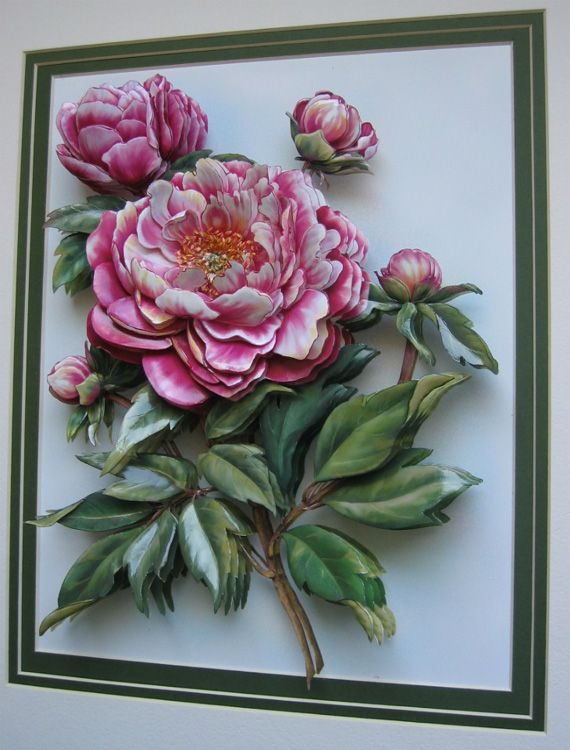 Then layer up smaller sections on top with dimensional foam squares or thick silicone adhesive.
In this way, you create a 3D design which is traditionally used for the front of handmade cards as well as framed pictures and art.
Sheets With Easy to Follow Designs to Cut and Layer Up
Depending what type of printed designs you're working from, the overall principle remains the same. I've written out instructions for whichever type of sheets you are using.
If you are working from design sheets like the ones shown above, I have another tutorial to help you with those.
These sheets already work out all the pieces that need to be cut and layered up, they sometimes come with a number order that you work to.
If your paper tole sheets are not numbered, you generally work from the largest piece of the design at the bottom to the smallest right at the top.
Some sheets look like this where all the prints are the same and you choose where to cut yourself.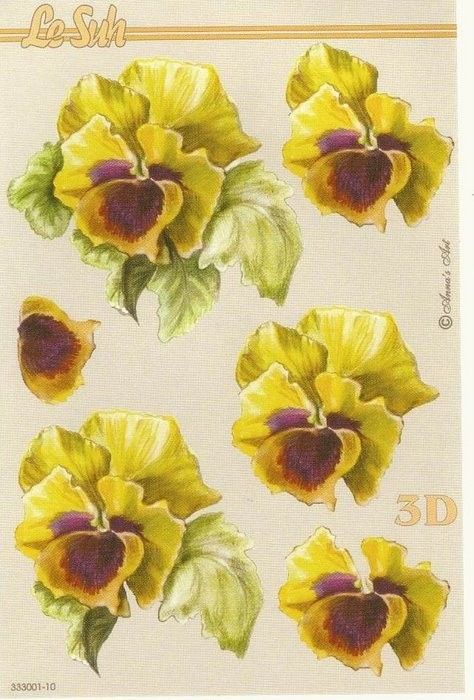 Others come with parts which are numbered and ready to cut out.
Step 2: There are times when you will work from prints that are not already divided up for you into sections but are all exactly the same. Many of the larger paper tole kits come this way.
You get some pre-printed sheets like this. Additionally, any personal photos and images that you print off are likely to be in this format too. In this way, you have to work out where to cut to make the completed design look three dimensional. I can help with this.
If you do not have any pre-printed sheets, you can make your own by using identical prints or copies of the same picture or photo. You need a minimum of 3 pictures or prints which are all identical.
I like around 4 or 5 layers if making a design to place in the middle of a handmade card but for larger and more complex images, you could use significantly more repeats of the same print.
Cut right around the first print
Step 3: This step is easy.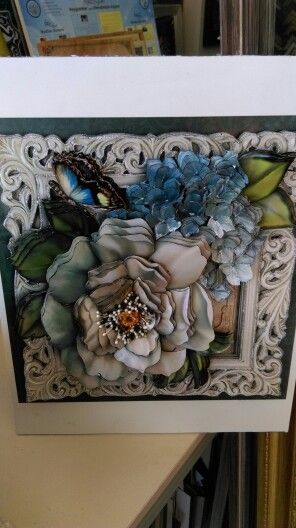 You just cut completely around one of the prints just as it is. So, in this example, I've cut out one of the square designs with a teddy bear in the middle. This will form the base for your work.
Use 3D foam squares or dots which are easy for a beginner to this craft
Step 4: You now have one base design which you've just cut out and 3 remaining copies of the teddy design.
For the second layer, you want to cut away some of the background and focus on cutting out the main image in the design. For me it is cutting out the whole teddy bear but for you it could be cutting out a large flower or an animal.
I prefer to use small decoupage scissors for most of my cutting but you can also use a craft knife and have a cutting mat or board under the paper to protect your work surface.
I would only recommend using a knife if you're already comfortable cutting with one because it's very easy for beginners to end up ripping through the paper instead of making sharp, precise and neat cuts.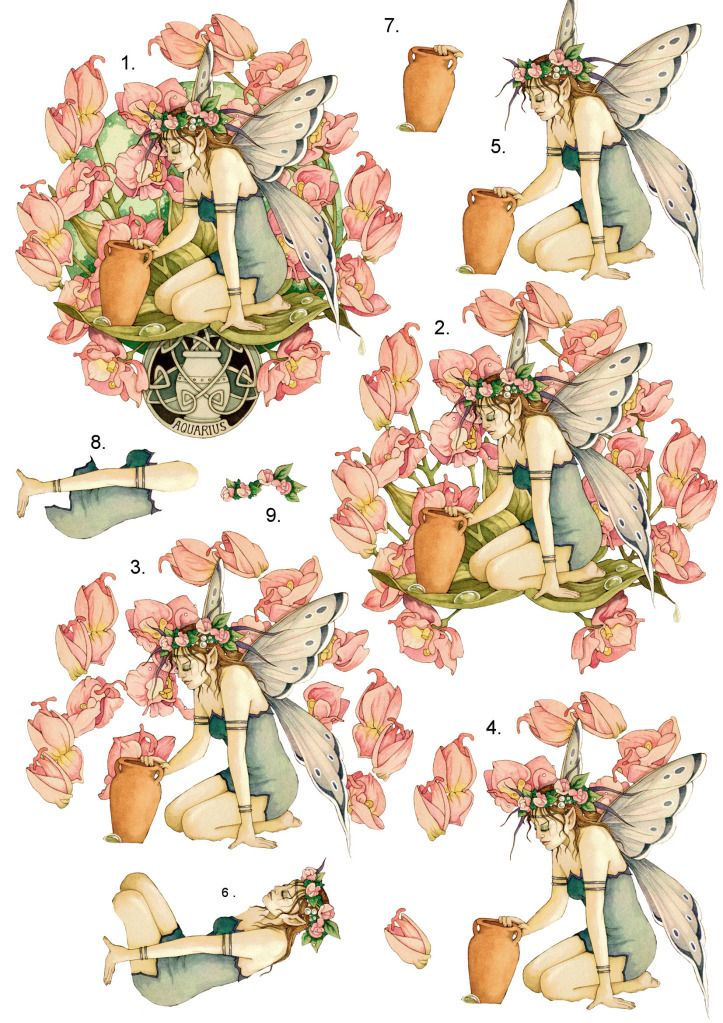
3D Foam Squares are Easy to Use for Layering Your Paper Tole Pieces Up
Get yourself some 3D foam squares or pads (some people prefer 3D glue dots) and apply them to the back of the second layer that you've cut out.
⭐ See My Tutorial on How to Apply and Use 3D Foam Squares
You can see where I've applied mine. You don't need the foam stickers all over but need just enough to support the paper in the middle and near the edges.
Layer sections of the design on top of one another to make the picture look 3D
Step 5: Remove the backs off from the sticky foam squares (I find curved ended tweezers good at removing the backing paper from those or long nails) and then place your next layer directly on top of where it is on the base design.
For example, you'd want the teddy right on top of the other teddy. Be careful at aligning the image properly before you stick it down because once stuck, it will be pretty hard to remove.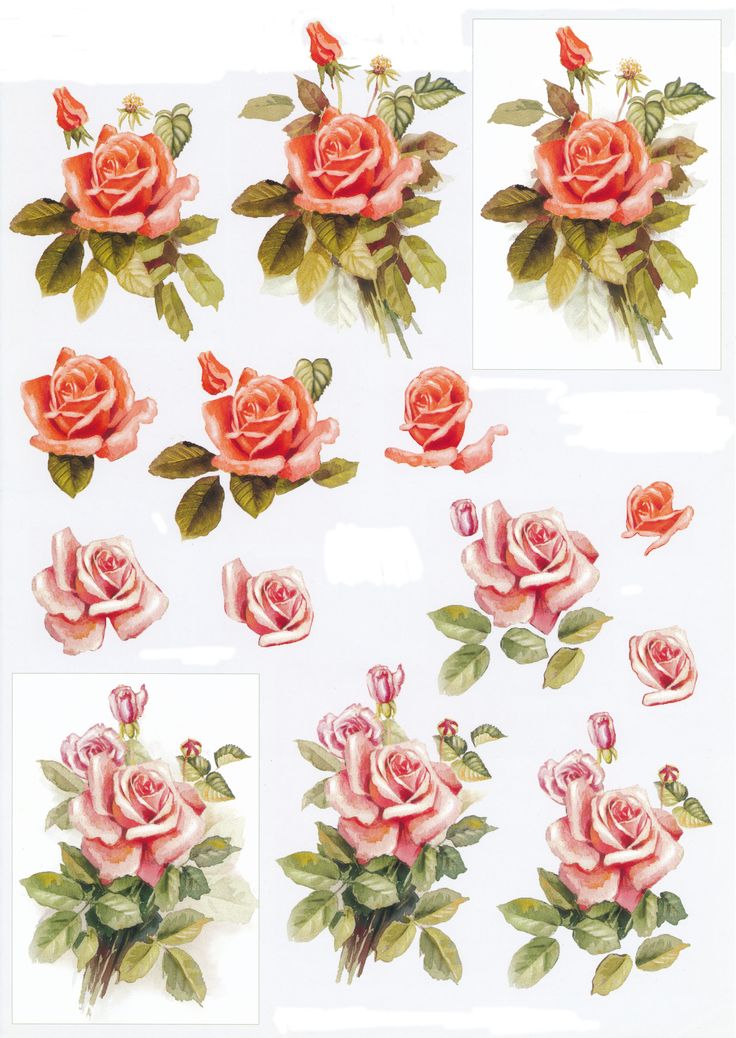
Choose to cut out sections that would look nearer the front or foreground in real life
Step 6: This is where it starts to get a little bit harder. You need to decide how you are going to cut out the next (3rd) layer of your design. It needs to be smaller than the 2nd layer and you need to think about what part of this design would naturally be in the foreground or nearer the front in real life.
I opted to cut out most of the bear but cut away one arm and leg which face nearer the background. You might have chosen to cut it differently and that is part of the beauty of working with prints where you decide how you want it layered. Stick this 3rd layer on top using the sticky pads as before.
Cut out more detailed parts to layer up as you progress
Step 7: For my final 4th layer, I opted to cut out some small detail sections: his nose, the bow and his left foot or paw.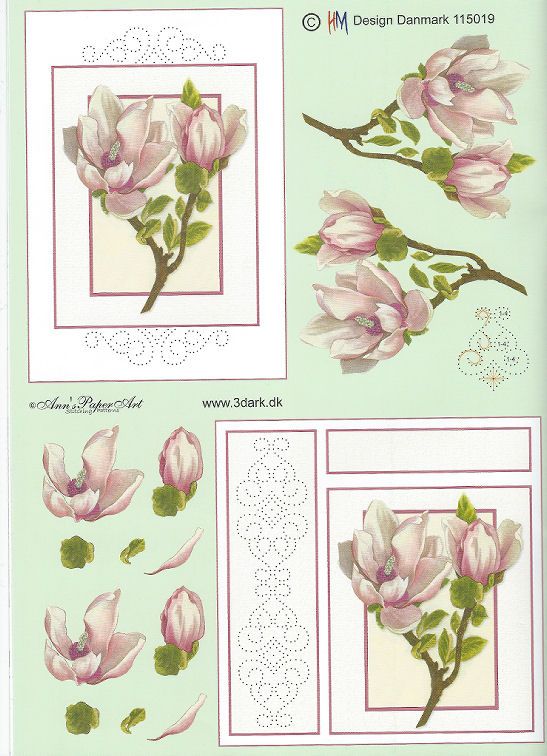 These were all pieces that seemed naturally to be right at the front of this design.
For smaller pieces like the ones here, you may need to cut your foam squares or glue dot down to fit on the back. I cut the foam pads while they are still attached to the sheet using my scissors.
For cutting glue dots, wrap backing paper around the sticky side (so the sticky section is covered over) and then cut with your scissors. Layer your smaller pieces on top.
If your scissor blades get sticky, you can carefully wipe them with a little nail polish remover which normally cleans them up beautifully.
Viewed from the side, you get a sense of how the picture becomes three dimensional
Step 8: You can get a sense of how this dimension shapes up with a part sideways look at the completed design which shows the different layers.
It does look really cool when you're done and a small and simple design like this takes me around 15 minutes to make (when not stopping to take photos!) so it doesn't have to take a huge amount of time up.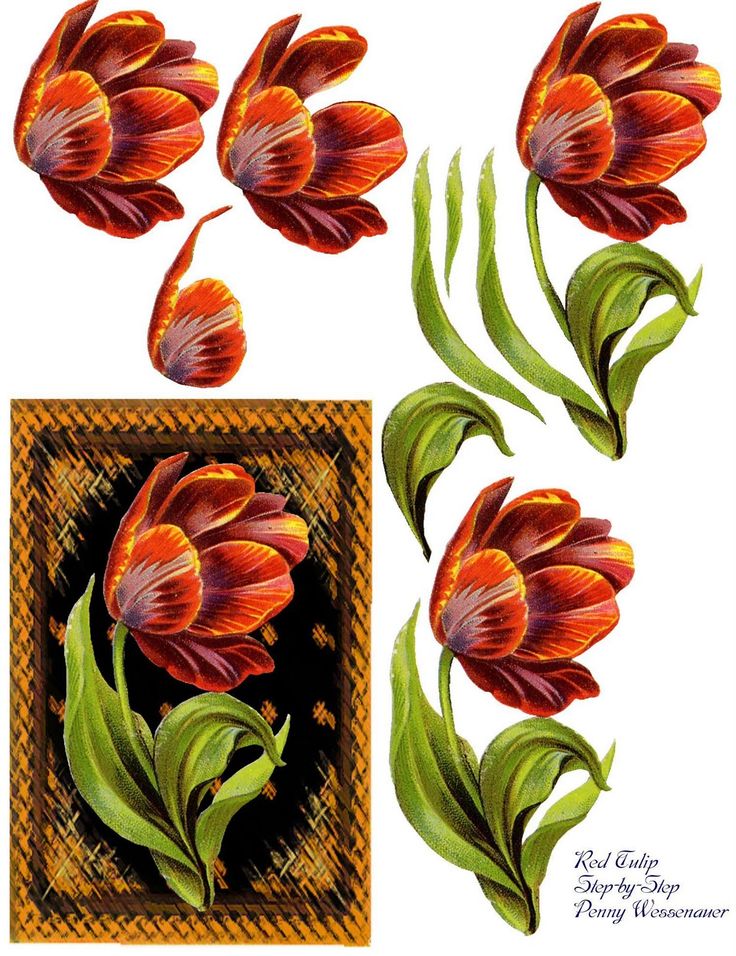
Some Papier Tole designs are very intricate and more challenging to cut
You can go for simple designs or more complicated ones like this red rose card above where a lot of layers and fine sections have been cut.
I really prefer using prints where I get to decide where to cut and layer. Partly because I find them a little more challenging and also because it makes the finished design really unique.
You also can do this with your own photos. Imagine taking a photo of something meaningful and applying this technique to make a picture that you can frame. If you enjoyed this, please leave a comment or share the link of this article on a favorite social media site so other people can enjoy it too.
This is one of my slower paced paper crafts and it is one I love to do when I really want to relax. I love cutting and the process of using scissors and enjoy building up a beautiful, layered image which makes for a real wow-factor of a card.
People are always impressed when they receive one of these designs because they look really intricate and hard to make. Actually they are very easy if you love sitting quietly with a coffee, or your favorite beverage, and they just take a little time.
Related Posts You Should also Enjoy:
Page Last Updated:
Printed paper cup 150, 200, 250, 300, 400, 500 ml
- Main
- Specialized packaging
- Disposable tableware
- Disposable cardboard tableware
- paper cups
- Printed paper cup 150, 200, 250, 300, 400, 500 ml
Availability: Pre-order
SKU: u3895
Select
parameters
Print ---Choose---logo standard text color print
Volume --- Choose --- 100ml 150 ml 165 ml 180 ml 200 ml 250 ml 300 ml 350 ml 400 ml 450 ml 500 ml 500 ml
Color ---Choose---White custom color
| Material | laminated paper |
|---|---|
| Volume | 100 - 500 ml |
| Color | white |
Go to Description
Minimum order quantity for this item is 1000
Price and Cost
Each order is calculated individually.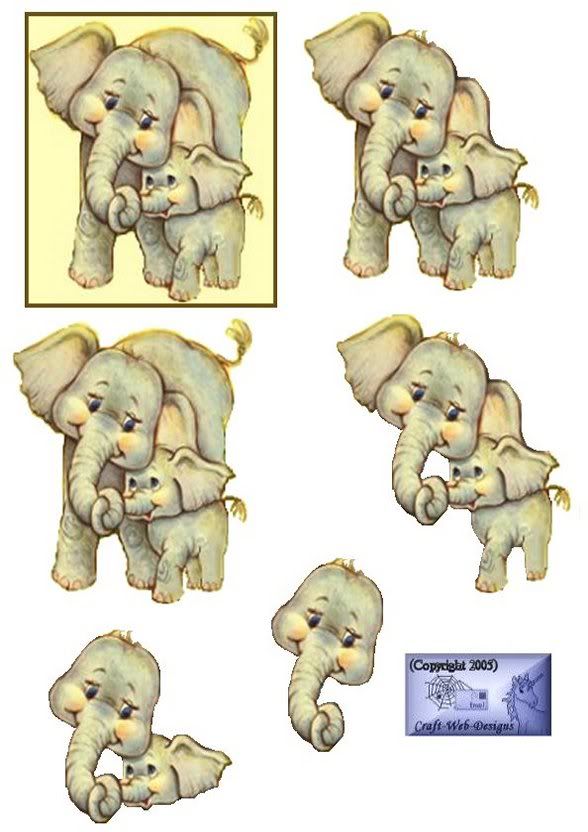 Please contact our managers or send a request for calculation in the form below:
Material: Laminated paper
Properties: Paper cup with print, volume - from 150 to 500 ml, color - color print on request. From bleached pulp. Light, dense, eco-friendly material. Laminated, does not soak under the influence of moisture, liquid. Suitable for bottling hot and cold drinks. Can be closed with a lid (ordered separately). Disposable, disposed of after use.
Scope:
- Fast food restaurants.
- Street cafes.
- Hot drinks outlets.
- Confectionery.
Delivery: Minimum order - from 1000 pcs.
| Designation | Volume ml | Height, mm | Top diameter, mm |
| Printed paper cup | 100 | 60 | 60 |
| Printed paper cup | 150 | 80 | 70 |
| Printed paper cup | 165 | 74 | 70 |
| Printed paper cup | 180 | 75 | 70 |
| Printed paper cup | 200 | 85 | 70 |
| Printed paper cup | 250 | 87 | 78 |
| Printed paper cup | 300 | 105 | 88 |
| Printed paper cup | 350 | 110 | 90 |
| Printed paper cup | 400 | 130 | 88 |
| Printed paper cup | 450 | 130 | 90 |
| Printed paper cup | 500 | 136 | 90 |
Customization options: White cups ideal for logos, texts, designs.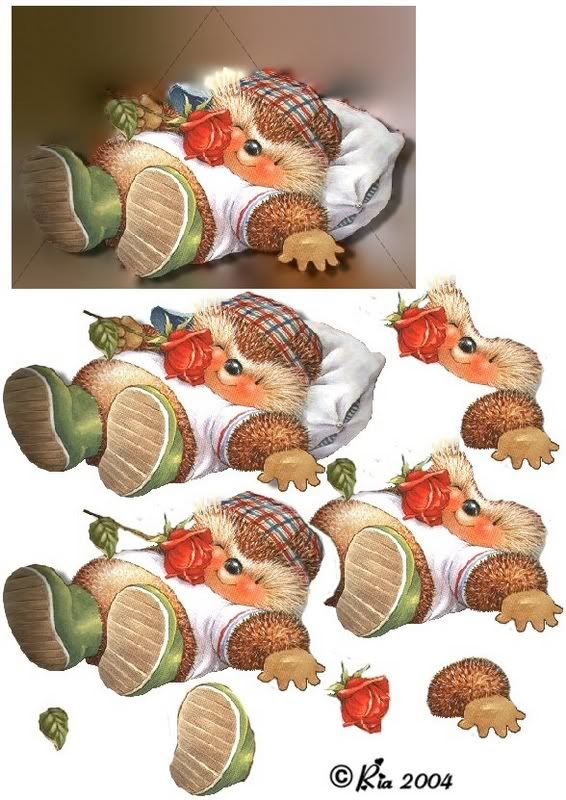 The designers of Upakovka-Torg will develop a layout of glasses according to your wishes, we also print according to an already created template.
With this product order: You can order disposable spoons, bags for carrying glasses, cardboard plates, lids for glasses from us.
| Material | laminated paper |
|---|---|
| Volume | 100 - 500 ml |
| Color | white |
Related products
Similar products
Share website link
Our offices
Mon-Fri 9.00-18.00 Sat-Sun day off
Moscow
Korolev
Nizhny Novgorod
St.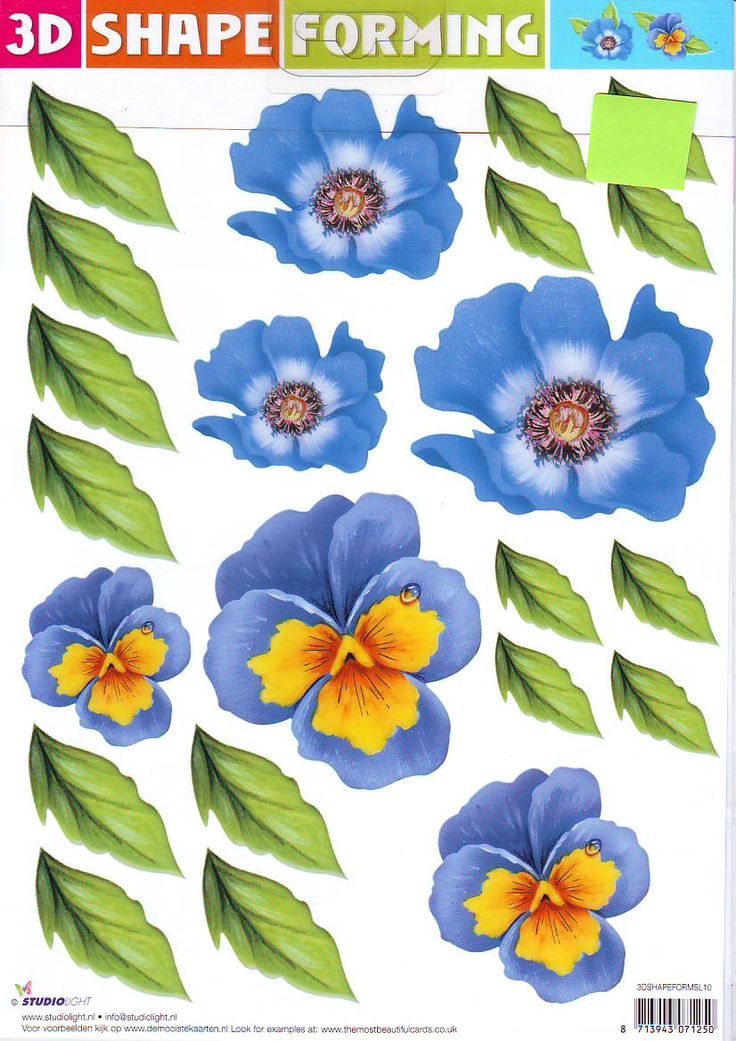 Petersburg
Yekaterinburg
Sevastopol
Belgorod
All offices
Mon-Fri 9.00-18.00 Sat-Sun day off
Paper cups with custom logo
Paper cups with logos and individual designs are a good image component of a product, brand or company as a whole. They serve as an effective advertising space, provide a wide coverage of the target audience and 100% long-term contact with the advertising medium.
Our company offers a full range of services for the production of private label cups: from design development to delivery of finished products to the Buyer's warehouse.
Market leader
The Formation company is more than 30% of the market of paper cups in Russia.
Large production
Own production complex, including offset printing.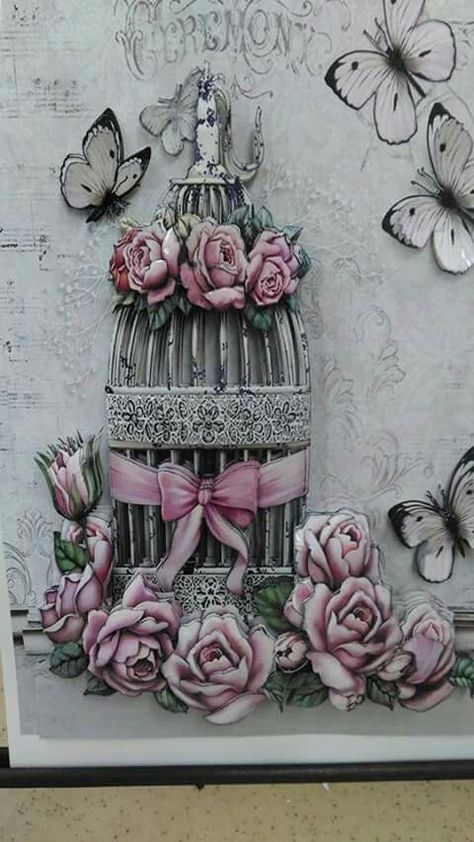
Top materials
Finnish premium cardboard Stora Enso, harmless German water-based paints.
Own delivery service
Four own warehouses in Moscow, St. Petersburg and Riga, as well as a car park.Get detailed information
We will design and produce excellent printing
Types of paper cups and minimum quantities
single-layer paper cups are produced using the technology of single-sided and double-sided lamination. It allows you to keep the freshness of the drink, prevents the bottom and walls from soaking, and also provides protection against leakage.
Calculate cost
| Volume (Full volume) | Quantity in tube | Quantity in a box | Minimum run with your design | ||||
|---|---|---|---|---|---|---|---|
| Internal lamination WHITE | |||||||
| 100 ml (120 ml) | 62 mm | 57 mm | 45 mm | 63 mm | 60 | 2520 | 90,000 pcs.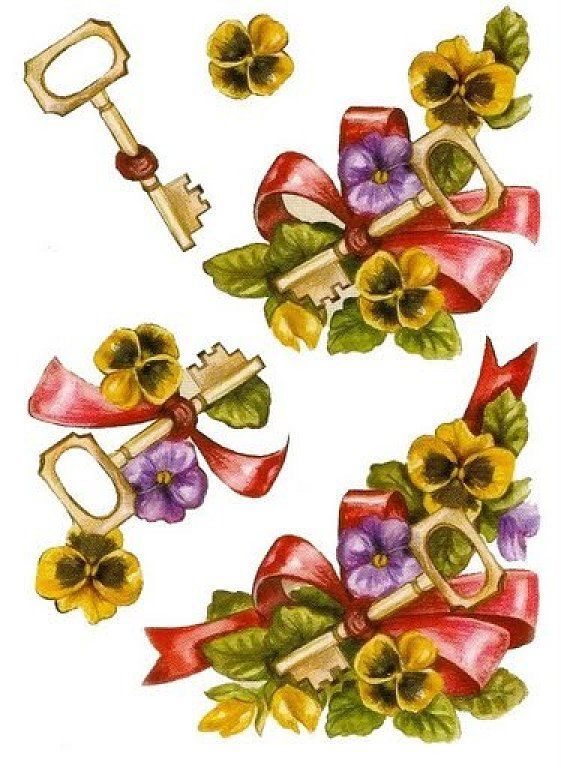 |
| 150 ml (180 ml) | 70 mm | 66 mm | 45 mm | 80 mm | 100 | 3000 | 65,000 pcs. |
| 165 ml (195 ml) | 70 mm | 66 mm | 49 mm | 80 mm | 100 | 3000 | 65,000 pcs. |
| 180 ml (205 ml) | 72 mm | 67 mm | 50 mm | 80 mm | 80 | 2000 | 65,000 pcs. |
| 200 ml (210 ml) | 73 mm | 68 mm | 47 mm | 104 mm | 90 | 2700 | 58,000 pcs. |
| 230 ml (260 ml) | 70 mm | 65 mm | 50 mm | 93 mm | 70 | 1750 | 48,000 pcs. |
| 250 ml (280 ml) | 80 mm | 74 mm | 57 mm | 88 mm | 75 | 1500 | 42,000 pcs. |
| 300 ml (340 ml) | 80 mm | 74 mm | 50 mm | 116 mm | 50 | 1000 | 33,000 pcs.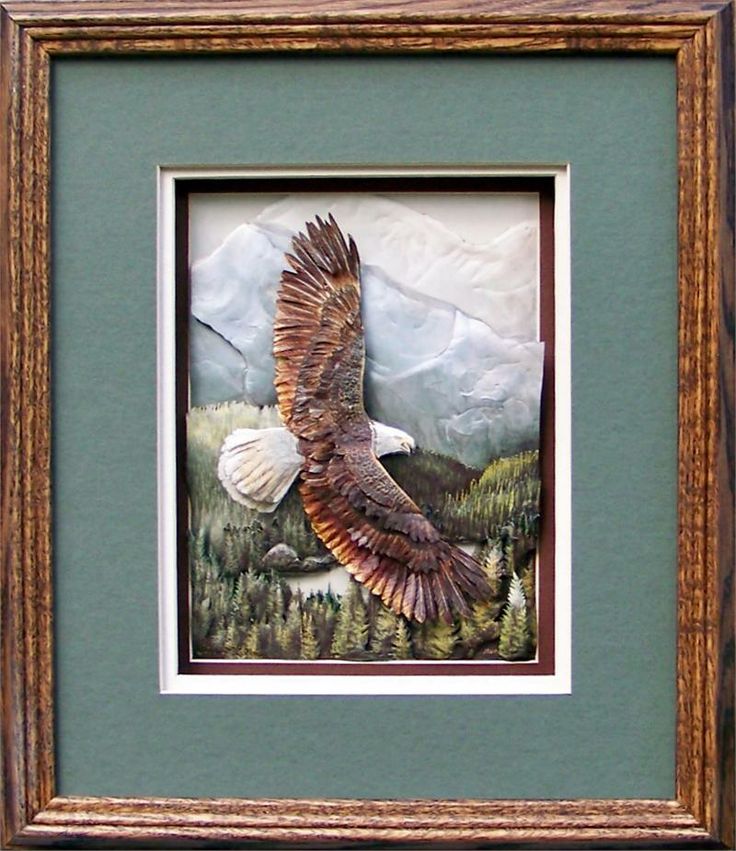 |
| 300 ml (430 ml) | 90 mm | 84 mm | 60 mm | 112 mm | 50 | 800 | 27,000 pcs. |
| 400 ml (530 ml) | 90 mm | 84 mm | 60 mm | 136 mm | 50 | 800 | 23,000 pcs. |
| Internal lamination BLACK | |||||||
| 250 ml (280 ml) | 80 mm | 74 mm | 57 mm | 88 mm | 75 | 1500 | 42,000 pcs. |
| 300 ml (430 ml) | 90 mm | 84 mm | 60 mm | 112 mm | 50 | 800 | 27,000 pcs. |
| 400 ml (530 ml) | 90 mm | 84 mm | 60 mm | 136 mm | 50 | 800 | 23,000 pcs. |
The main advantage of the double-walled paper cups is the double wall, which allows the drink to be kept hot longer and reduces the heating of the cup.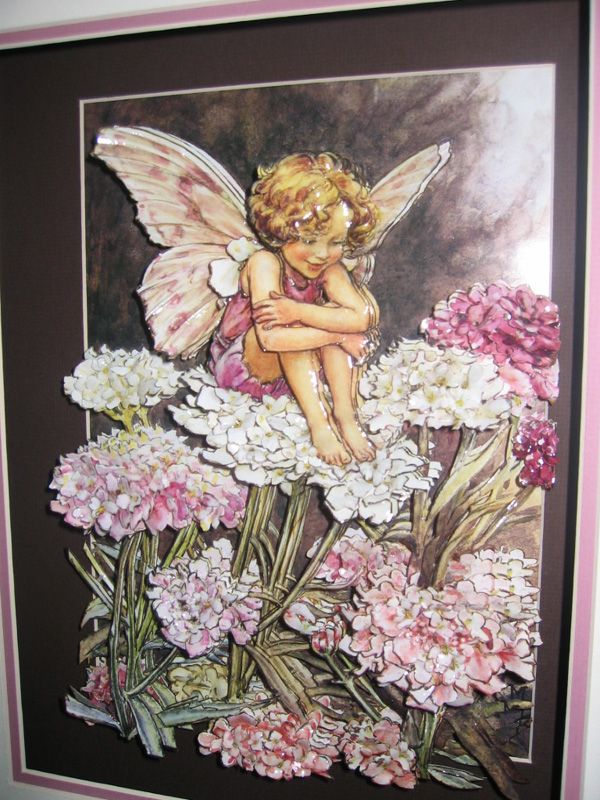
Calculate cost
| Volume (Full volume) | Quantity in tube | Quantity in box | Minimum run with your design | ||||
|---|---|---|---|---|---|---|---|
| Internal lamination WHITE | |||||||
| 250 ml (280 ml) | 80 mm | 74 mm | 57 mm | 88 mm | 25 | 500 | 1000 pcs. |
| 300 ml (430 ml) | 90 mm | 84 mm | 60 mm | 112 mm | 25 | 400 | 800 pcs. |
| 400 ml (530 ml) | 90 mm | 84 mm | 60 mm | 136 mm | 25 | 400 | 800 pcs. |
| Internal lamination BLACK | |||||||
| 250 ml (280 ml) | 80 mm | 74 mm | 57 mm | 88 mm | 25 | 500 | 30,000 pcs.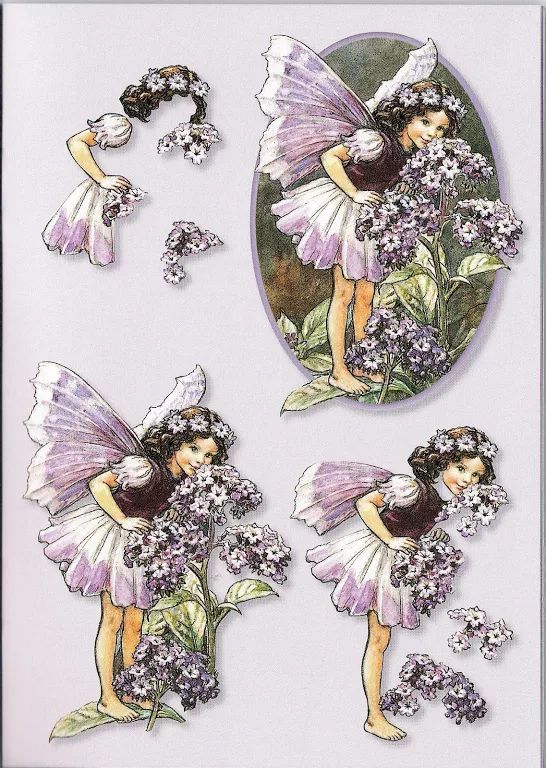 |
| 300 ml (430 ml) | 90 mm | 84 mm | 60 mm | 112 mm | 25 | 400 | 30,000 pcs. |
| 400 ml (530 ml) | 90 mm | 84 mm | 60 mm | 136 mm | 25 | 400 | 30,000 pcs. |
Corrugated double layer cups
In the production of corrugated paper cups , the second, outer layer of the cup is subjected to a special process that gives it a "roughness". It makes the glass voluminous, attractive, memorable, and also provides excellent thermal insulation.
Calculate cost
| Volume (Full volume) | Number in tube | Quantity in a box | Minimum run with your design | ||||
|---|---|---|---|---|---|---|---|
| Internal lamination WHITE | |||||||
| 250 ml (280 ml) | 80 mm | 74 mm | 57 mm | 88 mm | 25 | 500 | 3200 pcs.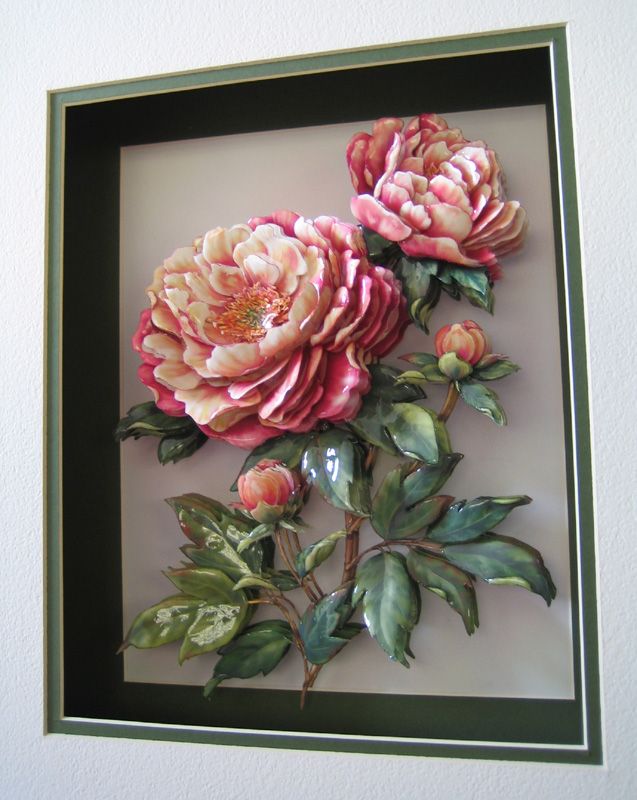 |
| 300 ml (430 ml) | 90 mm | 84 mm | 60 mm | 112 mm | 25 | 400 | 3200 pcs. |
| Internal lamination BLACK | |||||||
| 250 ml (280 ml) | 80 mm | 74 mm | 57 mm | 88 mm | 25 | 500 | 30,000 pcs. |
| 300 ml (430 ml) | 90 mm | 84 mm | 60 mm | 112 mm | 25 | 400 | 30,000 pcs. |
Corrugated three-layer sleeves
Three-layer corrugated cups are made by soldering an additional layer of thick corrugated cardboard onto a two-layer cup. Thus, corrugated glasses have better thermal insulation properties.
Calculate cost
| Volume (Full volume) | Quantity in tube | Quantity in box | Minimum run with your design | ||||
|---|---|---|---|---|---|---|---|
| Internal lamination WHITE | |||||||
| 250 ml (280 ml) | 80 mm | 74 mm | 57 mm | 88 mm | 25 | 500 | 39,000 pcs.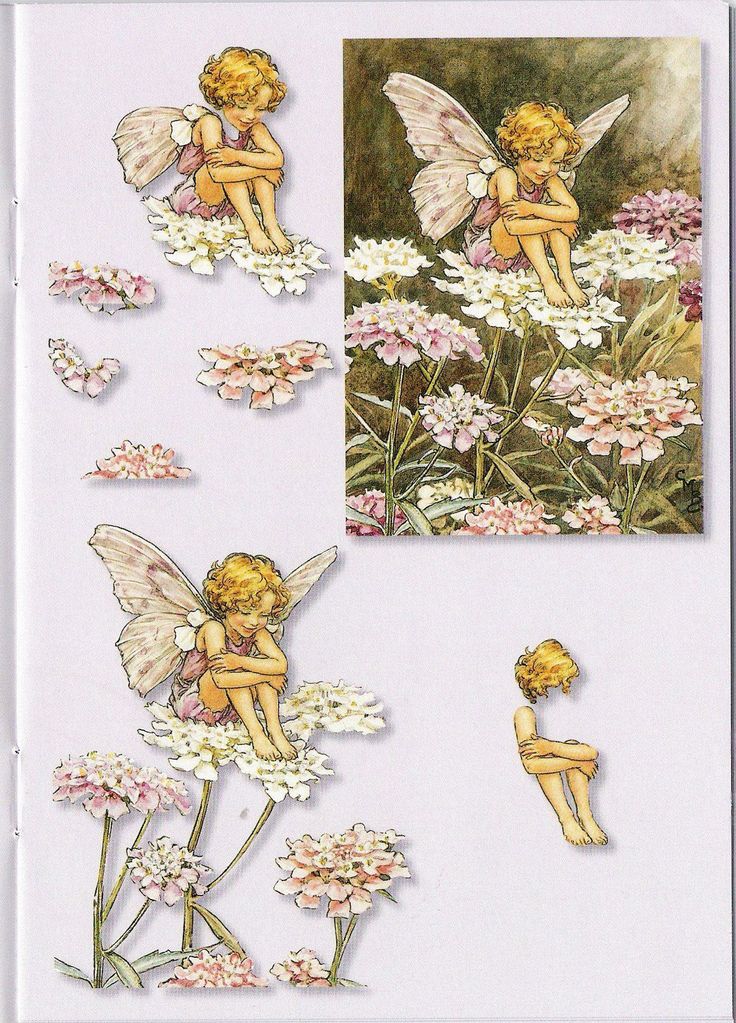 |
| 300 ml (430 ml) | 90 mm | 84 mm | 60 mm | 112 mm | 25 | 400 | 37,000 pcs. |
| Internal lamination BLACK | |||||||
| 250 ml (280 ml) | 80 mm | 74 mm | 57 mm | 88 mm | 25 | 500 | 39,000 pcs. |
| 300 ml (430 ml) | 90 mm | 84 mm | 60 mm | 112 mm | 25 | 400 | 37,000 pcs. |
Additional features
Thermal ink
Hot drinks can make glass elements appear and disappear due to the thermal ink used in printing.
Printing on the bottom
Printing on the bottom of a glass is a bright and memorable element that will attract attention and ensure full contact between the customer and the product.
Soft Touch
Soft touch elastic matt coating gives the cups extra texture, making them soft to the touch.