100 microns 3d printer
Is 100 Microns Good for 3D Printing? 3D Printing Resolution – 3D Printerly
When it comes to 3D printing resolution or layer height, you always hear or see the term microns, which definitely confused me at first. With a little research, I’ve figured out the micron measurement and how it’s used in 3D printing to describe 3D print resolution.
100 microns is equivalent to a 0.1mm layer height, which is a good resolution for 3D printing. It’s relatively on the finer side of a 3D printed object, with the normal default micron measure for Cura being 200 microns or 0.2mm. The higher the microns the worse the resolution.
Microns are a measurement that you should get comfortable with if you are in the 3D printing space. This article will give you some key details that you can use to expand your knowledge of 3D printing resolution and microns.
What Are Microns in 3D Printing?
A micron is simply a unit of measurement similar to centimeters and millimeters, so it isn’t specific to 3D printing but it is definitely widely used in the field. Microns are used to indicate the height of each layer of a 3D print by a 3D printer.
Microns are numbers to determine the resolution and quality of the object being printed.
Many people get confused while buying a 3D printer because they don’t know that a printer with fewer microns is better or a printer with a higher number of microns is actually lower resolution.
When looking directly at the numbers side of things, microns are equal to the following:
- 1,000 Microns = 1mm
- 10,000 Microns = 1cm
- 1,000,000 Microns = 1m
The video below shows just how high your 3D printing resolution can go, and it can go even further than this!
The reason you don’t hear much about microns in everyday life is because of just how small it is. It’s the equivalent of 1 millionth of a meter. So each 3D printed layer goes along the Z-axis and is described as the height of the print.
This is why people refer to resolution as layer height, which can be adjusted in your slicing software before you print a model.
Do keep this fact in mind that only microns do not ensure the print quality, there are many other factors as well that contribute to it.
The next section will get into what a good resolution or number of microns is desired for 3D prints.
What is a Good Resolution/Layer Height for 3D Printing?
100 microns is considered a good resolution and layer height since the layers are small enough to create layer lines that aren’t too visible. This results in higher quality prints and a smoother surface.
It becomes confusing for the user to determine the resolution or layer height that works well for your print. Well, the first thing you should note here is that the time taken for the print to complete is inversely proportional to the height of the layer.
In other words, generally the better your resolution and print quality, the longer its going to take to print.
Layer height is a standard to define the print resolution and its quality but thinking that layer height is the whole concept of print resolution is wrong, a good resolution is much more than that.
Printer height capability varies but usually, the object is printed anywhere from 10 microns to 300 microns and above, depending on the size of your 3D printer.
XY and Z Resolution
XY and Z dimensions together determine a good resolution. The XY is the movement of the nozzle back and forth on a single layer.
The print will be more smooth, clear, and of good quality, if the layer height for the XY dimensions is set at a medium resolution such as at 100 microns. This is the equivalent of a 0.1mm nozzle diameter.
As previously mentioned, the Z dimension relates to the value that tells the printer about the thickness of each layer of the print. The same rule applies in terms of the fewer the microns, the higher the resolution.
It is recommended by the experts to set the microns by keeping the nozzle size in your mind. If the diameter of the nozzle is about 400 microns (0.4mm) the layer height should be between 25% to 75% of the nozzle diameter.
The layer height between 0.2mm to 0.3mm is considered as best for a nozzle of 0.4mm. Printing at this layer height provides a balanced speed, resolution, and printing success.
50 Vs 100 Microns in 3D Printing: What’s the Difference?
Smoothness and Clarity
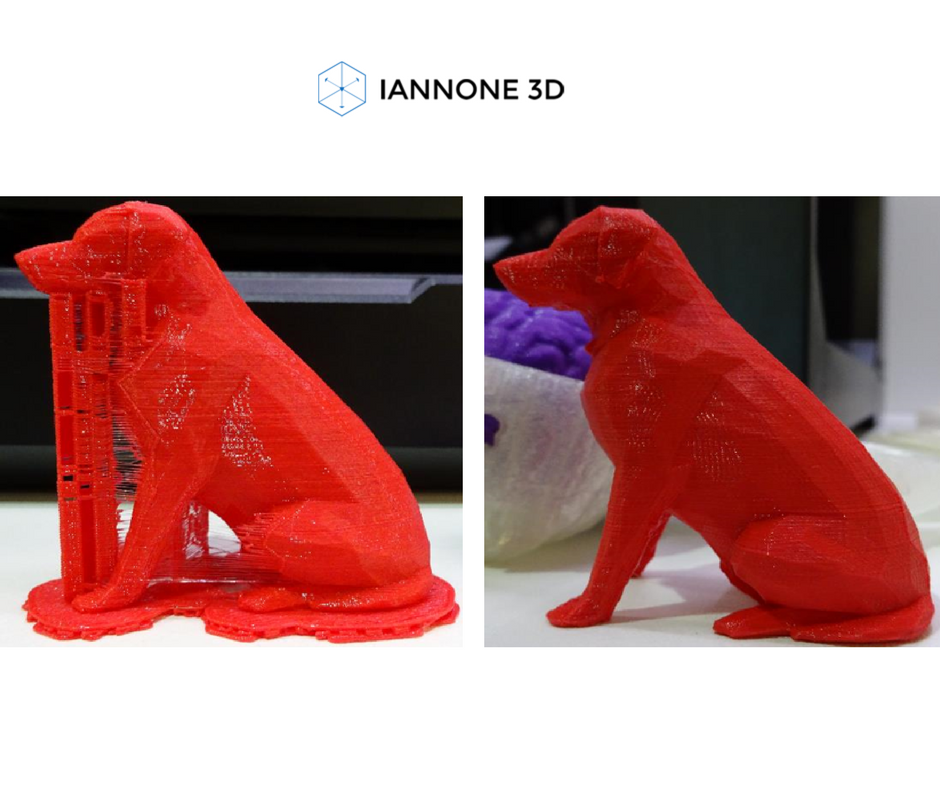
If you print one object at 50 microns and a second at 100 microns then up close, you will be able to see a clear difference in their smoothness and clarity.
The print with fewer microns (50 microns vs 100 microns) and higher resolution will have less visible lines as they are smaller.
Make sure you are doing regular maintenance and checking over your parts because 3D printing at lower microns does require a fine-tuned 3D printer.
Bridging Performance
Overhangs or stringing is one of the major problems that occur in 3D printing. The resolution and layer height does have an impact on it. Prints at 100 microns compared to 50 microns are more likely to have bridging issues.
Bad bridging in 3D prints leads to much lower quality, so try to fix your bridging issues. Lowering layer height helps out a bunch.
Time Taken to 3D Print
The difference between printing at 50 microns and 100 microns is twice as many layers need to be extruded, essentially doubling the printing time.
You have to balance the print quality and other settings with printing time, so it is down to your preference rather than following the rules.
Is 3D Printing Accurate?
3D printing is very accurate when you have a high quality, fine-tuned 3D printer. You can get very accurate 3D printed models right out of the box, but you can increase accuracy with upgrades and tuning.
A factor to take into account is shrinkage and ease of printing, because materials like ABS can shrink a decent amount. PLA and PETG don’t shrink very much, so they are great choices if trying to achieve printing accuracy.
ABS is also fairly hard to print with and requires ideal conditions. Without it, you can find your prints start curling around the corners and edges, otherwise known as warping.
PLA can warp, but it takes a lot more for it to happen such as a gust of wind hitting the print.
3D printers are more accurate in the Z-axis, or the height of a model.
This is why 3D models of a statue or bust are oriented in a way where the finer details are printed along the height region.
When we compare the resolution of the Z-axis (50 or 100 microns) to the nozzle diameter which is the X & Y axis (0.4mm or 400 microns), you see the large difference in resolution between these two directions.
To check the accuracy of a 3D printer it is recommended to create a design digitally and then get your design printed. Compare the resultant print with the design and you will get the actual figure on how accurate your 3D printer is.
Dimensional Accuracy
The easiest way to check 3D printer accuracy is to print a cube with a defined length. For a test print, design a cube that has equal dimensions of 20mm.
Print the cube and then manually measure the dimensions of the cube. The difference between the actual length of the cube and 20mm will be the dimensional accuracy for every axis of the resultant print.
According to All3DP, after measuring your calibration cube, the measurement difference is as follows:
- Greater than +/- 0.
 5mm is Poor.
 - Difference of +/- 0.2mm to +/- 0.5mm is Acceptable.
- Difference of +/- 0.1mm to +/- 0.2mm is Good.
- Less than +/- 0.1 is Excellent.
Do keep this fact in mind that the dimensional difference in positive values is better than the negative values.
CREAT3D handy 3D printing tips
This post was originally written in 2016 and has since been refreshed and republished for accuracy purposes
May 2021
With plastic extrusion (FFF/FDM) desktop 3D printers, one of the most used, and perhaps, most mis-used terms acting as a means of comparing different machines is microns. Printer A can do 20 microns whereas Printer B can only do 100 microns, so A must be a better printer!
Right? Well our Technical Team have put it to the test to highlight what microns really mean in a real-world application.
What is a micron? A micron is equal to one millionth of a metre. It is normally used to refer to the layer height, also known as print resolution or Z height. So 100 microns is equal to 0.1mm. The lower the micron, the higher the resolution.
FDM 3D printers vary in their layer height capability, generally we see machines running from 10 microns to 300 microns layer heights.
So in theory, if you always print at a lower layer heights (i.e. lesser microns) then you should always get better results. Right?
Take a look at the Coupling in the photo (part source: Thingiverse Thing 38678).
Same part, printed on the same printer, same material, same settings except for one thing - the layer height:
- One part is printed at 20 microns
- One part is printed at 60 microns
- One part is printed at 180 microns
Which one visibly looks the best? Easy answer: Part C. So which part was printed at which layer height? Was Part C printed at 20 microns?
No, in fact it may surprise some, but Part C was 3D printed at 180 microns. Part B was printed at 60 microns and Part A at 20 microns.
Confusing!
There are so many other factors that affect the finished output, these include (but aren't limited to!) 3D printer set-up (build & configuration), accuracy, part geometry, part size and the type of material used.
In the case of the coupling above, one of the main reasons that printing at 20 micron layer height produced a worse finish was mainly due to the small surfaces in the main section. When printing at lesser microns, you are putting more layers down. As the surface area is relatively small on the groves, what we see is the effect of heat transfer / disruption from the current layer on the layer previous, whereby the heat from the nozzle when applying layer 3 on top of layer 2, has distorted layer 2.
You can see this heat transfer effect reduces as you move up the micron ladder. So at 60 microns, there is some minor distortion and at 180 microns there is none, and we see a good quality print.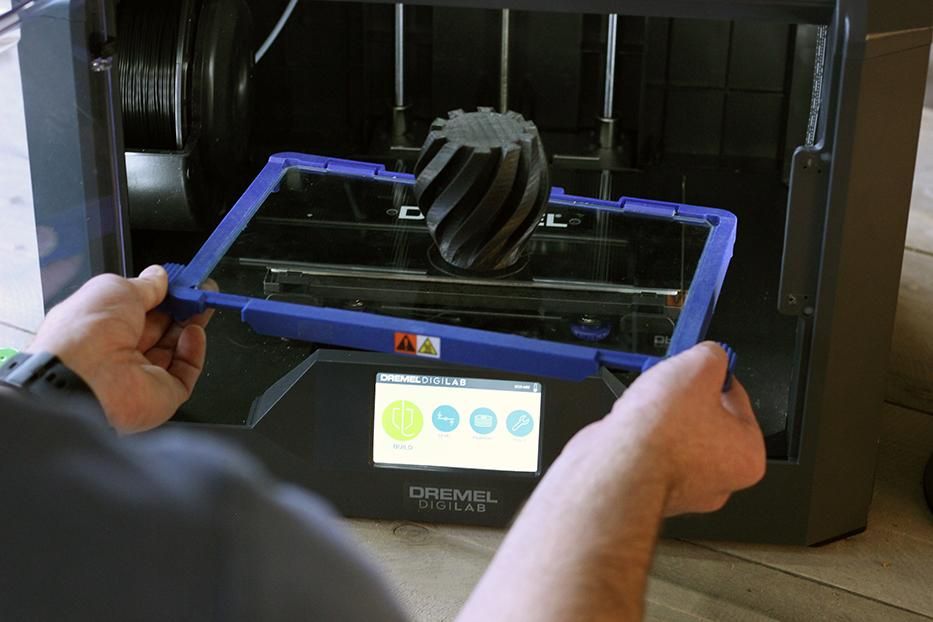
In our experience, the best practice is to select your layer height according to the model shape and your desired output.
For example, the model such as the 3D Hubs Marvin keyring pictured, due to its size and the fine detail is best 3D printed at a lower layer height, in this case 80 microns (part source: 3D Hubs Thingiverse Thing 215703).
However, printing the same Marvin model in ColorFabb woodFill needs to be printed at a increase layer height, in this case around 270 microns because of the material properties.
Both outputs produce a good quality print, but are from opposite ends of the micron scale.
Think about microns in the same was as you would think about mega-pixels in cameras - more doesn't always mean better! There is a whole load of other factors that will impact on your output. The key is to find the printer that is designed to do the job you need, rather than hunting for the theoretical "best of everything".
If you already have a 3D printer, then it is a case of learning! In addition to the part's geometry and size, you also need to consider your printer's capabilities and set-up, as well as the properties of the material you are using. You also need to balance the required output versus time, as printing at a lower microns takes longer and as we have shown you above, doesn't necessarily give better results. Sometimes it can just be a case of experimentation until you find the right parameters!
If you are looking for advice on which printer is going to deliver the best results for your needs, then contact the CREAT3D team and we can talk you through the options.
If you'd like to cover off any of the above, or other aspects of 3D printing in more detail, take a look at our training options, including our 1 hour phone / video training, great for a top-up or refresh for £115 plus VAT.
Back to News >
Budget 3D printers for printing with photopolymers / Habr
tedbeer
Gadgets Computer hardware
While there are already a great many printers for printing with molten plastic, until recently there were practically no amateur printers printing with photopolymers.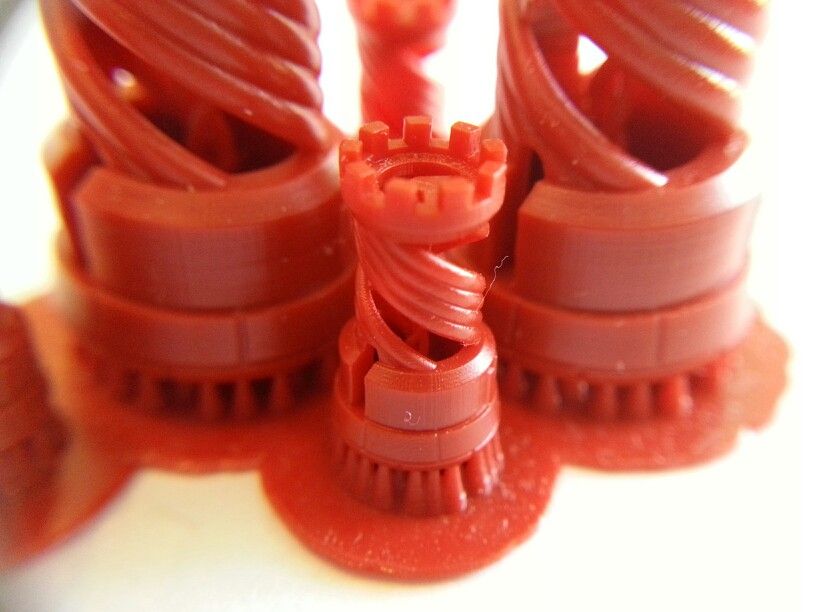 The main advantage of such printers is high resolution, smooth surface of the product, which practically does not require additional processing. The price tag of professional printers goes off scale for tens of thousands of dollars. But now printers have begun to appear in the budget category.
MiiCraft
Miniature printer based on DLP pico projector. The photo above shows that the device includes two parts - a printer and a fixative (provides additional illumination of the printed model, although this can be done just in the sun) While blue and transparent polymers are available, others are being developed.
Projector resolution : 854 x 480
Printable area : 43mm x 27mm x 180mm (XYZ)
Product size : 20.5cm (W) x 20.8cm (L) x 3.5cm30012 Resolution : 56 microns in XY, 100 microns in Z
Print speed : 2-3 cm per hour
Price of resin : $250 per kilo ($0.25 per cubic cm) 90 micraft. com
Printer Price : $2000
Project Status : By mid-June of this year (2012) it is planned to complete the construction of samples and start a fundraising campaign for production on the site indiegogo. com.
com.
B9Creator
Projector resolution : 1024 x 768
6-100µm Z (software selectable)
printable area at 100 micron precision: 102 mm x 76 mm x 203 mm (XYZ)
printable area at 50 micron precision: 51 mm x 38 mm x 203 mm ( XYZ)
Product size : 79 cm x 47 cm x 30.5 cm
Print speed : 12~20mm per hour
resin price : $99($132 for international orders) per kilo ($0.10 per cc)
printer price (complete assembly kit plus 1kg of resin): $2375 ($2675 for international orders)
Project website : b9creator.com
Youtube channel : user:B9Creations
Project status : Kickstarter is collecting money until June 12th. The entire amount has already been collected - $ 232,750 (it was necessary $ 50k).
Prices shown are current on Kickstarter. What will happen after is unknown. So hurry, there's still 10 days left. The current plan is to complete production and delivery by the end of August. After that, drawings and software will be released to open source.
Veloso 3D
At the moment, funding has failed, perhaps another attempt will be made.
Printer from Singapore. It prints with high quality, a lot of positive reviews, the price is much lower than commercial ones. But, apparently, the price per whale was not low enough, or a high bar was ordered to finance the project. As a result, the funding failed, despite raising $45k of the $300k required on the first day.
Print area : 150 X 112 X 200 (XYZ)
Resolution : 100 microns in XY, 15 to 100 in Z. Accuracy can be further improved by reducing the print area.
Price of a complete set of (everything needed for construction, software, plus 1 kg of polymer): $4000 (there were cheaper options for incomplete kits)
Price of polymer : up to $150 per kilo ($0.15 per cubic cm) veloso3d
Project status : Indiegogo. com fundraiser failed.
My previous related posts:
A quick tour of 3D printing techniques
New budget 3D printer
First 3D printing event in the Netherlands
3D printing event: 9 006 (end) June MiiCraft started fundraising. You have 44 days until July 20 to participate and get an interesting high quality printer.
Tags:
- 3D-printing
- 3D printer
Habs:
- Gadgets
- Computer iron
total votes 112: ↑ 108 and ↓ 4 +104 9000 49
TedBeer @TedBeer
User
Comments Comments 49
3D print layer height: how important is it?
3DPrintStory 3D printing process 3D print layer height: how important is it?
Layer height is actually the height of each layer of plastic, extruded, vulcanized or sintered on a 3D printer.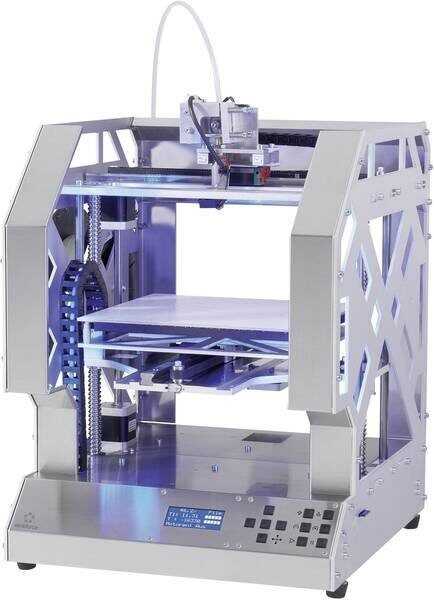 This setting is configured with your slicer and has a much larger impact on the final 3D printed model than it might seem at first glance. When used correctly, this setting will increase the speed, resolution, and quality of 3D printing in general.
The height of a 3D printed layer is usually measured in microns. One micron is equivalent to 0.001 mm.
Things to watch out for when playing with layer height on FDM printers: a thinner vertical layer results in a thicker horizontal line, and a thicker vertical layer results in a thinner horizontal line. This can reduce horizontal accuracy, especially in small moving parts.
Different printers have different maximum layer height resolution. The standard minimum height is typically 50 to 100 microns (0.05 to 0.1 mm). Cheaper 3D printers usually do not have such high accuracy. In printers such as the Anet A8, the minimum layer height is 100 microns (0.1 mm). Therefore, when buying a 3D printer, you should consider the minimum layer height.
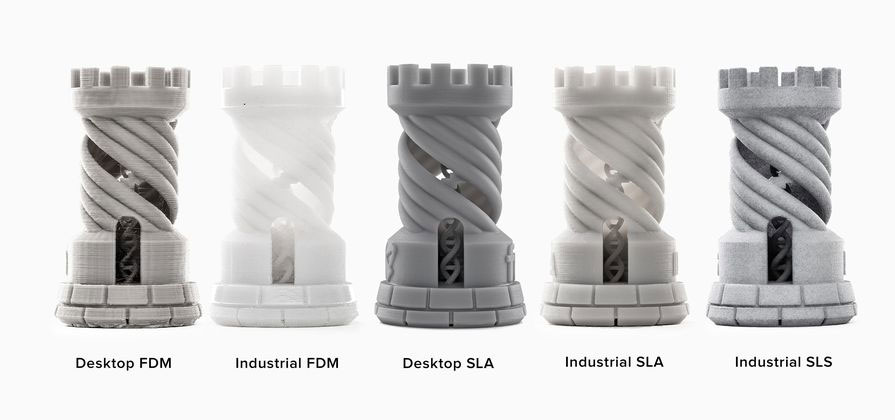
SLA and laser 3D printers typically have a much lower minimum compared to FDM printers, which explains the insanely detailed models they can print.
Optimizing 3D print speed
One of the most common reasons for changing 3D printer layer height settings is to increase 3D print speed. The higher layer height means the printer doesn't have to print multiple layers to achieve the same overall height, resulting in much faster 3D printing.
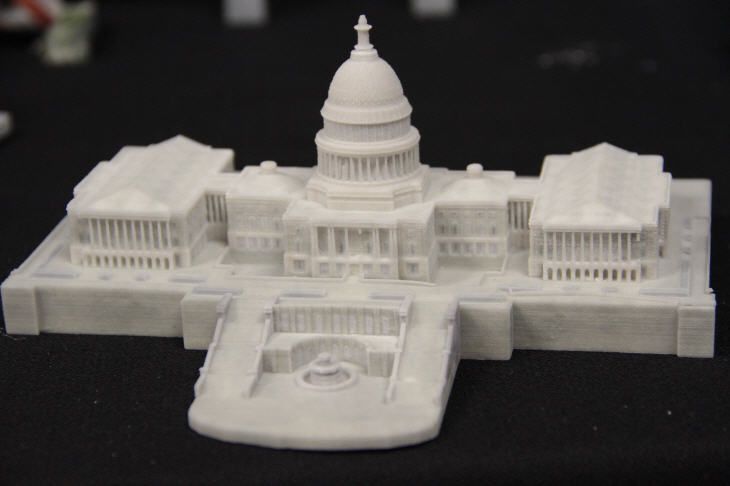
In general, increasing the layer height reduces the resolution and print quality. Thus, this "trick" is best suited for large 3D models, where close-up details will either be ignored or corrected during any post-processing.
Layer height can be optimized for each model separately to achieve maximum print speed while maintaining a specific resolution. However, this is something that should be judged individually for each 3D printer, as effective 3D printing will require some play around with the settings.
Increasing resolution
A little-known fact in the 3D printing community: most 3D printers have higher vertical resolution than horizontal resolution. Why? The lead screws provide your 3D printer with a much more precise vertical position than the drive belts used for other axes. Thus, the printer can create sharper patterns in the vertical plane than in the horizontal plane.
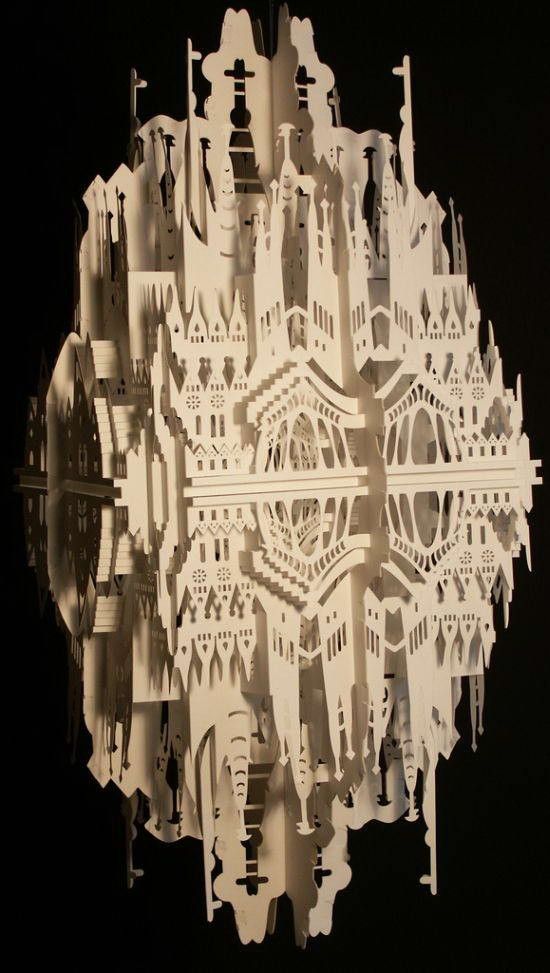
This is one of the reasons why aaskedall's "Fillenium Malcon" model is so popular (among Star Wars enthusiasts). It is because of the presence of such amazing details that can be implemented on a huge number of 3D printers.
A lower layer height on your 3D printer will, of course, slow down printing, but the printer will apply more layers for a given height, resulting in much higher detail.
Smoothing the Surface
Another use for the extreme detail available at lower layer heights is to smooth 3D models. With a lower layer height, they become less noticeable, and the details become smoother.