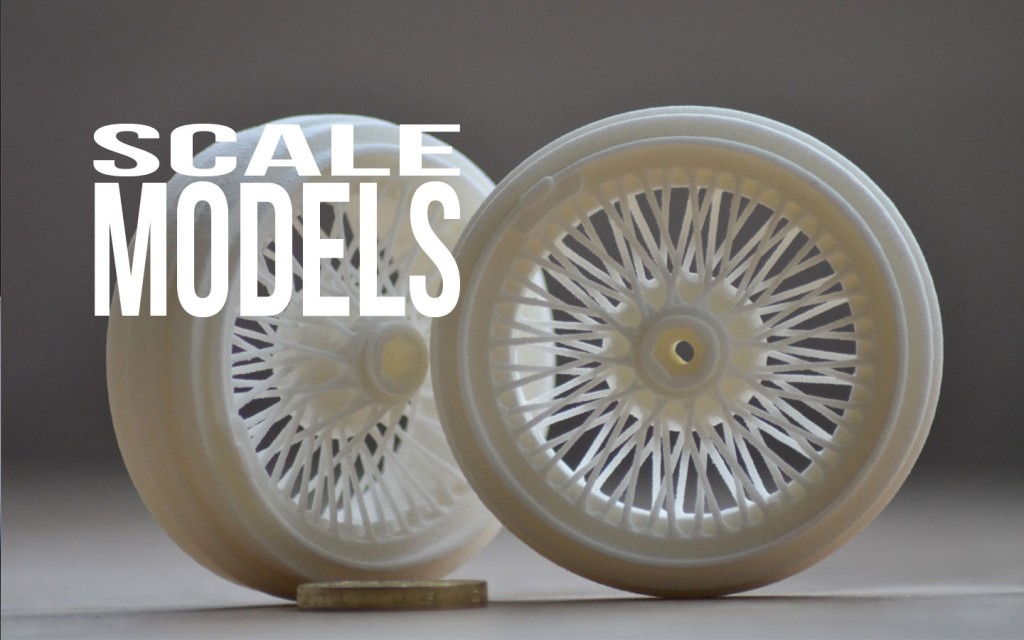
Scale model 3d printing
3D Printing for Scale Modeling
Introduction
[NOTE: We previously published this feature as a ten-part installment describing what we were experiencing as we delved into the world of 3D-printing. Rather than continue down that format, we consolidated the key points into this overview, and we will deal with individual projects as separate features or reviews.]
Well over 30 years ago, a friend used to build models of an air defense gun system, and he’d make masters of the key components and cast them in resin. The problem was that there was no good way to cast the structural frames, but he had access to some industrial 3D printers (which were new at the time) that could make those solid frames with minimal time and effort. Unfortunately, 3D printers at that time were more expensive than houses, so they were limited to industrial applications. Fast forward a decade or two and companies like Makerbot came on the scene with hobbyist-level 3D filament-based printers.
I jumped into the 3D printing world with the wood framed Makerbot Replicator 1 after hearing how the company was creating end-to-end solutions for their 3D printing ecosystem. Their concept was great, but the execution was lacking. At the time, their extruders (melts the filament and ‘draws’ it onto the print table) were not reliable and mine failed a short time after purchase. They did create a vast library of items to 3D print in their Thingverse, which is still operational today, but they never released a CAD program which could help a creator make their own designs to print. My Makerbot still sits in my office to remind me about jumping into new technologies too soon.
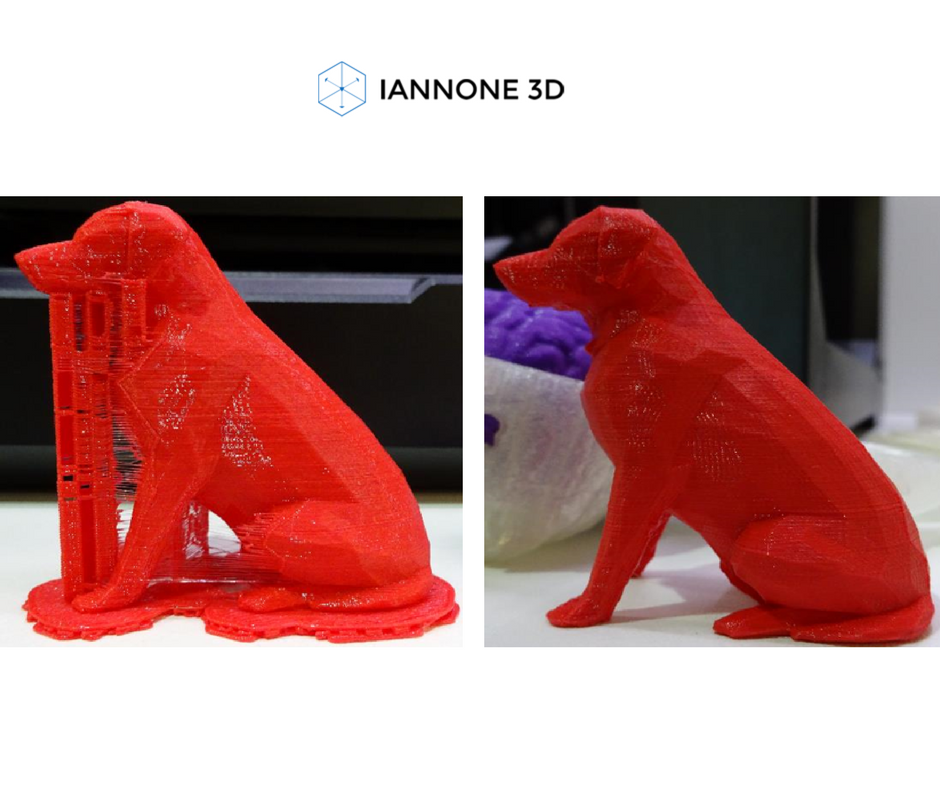
Since that time, I’ve watched those with the talent and resources create mold masters using 3D printing and how their masters have improved in resolution over the years. More recently however, a new generation of cottage industries have emerged selling their 3D prints directly off their printers instead of casting them from 3D-printed masters.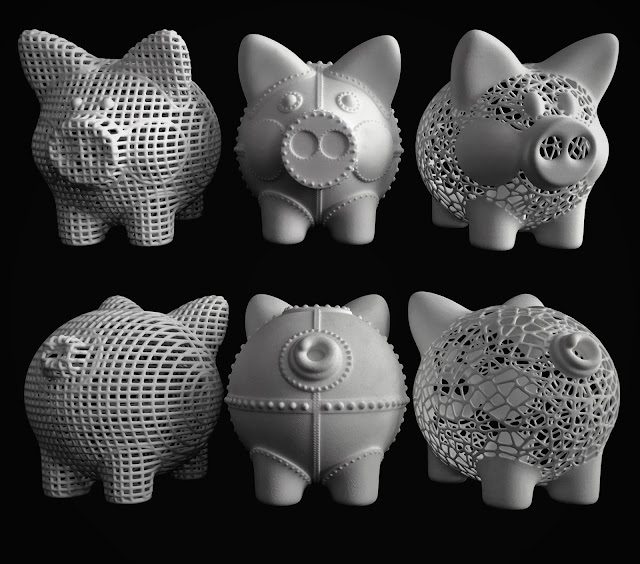 Look at the details produced by companies like Anyz and Metallic Details. The technology has advanced to the point where resin-based 3D printing is now viable and inexpensive.
In addition to resin 3D printing, the filament-based printers have also improved in resolution and reliability while coming down in cost. The resolution of filament-based printers has yet to come close to those of resin printers, but there are a variety of applications where using filament-based printers are faster and more effective. In an ideal setting, you’d want to use both technologies.
In the last year or so, yet another form of 3D printing has arrived on the scene, and this involves printing resin onto decal material to replicate cockpit or cab interiors while creating the effects in three dimensions. Some folks have used a simpler process to create 3D rivet details for scale modeling like those from Archer Fine Transfers, but nothing compares to the custom cockpit sets produced by Quinta Studio.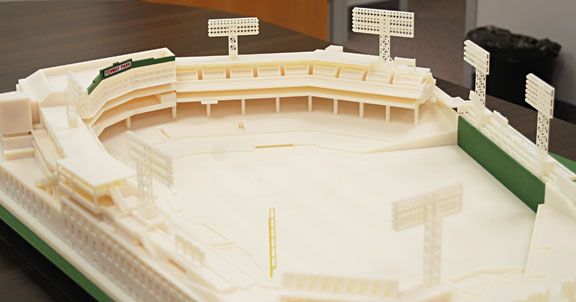 In addition to the printing processes, the replication of the 3D details unique to each cockpit in addition to the colors and even glossy effects for instrument faces is impressive, then transforming those details into decals that are custom fit to specific kits from specific manufacturers. Now that is custom printing, but I digress…
I recently saw a video ad on Zuckbook that highlighted another 3D printing technology. I watched in a mixture of fascination and disbelief as they were trying to portray a vacuform machine as a 3D printer. Okay then…
Choosing a Printer and Infrastructure
As far as 3D printing is concerned, where do I begin? Filament or resin? While I’ve read and viewed a variety of 3D printer reviews, I found some of them to be as useful as asking drivers which is better: Mustang or Camaro? They are both good, they both have their pros and cons, but nothing that distinguishes one from another. So, I asked around and some were kind enough to share what they use to replicate their high-resolution resin prints/products.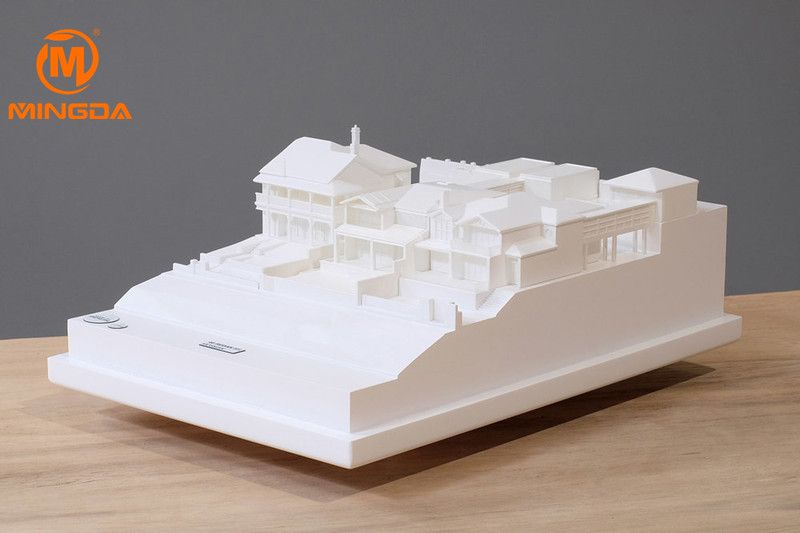 The standout for me was the Phrozen Sonic Mini 4K which is a small printer that costs roughly $350. For me, this would easily print the parts I want over the next several months and let me learn how to use the system before I get the larger system that will also print in high resolution. Some of my conversions/corrections are larger, but I need to walk before I can run.
I ordered the Phrozen Sonic Mini 4K and noted in many of the articles I’ve read/viewed that there a variety of things I’ll need to make this process work. It is more than just the printer; you need some infrastructure. One enhancement to the printer that caught my eye was installing a removable flexible build plate. It is a metal sheet cut to the shape of your printer’s build plate and held in place by a magnetic sheet on the build plate. The flexible build plate is easy to remove to facilitate easier access to your printed objects with less dripping resin than trying to work with the full build plate assembly. I ordered one from Whambam (whambamsystems.com) along with their large silicon ‘slap mat’ which protects your workspace from resin drips/spills.
A complaint that comes from the resin 3D printing community is that the resin prints may stick to the FEP film on the bottom of the resin vat. This is a clear film that is mounted to the vat to allow each UV pixel on your LCD screen to reach the resin above. That brief exposure creates a pixel-sized solid to form that will stick to the build plate and/or previous layer(s) of solidified resin. When the built plate pulls up the exposed layer to make room for the next layer, there may be a ‘pop’ noise as the solidified resin pulls free of the clear film. One solution to this that I used from the start is applying a PTFE lubricant to the FEP film inside the vat to make it stick-free like Teflon. That layer must be extremely thin to not obscure the LCD UV light, and you need to use a microfiber towel to spread PTFE powder as well as keep fingerprints and other contaminants off the FEP film without scratching that surface.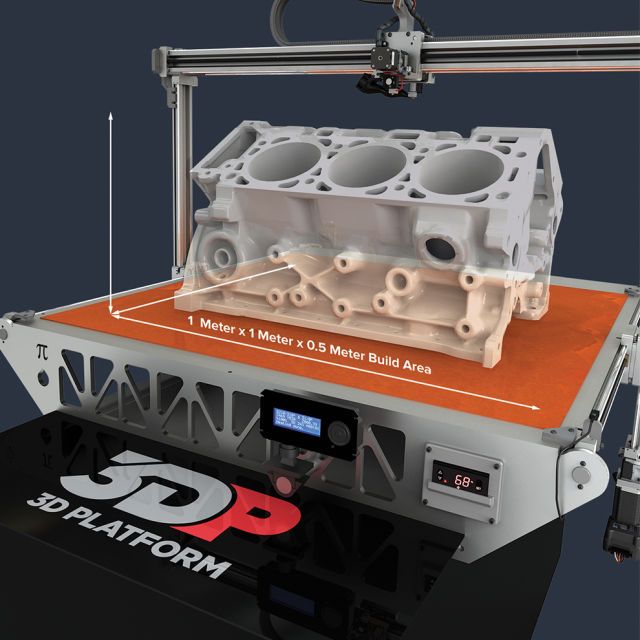
Oh yes, a friend who uses the same resin printer said that he has stopped printing really small parts for the winter. The printer still works, but there’s one thing I didn’t learn until getting deeper into the instructional videos – the resin doesn’t work well below about 80 degrees Fahrenheit. Like motor oil, the resin gets thicker as it gets colder. It will still work, but the finer details don’t print as clearly as when the resin is warmer/thinner.
From the experts, you’ll need a supply of Isopropyl Alcohol (abbreviated as IPA, but not to be confused with the adult beverage). The IPA (91% or greater) will help clean off excess resin off of your prints. You can remove any drops of resin that drip onto your printer, tabletop, or whatever with the IPA as well. You’ll want to clean any excess resin off of your parts before the resin starts to cure and leave unwanted blobs on your work.
Once your printed part is clear of excess resin, you need to put the object(s) into a UV light booth which will cure the resin. I found a nice booth with turntable on Amazon, and it worked great for a while, but it cracked when a later printed part fell off the turntable and shattered the bottom of the booth. I put one or more parts on the turntable and set the timer for five minutes (300 seconds). When that cycle is finished, turn over the parts and run them through the process again. If the parts remain tacky after curing in UV, you might either run them through the process again, or set them by a window so the UV from sunlight can finish the job.
Speaking of sunlight, wherever you set up your printer, do not put it near a window and keep the cover over the printer whenever there is resin in the vat. I’ve seen a few photos of resin printers that were operated without their covers near a window and the result looked like the printer was used to mix concrete as the resin cured in the sunlight while the printer was in use. Recovering from a disaster like that won’t be fun/inexpensive.
The experts warn not to use paper towels to clean your printer vat bottom (FEP) as they tend to leave small debris that will get into your resin prints, and they’ll scratch the FEP film. They recommend microfiber towels, but I don’t want to wash the used towels as that will leave uncured resin contamination in my washer/dryer/other clothes. I found that the blue shop towels don’t scratch, are disposable, and I’ve been using these instead of paper towels for my regular scale modeling as well.
One other essential to have with your printing is a supply of Nitrile gloves. Your printer usually provides two gloves, but you don’t want to reuse them once they’re contaminated with resin. Most people will have reactions to the printer resin, so you don’t want to have direct contact at all. Amazon sells a box of 100 Nitrile gloves for very little cost and if you do get into the printing hobby, you’ll go through a box of gloves in a week or so.
This covers most of the infrastructure you’ll need to print safely, but there is far more to do before you have a print file on a USB thumb drive ready to print.
Get Started Printing
To get a 3D print file ready for printing, you need to have a tool that analyzes the 3D file for integrity, then sets up the necessary sprue supports to hold the object being printed to the print plate.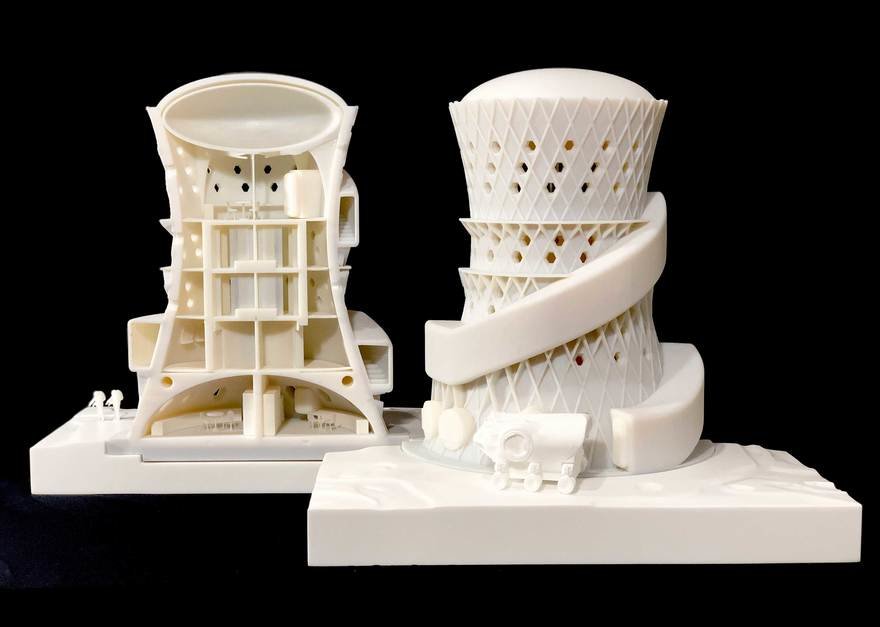 The Phrozen series of printers use/recommend Chitubox. Chitubox is one of the more popular tools out there and they developed the software inside the Phrozen printers, so it was a simple choice. You can go out to YouTube to watch tutorials on Chitubox, and you’ll be amazed at just how simple this tool is to use. When you’re finished setting up the print file, then you can hit the SLICE button, and you have the print file to load on the USB drive and be printed. In a nutshell, Chitubox converts a 3D CAD file into a number of very thin slices which the printer will render, one layer at a time, until the original 3D shape is replicated on your build plate. Chitubox is free, but a more feature-packed version can be purchased as well.
Phrozen provides a test file to print on a memory stick included with the printer. My workshop had warmed up to about 70 degrees, 10 degrees below the 80-degree minimum reported online, but what was the worst that could happen? I initialized the printer, calibrated the Z-axis, and after listening to the stepper motor whine, I applied some of that PTFE lubrication powder to the jack screw that drives the print table. That dulled the whine down quite a bit! It was finally time to print the test file. Much to my surprise, the test file was a rook figure rather than the ring that had been provided to previous Phrozen printers. According to the LCD panel, it would take a little over two hours and 700 print steps to complete the figure.
I came back about two hours later, just as the printer was finishing, so I donned some nitrile gloves and when completed, removed the flexible build plate from the magnet mounted to the build table and looked the rook over. There was still a light coat of resin liquid on the rook (as well as the build plate and build table) so I flexed the build plate over the ultrasonic cleaner and the rook dropped right off. The cleaner had been filled with the IPA (not the adult beverage) and run for about five minutes while I cleaned up the excess resin from the build surfaces using IPA on a blue shop towel. When the cleaning cycle completed, I placed the rook onto the turntable inside the UV curing booth, closed the door, and let that run for five minutes, then set it on its side and ran the curing cycle again.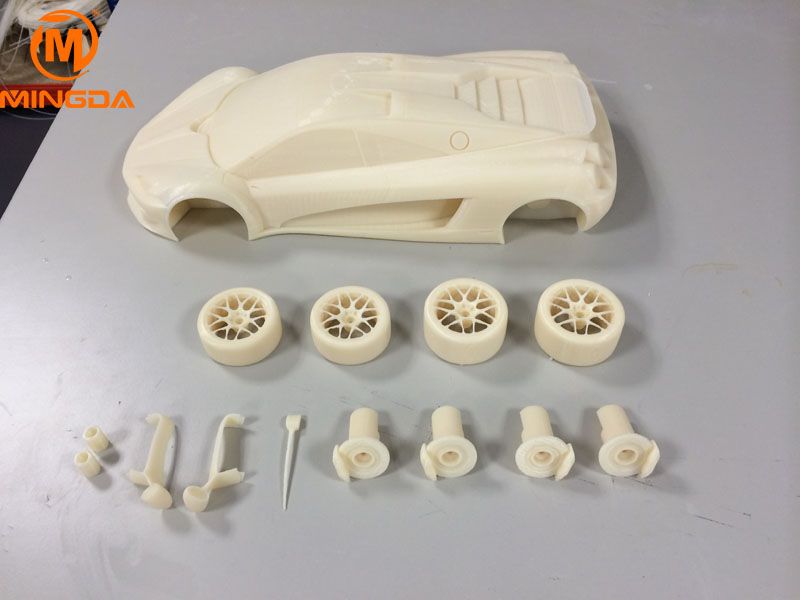
Safety warning: While the IPA did an excellent job of removing the excess resin from the print, my old ultrasonic cleaner didn’t like the exposure to resin-contaminated IPA and the rubber edges outside the cleaner began to break down. I replaced the ultrasonic cleaner with a larger version that could hold some of the larger prints that was also all-metal. While it works great as well, it gets warm during operation, and it also has a heater to warm the cleaning fluid when needed. The IPA was warmed well above its rated flash point during cleaning, and I was fortunate not to have an ignition source nearby as the combination of IPA and ultrasonic cleaner made for a potential fire hazard. I now use a two-step process to rinse the freshly printed part in a tub of IPA, then if needed, put the part in the ultrasonic cleaner with non-flammable cleaner for a rinse, then place it into the UV booth for curing. Do NOT use the built-in heater in your ultrasonic cleaner (if it has one) as that may cause some of the print layers to delaminate.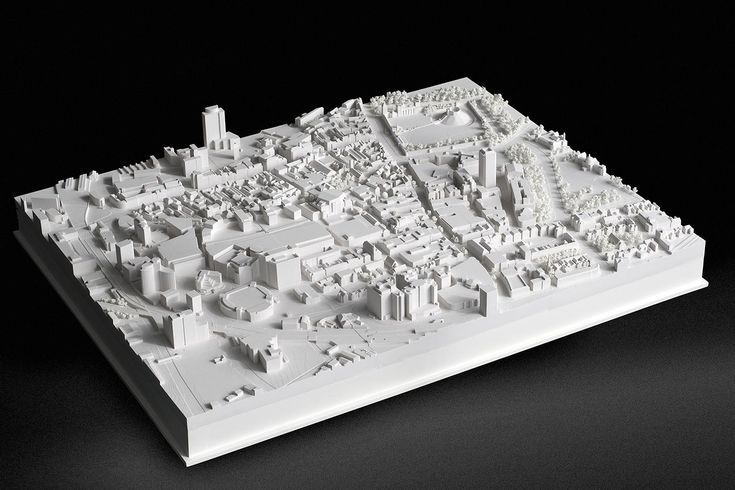 That happened to me once when I used the heater, and I won’t make that mistake again.
Take a look at that rook. From the front, you can see the spiral structure on its exterior and a spiral staircase winding in the other direction inside. For perspective, that rook figure is 1.25 inches high! You can’t see the steps that are typical of many other printers. And this is at 4K resolution – wait until the 8K printers are released next year! In any case, this is just the print quality I’ll need for printing custom parts for my upcoming projects.
Online Print Files
Here’s where we go to one of the many online libraries to access print files. Some of the libraries are free to use, others charge a fee depending on what you want to print. Thingverse (www.thingiverse.com) is an online library of print files that Makerbot established years ago, and while it has a vast array of files to choose from, evidently it is having some issues with some files not being available (404 Not Found).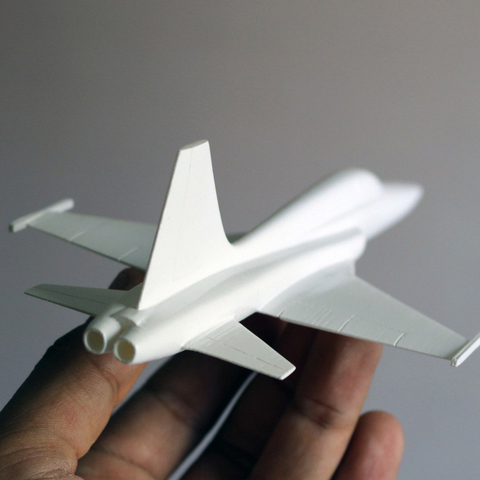 I didn’t run into that, but some folks are reporting issues.
Another interesting (for me) resource is (Gambody (www.gambody.com), which sells print files of high-quality figures and spacecraft. I now have printed several of their subjects, and the detail is good enough that I can take their 1/16 scale figures and scale them up to 1/8 scale, though the resulting figures are heavy.
Another few resources for free and interesting subjects come from NASA and the Smithsonian Institute. They’ve placed quite a few 3D scanned subjects online, some of which have been further processed into printable files, while the rest are available to do that yourself (when you’re more conversant with the software tools out there).
One other resource of note: there is a subscription service called Loot Studios (www.loot-studios.com) that will provide a different group of printable gaming figures each month for a $15/month fee. You can choose their fantasy or science fiction tracks (or pay $30 to access both) and you can download the various figures, vehicles, props, etc. , each month for use at any time, though you must download the group before the next groups replace them. My first group was a series of figures and settings for a Dune-themed world, complete with a sand worm and an ornithopter.
Making My Own Parts
While the idea of printing aftermarket products and others’ models on my own printer is novel, it doesn’t satisfy my basic requirement: I want to build unique subjects that I want on my shelf. In order to do that, I need to develop CAD designs to print for my own custom parts. What if I want to convert the Kinetic F-104A into an NF-104? There used to be such a conversion many years ago that was cast out of the smelly yellow/tan resin and those parts lacked details. If I can CAD up a new nose with pitch-yaw thrusters up front and the new rocket fairing for the tail, I can get there. Zvezda has that beautiful C-130H kit, but I want to build the EC-130H that I flew aboard as an aircrewman when we first brought it into service.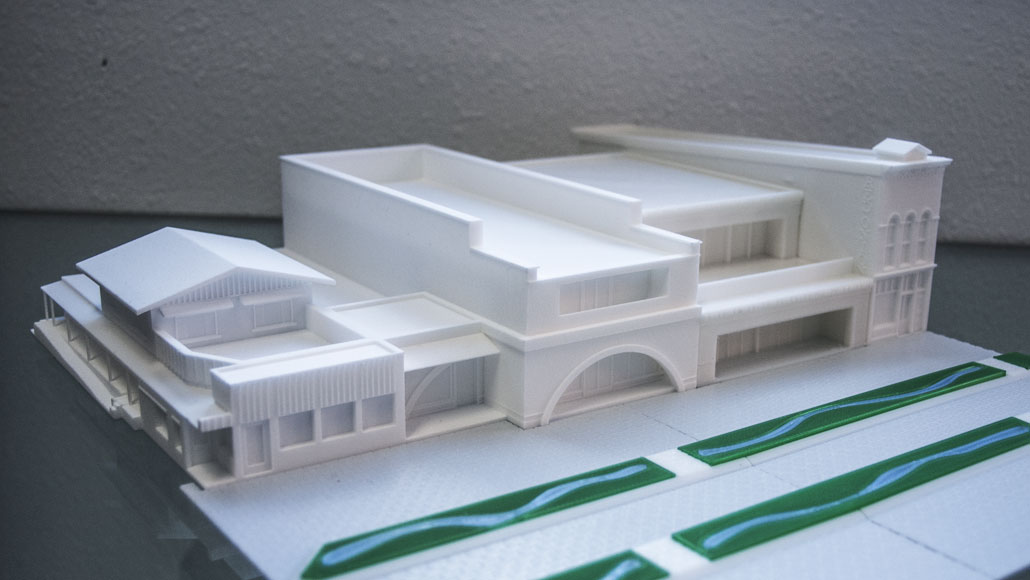 I could go on with my project list, but you get the idea. With the wide range of 3D printers and the relatively low costs, being able to design and print my own parts is more feasible.
The main obstacle to designing my own parts is an inexpensive and reliable Computer Aided Design (CAD) software tool, and the most widely used design tool in the hobby industry is Solidworks. It is widely used in a variety of industries and has been around for many years, but when I first looked at it for my Makerbot (and even more so today), the tools are rather pricey. While they’ve released a far less expensive option with 3DExperience Solidworks for Makers, it is web-based, and it is still going to take some time, effort, and expense to get usable results. There are other CAD tools ‘out there’ that can be used to design parts, and I’m in the process of learning Blender – a free tool that seems to be what I need.
First Experiences
One of the library files I wanted to print was of a rocket engine bell that I could use on one or more of my projects.![]() In the aftermarket for space and sci-fi projects, it is hard to find engine bells usable for different projects, so the prospect of printing what I needed was at the top of my list. I found a usable engine bell on Thingverse and using Chitubox, I loaded the bell, resized it to something smaller, then made two copies. I resized another copy into something smaller and made three more copies of that. In short, I had seven engine bells ready to print together. I ran the design through the 'slicer' a function in Chitubox that tells the printer where to print each layer of resin. Once completed, I loaded that file into the printer and two hours later, here is the result. These are very usable for my needs, but it shows that the default settings for the thickness of each print layer is a bit too thick, so I'll be doing more of these with thinner layers which will do away with some of the 'steps' you see in the print. Nonetheless, when you look at the white plastic engine bell on the right, this is from the old AMT Pilgrim Explorer spacecraft kit and the ends of those bells are solid/closed.
In the aftermarket for space and sci-fi projects, it is hard to find engine bells usable for different projects, so the prospect of printing what I needed was at the top of my list. I found a usable engine bell on Thingverse and using Chitubox, I loaded the bell, resized it to something smaller, then made two copies. I resized another copy into something smaller and made three more copies of that. In short, I had seven engine bells ready to print together. I ran the design through the 'slicer' a function in Chitubox that tells the printer where to print each layer of resin. Once completed, I loaded that file into the printer and two hours later, here is the result. These are very usable for my needs, but it shows that the default settings for the thickness of each print layer is a bit too thick, so I'll be doing more of these with thinner layers which will do away with some of the 'steps' you see in the print. Nonetheless, when you look at the white plastic engine bell on the right, this is from the old AMT Pilgrim Explorer spacecraft kit and the ends of those bells are solid/closed.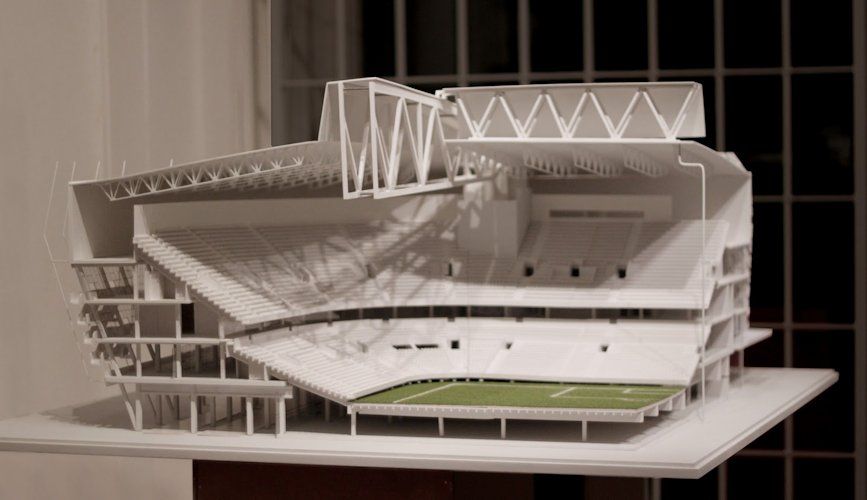 Even after I hollowed them out, they're still a too rough for my needs, so the four small bells will replace the kit parts. Look how thin those bells are compared to a typical styrene part!
What is interesting is that several aftermarket companies are replacing their cast resin detail sets with 3D resin printed parts and you can see the difference in quality. I can see the advantages of being able to use this system to produce details and conversions that other companies won't necessarily tackle. What a time to be a scale modeler!
As I mentioned previously, we've finally reached the point where we can buy aftermarket accessories (print files) online and print them yourself. The items below are the HUD for the Tamiya (or other brands) 1/48 F-14D Tomcat. The image on the left is the CAD design by Anyz, and on the right is what came off my printer.
Some Lessons Learned
- I wasn't impressed with the plastic and metal scrapers that were included with this printer and purchased some silicone squeegees to clean the clear FEP bottom of the resin vat which I had dented a while ago.
 The metal scraper was for removing prints off of the build plate, but since I'm using a flexible build plate, the prints come right off by bending the flexible plate.
 - That clear FEP on the bottom of the vat is very fragile and I put a small hole in the FEP, so I watched a YouTube demonstration of replacing the FEP film on that specific printer vat and tried it myself. It works perfectly.
- I was somewhat surprised that the printer and the flexible build plate conversion both included 600 grit sandpaper. I sanded the print surface of my flexible build plate, but after a number of prints, I started experiencing print malfunctions (the print item would fall off the plate during printing and float around in the resin vat, which could interfere with other items being printed at the same time. Now I know to periodically sand the plate again and so far, I haven't had another print malfunction.
- Another cause for prints to come off the build plate during printing is a bad foundation.
 If you don’t calibrate the Z-axis on a regular basis, one corner or one whole side of your print will not adhere to the build plate and disaster will soon follow.
 - Of course, my spousal unit wanted a few prints out of that thangs.com library, but my first attempt at this was a horrible failure. Remember that scene in ‘Star Trek: The Motion Picture’ where the transporter malfunctioned, and the two folks were malformed during materialization? That was the aftermath on my printer as well. My problem was that I wasn't getting enough support framework out of Chitubox, and I didn't have the experience to do this manually. After a bit more research, I opted to upgrade my Chitubox to the Pro version and BAM! - I had a rabbit materialize. Now I'm having flashbacks to Monty Python and the Holy Grail, but I digress...
- As I set up for a new print project, I discovered that some resin had dripped onto the printer and flowed under the vat and over the UV light panel that is used to create these prints.
 In my attempt to clear the cured resin off the screen, I managed to scratch the surface of the screen rendering the printer unusable. At another time, the FEP was somehow punctured allowing resin onto the screen. This time, I tried using one of those orange plastic razor blades we use for folding photo-etched parts and IPA. That worked and the printer was restored to function though with my backup vat while the punctured one awaited its new FEP.
At this point, I've learned much more about what to do/not do with the printer and how to get self-induced problems mitigated. The learning curve is steep and sometimes frustrating, but if I didn't have any problems, I would not have learned very much. I am looking forward to printing more of the figure and spacecraft files from Gambody, as I am fascinated by a new vignette available there: Darth Vader versus Alien Queen. Check that one out! We're still far from finished in this process however, while I can print other people's files, now I need to focus on learning how to produce my own CAD files to print.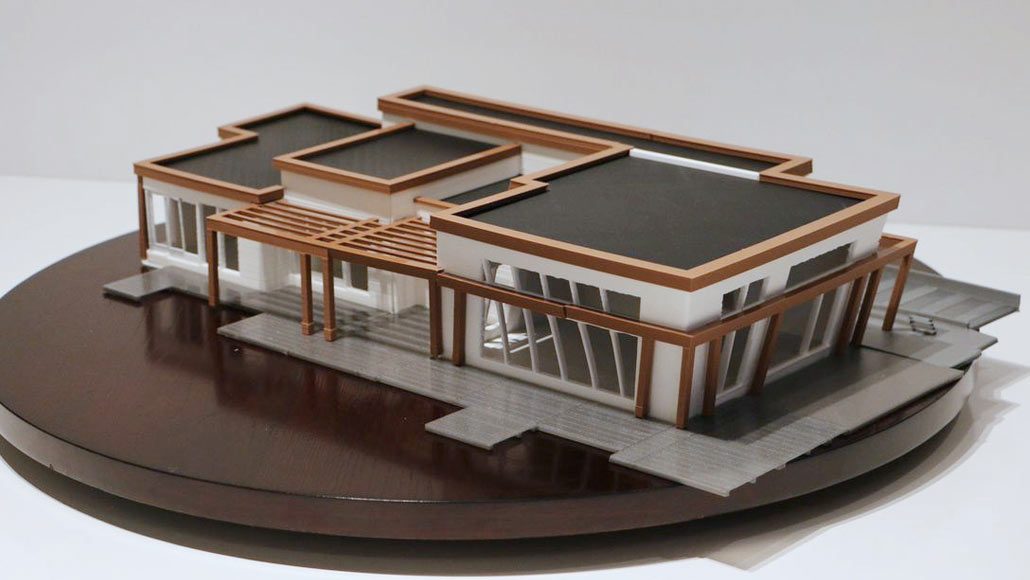
3D Printed Scale Models | 3D Printing Shop
Oops...Seems your browser is blocking cookies. Please adjust your settings to accept cookies.
From model railroad tracks to 3D printed brains, our scale models come in all shapes and sizes. See the world through miniature glasses.
Discover more:
Educational Figurines Model Trains Vehicles
Enter your search here
- All categories
- Art
- COVID-19 Protection
- DIY
- Fashion
- Gadgets
- Games
- Home Decor
- Jewelry
-
Scale Models
- Educational
- Figurines
- Model Trains
- Vehicles
3D Printing
- How It Works
- 3D Printing Materials
- 3D Printing Technologies
- Hire a 3D Designer
- Educational Discount
Business
- Manufacturing Partnership
- Referral Partnership
- White Label Integration
- Crowdfunding
- API
Support
- Contact Us
- Shipping Info
- Tutorials
- 3D Design Tools
Shop
- Shops
- Designers
- Open a Shop
Community
- About Us
- Blog
- Forum
Terms and Conditions Privacy Policy Cookie Statement Sitemap
© Copyright 2022 Materialise nv, all rights reserved.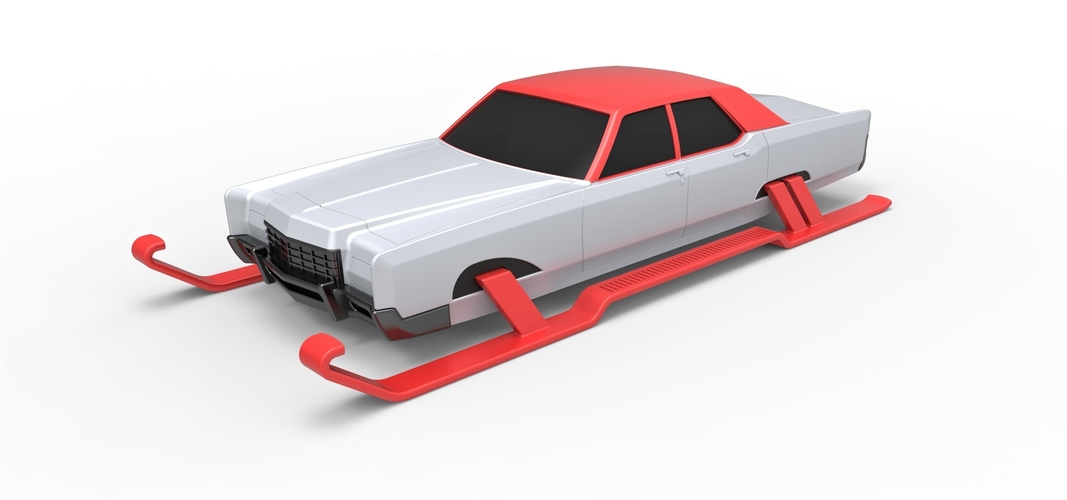 “i.materialise” is a registered trademark of Materialise nv.
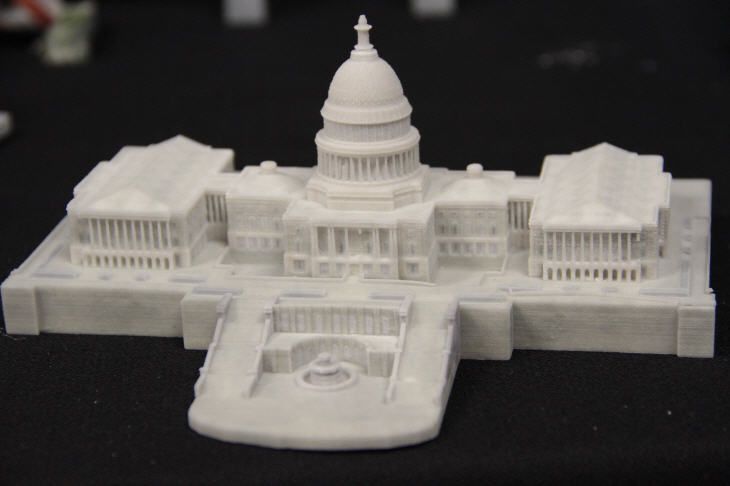
The largest 3D printed city model / Sudo Null IT News
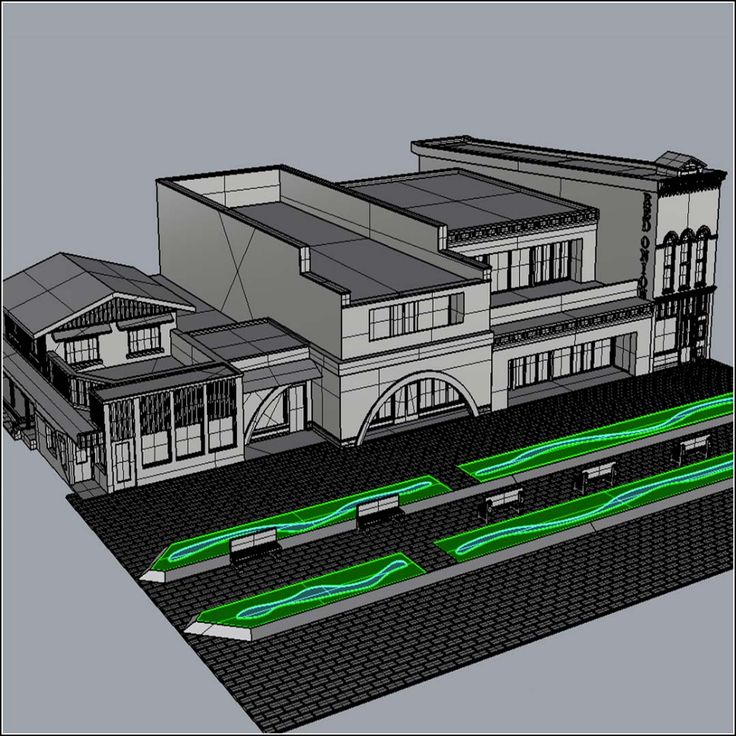
I love cities, 3D models, layouts… A 3D printed city? Perfect! In 2014, the largest printed interactive 3D model of the city was presented in San Francisco, and a year and a half later, this status is still with her. The layout still doesn't cover the whole city, but 115 blocks of northeast San Francisco at 16 micron print resolution and the appropriate level of detail is a really impressive result. I'm surprised no one has posted about this here. I will correct the injustice.
The model was developed by Steelblue, a creative agency engaged in the marketing of large construction projects, under the auspices of Autodesk, commissioned by a large real estate developer, Tishman Speyer. It was made in Autodesk's "creative workshops Pier 9" from VeroWhite photopolymer on two Objet500 Connex 3D printers with a print chamber of 500x400x200 mm.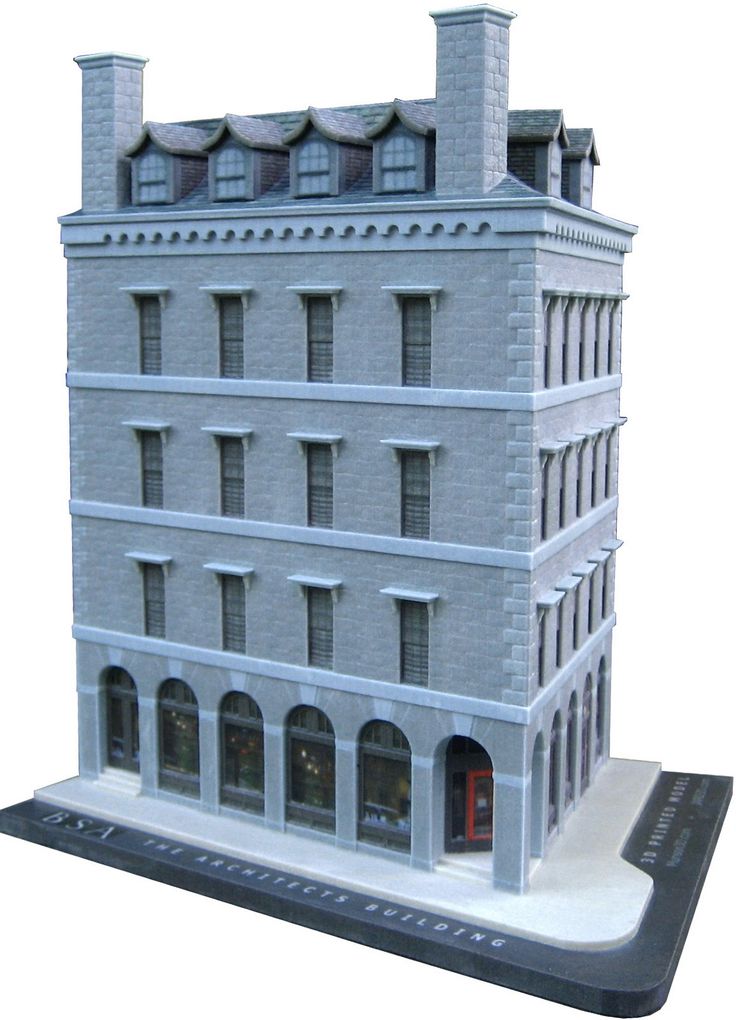 This printer combines a large volume chamber and high print speed with very thin layers, allowing you to quickly and accurately create large parts or even multiple parts in different materials. But even with such equipment, printing took 2 months, 5 days a week, 18 hours a day. The total weight of 68 kg is no joke to you. But there is still a manual post-processing stage, about 45 minutes per quarter.
The 3D model was created from a large amount of heterogeneous data. Topographic maps, and three-dimensional scanning, and photographs, and architectural projects from the archive were used. The covered area includes many local attractions that have been recreated with great care. Modeling took about 6 years: from 2008 to 2014. Even the 3D models of buildings available to the developer from previous projects could not be used: at a scale of 1:1250 and printer resolution, it turned out to be easier to build new ones than to simplify the old ones. The minimum detail size corresponds to approximately 30 cm in the real world.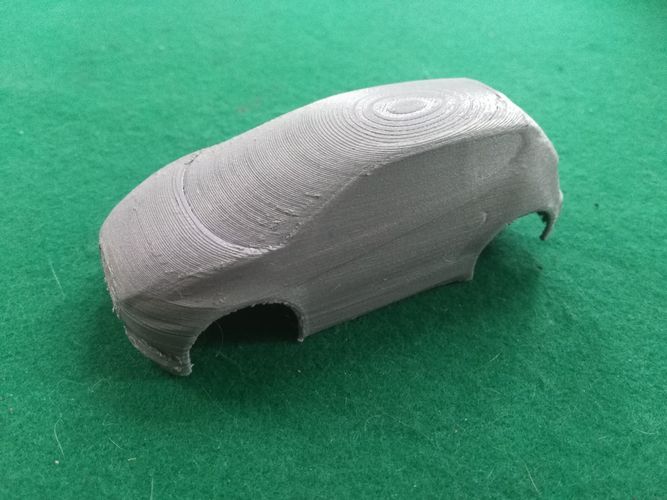
Video of the construction process
The purpose of this large-scale project is to help the developer in urban planning. Any block can be replaced and see what happens. One of the advantages of 3D printing is the ability to easily maintain the relevance of the model. Another advantage is the higher detail, speed of production and low cost than the traditional hand-made layout. The main point of creating a layout in general is that it allows you to feel the space in a way that an arbitrarily realistic picture on the screen will not help. Although the virtual part of the model also plays an important role: the work is going on in it, and the layout itself is used for presentations.
In addition to the city model itself (in the state of 2017, when some large objects will be completed), the kit includes a projector located under the ceiling, which creates an interactive component for every taste. You can overlay future metro lines or roads on the layout (even simulate the flow of vehicles on them), you can sign the streets or display zoning on some basis. You can simulate the movement of the sun across the sky and follow the shadow zones. Only the limits of imagination limit the ways in which the backlight can be used.
Projector demo
The original with all associated hardware and software remains with the customer, Tishman Speyer. In the copy, which will be shown to the public in the Autodesk gallery, the backlight is planned to be built into the table itself from below, for beauty. Steelblue is ready to expand the model with new quarters, develop a more functional lighting option with several projectors, and would also like to print other cities, but with such a laborious work and a cost of several hundred thousand dollars, the San Francisco layout is still unique in terms of coverage of the territory .
Sources:
Presentation of the layout on the Autodesk website, there is also a report on printing in the Pier 9 workshop
A story by Jeff Mottle, owner of the architectural magazine CGarchitect, about Steelblue's work on this object and future plans
Own The site of the main modeler of this project, Jacob Gubler, also contains similar but smaller prints of Boston and Manhattan, as well as a print of San Francisco made of transparent material Veroclear.
3d printing to help collectors. 1:18
Application
Subscribe to the author
Subscribe
Don't want
18
Another application of 3d printing, in miniature. Collecting cars on a scale of 1:18. Not to be confused with toys and car modeling, despite the similarity of genres.
The market for virtual 3d models is currently much wider than the market for scale figures that can be purchased in online stores. With the development of 3D printing, the availability of new thematic 3d models of people on various paid and free resources is growing exponentially. Of course, there is no point in printing a collectible car, since there are options for $ 1000, in metal and with a lot of moving parts, where the manufacturer and circulation are more important, which only increases the cost of the exhibit with age, which cannot be said about the surroundings.
The specificity of the surroundings of objects in this scale most often excludes the possibility of creating dioramas, since they will take up a decent amount of space, preventing the collection from growing on the shelves.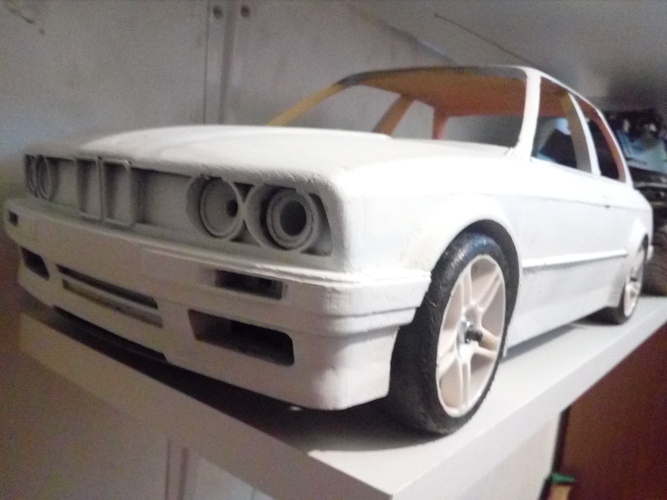 Personally, I have friends with hundreds of cars in personal collections. Well, apparently, precisely because of the constrained circumstances, it turned out that the exposition is enhanced by thematic figures, and not by the details of the surrounding landscape.
The question arises: why do collectors need any entourage at all? Probably for the same reason why numismatists buy big beautiful albums, and do not keep coins in a box. It is much more pleasant to watch another coveted model in a beautiful "wrapper". And, by the way, with regard to cars, a miniature person very well emphasizes the scale of the model, because the relationship with the human figure helps to feel the scale of everything in general that is not presented in full size.
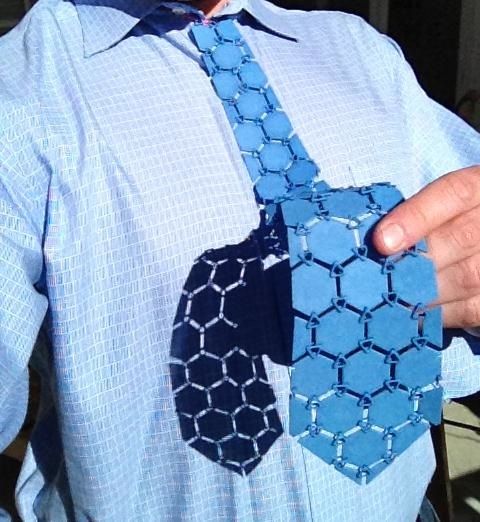
Now regarding 3d printing objects. - police officers, racers, auto mechanics, drivers and of course WOMEN. They are more pleasant to model and print and color. All the girls in the photo were modeled in our workshop and, in principle, are suitable for printing at different scales, although they were originally designed for a different audience.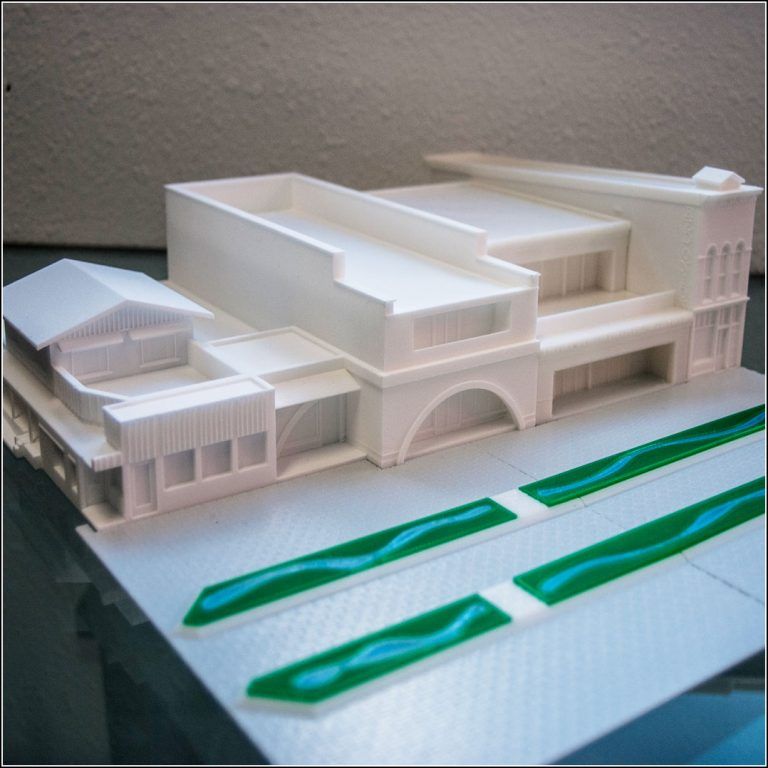
The image of expensive cars in our time is firmly associated with beautiful ladies of the fairer sex, in sometimes revealing outfits. And since the majority of collectors are still men, it didn’t take long to think about the choice of nature.
1:18 scale can be said to be transitional. In the sense that it is possible to achieve an acceptable result with different printing principles. It is possible not to lose heels and fingers when using FDM, and also not to waste too much photopolymer.
I noticed that manufacturers of 3d printers and consumables do not consider such areas as collecting or modeling as their target audience, unlike architecture. The point is that layout architects are very knowledgeable about 3d printing, while modellers, as practice shows, know nothing at all. But in modeling, 3D printing solves many issues than in architecture. Maybe you should pay attention and add on the websites of manufacturers, in addition to education, medicine and architecture, a new field of application - hobbies or scale models.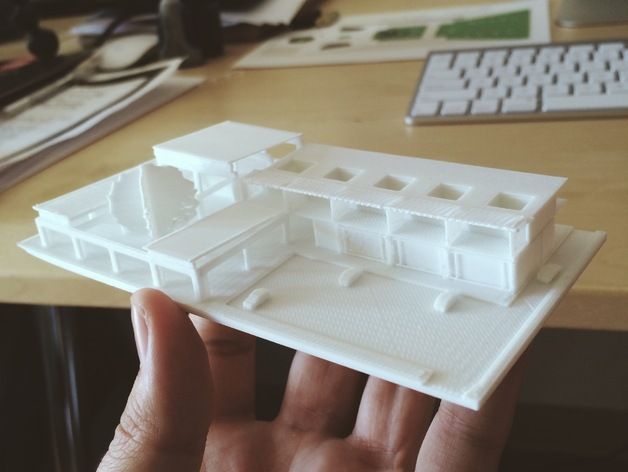
Subscribe to the author
Subscribe
Don't want
18
More interesting articles
xolodny
Loading
05.11.2022
2994
38
Subscribe to the author
Subscribe
Don't want
They contacted me for the manufacture of just such a thing - the gears of the worm drive of the rear wheel ...
Read more
K54115
Loading
11/12/2022
1050
16
Subscribe to the author
Subscribe
Don't want to
I have a bike and it once had the protection of a leading star so that she, the star, does not chew her pants .