100 infill 3d printing
What is the Strongest Infill Pattern? – 3D Printerly
Infill patterns can easily be overlooked when you’re 3D printing but they make a big difference in your quality. I always wonder which infill pattern is the strongest so I’m writing this post to answer it and share it with other 3D printer hobbyists.
So, which infill pattern is the strongest? It depends on the application of your 3D print but generally, the honeycomb pattern is the strongest all-round infill pattern out there. Technically speaking, the rectilinear pattern is the strongest pattern when the direction of force is accounted for, but weak in the opposite direction.
There isn’t a one size fits all infill pattern which is why there are so many infill patterns out there in the first place because some are better than others depending on what the functionality is.
Keep reading to get more information about infill pattern strength and other important factors for part strength.
If you are interested in seeing some of the best tools and accessories for your 3D printers, you can find them easily by checking on Amazon. I filtered out for some of the best product out there, so have a good look through.
What is the Strongest Infill Pattern?
A 2016 study on the found that a combination of a rectilinear pattern with 100% infill showed the highest tensile strength at a value of 36.4 Mpa.
This was just for a test so you wouldn’t want to use 100% infill but it does show the real effectiveness of this infill pattern.
The strongest infill pattern is Rectilinear, but only when it’s aligned to the force direction, it has its weaknesses so keep this in mind.
When we talk about the specific direction of force, the rectilinear infill pattern is very strong in the direction of force, but much weaker against the direction of force.
Surprisingly enough, the rectilinear infill pattern happens to be very efficient in terms of plastic use so it prints faster than honeycomb (30% faster) and a few other patterns out there.
The best all-round infill pattern has to be honeycomb, otherwise known as cubic.
Honeycomb (cubic) is probably the most popular 3D printing infill pattern out there. A lot of 3D printer users will recommend it because it has such great qualities and characteristics. I use it for a lot of my prints and I don’t have any issues with it.
Honeycomb has less strength in the direction of force but has an equal amount of strength in all directions which make it technically stronger overall because you can argue you’re only as strong as your weakest link.
Not only does the honeycomb infill pattern look aesthetically pleasing, it’s widely used in many applications for strength. Even aerospace grade composite sandwich panels include the honeycomb pattern in their parts so you know it has earned its stripes.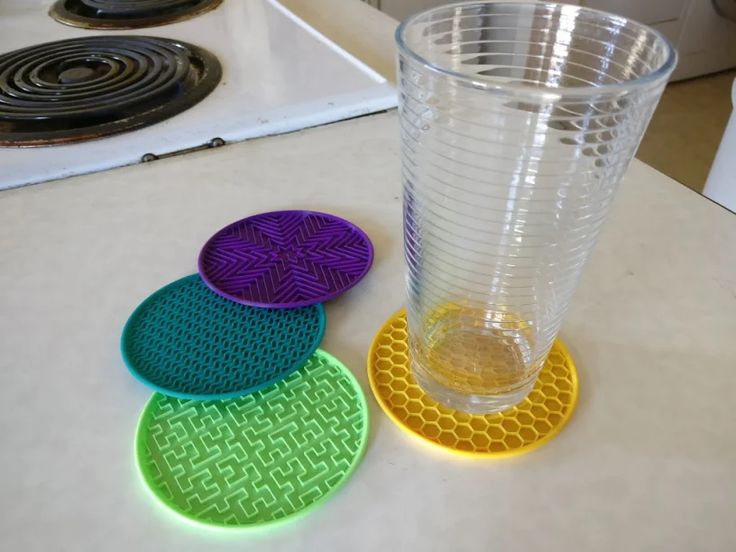
Do keep in mind the aerospace industry uses this infill pattern mainly because of the manufacturing process rather than the strength. It’s the strongest infill they can use given their resources, otherwise they may use a Gyroid or Cubic pattern.
For certain materials it can be quite difficult to use some infill patterns so they make the best of what they can do.
Honeycomb does use a lot of movement, meaning it is slower to print.
What’s your favorite infill pattern? from 3Dprinting
Tests were done by a user to see the influence of infill patterns on mechanical performance and they found that the best patterns to use are either linear or diagonal (linear tilted by 45°).
When using lower infill percentages, there wasn’t much difference between linear, diagonal or even hexagonal (honeycomb) patterns and since honeycomb is slower, it’s not a good idea to use it at low infill densities.
At higher infill percentages, hexagonal showed similar mechanical strength as linear, while diagonal actually showed 10% more strength than linear.
List of the Strongest Infill Patterns
We have infill patterns which are known as either 2D or 3D.
Many people will use 2D infills for the average print, some can be quick infills that are used for weaker models, but you still have strong 2D infills out there.
You also have your standard 3D infills which are used to make your 3D prints not only stronger, but stronger in all directions of force.
These will take more time to print but they make a big difference in the mechanical strength of 3D printed models, great for functional prints.
It’s good to keep in mind there are many different slicers out there, but whether you are using Cura, Simplify3D, Slic3r, Makerbot or Prusa there will be versions of these strong infill patterns, as well as some custom patterns.
The strongest infill patterns are:
- Grid – 2D infill
- Triangles – 2D infill
- Tri-Hexagon – 2D infill
- Cubic – 3D infill
- Cubic (subdivision) – 3D infill and uses less material than Cubic
- Octet – 3D infill
- Quarter Cubic – 3D infill
- Gyroid – Increased strength at lower weight
Gyroid and rectilinear are two other great choices that are known for having high strength. Gyroid can have trouble printing when your infill density is low so it will take some trial and error to get things right.
Cubic subdivision is a type that is very strong and also fast to print. It has amazing strength in 3 dimensions and long straight printing paths which give it quicker infill layers.
Ultimaker have a very informative post about infill settings that gives details about density, patterns, layer thickness and many other more complex infill topics.
What is the Strongest Infill Percentage
Another important factor for part strength is infill percentage which gives parts more structural integrity.
If you think about it, generally the more plastic in the middle of a part, the stronger it’s going to be because force will have to break through more mass.
The obvious answer here is that 100% infill will be the strongest infill percentage, but there is more to it. We have to balance out printing time and material with part strength.
The average infill density that 3D printer users apply is 20%, also being the default in many slicer programs.
It’s a great infill density for parts made for looks and that are non-load bearing but for functional parts that need strength, we can definitely go higher.
It’s good to know that once you get to a very high filament percentage like 50%, it has big diminishing returns on how much more it strengthens your parts.
Infill percentage ranging from 20% (left), 50% (center) and 75% (right) Source: Hubs.comGoing above 75% is mostly unnecessary so keep this in mind before wasting your filament. They also make your parts heavier which could make it even more likely to break due to physics and force because Mass x Acceleration = Net Force.
What is the Quickest Infill Pattern?
The quickest infill pattern has to be the lines pattern that you may have seen in videos and pictures.
This is probably the most popular infill pattern and are defaults in many slicer software out there. It has a decent amount of strength and uses a low amount of filament, making it the quickest infill pattern out there, other than having no pattern at all.
What Other Factors Make 3D Prints Strong?
Although you came here searching for infill patterns for strength, wall thickness or the number of walls has a bigger impact on part strength and there are many other factors. A great resource for strong 3D prints is this GitHub post.
There is actually a pretty cool product that can make your 3D printed parts stronger that is implemented by some 3D printer users. It’s called the Smooth-On XTC-3D High Performance Coating.
It’s made to give 3D prints a smooth finish, but it also has the effect of making 3D parts slightly stronger, as it adds a coat around the outside.
Filament Quality
Not all filament is made the same so make sure you get filaments from a reputable, trusted brand for the best quality out there. I recently made a post about How Long 3D Printed Parts Last which has information about this so free to check it out.
Filament Blend/Composites
A lot of filaments have been developed to be made stronger which you can take advantage of. Rather than using the usual PLA, you can opt in for PLA plus or PLA which is blended with other materials such as wood, carbon fiber, copper and much more.
I have an Ultimate Filament Guide which details many of the different filament materials out there.
Print Orientation
This is a simple but overlooked method that can strengthen your prints. The weak points of your prints will always be the layer lines.
The information from this little experiment should give you a better understanding as to how to position your parts for printing. It may be as easy as rotating your part 45 degrees to more than double the strength of your print.
Or, if you don’t mind the excess material use and long print times, you can’t go wrong with the “solid” print density configuration.
There is a special term called anisotropic which means an object has most of its strength in the XY direction rather than the Z direction. In some cases Z axis tension can be 4-5 times weaker than XY axis tension.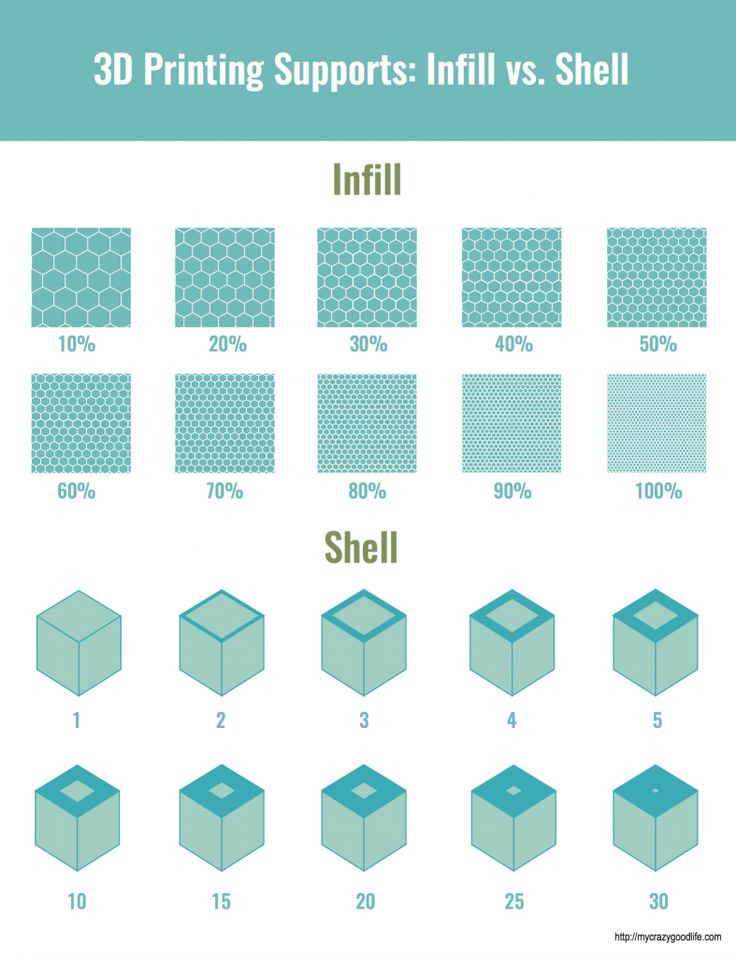
Parts 1 and 3 were the weakest because of the pattern direction of the infill was parallel to the edges of the object. This meant the main strength the part had was from the weak bonding strength of PLA, which in small parts will be very little.
Simply rotating your part 45 degrees has the ability to give your printed parts double the amount of strength.
Source: Sparxeng.comNumber of Shells/Perimeters
Shells are defined as all the outer parts or near the outside of the model which are outlines or outer perimeters of each layer. Put in simple terms they are the number of layers on the outside of a print.
Shells have a massive impact on part strength, where adding just one extra shell could technically give the same part strength as an extra 15% infill on a 3D printed part.
When printing, shells are the parts that are printed first for each layer. Do keep in mind, doing this will, of course, increase your printing time so there is a trade-off.
Shell Thickness
As well as adding shells to your prints, you can increase the shell thickness to increase part strength.
This is done a lot when parts need to be sanded down or post-processed because it wears the part away. Having more shell thickness allows you to sand down the part and have the original looks of your model.
Shell thickness is normally valued at a multiple of your nozzle diameter mainly to avoid print imperfections.
Number of walls and wall thickness also come into play, but already technically part of the shell and are the vertical parts of it.
Over Extruding
Around 10-20% of over extrusion in your settings will give your parts more strength, but you will see a reduction in the aesthetics and precision. It may take some trial and error to find a flow rate that you are happy with so use it to your advantage.
Smaller Layers
My3DMatter found that lower layer height weakens a 3D printed object, although this isn’t conclusive and probably has many variables that affect this claim.
The trade-off here, however, is that going from a 0.4mm nozzle to a 0. 2mm nozzle will double your printing time which most people would steer clear from.
For a truly strong 3D printed part you should have a good infill pattern and percentage, add solid layers to stabilize the infill structure, add more perimeters to the top and bottom layers, as well as the exterior (shells).
Once you put all these factors together you’ll have an extremely durable and strong part.
If you love great quality 3D prints, you’ll love the AMX3d Pro Grade 3D Printer Tool Kit from Amazon. It is a staple set of 3D printing tools that gives you everything you need to remove, clean & finish your 3D prints.
It gives you the ability to:
- Easily clean your 3D prints – 25-piece kit with 13 knife blades and 3 handles, long tweezers, needle nose pliers, and glue stick.
- Simply remove 3D prints – stop damaging your 3D prints by using one of the 3 specialized removal tools
- Perfectly finish your 3D prints – the 3-piece, 6-tool precision scraper/pick/knife blade combo can get into small crevices to get a great finish
- Become a 3D printing pro!
Choosing Infill Percentage For 3D Printed Parts — 3DPros
3D printed parts are typically not produced with a solid interior.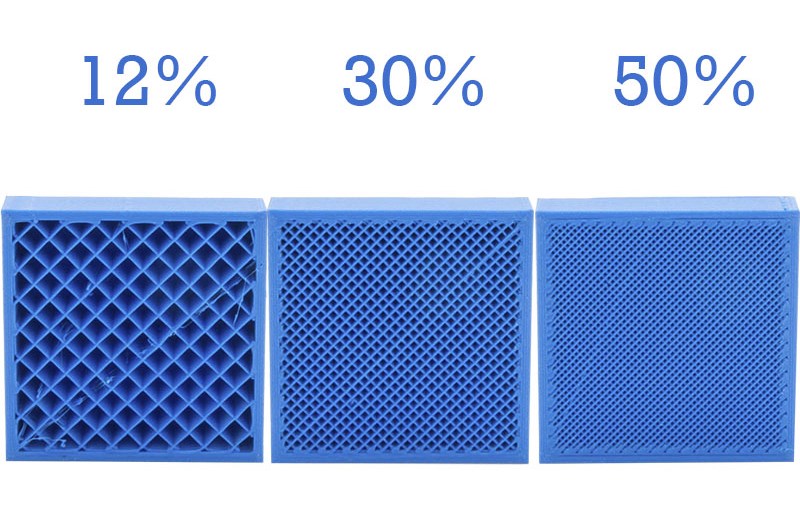 Instead, the printing process uses a crosshatch or other pattern for interior surfaces. This greatly reduces cost due to reduced material usage and print time, while moderately reducing strength. The density of this pattern is referred to as the infill percentage.
The diagram below shows the appearance of various infill settings on a partially completed model. The exposed pattern would not be visible on a completed print.
Use these recommendations to choose the best infill percentage based on the requirements of your project:
0-20%: Non-functional parts: For pieces that are not functional or do not need to withstand force, such as a display model or presentation prototypes, 10-20% infill is sufficient. In some cases, no infill is a viable option if there are no large flat surfaces on the top of the print. If there are large flat surfaces on the top of the print, some infill is needed to support those surfaces.
20-40%: Light-use parts: For functional parts which will undergo some force, a moderate level of infill provides nearly the same strength as a solid part at a reduced cost.
40-100% Heavy-use parts: If your parts must withstand significant forces, or strength is the most important factor above cost, a higher infill percentage is the best choice. However, increasing infill percentage beyond 60% has diminishing returns on strength.
The price difference between higher and lower infill settings can vary greatly depending on the geometry of the model. Models with more interior volume will see a significant impact to the cost from changes in infill percentage, whereas thinner parts may see no impact.
Print speed is another factor to consider when choosing an infill percentage for a 3D print. A higher infill percentage will result in a longer print time, especially on models with a large interior volume.
Also, keep in mind that infill is not the only setting that can impact the strength of a printed part. The thickness of the outer shell and the how the part is oriented when printing are also important factors for the strength of the print. If you print your parts through us, we will help you decide on the best settings based on the requirements of your application.
Want to Learn more about buying your own 3D printer?
Our informational site www.crealityexperts.com is a great place to start! We have used Creality brand 3D printers for years and have been very happy with them
Looking to order 3D printed parts?
You can find a local vendor on Treatstock; a site for small 3D printing businesses to list their services. We have worked with them in the past and had great experiences, and we highly recommend them if you are looking to work with a small business
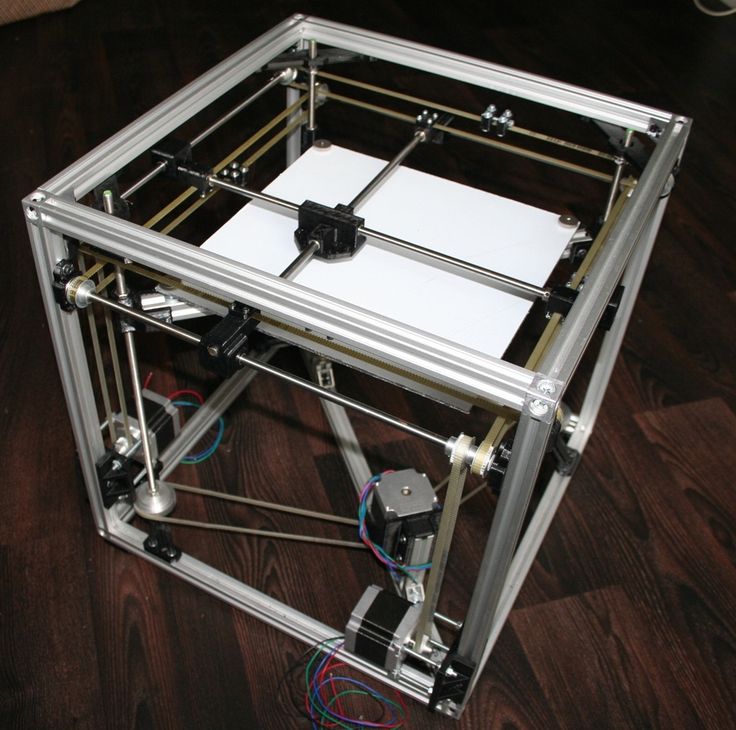
How I printed with 100% infill
3D printing
Good afternoon, evening or morning everyone))
I want to share a story about how I printed a fairly large model with 100% infill.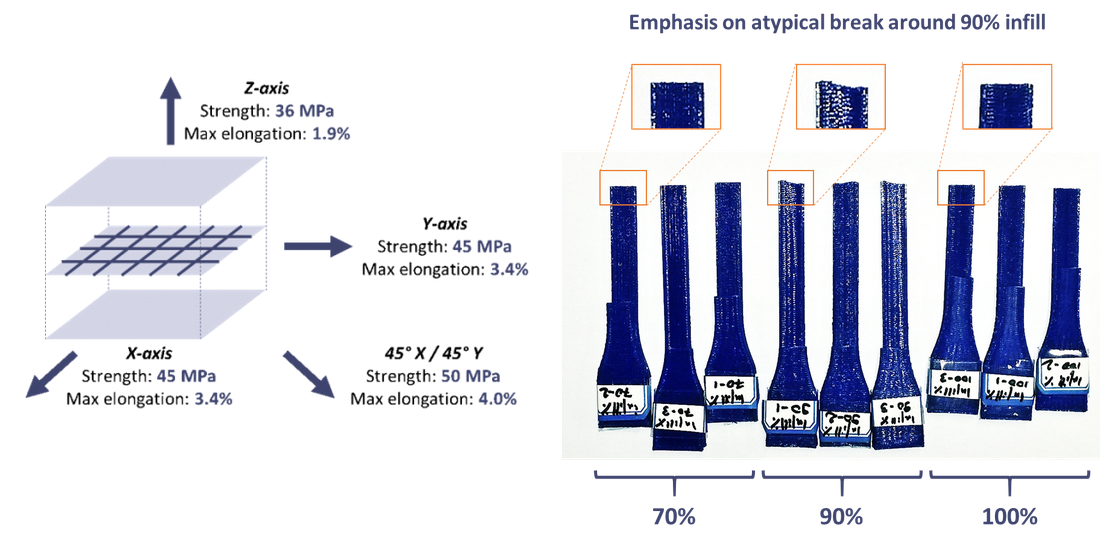
The part is not small. 140mm by 57 65mm high.
I printed ABS FDplast natural (without dyes), I repeat, 100% filling.
Printed on prusa i3 steel of my own assembly. As a heat chamber, there was a 'nano garbage bag' put a mirror on the table. I smeared the mirror with glue with a pencil for a scribble of a small child. (Not advertising!)
After 35%, the printed model began to peel off from one corner, but not critically. (Unfortunately, no photo)
And now, when the model was almost finished printing, all corners began to bend (at 85 percent) The photo below clearly shows this.
After 12 hours of printing, this miracle came out. But not without jambs, of course))
Yes, the wobble is noticeable...
After the table has cooled down, the model itself has come unstuck from the table. Eh... you still have to buy a new glass :)
And here's a close-up detail.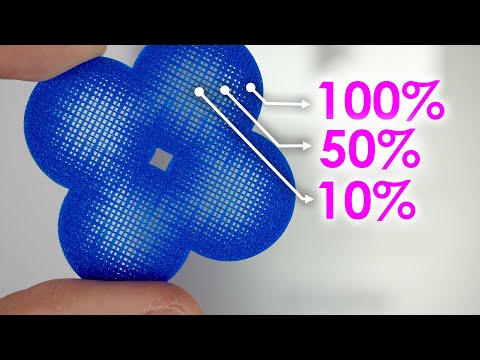 Layer 0.3
As expected. The layers are glued together. But it doesn't matter. I'll cover it with ABS juice and it will be like new))
Table temperature 113
Nozzle temperature 233
Speed 70
I took temperature data from the display. I know that Chinese electronics are not accurate.
This is my first post. Please do not judge strictly and do not throw the remnants of plastic))
Subscribe to the author
Subscribe
Don't want
12
Even more interesting articles
brtv
Loading
10/16/2022
2182
9
Subscribe to the author
Subscribe
Don't want
Hello my friend! Today I decided to assemble a simple pneumohydraulic generator or Generator.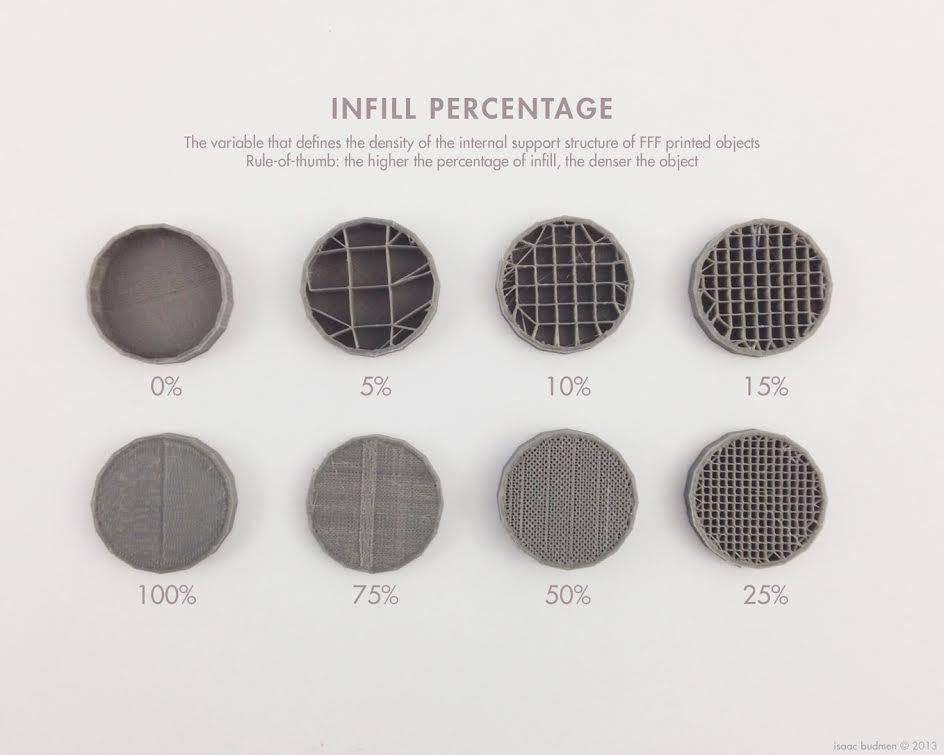 ..
..
Read more
Leoluch
Loading
09/07/2015
353363
343
Subscribe to the author
Subscribe
Don't want
Good afternoon, dear visitors of the portal.
Today I decided not to leave in art...
Read more
198
Subscribe to the author
Subscribe
Don't want
Here I am again :)
With good and joyful news.
But first I want...
Read more
what is it and how to do it? Infill Percentage
Internal infill (model infill) is used to achieve strength, structure retention, and a certain weight of the finished printed model. This factor plays a very important role in 3D printing. There are many types of filling and its characteristics. Let's try to figure out what they are for and how to choose them.
Purposes of filling
Filling the model initially has the function of sealing. But at the same time, it also changes the weight. The 3D printer prints flat horizontal edges more accurately over the void. Models without filling do not have a reliable structure, stability. Such models are fragile.
Thus, infill can be considered the most important factor in 3D printing.
Filling can be of different shapes, weights, styles and even patterns. Infill optimization may seem like a daunting task, but with some knowledge and customization skills, the result will be excellent.
Fill style
Fill can be done in different styles. Each of them has its own advantages and disadvantages. Each variety will be applicable in certain areas. There are several samples that can be considered standard.
Filling should not be chosen for aesthetic reasons. The fact is that the filling will occupy the internal space of the model, and therefore the key factor should be to improve the quality of the finished model. Patterns that consist of grids, lines, honeycombs, concentric or rectilinear patterns are considered the best. If all settings are set correctly, then the volume between the gaps for 3D printing will be sufficient. As a result, 3D printing on voids will be accurate and less prone to errors.
Infill density
If you have chosen an infill pattern, then you need to decide on the saturation, that is, the density of the infill. This indicator will be measured in%. In this case, the zero value will correspond to a hollow model, and 100% full-bodied, that is, solid 3D printing. Between these indicators, many options are possible, and adjusting this indicator will save money, change the weight of the product.
20-25% filling is considered standard.