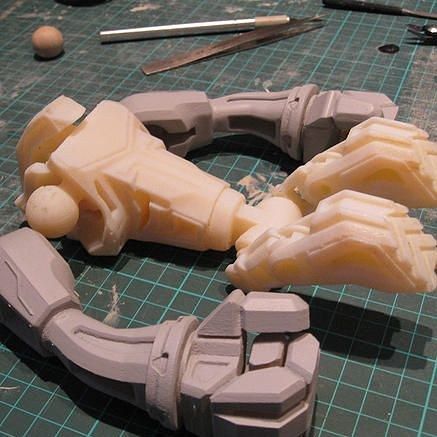
Wrench 3d printer
Wrench best 3D printer files・Cults
Toolbox Wrench Rack
Free
TOM Tool/Spare Parts Holder
Free
Nozzle Wrench Grip for ender 3 wrench
Free
Tool Carrier (Electronics/ tools)
Free
3D Printable AR wrench for Airsoft
€1.45
Ratchet Tap Wrench Box/Holder Storage
€1.45
Spindle wrench for a Taig mill
Free
Oil filter wrench 64mm - Oil filter wrench
Free
Propan regulator and tank wrench
Free
Nozzle Changer Tool
Free
Christmas ball plumber trade
€0. 50
#1 Dad - Wrench Magnet
Free
Socket wrench
Free
O2 Oxygen Tank wrench EMT
€0.95
-AN Wrenches HD
Free
wrench size sw5.5 up to sw20 // STL File
€1.27 -30% €0.89
Logitech Driving Force GT Clamp Key-wrench
Free
Fallout 4 Inspired - PipeWrench
€3.49
1/2" Socket Holder
€0.62
FPV Iflight Quad Wrench Sleeve
Free
Stuffing Gland spanner (25mm and 20mm)
€0. 70
70
SLR/DSLR Pointed Spanner Wrench for Camera and Lens
Free
Wrench Rack for Combination Wrench Sets
Free
Impact Gun Trigger Button - Goodyear Racing 1/2" Air Impact
Free
Tech Wrench Staff
€0.62
1:64 SCALE FIGURES 6 PACK NO6 (CINDY'S GARAGE) GASSLANDS OR HOTWHEELS POSERS
€5.69
Parkside Hex & Torx Set of Wrenches Wall Holder - Storage Organiser
€3.15
1/4" Hex Bit Wrench Adapter
Free
M4 barrel wrench gunsmith wrench delta ring tool airsoft ar-15
€1.85
Kenner Vintage Vehicle Maintenance Energizer 8 Tools
€4
Parkside Adjustable Wrench 200mm Wall Holder
€0. 55
55
Handle for 13mm KStools GEARplus ratchet ring open-end wrench, article no.: 503.4213
€2.03
Slice Mosquito Assembly Jig
Free
PISTON MEN
€0.50
TAP WRENCH M5 M6 M8
Free
Bench Block
Free
NASA space wrench
Free
Gas cylinder wrench 27 mm
€1.70
Ratchet Wrench and 10mm Keychain
Free
Parametric Wrench
Free
Metric Allen Wrench Holder Mount
Free
enfit feeding bag connector wrench
€1.![]() 90
90
Allen wrench rack for Prusa MMU allen wrenches
Free
PRINT IN PLACE : Hex key (Allen key) ratchet
Free
Wrench for a water purifier (Reverse Osmosis filter) resin tank cap
Free
Stanley Workmaster Allen/Hex Wrench Handles
Free
3.5mm Ball Cup Wrench, Team Associated
Free
Wrench Set
Free
5 Lesser Known Tools That Make 3D Printer Maintenance Easier
It takes years to master a hobby as complicated as 3D printing, but printer maintenance is a lesson beginners learn relatively quickly and painfully. Acquiring the right tools isn’t just a matter of convenience for 3D printing. Oftentimes, it will save you from the agony of losing time and money to print failures and broken parts.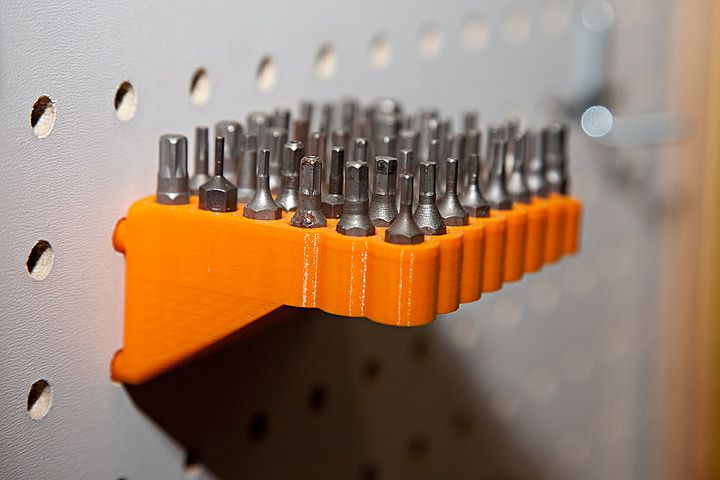
At MUO, we have endured enough failed prints and broken 3D printers to curate this definitive list of 3D printing tools indispensable for home additive manufacturing enthusiasts. Read on to benefit from the fruits of our collective suffering and 3D printing mistakes.
Why Should You Invest in Tools?
A modern consumer-grade 3D printer is a delicate contraption made up of complicated motion systems liable to wear and heating elements that get hot enough to melt aluminum. Preventative maintenance not only insures against printer breakdowns, but it could also save you from a potential house fire.
The uses of the tools listed here range from helping you maintain proper bed alignment to preventing the dreaded blob of death that kills expensive hot ends.
1. 3D Printed Nozzle Wrench
Since we have got your attention with the blob of death, it is the most common reason for printer breakdowns. The blob of death manifests as molten filament leaking out from the gap between the nozzle and the heat-break. This gap is a result of insufficient torque being applied to the nozzle during the hot tightening procedure.
As the name suggests, hot tightening is a scary proposition where you are expected to apply sufficient torque to a nozzle that has been heated to the highest possible temperature. Tightening the nozzle too much can easily snap it in half, so most 3D printer owners end up applying insufficient torque.
This results in molten filament oozing out the hot end and completely engulfing it in an impenetrable mess of solid plastic. Which is also known as the dreaded blob of death.
https://www.anrdoezrs.net/links/7251228/type/dlg/sid/UUmuoUeUpU2006432/https://www.youtube.com/supported_browsers?next_url=https%3A%2F%2Fwww.youtube.com%2Fwatch%3Fv%3DxLYmTrfSTVY
This can be prevented with a torque wrench that safely slips the moment you exceed the manufacturer recommended torque. While this is an easy fix, it can also be very expensive, so not really feasible for the average 3D printing enthusiast.
Thankfully, you can 3D print one at home, and it works just as well as the real deal for our use case. We have made dozens of nozzle changes without any issues. Just be sure to follow the print settings and material notes mentioned on the Thingiverse download page, and you should be good.
2. Hex Ball Driver Set
Common Phillips head screwdrivers are designed to cam (or slip) out to prevent overtightening of screws. Unfortunately, this feature also causes such screws to strip out with repeated use. That’s why any serious piece of machinery is outfitted with the superior hex (hexagonal) head screws.
And 3D printers are no different.
Your 3D printer will most likely include a basic set of hex head drivers, but you ideally want to upgrade to a better set with molded grips and some form of hardened tool steel. Most importantly, it pays to buy a set of hex drivers with ball-end geometry.
Related: Are 3D Printed Utensils Food Grade? Here's How To Make Them Food Safe
Hex ball drivers differ subtly from their plain vanilla counterparts by incorporating a near spherical profile at the business end. This makes it possible to turn blind screws which can’t be reached head on by the driver. Hex ball drivers can turn screws even at 30-degree offset angles.
Most 3D printer designs actually factor this angle in while designing screw locations in cramped quarters. Such fasteners can usually only be manipulated by ball drivers.
The Bondhus hex ball driver set is known for its durability and quality. If budget isn’t a constraint, Wera’s patented design is proven to reduce the chances of stripping screw heads.
3. Feeler Gauge
You can’t have a successful 3D print without a perfectly trammed (leveled) printer bed. Unfortunately, the most widespread bed tramming technique is fundamentally flawed. The process involves using a piece of copy paper to adjust nozzle height, such that it is equal across all corners of the bed.
This is achieved by bringing the nozzle down until it just about catches on a piece of paper. This is a terrible idea because paper is a relatively soft and pliable material that compresses proportionally to the applied pressure. It is nigh on impossible to set a uniformly accurate nozzle height this way, especially when even a variance of 0.05mm can negatively impact print quality.
The solution involves substituting paper with metal. A feeler gauge is the perfect tool for this job, since it’s a collection of metal strips ranging from 0.04mm to 1mm in precise 0.01mm increments.
https://www.anrdoezrs.net/links/7251228/type/dlg/sid/UUmuoUeUpU2006432/https://www.youtube.com/supported_browsers?next_url=https%3A%2F%2Fwww.youtube.com%2Fwatch%3Fv%3DrDm9OziZ6dY
A metal sheet is resistant to being compressed by nozzle pressure, which makes it easier to adjust the nozzle height accurately. It also allows you to jog the nozzle up by, say, 0.1mm from the bed and then use a 0.1mm metal strip to equalize nozzle height across the bed.
This way, you get a perfectly level bed without leaving an otherwise paper thick air gap during actual printing. Once you try a feeler gauge to tram your bed, you won’t ever go back to the paper method.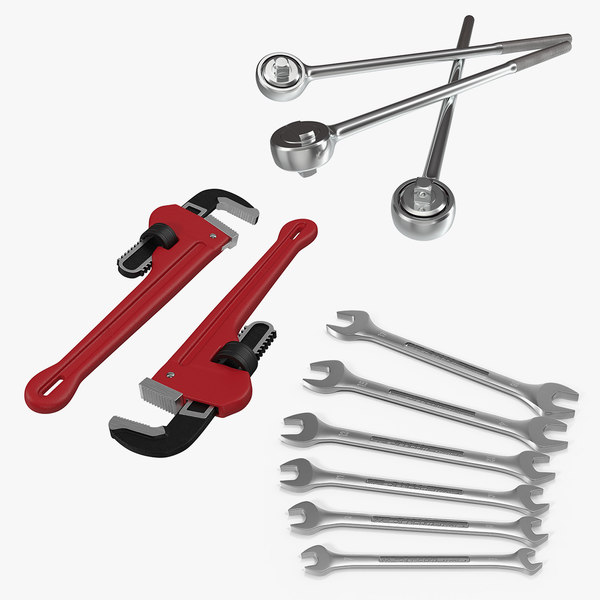
4. Using the Right Lubricants
Your hot-end makes tens of thousands of movements in every conceivable direction during the course of an average print. The motion system is naturally subjected to a tremendous amount of wear and vibrations over time. Proper lubrication is, therefore, essential to ensure the longevity of your 3D printer.
But which lubricant should you use?
Related: How to Add LED Lights to Your 3D Printer
This primarily depends on the material makeup of the sliding components. Any motion involving metal-on-metal contact is best served by petroleum-based lubricants—primarily due to their penetrative nature and oxidation (corrosion in ferrous parts) resistance offered. Using any other type of lubricant poses a significant risk of oxidation.
That means that a brass lead screw nut riding on a steel lead screw is best lubricated with lithium grease. However, some lead screw assemblies use a POM (polyoxymethylene) plastic nut instead.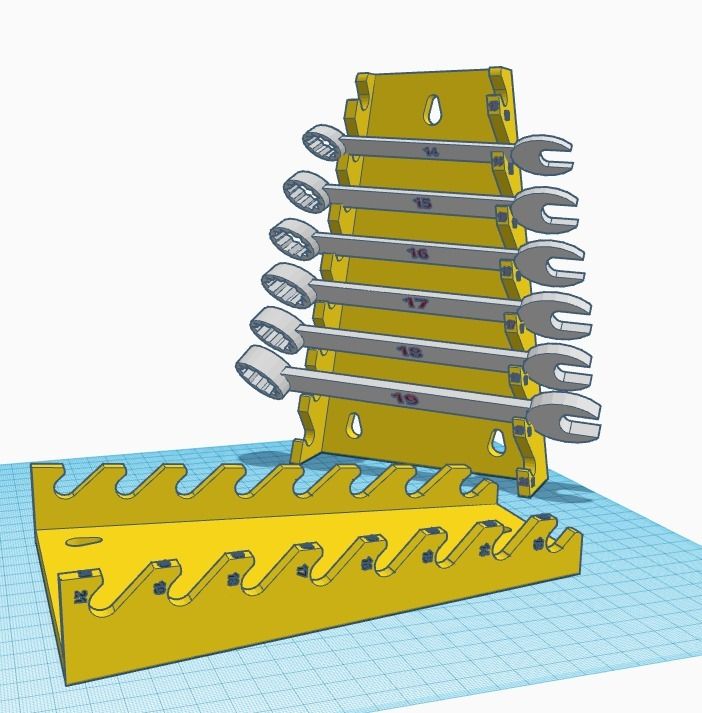 Petroleum greases tend to destroy plastic and rubber parts over time. In that case, your lubricant choice is limited to non-petroleum derived options such as silicone greases and PTFE powder/grease blends.
However, the chemical composition of a lubricant isn’t the only deciding factor. The speed at which a part moves also dictates the lubricant viscosity. A lead screw driving the printer’s Z-axis only moves a couple of millimeters every hour. Lubing it with thin oils will cause most of the lubricant to drain away under gravity.
Slow-moving parts need thicker lubricants, whereas fast-moving parts such as roller and linear bearings used in the printer’s motion system benefit from the thinner variety.
The viscosity of a lubricant is specified by the NLGI consistency number, which typically ranges between grade 0 and grade 3 (in ascending order of viscosity) for 3D printer applications. You essentially want a grease that strikes a balance between ease of movement and lube adhesion.
Lower-grade greases are best used to lubricate fast-moving components, whereas the ones with higher NLGI grade numbers are suitable for slower components.
5. Brass Nozzle Cleaning Brush
This might seem obvious, but a dirty nozzle has a domino effect on multiple factors ranging from print reliability to bed tramming accuracy. Molten plastic tends to accumulate on the nozzle and is eventually burnt to a crisp, only to attract another layer of fresh plastic.
Covering the heater block with a silicone sock helps alleviate the problem, but the nozzle is still free to accumulate carbonized plastic. Cleaning the nozzle regularly with a brush is the only viable and practical option.
However, not any odd brush will do. Plastic can only be cleaned off a hot nozzle, so that rules out brushes with polymer bristles. Steel bristles can survive a hot nozzle, but will scratch away at the softer brass material. Your safest bet, therefore, is to use a brush equipped with brass bristles instead.
But be sure to keep the conductive bristles away from the heater and thermistor cartridges attached to the heater block. Stray bristles can cause these components to short, which may result in damage to the printer mainboard.
Printer Maintenance is Easy With the Right Tools
As a beginner, it might be tempting to save a few bucks on cheap tools and skimp on maintenance, but 3D printing is too complex on its own to complicate it further with a careless attitude.
We hope these hard-won lessons from our experience maintaining and running 3D printers will save you the time, effort, and expense of dealing with avoidable breakdowns and ensuing heartburn.
astronaut needs a wrench, NASA sends a model to print it / Sudo Null IT News This is not the first attempt at 3D printing, but finally Zero-G has a practical use. Usually, it can take months from requesting a tool for the ISS to arriving on a space truck, but here it was made on site within a few tens of minutes.
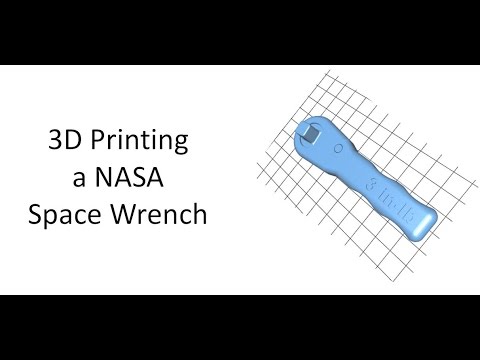
The Zero-G 3D printer was delivered to the ISS on September 22 as part of the two tons payload of the SpaceX Dragon unmanned spacecraft. The first item was printed on November 24th. It was a trial model just to test the operation of the printer - a small panel with the name of the manufacturer of the Made In Space device and the NASA logo.
The scenario when something breaks on a manned station somewhere far in space, and the astronaut only has to replace the broken part with a printed sample based on a model received from Earth or stored on a computer hard drive, is very attractive. As part of the Future Engineers competition, many more models will be printed on the ISS.
At least 21 items have already been printed, their shape is shown above. All of them will return to Earth to study the effects of long-term microgravity on the 3D printing process - they will be compared with similar samples made under the gravity of our planet. The study will improve the future performance of 3D printers in space.
Made in Space overheard Wilmore mention the need for a wrench over the radio. So they created a model of it and sent the file to NASA, which in turn sent the data to the ISS.
Made in Space co-founder Mike Chen details the simple process of sending items to the ISS "by email". On Earth, a model is created, usually this is done in the Autodesk Inventor package. The file is converted to the G-code format available for the 3D printer.
The files are then sent from the office in Moffett Field (California) to NASA. The space agency, in turn, sends data to the ISS from the operations support center in Huntsville. The item is crafted in layers in the Microgravity Science Glovebox on board the station.
Zero-G by Made In Space
3D printing can become an important part of expeditions to other planets, when just waiting a few weeks or months for the next supply truck will not work - the device will be millions of kilometers from home, which including excludes real-time audio and video communication. If an object is suddenly needed on board a spacecraft, station or in a space colony, then it will have to be made there.
Next year, Made In Space plans to replace the 3D printer with a larger model. The European Space Agency will also launch its own printer in 2015.
Tools needed to maintain the 3D printer
3DPrintStory Reviews Tools needed to maintain a 3D printer
Building a 3D printer from scratch is hard enough, not to mention trying to assemble one without the right tools. Below we highlight some of the most common 3D printer repair and assembly tools.
Caliper
Calipers are used to measure the distance between opposite sides of an object.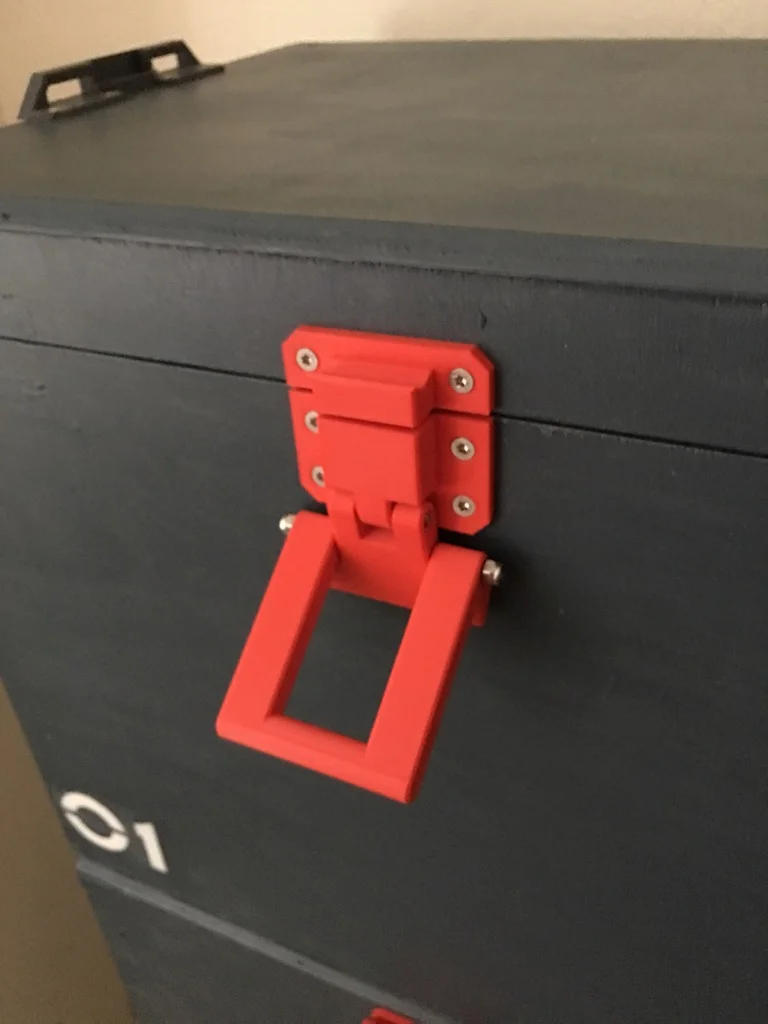 Although used in many industries, including medicine and woodworking, modern calipers in mechanical engineering are often Vernier calipers that offer a high degree of accuracy compared to purely mechanical options. The included digital dials and scales can display measurements to the nearest thousandth of a millimeter/inch.
Screwdrivers/Hex Keys
The 3D printer is made up of complex individual parts that are held together with a variety of materials and fasteners. In matters of assembly and repair of a 3D printer, screwdrivers and hex keys are crucial. Be sure to stock up on a flat head screwdriver as well as a set of hex wrenches of various sizes. Due to the huge number and variety of mounts, most 3D printers use metric mounts, but this statement is not an unshakable truth, anything can happen, there are a lot of manufacturers of desktop 3D printers.
Hex wrenches are simple and small hex head screwdrivers that are very cheap in cost. So it is convenient for both manufacturers and consumers, who can purchase a set of hexagons of various sizes for a small amount and use it not only for a 3D printer, but in general in everyday life.
Wrenches
Although there are dozens of wrenches, each with a specific purpose, for those who work with a 3D printer, hex keys, socket wrenches, spanners and adjustable wrenches will be the most useful.
Due to the large number of fasteners used in 3D printers, manipulating in tight spaces and applying a lot of force without moving the entire wrench arm is key. To do this, hex keys have a relatively small footprint, and socket wrenches allow you to securely tighten fasteners without swinging the entire socket wrench arm (and likely avoid damaging the 3D printer frame). Adjustable wrenches have the same backlash as adjustable pliers, allowing precise control of fasteners in tight spaces. keys like these will be useful for working in and around the 3D printer's extruder.
Wire strippers/wire crimps, soldering iron
Often found in the same tool, wire strippers and wire crimps are used to strip wires and connect crimp connectors, respectively.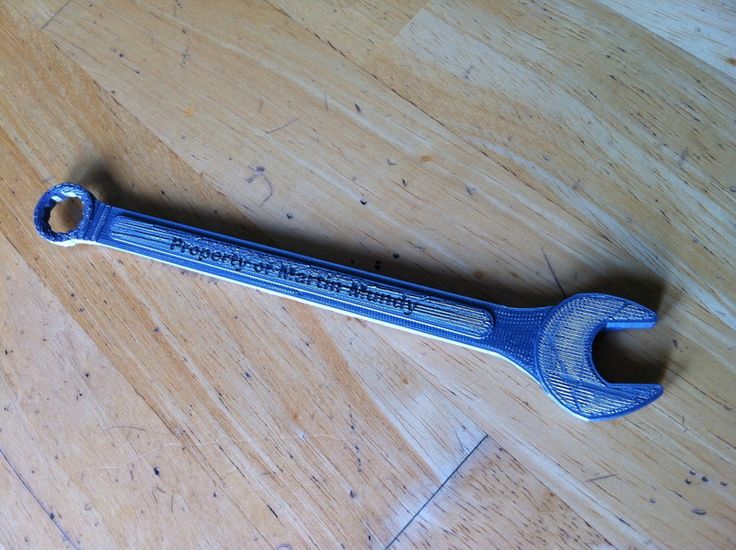 While any pliers with sharp inside jaws can strip the wire, the process is more difficult than using a good wire stripper. Similarly, sharp-tipped pliers can be used to terminate crimp connectors at the ends of wires, although this requires more skill and patience than using crimp pliers.
3D printers often include dozens of wires, and having clean connections between various electronic devices ensures they last a long time. Along the same lines, a soldering iron may sometimes be required when assembling and maintaining the printer. However, solder joints can serve as replacements for crimp connector bodies, although the solder joint is not as flexible/modular if changes need to be made.
Please note that most solders cannot withstand the temperature of a 3D printer's hot end. Crimp connectors should only be used in areas of the printer that can become very hot. This applies to the greatest extent to the connections of the heating element and the hotend thermistor.
Pliers
When building your basic 3D printing tool kit, don't overlook a good pair of pliers. They will definitely come in handy for scraping off excess filament from the hotend and bed, or for fixing parts of a 3D printer and attaching wires. Due to the extreme temperatures around the hot end, you should never manually adjust components under the X carriage while the printer is heating up or cooling down. Pliers (and to some extent wrenches and screwdrivers) will allow you to manipulate the hot parts of a 3D printer without getting burned.
Lubrication
With many moving axles, bearings and carriages, a 3D printer is nothing more than a finely tuned dynamic machine. It is very important to properly lubricate the parts with a few drops of machine lubricant. Silicone-based compounds or those containing PTFE are best for protecting the rods, bearings, and bushings that allow the printer to print. Lubricant and timely maintenance of the mechanics of a 3D printer will definitely help protect your brainchild from unnecessary and unpleasant breakdowns.
Spirit level
A simple water level can help calibrate the 3D printer bed, X carriage and frame components.