When to replace 3d printer nozzle
Signs You Need to Replace 3D Printer Nozzle
3D printing can be enjoyable when everything is going right. However, it can rack your brains when something goes wrong. 3D printing issues can usually be fixed by adjusting the settings or the parts. But if you’ve tried everything and it’s still not working, it could be that you need to replace a part in your 3D printer, particularly the nozzle.
What could wear out your nozzle? Here are the following reasons:
Nozzle Damaging Practises
Using abrasive filaments
Some 3D printer filaments are tough on regular nozzles. These are usually “composites” or filaments that have been reinforced by fibres to improve their mechanical properties. These filaments are:
- Carbon fiber
- Fiberglass
- Nylon
- Metal-filled filaments
- Glow-in-the-dark filaments
Use tougher nozzles made of hardened steel, ruby, tungsten, and stainless steel when using these filaments. They are much more capable of withstanding the abrasiveness of these filaments and lasting longer than the regular brass ones.
Aggressive nozzle unclogging methods
While unclogging your nozzle can be good for your nozzle and the quality of your print outcome, doing it often and aggressively can wear out your nozzle. You have to be careful of clearing it, using gentle methods and materials to clean it with. Follow our nozzle unclogging and cleaning tips that won’t harm your nozzles.
3D Printing Issues that may be caused by nozzle damage
You may encounter a reduction in print quality when your nozzle is worn out. You’ll notice some of these issues crop up:
- Under-extrusion
- Poor layer adhesion
- Print blobs
- Uneven or rough print surface
However, it can be tricky to attribute these issues to nozzle wear. These issues can also be caused by the following:
- Clogged nozzle
- Setting the bed too high
- Incorrect nozzle diameter setting in the slicer
Check your 3D printer to make sure that you’re not committing any of the mistakes above. If you’re still experiencing the same print quality issues after checking your 3D printer, then it means it’s time to replace your nozzle.
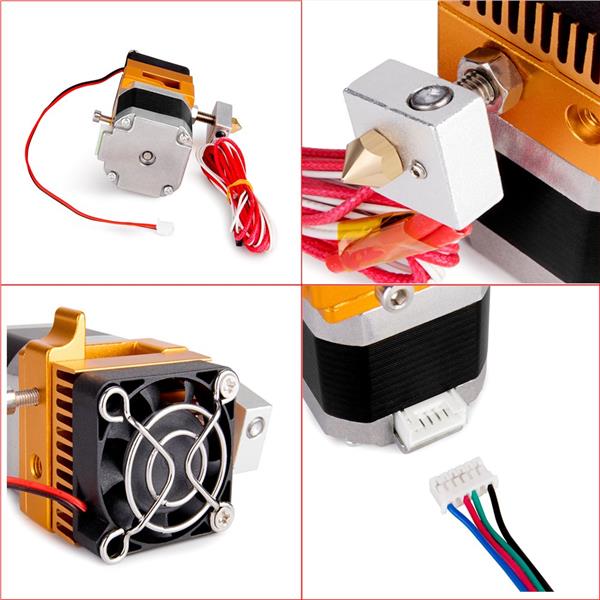
Signs of Nozzle Damage
To the untrained eye, a worn-out 3D printer nozzle looks just like any. However, if you look closely, you’ll see the signs of wear and tear. Here’s what you need to look out for:
- Marks and grooves in the inner walls near the opening
- Bigger nozzle diameter than usual
- Nozzle tip has become dulled down or shortened
Take care of your 3D printer nozzle before it’s too late!
It’s not the end of the world if you have to replace your 3D printer nozzle. They are usually reasonably priced and easy to replace. In fact, it could be smart to stock up on nozzles of different diameters and make since you need to change it depending on the filament you’ll be using and model you’ll be creating. For a guide on what nozzles to get, check out our 3D Printer Nozzle Sizing Guide. You can also contact us by email or phone for inquiries.
Tags: Printer hardware
When & How Often Should You Change Your Nozzle On Your 3D Printer? – 3D Printerly
Nozzles on a 3D printer are a consumable that gets used, abused and replaced many times in a 3D printer’s lifespan. The problem is, when should you be changing your nozzles over?
After wondering about this question I decided to search around for the best answers and share it with you guys.
When you notice lower quality prints, when maintenance doesn’t improve things your nozzle is most likely due for a replacement.
Some people have changed their 3D printer nozzle 6 times in 3 years, but start printing with a new filament and require nozzle replacements every 3 months.
If you are interested in seeing some of the best tools and accessories for your 3D printers, you can find them easily by clicking here (Amazon).
How Often Should You Change/ Replace Your Nozzle?
There isn’t a specific time frame in which you should change or replace your nozzle, but generally you should change your nozzle every 3-6 months. This really depends on how often you are using your 3D printer, what kind of filaments you are using, and how high or low the quality of your nozzle is.
If you have an expensive, high quality nozzle, designed for long-lasting smooth printing, it’s a lot more likely to last you more printing hours than a cheap, Chinese manufactured brass nozzle.
3D printer users that only 3D print with low temperature PLA could technically use one brass nozzle that lasts for years and have great results throughout.
In some cases, you may have leveling issues where your brass nozzle scrapes against the build plate and wears out, so it would need replacing sooner.
The factory brass nozzles that come with 3D printers tend to be fairly cheap so that the price of the 3D printer overall is competitive.
A good set of nozzles that last a long time is the LUTER 24-Piece Brass Nozzle Set from Amazon. It is very popular and sometimes runs out of stock so check the link to see if they are available.
Not only are you getting a wide range of brass nozzles sizes with a storage box, it’s also the highest rated on Amazon, mainly because of the premium quality and the great price.
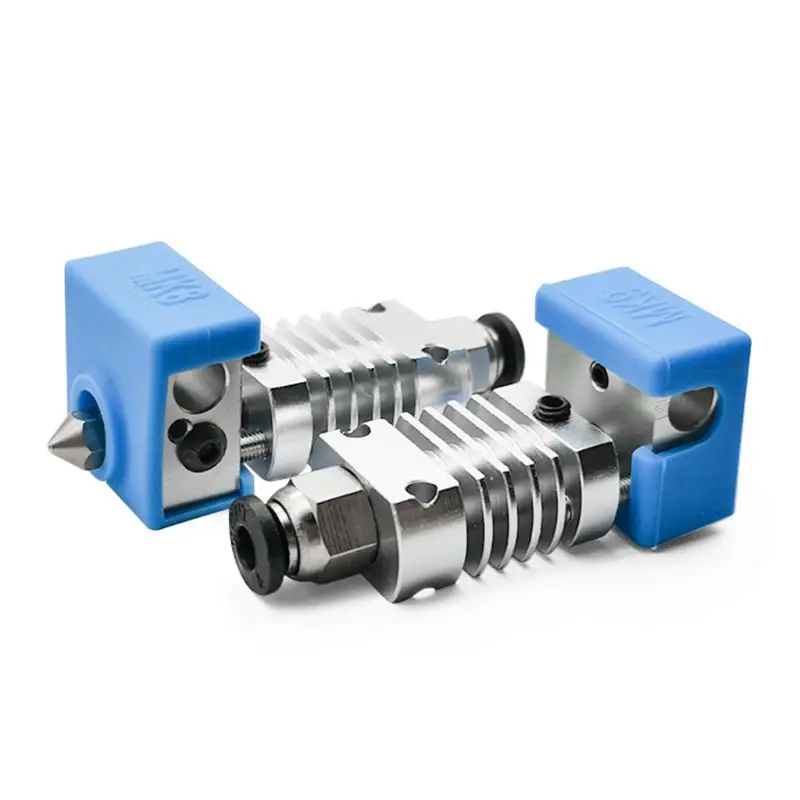
Compatible with MK8 extruders such as the Ender 3, Creality CR-10, Makerbot, Prusa I3 and many more.
You always have the choice of upgrading your printer’s nozzle to something of a higher quality, which later in this post I will explain which ones are good. The usual response here is, if it ain’t broke, don’t fix it.
Your 3D printer may produce successful print after successful print, so generally you shouldn’t need to change your nozzle until you actually see some evidence of print quality being affected.
This is so you can maximize the printing hours of each nozzle and not throw out nozzles earlier than you needed to. This may not be an ideal strategy if you are someone who does long, complex 3D prints because it could ruin the whole print.
You may have a resume printing function, but if your layers aren’t done adequately in the middle of a print, and you switch out the nozzle, your print might not get resume to a print that finishes properly.
How Do You Change & Install a 3D Printer Nozzle (Ender 3 Pro/V2)
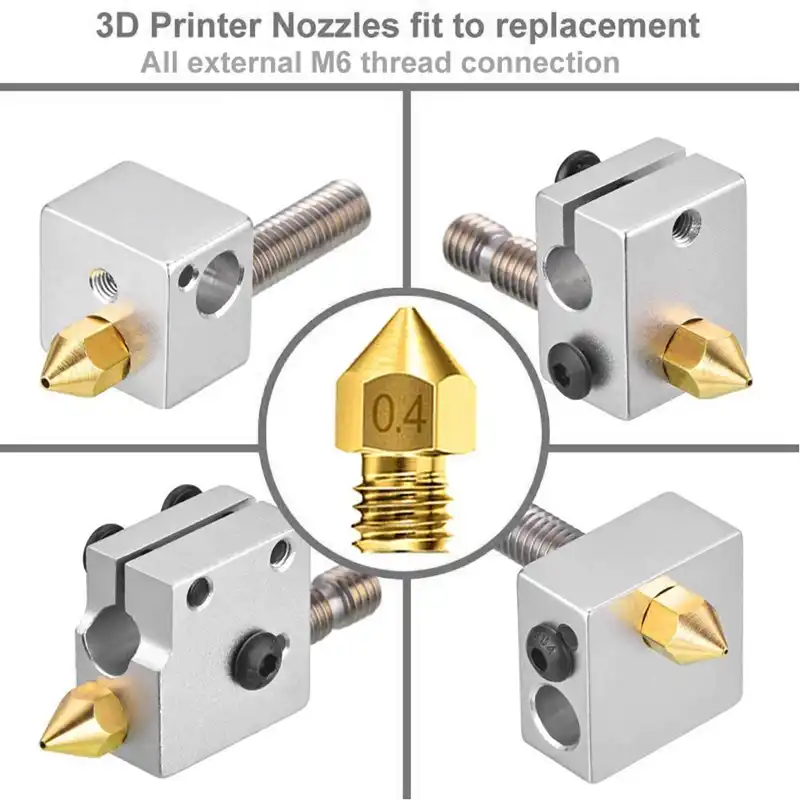
To change and install a nozzle for your 3D printer you should first remove the main fan shroud on the print head to access the heat block and nozzle. Heat up the nozzle to normal temperature and turn the printer off. You can then use pliers to hold the heater block while using a wrench to remove the nozzle.
Some people use a nozzle torque wrench of 3nm to make sure they don’t over tighten the nozzle but it’s not necessary. Just tighten the nozzle until you start to feel a decent amount of resistance. It doesn’t have to be very tight.
This is the standard technique, but it isn’t the best since many people manage to accidentally touch the hotend and burn their fingers.
There is now a professional solution that works almost too well, that several users have grown to love.
I would recommend getting the ZCatch 3D Printer Nozzle Removal Tool from Amazon, a great addition to your 3D printing tool kit. It was made specially for users to easily change 3D printer nozzles.
The removal tool comes with a 10-piece ¼ Vanadium Chrome Socket Set, 1-ZCatch Decal & Instruction Manual. Reviewers of the product only have positive things to say about it because it works so well!
It’s a tool that makes changing your 3D printer nozzle so much easier. You will no longer have to struggle with getting a good grip with pliers on the heat block while removing the nozzle.
This tool sets the heater block in place while removing the nozzle through a few simple twists. You don’t have the most leverage to hold the hotend so in some cases you may still have to hold the hotend, but once it’s loose, you can easily remove the nozzle.
It has a nice area where the nozzle can drop into, rather than trying to balance the nozzle and keep it gripped.
How Do I Know My Nozzle is Worn Out?
There are a few ways that you can check or know that your nozzle is worn out. Some aren’t 100% thorough, but it will generally get the job done if you can spot the signs.
Checking Your Nozzle Visually
The first way I recommend for checking if your nozzle is worn out is simple by visually checking your nozzle. You want to check for distinctive differences between when the nozzle was fresh and how it is now. The main differences you’re looking for is the diameter size.
If you notice the size of the hole on your nozzle has increased, this is a pretty good sign that your nozzle is wearing out, and isn’t producing the best quality prints. Sometimes you won’t notice this visually, but there is a quick test you can do to check this out.
Get a set of tiny drill bits and check your nozzle by trying to fit one of the larger sized drill bits into your nozzle hole.
If say a 0.5mm drill bit fits into a 0.4mm nozzle, then you know that your nozzle has significant wear that will likely cause a decrease in the quality of your prints.
The second method for checking your nozzle is to check for ridges, grooves, curves, marks, bumps, whatever you can find on your nozzle.
The reason this method works is that a lot of the time, your nozzle will be worn out on the inside rather than at the tip, so being able to see deterioration in the nozzle’s material is important.
It means that your nozzle is wearing away, possibly leading to unpredictable, inconsistent layering. You’ll probably still be able to print successfully, but it means your nozzle is getting to a point where it soon needs to be changed over.
This ties in with the nozzle diameter, but the tip of your nozzle becomes rounded, you know that it’s coming to the end of its life. Abrasive materials will affect a nozzle, and it’s shape, creating a nozzle that is no longer sharp at the tip.
It can lead to adhesion issues because the height of the nozzle and bed will be off balance over time. This one is a bit easier to spot so keep an eye on it and get a replacement ready if you see this.
Do The Straight Extrusion Test
This is a quick test you can carry out to give you a sign that your nozzle is worn out. What you want to do if pull your print head to the side, off the bed and have your printer extrude. What you want to see when this happens is a squirt of plastic straight down.
If you see the plastic bending and wonky, or extruding in one direction and curling around, it’s a pretty good sign of nozzle damage.
How to Make Your Nozzle Last Longer?
Now that we have learned how often to change a nozzle and how to tell if it’s worn out, we can move onto how to make sure your nozzle is getting the most life that it can get.
The simplest piece of advice to make your nozzle last longer is to not use abrasive filament such as carbon fiber, exotic and composite filament or some brands of glow in the dark filament.
These filaments have certain properties that don’t react very well to some nozzle materials over time, and some are definitely worse than others.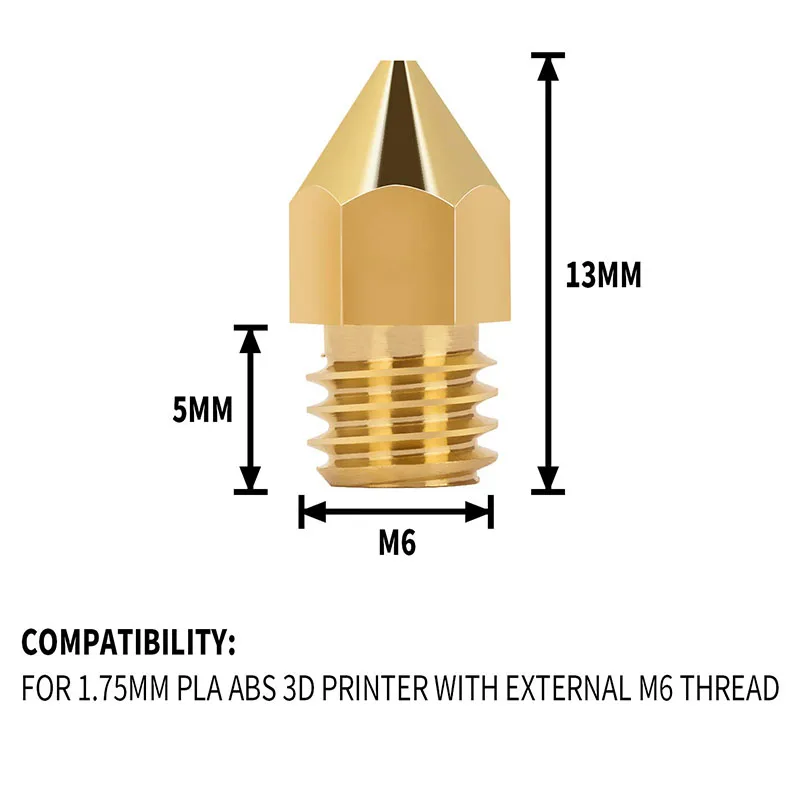
Basic filament like PLA, ABS and PETG don’t usually have these type of problems because they aren’t abrasive and are fairly smooth.
Not only are they abrasive, but they are more likely to lead to common filament feeding problems making them get clogged and jammed.
When you pick up a few good practices of 3D printer maintenance, you can definitely avoid these common issues and make your nozzle last longer.
Follow these steps to make your nozzle last longer:
- Use a filament cleaner sponge
- 3D printer flushing
- De-gunk your 3D printer routinely
- Disassemble your printer from time to time to clean up accumulation of materials
Using these techniques, along with a high quality nozzle can lead to a very long nozzle life which gives you numerous successful prints.
Many times, this is what makes the difference between someone who enjoys 3D printing and gets good results, and people who constantly get frustrated with 3D printing and don’t have the knowledge to overcome some problems.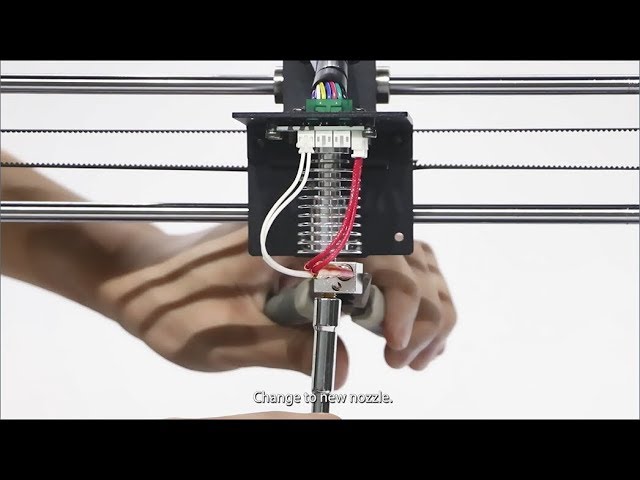
Don’t be afraid to give your nozzle, extruder and printer a good clean.
What Happens If You Print With a Worn Out Nozzle?
3D printing with a worn out nozzle is the equivalent to setting your nozzle diameter in your slicer to a bigger size than your actual nozzle, setting your bed level too high, or printing with a partially blocked nozzle.
In some cases, your print may still complete without any huge differences, but in most cases your print would see many defects that you would want to avoid at all costs. This can include under-extrusion, bad layer adhesion, rough surface finishes and blobs of material around your print.
What Are the Best Nozzles 3D Printer Users Use?
There are many types of nozzles, the most popular being brass and ranging to materials like stainless steel, hardened steel and even ruby.
Get a Hardened Steel Nozzle if you plan on printing with abrasive filaments, or if you just want a high quality nozzle in general. The reason brass is used so widely in 3D printers is because of its thermal conductivity and ease of manufacture.
Instead of sticking to just brass you can opt in for a Micro Swiss Plated Nozzle from Amazon. They are a pretty good price, and users are definitely happy with the quality of these nozzles.
I have a pretty in-depth article called 3D Printer Nozzle – Brass Vs Stainless Steel Vs Hardened Steel so check that out for more info about the best nozzle to use.
Not only do they last longer, but they have been known to improve your print’s quality overall while causing less printing issues. It’s a no-brainer when it comes to switching from a factory nozzle that came with your 3D printer so get yourself an upgrade now.
If you get stringing with your stainless steel or hardened steel nozzle, you may want to increase your retraction settings.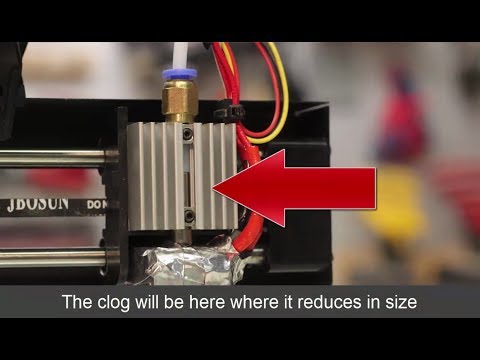 You could possibly decrease the printing temperature slightly, but since the thermal conductivity isn’t as high as brass, this could result in under extrusion.
Now that you’re at the end of the post you should have a better idea of nozzle maintenance, what the best nozzles are and when to replace your nozzle.
If you enjoyed this post, go ahead and check out my post on the 25 Best Upgrades for Your 3D Printer and How to Make Money With Your 3D Printer.
If you love great quality 3D prints, you’ll love the AMX3d Pro Grade 3D Printer Tool Kit from Amazon. It is a staple set of 3D printing tools that gives you everything you need to remove, clean & finish your 3D prints.
It gives you the ability to:
- Easily clean your 3D prints – 25-piece kit with 13 knife blades and 3 handles, long tweezers, needle nose pliers, and glue stick.
- Simply remove 3D prints – stop damaging your 3D prints by using one of the 3 specialized removal tools.
- Perfectly finish your 3D prints – the 3-piece, 6-tool precision scraper/pick/knife blade combo can get into small crevices to get a great finish.
- Become a 3D printing pro!
How to choose the nozzle size for a 3D printer? Pros and cons
3DPrintStory 3D printing process How to choose nozzle size for 3D printer? Advantages and disadvantages
When choosing your 3D printer, the nozzle size of your 3D printer may have been the last thing on your mind. This is a detail that is often overlooked. But depending on what you need to print, the wrong nozzle diameter can get in the way. nine0005
In this article, we'll take a look at the different 3D printer nozzle sizes and why you should consider this assembly, what materials it's made from, understand the relationship between nozzle size and layer height, and how to measure the actual nozzle diameter.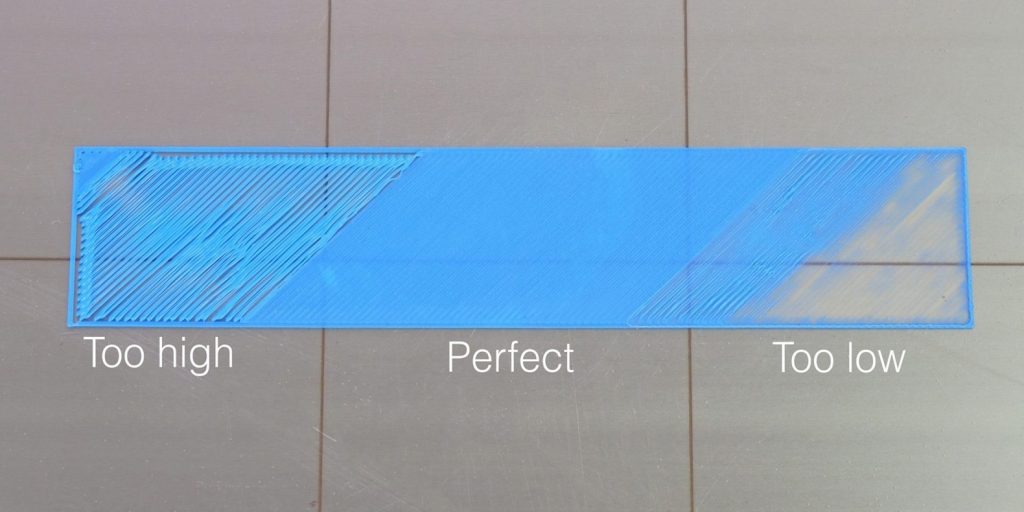
How does nozzle size affect 3D printing?
Nozzle diameter affects the extrusion width of the 3D printer line. This affects some elements of your model. If you are 3D printing for business (make a lot of orders), you need to make sure your extruder is feeding the right amount of material. If too much material is fed, then more filament is used than is actually required for successful 3D printing. Well, a smaller number can simply lead to marriage. nine0005
Or maybe you're printing different designs, some of them very detailed and intricate, and some more practical (like a replacement doorknob) that just needs to be printed quickly and with maximum durability.
In any case, you will need the correct setting to save time, material and ensure the normal quality of the 3D model.
There is no easy answer to what is the best nozzle size for a 3D printer. You need to weigh what you want to achieve and what elements of the 3D model are most important to you.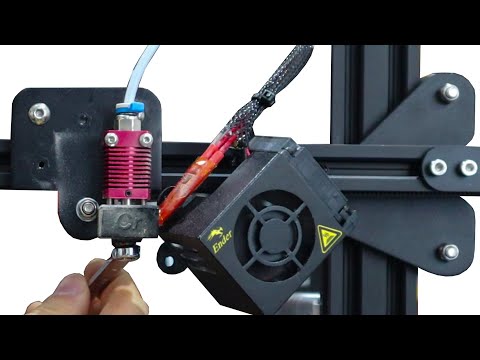 nine0005
Depending on your 3D printer, the nozzle can be quite easily replaced (most of them are mounted on screws), and buying a package with different sizes will cost you a lot.
Most common 3D printer nozzle options
The most common standard nozzle size is the 0.4mm (or 0.35mm) nozzle used by most modern 3D printer manufacturers. The reason for this is that it is a rather large and yet versatile nozzle size. This means that you can print with exceptional detail in no time. nine0005
With the 0.4 mm 3D printing nozzle you can print up to a layer thickness of only 0.1 mm or up to 0.3 mm. The lower the layer height, the better the detail (on the Z axis) and the larger the layer height, the faster your 3D print will be, but with worse detail quality.
A common misconception is that if someone doesn't get good enough 3D print quality on their printer with a 0.4mm nozzle, they immediately think they need a smaller 3D print nozzle.
Another common smaller size is 0. 25 mm. Some 3D printers offer 0.2mm, 0.15mm, and Mass Portal is even experimenting with 0.1mm 3D printer nozzles. And the experiments are really interesting. Thanks to this miniature nozzle, they were able to print the clock mechanism with excellent detail. nine0005
How is nozzle diameter related to 3D printer resolution?
Theoretically, smaller 3D printer nozzles allow for greater precision. But for many 3D printers, especially cheaper or older models, a smaller extruder nozzle won't necessarily make a difference if your printer doesn't support the higher resolution you need. It's like putting low-profile, high-performance tires on an old classic car - it doesn't make it go faster, and it doesn't necessarily make it better cornering. nine0005
This is also similar to how the specifications of a 3D printer on paper (eg advertised resolution) do not always result in the best print quality of the finished product. Just like Ultimaker and Zortrax have very similar resolutions on paper, but in many actual tests, Zortrax produces better models than Ultimaker 2.
smaller nozzles as resolution across the board is getting better every day. nine0005
Let's look at the pros and cons of 3D printing with smaller nozzles. Some are less obvious than others. Next, we'll look at the larger, underpriced nozzles available. I hope after reading this article you will be able to answer the question: "What nozzle size should I print?".
You probably already guessed that the smaller the nozzle size in the extruder, the more detailed model you can get as a result of 3D printing. The thin nozzle is great for complex figures, or if you need to print very thin walls for aircraft skins, or high transparency models, etc. nine0005
The photo below shows the printed skin of a model aircraft, which was made with a standard 0.4 mm diameter nozzle. If the same skin is printed with a nozzle with a diameter of 0.2 mm, then the weight (and strength) would be halved.
It is worth noting that a 3D printer with a 0.2 mm nozzle feeds half as much material as a 0.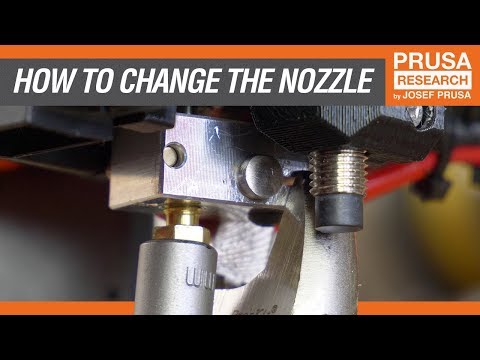 4 mm nozzle. And this actually leads to an increase in print time by the same two times. It should be noted that strength and detail are reciprocals of time. So to get high-quality 3D models using a thin nozzle and high resolution, you will have to be patient (2 times more than when printing with a standard 0.4 extruder :)). In some cases this is justified, in others it is a waste of time...
As a general rule, the smaller the nozzle size, the higher the chance of problems with the 3D printer. Especially if you are using cheap materials - they can work well with low models and thicker nozzles, but if you need detailed models that are printed using a thin nozzle, then you should also be puzzled by buying quality filaments for 3D printing.
Other factors are less obvious when 3D printing with a thin diameter nozzle - for example, protrusions can be problematic. This is because each layer has a smaller width for the next layer. Crossing bridges can also be difficult. nine0005
But there is good news too! Where overhangs form, the caliper material will be much easier to remove if printed with a thin nozzle. Due to the increased accuracy, your slicer can use a minimum amount of material between your model and supports, so they will break off more easily and have fewer damaged pads that need to be sanded.
And finally, the most annoying thing about a thin nozzle is the ease with which it clogs. If you downsize to 0.2mm or even 0.1mm, you'll need a small particle to clog the hotend. You need to be very careful about the cleanliness of your 3D printing material and regularly clean the nozzle of your 3D printer. Otherwise, you will not end up with additional unnecessary problems. nine0005
It is also worth taking the time to understand the relationship between nozzle size and layer thickness. In short, the first parameter determines the horizontal detail (along the x and y axes), and the second adjusts the resolution along the vertical or z axis.
How to measure the nozzle size of a 3D printer?
Although the actual nozzle diameter should be engraved on the side of the nozzle, it is not always possible to read this value if it is already installed in the extruder or if you have been printing with it for some time.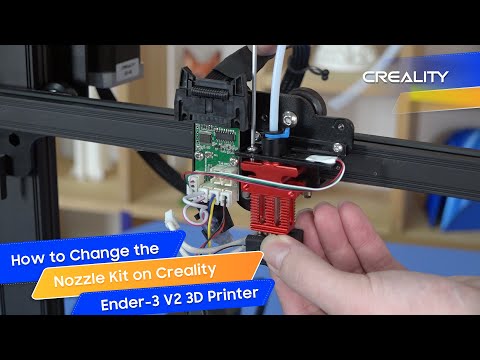 After all, there is the concept of wear and you may not be sure that the nozzle is the same size as before. nine0005
To determine what size your nozzle really is, very slowly extrude some material into the air (high speed may change shape or size) at the lowest setting you can feed material at (approximately 1 mm/s). Once cool, use a micrometer if you have one. They are generally more accurate than digital calipers. Keep in mind that the filament will probably expand after being extruded. Poor quality material or an extruder that is too hot (especially if you extrude at 1mm/s) will cause the material to expand more, resulting in inaccurate readings. nine0005
It can also be useful to know the size to which your material expands after extrusion if you are working on getting a really nice and accurate model. So feel free to experiment with higher speeds that are a bit more like your actual 3D printing.
What is the relationship between 3D print layer height and nozzle diameter?
In simple terms, this is the thickness of each line of extruded material that makes up each layer of your model. The thinner the layer height (or layer thickness), the finer the print detail in the Z-axis (the vertical dimension of your model), but the more layers will be required. Increases print time. nine0005
These characteristics are related, but not completely. For example, you can print using a thinner, thicker nozzle if vertical resolution is less important to you. Or you can use a thicker nozzle with a very small layer height. Although in this case, do not get too carried away. To maintain adequate pressure, your layer height should be at least 20% less than your nozzle width - and in most cases, for best 3D printing results, it should be around 50%. nine0005
How to determine the correct distance from the nozzle to the desktop of a 3D printer?
With the correct setting of the distance between the table and the nozzle, the base of the finished model should have an almost perfectly smooth, glassy surface. Many people assume that you need to use a stylus to properly set the distance between the nozzle and the 3D printer bed, but in fact, even that can be too thick.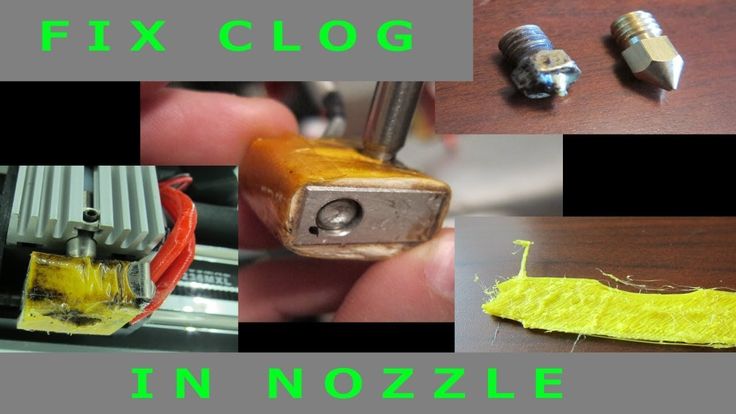 So it's worth thinking in the direction of the already proven table calibration with a piece of paper. You should use thin paper. For example, check paper is a great choice. Place the receipt paper under the nozzle and gradually lower the nozzle down until the receipt paper resists a little when you try to push it out. 3D printing at this height will give the bottom of the model a great look, and in the case of tall models, the print will definitely not go astray. nine0005
What is the maximum 3D print layer height compared to the nozzle size?
You don't necessarily need a layer height calculator on your 3D printer, but typically the maximum layer height is 50% of the nozzle width. In some cases, you can go higher (perhaps 75%), but in this case, you must be aware that you can sacrifice reliability.
It's best to experiment with the parameters of your model if you understand the relationship between the 3D printer's nozzle size and the layer height you'll be using to print.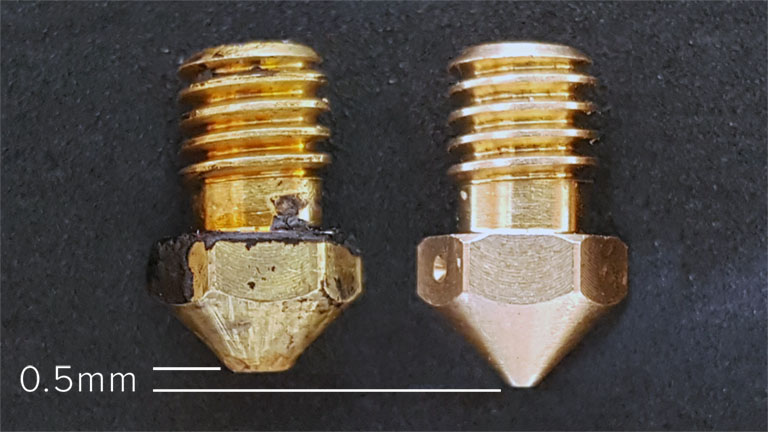 So for a 0.4mm nozzle, you will need to print with a layer height of 0.2mm, or up to 0.3mm. Your minimum should be around 0.1mm. If less, then in fact you just increase the waiting time without much benefit (on the same 0.4 mm nozzle). nine0005
In most cases, it is worth printing thinner layers with smaller nozzle diameters and generally thicker layers with thicker nozzles. Just note that if you are printing with a thicker nozzle diameter and very thin layer height, you will need to lower the extrusion settings in your slicer to prevent overfeeding.
It's also worth noting that no matter the size, you should always make sure you always have a clean nozzle. One of the easiest ways to do this is to use a high quality cleaning floss. You only need to use a few grams of it each time you brush, but this will prevent carbon buildup over time. nine0005
So why should I use a 0.8mm nozzle or thicker?
Similar nozzle sizes were more common on older 3D printers but are making a comeback. It's all about using what you need and nothing more. For a large number of models, the 0.4mm headroom that your 3D printer probably comes with may be overkill in terms of detail.
If you need strength and speed, but detail is less important, then you should use a 0.8 mm or even 1.0 mm nozzle. And don't forget that models printed with a 0.8mm nozzle can be very detailed, as a lot depends on your 3D printer as well. nine0005
The only slight disadvantage may be that you use more material, but with thicker part walls you can probably compensate with less infill.
There is no single optimal nozzle size for all models, you just need to take all factors into account and decide which nozzle size is best for you.
What nozzle size should I use for composite materials?
It is worth noting that composite materials (any particulate filament such as wood filler, copper filler, carbon fiber nylon or glass reinforced nylon) will cause extrusion problems when using a thinner nozzle. nine0005
This is because these filaments contain particles which, although nanosized, can cause problems when passing through nozzles smaller than 0.4 mm. For composite materials, it is better to use nozzles of at least 0.5 mm, and for any metal, glass or carbon fiber materials, you will need a hardened nozzle. The brass nozzle that comes with your 3D printer will most likely not last long and will increase in diameter after a few hours of printing.
A 0.5 mm stainless steel or tungsten nozzle will last much longer for composite materials, but will, of course, be more expensive.
So, if you're still wondering "What size extruder nozzle to choose?", here are the results for a nozzle with a diameter smaller than the standard 0.4 mm:
- worth using for small detailed models if your 3D printer supports high resolution;
- 3D printing can take significantly longer, thicker nozzles can significantly reduce print time; nine0005
- overhangs are more difficult to print, but supports break off more easily;
- you need material from a quality proven manufacturer, otherwise the nozzle can easily become clogged.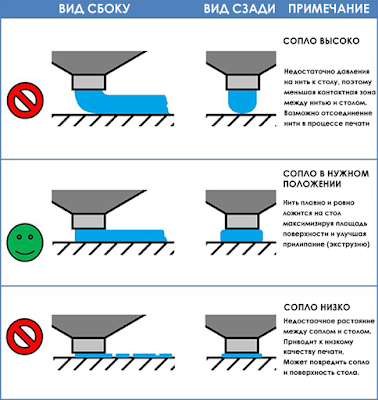
How to clean the nozzle of a 3d printer: clean the extruder from plastic
The extruder nozzle is one of the most problematic parts in a 3D printer. It can easily get clogged or clogged. Poor plastic feed will affect the quality of the finished model. Print defects will occur. Sometimes the job is completely stuck as the printer needs a nozzle cleaning. nine0005
Main Causes of Clogged Extruder
Regardless of the type of print head, it can become clogged. The reason for this is the filament or dirt that accumulates inside the knot. Most often, the nozzle becomes clogged when the printer is not used correctly under conditions of:
- Increased load, when the device works for a long time without stopping.
- In dusty areas. Sometimes the printing device is placed in a non-residential room or workshop, where cleaning is very rarely carried out. nine0136
- Wrong print settings. In particular, the use of an unsuitable filament or an erroneously set melting point.
In some cases, the design of the nozzle itself can cause frequent clogging. For example, when the printer comes with an initially defective extruder. The geometry of the nozzle is broken. The device should be returned under warranty or the nozzle should be replaced separately.
Information! The filament itself can cause litter. A common factory defect or a burr on the plastic can cause a cork. nine0005
Pieces of sintered filament
In any case, it is worth carefully studying the problem of blockage and only then proceed to prevention. If you are afraid to damage the device, it is better to take the printer to a service center.
Dust and debris trapped in the nozzle
The first cause is dirt or dust that has entered from outside. Most often, the nozzle becomes clogged with debris for a long time. Dirt can accumulate for months and even years. It sinters on the walls of the nozzle, plaque is formed.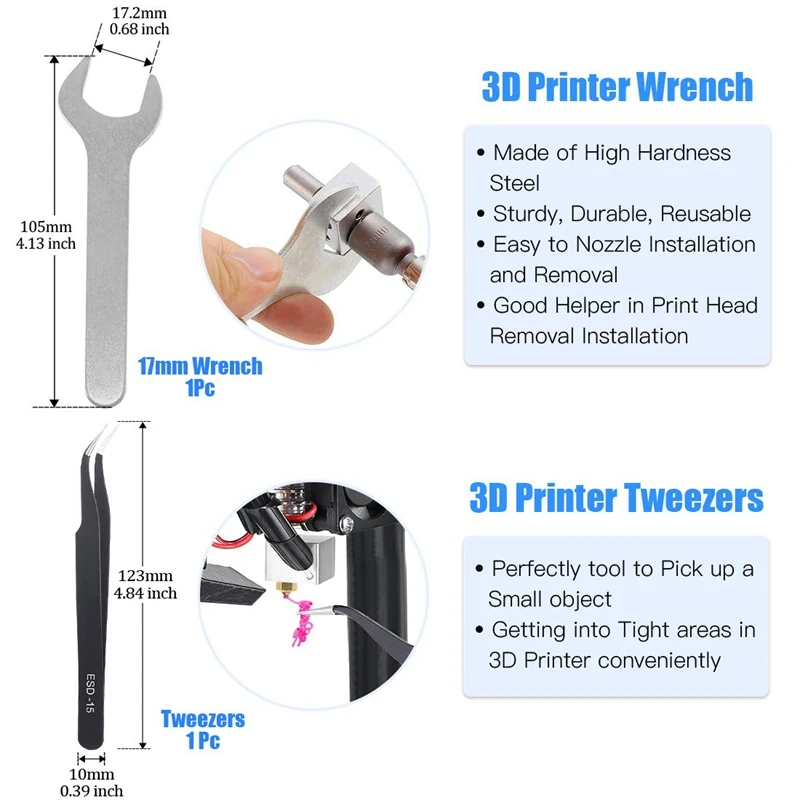 Over time, it can cause the filament to get stuck. nine0005
Extruder temperature too high
Beginner 3D makers find that an excessively high melt temperature will help avoid clogging problems. This is an incorrect judgment. When working at an elevated temperature, the plastic is instantly sintered right inside the assembly. Filament jamming occurs. A bottleneck is formed.
Therefore, it is important to observe the temperature regime recommended by the filament manufacturer. Sometimes this figure may differ slightly. Somewhere at +/- 5 ° С. It all depends on the printer model, as well as the extruder itself. The optimum melting point is found experimentally. nine0005
How to clean the 3D printer extruder: step-by-step instructions
You can clean the printer yourself, without going to a specialized workshop. There are several working methods by which you can clean the nozzle.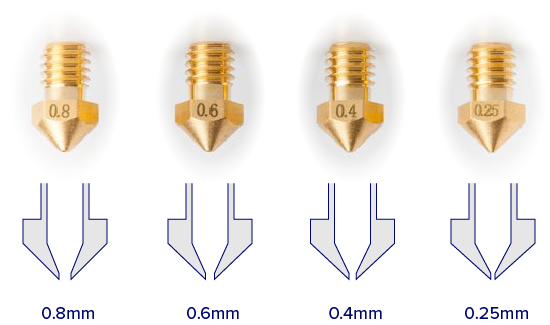 Let's consider each of them step by step.
Clogged extruder nozzle
Manual
The roughest way to clean the extruder. Thin objects are used for it:
- drill with a diameter of up to 0.35 mm; nine0136
- guitar string up to 0.33 mm in diameter;
- leg from diode or transistor.
Special nozzle cleaning tool for different diameters
Cleaning algorithm:
- Shut off the 3D printer. Wait until the nozzle cools down a bit.
- Remove filament residue from nozzle tip.
- Drill or chisel the hole slowly with the tools indicated. Be careful not to make a hole too deep. nine0136
- Turn on the printer, feed the plastic to print.
- Repeat the procedure several times until the filament comes out in an even layer.
Some experts advise you to clean the nozzle while the printer is on. This can be done if the primary rubbish has been eliminated.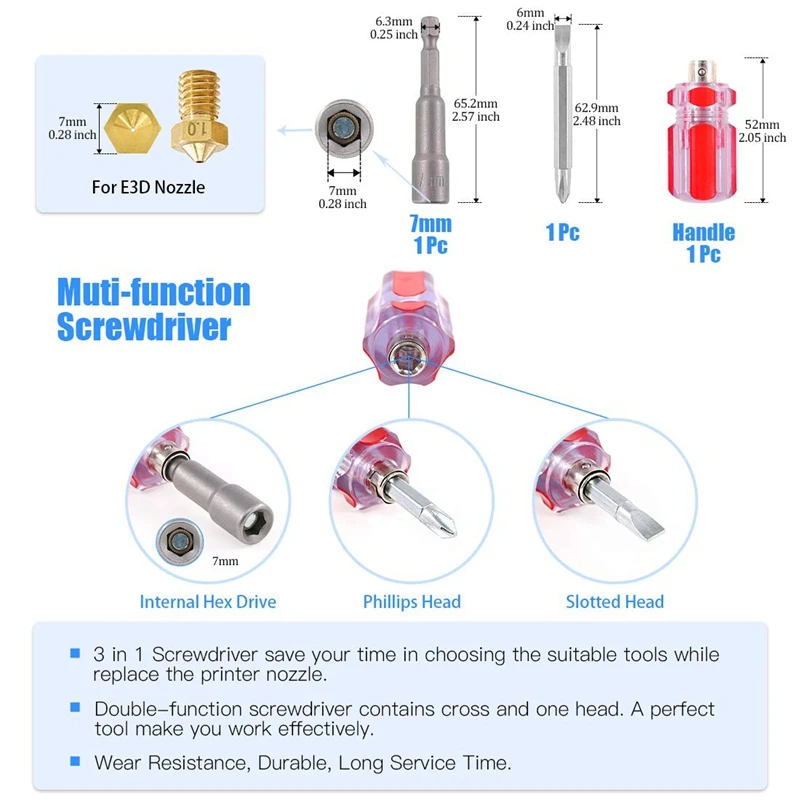
Attention! Do not use a screwdriver or drill! So you can miscalculate the force and go through the extruder, damaging the plastic capture mechanism. It is better to use a thin drill clamped in pliers. nine0005
Cleaning with a thin tool
Thinner
Sometimes mechanical cleaning is only partially helpful. With a drill, you can remove the cause of the blockage, but there are still plaques or influxes of plastic inside the nozzle. This situation is often encountered when working with ABS. To remove the filament completely, you will need to clean the nozzle in an aggressive environment. For example, in acetone or dichloroethane.
Cleaning algorithm:
- Turn off the printer, let the extruder cool down a bit. nine0136
- Unscrew the nozzle, put it in a container with acetone or dichloroethane.
- Leave the part for 2-3 hours, then remove and clean the nozzle with a needle.

Screw the nozzle onto the print head. Throw out the plastic.
Important! Spare nozzles can be stored in the acetone jar. In this way, they will always be ready for use without pre-cleaning.
Filament
Filament cleaning is one of the safest methods that does not involve intervention in the design of the extruder or partial disassembly of this unit. Two types of plastic are used to clean the nozzle:
- Filament with higher melting point. A reel with refractory plastic is placed in the printer. It literally pushes the cork out of the extruder.
- Cleaning plastic. It is usually sold in the form of short sticks or small coils. Its structure resembles nylon. Cleaning filament is the safest way to remove plugs in an extruder.
We recommend using the latter method as an alternative to manual or dry cleaning.
Carbon deposits on the filament
Prevention of clogging - expert advice
To keep the extruder and nozzle in good condition, it is worth following a number of rules:
- Use the filament melting temperature specified by the manufacturer.
Learn more