What do i need for a resin 3d printer
What Do You Need For Resin 3D Printing? – Gorilla Output
This post may contain affiliate links, which means that we get commissions for purchases made through such links, at no additional cost to you. As an Amazon Associate we earn from qualifying purchases.
You should know all the materials you need for resin 3D printing if you wish to start exploring the world of resin 3D printing. That is why we have put this post together to share our knowledge and expertise on the requirements for resin printing.
What do you need for resin 3D printing? You need a resin 3D printer and resin material. You also need safety accessories, like goggles, a respirator mask, and gloves. You may also need paper towels or a pallet knife to make your resin 3D printing easier. What’s more, you should think of the accessories you would need for post-processing. These include isopropyl alcohol and a UV curing machine (or sunlight, if you like), among others.
There are many things you need for resin 3D printing beyond just the resin material and a 3D resin printer. Some of these materials are basic requirements, while some others will make resin printing easier and/or safer for you. As you read on, we will show you everything you need for resin 3D printing and explain what each one does.
The Basic Things You Need for Resin 3D Printing
The two basic needs for resin 3D printing are a 3D printer and resins. Resin is the basic material for creating 3D parts. The printer, on the other hand, is the machine that helps harness the resin to create your desired 3D part. If you have these two things, you can print your resin 3D models, but you may need some accessories to make the process easier and safer.
Resin 3D Printer
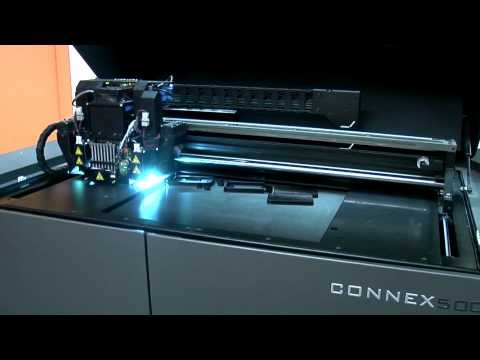
A resin 3D printer uses liquid resins, rather than filaments or powder, to print 3D models. There are different types of resin printers, but stereolithography (SLA) printers are the most popular. The SLA happens in a “tank” as the printer spreads the resin layer by layer, starting with the first layer on the printer’s platform.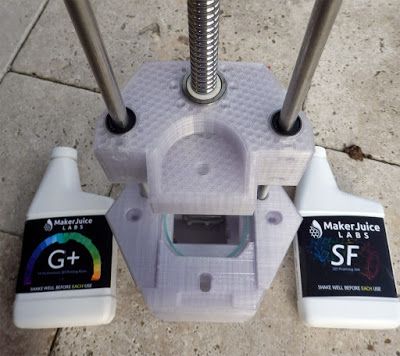 Successive layers are spread on the one before it.
Types of Resin 3D Printers
There are three common types of resin 3D printers. These three types use resin but they employ different mechanisms to solidify resin parts. The 3 common resin printer types are:
- SLA (Stereolithography) 3D printers, which makes use of laser beams
- LCD 3D printers, which use the LED lights of LCD panels
- DLP (Digital Light Processing) 3D printers, which light flashes from a projector
Resin
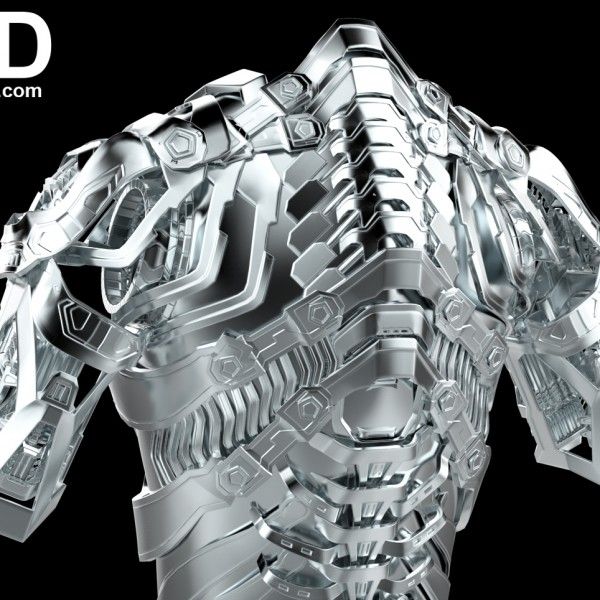
Resin is the basic material for printing resin 3D models . This photopolymer material, which comes in liquid form, cures when exposed to light to create solid 3D parts. There are different resin types and models for various applications. Entry-level resins are cheaper but they don’t offer as much quality as high-end resins, which usually cost more.
Ultimately, resin materials provide higher quality and print models with higher details and accuracy than FDM printers.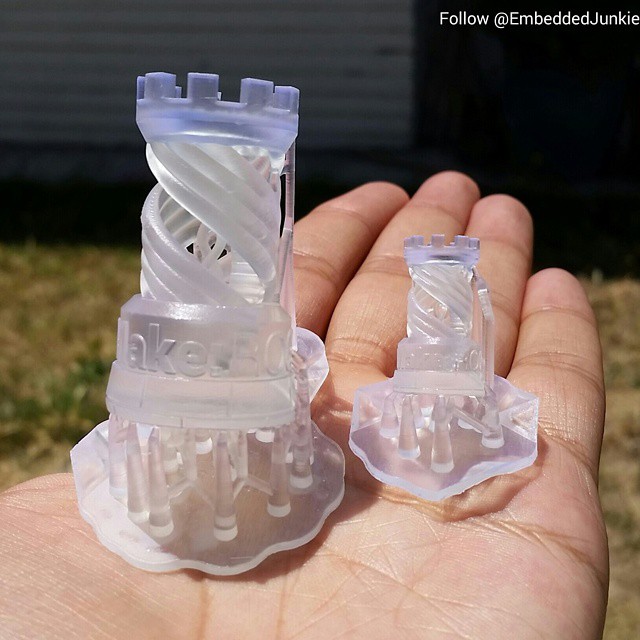 They also provide smoother results than 3D models created with filament or powder materials.
✅ Video – You NEED these to 3D Print with Resin (Short Version)
Before you read on, watch this video to get a basic overview of what we will be talking about. It shows you the different accessories one by one and even demonstrates how to use them. The sections after this video categorize the accessories by what they do and give a more detailed explanation of each accessory.
Safety Accessories for Resin 3D Printing
Goggles, respirator masks, and gloves are the three vital safety accessories for resin printing. Goggles will protect your eyes, the respirator mask will protect your lungs, and the gloves will protect your skin, particularly your hands. You shouldn’t undertake the resin printing process without these three accessories.
Resin can cause skin irritations and the fumes can get into your eyes and lungs too. So you’ve got to use adequate protection to keep yourself safe while the printing process is ongoing. Let’s take a good look at these three safety accessories:
Goggles
The fumes from standard printing resin are not safe for the eyes. These fumes or even resin itself should never come in direct contact with the eyes. If they do, they can cause quick harm to the eyes. That’s why you need goggles to keep your eyes safe. Some people manage to print 3D resin parts without goggles, but it’s not a safe practice. If you can’t get goggles, you can use regular safety glasses as an alternative.
Respirator Mask
Masks are very important for the protection of your lungs. Resin and its fumes can have two effects on your lungs. Firstly, it can cause quick damage when you inhale too much while printing. Secondly, the effects of minor exposure from time to time can accumulate over years and cause chronic lung damage and respiratory problems. In addition to a mask, you should make sure to print your 3D resin in a well-ventilated area.
Gloves
While handling resin, you should avoid direct contact at all costs to prevent skin irritation. A pair of nitrile gloves should come in handy here. Some people claim that resin does not irritate their skin, but they don’t understand the type of irritant that resin is. You can touch resin several times with no irritation whatsoever. But with increasing exposure, your skin will eventually react. And from the first time your skin reacts, it won’t stop reacting.
Other Resin 3D Printing Accessories
To make your resin 3D printing easier, you need a paint scraper or pallet knife for print removal and paper towels to absorb spills. You also need a dedicated toothbrush to remove excess resins from the finished print. What’s more, you may also need an FEP film and a good filter.
A lot goes into resin 3D printing and that’s why it costs a bit more than other 3D printing technologies. You not only need more consumables for resin printing, but you also need more accessories to help facilitate the process. You should be aware of these requirements before you dabble into resin 3D printing.
Here’s a closer look at the different accessories that can make your 3D resin printing easier:
Paint Scraper or Pallet Knife
After you finish printing your 3D part, you must remove it gently from the printer’s build plate without damaging the newly printed model. Since these models are usually still quite delicate, it’s best to use an extra-wide knife, such as a paint scraper or pallet knife, to remove them. That way, you wouldn’t stress or damage the model while getting it out of the printer.
Paper Towel
You need paper towels to absorb spills during printing. You can use any type of cleaning material, but paper towels do the best job for cleaning resins. Make sure to buy this in bulk because resins are quite messy and can quickly cause permanent stains if left uncleaned. What’s more, it’s better to use pantry paper towels rather than those sold in drugstores.
Toothbrush
You should have dedicated toothbrushes for your resin 3D printing. They are ideal for brushing off excess resins from finished prints. You can also use them to remove dust from the surface of your 3D part after sanding. Make sure you get a toothbrush with soft bristles, as hard bristles can damage prints.
Filter
You don’t need filters during printing but they can help you save waste after printing. If there are leftover resins in your printer vat, you can filter them to remove cured resins. Dispose of the cured resin and store the uncured resins for later use.
You have two options; you can get a permanent filter or buy disposable filters from time to time. Both options work well. But permanent filters need thorough washing after each use.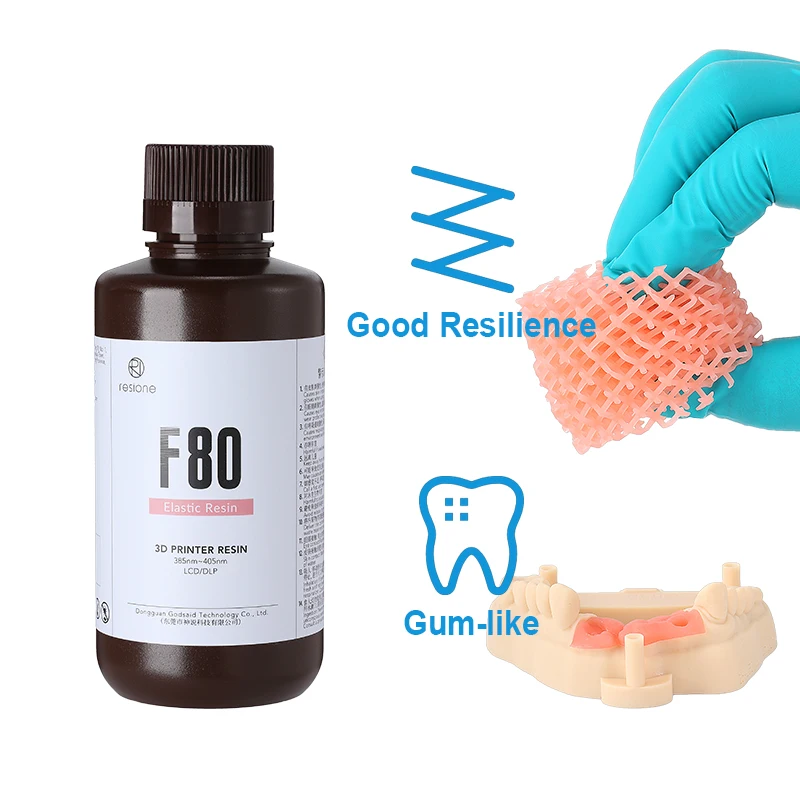 Disposable filters, on the other hand, are to be disposed of after each use but that’s not so environmentally friendly because they can’t be recycled.
FEP Film
FEP films are transparent, double-layered foils that you can insert into the rack linked to your printer’s tank. This film creates a clear way for UV radiation to cure resins while printing is still ongoing. This makes the entire process faster without affecting the model’s strength or accuracy.
Accessories for Resin 3D Print Post-ProcessingThe accessories for post-processing resin 3D prints include IPA (Isopropyl alcohol) to wash off excess resins and an ultrasonic cleaner that will help clean the printed part automatically. A UV light source is also very important for curing your 3D print. You can cure your 3D part with sunlight but you would need a solar-powered turntable to facilitate even and effective UV curing.
Let’s examine the different post-processing accessories one by one:
Isopropyl Alcohol (IPA) & Pickle Bucket
IPA will help wash excess resins away from your printed part. You may need a pickle bucket where you will pour IPA and dunk the printed part in it. As you do this, all the extra resins on the surface of your printed part will wash off.
Ultrasonic Cleaner
An ultrasonic cleaner will come to your rescue if you don’t want to wash your resin print manually. This machine is designed to clean resin prints automatically. You will have to add IPA and put your finished print in the machine. Then, switch it on and let it run for about 5 minutes. Some ultrasonic cleaners have a timer, so you can set the time it would run for.
UV Light Source
If you are not curing your 3D resin with sunlight, you would need a source of UV light. For this, you can use a UV lamp or torch. But for high-quality results, you can purchase a UV curing machine. These machines allow you to set your preferred UV wavelength and heat levels. So you can use custom curing settings for different applications.
Solar-powered Turntable
Solar-powered turntables are originally for displaying objects but you can also use them for post-processing your resin prints. If you are curing your resin 3D part under sunlight, you would need to rotate the model for even curing. That way, the UV light will touch all sides of the model regardless of the direction of sun rays. Without a turntable, only a side will receive UV rays and that will cause uneven curing.
Wash & Cure Box
This is an optional post-processing accessory but if you get it, it will make your work easier. These machines are all-in-one stations that will wash your resin print and cure the resins for you. This reduces the need for manual input in post-processing resin prints.
Related Questions
How Much Resin Do I Need For 3D Printing?
A 1-liter resin bottle should be enough to print about 120-140 small board game figures, assuming the figures are about 1 inch tall. This should give you an idea of how much resin you need to print your model, considering the size. But not to worry, most SLA printers have in-built slicer software that estimates how much resin you need to print your design.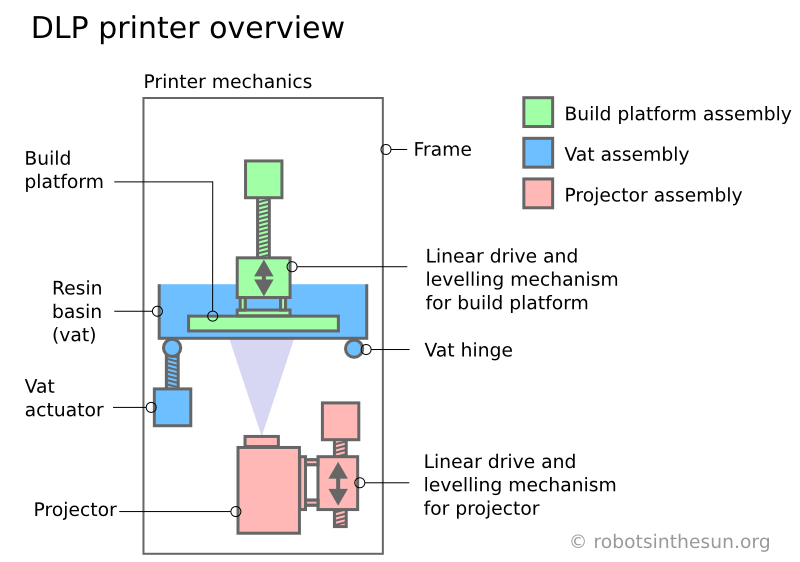
Modeling software for 3D prints usually gives information on how much resins your 3D part will require before you start printing. As such, there is little to no chance that you will run out of resins midway during printing.
How Long Does Resin Printing Take?
3D resin printing can take as little as 30 minutes or as long as one week or more. Factors that determine this include the size and complexity of your model and the print resolution. The type of printer you are using also plays a vital role. Generally, SLA resin printers are the fastest for highly detailed resin printing. But then, there are cheap printers and high-end printers. High-end printers, though more expensive, tend to be faster.
We have a comprehensive that answers the question, “How fast is a resin 3D printer?“. You can read it for more details.
What Are The Dangers Of 3D Printing?
The major dangers of 3D resin printing stem from the fact that resin is a toxic material. It gives off fumes that could be toxic to the eyes and lungs. And it causes skin irritation too. What’s more, resins are not friendly to the environment and ecosystem, particularly sea animals.
To mitigate the toxic effects of resins, make sure to protect yourself with gloves, goggles, and ventilator masks while handling resin. Also, make sure to cure excess resins before disposal. And dispose of them appropriately as designated by local authorities for non-degradable materials.
Conclusion
It’s exciting to be able to print highly detailed 3D prints with resin from your workshop or home. But to do this successfully, you must have the right tools, materials, and accessories. So far, we have listed 16 such materials in this post. We hope that you find this list helpful as you embark on your resin 3D printing.
15 essential 3D resin printer extras
When you purchase through links on our site, we may earn an affiliate commission.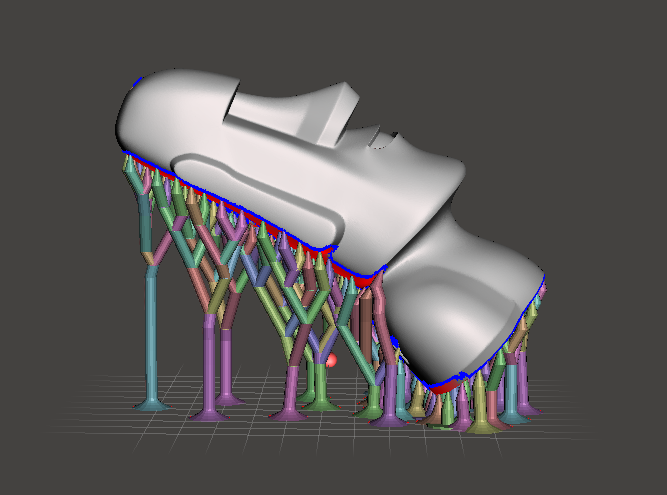 Here’s how it works.
3D printing with resin is becoming a more accessible hobby for curious newcomers, thanks to affordable hardware and a growing community offering advice, but you'll need some essential extras before starting. Some of the best 3D resin printers, such as the Anycubic Photon and Elegoo Mars, are perfect for beginners with enough patience to learn.
It's a more complex method than FDM filament 3D printing, and you'll need these accessories to keep you safe. Some will make life a little easier when creating models, and some are critical to maintaining a healthy printing environment.
Pickle container/model bath
Made for cleaning
This little pickle container has a strainer perfect for cleaning your smaller models. Just fill the container with isopropyl alcohol and put your model in the strainer. You can then use the strainer to lift it out of the bath when it's ready.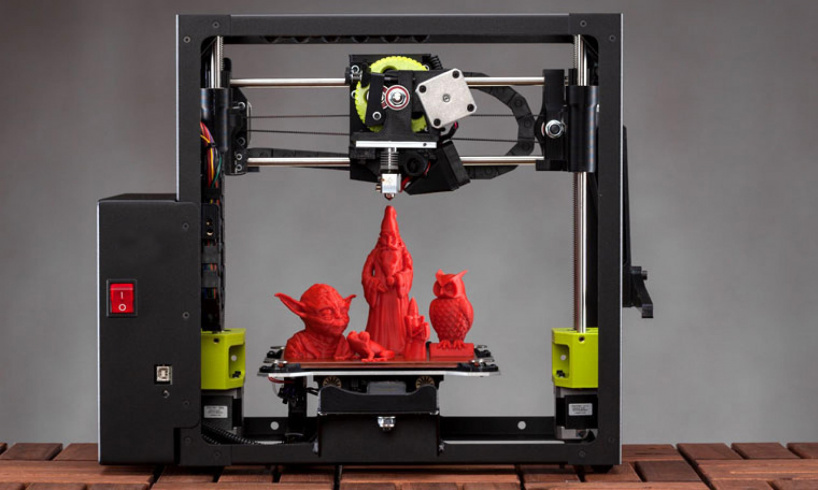
Nitrile disposable gloves
Safety first
You don't want to get resin on your skin. Nitrile gloves are the most critical thing on this list, and having a good supply will save you from some severe chemical burns. Resin printing is a lot of fun and rewarding, but be safe.
BuildTak 3D print removal tool
Print removal
Removing the print from the build plate to your resin bath is essential without damaging it. This extra-wide knife allows you to get the model without stressing it, and the 90-degree angle from the blade to the handle helps spread pressure evenly.
DDSKY 2-pack strong suction cup handles
Easy lifting
Resin printers often have lift-off acrylic covers that become dirty.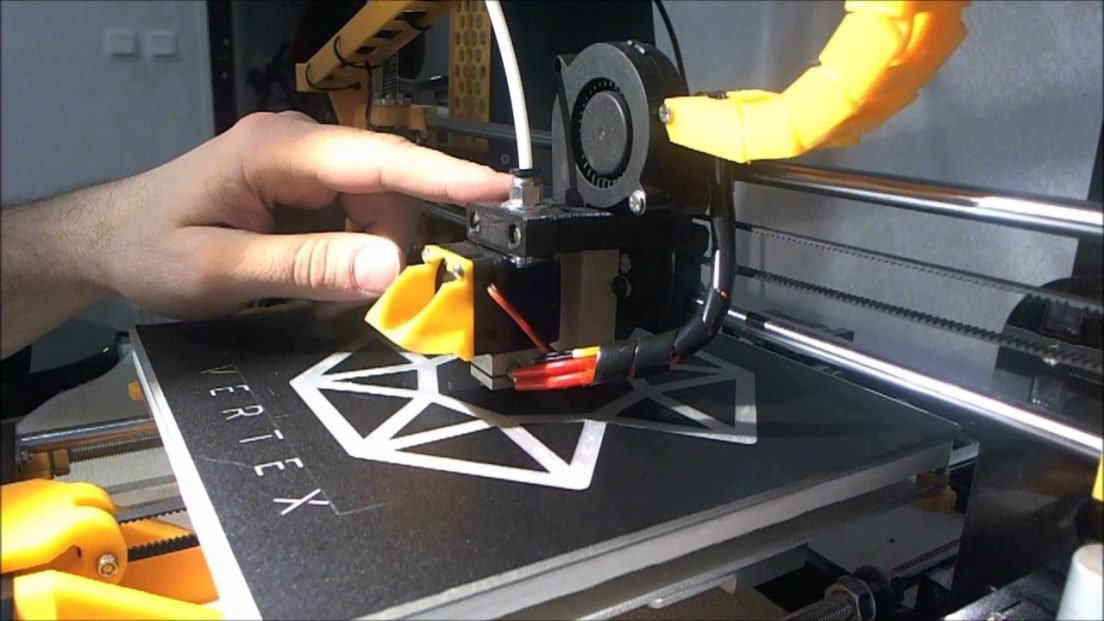 This 2-pack of suction cup handles helps you remove the lid. One is clean for when you don't have resin on your hands, and one is dirty for when you do.
Plastic putty knife
When things go wrong
Not every print is successful. Sometimes your print doesn't stay on the print bed, and you need to remove it from your FEP sheet in the vat. Using a metal scraper will immediately ruin the FEP, so use one of these plastic scrapers instead.
Extra soft bristle toothbrush
Not for your teeth!
When you have detailed prints, you need to get rid of the excess resin from all the lines. These ultra soft-bristled toothbrushes work excellently, but you need to be as gentle as possible. If you scrub at them too hard, you could damage the print.
50 micron paint strainers
Strain away the bad
You often have to change resins when 3D printing, and it's essential not to get any cured resin mixed in.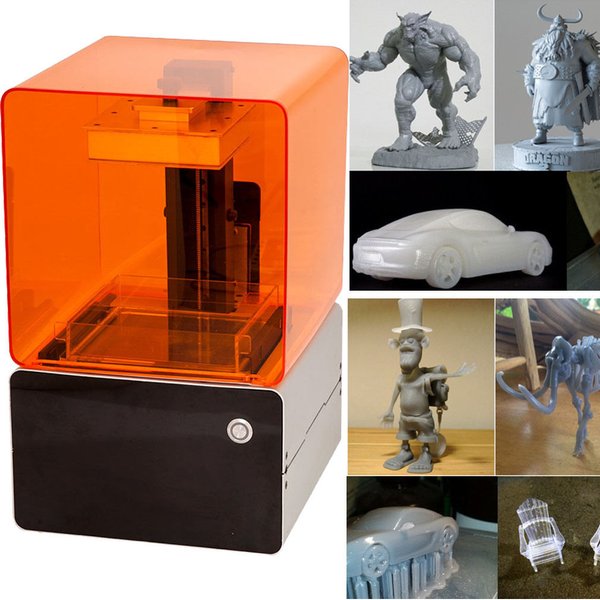 These nylon filters are perfect for filtering resin, and a 50-pack should keep you going for a while.
Anycubic Wash and Cure V2
Clean solution
The Wash and Cure Box from Anycubic is cheap and, frankly, excellent for finishing the resin printing process, and you would be doing yourself a disservice by not owning one. It washes and cures your prints all in one handy machine.
FEP film
Don't skimp
All 3D-printing parts break at some point. Be prepared for the worst, and keep a spare FEP film handy or, in this case, six. A good quality film will last a long while in most DLP printers.
Home air purifier
Breathe free
Molten resin is smelly.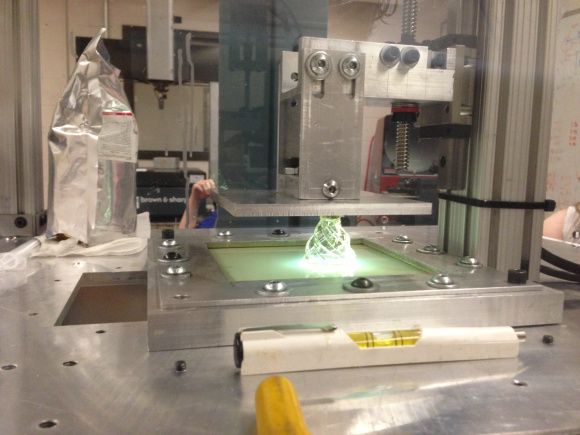 3D printers should always be in a well-ventilated room, but having an air purifier certainly doesn't hurt. It clears irritants out of the air and works on any mold or smoke from your workshop.
UV curing light
Hard light
The last step in finishing a resin print is curing, done in bright sunlight or using a UV lamp. With some elbow grease, this powerful lamp can make a cool UV curing station.
Safety glasses
Eye protection
You only get one set of eyes. Even at relatively low levels of intense UV, continued exposure can be harmful. Besides, you don't want resin in or near your eyes either.
Dual cartridge respirator
Breathe easy
It might look a little much, but resin gives off noxious fumes.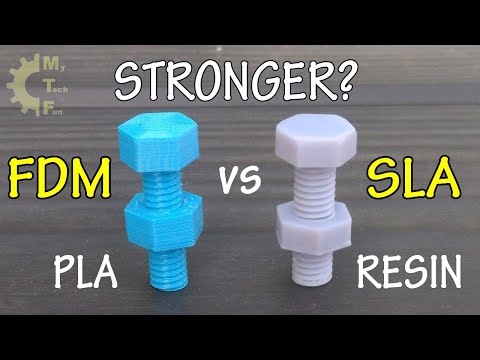 If you don't have a great ventilation system, then a respirator is essential. If you're planning on spray-painting your prints, you'll want one of these anyway. With replaceable filters, this half mask will last you years.
Ultrasonic cleaner
Easy clean
This ultrasonic cleaner, an alternative to the pickle jar, is perfect for automatically cleaning your prints. All you need is a bagged print with isopropyl alcohol with the timer set for three to five minutes. This one even has a handy basket for easy removal.
99% Isopropyl Alcohol
Cleaning only
Cleaning resin can be messy. After you've printed the model and before it is fully cured, you need to wash it in a bath of isopropyl alcohol. Isopropyl removes any excess resin so your model can look at its very best.
Why you can trust Windows Central Our expert reviewers spend hours testing and comparing products and services so you can choose the best for you. Find out more about how we test.
To properly enjoy resin 3D printing, we must be careful and respect the tools. While there are fewer toxic resins available (even some that you can wash in a bucket of water), the fact is that in their uncured state, these photopolymer resins are more dangerous than the thermoplastic filaments used in FDM/FFF printing.
Check our roundup of the best resin for SLA/DLP 3D printers for advice on which brand to choose. The nitrile gloves are an absolute must if you want to handle liquid resin or any models after printing. You want to be wearing safety glasses as well.
Nitrile is less irritating to the skin, and unlike latex and vinyl, far fewer people have adverse effects from wearing these. On a lighter note, the 3D printing community found pickle containers might help with cleaning, and they're right. Some suggestions might not seem so critical at first glance, but they'll prove their worth quickly enough when used with a superb resin printer like the Anycubic Photon.
Get the best of Windows Central in your inbox, every day!
Contact me with news and offers from other Future brandsReceive email from us on behalf of our trusted partners or sponsorsJames built his first PC when he was 13 and has never looked back. He can be found on Windows Central, usually in the corner where all the 3D printers are, or huddled around the Xbox playing the latest games.
Windows Central Newsletter
Thank you for signing up to Windows Central. You will receive a verification email shortly.
There was a problem. Please refresh the page and try again.
By submitting your information you agree to the Terms & Conditions and Privacy Policy and are aged 16 or over.Introduction to Resin 3D Printing and Overview Anycubic Photon S
Table of Contents
1. Introduction
2. Printer Description
2.1. Specifications Anycubic Photon S
2.2. Delivery set
2.3. Design description and comparison with the first generation
3. Operation
3.1. Starting the printer
3.2. Slicing programs
3.3. Photopolymer printing in general
3.4. Features of operation of photopolymer printer
3.5. Features of operation of Photon S
4. Conclusion and examples of printing
1. Introduction Your obedient entered / got into 3D printing (underline as necessary) back in 2014. After looking and reading well on almost the only forum at that time, Roboforum.ru, the topic of choosing and buying a printer and seeing that almost every first one there buys a kit of self-assembled Pryusha of a Chinese spill, after assembling which he begins to print parts on it for a new 3D printer, I made the only possible decision: in order not to fall into this inevitable vicious circle, I bought an already assembled clone of the second Makerbot - FlashForge Creator, which I have already mentioned more than once in my articles on 3D printing technologies (blowing dust).
But the topic of photopolymer printing, which gives a completely different potential for the quality of the print, albeit at the price of a smaller size of the latter, inevitably “tickled the nostrils”, enticing the opportunity to get the result already without reservations “well, what do you want, this is 3D printing, not casting”. But the projector photopolymers that were available for purchase at that time did not attract at all with an exorbitant price.
Therefore, the first acquaintance with this technology took place on a self-made printer built on 15 mm rails and ball screws with a FullHD projector. It would seem that this is it - the brightness (light speed), the size of the tray for printing 192x120, the presence of a “nod” in the design, serious mechanics. But alas, all castles in the air stumbled over the harsh reality, as often happens: large size, fragile acrylic bath, dust on the projector optics, a milled platform and its bracket that do not provide for normal cleaning of the photopolymer, let's say politely, the unpleasant smell of Chinese photopolymer, which also turned out to be practically non-working (did not freeze even in the sun), and, as a control, poor sharpness at the corners of the used Acer P1500 projector at the required short focusing distances. As a result, one (ONE in capital letters) successful printout with FunToDo Castable photopolymer was made on this printer, which was later put into experiments. And the main reason why I completely closed the topic of a home-made projector printer for myself is the actual change during this time of technology from a cumbersome and expensive projector to LCD technology that has almost completely captured the market today, when it became clear that a photopolymer, especially a home one, simply must be much more compact, simpler and uniquely to have a closed print chamber. Moreover, the cost of a projector printer and an LCD are completely incomparable, not to mention the intricacies of calibrating the coaxiality of the optics of the projector of the Z axis of the printer.0004
Thus, the real entry into the photopolymer occurred already on the first generation Anycubic Photon bought a little later. This printer had an excellent film tension system, a durable aluminum tray and a platform well adapted for cleaning, but at the same time, due to the cheaper design, it had problems with the stability of the Z axis, so a year later I was already unpacking the Anycubic Photon S bought on occasion and at a discount, which will be discussed further (hereinafter I will call it Photon, indicating the first or second, which is S, generation if necessary).
What is the point of doing a review in any form of an already morally obsolete printer, except, I confess, it’s a sin, participating in a printer review contest, when there are already more promising technologies for using monochrome matrices, and indeed, something, and even video reviews on YouTube on Is this printer enough? Firstly, it is still a very good and quite budgetary photopolymer, sold and relevant in terms of aggregate, secondly, “what we have from the goose” after a year and a half of operation are pitfalls that are difficult to stumble upon during the initial review, features of work, wear, etc. Thirdly, this is an opportunity, based on a review of this printer, to create, along with this, an article on an introduction to photopolymer 3D printing for beginners [the author wipes his hands first with isopropyl alcohol, then with a damp cloth, swearing quietly under his breath]. But I must say that this article reflects my own experience with photopolymer and therefore may be somewhat subjective.
2. Description of the printer
money change?
2.1. Characteristics of Anycubic Photon S For those who are not familiar with this printer, first I will give the main characteristics:
- a 5.5 "RGB matrix typical for photopolymers of this class with a resolution of 2560x1440, giving a dot pitch of 47 microns
- LED UV matrix, which gives better illumination uniformity and thus removes the problem of geometric distortion in the corners
- aluminum tray with groove for pouring out the photopolymer
- platform calibration system with one fixing screw - exhaust air filtering system with two charcoal filters
- Z-axis on two roller guides - ABS housing white versions, I chose black. I will give a photo from the official site, because. after a year and a half of operation, the printer no longer looks like it did when the box was first opened.
2.2. Scope of delivery
The printer itself is delivered in a cardboard box, padded around the perimeter with a sufficient amount of sealant, the print platform and tray are placed inside the case itself and individually packed in a sealant. The printer also comes with a set of disposable paper filters for filtering the polymer (you can buy them at auto enamel stores), a plastic spatula, which I personally use to clean the walls of the bath from the photopolymer when draining it back into the container, a pair of gloves, a flash drive with test files and screwdriver. Also, the kit should include half a liter or a liter of branded Ekubikov photopolymer, but this already depends on the configuration of the printer.
2.3. Description of the design and comparison with the first generation
Now let's dwell on the design in more detail and conduct a comparative analysis of it with respect to the first generation, whether the printer has become a predecessor in everything. The first striking difference between the Photons of two generations is the case material. Those who were interested in these models, of course, know about it, but this article is primarily intended not for gurus who know all this, and have already eaten more than one dog on their own construction of 3D printers, but for people relatively distant . .. So, the case of the first generation Anycubic Photon is made of steel, the second one is made of ABS plastic. In a sense, this is even funny, because. this plastic is easily degraded, more precisely, it gradually dissolves upon contact with the photopolymer. If, in the case of a steel case with acrylic windows, it was clear that nothing would happen to him, then there are even doubts whether the walls will lead over time and whether, for example, the door will close with difficulty and stick it to body with this same photopolymer. And it's not that the metal case is a clear advantage, but for Photon, given the peculiarities of its design, unfortunately, yes. More on that below.
The second feature that, looking ahead a little, was decisive for me when buying, is the replacement of a single Z-axis roller guide with a double one. In the world of harsh homemade products, recognizing only the option with rail guides, when in every second homemade product you can see red-green ones similar to HIWIN (yes, in most cases they are similar, because they are ordered mainly from China, and the percentage of fakes of this fashionable home-made manufacturers, very high) rail carriages, the use of roller guides is not even bad manners, this is an excuse to lead a naked printer designer through a crowd of home-made workers, throwing rotten vegetables at him. Yes, yes, and someone's voice, periodically repeating "Shame!".
Indeed, the first generation with a Z-axis roller guide was very prone to wobble depending on how lucky the owner was with a particular instance. For those unfamiliar with the terminology, this means that the carriage, when lifting and lowering, “walked” horizontally by several tens of microns and deviated by small fractions of a degree. “And how many are these several tens of microns, these are pennies!”. Believe me, no. On all more or less even vertical surfaces or close to them, unpleasant and easily noticeable “waves” appeared, with which nothing could be done. Yes, these carriages have an adjustable tightness, but an attempt to adjust the print quality on the first generation of the Photon did not lead to significant changes. On the other hand, wobbles really catch your eye only on flat surfaces with a large angle of inclination. Why, even without trying this second generation in print, I immediately decided for myself that this was almost the main reason for replacing it? It's very simple: even two such "imperfect" rollers on individual guides, separated by a long distance, despite the seemingly simple solution, wobble removes almost completely. This solution is in the “simple, blocky and works” category, and elementary geometry from high school guarantees “workability” here. These double guides are clearly visible here, as well as the Z-axis close to them (ideally, the location of this axis should be close to plane formed by vertical guides):
The third difference from the first generation of Anycubic Photon S is the use of a backlight LED array. I repeat that, unlike the "bell"-diffuser and a single powerful LED of the previous generation of LCD photopolymers, this design makes the illumination of the entire screen somewhat more uniform, and also eliminates the geometry problems of the printout in the corners of the platform. As a nice bonus, this reduces the exposure time of the layer by approximately 15-20% due to the greater total backlight power. In this not very representative photo, I tried to show how such a block of individual LEDs, usually called “paraled”, shines through the matrix
Another feature that frankly surprised me, which is common to both generations of Foton, is the presence of a carbon filter with an exhaust fan (two fans and two filters in the second generation) of air from the printing chamber. As conceived by the developers, this was to remove the inevitable smell of photopolymer during printing by absorbing it with a carbon filter. Namely, the air extraction from the chamber is necessary so that through the leaks of the body, mainly the doors, the air does not leak out, bypassing the filters, taking with it the smell of the photopolymer. At this point, I want to pause, look thoughtfully at the ceiling and say “Mdaa”. On paper, it might have looked good. But in practice, in my experience, it turned out something like ... Imagine the situation: you work in an office building, and on your floor, sorry, the sewer broke through in the toilet. And so that this toilet does not smell so much, for a while, until everything is repaired, at the exit of it, the “kind” administration put a large fan to blow air from the toilet into the common corridor along which people walk. I agree, the analogy is a little "smelly" in every sense, and not too "literary" for such an article, but it describes the printer's ventilation system well.
The fact is that the carbon filter does not retain the smell of the photopolymer, and when the fan in the structure actively blows air out of the working chamber, the effect is much more pronounced than if this fan is simply turned off. On the first version, I, hesitantly, turned it off after a while, having previously asked technical support if something would “fall off” there, on the second version, I turned off the blowing fans even before the first turn on.
Here you can see the filter blocks located at the corners
The screen for controlling the printer itself has a small diagonal and is made a little smaller than on the first generation. It is sufficient to manage all the functions, when entering the print menu, each file carries an icon from the slicer, how the printouts will look, but the print icons are very small, smaller than on the first generation, and as a result, it is difficult to see them, what exactly will be printed there, basically you still have to focus on the file name.
As you can see, in the file selection menu, the legibility of icons leaves much to be desired. When you select the desired file, the preview will open in full screen, but believe me, it will not get much better.
The lifting mechanism is powered by a NEMA 17 stepper motor, as in a large percentage of 3D printers, on a trapezoidal screw and the two roller guides already mentioned above. Engine noise during operation is very low. In general, the printer can be described as quiet.
The printer has only one optical limit switch at the bottom, so keep this in mind when working: in the first generation there was not even a software upper limit, so it was easy to mechanically rest against the upper limit by pressing the platform lift. On the second generation, I personally did not check for this limitation. But in any case, when you turn on the printer, it may not know how high the platform is, so be careful.
3. Operation
3.1. Starting the Printer Starting up the printer is quite simple: 1. We check the tension of the fluoroplastic (hereinafter referred to as Teflon, since this is already an established term) film2. We remove dust from the screen and from the film on the back of the bath and put the bath in place, fixing it with the screws3 intended for this. We install the printing platform in the right place with a loosened screw that fixes the platform in the hinge4. We connect the printer to the network, turn it on and perform a zero and horizontal calibration of the platform, followed by fixing the hinge fixing screw - the calibration video is easy to find on YouTube5. Shake to mix and pour in the photopolymer. That's it, you can print the test "enicubic" that comes on the flash drive.
This turns on the cooling system of the LED (the LED block in the case of Photon S), the platform lowers until the optical zero limit switch is triggered, after which it drops to logical zero (when calibrating the printer, this same logical zero can easily be a millimeter below the limit switch), after which already turns on the illumination of the first layer.
The general rule for printing photopolymer printers is reduced to a long (30-120 seconds) first few layers to compensate for the unevenness of the platform and to ensure that these very first layers “hook” well on it, the subsequent layers are printed with a regular exposure time (about 3 -12 seconds on average depending on printer, resin and selected layer thickness). After the layer is illuminated, the platform is raised to a certain selected height (usually around 4 mm) to tear off the Teflon film from the illuminated layer, after which the platform is lowered back by the same value minus the layer thickness, then a pause is made in the region of one second to “calm down” the photopolymer , after which the illumination of the next layer is turned on. After printing is completed, the platform rises to a height close to the maximum, after which the printer remains in standby mode with an inscription on the screen about the end of printing, and the backlight cooling fan turns off.
3.2. Programs for slicing
“So how to slice on a computer?”. Download the branded Photon Slicer, which already generates printable files in the proprietary Enikubika format. But from my point of view, it is better to use ChiTuBox, which, in fact, Photon Slicer is based on. ChiToo is updated more often than the Enikubik branded slicer, so the possibilities in it will be higher. In general, I can universally recommend this slicer to a novice owner of any photopolymer.
This is how the ChiTuBox interface looks like
And this is a preview of the already cut model, on which it is good to monitor the adequacy of the spaced calipers
3.3. Photopolymer printing in general
1. This has been said by everyone and everywhere, but I cannot but repeat it. The most accurate description is the English word "messy", i.e. dirty and tedious. This is the transfusion of the photopolymer that easily blurs the surroundings, the washing of hands, which are almost impossible to protect even with gloves due to some work features, the transfusion of the photopolymer again, draining the bath, cleaning it, isopropyl alcohol, acetone, conservatory, court, Siberia . .. um ... sorry, carried away . But the general meaning, I think, is clear. Unfortunately, this is not FDM printing, in which everything is much simpler in terms of work.
2. Low predictability of printing results, if you have everything in openwork or even not very calipers. Black box effect: you sent it to print, after which it’s hard to say what happens or not until you take the platform out of the printer and look at it point-blank. Yes, you can look into the windows, yes, you can see if nothing at all has appeared above the surface except for the platform itself, when you can unambiguously cancel printing, yes, you can pause with the simultaneous lifting of the platform, but the essence still remains: you are looking on the platform in the printer, and everything seems fine, but when you remove it and look at point-blank range, critical flaws are often visible there that could not be seen during printing.
3. In the same way, the required shamanism with the calibration of the exposure time and the thickness of supports for various cases, as well as the selection of scales, gaps and supports in FDM printing. This requires experience when you understand that here and here the calipers automatically set by the same ChiTu are superfluous, which will require subsequent excessive cleaning of the surface, but here and here they must be put, otherwise the output will be a marriage.
4. Corresponding to point 1. The processing cycle of the finished printout includes removal of the printout, washing in dirty isopropyl, washing in pure isopropyl, backlight-drying, preferably in an ultraviolet chamber, and washing in acetone. The latter removes that part of the photopolymer that remains even after washes with isopropyl and backlight. Some people use acetone directly instead of isopropyl, but personally I look at this approach with doubt: acetone destroys underexposed fragments more, which can lead to cracks in the model. But this is a debatable issue. In other words, post-processing of the model after printing is a separate procedure that requires time and effort.
5. Cheap photopolymers often smell. .. to be honest, especially during operation, when heating occurs as a result of the exothermic reaction during polymerization. For example, some Chinese, though not all. Our manufacturers (such as HarzLabs, but not only) initially tried to make the photopolymer not have a pronounced unpleasant odor, but now the Chinese have begun to pay attention to this, so it’s already possible to buy a photopolymer that will not carry some mixture of chemistry and fish, even Ali.
6. Most photopolymers are brittle. There are those that have some elasticity and do not prick when trying, for example, drilling, but they usually cost significantly more, at least at the moment. That is, despite the fact that these are essentially cast parts, they can often be inferior in strength to printed parts made using FDM technology.
7. Most prints require rubbing alcohol except for water washable photopolymers. Isopropyl alcohol is usually used because it evaporates faster. First, washing is done with already dirty isopropyl, after which a second washing is done in pure alcohol. Further, the printouts should be illuminated, for this you can use a special illumination camera, the sun, or even the printer's camera itself in the case of printers that have this function. After that, I would recommend doing another wash in acetone to remove the remnants of the photopolymer left after backlighting. Acetone is more aggressive to the photopolymer, but it is not dangerous for an already fully polymerized printout.
8. Can photopolymer printing already provide unconditional quality when the printout is almost indistinguishable from the cast part? Unfortunately, not always. Just like with FDM printing, there are problems with the bottom surface of the printouts, the photopolymer has the same problems. Yes, it allows you to print with large overhang angles, does not create frank porridge in the area of \u200b\u200bcalipers, but still, the printout needs to be finalized in these areas. And even after that, it is not always possible to get a level surface “like a real one”. Also, photopolymers, like ABS plastic, have shrinkage, which must be taken into account both during printing and during subsequent exposure - in the absence of calipers, a thin part can simply be bent. But if there are no extreme angles and a large number of calipers, then it is realistic to achieve the quality “almost like casting”.
3.4. Features of operation of photopolymer printer
Here I will give the features of operation of photopolymer printers themselves, i. what applies to printers in general and which are relevant not only for Photon C, but also for any photopolymer built on a similar technology:
without additional manipulations. The duration of problem-free storage of the photopolymer without refilling depends on the specific brand of photopolymer.
2. Once every 10-30 hours of printing, although it is difficult to give an exact figure here, this is individual, and it also depends on the photopolymer used, it must be drained through the filter back into its original storage container. This is not related to the photopolymer itself, but is required to clean the Teflon film, which is the bottom of the bath. It could be said that during operation the Teflon film becomes contaminated, etc., but what exactly happens there, whether the film is contaminated, the photopolymer residue, or some other factors are to blame, but, simply put, the printer stops printing. Yes, something that a couple of seals ago was perfectly printed with this photopolymer and this very file is already coming out with a marriage. And yes, you just need to wipe the bottom of the bath with isopropyl alcohol, pour the photopolymer back in, and everything works fine further. I will illustrate this phenomenon with a specific example, where on the left (on the left photo), the first printout, one or two calipers were missing, as a result which part of the frame came off during printing, and on the second one there was enough of everything, but the tray that was not cleaned in time ruined the print in the bud, when not only the frame, but even the radiator was not printed.
At the same time, after cleaning the bath, the printing was already without problems.
3. If it is suspected that part of the light remains at the bottom of the bath, during a failed print, it is also necessary to drain the photopolymer and clean the bottom. Best of all, the “blots” of the polymer smeared along the bottom are removed by simply pressing a finger on the film from the back. This "blot" is easily peeled off from the film, and the film itself is not damaged. It is necessary to do this cleaning so that when you start the next print you do not damage the film, or even the printer screen by pressing this “jellyfish” with the platform from above, especially since most likely printing in the presence of such an illuminated piece of photopolymer on the film you most likely still won't work.
4. Film needs to be changed periodically. This procedure is simple, but rather painstaking, plus you must have a supply of film. The film does not have a direct "timer" of life, its wear depends on the duration of exposure of the layers, the shape of the printouts and mechanical damage during cleaning. It can work for a very long time, and require replacement if mishandled and after 2-3 prints.
This is the process of replacing the film, shown by the manufacturer himself - an excellent and understandable video, in which, in particular, you can appreciate the genius of the bath design. Yes, it is difficult to establish who invented it first, but the fact itself does not negate it
5. Teflon film is strong, but even a careless swipe of an angle with a plastic spatula during cleaning can easily leave an indelible mark on it in every sense. Moral: clean the film carefully, it is better to let the photopolymer drain from it without external influences and then clean it with isopropyl alcohol in the bath already put in place.
6. The film on the side of the screen and the screen itself must be clean. Free of dust and grease. You can clean it with the same isopropyl and blow it with a "pear". Do not allow photopolymer to get on the screen. And, moreover, do not turn on the backlight if there are at least small traces of photopolymer on the screen, otherwise you will change the screen.
7. Do not print hard and thick parts directly on the platform itself without supports. Then you will remove such a "bar" from the platform with a hammer and a chisel, and not with a metal blade.
8. My experience is that it is easier to remove parts from the platform, for example with a knife, rather than a plastic spatula - the latter is more likely to break itself than to actually remove any part.
9. An important question that a person who has had a glimpse of photopolymer printing might ask is: "Is it possible to get a print that feels tactile like a molded part, without any signs of stickiness, slipperiness and other residual effects" I once was goo"? Yes, you can: obligatory illumination and washing in acetone after. There are still a couple of minor reservations here, but in general the answer is positive.
this greatly increases the wear of the Teflon film. The rate of its wear can be indirectly heard by the sound of a layer tearing away from it when the platform is raised. Ideally, this should be almost inaudible.
11. To select the exposure time specifically on Photon C, it is possible to use the r_e_r_f.pws file located on the flash drive, in which the printed surface is divided into fragments horizontally, each fragment is illuminated for one second more than the previous one. Thus, a sufficient exposure time can be selected. Also, on the sites of photopolymer manufacturers often publish tables of exposure time settings for different layer thicknesses, as well as rise speeds and delay times before printing.
This is how the standard Enikubik calibration model looks like. There are four elements printed at the same time with different exposure times.
3.5. Features of operation of Photon S
The main feature and, frankly, the disadvantage is the use of a one-piece body with a door, in contrast to the use of a "hood" in most printers (also in newer Enikubik printers). Thus, you do not have an insulated sealed hood with work area seals. Those. your printable area is leaking. And this means that all the same, when printing, you will get the smell of photopolymer around. Not too strong, but anyone will notice it. The fact is that the design of the door is made unsuccessfully and does not provide for seals that would hold back the evaporation of the photopolymer through leaks. Structurally, this seems to me the biggest miscalculation of the Foton developers. The lack of a normal handle is added to the disadvantages of the door already described, as a result of which the door sometimes becomes difficult to open without fear of simply breaking it. In addition, the entire top of the printer would benefit from a resin-resistant material. In this regard, even the same unsuccessful design of the upper part of the first-generation Photon printer was better, because. there was steel, plus a handle to open the door.
When printing, a small amount of photopolymer drops falls on the bottom of the door, so I would recommend immediately tape it with black tape from the inside - the standard width of the tape just fits the width of the grooves needed for pasting - if you look at the door from the inside, you will immediately understand , "about where" I'm talking about. This will reduce the chance that your door will just start to stick when you miss the photopolymer drops on it.
In addition, I did not notice any other noticeable flaws that would complicate the operation of the printer. Oddly enough, it is difficult for me to describe any specific shortcomings of this printer that affect its operation, which would not be on others. Aside from the questionable case design and the rather odd chamber purge solution, this printer is a perfectly normal workhorse, printing fairly consistently within the limitations of technology and design. Such limitations, for example, include the missing easy layer separation mechanism that FormLabs Form 3 has, but such technologies rarely wander into budget and extra-budget solutions, to which Photon S belongs.
Double roller guide mechanism avoids wobble - please note that wobble is a very likely evil for all printers with a single guide, which is often found in budget solutions.
RGB screen, unlike monochrome ones specially released for photopolymer printers, has slightly less detail for equal screen resolution and longer exposure time of the layer, but do not forget that the total time per layer is the sum of the exposure time, rise time, fall and pause before turning on the illumination of the next, i. e. even a 100x increase in flash speed will not give you even a 10x increase in print time.
The LED matrix cooling fan is quite quiet, it is noticeably quieter than on the first version, it will not even interfere with sleep if it turns out that the printer is in your room, because the sound of the lifting and lowering of the platform is even a little louder than the cooling system. The only caveat: because. I immediately turned off the chamber purge fans, I can’t say about the noise of their work. But, remembering the design of the case, I would not recommend sleeping in a room with a working photopolymer without good ventilation.
i.e. the only limitation, but quite important for a certain number of potential buyers of the printer, is the leakage of the case during operation. So, to reiterate, when working, you cannot completely avoid the smell of photopolymer in a room, unless the room is large enough and well ventilated.
4. Conclusion and printing examples
Can you recommend buying Anycubic Photon S as a budget solution? Yes. It gives quite good print quality, and at the same time it is very inexpensive by today's standards. When choosing, you should pay attention to how critical the absence of a conditionally sealed print chamber will be for you, which other printers can boast of, in particular in the budget segment, but which the Photon lacks. On the other hand, I recommend paying attention to the double roller guide and the close-mounted lifting axle, which eliminates wobble, which is often not found in many other budget photopolymers. Also, the use of a matrix of LEDs can be attributed to the pluses, which is also not available for all budget solutions. This makes, with the reservations already indicated, this printer quite successful, and I can recommend it for purchase and operation.
And as for the question posed at the beginning of the article, was the game worth the candle, was it worth changing one printer for another that is so different from it? Yes ... The fact is that the quality of printing on the first Photon, unfortunately, did not suit me. Yes, it was possible to replace the standard Z-axis with a double rail guide, but the replacement kit at that time cost the same as the cost of an “upgrade” by replacing the entire printer with a second generation, taking into account the sale of the old one. Therefore, for me personally, the choice was obvious.
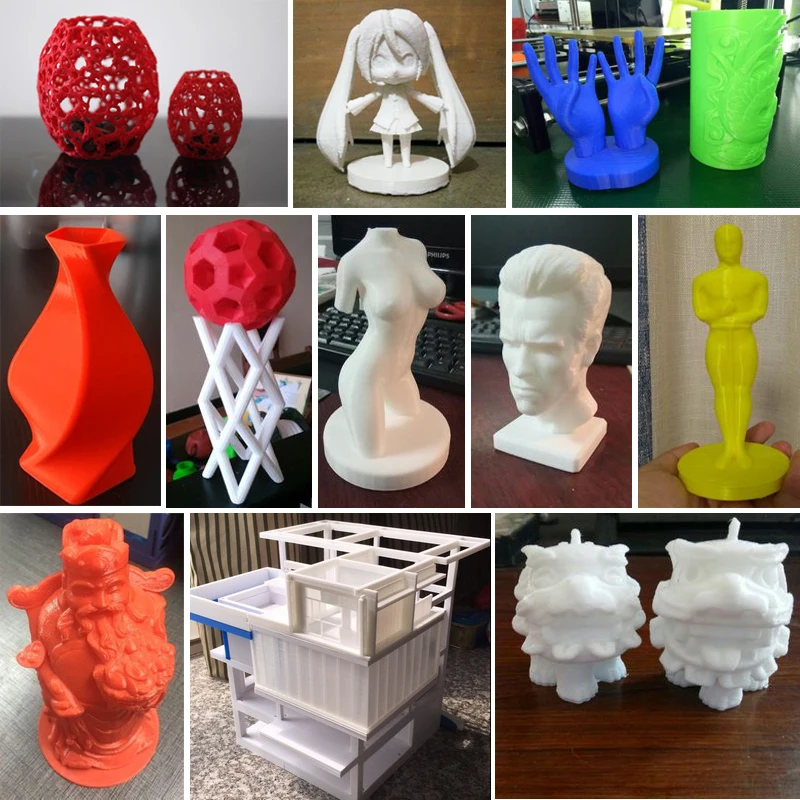
At the end of the article, I will give examples of what can be obtained on this printer, so to speak, from personal stocks.
Feed augers made for testing in slightly different configurations
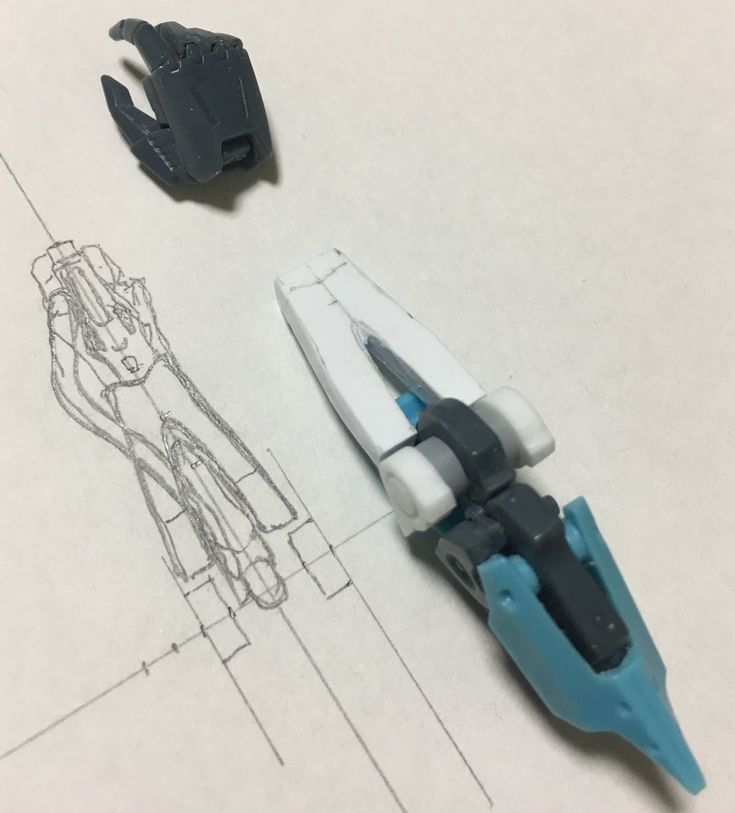
Models of pumps made from a photograph
Made for a co-worker a plinth for the head of a character from Warhammer.
Pay attention to the print direction. Printing on calipers allows you to easily separate the printouts from the platform later, and the slope of the surface reduces the wear of the bath film by changing the position of the boundary in layers. You can see that the calipers on the first layers still moved away, this required subsequent grinding of the base.
Cartridge cover and platform. The second one was also made for the already mentioned comrade.
One of the teeth had to be removed and placed separately for subsequent gluing, because. it just didn't fit in the printable area.
A gift for the 8th of March - a simple but quite nice one
A couple of playful medals
And finally, a couple of frames from one rather long project to create a truck model.
Thank you for reading
Kinds of 3D Printer Consumables 2020 Selection
Home » Articles » Consumables » Types of consumables for 3D printers 2020 selection
How to print on a 3D printer in 2020? What types of consumables for 3D Printing are there in general?
The production of various products on FDM printers is now very popular. Specialized 3D printing equipment is used by souvenir manufacturers, teachers and students, it can be seen in the workshop and in the apartment.
Each user of the printer knows that thermoplastic materials ABS, PLA are used in working with it. These are the standard options for these devices. But besides them, there are other options on the market that can be called exotic. Manufacturers of consumables are guided by the growing popularity of 3D printing, constantly expanding the range of consumables. Now in the work it is possible to use metal alloys, wood, carbon fibers, phosphorescent dyes, to give products specific qualities.
A wide range allows you to make a choice of material, guided by the requirements for the finished model.
- Thermoplastic ABS
This material is a pioneer in 3D printing. Durability, low cost, low weight of ABS provided it with well-deserved popularity. Thermoplastic has a wide range of applications, it is used in the production of accessories, children's LEGO designers, etc.
However, this material also has disadvantages that have caused a decrease in demand. An important disadvantage of ABS is the increased melting point, which is 210-250 degrees. This material requires a special heated platform. It prevents deformation during partial cooling in the printing process. The disadvantages of the polymer include strong fumes that accompany printing. They pose a danger to the human body, animals with respiratory diseases. The installation site of the printer requires the creation of high-quality ventilation.
ABS thermoplastic features:
product durability and strength, impact resistance;
low bending strength, flexibility;
requires controlled cooling rate, may warp during partial cooling;
working t° 210-250;
dissolves in acetone;
medium printing, fine-tuning required;
it is recommended to use a platform equipped with heating;
is not allowed to come into contact with food.
The material is excellent for the manufacture of housings for electronic devices, dynamic parts of machines, toys.
- Thermoplastic PLA
The introduction of PLA polymer, which is based on polylactic acid, has significantly reduced the popularity of ABS. Many 3D printing enthusiasts and experts have given it preference. The material is made from renewable raw materials and is biodegradable. In the category of plastics, PLA ranks first in terms of environmental friendliness.
This thermoplastic does not emit odorous fumes during printing. It is possible to use PLA indoors without fear of negative consequences. With partial cooling, it practically does not deform, there is no need to install a heated platform. It should be noted that this plastic is harder than ABS, products made from it are more fragile.
Features of thermoplastic PLA:
durable, strong, comfortable to use;
high print speed, smooth layer transitions;
does not dissolve;
working t° 180-230;
during cooling shrinkage, minimal deformation;
installation of a heated platform is not required;
simple print.
Thermoplastic is used in the manufacture of small children's toys, etc. Check with the manufacturer if contact with food is allowed.
- PET resin
An excellent alternative to traditional options is PET polymer. Polyethylene terephthalate is the perfect combination of flexibility and strength. In these indicators, it surpasses ABS, and in terms of ease of setting print parameters, PET is similar to PLA. During operation, no unpleasant odors are emitted. The resulting waste can be recycled.
Features of PET polymer:
minimum weight, increased strength, impact resistance;
high wear resistance;
maximum flexibility;
working t° 220-250;
during the cooling process, changes in geometry are minimal, a heated platform is not needed;
does not dissolve;
is a work of moderate difficulty, it is necessary to fine-tune the temperature.
PET polymer is used in the manufacture of models for which impact resistance and flexibility are important criteria, for example, covers for gadgets. Increased wear resistance and strength make the material an excellent option for printing mechanical parts that are subjected to significant stress. The admissibility of contact with food must be checked with the manufacturer.
- PETT resin
This polymer is a modification of PET polymer and has specific properties. Another name for polyethylene co-trimethylene terephthalate is T-Glasse. The material has decent rigidity, strength, in addition, it has increased hardness and transparency. Biocompatibility allows the polymer to be used in the production of food containers. It was approved by the United States Food and Drug Administration.
Features of PETT polymer:
hardness, impact resistance, lightness, transparency;
increased wear resistance;
maximum flexibility;
does not dissolve;
working t° 210-230;
minimal deformation during cooling, no heated deck required;
work is of moderate difficulty.
It is used in the manufacture of mechanical parts subjected to friction, shock. It is necessary to check with the manufacturer whether it can be used to create products that come into contact with food.
- HIPS filament
The ability of the HIPS polymer to decompose in a biological environment, the absence of harm in contact with humans and animals ensured its wide application in the production of food packaging. Polystyrene has a high impact resistance, has a white color.
In the manufacture of objects in 3D printing, HIPS is not used due to difficulties with adhesion, curling, if there is no platform equipped with heating. But this polymer is used in 3D printing for other purposes. It is an excellent secondary product, providing reliable support for complex objects created from other consumables in dual extrusion.
After receiving the result, the auxiliary parts from HIPS can be removed. To dissolve it, liquid colorless carbon, for example, acetone, is used. Most often the polymer is used in combination with ABS.
HIPS filament features:
increased strength;
practically does not bend;
dissolves well in various types of solvents;
is not safe in contact with food;
working t° 210-250;
noticeable shrinkage during cooling, process speed control is required;
Heated area required;
is a work of moderate difficulty, the parameters need to be fine-tuned.
- PVA filament
PVA filament, like polystyrene, is not used in pure form in the manufacture of models by means of 3D printing. It combines with other polymers to create complex structures that require support. Polyvinyl alcohol is used as raw material for production. This filament is non-toxic, safe, biodegradable, can dissolve in water.
The consumable is used in printing on all standard FDM desktop devices. But the work requires a heated area, it is necessary to strictly observe the temperature regime of printing.
Features of the PVA filament:
is used to create a support structure;
has good strength, reduced flexibility;
is soluble in water;
working t° 180-230;
has deformation during cooling;
work of a low degree of complexity.
- Synthetic polymer nylon
One of the most popular polymers is nylon. It is widely used in various industries, is cost-effective, wear-resistant, flexible, strong, light. In terms of fragility, the performance of this polymer is much lower than that of ABS, PLA. The material is perfectly dyed with standard pigment products intended for fabrics.
Nylon features:
durability, strength, wear resistance;
increased flexibility;
does not dissolve;
working t° 220-260;
shrinks during cooling, it is recommended to install a platform with heating;
work of moderate difficulty.
The material can be used in the production of consumer goods, boxes, toys. Resistance to dynamic loads allows the use of nylon in the manufacture of structural elements of mechanisms. It is necessary to check with the manufacturer about the possibility of using it for the manufacture of products in contact with products.
- Laywood
Wood products provide a pleasant tactile sensation that makes them particularly attractive. There are a lot of wood filaments on the modern market. But before giving preference to them, it should be noted that they do not differ in particular strength, flexibility.
Features of Laywood wood materials:
excellent aesthetic performance, pleasant to the touch;
decent flexibility;
does not dissolve;
do not allow contact with food;
working t° 195-220;
has some shrinkage during cooling;
does not require a heated pad;
work of moderate difficulty.
Interior decor items are made from this consumable. The strength index is determined by the print geometry.
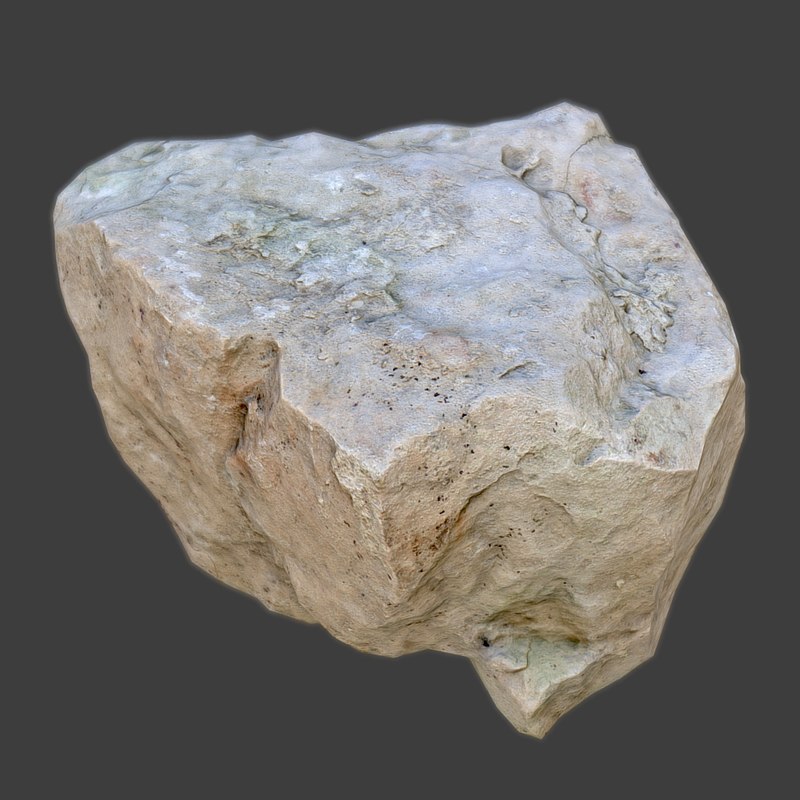
- Laybrick
This filament is based on sandstone, to which PLA polymer is added. It perfectly imitates the texture of a natural mineral. Consumables are great for architectural decoration, landscape design. You can get objects with a smooth or rough texture by changing the extrusion temperature.
Laybrick features:
excellent aesthetic performance;
reduced flexibility, fragile;
does not dissolve;
food contact is not allowed;
workers t° 165-210;
no shrinkage during cooling;
work of moderate difficulty.
The main purpose is to create details of layouts of structures, landscapes.
- Metal/PLA composite
This is a material that combines PLA and metal powder. In appearance, the objects are similar to copper, bronze, brass items. They can be polished, to create the effect of aging. The density of the material is high, it feels closer to metal than to PLA.
Features of the composite:
unique aesthetic properties;
increased strength;
does not dissolve;
not allowed contact with food;
working t° 195-220;
low shrinkage on cooling;
high level of complexity work, the temperature setting must be accurate.
This material is used to make replica artifacts, figurines, jewelry, home equipment.
- Metal magnetic PLA
3D printers can use more than just plastic and metal. There are in the assortment of consumables and more interesting options for lovers of experiments. These include metal PLA with magnetic properties. Iron powder is added to the composite, which imparts magnetic properties, allowing for granular finishing of objects. The property of the product to be attracted to metal can be useful in a variety of projects.
Features of metal magnetic PLA:
the presence of magnetic properties;
increased strength, low flexibility, depending on the design features;
does not dissolve;
food contact is not allowed;
working t° 195-220;
shrinkage is minimal during cooling;
Heated pad not needed;
work of increased complexity, the accuracy of the temperature regime is a prerequisite.
The material is widely used in the manufacture of souvenir fridge magnets, in the production of dynamic parts for mechanisms.
- Conductive
The introduction of Conductive material has significantly expanded the scope of 3D printing. Coal fractions that conduct electric current are added to the composition. This makes it possible to produce the simplest circuits for various sensors, LEDs.
Filament should be used with traditional PLA. This makes it possible to create a full-fledged printed plate directly on the working site.
Features of Conductive material:
low strength;
is resistant to bending;
does not dissolve;
contact with food is not allowed;
cooling shrinkage negligible;
Heated pad not needed;
workers t° 215-230;
simple printing, similar to PLA processes.
The main purpose of Conductive is the manufacture of electronic circuits for low voltage devices, sensors and LEDs, circuits.
- PLA filament with heat sensing
Under the influence of temperature, this modification of PLA changes its shade. There are several options for combinations of representatives of the color spectrum, each manufacturer has its own range, which has specific qualities.
Thermally sensitive PLA features:
changes color when heated;
has strength, moderate flexibility;
does not dissolve;
cannot be used with food products;
working t° 215;
shrinkage is negligible on cooling;
heated area not installed;
the work is simple, similar to the manipulation of conventional PLA polymer.
The main scope of this consumable is the manufacture of souvenirs, children's toys.
- PLA carbon
The inclusion of carbon fiber in PLA gives the material extreme rigidity, increasing the degree of adhesion between layers. But the filament also has disadvantages. It has abrasive properties, leading to accelerated wear of the extruder. It is enough to use 0.5 kg of this material in work to significantly increase the diameter of a nozzle made of brass. When printing with this filament, it is recommended to use a tungsten carbide protected nozzle.
Features of PLA-carbon:
increased parameters of adhesion, strength, rigidity;
reduced flexibility, brittleness;
does not dissolve;
food use is prohibited;
working t° 200-220;
geometry changes in cooling are minimal;
does not use a heated pad;
extruder wear;
work of moderate difficulty.
The material is used in the manufacture of casings, protection, mechanical parts.
- TPE
Incredibly flexible thermoplastic is useful when you need to make stretch products. Conventional filaments are not designed for such tests. Printing with it is quite complicated, the elastomer scatters in different directions.
Features of thermoplastic TPE:
maximum flexibility;
increased strength;
does not dissolve;
is not intended for food use;
working t° 220-230;
slight shrinkage on cooling;
work has a high level of complexity, the accuracy of the parameters of the feed rate and temperature is needed.
Original souvenirs, toys for children are made from TPE elastomer.
- Luminous PLA filament
The material is a modification of PLA, accumulates light rays, creates a glow in the dark.
Glowing PLA features:
decent strength and flexibility;
does not dissolve;
is not used with food products;
working t° 215;
slight shrinkage;
work is simple, similar to operations with PLA.
Modification PLA is used in the manufacture of festive paraphernalia, decor, to create additional light sources in low light conditions.
- New generation material - Amphora
Amphora is a copolyester in composition. The material is new from Eastman Chemical Company. Unlike other thermoplastics, it was developed directly for printer printing. Taking into account the specifics of the application made it possible to give the material excellent properties. There is practically no unpleasant smell during operation, Amphora has a high melting point, good adhesion between layers, and increased strength. Models from it are easily processed, products are safe, contact with food products is allowed.
Amphora features:
increased strength and rigidity;
excellent flexibility, light weight, impact resistance;
does not dissolve;
working t° 220-250, platform heating is not needed;
work of medium complexity, attention is paid to temperature parameters.