Warped 3d prints
What Causes 3D Print Warping and How to Prevent It
3D print warping is a common problem in fused deposition modeling (FDM) that causes parts to deform on the print bed. If you’ve ever noticed that the base of your 3D print is curling up and the corners are unsticking from the build plate, that’s warping. The good news is that there are several tips and tricks to prevent warping and improve your chances of a successful, warp-free 3D print.
What causes 3D print warping?
3D print warping happens when extruded filament layers on the 3D printer build plate cool too quickly and shrink. This causes the plastic material to contract and pull away from the build plate, resulting in warping (or curling, as it is sometimes known).
We can understand the problem of warping better if we zoom out a bit and look at the FDM process on the whole. In FDM 3D printing, a heated extruder deposits melted filament onto a print bed. This filament is made from a thermoplastic, a type of material characterized by its ability to melt into liquid form and resolidify when cooled. This means that in the printing process, as each layer is deposited, the filament hardens as it cools, but it also shrinks.
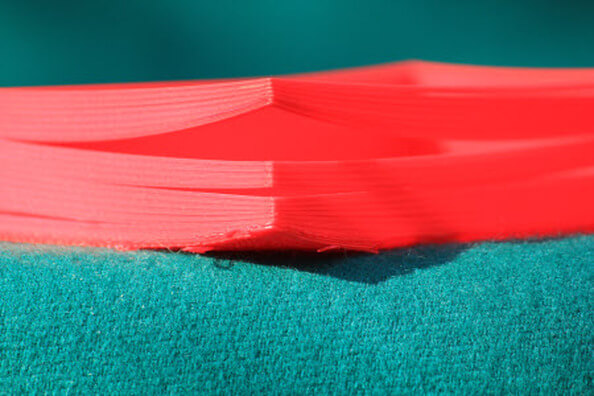
Thermoplastic filament shrinks as it cools; if it shrinks too quickly it can lead to warping
Warping occurs when the cooling process happens too quickly or unevenly and 3D printed layers shrink and pull on less solidified layers, ultimately lifting the first layer off the build platform and causing deformation. Though it is possible to experience warping with any type of 3D printed part, it is more common when 3D printing larger parts or parts with a large surface area. Certain 3D printing filaments are also more prone to warping than others. Typically, materials with a higher printing temperature, like ABS, suffer more from shrinkage because the temperature difference as they cool is more extreme.
How to fix 3D printer warping?
Fortunately, the chances of 3D print warping can be mitigated and 3D print outcomes can be improved using a few key techniques.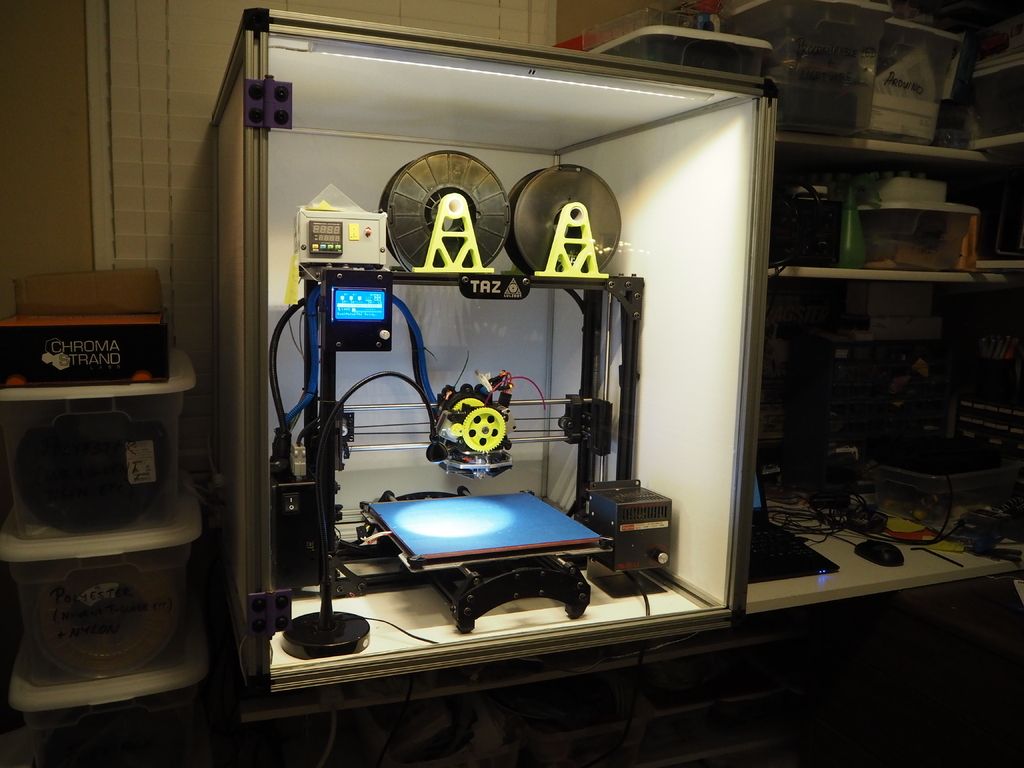
Bed Adhesion
One effective way to minimize the risk of 3D print warping is to improve your 3D printer’s build plate adhesion. Good bed adhesion will keep your 3D printed part stuck to the build surface and prevent the first layers of the print from curling up as they cool.
Bed adhesion can be achieved in a few ways. For example, there are dedicated 3D printer adhesives that can be applied to the build plate before printing. Many also opt for more DIY adhesives, like glue sticks and hairspray. A third option is tape, which is placed on the build plate surface. Painter’s tape is a popular option because it can be removed easily and the porous texture of the non-stick side keeps filament stuck down.[1] Kapton tape is also commonly used to encourage bed adhesion.
If you are using adhesives on your 3D printer, be sure that the print surface is clean before and after printing. Glue residue can cause an uneven print surface, potentially impacting calibration and the quality of future prints. It is also a good idea to try a test print if you are using a new adhesive to ensure it keeps the bottom layer of the print down but can also be easily unstuck when the print is done.[2]
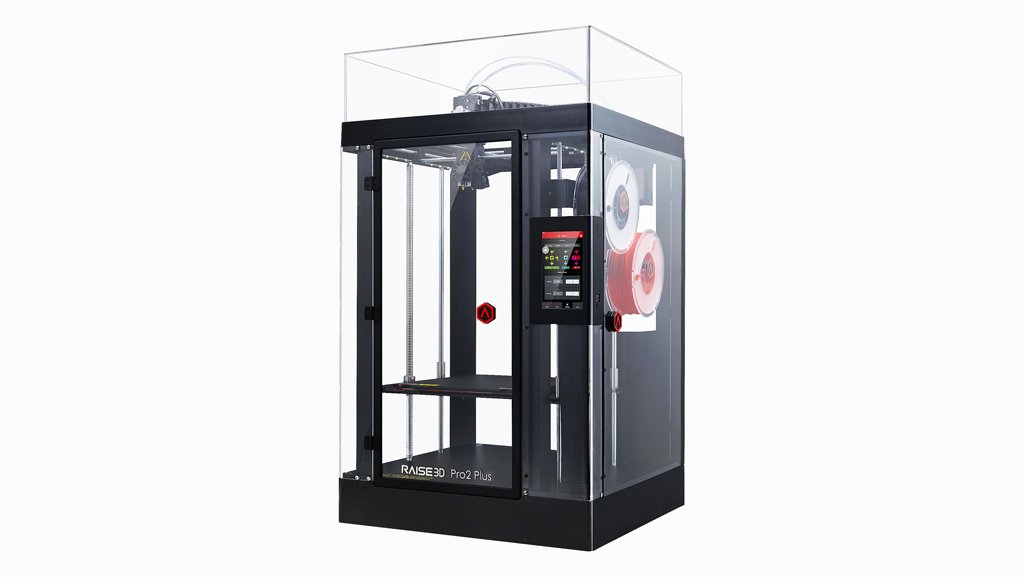
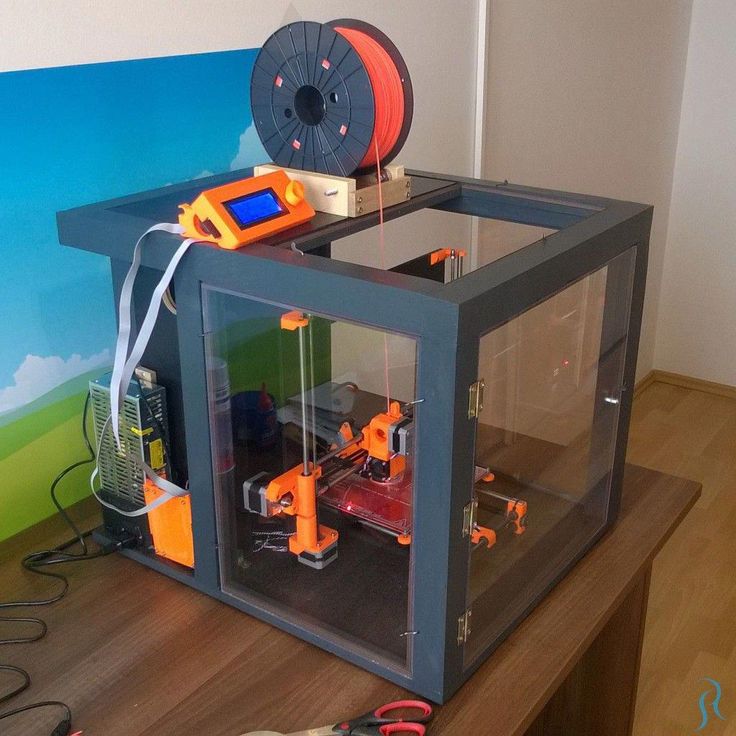
An enclosed build chamber can reduce the risk of warping by maintaining a stable print temperature.
Temperature
Because cooling filament too quickly is what causes shrinkage and warping, it is key to control the temperature of your build as much as possible. 3D printer temperatures can be regulated using different methods or a combination of approaches. One of the most effective tricks for improving bed adhesion is to use a heated build plate. Each type of filament will have its own recommended bed temperature for good adhesion—for example, PLA works best with a heated bed at a temperature of between 60 and 70°C, while ABS requires a hotter print bed of between 100 and 120°C.[3]
Using an enclosed print chamber can also help to maintain an ambient temperature throughout the printing process and stop 3D printed layers from cooling too quickly.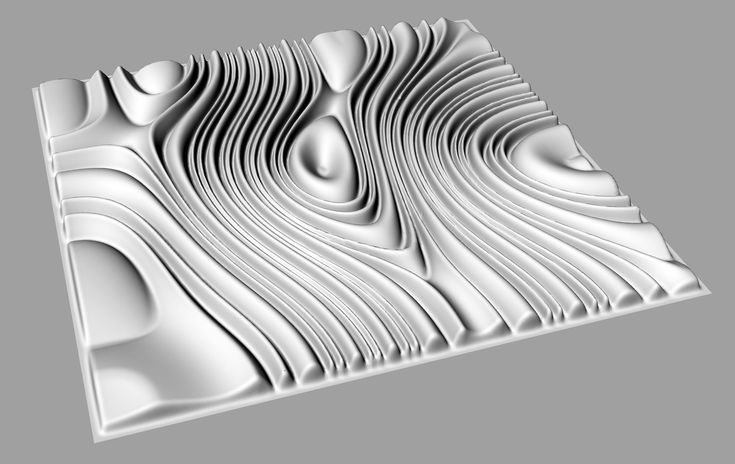 Many 3D printer models have a built-in enclosed chamber, but those that don’t can still benefit from a DIY enclosure. Other ways to improve temperature consistency in your 3D printer are to adjust cooling fan speed settings (especially for the first layers of a print) and keeping your room temperature as ambient as possible (i.e. keeping cold air out by closing windows).
Brim or Raft
Brims and rafts are tried and true techniques for boosting bed adhesion, especially for ABS and other high-temperature filaments. These 3D print features are added in slicer software right before printing and have several functions.
Specifically, a brim is a 3D printed border that connects to and goes around the edges of a 3D printed part. Brims are typically a few millimeters wide and consist only of 1-2 layers. They increase the footprint of the 3D printed part and anchor its edges to the build platform. A raft is similar, only it is also printed under the 3D printed part, acting as a base for it.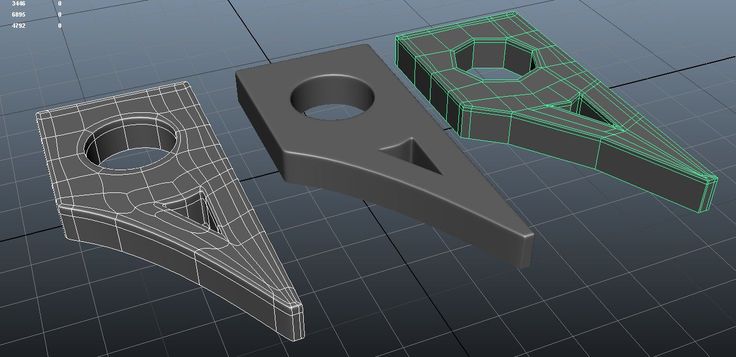
Brims and rafts are especially beneficial for 3D printed parts with unbalanced geometries or small footprints, as they can stabilize the print and secure it to the build surface. Both brims and rafts must be removed after printing, either by hand (by peeling them off) or using a tool. Printed parts with brims or rafts may require additional post-processing to achieve a smooth first layer.
3D printed brims can help to anchor the printed part down to the build platform.
Slicer settings
The risk of warping can also be reduced substantially by implementing the right print settings for the first layers of the printed object. Most slicer software programs allow you to adjust the print speed and layer height specifically for the first layer. A slower print speed for the first printed layer of a build will help to ensure that the filament sticks to where it has been deposited and is not pulled by the nozzle as it moves. Choosing a slightly thicker layer height for the first layer can also improve bed adhesion and help reduce any leveling inconsistencies.
Another print setting that can influence warping is fan speed. Fans are built into some FDM 3D printers and ensure the build space does not get too hot. By tweaking fan speeds you can maintain closer control over print cooling. For example, fans can be programmed to turn on only after the first few layers of a print have been deposited. This helps the first layers cool slowly and evenly on the print bed.
Conclusion
3D print warping is a frustrating problem most makers will encounter at some point or another. By following the tips and methods laid out in this article, however, you can ensure good bed adhesion, consistent printing temperatures, and ultimately reduce warping and improve print quality overall.
References
[1] TapeManBlue, 2022. “The Complete Guide to Blue Tape for 3D Printing”. [Internet]
https://tapemanblue.com/blogs/tips-tricks/blue-tape-for-3d-printing [Accessed March 31, 2022].![]()
[2] Ultimaker, November 10, 2020. “Build plate adhesion: How to get your print to stick to the build plate”. [Internet] https://support.ultimaker.com/hc/en-us/articles/360012015680 [Accessed March 30, 2022].
[3] Simplify3D, 2022. “Warping”. [Internet] https://www.simplify3d.com/support/print-quality-troubleshooting/not-sticking-to-the-bed/ [Accessed March 30, 2022].
3D Prints Warping or Curling? – Why It Happens and How to Prevent It
In this guide, we’re going to cover what causes warping, and how to remedy it. Including tips for specific materials, and how to make sure it doesn’t happen again!
If you’ve used a 3D printer, then it’s likely that you’ve experienced 3D print warping. Warping is one of the most common problems encountered in 3D printing and it’s one of the most annoying.
But luckily, it is easily preventable – depending on your material and printing conditions, there are different remedies we’ll cover below.
3D printing curling doesn’t always cause a catastrophic failure of the object being printed like some other problems can. However, it does cause the object to deform enough to look unacceptable and unprofessional.
The worst case is your warping 3D printing can pop off the heated bed, causing it to fail completely.
Why Has My 3D Print Warped?
A 3D printer warping problem typically occurs when an object is cooling unevenly after printing.
Cooling, as you know, causes contraction and this contraction causes stress along the object’s lateral surfaces. The quicker the cooling occurs, the greater the stress on the object.
This stress is greatest at corners where two sides meet. There, the pulling stress exerted on both sides causes the corner of the object to deform and pull up and inward. The result is not pleasing to the eye and usually makes the object unusable.
There are really only three ways to prevent 3D printer curling; increasing ambient temperature to reduce cooling time, or seriously improving your bed adhesion. Luckily there are simple ways to do all three, which we’ll cover shortly.
But first, what if it’s too late – and you have a warped print right now? Well, maybe not all is lost just yet…
How To Fix a Warped Print?
While not all warped prints can be fixed, if the print bottom warping is slight – and your print isn’t too thick or large in volume you might just be able to salvage it.
To do this, you’ll need to heat up the print close to its glass transition temperature (where it’ll get just soft enough to mold back down).
You’ll need a large metal surface, like a frying pan, big enough to place the print bed side down (just the way up it came off your print bed).
Get a hairdryer and place the print in the pan. Heat it up on full power, and move the dryer around to evenly heat it.
After a minute or so, you can turn off the dryer and you should be able to hold the print down to bend it back to a flat shape. You’ll need to hold it for a few minutes until it’s cooled a bit.
Repeat this process until it works sufficiently. Don’t bother just putting the print back on a heated bed, or worse heating the pan – because this will just heat the bottom of the print. You’ll need to heat it up evenly all over.
So, let’s take a quick look at some of the ways that can help you prevent print warping:
Heated Bed
Once upon a time, heated print beds were relatively rare. Because of this, printed objects tended to cool very quickly once a job was underway.
This caused high levels of lateral stress and ABS curling was commonplace.
Today, most people are printing on a heated print bed. This causes a printed object to cool much more slowly. This reduces the stress caused by contraction which, in turn, helps to reduce warping.
Heated beds are not an all-in-one solution to warping, but when used in conjunction with other preventatives, they do lower the chances that your object will warp.
One thing to note with heated beds, is that the heating element isn’t always the full size of the bed – this means the edges might not get hot enough (depending on your printer). The diagram below illustrates the common causes of warping.
So it’s worth taking this into consideration if large prints warp, but smaller central ones don’t. Here you see the print warped, or is curling at the edges.
This is also assuming the heat on your bed is even. Still getting ABS warping on a heated bed? It could be because the heating elements are not even under the glass or metal plate.
Check out this thermal image of a very popular model of 3D printer. Can you guess what it might be?
This is taken from the heated bed on a Prusa MKIIThe target temp for this bed is 50°C, notice the cooler area in the center. Commonly this is where people normally place smaller prints. So you may be getting small prints warping, but larger prints staying flat and printing fine.
It should also explain why you may be getting your PLA curling in some areas of the print but not others, for example.
It’s also worth noting that if your bed is made of particularly thick aluminum or glass – the thermometer may be reading full temp before the actual surface of the bed has had the chance to fully heat up yet.
In this instance, you’re best off waiting a good 10 minutes after your bed is reading the correct temperature before you start to print. This could mean the difference between first layer success and your ABS lifting later in the print.
How to Avoid Warping 3D Prints
It’s extremely important to regard how different printing materials are affected. For example, PLA doesn’t require a heated bed. However, when printed on one at around 50°C it can help those first few layers adhere a little more consistently.
But if you’re getting 3D print warping PLA then it’s likely at too high a heated bed temperature (eg. over 60°C) can cause it to warp.
Rule of thumb for PLA warping on a heated bed – you’re likely printing too hot.
Whereas if you’re getting 3D printer ABS warping with the heated bed, a big culprit is likely to be that the heated bed simply isn’t getting hot enough. So usually just turn it up!
Another way to prevent ABS from misbehaving, as it can be a common issue, is to improve the ambient temperature of the printing enclosure to slow down the cooling of the print.
Generally, it’s always best to print ABS in an enclosure, or failing that a warm ambient environment.
With something very sensitive to cooling too fast, like the UV resistant ASA; you’ll definitely want to make sure it’s printed in a warm ambient area with no drafts or it can warp so badly you see cracks in the print. More on this later.
These rough assumptions are based on you using the correct adhesive or surface for your material. This is also really important to prevent 3D printing warping – but don’t worry, more on this below.
So, how to prevent warping
Use a Build Surface that Promotes Adhesion
This is quite likely the most important step that you can take to eliminate warping in your printed objects. Most printers come with a glass or aluminum build surface that is durable, but also far too smooth.
A key aspect when working out how to prevent ABS warping is getting your adhesion for the bed sorted perfectly.
Extruded thermoplastics have nothing to grab onto when they encounter smooth surfaces. The result is that warping caused by cooling becomes more pronounced.
The solution is to start using build surfaces that enhance adhesion. There are a number of things that you can try in order to achieve this. Painter’s tape and Kapton tape both work well to reduce warping in PLA and ABS respectively.
Hairspray applied directly to the build surface to increase tackiness is used by many in a pinch, but it is messy and has limited durability.
If you’re having persistent issues with your ABS print warping, you may want to use a mixture of ABS slurry or ABS juice on your bed, which should significantly aid adhesion.
What is ABS juice?
ABS juice is a mixture or partially dissolved ABS scraps in acetone, to make a solution that can be painted evenly onto your heated bed.
Pritt stick accomplishes the same effect much more efficiently and with much less mess.
Finally, a substance like PEI (polyetherimide) comes in sheets that are easily attached to your build surface, are affordable and give excellent adhesion to just about any print material (except Nylon). Find out more about build surface adhesion solutions here.
PEI for the most part is one of the best bed surfaces to avoid warping, unless you’re using Nylon based materials that tend to respond best with Tufnol.
Clean Your Build SurfaceNo matter how adhesive your build surface is, dirt and grease will conspire to reduce that adhesion and put you back at square one when it comes to warping.
Make sure that your build surface is as clean as possible before you begin printing.
An ammonia-based product like Windex or Halford’s Glass Cleaner works great to remove grease and fingerprints from the build surface. Isopropyl alcohol and water solution also work well.
When your build surface is clean, your print material has a much greater chance of adhering which will reduce warping.
Rounded CornersYour PLA curling at the corners? One interesting way to reduce warping is to design objects that have rounded corners whenever possible.
A rounded corner tends to ameliorate the amount of upward stress that occurs where two or more flat surfaces meet, by distributing that stress over a wider area.
Less stress means less warping and less 3D print curling, which means more successful printing.
Check Your Starting Z CoordinatesSometimes, printing a good first layer is key to achieving a successful result. One way to increase the odds of putting down a decent first layer is by checking your starting Z coordinates before printing.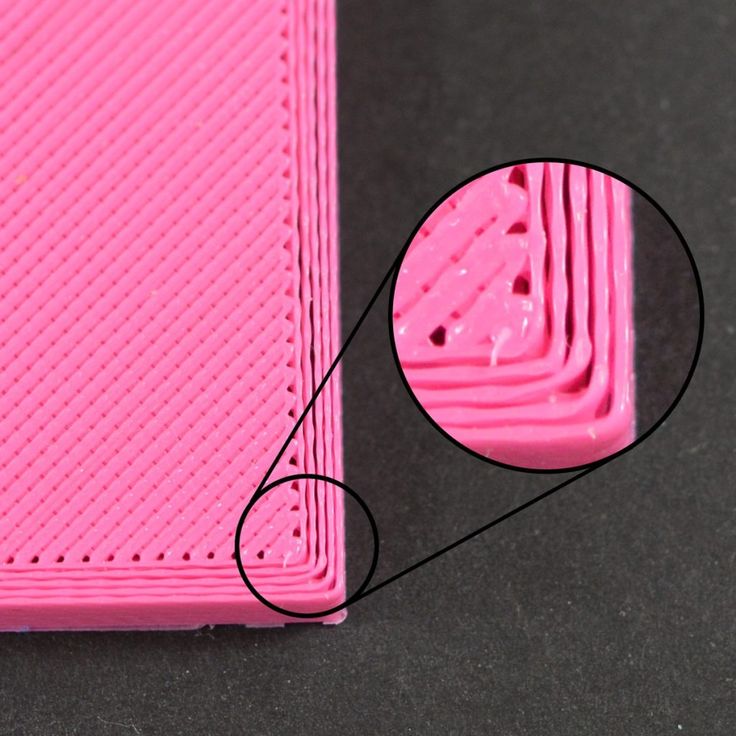
If the Z-axis is starting too high, extruded print material has a longer distance to travel before contacting the build surface.
The longer the distance that the material has to travel, the cooler the material becomes and the greater the chances are that it will not adhere correctly.
If you’ve tried everything and are still experiencing warping, try lowering the Z-axis height in 0.05mm increments and see if that corrects the problem.
As you do this, keep in mind that you never want your extruder nozzle to come too close to the build surface, as this will cause its own set of problems.
If your print has a low surface area, and is proving hard to stick down it may also be worth printing a brim or skirt around your print to encourage extra adhesion to the bed.
Here’s an example:
Eliminate DraftsThe key to controlling warping is a slow and steady cooling process.
The quicker that cooling occurs, the more likely it is that your object will warp, no matter how many steps you’ve taken to prevent it.
This is why eliminating all drafts while you’re printing is extremely important if you want to reduce the instances of warping.
You should consider printing in a room in your house or place of business that provides the steadiest ambient temperature. Remind others in the area that you have a print job running and ask them to stay out of the room in question for the duration.
Having someone open a door while your printer is running can cause the warping that you’re trying to prevent.
If your home or office is especially drafty, or if your printer must be located in a somewhat high traffic area, you might want to consider enclosing it so that temperature remains stable, or just significantly hotter while you print.
What is Elephant’s Foot?
Related to warping, but a slightly different fault is something we call 3D Print Elephant Foot – it’s when the base of your print widens out, shaping the object like, well – an Elephant’s large foot. It’s got elephants foot AND it’s warped? Oh lets all just go home…
You can see the bottom few layers here have spread out wider than the rest of the print. Here’s how this phenomenon happens and how to solve it:
Essentially your first few layers are being squashed, causing them to ooze out to the side. This is usually caused by a combination of factors:
- Your bed is likely to be much too hot. If the object also warps off the bed, this is almost certainly the main cause. Having a bed that is too hot also allows heavier prints to compress the lower layers, causing them to sag and flow outwards.
- Having your nozzle too close to an overly-hot bed can cause a lesser version of this. In some cases, it may exacerbate the other two factors quite considerably if not corrected.
(Some beds such as FR4 or PEI require a higher temperature to ensure initial bed adhesion with PLA so) there’s nothing wrong with putting down the first layer onto a bed at say 55-60°C, as long as you reduce it to 45°C for all subsequent layers.
Don’t forget, the bed will take time to cool.
To Solve 3D Printing Elephant Foot:
Assuming the elephant’s foot is happening evenly on all base sides of your print, increase the Z-axis offset slightly, to allow more room for those first layers to settle at the correct height. We recommend starting in 0.1mm increments.
Too much and you’ll risk there not being enough pressure for the print to have sufficient adhesion to the bed.
If the elephant’s foot is only on one or two sides, you’ll need to re-level your bed.
Finally, if you’re finding that it’s a heavy, large model weighing down those first layers (you’ll notice this effect increases the larger the print gets if this is the case) then you’ll need to reduce temperature of the heated bed.
Too hot and you’ll soften the material too much.
To prevent Elephants foot in a nutshell:
- Level your heated bed
- Adjust z-axis offset/or the nozzle height from the bed
- Correct heated bed temperature
As we said, warping is one of the most common problems that occurs when 3D printing.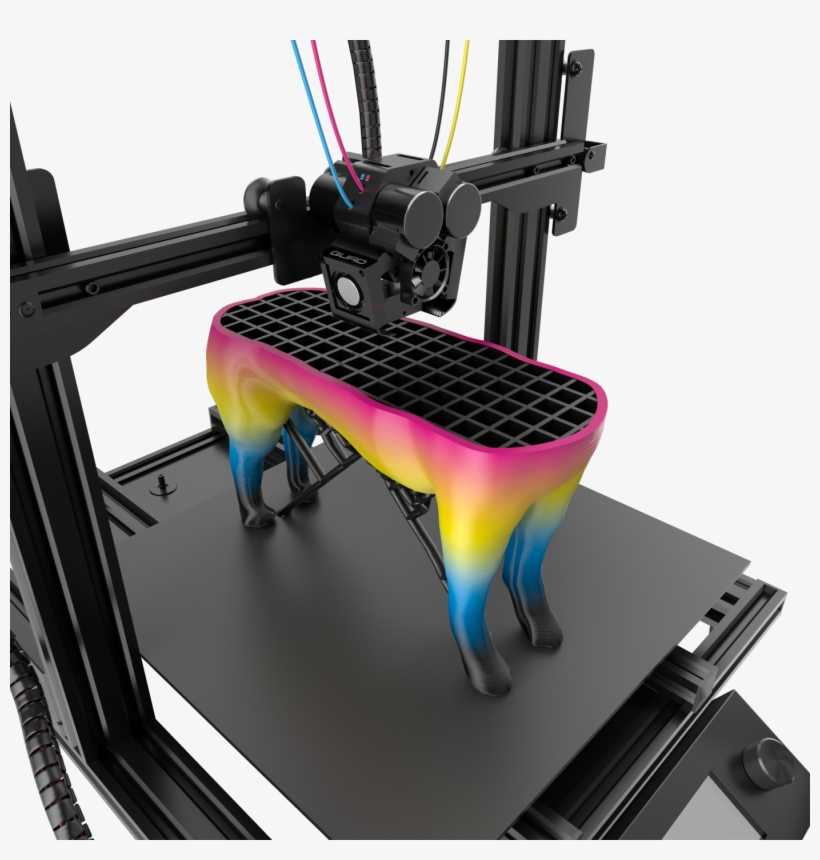 The good news is that even though it can be caused for a number of reasons, it is relatively simple to prevent.
Related articles:
- 3D printer troubleshooting – 44+ problems fixed
- How to smooth PLA
- How to acetone smooth ABS
- How to fix a clogged extruder nozzle
Top Deformitos・Cults
3D Printer ModelsStamp "Flork Christmas #2".
€0.80
Stamp "Flork Christmas #3".
€0.80
CHRISTMAS FLOOR CUTTER SET - CHRISTMAS COOKIE CUTTER
4 €
(x4) Keychain Flork
1.19 €
nine0002 DEFORMED CUTTER AND STAMP FLORK HALLOWEEN - CUTTER FLORK3 €
Flork Dracula Vampire M17
0.92 €
Ax Flork Head Ax M16 Bloody ax Flork
0,87 €
Ghost Flork M15 Ghost Flork
0,92 €
Flork with electric saw M14 Flork with electric saw
0. 87 €
87 €
Flork Witch Halloween 13 Flork Happy Halloween
0.87 €
Flork with Halloween candy basket M12 Flork with Halloween candy basket
0,87 €
Flork Skeleton M11 Flork skeleton
0,87 €
Flork Diablo M10 Devil Flork
0.87 €
Flork Diablo M9 Devil Flork
0,87 €
Flork Diablo M8 Devil Flork
0,87 €
Flork M7 Degollado Killed Flork
0.87 €
Flork M6 Mom and baby Flork Mom and baby
0,87 €
Flork M5 Mama Flip Flop
0.87 €
Flork blushed
0. 81 €
81 €
Flork chocolatito
0,99 €
Florist angel
0.99 €
Key ring Flork
Free
CUTTER AND STAMP FOR HALLOWEEN SCROARIE
1 €
Florks Deformitos
0.81 €
CUTTER AND STAMP RATCH BEAR - COOKIE CUTTER BEAR
1 €
CUTTER AND STAMP BEAR CUP - TEDDY COOKIE CUTTER
1 €
CUTTER AND STAMP FOR MERMAID TAIL
1 €
nine0002 CUTTER AND STAMP BABY SHOWER - BABY BOTTLE1 €
CUTTER AND STAMP FOR KAWAII PUPPIES
1 €
Key ring Flork Hincha Argentina
1. 62 €
62 €
LLAVEROS FLORK LOS MAS LINDOS!!!
€10.82
bad rabbit deformed keychain
1.19 €
Shakira deforito keychain
1.19 €
key ring - Belgrano football deformito
0.54 €
flork - deformed river football
0,54 €
flork - deformed football mouth
0,54 €
nine0002 malformations child fuy fuy fuy1.43 €
FLORK TOPPER HAPPY BIRTHDAY
1,07 €
Flork pack of 112 models of deformed keyrings
1.62 €
Keychain Flork Twerk
1. 62 €
62 €
Florks - 2 key chains Heart and Dorime/Resando
1.67 €
Flork M4
0.81 €
Florks made for a keychain (deformed)
1.08 €
SUPER DAD COOKIE CUTTER - SUPER DAD COOKIE CUTTER
0,90 €
Father Flork Cookie Cutter - Father Flork Cookie Cutter
2 €
Keychain "Mom's Flork"
0,95 €
Key ring Flork Angel & Demon
1.89 €
Models Flork x 80
2.16 €
Best Demons・Cults
3D Printer ModelsFancy Flame Frisbee
Free
Steve Irwin's worst nightmares
Free
Stink demons
2. 35 €
35 €
Alpha Hound Blood
3 €
Katana Kyojuro Rengoku
1 €
Deformed sons of destruction
18.07 €
nine0002 Ascended Demon of Destruction18.07 €
King Cnidarian Fire Dispensers
Free
Fire dispensers for cnidarians
Free of charge
Chariot of the Hedonists
6.50 €
Witchcraft Condors
Free
nine0002 1K Hijos Prime Magus Rojo (with pre-support)14.12 €
Pink demons
2.82 €
GIANT ULCER
9. 95 €
95 €
Possessed cultist
2 €
Plagerators
5 €
American Werewolf in London Nightmare Demons v1
4.71 €
Ariel La Sirenita Little Mermaid lapwing
2.60 €
Grounds in close combat
6.59 €
Machete One piece of gomu fruit
1.20 €
Biker Funko Motorizado
2.50 €
sullivan box monster inc
0.80 €
Foster Blue Mansion
0.65 €
Funko doctor girl - funko doctor
2,50 €
POKEMON GENGAR SWUL
5. 88 €
MONKEY SMOKING SIMPSON - MONKEY SMOKING SIMPSON - MONO Fumarola simpsons
5,90 €
nine0002 HALLOWEEN GHOSTS :O1.30 €
tuxedo mask - sailor moon
8,95 €
Ring of Ozaru / Ring of Ozaru
3.50 €
baby krillin and goku
6.95 €
KSBD - Allison
Free
nine0002 1K Hijos de Pulvo Culto de Escaraba Terminators (previously maintained)17.14 €
Zuggtmoy
Free
Dacians
14.48 €
Pink nightmares of change
14. 29 €
Pink nightmare of change FREE
Free
nine0002 Package "Demons". Preliminary support12 €
Stargazer Radan
6.52 €
Malenia, Blade of Michella
6.52 €
DEMON MASK
17.20 €
Smallpox flock
3.15 €
nine0002 Bloodspillers5 €
Aros Demon slayer bamboo earrings
1,08 €
Demonic Hell Screamers Fantasy Miniatures Numerous Models
3.15 €
Sekiro: Sekiro Shadows Die Twice (or three or four or a thousand)
6.