Structure 3d scanner review
Structure Sensor 3D Scanner Review & Tutorial
If you’ve read my previous 3D Scanner Review of the 3D Systems Sense you know that I was impressed by the ease-of-use and geometric details for a device priced below €450. But the quality of the color information — or textures — the Sense captures are completely underwhelming. This has been fixed with the Sense 2 I reviewed later)
In this Review I’m testing the Structure Sensor made by a Occipital. This device was also available as the 3D Systems iSense but that rebranded version has been discontinued*.
I got my Structure Sensor from the Dutch 3D Printing and 3D Scanning Store MakerPoint.
Pricing
If you live in the US, a Structure Sensor will cost $379 with an iPad Air 2 bracket on Amazon. You can also buy them directly from Occipital for that price and have a choice of various iPad brackets and accessories such as a wide angle lens and a pro charger cable that can charge the Structure Sensor and iPad at the same time!
If you live in the EU and don’t want the hassle of international shipping and added customs costs and taxes you can best get the Structure Sensor with fitting bracket from Makerpoint for €499.
It’s compatible with all iPads newer than the 4th Gen iPad and iPad mini 2 (previously known as “iPad Mini with Retina Display”) — including recently added support for the iPad Pro 9.7″ & 12.9″.
I’ve tested it with the least powerful compatible device, the iPad mini 2, which has a 5 megapixel camera with an aperture of f/2.4. Since this camera is used to capture color details, it’s safe to say that using a newer iPad will result in better texture quality. This iPad Pro 9.7″, for example, has a 12 megapixel camera with a faster f/2.2 lens. That being said, I think that testing with an iPad mini 2 is a great benchmark and this iPad is still being sold for €265, bringing the total minimal costs of the Sensor + Bracket + iPad to €765 — which is still a lot less than many other 3D Scanners. (All prices I mention are in Euros and include 21% Dutch VAT).
I’ve tested the Structure Sensor with 3 different applications, which I’ll cover in 3 different parts of this Review:
- Occipital’s own iPad apps
- The third-party itSeez3D iPad app I reviewed and
- Occipital’s Skanect software for Mac and Windows (Review finally coming Q1 2017)
Setting up the Hardware
Attaching the Bracket
Firstly, you need to attach the Structure Sensor to the bracket—both are available with silver or blue aluminum—for your device. The sensor includes 4 screws and a screwdriver. The bracket can be an official one but you can also order 3D Printed versions through Shapeways or download one from Thingiverse and 3D Print it yourself. The Structure Sensor is a very “open” and customizable system this way. Occipital has even placed CAD drawings on its developer website so you can design your own bracket. Developers that want to experiment with the sensor beyond using it with an iPad, can also buy a €50 USB Hacker Cable to attach the sensor directly to any chosen device.
Structure Sensor (silver) mounted onto the iPad mini bracket with aluminum latch (also silver).
Nice detail: With the Structure Sensor attached, the iPad mini sits at a perfect working angle and rests on the aluminum edge, protecting the glass.
3D Printing a Lens Cap
The brackets are designed to be easily removed from the iPad. This is nice, because like me you’ll probably have a case or sleeve of some kind to protect your iPad during transport.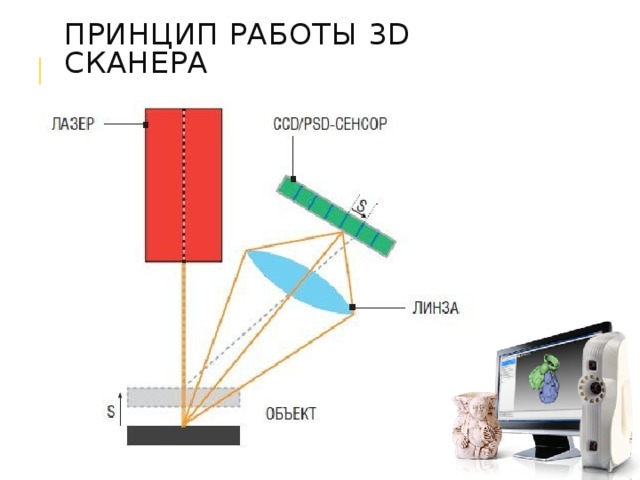 Unfortunately, the Structure Sensor doesn’t come with any kind of carrying pouch. And while the bracket with the sensor attached is sturdy enough to transport in one of the side pockets of my laptop bag, I don’t want any scratches on the glass. A lens cap isn’t included so I downloaded this Structure Sensor Lens Cap from Thingiverse and 3D printed one myself. If you don’t have a 3D Printer yourself, you’ll probably live near a Hub that can help you out.
I 3D Printed the lens cap with strong InnoPET Filament (Check out my Revised Filament Guide for more info about this and other 3D Printing Materials)
Calibrating the Sensor
Before using the Structure Sensor for the first time, it has to be calibrated. This is mainly because the iPad’s native rear-facing RGB camera is used to capture the color information and the location of the camera varies on different iPad models. Because of this the offset between the iPad camera and infrared camera on the Structure Sensor has to be compensated.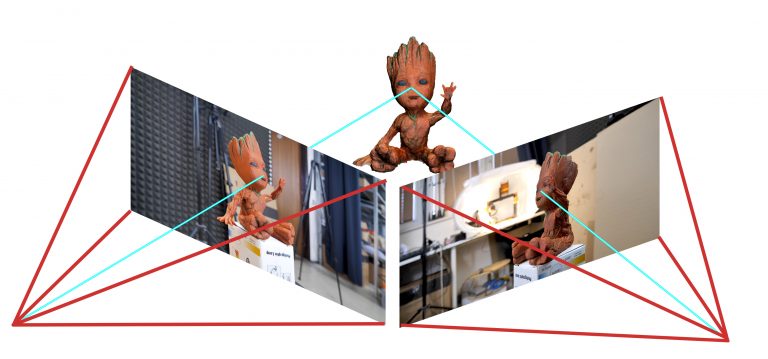
There’s a dedicated Calibrator app that makes the process very easy: just go outside on a bright day and point the sensor towards something with a lot of detail. The app will track some details automatically to do the biggest part of the calibration and let’s you fine tune it afterwards if necessary.
The calibration app works perfectly and also gives a good idea of what the infrared camera (left) actually sees outside in bright daylight—more about that later.
3D Scanning with the Occipital Scanner App
The native Scanner app is pretty straight forward. Simply point it at the person or object you want to capture and use a two-finger gesture to scale the indicator box so it matches the size of the subject, which will also be highlighted.
There are only two options:
- Scan using the “Old Tracker” that only uses shape information or use the “New Tracker” that also uses color information to keep track of the object you’re scanning.
 I see no reason to use the old tracker, because scanning without color information make it hard or impossible to scan uniform objects without many geometric details.
 - “Low Resolution” or “High Resolution” Color. From my tests, the difference between the two is that the former outputs a 2K (2048 x 2049 pixels — or 4.2 megapixels) texture map and the latter a 4K (4096 x 4096 pixels — 16.8 megapixels) version.
The high resolution version does take a bit longer to render, or calculate. This is done on the iPad itself and my iPad mini 2 is one of the slowest compatible iPads. The exact time depends on the size and complexity of the subject. During this time you can’t make a new scan.
Scanning with a turntable
You can make 3D scans either by freely moving around an object or by using a turntable. Below is a video of the scanning process with the help of a €6 IKEA SNUDDA Turntable and a €4 tablet stand from Xenos. It’s played back at 4 times the original speed (hence the high-pitched 3D printer sound in the background).
As you can see I put Teddy on top of a book (the marvelous The Art of The Last of Us, to be precise). This makes it easier for the RGB tracker to correctly track the object while rotating. The app particularly had a hard time tracking the side view of the bear without the book. Apart from the natural light from the windows in the studio, I only used a 55 Watts light with a small softbox (visible on the right in the video).
When the rendering is done, you can preview the scan and export it though email as a .OBJ 3D model with separate texture map in .JPG format. Unfortunately there’s no way to save your scans on the iPad, so you need to have an internet connection to email the scan before making a new one.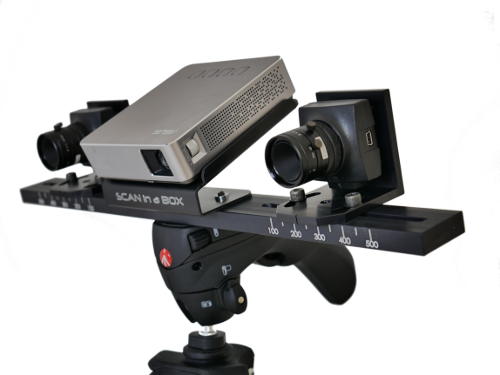 The .OBJ gets emailed as a .ZIP containing the model and texture files. The .ZIP can be uploaded directly to Sketchfab:
I was surprised by the scan quality. Especially taken into account that it took no time to “render” the geometry and only a minute to render the textures on a relatively slow iPad mini. The color quality sits somewhere between the blurry textures of the 3D Systems Cubify Sense (click for reference scan of the same model) and the sharper result of Photogrammetry with the free Autodesk 123D Catch app. I would say a scan like this is usable for many non-industrial purposes and you’d probably get better textures from a higher-end iPad. By scanning like this from a fixed angle I wan’t able to capture under Teddy’s arms.
Free Scanning
For the next example I chose a bigger and less fluffy object: a small oil drum which has been modified into a basket (in Bali through Fair Trade store Jansje). I placed it on yet another of my daughter’s cheerful—and perfectly trackable—placemats on our dining table and walked around it freely, stopping every once in a while when asked to by the app. At those stops it takes a photo for the textures. I was surprised how smooth this experience is and how well the software tracked the object—it never lost it! And this is with the last bit of afternoon daylight and two dimmed ceiling lamps, so far from perfect lighting conditions.
The (new) tracker didn’t even mind that my (even newer) cat walked through the session! Of course I was glad no texture snapshot was taken at that moment.
Below is the result of the scanning session above. As you can see it didn’t completely capture the handle on the lid but the handles on the sides are fine. The texture okay, but not as sharp as I’d hoped. The stitching of the textures quite good, though.
Scanning People
Since I asked my business partner Patrick to model for the Cubify Sense 3D Scanner Review, I asked him to wear the very same shirt to the office for a perfect comparison. As you can see he was very happy.
View this post on Instagram
See? 3D Scanning makes everyone happy—even @patrick_deen_draws! #3d #3dscan #3dscanner #3dscanning #structuresensor #itseez3d #softboxes #photography
A post shared by 3D Scan Expert (@3dscanexpert) on
As you can see below, the result is a lot better than that of the Sense. The resolution is a bit low—both in terms of geometry and texture—but it required no rendering after scanning for the mesh and only a minute for the texture information. To me it kind of looks like a video game character. It also makes Patrick look 10 years younger…
Update June 27th 2016
Occipital just released a new version of their Scanner app which uses their wel 0.6 SDK. The update promises higher quality meshes—a 60% resolution improvement on each of the 3 axis, actually—partially due to their acquisition of Lynx Laboratories.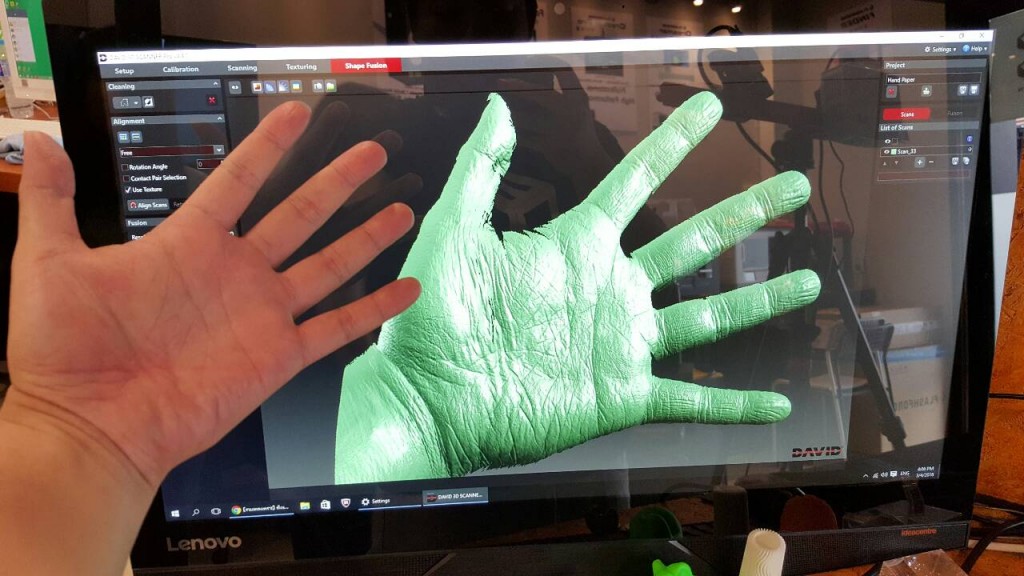
Naturally, I wanted to test if this is true!
As you might have seen on my Instagram, my first test was this 40 cm tall owl statue 3D printed with the Big Builder I reviewed a while ago:
At this size, the polycount was 50.000 vs. 44.000 with the old app based on the 0.5.5. SDK. A 15% improvement, but not really visible. So I scanned my loyal test subject and business partner Patrick:
At this size the upgrade in resolution is very apparent: 24,169 vs. 56,427 faces with the new app—230% more polygons! Even without the numbers, there’s clearly more detail in Patrick’s face (he likes the old mapper better) and T-shirt.
It’s impressive that this kind of improvement can be achieved with just a software update. And remember it’s all rendered locally on an iPad—in realtime—no cloud processing. And according to the Developer Program Manager of Occipital, this is just the beginning:
Excellent to hear and thanks for the kind words.
@mrm_design @structure @NickLievendag Next rev of the SDK will be even better.
— Mark Piszczor (@mpiszczo) June 27, 2016
It’s worth mentioning that since this update to SDK 0.6 there’s no longer support for the 3D Systems iSense I mentioned in the into. So the new Scanner app only works with an actual Structure Sensor bought from Occipital or one of its resellers.
Scanning Outdoors
The Structured Light technology that the Structure Sensor uses to capture depth is great for 3D scanning indoors. Trying to capture objects outside the comfort of my studio I quickly ran into the limitations. As you can see in the calibration image in the beginning of this post, the infrared camera has a hard time capturing details in bright sunlight, let alone see the projected laser pattern.
So I did some experiments on a cloudy day—of which there are enough in The Netherlands. Below is a typically Dutch litter bin.
Note that the icon on the litter bin isn’t covered by the grey preview…
Again I was surprised by the smooth tracking: even without a flat floor surface the litter bin was tracked smoothly. It was a bit hard to capture the back without falling into the canal, but I managed quite well because it apparently doesn’t matter if the object goes out of frame for a moment, because its surroundings are tracked as well.
Below is the result of the scan. It’s far from perfect, but I find it especially interesting that there’s a hole where the icon is printed. Apparently the dark green of the bin absorbs enough sunlight for the infrared sensor to detect the laser pattern, but the white icon is simply too bright. There are also a lot of particles flying around which I’m pretty sure weren’t present in reality.
Below is another outdoors scan of a Dutch mail box when there was a bit more sunlight. The shadow side of the object and the wall are captured decently, but the side that’s facing the sun was totally invisible to the Structure Sensor. The result is rather interesting, but not usable of course.
3D Scanning interiors with the Room Scanner App
The last app I’ll cover in this part of the review is Occipitals Room Scanner App. It’s completely foolproof: use the slider to visually indicate the size of the room you’re about to scan, hit scan and move around until every surface is covered by green polygons. Unfortunately, the app forces you to stay more or less in one place, so you can’t walk around a room freely to scan around corners.
It’s kind of like entering the Matrix…
Its usefulness greatly depends on the purpose. As you can see below, the output quality is too low—both in terms of geometry and texture—to use for any purpose that needs to be esthetically pleasing (you can look around in the interactive Sketchfab embed below by changing the navigation from Orbit to First Person with the icons in the bottom-right corner)
However, I can think of a few purposes for which the Room Scanner app is useful. For instance, game level designers can use it as a dimensionally accurate reference to create an interior for a video game. It’s also very handy to take quick measurements, because making a scan only takes a minute and the app has a built in measuring feature.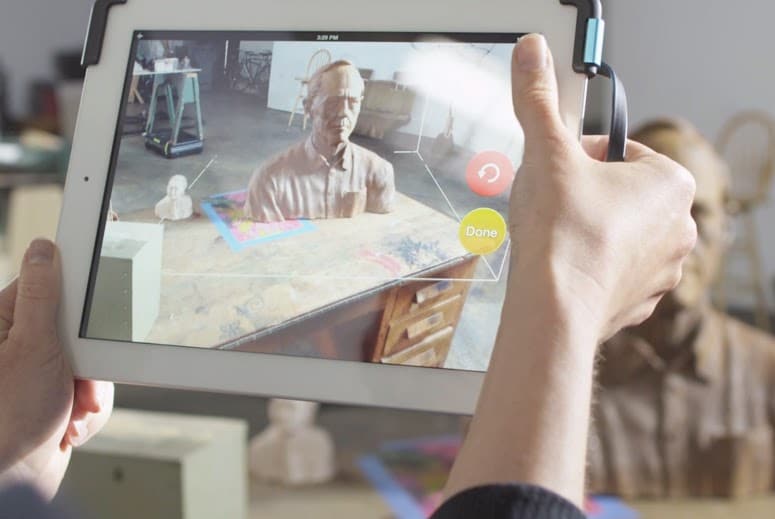
Measuring this way is a lot faster than with a tape measure—and way cooler.
Wrapping up Part 1
It’s good to realize that Occipital’s Scanner apps are samples to demonstrate new features that are announced every few months. For example, in March 2015 SDK 0.4 was introduced, which offered the New Tracker I wrote about earlier, as well as the ability to output UV-textured meshes. Earlier versions apparently used per-vertex coloring that delivered the same low-quality color information that disappointed my in my 3D Systems Sense Review.
So… the Structure Sensor has an SDK that allows third party developers create their own apps for all kinds of purposes. For example, it can be used to create Virtual Reality & Augmented Reality experiences. However, for this Review I’m merely using it as a iPad-based 3D Scanner and for that purpose there’s only one third party app—itSeez3D—which uses cloud processing for more detailed scans.
Continue Reading Part 2 about itSeez3D
Skip to Part 3 about Skanect
Subscribe to my Monthly Newsletter
Get great contents delivered straight to your inbox everyday, just a click away, Sign Up Now.
Email address
Structure Sensor 3D scanner review
We use affiliate links. If you buy something through the links on this page, we may earn a commission at no cost to you. Learn more.
REVIEW – The iPad market share has hovered around 20 to 30% for the past few years. Imagine how different our world and experience would be if each one of those cameras had 3D capture ability. The Structure Sensor is an attachment to the iPad that provides the ability to capture 3D information. Read on to see what I think!
What is it?
The Structure Sensor is an attachment to an iPad, but also works with non-iPad tablets, iPhones, and can be modified to work with standalone applications.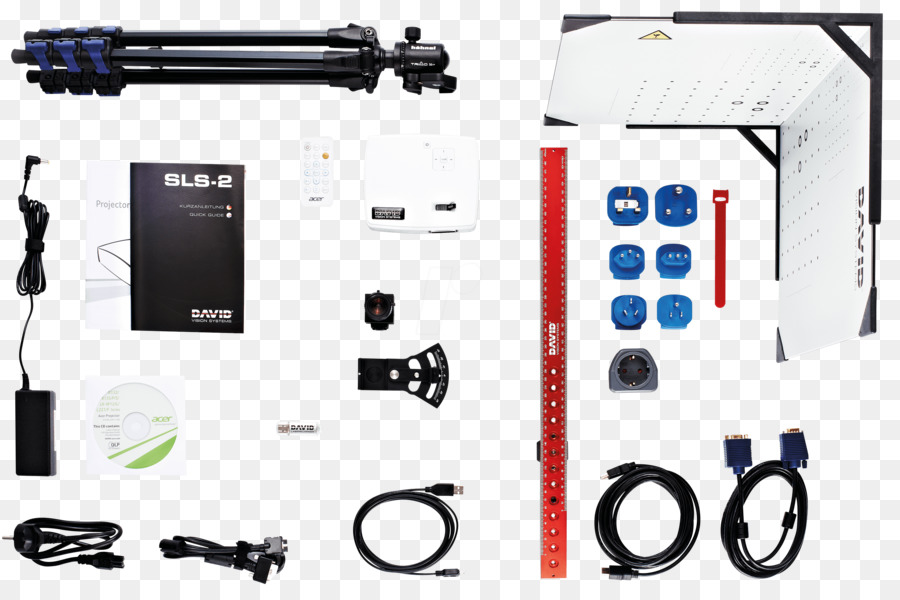 It contains two infrared LEDs, an infrared structured light projector, and an infrared camera. The Structure projects a unique infrared pattern of dots out in front of it, and the infrared camera captures the projected pattern as it is reflected off of objects. Apparent variations in the position of the captured dots are interpreted by software to determine the relative position of a captured image. The graphic below, by Paul Kah of the Lappeenranta University of Technology, Department of Mechanical Engineering, illustrates the technique in a cartoon.
The Structure Sensor uses images from the iPad’s built-in camera, so aligning the Structure sensor up to the built-in camera is critical. The Structure Sensor provides a custom designed mount to ensure alignment. The sensor software also uses the iPad accelerometer, compass, and computing power to generate the 3D images.
What’s in the box?
My employer purchased this device so I didn’t see the box it came in. The following description is from the Structure website:
Structure Sensors purchased directly from the Official Structure Sensor Store will arrive in a gift box, like so:
Structure Sensors purchased from Amazon. com will arrive already assembled, in a new “bento box” style, which doubles as a carrying case for your Structure Sensor, bracket, and cables:
Regardless of where it was purchased, your Structure Sensor should arrive with the following:
- One Structure Sensor
- One Lightning cable
- One Power Adapter
- One magnetic screwdriver
- Eight (8) M1.6 screws
- One user manual
Precision Bracket with Aluminum Latch
The Precision Bracket with Aluminum Latch will arrive in a separate box, like this one:
Precision Brackets with Aluminum Latch for iPad Air 2 and iPad Mini 4 will arrive in a “bento box” style, which doubles as a carrying case for your assembled Structure Sensor, bracket, and cables:
Structure Sensor Bracket For iPad Pro
Your Structure Sensor iPad Pro Bracket should arrive with the following (shown from top to bottom):
- One Bracket Alignment Tool
- One Structure Sensor Base Plate
- One Bracket
This is what the bracket looks like when not attached to the camera:
The bracket surrounds the iPad camera so that a specially designed 120-degree lens may be installed for use with some applications. The camera lens may be unusable by other hardware add-ons if the bracket secured with an adhesive is applied to the rear of the iPad.
Design and features
The Structure Sensor is an anodized aluminum device with a glass front and a plastic back. The back is designed to fit into or screw onto a bracket that connects it to the iPad. The Structure Sensor has its own internal battery to preserve the battery life of the iPad, The bottom side of the camera has a port for the dedicated AC charger. An LED indicator on the Structure Sensor’s glass face will pulse when your Structure Sensor’s battery is charging. As soon as your battery is completely charged, the LED indicator will be illuminated continuously until the AC charger is disconnected.
There is also a port for the data cable to lightning adapter cable
If the Structure Sensor is used with a non-iPad device a separate cable may be purchased that terminates in a USB type-A connector. This cable may also be used with a USB power adapter to charge the Structure Sensor and will charge the battery more quickly than the standard Power Adapter.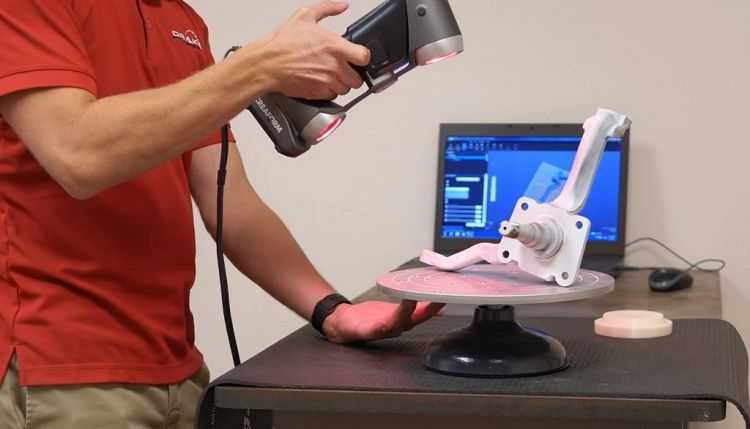
When the sensor is latched to the rear of a device and connected with the dedicated data connection to the device it looks like a kludge to repair an inoperable camera. Technically its similar to taping a Microsoft Kinect to the back of the iPad. However, despite its appearances, the bracket and camera are sturdy when attached and function as if the Structure Sensor were an integral part of the tablet.
The biggest feature of the Structure Sensor is that it was designed as a piece of standalone hardware and not a custom attachment for a specific program. Occipital, the makers of the Structure Sensor published an SDK for the hardware very early on. This development philosophy helps establish this hardware as a well-supported attachment to the iPad. There are over 80 apps built for Structure Sensor as of December 2018.
Rapid 3D scanning of objects and people and 3D scanning of interior spaces were the features I used. The sensor can also be combined with a virtual reality headset to provide augmented reality experiences that incorporate real integration of the 3D environment.
I’ll talk about two of the apps I was able to use with the sensor.
The scanner app allows you to capture 3D models of objects and people by simply walking around them with your iPad and the Structure Sensor accessory. Captured objects can be sent via email (uses OBJ format). The camera collects color information as well to make a texture file. When scanning I got the best results moving the iPad up and down to cover the entire model and then making sure I captured distinct areas, such as the face, all at once so that the iPad would provide the best result when the data is stitched together. Having patience is important; moving too quickly will cause the model to not be assembled correctly. I make models of each of my children. You can see that the model I made of my son’s hair is corrupted on one of my earlier tries.
After some practice, I got the hang of it and was able to capture both of my children without any model errors. Here’s a model of my daughter.
You can view the full model here. The models import into the Windows 10, 3d builder in the wrong orientation and with an error, but the orientation can be rotated and the error is fixed by the program.
Canvas
Canvas is another app for the Structure Sensor. This app is designed to render a room in 3D and has an option to have the 3D scan converted into a CAD (computer-aided design) file so that architects and builders can use the captured measurements as a starting point for modification.
I decided to model a downstairs hallway in my house that has a number of doors and a coat rack area in order to test the capabilities of the device. I had some guidelines to go on but since the time I have made the renderings and now, a video on the scanning process has been published by Occipital. The video below gives an impression of what it is like to use the software.
Once some familiarity is gained with using the software, the whole process is quite fun.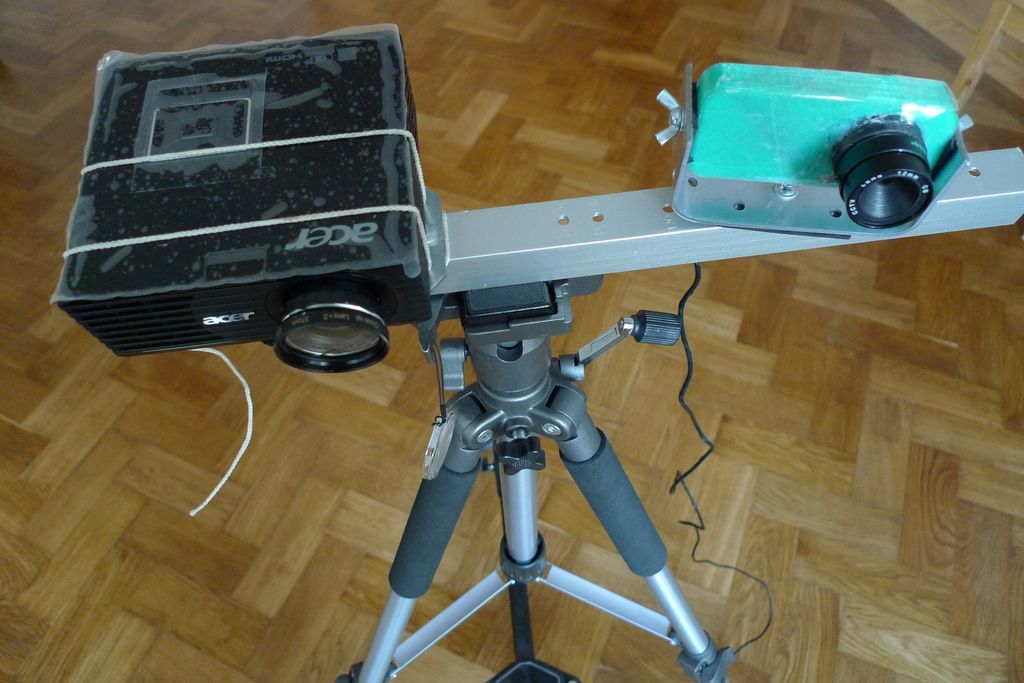 The software indicates the rendering of the space by apparently covering it in a white foam. The end result is that the entire scanned area looks like it is covered in shaving cream or marshmallow.
Here are some pictures and screenshots that I made of the capturing process.
This shows a screenshot of the other end of the hallway.
Instead of showing the camera image, it is possible to show the image depth view rendered in false color
The model files I made include the stairwell going upstairs.
Here is a view of the stairs from the opposite angle.
This is my best rendering. The remainder of the attempts below have some shortcomings. Some, like the capture with an incomplete floor, would be fine for conversion into a CAD model.
Both sides all crooked
Floating coat rack
Odd looking ceiling
Good but some missing wall
Incomplete floor
One side crooked
Rotated during scan
Like the Scanner app, the models import into the Windows 10, 3d builder in the wrong orientation and with an error, but the orientation can be rotated and the error is fixed by the program.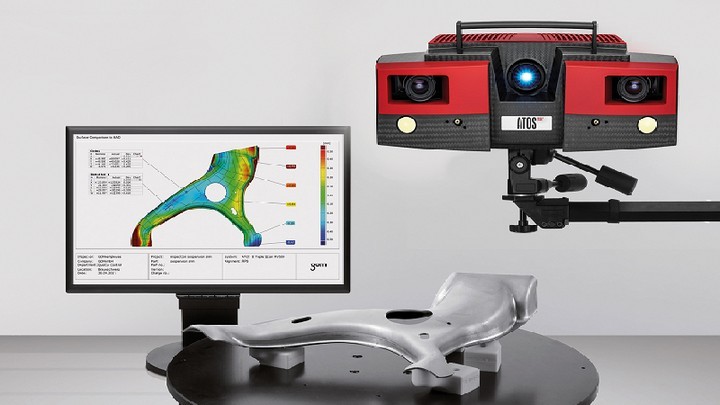 CloudCompare is a good cross-platform alternative, has a portable build, and doesn’t have any importing issues.
What I like
- Unique device
- Powerful features
- Open development
What needs to be improved
- Learning curve
- Cost
- The adhesive bracket may limit camera use
- The camera cannot be used with a case
Final thoughts
With the Structure Sensor, a whole new dimension can be experienced with your iPad.
Price: $379 to $499
Where to buy: Structure
Source: The sample for this review was provided by my employer.
technologies, types, how 3D devices work
Many digital engineering strategies for the future of development, manufacturing, quality control, and product release start with 3D scanning. 3D scanners work with advanced technologies and specialized software to create a tool that allows you to achieve revolutionary results. For those still working with power tools and traditional coordinate measuring machine (CMM) technology, 3D scanners serve as an easy gateway to advanced manufacturing and engineering strategies. nine0003
Read below to learn more about how 3D scanners work and what this technology can do, so you can start enjoying its benefits now.
What are 3D scanners?
A 3D scanner works by capturing data from the surface of a physical object to describe its shape in an accurate digital 3D format. Unlike CMM measurement data, high quality 3D scan data is used for more than just inspection and dimensional analysis. The data obtained by non-contact measurement allows faster and more accessible digital analysis and inspection using a visual, in-depth method of examination. nine0009 3D scanners are also used to replicate parts in reverse engineering, check the fit, shape and function of components in remote locations, and check CAD models of 3D printed parts. 3D printers can use 3D scan data to create physical objects.
What is 3D scanning?
3D scanning is the process of collecting data about the surface of an object in digital format to determine its shape, allowing users to either reproduce the part by reverse engineering or verify it by dimensional analysis. nine0003
To do this, operators use scanners that use lasers, light or sensors to determine the surface of the scanned object and assign data points to this surface. These data points will eventually recreate the . Depending on the type of laser, light, or sensor used, the level of detail and scanning performance may vary.
3D Scanning Technologies
Photogrammetry
Originating from photography, photogrammetry is an incredibly useful technology in various fields. This technology allows you to take multiple images taken at different positions and triangulate points on those images to determine their location in 3D space. nine0003
For example, cartographers use this technology when compiling maps. When it comes to hard-to-reach places like mountains, surveyors can use photogrammetry to take measurements.
Many modern technologies use photogrammetry, and the quality of the images is the main factor determining accuracy. If the images are poor quality, there will be holes in the grid. The more images you can get, the higher the scan accuracy will be. nine0003
Shining 3D offers a solution - DigiMetric Photogrammetric System.
Read also DigiMetric case study “Scanning with a Digimetric Photogrammetric System and a FreeScan Handheld 3D Laser Scanner”
Structured Light
This technology is created by applying geometric patterns to an object while simultaneously capturing an image with a camera. In this case, the camera registers the deviation of the image.
Based on this template offset, all existing points can be located. It is necessary to conduct many scans from different positions, and then merge them until the mesh is 100% complete. Computer programs automatically combine all images to form a complete grid. nine0003
3D laser scanning method
3D laser scanning data acquisition
3D laser scanning process
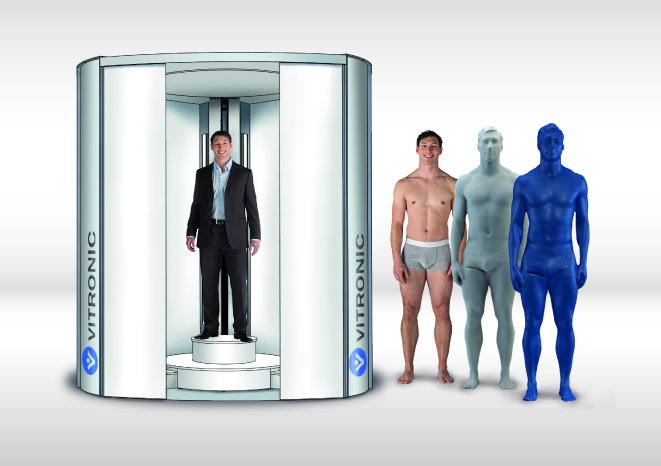
The object to be laser scanned is placed on the scanner platform. Specialized software directs the laser probe over the surface of the object. A laser probe projects a line of laser light onto the surface, and 2 sensor cameras continuously record the change in distance and shape of the laser line in three dimensions (XYZ) as it passes along the object. nine0003
Acquired data
The shape of an object is displayed as millions of dots, called “point clouds”, on a computer monitor as the laser moves around, capturing the entire shape of the object's surface. The process is very fast and laser scanning is more accurate than infrared.
Point cloud data for inspection
If the data is to be used for inspection, the scanned object can be compared with the designer's nominal CAD data. The result of this comparison is provided as a “color map deviation report” in PDF format, which clearly describes the differences between scanned data and CAD data. nine0003
Reverse engineering CAD model
Laser scanning is the fastest, most accurate and automated way to obtain digital 3D data for reverse engineering. Again, with the help of specialized software, point cloud data is used to create a 3D CAD model of the geometry of the part.
The CAD model can accurately reproduce the scanned object, or the object can be modified in the CAD model to correct imperfections. nine0003
Types of 3D scanners
Active scanners emit some radiation or light. The scanner detects the reflection to collect information about the object. Let's take a look at the active views of 3D scanners below.
3D Laser Scanners
3D Laser Scanners use a process called trigonometric triangulation to accurately display a 3D shape as millions of dots. Laser scanners work by projecting a laser line or lines onto an object and then capturing its reflection using one or more sensors. nine0003
The sensors are located at a known distance from the laser source. Accurate point measurements can be made by calculating the angle of reflection of the laser light.
Laser scanners are very popular and come in many designs. These include handheld, manipulator-based, CMM-based handheld devices, long-range trackers, and long-range single-point trackers.
Benefits of 3D laser scanners:
- Ability to scan complex surfaces such as shiny or dark surfaces. nine0083
- Less sensitive to changes in lighting conditions and ambient light.
- More accurate data, available for inspection.
Learn about FreeScan UE 3D laser scanner features, features, features and benefits.
An example of using FreeScan UE and photogrammetry can be found on our blog page - Large Part 3D Inspection.
As well as the article The rebirth of historic motorsport icons. nine0003
Projected or structured light 3D scanners
Historically known as “white light” 3D scanners, most structured light 3D scanners today use blue or white LED projected light. These 3D scanners project a pattern of light onto an object, consisting of stripes, blocks, or other shapes. A 3D scanner has one or more sensors that look at the edges of these patterns or structural shapes to determine the object's 3D shape.
Using the same trigonometric triangulation method as in laser scanners, so the distance from the sensors to the light source is known. Structured light scanners can be mounted on a tripod or hand held. nine0003
Benefits of structured light 3D scanners:
- Very fast scan times of only 2 seconds per scan.
- Versatility - multiple lenses for scanning small and large parts in one system.
- Portability - handheld systems are highly mobile.
- Eye friendly for 3D scanning of people and animals.
- Color 3D scans available.
- Various price ranges from inexpensive to expensive depending on resolution and accuracy. nine0083
An excellent solution to 3D scanners with structured light, are models:
- Einscan HX
- manual 3D scanner Einscan H.

Examples of scanning using 3D 3D scanners EINSCAN:
- https: // www.shining3d.ru/blog/perfectly-equipped-for-emergency-with-the-einscan-hx/
- https://www.shining3d.ru/blog/at-the-intersection-of-craftsmanship-and- technology-einscan-h-and-fusion-360-in-traditional-boat-building/. nine0083
Coordinate Measuring Machine (CMM)
Coordinate Measuring Machine (CMM) is mainly used for parts inspection. The machine can be controlled manually or through autonomous control by software and computers. Measurements are determined by attaching a sensor to the machine. The sensor usually has a small ball at the end of a shaft of known diameter. The CMM is then programmed to make contact with the part. When the machine senses contact with the probe tip, a value in XYZ space is measured. The most common type of CMM is the bridge type, which has 3 x, y, and z axes. The attached sensor system can be rotated to provide an additional 3 xyz axes, giving a total of 6 degrees of freedom (DOF). nine0009 For very precise measurement of parts down to a few microns, CMMs are usually installed in a controlled room.
The room includes a reinforced floor, controlled humidity and temperature, and isolation from vibration and other forces that may affect accuracy.
In addition, most CMMs have a large granite table surface that is perfectly flat. Details are fixed on a granite table in such a way as to exclude their movement during the measurement process. nine0009 Advantages of CMM:
- One of the most accurate way to measure an object
- With the appropriate machine, both small and large parts can be measured
- There are industry standards and certifications for measurement and software
Solutions provided by Shining 3D – FreeScan Trak CIM Portable Wireless Scanning System.
Application example – Mobile precision testing for the highest requirements. nine0003
The practical use of 3D scanning is already a reality today.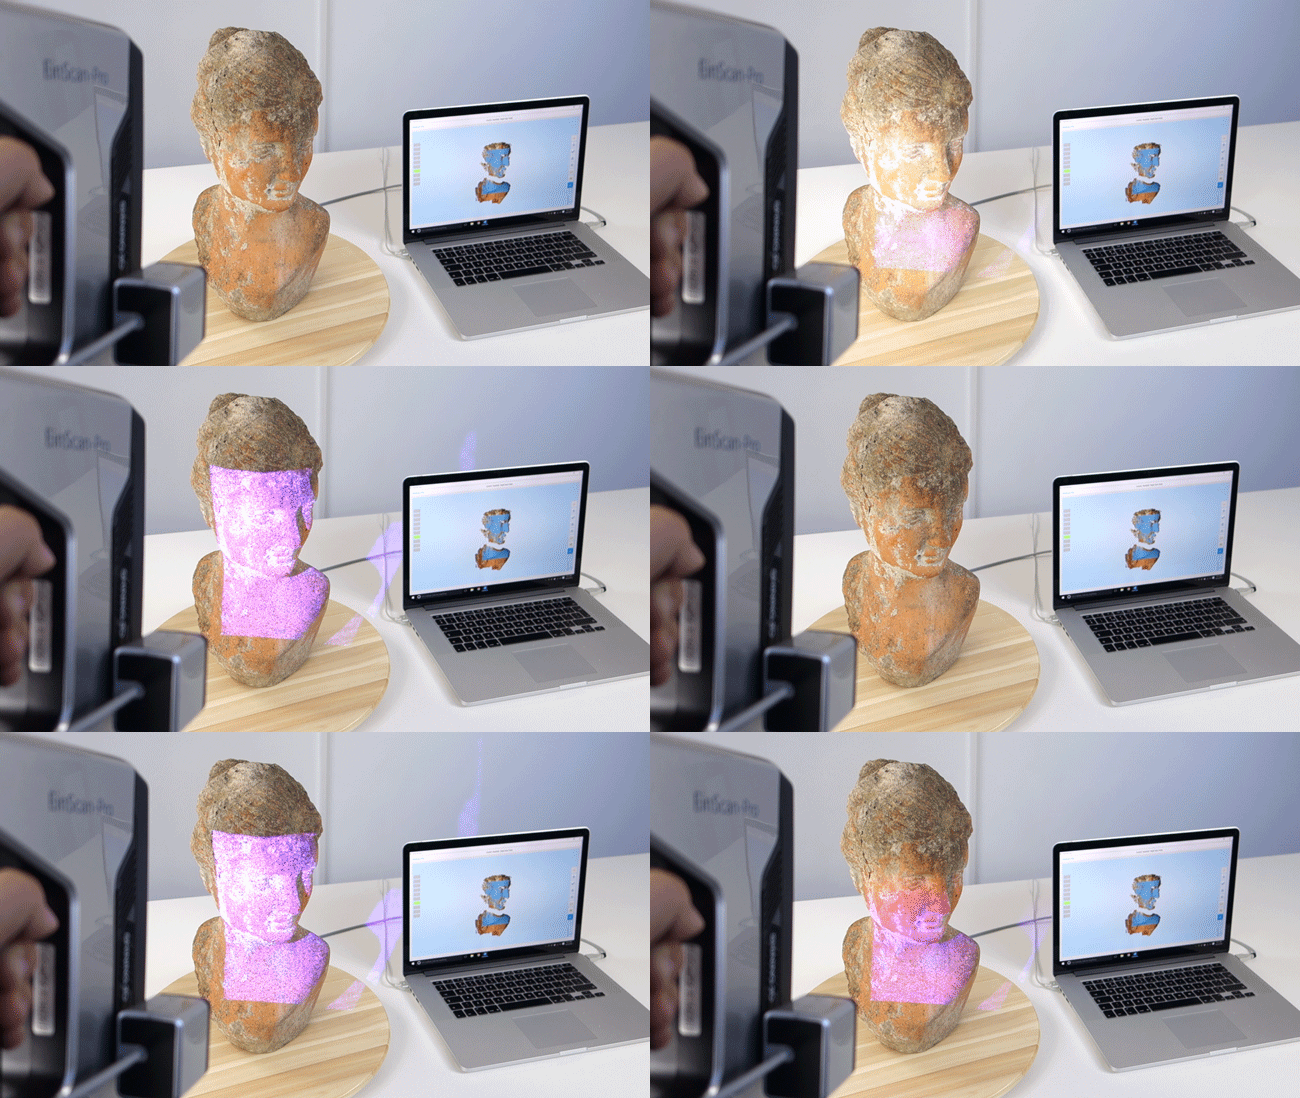 The principle of operation of 3D scanners is based on accurate measurement of distances to the characteristic points of the object under study, which makes it possible to determine their coordinates in space and build a digital three-dimensional model. In the future, it can be displayed on a computer screen or formed on a 3D printer
Lowrance Structurescan 3D (LSS-3D) - Structural Scanner 3D | Scanners Lowrance (Lawrence) | Navigation equipment Lowrance (Lawrence)
Lowrance StructureScan® 3D allows anglers to see fish, their locations and bottom contours in stunning 3D. StructureScan® 3D scans the underwater landscape and fish locations to create high-resolution, 180-degree 3D images directly below your boat. With the help of unique image viewing technology, you will better understand where the fish are and where they accumulate in relation to your boat. When using the combination of the SideScan 3D Skimmer® side scan transducer and the StructureScan® 3D module, photorealistic, 3D images are displayed on the screen of your Lowrance HDS Gen3 fishfinder/chartplotter. nine0003
Lowrance StructureScan® 3D
StructureScan 3D is powered by multi-beam sonar technology that scans underwater terrain and fish spots in stunning detail and converts the scanned material into high-resolution 3D images with 180-degree coverage.
Easy-to-understand sonar view
Viewing 3D images from any angle is panned to either side of the ScanTrack™, touch-controlled via on-screen commands for easy-to-use preset viewing positions. nine0003
Quickly find key fish habitats
StructureScan® 3D makes it easier for anglers to locate fish, where they are in relation to their boat. By moving slowly over a wide potential fish area, within a 180-degree scanning range, anglers can quickly find key areas and hiding places - such as sudden changes in depth, holes, ditches, rocks, weeds, logs, wrecks and more.
Outstanding side view clarity
To provide the clearest side view possible, the design of the StructureScan 3D sensor has been improved by increasing the number of sensors for greater image acquisition efficiency.
High Definition (HD) and Super Wide 3D Scan
Contours below the surface of the water can be shown on the sides of boats up to 180m deep to port and starboard, with incredibly detailed HD images. StructureScan® 3D provides several modes, including DownScan™ and HD StructureScan® 2D imaging modes, and a new, realistic 3D imaging mode. Using the preset virtual angle viewpoints or the ScanTrack™ pan/tilt control mode, you can fine-tune the view and perspective below your boat. Using a combination of high definition (HD) and 3D images increases your understanding of where fish might be hiding and makes it easier to find a fishing spot. nine0003
Leading Edge™ scan results
Leading Edge™ delivers crisp graphic sonar beams, StructureScan 3D - Easily and quickly adjust your trolling lure display to capture the correct side and depth. at the point of their intersection with the contours of the bottom. The depth and range of the scanned area are shown as red fan marks directly below the boat.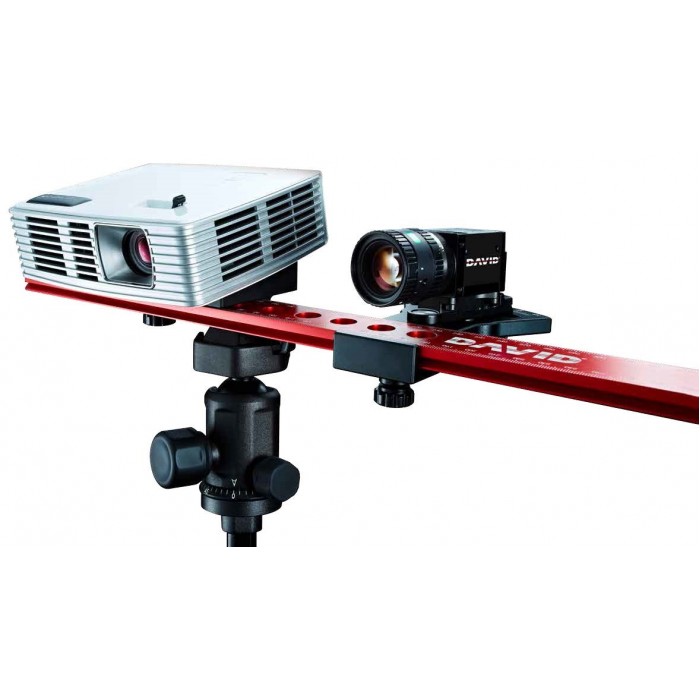 Leading Edge also includes a depth scale that, when zoomed in, shows more detail, giving you a better understanding of targets at depth
SelectScan™ target identification
SelectScan™ automatically colors fish spots and captures objects in a color that contrasts with the selected color palette, making target identification faster and easier than ever before.
Vertical gain control
Vertical gain is a user-selectable scale that accentuates sharp changes in vertical terrain and contour depth on the screen, making it easier to identify them in relation to surrounding underwater terrain. Vertical Enhancement makes even the smallest changes in depth more visible. nine0003
Waypoint overlay
Reviewing fishing grounds, fish habitats and other bottom features is easy with waypoint overlay. Use the keyboard icons to store a route waypoint at the boat location, or switch to cursor mode and store a waypoint over a specific target, fish feeding or hiding place.
Automatic adjustment of 3D images
StructureScan 3D - Comparison of 2D and 3D. Seeing StructureScan® HD and StructureScan® 3D at the same time is a quick way to see what you've been believing in all these years! Adjusting 3D image settings is set by default depending on the configuration of your HDS Gen 3 and StructureScan 3D module. Sharpness and contrast adjustments can be made using the slider bar settings on the screen. The Clarity option reduces noise on the screen surface by lowering the sensitivity of the sensor near the surface. The Contrast option brightens/darkens the color palette to make it easier to identify fish and bottom structure. nine0003
Triple Ethernet port for connecting to network devices
Improved Skimmer® side scan sensor design
Lowrance StructureScan 3D Specifications:
SideScan
Max. range 455 kHz - 365 m (Common), 182 m each way
Max. speed 56 km/h
Target marks 24 km/h
Optimum speed 16 km/h or less
DownScan
Max.


