Roland 3d scanners
Roland Introduces the LPX-600 3D Laser Scanner for Easy, Professional 3D Scanning at the Touch of a Button | News Release
11/30/2005
Roland DG Corporation
Roland Introduces the LPX-600 3D Laser Scanner for Easy, Professional 3D Scanning at the Touch of a ButtonHamamatsu, Japan, November 30, 2005 – Roland DG Corporation today announced the new LPX-600, a complete laser scanning package including software that easily scans a variety of objects to generate accurate 3D digital data. The LPX-600 is the industry's most user-friendly professional 3D laser scanner, with the entire scanning process controlled by a single button. Conventional 3D scanners, by comparison, require the advanced skills of experienced professionals to operate. "The LPX-600 3D Laser Scanner is an exciting innovation for the 3D CAD/CG industry, bringing unmatched ease-of-use to an otherwise complex process," said Toshi Yahiro, Roland DG 3D Product Manager. "Now, for the first time, anyone can easily generate high-quality 3D digital data. In fact, the LPX-600 is as easy to use as a flatbed scanner. Yet it delivers professional results, automatically filling holes and deleting polygons where needed for smooth surfaces and easy editing."
Scan your object in three easy steps
With the LPX-600, scanning is completed in just three easy steps:
1.Position your object on the LPX-600 work table
2.Press the "Preview" button to confirm scanning time
3.Press the "Scan" button to begin scanning
Easy-to-use Roland LPX EZ Studio scanning software included
Roland LPX EZ Studio scanning software controls the entire process from the initial LPX scan to the creation of 3D CAD/CG data in a range of file formats including STL (Standard Tessellated Language, industry standard 3D CAD format), GSF (Geometry Systems native file format) and 3DM (Rhinoceros file format). EZ Studio automatically eliminates extra polygons and fills holes for smooth, continuous surfaces. * Roland LPX EZ Studio is compatible with Windows® XP/2000/Me/98 SE (Second Edition).
LPX-600 Features:
- Easy to use — Even novices can scan objects to create accurate 3D data.
- Includes Roland LPX EZ Studio scanning software.
- Features USB connection for easy setup.
- Large working area, up to 254 mm (10") in diameter and 406.4 (16") mm in height.
- High-quality scanning as precise as 0.2mm (0.008") scanning-pitch
- Benchtop size and quiet operation make the LPX-600 ideal for any office environment.
- Special features for advanced users:
- Dr. PICZA 3 scanning software (included) allows scanning configurations and exports data to either surface software or 3D CG/CAD software.
- Pixform Pro surface software is available as an option.
*The ability to fill holes automatically depends on the shape of the object and whether the laser can reach all sides including front and back.
-
Roland DG Corporation (TSE symbol 6789) - First Section, Tokyo Stock Exchange
Phone: +81 (0)53-484-1201 / Fax: +81 (0)53-484-1216
3D Scanning with the Modela MX-20
3D Scanning with the Modela MX-20 In order to investigate as many 3D scanning methods as possible we decided to work on some of them as a group and then take one each to write up.
The Roland MDX-20 can be used for 'Tactile Scanning' of objects as well as milling. The process essentially involves delicately moving a long needle tip around over the model and prodding it to work out where the surface is at any point.
1. What Object to Scan?
We decided to try and find an object that we would be able to scan with as many methods as possible. This proved quite awkward as the different methods we planned on trying all work best with different scales of object. We settled on a pencil sharpener as it's quite an interesting shape, has some surface detail, has a flat bottom surface so that it's easy to stick down and has a chance of producing a scan with the Modela, 123D Catch and FabScan.2. Modela Setup
The machine requires a small amount of setup, basically the milling head needs to be replaced with the scanning head. The heads are only held in place by 2 'alan' screws so this is a fairly quick process.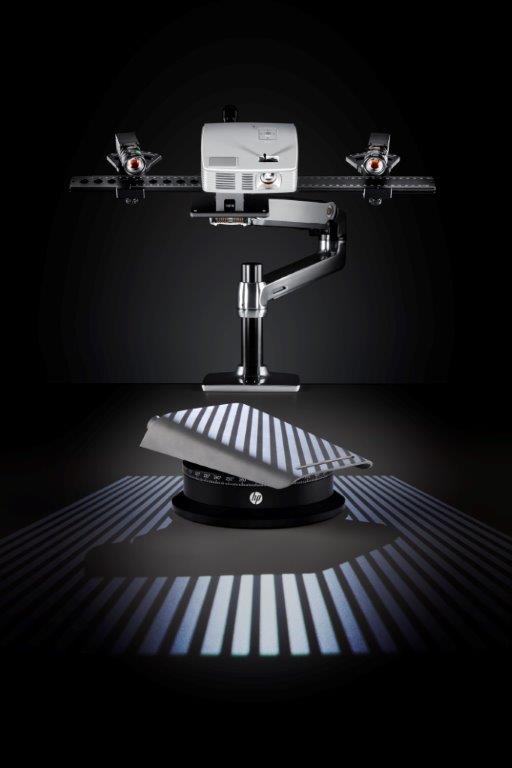
Once the machine was setup we stuck our object down on a flat part of the Modela bed with double sided tape.
3. Software Setup
We had been using Fab Modules in Ubuntu for all the milling work with the Modela, unfortunately scanning with the Modela is currently only supported by the official Roland software called 'Dr PICZA' which only runs under Windows.Dr PICZA proved to be quite intuitive to use and after 10 minutes fiddling around with it, investigating, we were happy we knew how it worked.
3.1. Setting Scan Area
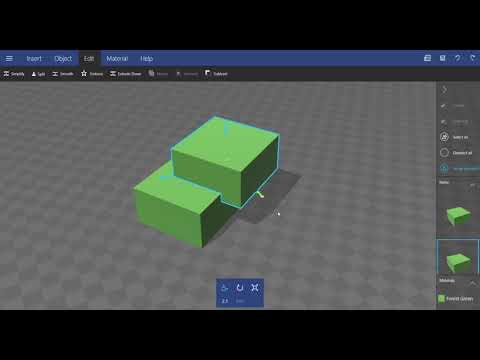
First thing to do is tell the Modela the area of the bed that requires scanning. Getting this as close as possible to the boundaries of the object will reduce the scanning time. Our initial estimate was by measuring from the lower left corner of the Modela bed. We put these measured numbers for x-min, x-max, y-min and y-max into the scan area dialog and then used the 'Begin Area Test' button to check them.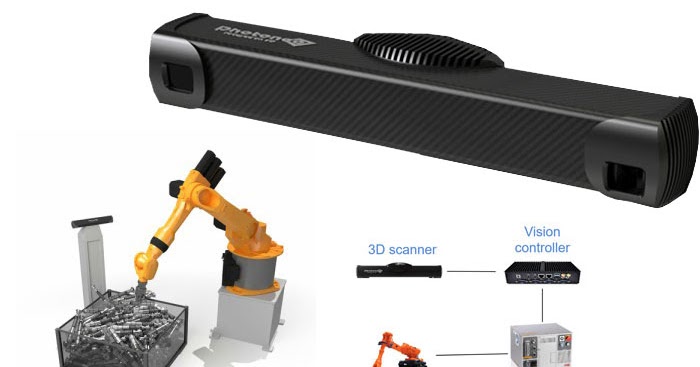 The software gives you a visual representation of the scan area with drag handles that can be used to adjust it. This gives a quick initial visual check of the area to be scanned.
For the 'area test' the Modela moves around the boundary of scan area lifting the needle up as far as it will go and dropping it at each of the corners and mid points of the of the boundary in turn (these are the same points as shown by the drag handles on the image).
This test allows us to refine the scan area from our initial measurements, moving the boundary in closer to the object so that the modela has less area to sample. We iterated this scan / refine boundary a few times until we were happy that we weren't scanning a large area of the flat bed but our scan was still well clear of the edges of the object.
3.2. Z Upper Limit
One thing that was obvious to us from watching the 'Test Area' process was that it takes an appreciable amount of time (around 15 seconds per cycle) for the Modela to lift the test needle as high as it will go and then rop it back down again. Obviously with no other information about the object being scanned the software has no choice but to do this. We realised that if we use the 'Z Upper Limit' function we could tell the Modela the upper extent of the object on the Z axis and it would know that it only needed to lift that far to clear the object as it moved around.
Setting the x, y position of the highest part of the object and clicking 'Apply' causes the Modela to move the needle to this position and drop it down to test the actual height at this point. By watching closely as it did this we could refine the x, y co-ordinates to get an accurate measure of the maximum height. hopefullyy this would save some time in the scan process as the Modela wouldn't need to lift the needle the whole way up as it moved it around. Watching the Modela actually perform a scan later showed us that even without this info it seems to be slightly more intelligent than this.![]()
4. Scanning
Once the scan area had been set up we set the x, y scan pitch and clicked scan. The software defaulted to 1.00mm for the x, y pitch when we launched it, so even though this didn't sound like it would give us a very accurate scan we decided to start with this to watch how the machine worked and then refine it later.The image below shows the scan in progress.
You can see from the image above that this scan is about a 3rd of the way through and still has about 12 minutes remaining until it is complete, so a total scan time of about 15 minutes. Our scan area was 22mm by 30mm, at 1.0mm pitch this is approximately 713 points including the boundaries. At 15 seconds per point samlpe this is around 180 minutes. So it looks like setting the z upper limit has had a significant effect (Or maybe the machine is cleverer than we think!).
And finally the mesh generated with our initial 1.0mm pitch scan.
You can see from this that even though the pitch was only 1.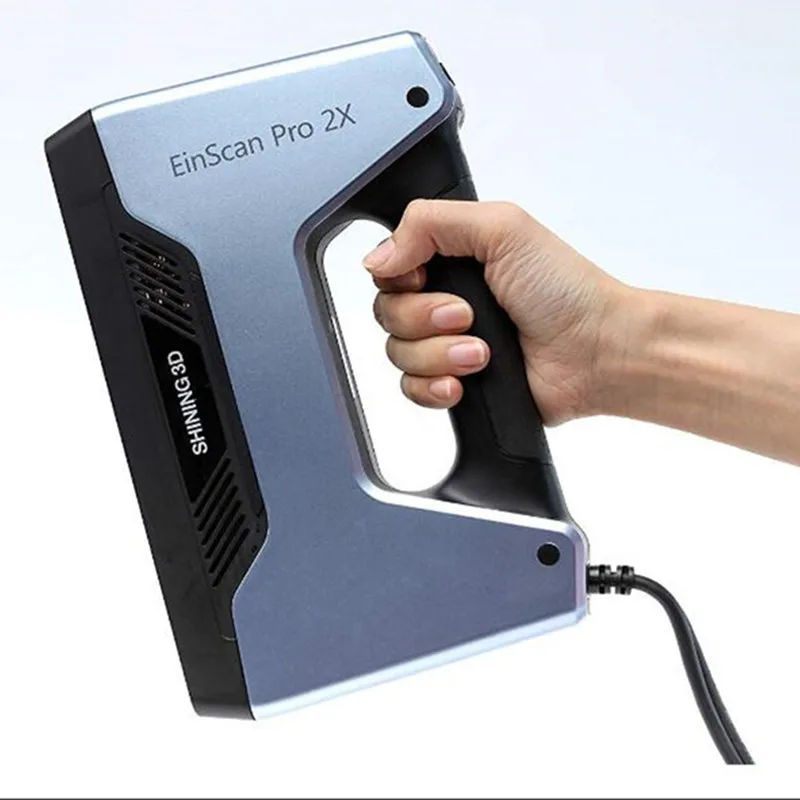 0mm, the scanned object is still clearly identifiable. However it's missing all of the finer detail such as the ridges on the finger indentations and the texture on the upper surface.
So we decided to refine the scan pitch and see how the detail changed. Below is the final mesh at 0.5mm pitch.
And this one below at 0.25mm scan pitch, this took around 2 hours to complete the scan.
At 0.25mm detail in the object is becoming clearly visible. You can see the following features:
- Dimpled texture on the upper surface of the sharpener body.
- Cross head screw holding blade in place.
- Difference in height of blade and body.
- Cutting edge of blade.
- Knurls on finger grips at side of body.
 Given time we may attempt this again as we would like to see what this machine is capable of.
STL Files for the 3 scans that worked are here, here and here.
5. How does it Scan?
The simplistic way to scan would be to step across the scan area in pitch step increments completely raising the scanning tip each time and then dropping it back down again. Based on our quick time to scan estimate earlier on vs. the actual time it took to do a scan and on observations of the machine scanning the process appears to be much more intelligent than that.The first thing to note is that t needle doesn't operated a simple switch when it drops down and touches the object. It is actually a piezoelectric sensor. This means that it will resond to deflections in the x and y directions as well as the z. With this the machine appears to sweep the tip across the object at a constant low height until it touches an edge. When it touches it lifts up until it clears and then continues it's sweep.
 with this information it can work out a better approximation of the boundary of the object than that provided by our simple scan area estimates and z upper limit. With this better boundary information it returns and performs a high resolution scan of the object only just lifting the scanning tip just enough to clear the object and saving a lot of time moving the head on the z axis.
 6. Printing our Scans
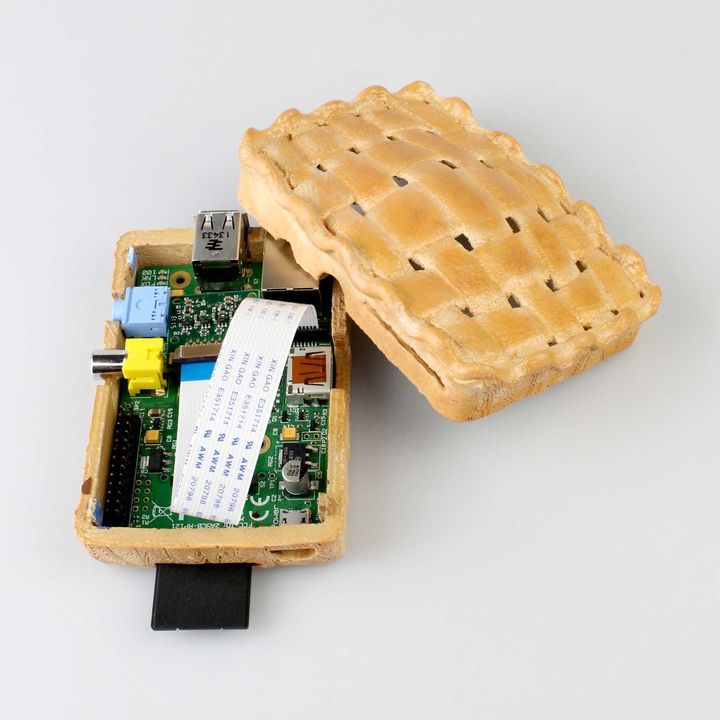
Having scanned our pencil sharpener we decided to try and print a copy and see how close to the original it looked. Our original print was at 1:1 scale, but at this resolution the printer (our in lab Ultimaker) wasn't capable of reproducing some of the detail that was visible in the mesh, so we decided to scale the print up to 2.5:1 to see how much detail had actually been captured. The original and both models are shown together in the image below.
Close up of the largest 2.5:1 print.
Roland LPX-600 Digital Scanner - CMIT 21
The Roland LPX-600 3D Scanner is the most professional and easy to use 3D scanner in its field, with the entire scanning process controlled by the push of a button. All other similar 3D scanners compared to LPX-600 require professionalism and experience with similar equipment.
The LPX-600 3D Laser Scanner is a new development in 3D-CAD/CG technology, combining incredible ease of use and a comprehensive solution to many issues. For the first time, many will be able to create high-quality digital 3D models. The LPX-600 can also be used as a flatbed scanner. The scanner produces amazing results by automatically filling in gaps in the structure and removing unnecessary parts to render a flat surface with the ability to edit the area you need.
Compatible with 3D-CAD/CG standards. LPX-600 Roland's DG Scanner makes scanning incredibly easy. Incredibly easy, even compared to 2D scanners, you can create digital models for programs that support the 3D-CAD/CG standard. The LPX-600 will help you create excellent results even if you have no experience with such equipment.
This combination of hardware and software is ideal for all popular CAD/CAM systems and animations. You can scan objects to create molds, molds, finished products, animations and more.
Features of LPX-600
- Easy to operate, even a beginner can scan and create a 3D model
- Bundled software Roland LPX EZ Studio provides advanced functionality and requires no special training
- USB connection
- Large working field - up to 254 mm in diameter and up to 406.4 mm high;
- Capable of planar scanning, which allows you to qualitatively digitize slices and troughs with a step of up to 0.2 mm
- Attractive, compact design ideal for your office
- The entire scanning operation is performed with one button
- Special features for professionals: - Dr. PICZA 3 allows you to scan and export files to 3D-CAD programs.
Two scan methods
Planar and rotational scanning methods are universal for digitizing a huge variety of objects. In rotational scanning LPX–600 quickly scans the entire object placed on the turntable. With planar scanning, the model can be scanned in six different planes, which allows you to digitize depressions.
Roland LPX EZ Studio software included
Roland LPX EZ Studio scanning software controls the entire process from the start of an LPX scan to the creation of a standard 3D-CAD/CG file in possible formats such as STL, GSF and 3DM. The scanner produces amazing results by automatically filling in differences in structure and removing unwanted parts to render a flat surface with the ability to edit the area you need (the ability to automatically fill in differences in the structure of the scanned object depends on the ability to scan all sides of the object).
A choice of two powerful packages for advanced users - Dr. PICZA 3 - included or Pixform Pro Surface Software - available as an option.
Software for LPX-600 is compatible with all professional applications. Dr. PICZA 3 allows users to scan and define the area of an object by accurately setting the height, width and distance from the center point, as well as setting the scanning angle. In addition, this software can export the acquired point or line data as 3D-CAD information
Pixform Pro is an optional LPX-600 software compatible with all popular CAD/CAM systems. Pixform Pro allows you to align and merge surfaces, fill holes, and simplify, rebuild, and convert polygon surfaces to NURB surfaces. The program supports many data formats, including DXF, STL, WRL, 3DM and IGES. IGES - NURB file format compatible with popular CAD/CAM systems such as SolidWorks, Pro/ENGINEER, Inventor, Mastercam, Delcam, FreeForm, Rhino, etc.
Pixform Pro also has powerful tools for easy and efficient editing of 3D models. They allow users to combine scanned objects for the best quality, change the shape of concave and curved surfaces, sharpen edges, expand the shape, increase the thickness.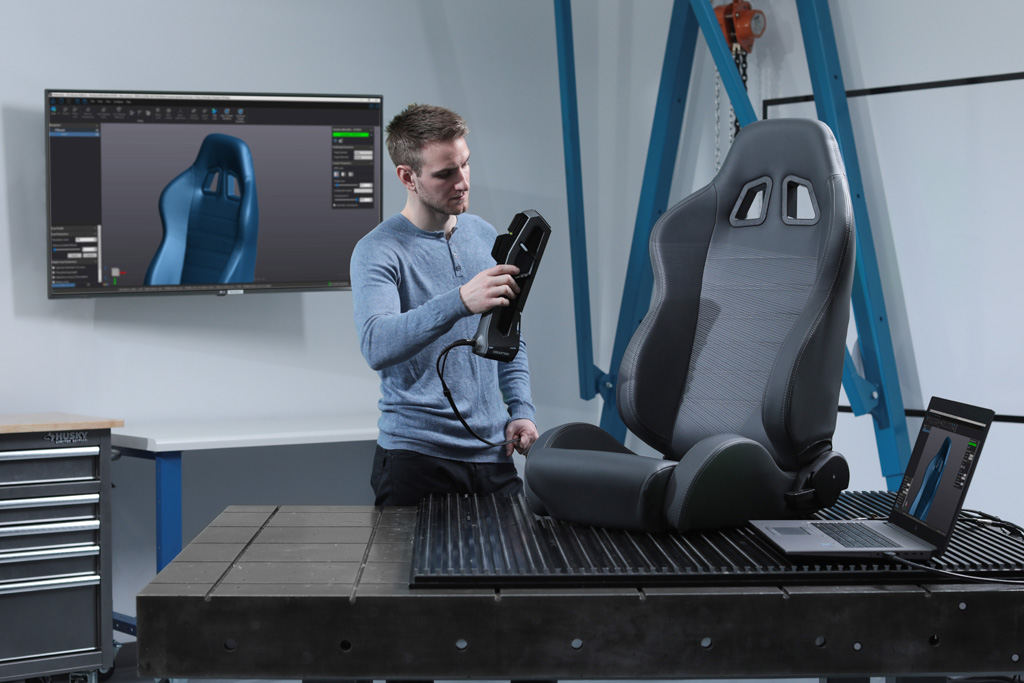
| Specifications | |
|---|---|
| Working area | 254 mm |
| Maximum scan area | Planar scanning: width 254 mm, height 406.4 mm. Rotary scan: diameter 254 mm, height 406.4 mm. |
| Scan pitch | Planar scanning: from 0.2 to 254 mm in width, from 0.2 to 406.4 mm in height. Rotary Scan: 0.18 to 3.6 deg. around the circumference, from 0.2 to 406.4 mm in height. |
| Repeat accuracy | ±0.05 mm |
| Maximum table load | 5 kg |
| Laser | Wavelength: 645-660 nm. Maximum power: 0.39 mW or less. Maximum laser power indoors: 0.1mW |
| Sensor | Non-contact laser sensor |
| Scan method | Beam triangulation |
| Operating speed | Table rotation speed: 9 rpm Laser head rotation speed: 4.  48 rpm 48 rpm Laser head travel speed: 37 mm/s |
| Interface | USB (Universal Serial Bus Specification Revision 1.1) |
| Power supply | Special AC adapter. (Input: AC 100-240V ±10% 50/60Hz 1.7A Output: DC 19V, 2.1A) |
| Power input | ~ 20 W (including AC adapter) |
| Dimensions | 630 x 506 x 761mm |
| Weight | 63 kg |
| Environmental requirements | Temperature: 10-40°C (25° or more recommended) Humidity: 30-85% (non-condensing) |
| Software | Roland LPX EZ Studio , Dr. PICZA 3, 3D Editor Pixform Pro (option) |
| Operating systems | Windows XP/2000/Me/98 SE. (Pentium IV, 512 Mb memory) |
| Equipment | AC adapter, power cord, CD-ROM, modeling clay, user manual |
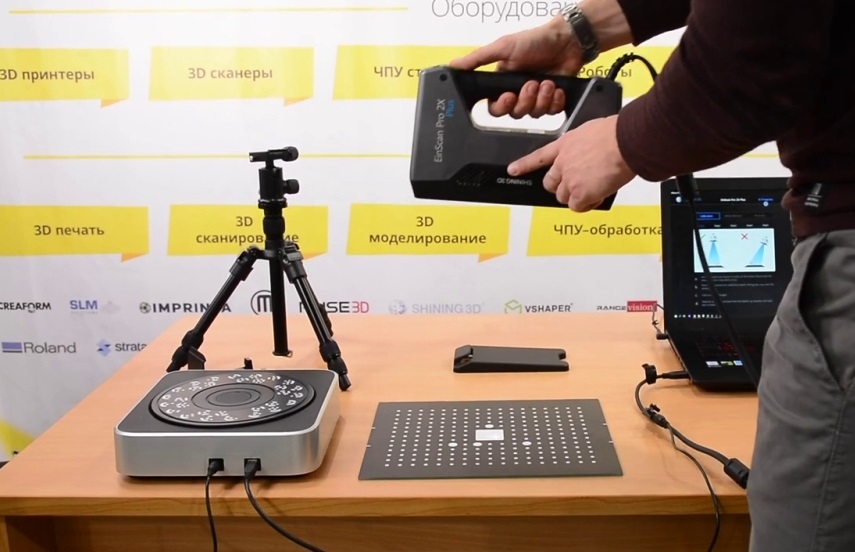
Scanform Professional Handheld 3D Scanners
Our clients
See all3
Well Technology Company
Manufacture of industrial ventilation equipment
Well Technology
FENDERIST — Vladivostok
Development and production of tuning components
fenderist.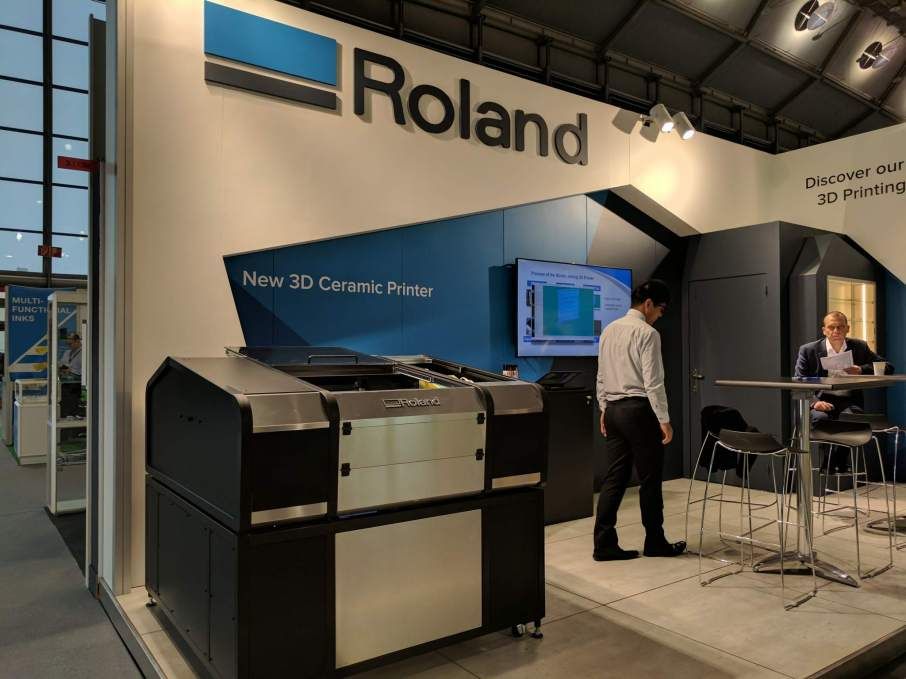 com
com
BoatService – Croatia
Boatservice Group — A network of yacht service shops operating in Croatia, Slovenia and Montenegro since 2008. Perform almost…
boatservice.eu
Bratuhin Customs - Izhevsk
Production of individual motorcycles and components: 3d scanning, reverse engineering, production and installation of side trailers…
bratukhincustom.com
Physics Racing - St.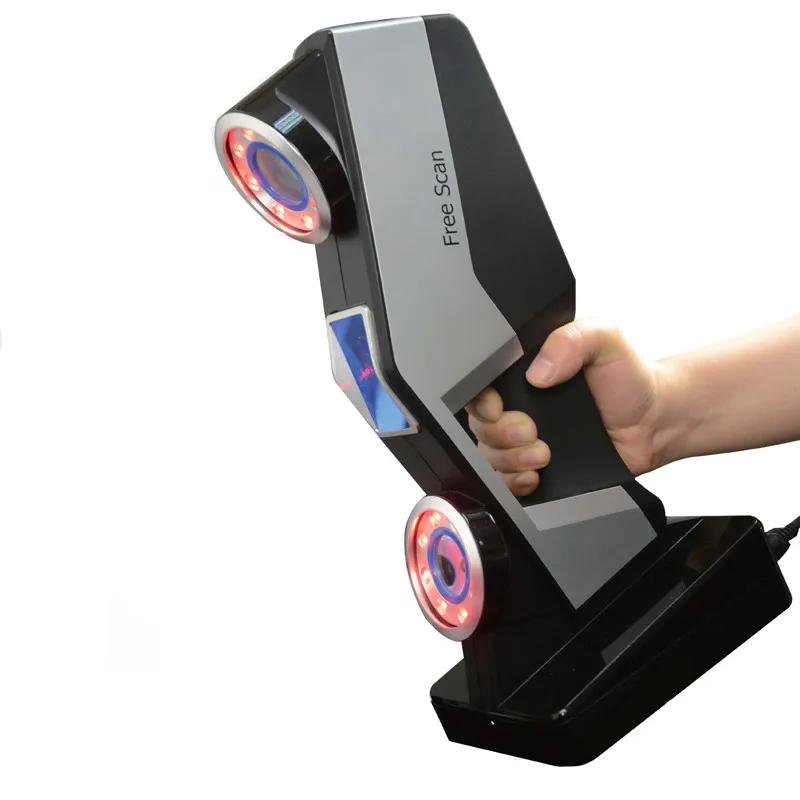 Petersburg
Quality construction, repair and maintenance of sports cars. Professional approach to work, preparation for exhibitions and competitions
fizikaracing.vsite.biz
RMM manufacturing — Novosibirsk
Manufacture of downpipes and exhaust systems for Mercedes, BMW, Porsche, Audi, Aston Martin, McLaren, etc.
CAD Engineer
Affordable 3D scanning and CAD design services in Florida, US
facebook.com
KMZ - St. Petersburg
Kingisepp Engineering Plant - a domestic manufacturer of diesel, heat exchange and deck equipment
kmz1.ru
DirTire - Vladivostok
Manufacturing, engine swaps, design, CNC laser cutting, welding, custom work, 3d scanning, 3d printing.
4
"Sport brake systems" - JBT
CTC (Sports Brake Systems) is an official dealer of high-tech JBT braking systems that provide significant . ..
..
View photo report
jbt-brakes.ru
4
LLC "TAURUS" - Istra
LLC "Taurus" provides services for clearing land from unwanted trees and shrubs using mulchers.
View photo report
mulcher-taurus.ru
3
Steffi Group - Rostov-on-Don
The company specializes in laser cutting, marking, CNC metal processing, CNC tube and bar bending. 3D modeling, scanning…
View photo report
cnc-services.ru
14
SWAP POINT
The company specializes in engine swaps and car modifications. As the guys say to themselves: “We swap everything that moves, and what ..
See photo report
youtube.com/Swap
5
SVS-Sochi
Russian company for the development and production of tuning components for cars of any class with its own unique design.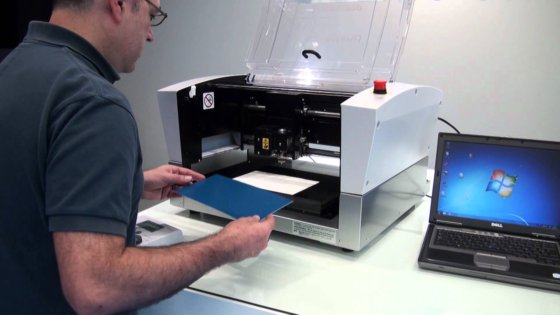
View photo report
5
Magic Print
3D printing, 3D scanning, design and modeling in Chechnya
See photo report
6
3D-Cartel — St. Petersburg
3D-Cartel offer a range of services for: 3D scanning, 3D printing, Modeling, Reverse engineering, stencil casting and aluminum casting
View photo report
6
Box 3D - Moscow
They specialize in 3D printing: large-sized objects, engineering composites, 3D scanning, modeling, design
See photo report
box3d.