
Resin 3d printer resolution
What Does Resolution Mean in 3D Printing?
Looking for a high resolution 3D printer? “Resolution” is an often discussed but seldom understood value in the world of 3D printing and additive manufacturing. How does XY and Z resolution influence on the quality of your 3D prints? What's minimum feature size and what layer thickness should you choose?
In this comprehensive guide, you'll learn how 3D printer resolution affects your 3D prints and how it differs between SLA, FDM, and DLP 3D printers.
Technology has been in a resolution war for decades. Televisions recently quadrupled pixel counts from HD to 4K and are poised to do it again soon to 8K. Cell phones, tablets, and anything with a screen will have its resolution as the lead on the spec sheet, provided that it’s something to boast about. But this is nothing new. Resolution wars have been waged since digital technology became popular, and the printing industry was one of the first battlegrounds.
If you were around in the 80’s and 90’s, you remember Canon, Brother, HP, Epson, and Lexmark (among others) battling it out for print speed and resolution. What started at 100x100 dots per inch (DPI) quickly escalated to 300x300, then 600x600, and finally the current industry standard of 1200x1200 DPI. Back then, the meaning of these values was clearly understandable; even the units made perfect sense. Unfortunately, things get more complicated when you add another dimension to printing.
A print’s level of detail is impacted by the 3D printer's resolution in all three dimensions.
In 3D printing and additive manufacturing, there are three dimensions to consider: the two planar 2D dimensions (X and Y) and the Z dimension that makes it 3D printing. Since the planar and Z dimensions are generally controlled via very different mechanisms, their resolutions are going to be different and need to be treated separately. As a result, there is a lot of confusion about what the term “3D printing resolution” means and what level of print quality to expect.
Sample part
See and feel Formlabs quality firsthand.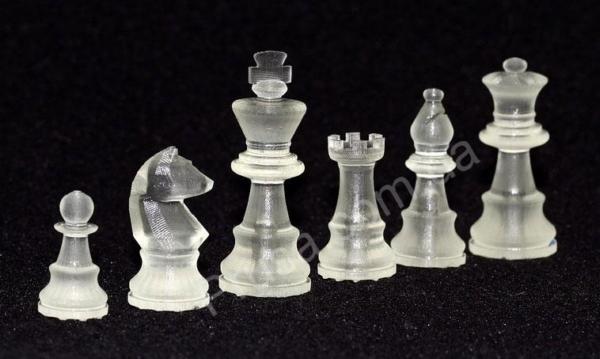 We’ll ship a free sample part to your office.
Request a Free Sample Part
Formlabs' high resolution SLA 3D printers have high Z-axis resolution and a low minimum feature size on the XY plane, allowing them to produce fine details
What makes a 3D printer high resolution? There’s not a one-number answer. Since 3D printers produce parts in 3 dimensions, you will have to consider at least two numbers: the minimum feature size of the XY plane and the Z-axis resolution (layer thickness or layer height). The Z-axis resolution is easily determined and therefore widely reported even though it is less related to print quality and surface finish. The more important XY resolution (minimum feature size) is measured via microscopic imaging and is therefore not always found in spec sheets.
Practically, it means that you should pick a 3D printer that performs well in both categories (in all 3 dimensions).
White Paper
Looking for a 3D printer to realize your 3D models in high resolution? Download our white paper to learn how SLA printing works and why it's the most popular 3D printing process for creating models with increadible details.
Download the White Paper
White Paper
Download this report for an internal test that Formlabs created to determine the dimensional accuracy of the Form 3 and Form 3B.
Download the White Paper
A lot has changed since the first desktop 3D printers became available to the public. Now stereolithography (SLA) 3D printers, like the Form 3+, are competing for the same desktop spots as fused deposition modeling (FDM) 3D printers. One of the main advantages that resin-based SLA 3D printers hold over their plastic-melting cousins is print quality: SLA 3D printers produce significantly smoother and more detailed prints. While SLA printers can usually also achieve significantly smaller layer thicknesses, the reason for the improved print quality lies in their much higher XY-resolution.
SLA 3D printers (right) offer higher resolution and can produce significantly smoother and more detailed prints than FDM 3D printer (left).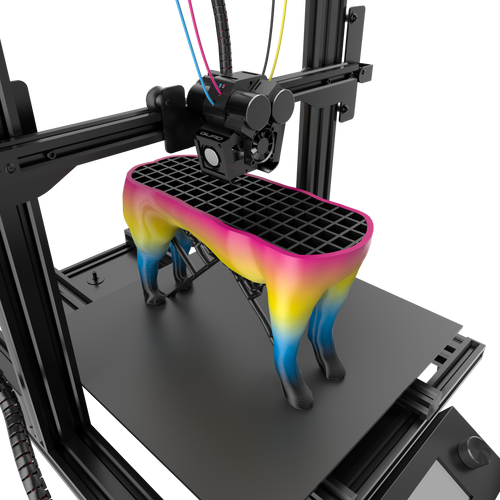
Unlike on FDM 3D printers, minimum feature size in the XY plane on SLA 3D printers is not limited by molten plastic flow dynamics but rather optics and radical polymerization kinetics. While the math is complicated (and outside the scope of this post), it shakes out to this: features on SLA prints can be approximately as small as the diameter of their laser spots. And laser spots can be really small, especially compared to the nozzle size of FDM printers' extruders.
Read our in-depth guide about FDM vs. SLA 3D printers to learn how they compare in terms of print quality, materials, applications, workflow, speed, costs, and more.
Resin 3D printers like SLA, LFS and DLP technologies offer the highest resolutions of all 3D printing processes available on the desktop. The basic units of the these processes are different shapes, making it difficult to compare the different machines by numerical specifications alone.
DLP 3D printers have a fixed matrix of pixels relative to the build area, while laser-based SLA and LFS 3D printers can focus the laser beam on any XY coordinate. This means that laser-based machines, given high-quality optics, can more accurately reproduce the surface of a part even if the laser spot size is larger than the DLP pixel size.
Whichever resin 3D printing process you choose, however, professional resin 3D printers should be able to capture the finest details of your creations, from photorealistic models to intricate jewelry.
In SLA and LFS 3D printing (left), layer lines are close to invisible. As a result, surface roughness is reduced, which ultimately leads to smooth surfaces, and for clear materials, more translucent parts. DLP 3D printers render images using rectangular voxels, which causes an effect of vertical voxel lines (right).
Learn more about the differences between SLA and DLP 3D printers and see how they compare in terms of resolution, accuracy, precision, build volume, surface finish, speed, and workflow.
In the world of 3D printing, no factor influences print quality more than XY resolution.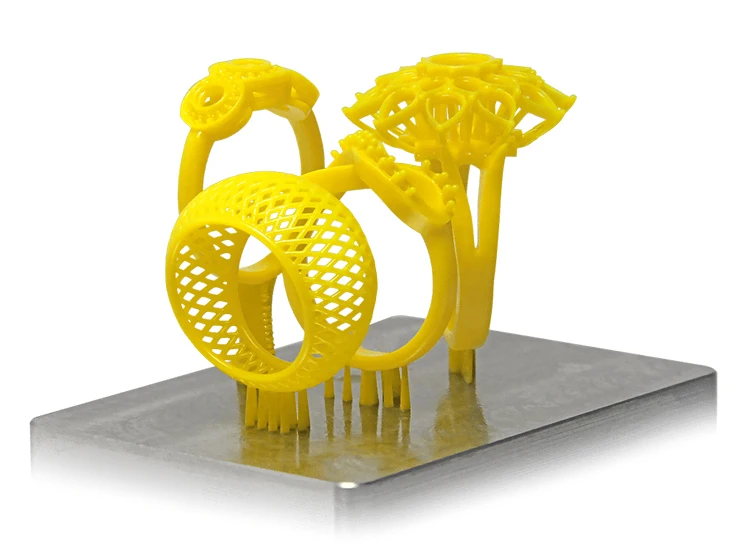 Often discussed but seldom understood, the definition of XY resolution (also called horizontal resolution) varies by 3D printing technology:
- SLA and LFS 3D printers: a combination of the laser’s spot size and the increments by which the laser beam can be controlled
- DLP 3D printers: the pixel size, the smallest feature the projector can reproduce within a single layer
- FDM 3D printers: the smallest movement the extruder can make within a single layer
As a rule of thumb, the lower the number, the better the details. Yet this number is not always included in spec sheets, and when it is, the published value is not always accurate. To truly know a printer’s XY resolution, it’s important to understand the science behind the number.
Practically, how does XY resolution affect your 3D prints? In order to find out, we decided to test the Form 2 SLA 3D printer. The Form 2 has a laser spot size of 140 microns (FWHM), which should allow it to print fine details on the XY plane.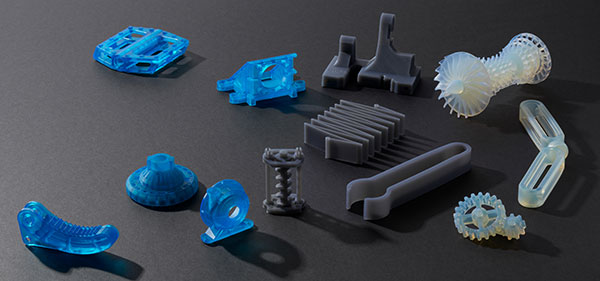 We put it to the test to see if this ideal resolution holds true.
To test the Form 2’s minimum feature size on the XY plane, we designed a model (left) with lines ranging from 10 to 200 microns and printed it in Clear Resin (right).
First, we designed and printed a model to test the minimum feature size on the XY plane. The model is a rectangular block with lines of varying widths in horizontal, vertical, and diagonal directions to avoid directional bias. The line widths range from 10 to 200 microns in 10 micron steps and are 200 microns tall, which equates to two layers when printed at 100-micron Z resolution. The model was printed in Clear Resin, washed twice in an IPA bath, and post-cured for 30 minutes.
The model was photographed and tinted green to improve visibility. On the right side of the window, the vertical yellow line with black points measures the width of a photographed line.
After post-curing, we put the model under a microscope and took high-resolution photos for analysis.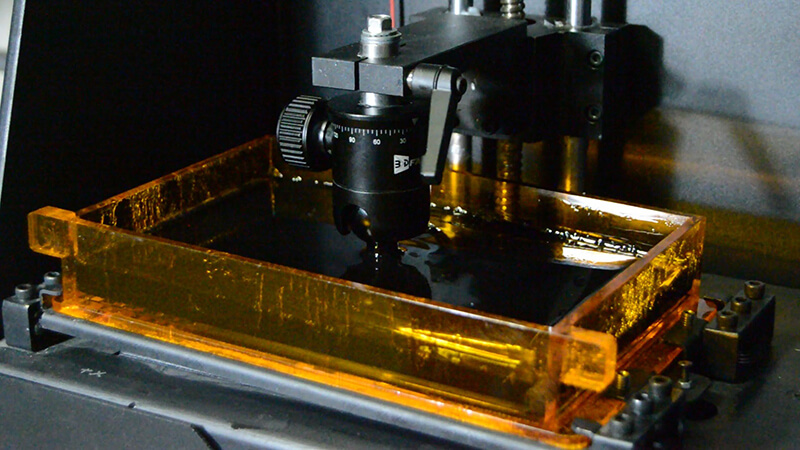 Using ImageJ, the NIH’s free image analysis software, we first scaled the pixels of the images and then measured the actual widths of the lines printed. We collected over 50 data points per line width to eliminate measuring errors and variability. In total, we printed and analyzed three models on two different printers.
The results indicate that the Form 2 has the same ideal and actual XY resolution for features that are 150 microns and larger.
As the print’s line width decreases from 200 to 150 microns, the ideal values are within the 95% confidence interval of the measured value. As the intended line widths get smaller than 150 microns, the measured interval starts to deviate significantly from the ideal. This means that the printer can reliably produce XY features as small as 150 microns, about the size of a human hair.
The Form 2’s minimum feature size on the XY plane is about 150 microns—only 10 microns larger than its 140-micron laser. The minimum feature size can never be smaller than the laser spot size, and there are many factors that affect this value: laser refraction, microscopic contaminants, resin chemistry, and much more.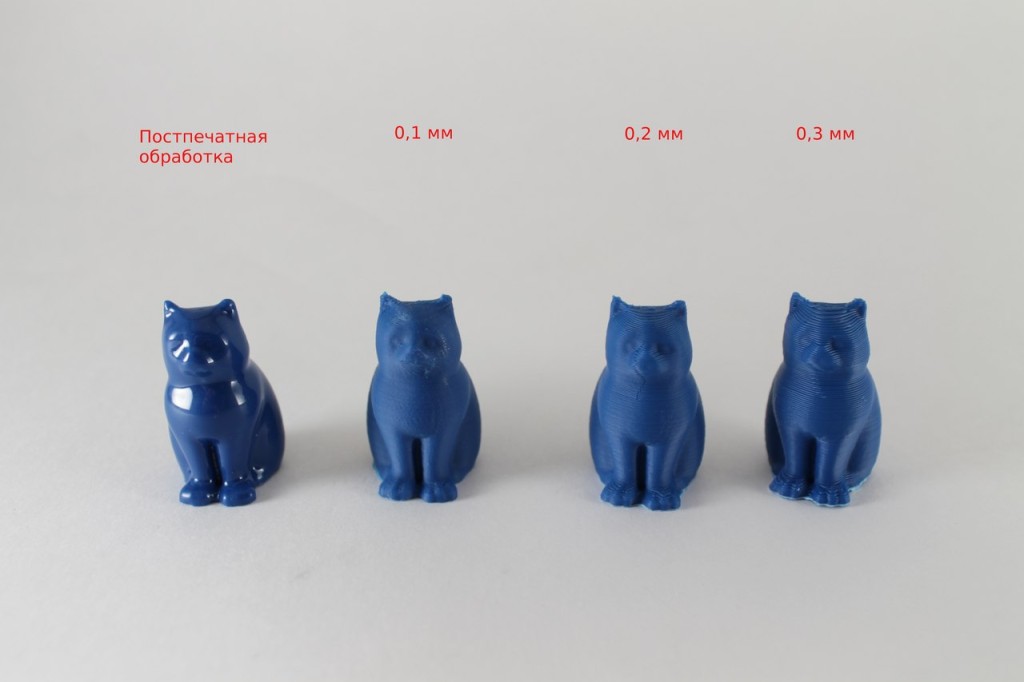 Considering the printer’s entire ecosystem, a 10-micron difference is nominal. Not every 3D printer’s published resolution holds true, so it’s a good idea to do plenty of research before choosing the one that's right for your project.
If your work calls for prints with intricate details, look for a printer with an XY resolution that’s backed by measurable data, not just a number.
When you read 3D printer spec sheets, you’ll see one value show up more than any else: Z resolution. Also known as layer thickness or layer height, the vertical resolution was the first major numerical differentiation between early 3D printers. Early machines struggled to break the 1 mm barrier, but now layer thicknesses on FDM 3D printers can be sub-0.1 mm thin, while LFS and SLA 3D printers are even more precise.
Formlabs 3D printers support layer thicknesses between 25 to 300 microns, depending on the material. This selection of layer heights gives you the ideal balance of speed and resolution.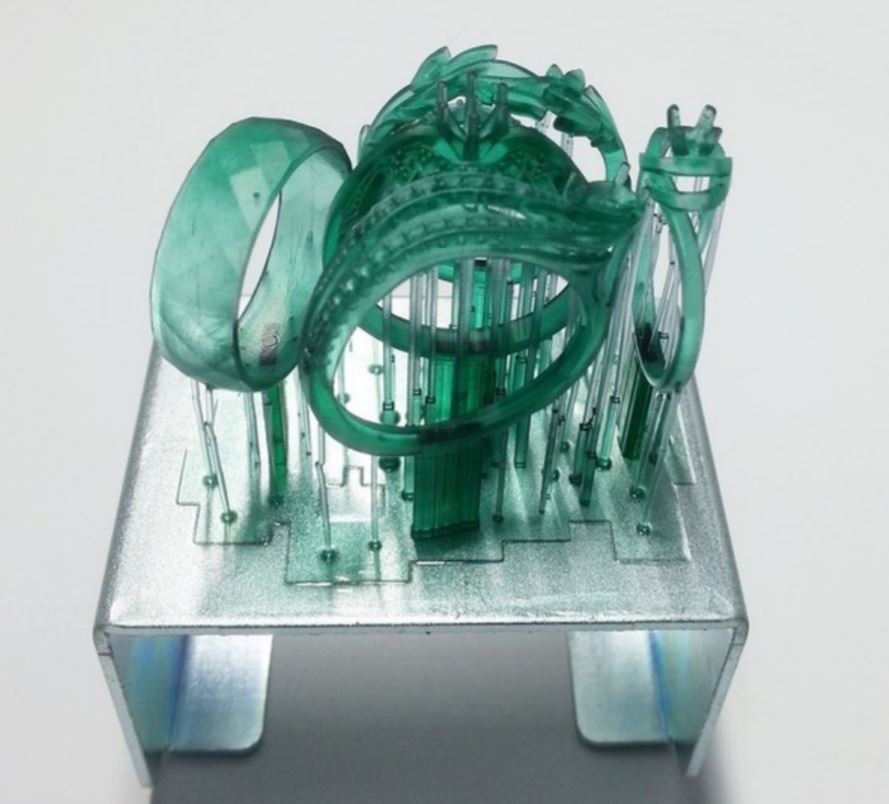 The main question is: what is the best layer thickness for your print?
High resolution 3D printing comes with a tradeoff. Thinner layers mean more repetitions, which in turn means longer times: printing at 25 microns vs. 100 usually increases the print time four-fold. More repetitions also mean more opportunities for something to go wrong. For example, even at a 99.99% success rate per layer, quadrupling the resolution lowers the chance of print success from 90% to 67% if one assumes that a failed layer causes total print failure.
Lower layer thickness equals more time, artifacts, and errors.
Does higher resolution (thinner layers) result in better prints? Not always—it depends on the model to be printed and the 3D printer’s XY resolution. In general, thinner layers equals more time, artifacts, and errors. In some cases, printing models at lower resolutions (i.e. thicker layers) can actually result in higher-quality prints.
Thinner layers are typically associated with smoother transitions on diagonals, which leads many users to generalize and push Z resolution to the limits.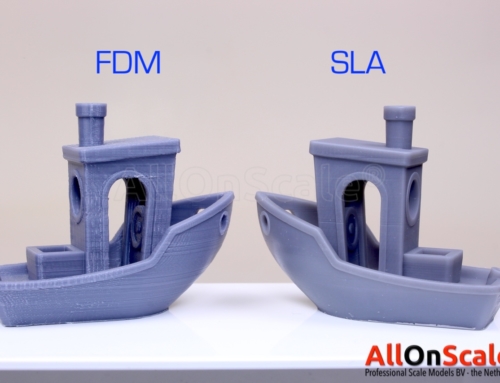 But what if the model consists mostly of vertical and horizontal edges, with 90-degree angles and few diagonals? In those cases, additional layers don’t improve the quality of the model.
The issue is compounded if the XY resolution of the printer in question is not perfect and “colors outside the lines” when drawing the outside edges. More layers means more mismatched ridges on the surface. While the Z resolution is higher, the model will look like it is significantly lower quality in this case.
That being said, there are times when you want higher resolution. Given a printer with good XY resolution and a model with intricate features and many diagonal edges, dialing down the thickness of the layers will yield a much better model. In addition, if that model is short (200 or fewer layers) upping the Z-axis resolution can really improve the quality.
Certain designs benefit from a higher Z resolution: organic forms, rounded arches, small embossings, and intricate engravings.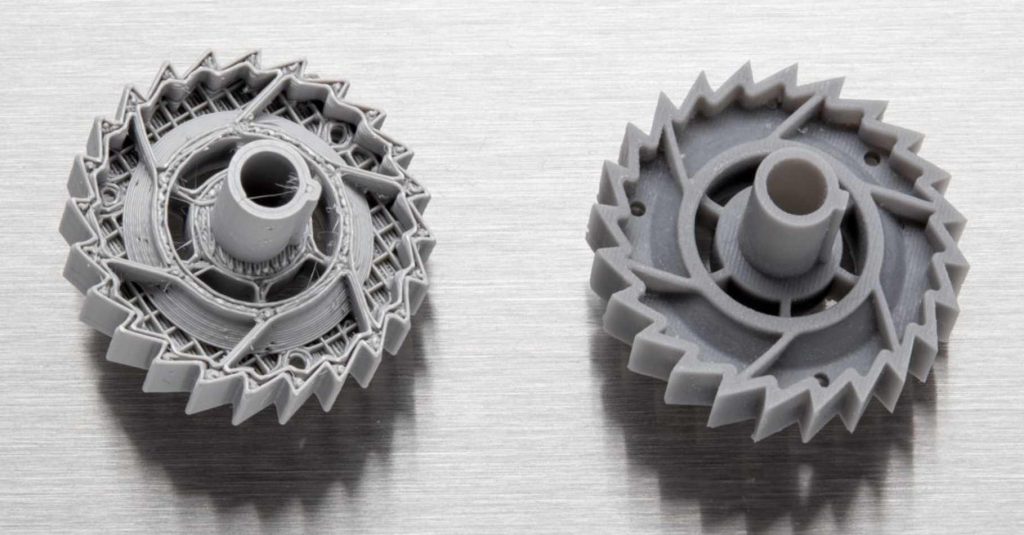
Intricate models with elaborate details call for a higher Z resolution. SLA 3D printed parts have sharp edges, sleek surfaces, and minimal visible layer lines. This example part was printed on the Formlabs Form 3 desktop SLA 3D printer.
As a general guideline, err on the side of thicker layers and only bump up the Z resolution when completely necessary. With the right printer and a certain type of model, higher Z resolution will capture the intricate details of your design.
Draft Resin, the fastest 3D printing resin available for a Formlabs SLA printers, prints at 200 microns and 100 microns, while retaining the a smooth surface finish.
In PreForm, Formlabs provides users with the choice of different layer thicknesses. Depending on the material and the requirements of the application, parts can be printed in the following layer heights: 200, 160, 100, 50, and 25 microns.
The desktop Form 3+ and the large format Form 3L SLA printers are ideal for high resolution 3D printing.
After learning about 3D printing resolution and sorting out the differences in technology and outcomes, we hope it’s much easier to select 3D printer that best matches your workflow and output needs.
To explore the next generation of SLA 3D printing, learn more about the Form 3 and Form 3L LFS 3D printers.
Curious to see the what high resolution 3D printing looks like firsthand? Order a sample part shipped to your office.
Request a Free Sample Part
2K, 4K & 8K resolution, 3D-printers and resins
In the beginning of DLP 3D-printers, the jargon were quite easy. There were mainly HD projectors available and in some exotic models, the manufacturers chose for a 4K DLP projector. In today’s hardware and material landscape, the different techniques and marketing expressions are endless and sometimes confusing. In this article we explain the differences in technology in hardware and materials.
HD vs 2K vs 4K vs 8K imaging hardware resolution
The naming of the resolution of the DLP and LCD screens come from the general hardware and display industry.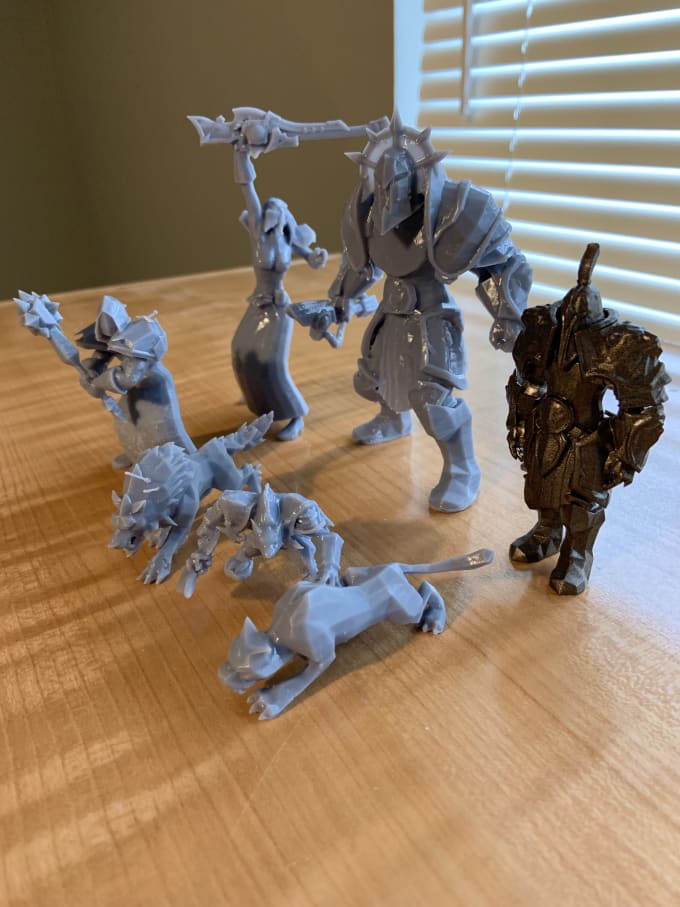 It has to do with the amount of lines and pixels available within one screen / projection. Originally there were 2 options, 720P (HD ready) and 1080P (Full HD). These resolutions are mainly used in DLP techniques. For instance the Asiga Max, Atum3D DLP Station 5, Miicraft Hyper series and 3DSystems Figure 4 use a full HD (1080P; 1920*1080 pixel) DLP module. For years (and maybe still today) this was the most used DLP module. Some older model DLP printers, and the newly announced Anycubic Photon Ultra use a lower resolution 720P DLP.
Image by thinkware.com: difference between 720P, 1080P, 2K 4K and 8K resolution in screen technology.
What about resolution in 3D-printing?
Looks quite simple right? Let’s look how this translates to resin 3D-printing hardware. In the table below you can find the resolution according to the 3D-printer manufacturer and actual pixel size of popular 3D-printers. In the 720P and HD resolution everything is matching quite well with the technical specifications used in the display industry. From 2K resolution and higher, it gets mixed-up.
Table 1: Resolution and pixel size of popular resin 3D-printing brands and technologies.
| Resolution | Pixel size | Brand, Model & technology |
| 720P | 1280 * 720 | Anycubic Photon Ultra |
| 1080P / HD
| 1920 * 1080
| Asiga Max (DLP) Atum3D DLP Station 5 (DLP) Miicraft Hyper series (DLP) 3D-Systems Figure 4 (DLP) RapidShape I30+ / HA30+ / S30+ / D30+ (DLP) Phrozen Sonic Mini (LCD) |
| 2K
| 2560 * 1440
| Anycubic Photon S (LCD) Elegoo Mars (LCD) |
| 2560 * 1620
| Anycubic Photon Mono SE (LCD) Elegoo Mars 2 & Mars 2 Pro (LCD) | |
| 4K
| 3840 * 2400
| Anycubic Photon Mono 4K (LCD) Anycubic Photon Mono X (LCD) Phrozen Sonic Mini 4K (LCD) Elegoo Saturn (LCD) |
| 4098 * 2560 | Elegoo Mars 3 (LCD) | |
| 3840 * 2160[1]
| RapidShape I50+ / HA50+ / S50+ / D50+ (DLP) Miicraft Profession series (DLP) Nexa3D NXE 400 (LCD) | |
| 3650 * 2300 | Nexa3D XiP (K LCD) | |
| 2960 * 1660 (XPR[2])
| ETEC / EnvisionTEC D4K (DLP) Miicraft Prime series (DLP) | |
| 2716 x 1528 (XPR[2])
| Asiga Pro 4K (DLP) UnionTech Cute 300 (DLP) | |
| 6K | 5760 * 3600 | Anycubic Photon Mono X 6K (LCD) |
| 5448 * 3064 | Elegoo Jupiter 6K (LCD) | |
| 8K | 7700 * 4300 | Phrozen Sonic Mega 8K (LCD) |
| 7500 * 3300 | Phrozen Sonic Mini 8K (LCD) | |
| 3840 * 2160[3] | ETEC / EnvisionTEC Extreme 8K (DLP) |
[1] Not clear from the data if a 4K (3840 * 2160 pixels) chip is used, or a XPR chip with lower resolution and pixel manipulation
[2] XPR is used to manipulate pixels of a 2960*1660 or 2716 * 1528 chip to 4K (3840 * 2160 pixels)
[3] Likely two 4K projectors
Let’s focus first on LCD technology, as this is easiest to explain. As you can see in the table above, there are several configurations possible for 2K, 4K, 6K and 8K LCD screens. The number before the “K” is often matched to the amount of pixels in the width. The 8K LCD screens used in 3D-printing in the Phrozen Sonic Mega 8K and Mini 8K have respectively 7700 * 4300 and 7500 * 3300 pixels. All mentioned in the marketing term “8K resolution”. The amount of pixels, divided by the width is the pixel size. This is often seen as the accuracy factor in 3D-printing. The Mega 8K and Mini 8K have quite similar amount of pixels, but the screen of the Mega 8K is much bigger giving it a pixel size of 0,043 mm while the mini 8K is much smaller and also has a smaller pixel size of 0,022 mm. What about 4K DLP printers?
Why is there a difference in 4K DLP resolution?
This is much more difficult to explain. High resolution true 4K DLP projectors have been around for a while, used in industrial applications like cinema’s. The pricing of a true 4K DLP with 3840 * 2160 pixels has always been very high and often not used in 3D-printing.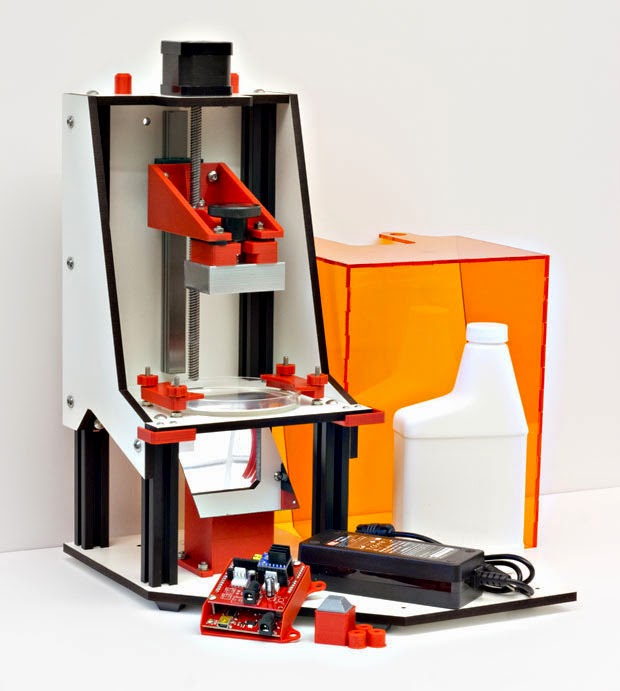 Since some years, DLP manufacturers have invented a method to make the 4K DLP systems cheaper by pixelshifting HD resolution into a 4K image. There is a controversy ongoing if this can be named 4K, because the pixel amount from the DMD chip is not really 3840 * 2160. If you have the time, an interesting read by Evan Powell from projectorcentral.com can be found here.
Let’s go back one step. In a DLP 3D-printer, one or more LED’s are emitting light on a DMD chip. This DMD chip is made out of micro-mirrors. These mirrors can be switched on or off for each mirror. If a mirror is switched on, the light will be exposed to the build tray in the 3D-printer. When a mirror is switched off, it will not be exposed. A Full HD DMD chip is made from 1920*1080 pixels. All these 2 million pixels / micro-mirrors can be switched on or off individually. Giving a HD resolution to the image. It is truly fascinating how small a DMD chip is with its 2 million micro-mirrors.
Image by projectorjunkies. com: famous 0.47” DMD chip which gives a Full HD projection (1920*1080 pixels).
To get a higher accuracy, you can add pixels to the DMD chip. As this is a complicated and expensive process, the prices go up significantly. An cheaper way to do this is to manipulate the pixels of a smaller DMD chip to reach 4K quality. They manipulate a 0.66” (2716*1528) DMD chip or a 0.47” (1920*1080) (Full HD) DMD chip to a 4K resolution(3840* 2160) image. Nikos Tsolas from Projectorjunkies.com explains this here. It is called XRP technology. This brings down the pricing to <$6900 for a 4K DLP projector.
Nikos explains ”XPR technology is what has allowed the DLP projectors of the last years to be called 4K and advertised as 4K, it is the trick of Texas Instruments we would say to give 4K resolution to the manufacturers of DLP projectors while selling them the classic DMD chip with resolution 1920 × 1080 who has been manufacturing for 10 years now. Let’s go straight to the point and find out how XPR technology works and many questions will be answered.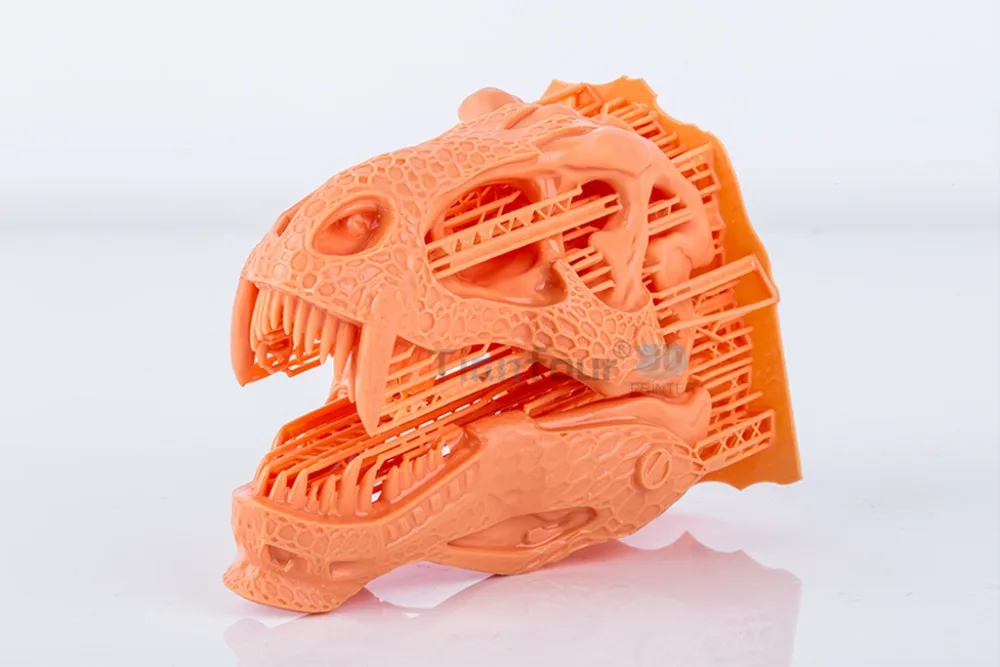 ”
”
Image by projectorjunkies.com: manipulation of Full HD and 2716*1528 DMD chips to 4K UHD.
What is XRP technology in 4K DLP systems?
Nikos continues ”The XPR module is a very simple but accurate device to conceive and consists of 2 main parts. The optical and the electromechanical part. In the optical part we have a piece of specially processed glass so that it directs the beam of light that receives its call according to the horizontal and vertical axis.
Image by projectorjunkies.com: XRP module to be placed after the DMD chip to shift pixels.
In the electromechanical part we have 4 electromagnets coils that force this piece of glass to change position both in the horizontal and in the vertical axis.”
Read the detailed article here or watch the video:
What does XRP manipulated 4K resolution mean in 3D-printing?
There are a few disadvantages in XRP technology compared to true 4K. Due to the pixels moving all the time, the contrast ratio of XRP is lower and there is a slight blur on the pixel edges. Does this matter for 3D-printing? For 3D-printing it is always good to have a high contrast ratio of your projector. A high contrast ratio means that the unexposed pixels are truly dark while the exposed pixels are very bright. By having a high contrast ratio, a detailed edge accuracy is possible in the 3D-printed part. A lower contrast ratio is not always visible without microscopic imaging. However, high reactive resins might have issues with this, as the dark pixels are not truly dark. After many exposed layers these reactive resins can start to polymerize randomly from the build-up energy of many layers. Then what about the blurry pixel edges? Well, a lot of 3D-printer manufacturers already use blurry pixels on the edges of the part to get a smoother print. When dialed-in properly on the resin this has the potential to work well without issues.
How do I know if a printer has an XRP 4K projector or a true 4K DLP?
This is depending on the data that a 3D-printer manufacturer publishes. Some are quite honest about it. For instance UnionTech has listed the DMD chip (TI DLP660TE) from their Cute 300 industrial 4K printer on their website. When searching on the DMD chip you can find that it is an 0.66” (2716*1528) DMD, meaning it can provide a 4K image by diagonally shifting pixels. ETEC / EnvisionTec is less transparent about it, but with calculating their build envelope (in mm) divided by their native pixel resolution (in mm) you find a DMD resolution of 2960 * 1660 pixels, which is close enough to the 0. 66” (2716*1528) DMD chip. While RapidShape does only mention 4K and 3840 * 2160 pixels. Is this a true 4K projector or a XRP 4K DLP?
Is a 2K LCD / MSLA printer more accurate than a HD?
As you expect by now, the answer is much more complicated than the question. First of all, the term 2K LCD or HD Projector does not say anything about the (native) pixel size. Even if you compare a 2K LCD with a HD projector with both a pixel size of 0.05mm, it is difficult to answer this question. If a DLP is produces well, the quality is often better compared to LCD printers.
If you dive deeper in the technical data, much has to do with the hardware in combination with the software, printing parameters and materials. What we have seen from earlier models of LCD printers, is that the edge accuracy was not to great, but in the latest year there has been a lot of improvement on this. What we know from DLP, is that there are much more manipulation options in the software and micro-mirrors possible (if the manufacturer develops this). Building a good DLP 3D-printer, the manufacturer has to make sure that the focus is perfect on top of the resin tank and compensate for the lens and trapezium deformations. If a DLP is produces well, the quality is often better compared to LCD printers.
Is a higher resolution projector / LCD more accurate?
If you rule out all the other factors, a higher resolution projector or LCD is more accurate. Unfortunately in most cases there are also other factors. What we have seen in the past is that within one printer brand, you can compare the specifications quite well. It is difficult to compare specifications from different printing brands. For instance the Phrozen Sonic Mini 4K and the Elegoo Mars 3 are quite similar with both a pixel size of 0.035 mm. With the Mars 3 we get higher quality models compared to the Phrozen Sonic Mini 4K. The LCD screens are different, but also the Mini 4K uses a glass plate on top of the LCD, which reduces the sharpness of the exposed pixels.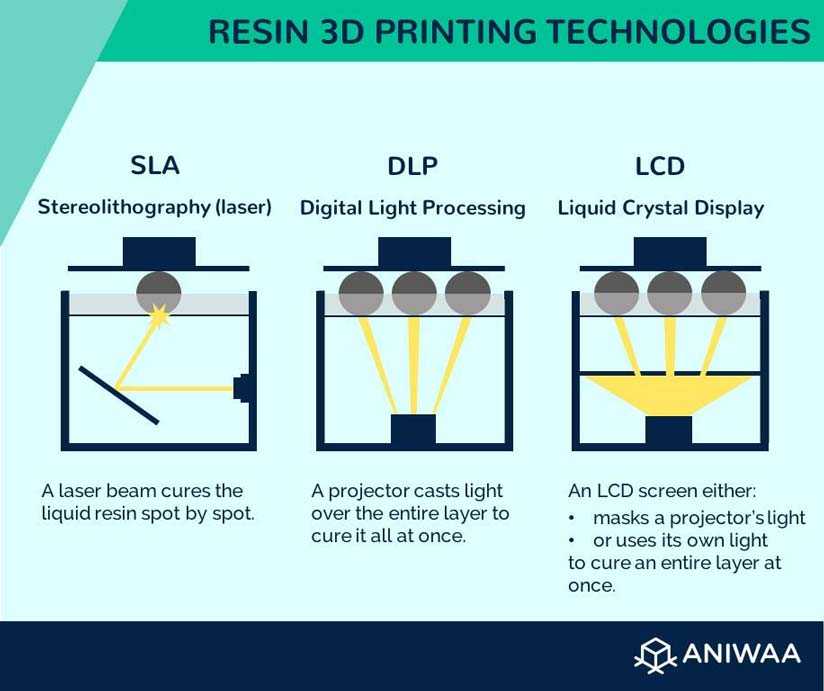 On paper these differences are difficult/impossible to see.
What are 4k or 8k resins?
With the rise of the 4K and 8K printers, marketing also hits the resin market. For instance Phrozen is now offering a 4K resin and a 8K resin. According to Phrozen; “Phrozen Aqua 4K Resin is designed to showcase 3D models in high resolution and works best with the Sonic Mini 4K & Sonic Mighty 4K 3D Printers. With its special formula, Phrozen Aqua 4K Resin creates high-quality & extremely intricate 3D models with 4K resolution.”
As resin developer and manufacturer, we completely understand that a resin specifically developed for a printer can give great quality. The power of the light source from the printer can be fine-tuned to work best for the resin and visa-versa. This does not mean that if you run it on another 4K printers, you will get the 4K resolution. The resolution comes from the hardware in combination with settings that work well with the resin. With any compatible resin you would be able to get similar resolution printed parts.
Update April 2022 on 4K DLP projectors for resin 3D-printing.
Just a few months after we published this article, Austrian DLP manufacturer In-Vision announced the release of a native 4K projector for 3D-printing applications. Available mid 2022, still a lot of details have to be published.
According to 3Dprintingindustry.com ”Named AVATAR, the light engine is based on a new chipset from Texas Instruments which offers a native resolution of 4096 x 2176, a radical improvement over the current need to re-position WGXGA-Chip pixels to improve image resolution and achieve 4K within DLP Projection.”
We got really excited reading this, but unfortunately there is not much information available about the actual pixel size or an Texas Instruments datasheet. The only information available is that it is based on the TI Chipsets: DLP990U or DLP990UUV and that it will be available for wavelengths 365 nm, 385 nm and 405 nm. According to In-Vision DLP manufacturer “Equipped with the native resolution of 4096 x 2176 offered by Texas Instruments’ new chipset, the AVATAR UV light projector will enable 3D printer operators to expose larger areas at high resolution than before, and to make moving exposures with high optical performance. In addition to its native resolution offering, the system also delivers a number of other key features to facilitate a new level of advanced industrial 3D printing.” If you are really into technology, a nice read about the background and testing done at In-Vision can be found if you subscribe to the whitepaper in this link on the In-Vision website.
We hoped this was an interesting and educational read. Please send us an e-mail at [email protected] if you have any questions, comments or remarks. We wish you happy printing!
Photopolymer 3D printer
3D printers can be sorted not only by the printing technologies used, but also by the consumables used.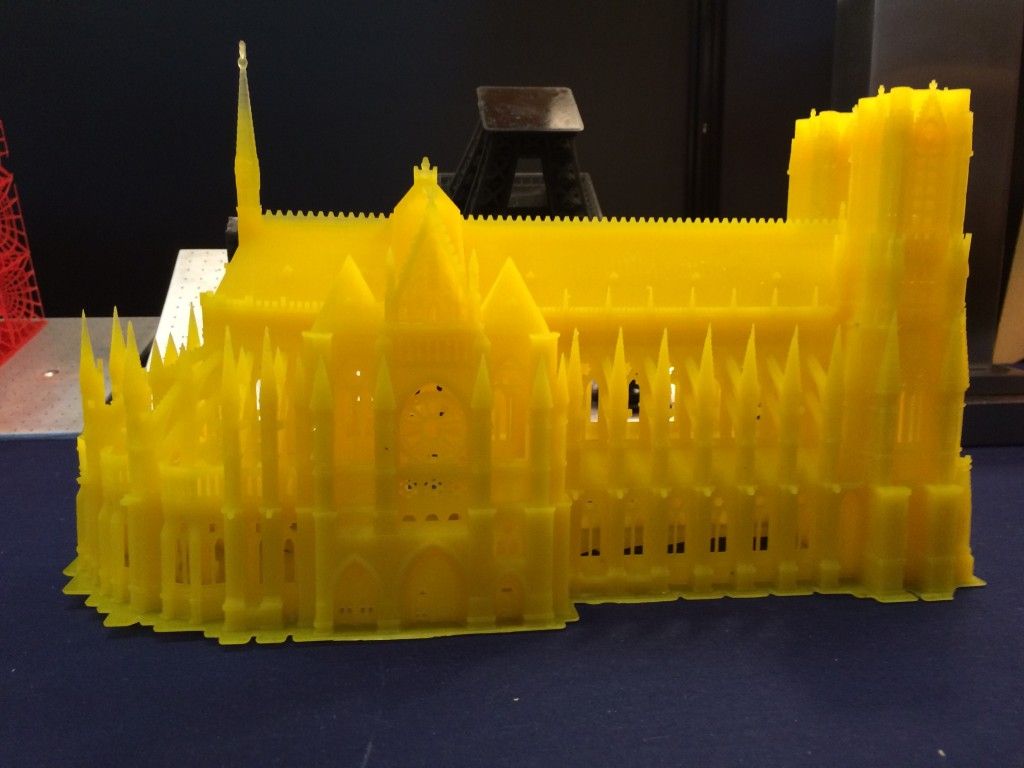 In this section, we will look at devices that use photopolymer resins to build models.
- 1 Consumables
- 2 Laser stereolithography (SLA)
- 3 Projector stereolithography (DLP)
- 4 Multi-jet (MJM and PolyJet)
- 5 3D pens
- 6 Additional illumination
Consumables
Photopolymer resins are liquid polymers that harden when exposed to light. As a rule, such materials are sensitive to the ultraviolet range, which determines the design of photopolymer printers. One of the common design elements is a transparent colored cap or housing made of a material that filters ultraviolet radiation. This is done both to protect the user's eyes and to protect the supplies inside the printer from exposure to sunlight and background lighting.
Photopolymer resin loaded into Form 1 3D printer
The physical properties of resins after polymerization vary widely. Both rigid and flexible options are available, transparent and matte. A wide selection of colors is also available. Resin consistency and exposure times also vary, so a range of compatible media should be considered when choosing a printer.
The last aspect to consider when choosing a material is its toxicity. There are both quite toxic options and biologically safe ones.
The cost of consumables can be considered the Achilles' heel of photopolymer printing. The plants themselves are already reaching quite acceptable price levels, but it is still quite difficult to find inexpensive photopolymer resins. It is hoped that the proliferation of inexpensive photopolymer printers will lead to an increase in the production of consumables and lower prices.
Laser Stereolithography (SLA)
SLA Model
The firstborn of photopolymer printing and modern 3D printing in general. The technology was developed in 1984 by Charles Hall, who later founded 3D Systems.
SLA printers use laser emitters to cure the photopolymer supply.
A typical SLA printer consists of a consumable tray sitting under a build platform driven vertically by a raise/lower mechanism.
Alternatively, the cuvette itself can be driven - what matters is the relative movement of the platform and the container. Above the cuvette is a laser emitter and a mirror system for deflecting the laser beam.
During the printing process, the platform is immersed in the consumable for the thickness of one layer of the digital model.
Since photopolymer resins can be quite thick, a leveling mechanism is often used to speed up the process.
SLA printer operation scheme
After leveling, the process of illumination of the material begins. Illumination is produced by laser irradiation. Most photopolymer resins are designed to cure (polymerize) when exposed to ultraviolet light, which determines the choice of laser frequency.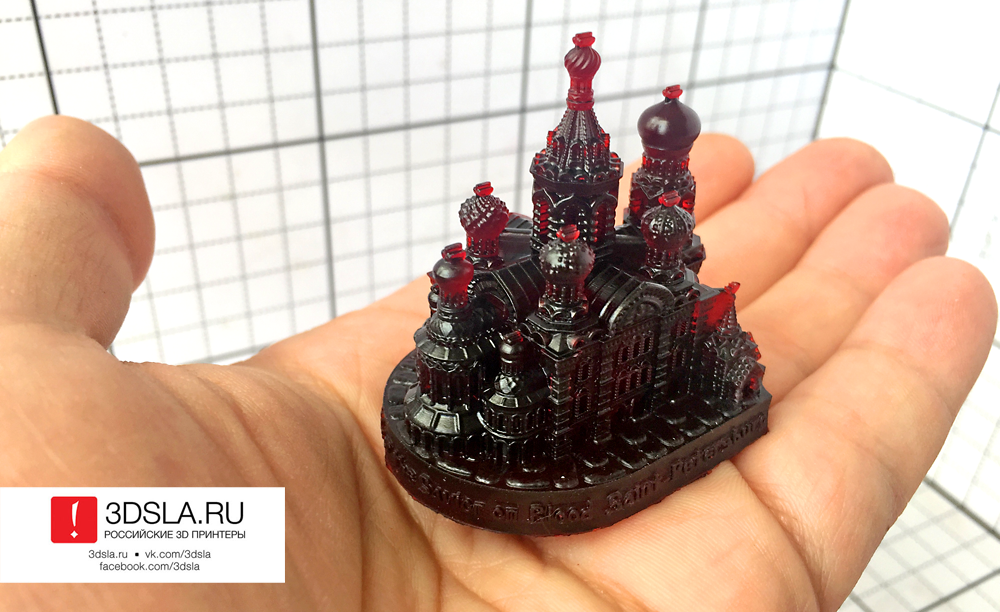 The movement of the beam along the X and Y axes is determined by the operation of the deflecting mirrors.
After the drawing of the layer is completed, the platform is immersed in the material for the thickness of one more layer, and the process is repeated with the drawing of the next layer of the digital model.
Model building animation
SLA printing takes quite a long time, and printers using this method tend to have relatively small build areas.
This is mainly due to the high cost of laser emitters: printing large objects with a single laser will take too much time, and installing additional emitters and mirrors will complicate the design, increase the dimensions of the installation and raise the price to an unacceptable level for most users.
Despite the success of this technology, projected stereolithography is considered to be a more promising, although very similar method.
Projector Stereolithography (DLP)
Formlabs Form 1 Desktop DLP Printer
A close relative of laser stereolithography, this method uses digital LED projectors instead of laser machines with mirror deflection systems.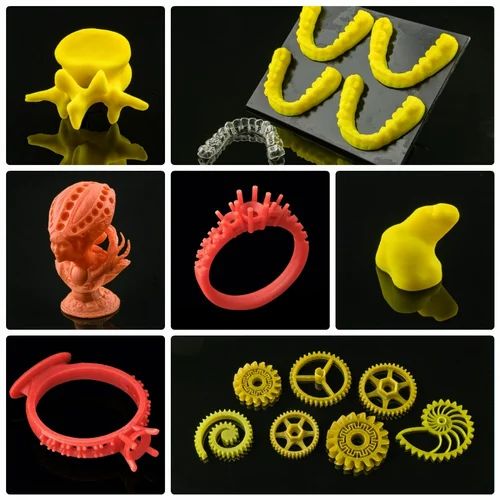 The method became popular due to the development of technology for the production of low-cost high-resolution digital projectors by Texas Instruments.
Layers are illuminated using a digital projector that highlights patterns of the entire layer, which distinguishes this method from SLA, where the "picture" emerges progressively using an ultraviolet laser.
A similar approach has previously been used on SGC-type plants, but this technology used physical photomasks, making the process costly, time consuming, slow and noisy.
At the moment, the FTI technology continues to exist - the development of SGC, almost indistinguishable from DLP printing, since it also uses digital LED projectors.
DLP printer design
Simultaneous illumination of an entire layer using projectors can significantly speed up the printing process even compared to SLA printers that have a high scanning speed (ie beam movement).
In addition, these printers are less sensitive to rough physical impact due to the absence of delicate mirror systems.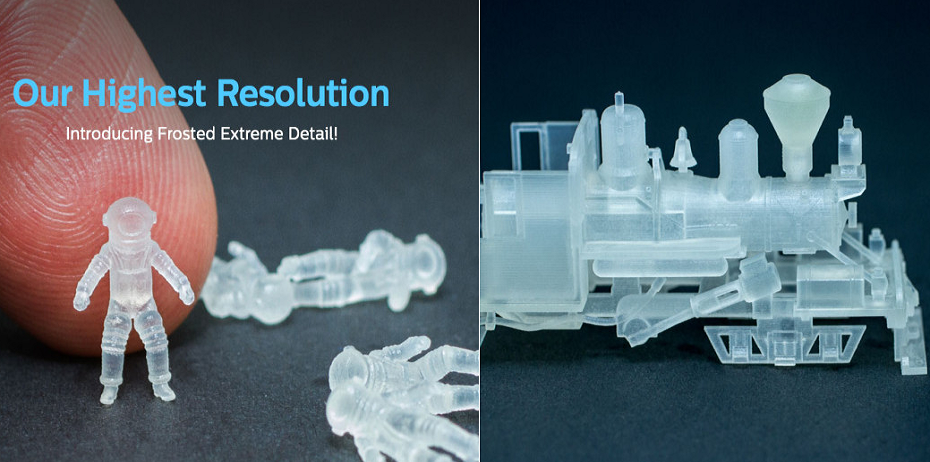
The absence of mechanical mirror systems improves accuracy. Finally, the cost of projectors sets them apart from laser systems.
Projection size can be quite significant, reaching the average of popular FDM printers.
An interesting feature of DLP printers is the ability to "reverse" or "reverse" printing.
In this case, the projector is installed under a transparent (material choice for transparency in relation to ultraviolet light) cuvette, and the platform does not sink into the material, but gradually rises, pulling out the layers of exposed polymer.
This approach eliminates the alignment mechanism and achieves even higher Z resolution than SLA printers.
In addition, the size of models in height is not limited by the depth of the cuvette, which favorably affects the dimensions of the printer and the possibility of increasing the build area.
Multi-jet printing (MJM and PolyJet)
3D Systems ProJet 3500HDMax MJM printer
MJM and PolyJet technologies are practically indistinguishable from each other. The name difference comes from the respective patents: Multi Jet Modeling is owned by 3D Systems, while PolyJet is owned by rival Stratasys.
The very principle of multi-jet polymer printing was developed by the Israeli company Objet, which eventually became a division of Stratasys.
Multi-jet printing technology combines features of 3D inkjet printing (3DP) and projection stereolithography (DLP).
How the MJM PolyJet printer works
Models are built by spraying photopolymer using linear arrays consisting of multiple nozzles.
The applied layer is immediately exposed to ultraviolet lamps - as a rule, two processes occur simultaneously.
By the time the array reaches the end of the build chamber, the previously deposited material is hard enough to print a new layer.
Composite models created on the ProJet 3500 DP dental printer
This approach allows to achieve very high printing speed, but is characterized by high design complexity, which negatively affects the cost of such installations and limits their distribution to professional use.
One of the advantages of MJM and PolyJet technologies is the ability to create composite structures from photopolymer resins with different physical characteristics.
It is therefore possible to create models with easily removable supports, use multiple colors and use flexible and rigid materials in parallel within the same model.
3D Pens
CreoPop 3D Pen
Recently, there has been a craze for hand-held printing devices called 3D pens. At the moment, there are three main options for such devices: drip-jet pens (DOD), called BioPen and used in the development of new methods for treating damaged tissues, FDM 3D pens, which are manual extruders (essentially similar to the usual hot glue guns, but using thermoplastics) and developments in 3D-drawing with photopolymer resins.
CreoPop 3D pen was the first "handheld resin printer". The design of this device is quite simple, because the most complex function, positioning, is performed by the user himself. The pen only extrudes resin through the tip surrounded by LED emitters.
CreoPop 3D pen in action
This way the resin hardens immediately after application, allowing you to literally draw on air.
The advantage of such handles over FDM-analogues is the low operating temperature - there are no heating elements in the device. As a result, with such pens you can even draw on the skin.
In addition, a wide range of photopolymer resins with different physical properties can be used with such devices, which greatly expands the range of possible applications. At a minimum, this is a relatively inexpensive, but entertaining toy.
The only drawback is the relatively high cost of consumables, but such devices are unlikely to require large volumes of photopolymer resin when used in everyday life.
Additional Lighting
Final Lighting of Resin Models in a Homemade Camera
Full curing of models can take quite a long time, so models during SLA and DLP printing are only partially polymerized, sufficient to maintain the physical shape of the part.
After production, the models are usually placed in chambers equipped with ultraviolet lamps until fully cured. Of course, if possible, you can simply lay out the models in the sun - the effect will be the same.
Just keep in mind that ordinary glass practically does not transmit ultraviolet light, so exposure to sunlight must be direct.
If desired, a UV-transparent quartz glass container can be used.
Go to the main page of the Encyclopedia of 3D Printing
Choosing a liquid photopolymer for a 3D printer. Classification of materials for SLA/DLP 3D printing.
Contents:
- Introduction
- SLA Overview
- SLA Standard Resins
- Standard photopolymer resin - Standard
- Clear Photopolymer Resin - Clear
- Engineering photopolymer resins
- Rigid photopolymer resin - Tough (like ABS)
- Durable photopolymer resin - Durable (PP-like)
- Heat resistant photopolymer resin - Heat resistant
- Rubber-like photopolymer resin - Rubber-like (Elastic)
- Ceramic photopolymer resin - Ceramic filled (Hard)
- How to choose the right resin for your application
- Dental and medical SLA resins
- Medical Device Photopolymer Resin - Custom Medical Appliances (Class I Biocompatibility)
- Dental Long Term Biocompatible Resin (Class IIa Biocompatible)
- Biocompatibility class I vs biocompatibility class IIa
- Cast SLA resins
- Cast resin for jewelry making
- Generalized rules
Hello everyone, Friends! With you 3DTool!
This article compares photopolymer resins using the Formlabs example for 3D printing by SLA - Standard ( Standard ) , hard ( Toug ) , Durable ( Durable ) heat resistant heat resistant 0025 flexible ) , dental ( dental ) and castable ( castable ) .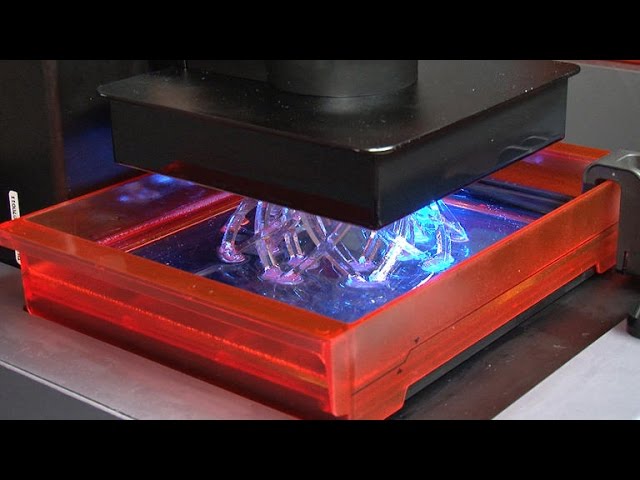 The information from the article will help you choose a photopolymer resin for your needs.
Catalog of photopolymer 3D printers
Photopolymers from FormLabs
Detailed review of the Formlabs Form 3 3D printer
Introduction
Stereolithography allows you to print plastic parts with high resolution, good fine detail and smooth surface. Due to the variety of photopolymer resins available for SLA, this technology is used in many different industries:
-
"Standard" photopolymers are used for prototyping
-
Engineering photopolymers have certain mechanical and thermal properties
-
Dental and medical photopolymers have biocompatibility certificates.

-
Cast photopolymers have a zero ash content after burning.
SLA 3D Printing Resin Overview
SLA uses a laser to cure a liquid photopolymer resin. This process is called photopolymerization. Various combinations of polymers and other additives that are part of the resin allow you to get different material properties.
The main advantages and limitations that are common to all resins in SLA 3D printing are:
Benefits:
Weaknesses:
Base Resins for SLA
Post-Processing SLA/DLP 3D Printing Article
Standard photopolymer resin - Standard
Standard resins produce parts with high stiffness, detail and a smooth surface. The low cost of resins, from $250 per liter, makes them ideal for prototypes.
The color of the resin also affects its properties. For example, in FormLabs products, gray resin is suitable for models with fine details, and white resin for parts that require the smoothest possible surface.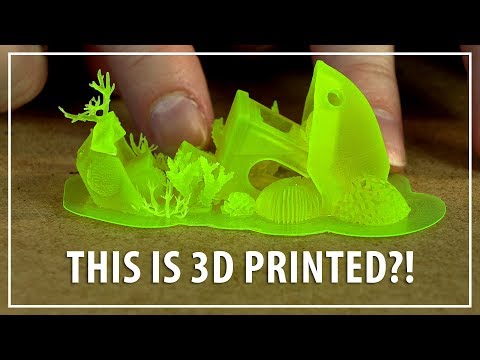
Benefits of using Standard grade resins:
Cons Standard:
Also included in the class of "Standard" photopolymer resins from FormLabs is the Color KIT - a set of special dyes and "Color Base" photopolymer resin for mixing and obtaining a variety of color solutions. This eliminates the need for painting parts after 3D printing.
FormLabs Engineering Photopolymer Resins
Engineering resins have a range of properties for injection molded plastics.
All engineering resins require additional UV curing, such as using the Form Cure, to achieve their maximum properties.
Tough photopolymer resin - Tough (ABS equivalent)
Tough resin was developed for models that need to withstand high loads and be durable.
This material produces strong, shatter-resistant parts and functional prototypes such as snap-on housings.
Pros:
Cons:
Ideal for: functional prototypes, mechanical parts
Durable photopolymer resin - Durable
Durable resin is a wear-resistant and flexible material with mechanical properties similar to polypropylene.
Durable photopolymer produces models with a smooth glossy surface and high resistance to deformation.
Durable Resin is ideal for:
- Bushings and bearings;
- Various functional compounds
Pros:
Cons:
-
Not suitable for thin wall parts (recommended minimum wall thickness 1mm)
-
Low heat distortion temperature
-
Low flexural strength (lower than hard resin)
Ideal for: functional prototypes.
Refractory Photopolymer Resin - Formlabs High Temp Resin
The heat resistant resin is ideal for parts that require high temperature resistance and operate at high temperatures.
Formlabs High Temp Resin provides the highest melting point (HDT): 238°C at 0.45 MPa.
The resin should be used to print detailed, accurate prototypes with high heat resistance.
Pros:
Cons:
Flexible Resin
Rubber-like resin allows flexible parts to be made. This material has a low tensile strength and high elongation at break and is well suited for parts that will be bent or compressed.
It can also be used to add ergonomic features to multi-material assemblies such as: dies, wearable prototypes, handles, pads and grips.
Pros:
-
High flexibility (high elongation at break)
-
Low hardness (simulates 80A durometer rubber)
-
High impact resistance
Cons:
-
Doesn't have all the properties of real rubber
-
Requires extensive support structures
-
Material properties deteriorate over time as the part is exposed to ultraviolet radiation (sunlight)
-
Not suitable for thin wall parts (recommended minimum wall thickness 1mm)
Ideal for flexible prototyping.
Ceramic Photopolymer Resin - Rigid Resin
This resin is reinforced with glass, which provides very high rigidity and a polished surface. The polymer is very resistant to deformation and is excellent for 3D printing thin elements.
Ideal for: molds and tooling, jigs, manifolds, retainers, electrical and automotive fixture housings
Thermal management components printed with SLA ceramic (hard) resin. Image credit: Formlabs
How to choose the right resin for your application
The table below shows the main mechanical properties of photopolymers for SLA:
Source: Formlabs
Standard resin ( standart ) has high tensile strength but is very brittle (very low elongation at break) so it is not suitable for functional parts. The ability to create a good part surface makes it ideal for visual prototypes and art models.
durable ( durable ) resin has the highest impact strength and elongation at break of any other SLA material. Best suited for prototyping parts with moving parts and latches. It lacks, however, the strength of thermoplastic 3D printing materials such as SLA nylon.
tough ( tough ) resin is a compromise between the material properties of tough and standard resin. It has a high tensile strength, so it is best suited for rigid parts that require high hardness.
heat resistant resin ( heat resistant ) can withstand temperatures above 200 o C, but has poor toughness and is even more brittle than standard resin.
ceramic ( ceramic reinforce ) resin has the highest tensile strength and flexural modulus, but is brittle (poor elongation at break and toughness). This resin is preferred for thin wall parts that require increased rigidity.
The graphs below compare the mechanical properties of the most common SLA materials visually:
Comparison chart for elongation at break and toughness for common SLA printing specifications and standard media. Image courtesy of Formlabs.
Stress-strain curves for conventional SLA technologies and standard materials. Image credit: Formlabs
Comparative chart of material properties of various technical resins. Image credit: Formlabs.
Dental and medical resins
Photopolymer resin for medical devices - Custom Medical Appliances 9028 (Bios Class 1 biocompatible resins can be used to make medical equipment such as surgical guides. Parts printed on this resin can be steam sterilized in an autoclave for direct use in the operating room.
Pros:
Cons:
- Moderate wear and tear resistance
Ideal for: Surgical aids and appliances