Objet 3d print
Objet30 Pro 3D Printer Review 2022
4.6
See Price
Stratasys’ ambition with the Objet30 Pro is to offer the precision and adaptability of an industrial-grade fast prototyping printer within a device with physical dimensions nearing those of an inkjet printer or office photocopying machine – a compact workhorse capable of highly detailed prints.
We’ve taken a look at the Objet30 Pro to see how well it lives up to these claims. Here’s our honest opionion.
| Printing Area | 294 x 192 x 148.6 mm |
| Layer Resolution | 16 to 28 microns |
| Supported Filament | Rigid Opaque, Transparent, High Temperature, Simulated Polypropylene, FullCure |
| Printing Tech | PolyJet |
| Extruders | 2 |
Table of ContentsShow
Design & Features
Touted as a desktop printer, the Objet30 Pro has all the allure of a professional grade printer with a sleek black and white color scheme that shapes a rectangular body that interestingly curves inwards vertically towards the center of the unit. The plastic casing will be familiar to anyone having used a consumer-grade ink printer making it very much at home in a design studio, home office or university alongside similar devices.
The total weight of the printer is a robust 106 kg, which apart from making transportation a hassle, ensures near unwavering stability, even when the print heads are whizzing away at the highest speed setting.
The components are all heavy duty and of the highest quality, positioned for maximized functionality but also a certain aesthetic, mechanical appeal especially when opening the hood and peering inside. The extruder mount can only be described as chunky with one of the most prominent profiles we’ve come across from a printer with this footprint.
The Objet30 Pro employs Stratasys’ patented PolyJet printing technology, which sits somewhere between typical FDM and precision SLA printers. The process resembles the inkjets found in standard printers whereby a jet places drops of liquid photopolymer material onto the build plate and then hardens or cures it by shining UV light onto it.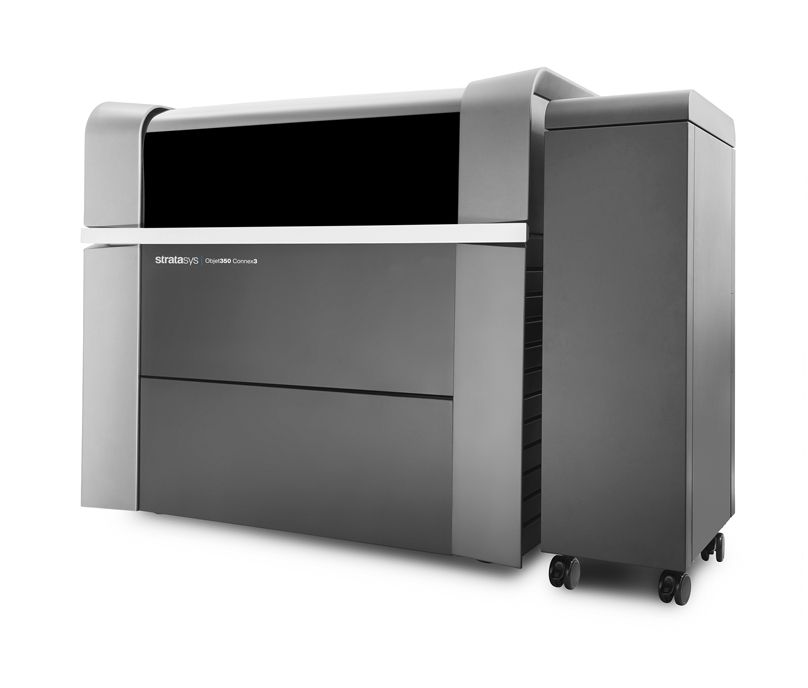 This method is uncommon with results that offer precision unseen in printers using FDM technology.
The build area tallies up to 294 x 192 x 148.6 mm with axis resolutions of 600 dpi, 600 dpi, and 900 dpi for the X-axis, Y-axis, and Z-axis respectively. Generally speaking, the Objet30 Pro attains software to real-world print accuracy levels correct up to around 0.1mm, but this vacillates important waging on the type of model, size, the materials used, and the complexity of the design.
The Objet30 Pro has a dual extruder setup; one for printing material and the other for support material, both sitting alongside the UV light that does the curing work. The configuration allows layer resolutions ranging from 16 to 28 microns depending on whether it prints on the high quality or high-speed setting. The precision makes it one of the most detailed printers on the market regardless of cost and is a world away from the 100 microns best of most consumer models.
The material support of the Objet30 Pro is where the printer comes into its element with different liquid photopolymers endowed with a range of physical properties for all manner of situations, the only real downside being that only materials sourced from Stratasys are compatible.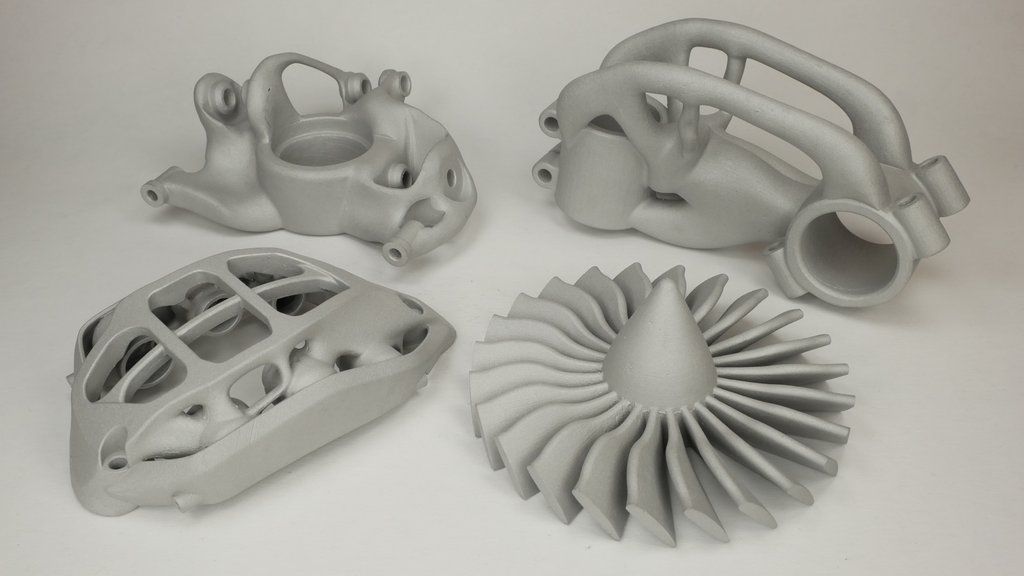
Rigid Opaque in white, black, gray, and blue allow for high detailed prints that reach the quality level of end products for prototyping. Transparent VeroClear is ideal for fine-modeling used to simulate end-product transparent materials. High-Temperature RGD525 is geared towards functional testing for scenarios where high temperatures, be it air or liquid, are required. Lastly, the printer supports DurusWhite Simulated Polypropylene designed for durability and robust usage for example low tolerance hinges and snap-fit products.
The printer also uses the non-toxic gelatinous FullCure 705 support material that is not only ideal for crafting complex overhangs and the like but is removable via the DT3 Clean Station that ships with the printer.
The materials are housed in a convenient slide out draw sitting below the main printing area. Should any of the liquid photopolymer cartridges run dry, the printer has an inbuilt feature that pauses the building process to allow the user to load in a replacement, when the device picks up where it left off.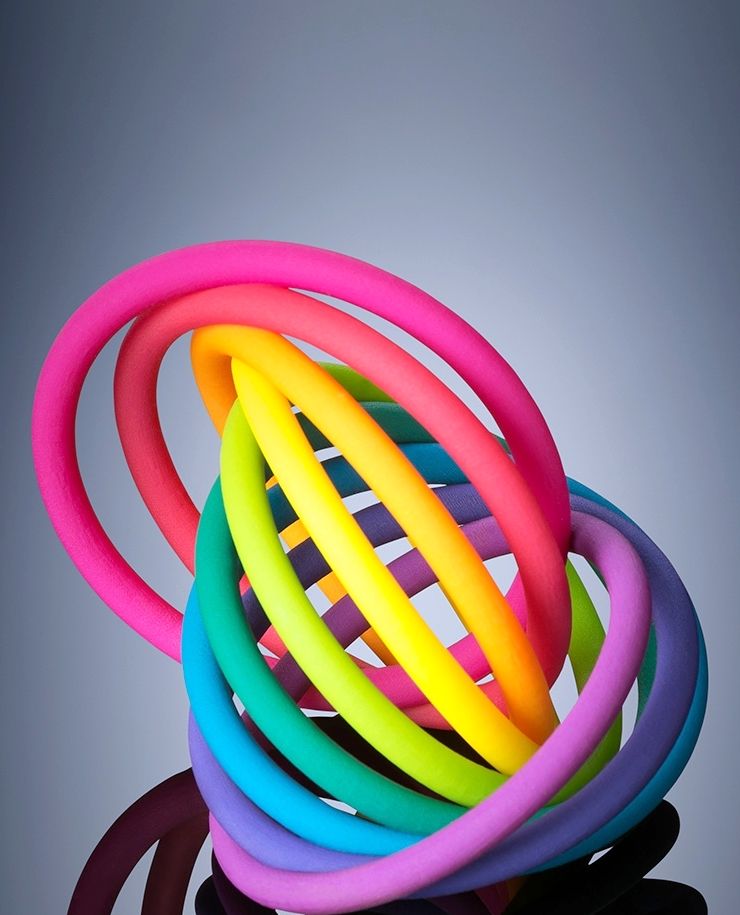
Connectivity is limited to a local network via ethernet cable, which is the standard for industrial sized printers that need a connection to multiple workstations.
As for software, the Objet30 Pro functions with Stratasys’ Objet Studio that converts any STL or SLC 3D CAD file into a sliced model that the printer can interpret and render. All controls are managed from Objet Studio with no LCD or controls on the printer itself.
Functionality ranges from automatic support creation, a range of editing tools, material selection, auto-positioning, maintenance, and the like. Compatibility is reserved for Windows systems. Overall, Objet Studio is as intuitive as it is versatile and rivals open source slicers such as Simplify3D.
Assembly
The Objet30 Pro arrives fully assembled with no installation other than fitting the liquid photopolymer cartridges into the loading tray and loading the roller bath/blade assembly into its berth below the build plate.
The package includes the Objet30 Pro waste containers, roller bath assembly, wiper blade assembly, sanding sponge, ethernet cable, nozzle ruler, loupe, tool kit (scraper, Allen key, mirror, spatula), cleaning cloths, transparency sheets, pink paper, nitrile gloves, scale, spray bottle, support cleaning fluid, model cleaning fluid, user guide notebook, USB flash drive, and a stylus pen.
Due to its complexity, the Objet30 Pro does require quite a bit of maintenance from cleaning the innards, replacing printheads, emptying waste containers, but nothing a versed lab or office technician couldn’t handle.
Printing
For a price tag nearing $20,000, we wouldn’t accept anything short of extraordinary, and the Objet30 Pro fits the bill. Prints are more or less immaculate, and the range of printing materials allow a varied selection of models. All our test prints were smooth, precise, and showed a level detail usually found in pre-assembly line models. We encountered no issues whatsoever with the printing process.
The results are suited to all manner of ends from engineering, consumer goods, low tolerance prototyping, end-user small scale manufacturing, dentistry, electronics, medical, and of course design. Virtually any industry can benefit from the quality of the prints generated by the Objet30 Pro.
Objet Studio is packed with choices and is incredibly simple to use even though it controls such a strong beast of a machine.
Support
As you’d expect from Stratasys, the support is of the highest caliber with a rich vault of guides, tutorials, and videos peppering its web site alongside the Stratasys Service Offering which includes on-site technical service and maintenance, part replacement, user training seminars, and discounts on accessories among other benefits.
Additionally, technical support teams are available throughout the world through phone, email or in person support. The printer itself ships with a standard one-year warranty.
Verdict
When reviewing leviathan grade printers with all the bells and whistle it is hard to produce a verdict other than excellent, but then again this is very much expected from the associated price tag.
The Objet30 Pro follows suits, and if you’ve got the budget to match (including maintenance and on-going production costs), then you quite simply can’t go wrong with this model.
It comes highly recommend for any professional context in need of a reliable, versatile, and precision-oriented 3D printer that won’t take up too much space yet deliver the same level of quality as pricier alternatives.
Stratasys Objet30 3D Printer Series
THE STRATASYS
The Most Versatile Family of Compact Precision 3D Printers
The Objet30 Series from Stratasys features the Objet30, Objet30 Pro and the Objet30 Prime; the world's most versatile set of desktop 3D printers. With a wide gamut of material options as well as the precision and accuracy of PolyJet technology, your design team will be enabled to create true-to-life prototypes that mimic the look and feel of the end product. With a variety of print modes you are able to 3D print fast, shortening product development cycles and design iterations.
View Video Brochure Request Demo
https://youtu.be/ZdjP7hNR5EY
- Overview
- Key Features
- Advantages
- Objet30 Series
- Materials
- Specifications
- Request a Quote
Bring Precision Prototyping to your Desktop
Whether you need to prototype consumer products or print with a range of specialized materials.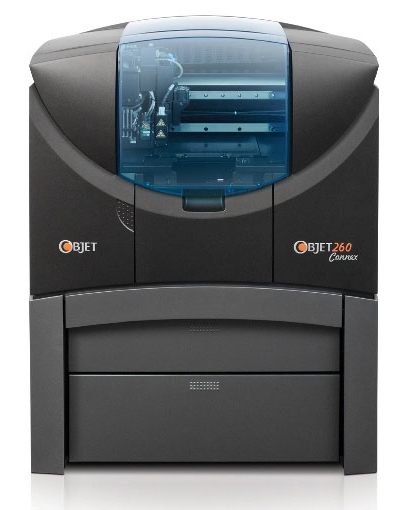 There is an Objet30 3D printer that will suit your organization and fit right on your desktop. Featuring the Objet30, Objet30 Pro and the Objet30 Prime, each iteration carries a build size of 30 x 20 x 15 cm allowing fast print times with a small footprint. The Pro and Prime models feature an extended list of material capabilities including up to 12 different materials for the best surface resolution in the business.
Big Performance, Small Footprint
The Objet30 Series Printers fit conveniently right in your office and carry a small footprint to allow prototyping as convenient as possible.
Material Variety
The Objet30 Prime can print with a variety of materials such as: Rigid Opaque, Transparent, Simulated Polypropylene, High Temperature, Rubber-like, and bio-compatible
Accuracy
Achieve detailed and precision printing with an accuracy down to 0.1 mm [0.0039 in] across all models in the Objet30 Series.
Build Modes
Get up to three different build modes including Draft, High Speed, and High Quality from the Objet30 Series.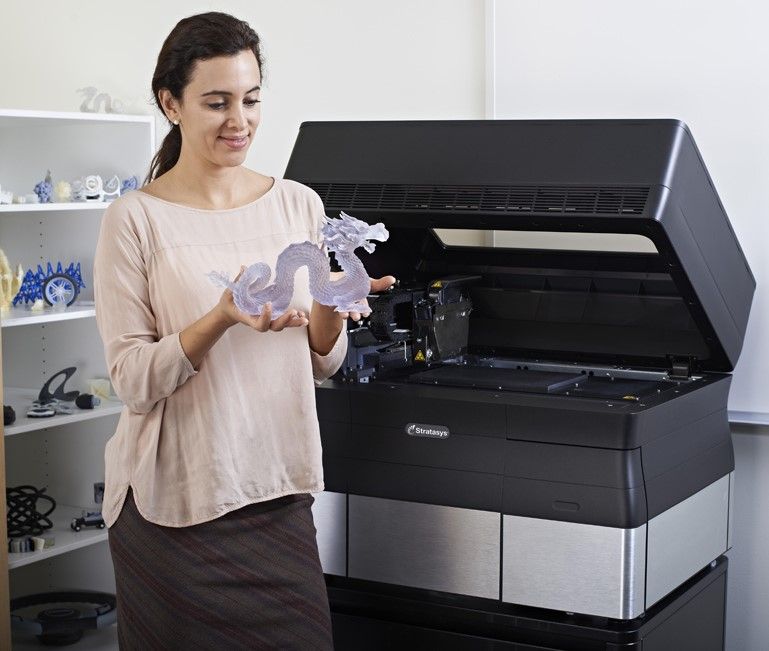 Choose the one that’s right for your business.
With PolyJet technology you are able to produce smooth and accurate models for a variety of conceptual modeling and prototyping applications.
With microscopic layer resolution and accuracy down to 0.1 mm, PolyJet 3D printing technology is the perfect fit for getting detailed models in a timely manner.
LEARN MORE ABOUT POLYJET
High-Resolution 3D Printing
With 28 micron layers, you don’t have to be a big budget business to create accurate, working models for multiple applications. Speed, reliability and precision – all-in-one.The Objet30 desktop 3D Printer is capable of printing high quality models in 5 different materials. This compact 3D printing solution, brings rapid prototyping capabilities to any office environment. Regardless of their size, product design agencies, service providers, consulting agencies, as well as engineering companies will benefit from the use of the Objet30
Big Power from a Little Package
Objet’s smallest 3D printer family fits compactly on your desktop and emits no toxic fumes, no loud sounds and is completely office friendly. Both designers and engineers can build working models and prototypes featuring ultra-precise details straight from your office desk. With an Objet24 on your desktop you print one part many times, or multiple parts one time throughout the day. The Objet24 lets you rapidly prototype whatever you need , as often as you like, in the convenience of your office – without the hassle of specialist training or equipment.
The Objet30 Series from Stratasys consists of the Objet30, Objet30 Pro and Objet30 Prime desktop 3D printers. All these systems are designed to help you create high-end prototypes with realistic and specialized material properties.
Objet30
Precision and Versatility for Rapid Prototyping
An office-friendly 3D printer from Stratasys capable of printing high quality models in five different materials. The Objet30 provides accuracy and versatility in a compact footprint- making it great for prototyping consumer products, even with limited space and budget.
Material Options – 3D print with five different materials including a polypropylene mimic.
High Detail and Dimensional Stability – simulate plastics that look, feel and function like the end product.
Applications – With high precision, speed, and material selection the Objet30 is perfect for rapid prototyping, snap fit, and assemblies.
Objet30 Pro
High-End Rapid Prototyping On Your Desktop
Produce high-end prototypes and realistic models with specialized properties with the Objet30 Pro. With its high accuracy and versatility, this system allows you to print your ideas from your desktop.
8 Different 3D Printing Materials – Use materials such as clear, high temperature and simulated polypropylene to create hyper-realistic models.
Best-In-Class Resolution– The Objet30 Pro yields high accuracy and smooth surfaces on even the smallest moving parts and the ability to create thin walls.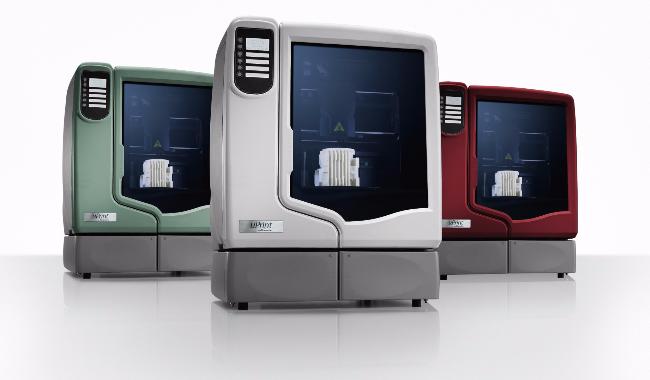
Big Tray Size – Print objects such as consumer goods, electronics, medical devices and more.
Objet30 Prime
3D Printing With New Possibilities
Print your biggest ideas right on your desktop with the Objet30 Prime, offering twelve different printing materials and ultimate precision & versatility within your office space. Enjoy three print modes from draft to high quality for every phase of your development cycle.
3 Print Modes – Deliver your boldest ideas with the versatility of three print modes.
Draft Mode– Enable fast and economical printing and prototyping from your earliest concepts.
Silent Operation & Small Footprint – The Objet30 Prime fits unobtrusively in any office space.
Rietveld Architects
Architecture
Rietveld Architects LLP was established in 1994 in New York City and is known throughout the U. S. and Europe for its creative commercial and residential spaces. Having first learned about 3D printing from NASA, the firm's partners Margaret and Rijk Rietveld saw the potential for this technology to increase productivity and foster more innovative designs.
View Case Study
Rigid Opaque
Combining dimensional stability and fine detail, Rigid Opaque materials in the Vero family simulate the appearance of production parts, and are even suitable for rapid tooling.
LEARN MORE
Transparent
Using RGD720 and VeroClear, combine features such as clarity, dimensional stability and surface smoothness in your print. Transparent Polyjet material lets you prototype clear & tinted products.
LEARN MORE
Rubber-Like
With Tango Gray and Tango Black material, rubber-like is suitable for a range of applications requiring non-slip or soft surfaces. Simulate rubber with different levels of hardness, elongation & tear resistance.
LEARN MORE
Objet30 |
Objet30Rigid opaque white (VeroWhitePlus)Rigid opaque black (VeroBlackPlus ) Rigid opaque blue (VeroBlue) Rigid opaque gray (VeroGray) Polypropylene-like material (DurusWhite) |
Objet30 Prime |
Objet30 PrimeRigid Opaque (Vero family) in a variety of colors including white, gray, blue and blackTransparent (RGD720 and VeroClear) for clear and tinted products with great dimensional stability and surface smoothness High Temperature (RGD525) for advanced functional testing, hot air and water flow, and static applications Simulated Polypropylene materials (RGD450 & RGD430) with toughness and durability for smooth prototypes with living hinges, flexible closures and snap-fit parts Rubber-like materials (Tango Gray or Tango Black) for a range of applications requiring non-slip or soft surfaces Bio-compatible (MED610) for medical-device prototyping |
Objet30 Pro |
Objet30 ProTransparent (VeroClear), a nearly colorless material featuring great dimensional stability, fine-detail model building, and simulation of transparent thermoplastic such as PMMAHigh Temperature (RGD525) for advanced functional testing, hot air and water flow, and static applications Simulated Polypropylene (RGD450 & RDG430) a material offering toughness and durability for smooth prototypes with living hinges, flexible closures and snap-fit parts |
Objet30 Series Specifications
Build Tray Size |
Build Tray Size29. 4 x 19.2 x 14.8 cm [11.57 x 7.55 x 5.85 in] 4 x 19.2 x 14.8 cm [11.57 x 7.55 x 5.85 in] |
Minimum Layer Thickness |
Minimum Layer Thickness28 microns [0.0011 in] |
Build Resolution |
Build ResolutionObjet30 & Objet30 ProX-axis: 600 dpi Y-axis: 600 dpi Z-axis: 900 dpi Objet30 Prime |
Build Modes |
Build ModesObjet30High Speed 30-micron [0.  001 in] 001 in]Objet30 Pro Objet30 Prime |
Model Materials |
Model MaterialsObjet30Rigid Opaque, Simulated Polypropylene Objet30 Pro Objet30 Prime |
Support Material |
Support MaterialSUP705 (WaterJet removable)SUP706 (soluble) |
Power Requirements |
Power RequirementsObjet30Single phase: 100-200V; 50-60Hz; 7A or 200-240V; 50-60Hz 3. 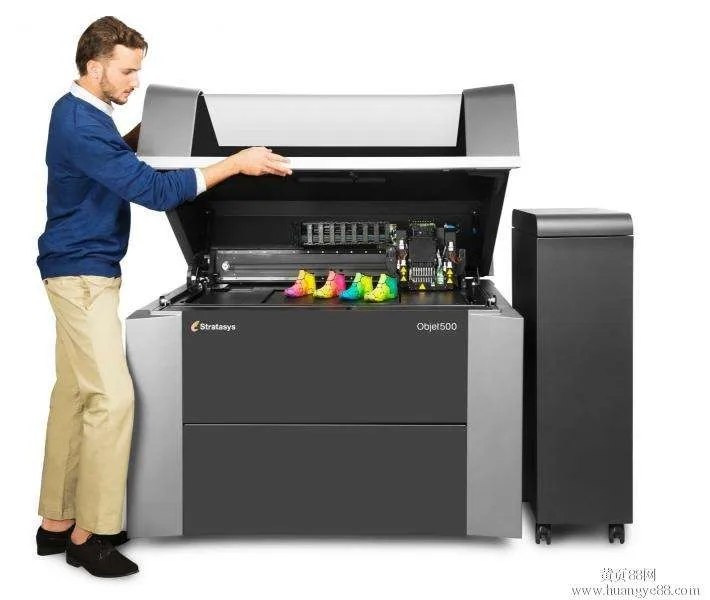 5A 5AObjet30 Pro Objet30 Prime |
System Size & Weight |
System Size & WeightObjet30 & Objet30 Pro82.6 x 60 x 62 cm [32.5 x 23.6 x 24.4 in] 106 kg [234 lbs] Objet30 Prime |
Printing 3D Objects in Photoshop
User's Guide Cancel
Search
Last update Dec 13, 2021 08:23:10 PM GMT
- Photoshop User Guide
- Introduction to Photoshop
- Dream about it.
 Do it.
 - What's New in Photoshop
- Editing the first photo
- Create documents
- Photoshop | FAQ
- Photoshop system requirements
- Transferring presets, operations and settings
- Introduction to Photoshop
- Dream about it.
- Photoshop and other Adobe products and services
- Working with Illustrator artwork in Photoshop
- Working with Photoshop files in InDesign
- Substance 3D Materials for Photoshop
- Photoshop and Adobe Stock
- Working with the built-in Capture extension in Photoshop nine0009 Creative Cloud Libraries
- Creative Cloud Libraries in Photoshop
- Working in Photoshop using the Touch Bar
- Net and guides
- Create transactions
- Cancellation and transaction history
- Photoshop on iPad | General questions
- Introduction to the working environment
- System requirements | Photoshop on iPad
- Create, open and export documents
- Adding photos
- Working with layers
- Drawing and painting with brushes
- Selecting areas and adding masks
- Retouch compositions
- Working with Adjustment Layers
- Adjusting the key of a composition using the Curves layer
- Applying transform operations
- Trim and rotate compositions
- Rotate, pan, zoom and restore canvas nine0009 Working with text layers
- Frequently Asked Questions | Photoshop Web App Beta
- Working environment overview
- System requirements | Photoshop 9 Web App Beta0010
- Keyboard shortcuts | Photoshop Web Application Beta
- Supported file formats | Photoshop Web Application Beta
- Opening and working with cloud documents
- Collaboration with stakeholders
- Limited editing options for cloud documents
- Photoshop Cloud Documents | Frequently Asked Questions
- Photoshop Cloud Documents | Workflow Questions
- Work with and manage cloud documents in Photoshop
- Cloud storage update for Photoshop
- Unable to create or save cloud document
- Troubleshooting Photoshop cloud documents
- Collection of cloud document synchronization logs
- Sharing and editing cloud documents
- File sharing and commenting in the application
- Working environment basics
- Learn faster with the What's New panel in Photoshop
- Create documents
- Working in Photoshop using the Touch Bar
- Tool gallery
- Performance settings
- Using tools
- Touch gestures
- Touch gestures and customizable workspaces
- Technology overview versions
- Metadata and comments
- Default key combinations
- Touch gestures and customizable workspaces
- Putting Photoshop images into other applications
- Installations
- Default key combinations
- Rulers
- Show or hide non-printing auxiliaries
- Specifying columns for the image
- Cancellation and transaction history
- Panels and menus
- File storage
- Positioning of elements with referencing
- Positioning with the ruler tool
- Setting sets
- Customizing keyboard shortcuts
- Net and guides
- Photoshop for design
- Artboards
- View on device
- Copy CSS from layers
- Splitting web pages into fragments
- HTML options for snippets
- Changing the arrangement of fragments
- Working with web graphics
- Create web photo galleries
- Resizing images
- Working with raster and vector images
- Image size and resolution
- Importing images from cameras and scanners
- Creating, opening and importing images
- Image viewer
- "Invalid JPEG marker" error | Opening images
- Viewing multiple images
- Customize color palettes and color swatches
- HDR images
- Image color matching
- Converting between color modes
- Color modes
- Erase sub-images
- Blend Modes
- Choice of colors
- Making changes to indexed color tables
- Image information
- Distortion filters not available
- Color details
- Color and monochrome corrections with channels
- Selecting colors in the Color and Swatches panels
- Sample
- Color mode (or picture mode)
- Shade
- Add color mode change to operation
- Add swatches from HTML CSS and SVG files
- Bit depth and settings
- Understanding Layers
- Reversible editing
- Create and manage layers and groups
- Selecting, grouping and linking layers
- Putting images into frames
- Opacity and layering
- Layer masks
- Application of smart filters
- Layer compositions
- Move, arrange and lock layers
- Layer masking with vector masks
- Manage layers and groups
- Effects and Layer Styles
- Editing layer masks
- Extract resources
- Display layers with clipping masks
- Generation of graphic resources from layers
- Working with Smart Objects
- Blend Modes
- Combining several fragments into one image
- Combining images with Auto Layer
- Alignment and distribution of layers
- Copy CSS from layers
- Load selections based on layer boundaries or layer masks
- See-through to show the contents of other layers
- Layer
- Mixing
- Composite images
- Background
- Select and Mask workspace
- Quick area selection
- Getting Started with Selections
- Selecting with the Marquee Toolbox
- Selection with the Lasso tools
- Selecting a color range in the image
- Pixel highlight setting
- Convert between contours and selection boundaries
- Channel Basics
- Moving, copying and deleting selected pixels
- Creating a temporary quick mask
- Save selections and alpha channel masks
- Selecting focus areas in an image
- Duplication, splitting and merging of channels
- Channel calculation
- Extraction
- Bounding box
- Perspective distortion
- Blur reduction due to camera movement
- Healing Brush Tool Examples
- Export color lookup tables
- Image sharpening and blurring
- Introduction to color grading
- Applying the Brightness/Contrast setting
- Shadow and Highlight Detail Correction
- "Levels" correction
- Hue and saturation correction
- Juiciness correction
- Adjusting the color saturation in image areas
- Quick tone correction
- Applying special color effects to images
- Image enhancement with color balance correction
- HDR images
- View histograms and pixel values
- Image color matching
- Crop and straighten photographs
- Converting a color image to black and white
- Adjustment and fill layers
- Curves correction
- Blend Modes
- Target Imaging for Press
- Color and tone correction with Levels and Curves eyedroppers
- HDR Exposure and Toning Compensation
- Filter
- Blur
- Lighten or darken image areas
- Selective color correction
- Changing object colors
- Camera Raw system requirements
- What's New in Camera Raw
- Introduction to Camera Raw
- Creating panoramas
- Supported lenses
- Camera Raw 9 Vignetting, Grain, and Haze Removal0010
- Default key combinations
- Automatic perspective correction in Camera Raw
- Reversible editing in Camera Raw
- Camera Raw Radial Filter Tool
- Manage Camera Raw Settings
- Processing, saving and opening images in Camera Raw
- Improving Images with Camera Raw's Improved Spot Remover
- Rotating, cropping and modifying images nine0009 Camera Raw color correction
- Removing objects from photos using Content-Aware Fill
- Content-aware patching and relocation
- Retouching and fixing photos
- Image Distortion and Noise Correction
- Basic troubleshooting steps to solve most problems
- Object transformation
- Crop, rotate and canvas adjustment
- Crop and straighten photographs
- Creating and editing panoramic images
- Deforming images, shapes and contours
- Perspective
- Using the Liquify filter
- Content-aware scale
- Transforming images, shapes and paths
- Deformation
- Transformation
- Panorama
- Drawing symmetrical ornaments
- Options for drawing a rectangle and changing the stroke
- Drawing details
- Drawing and editing shapes
- Paint tools
- Creating and modifying brushes
- Blend Modes
- Adding color to contours
- Edit contours
- Painting with mix brush
- Brush Presets
- Gradients
- Gradient interpolation
- Fill and stroke selections, layers, and paths
- Drawing with the pen tool group
- Making patterns
- Creating a pattern with the Pattern Builder filter
- Loop control
- Managing pattern libraries and presets
- Drawing with pen tablet
- Creating textured brushes
- Adding dynamic elements to brushes
- Gradient
- Draw stylized strokes with the Artistic Archive Brush
- Drawing with pattern
- Synchronizing presets across multiple devices
- Adding and editing text
- Universal text editor
- Working with OpenType SVG Fonts
- Character formatting
- Paragraph formatting
- Creating text effects
- Text editing
- Leading and letter spacing
- Font for Arabic and Hebrew
- Fonts
- Troubleshooting fonts
- Asian text
- Create text nine0009 Text Engine error when using Photoshop's Type tool | Windows 8
- Video editing in Photoshop
- Editing video and animation layers
- Introduction to video and animation
- Video and animation preview
- Drawing frames in video layers
- Import video files and image sequences
- Create frame animations
- Creative Cloud 3D Animation (Preview)
- Create timeline animations
- Creating images for videos
- Using the Liquify filter
- Using Blur Gallery group effects
- Filter basics
- Filter effects guide
- Adding lighting effects
- Using the Adaptive Wide Angle filter
- Oil Paint Filter
- Effects and Layer Styles
- Application of specific filters
- Image area feathering
- Saving files in Photoshop
- Export files to Photoshop
- Supported file formats
- Saving files in other graphic formats
- Moving projects between Photoshop and Illustrator
- Saving and exporting video and animation
- Saving PDF files nine0009 Digimarc copyright protection
- Printing 3D objects
- Printing with Photoshop
- Printing and color management
- Checklists and PDF presentations
- Print photos in a new image layout
- Spot color printing
- Duplexes
- Printing images on a printing press
- Photoshop Color Enhancement
- Printing troubleshooting | Photoshop
- Create activities
- Creation of data-driven images
- Scenarios
- File batch processing
- Operation playback and management
- Adding conditional operations
- About actions and the Actions panel
- Recording tools in operations
- Add color mode change to operation
- Photoshop UI Development Kit for Plugins and Scripts
- Understanding Color Management
- Accurate color assurance
- Color settings
- Working with color profiles
- Color management of documents for viewing on the web
- Color management for printing documents
- Color management of imported images
- Perform proofing
- Learn more about content credentials
- Identity and origin of NFT tokens
- Connecting accounts for creative attribution
- 3D in Photoshop | Common questions about deprecated 3D features
- Creative Cloud 3D Animation (Preview)
- Printing 3D objects
- 3D drawing
- 3D Panel Enhancement | Photoshop
- 3D Concepts and Tools
- Rendering and saving 3D objects
- Creating 3D objects and animations
- Image stacks
- 3D graphics workflow
- Measurements
- DICOM files
- Photoshop and MATLAB
- Image object count
- Combining and transforming 3D objects
- Editing 3D textures
- HDR Exposure and Toning Compensation
- 3D panel settings
Photoshop allows you to print any compatible 3D model without worrying about the limitations of a 3D printer.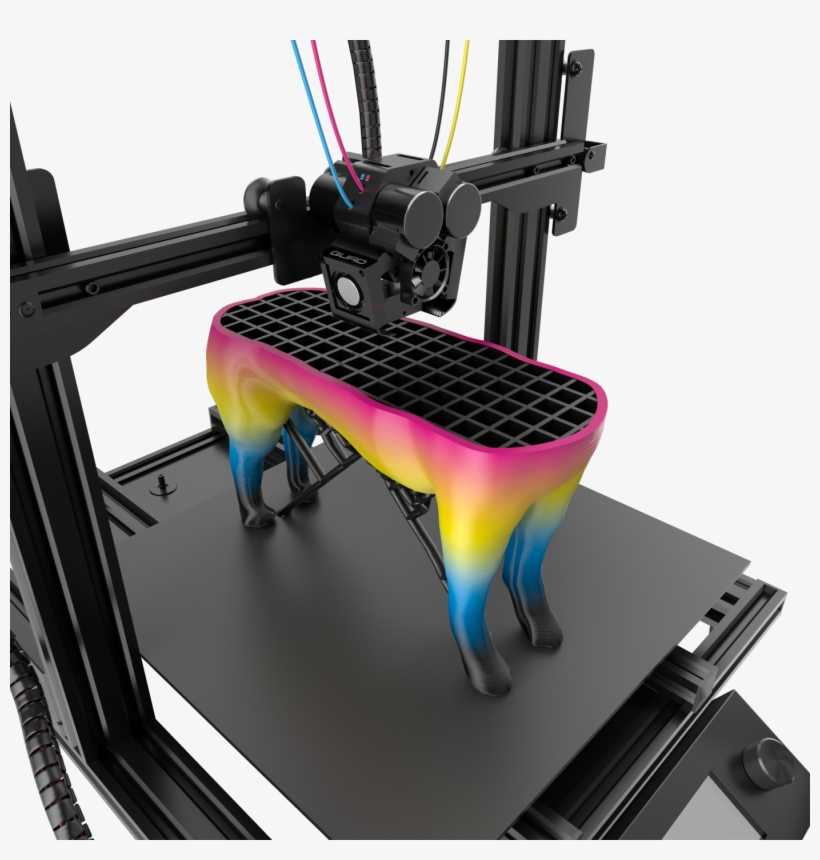 When preparing to print, Photoshop automatically renders 3D models impenetrable. Photoshop also generates the necessary support structures—platforms and bases—to help you achieve successful 3D printing results.
Preparing 3D objects for printing
- Select the menu item Window > Workspace > 3D to switch to 3D mode. nine0010
- Open the 3D model in Photoshop. If necessary, resize the 3D model while opening the file.
- Select menu item 3D > 3D Print Settings.
- In the 3D Printing Preferences panel, choose whether to use a printer connected to your computer via USB (local printer) or online 3D printing services such as Shapeways.com or Sculpteo.
You can now print 3D models as 3MF (3D Manufacturing Format) files. When specifying 3D printing options, select 9 for option0848 Print to is set to Local and Printer is set to 3MF File. When you send a 3D object to print, Photoshop creates a 3MF file. On Windows computers, Photoshop also launches the Microsoft 3D Builder application to further process the 3MF file.
To update the list of supported printers or online profiles, select Get Latest Printers from the Send to Print To pop-up menu.
- Select a local printer or Shapeways.com print profile. nine0010
View estimated prices for printing 3D models using available Shapeways.com profiles by selecting Printer > Estimated Price.
- Select the print volume units from inches, centimeters, millimeters, or pixels. This unit will serve to measure the dimensions of the volume of the printer as well as the dimensions of the printing plate.
A. 3D model B. Printing plate C. Printer volume overlay nine0003
- Select the 3D Printing Detail Level—Low, Medium, or Fine. The time it takes to print a 3D object depends on the level of detail selected.
- If you do not want to see the bounds of the 3D model's print volume, clear the Show Printer Volume Overlay check box.
- Set the Scene Size options to the appropriate size for the 3D printed object. When you change one value (X, Y, or Z), the other two values are scaled proportionally. When resizing the Stage Volume, notice that the print plate under the 3D model resizes accordingly. nine0010
You can scroll through the Scene Volume settings by clicking the size label (X, Y, or Z) and dragging the cursor left or right. By holding down the Shift key, you can scroll through the values faster.
- Select Scale by printer volume if you want to automatically resize the 3D model so that it takes up the entire available printer volume on the selected printer.
- If the 3D model includes normal maps, bump maps, or transparency maps, you can ignore these types of maps when printing the model. Notice how the 3D model changes in real time as you change the Surface Detail settings.
 nine0010
 - Optionally, you can exclude the support structures of the 3D object (platforms and bases) from printing. Use this option with caution as printing a 3D model without the necessary support structures may produce unsatisfactory results.
- If your printer supports multiple materials, select the material you want to use to print this 3D object.
(Experimental) Enable multitone printing for the MakerBot Replicator 2x 9 printer0036
You can enable an experimental feature that allows you to print continuous tones with your MakerBot Replicator 2x 3D printer.
Requirement: Enable experimental Photoshop features
Experimental features must be enabled in Photoshop before using multitone printing:
- Select Preferences > Experimental Features.
- Select the Enable multitone printing check box. nine0010
- Click OK.
- Restart Photoshop.
Experimental features not yet fully tested. They should be used with caution.
Choose a multi-tone surface material
- Select the MakerBot Replicator 2x printer in the 3D Printing Settings panel.
- In the Material field, select Multitone Surface. If you don't see this option, make sure the experimental Multitone 3D Printing feature is enabled. nine0010
- Set other parameters according to the generated 3D model.
- To view and print a 3D object, select 3D > 3D Print.
Preview and print 3D object
After setting the 3D printing options, follow these steps.
- Click the Start Print icon () or select the menu item 3D > 3D Print. Photoshop will combine the 3D elements of the scene and prepare it for the printing process. nine0036
- If you choose to print with a Shapeways.com profile, Photoshop will display a message that the actual print cost may differ from the estimated cost displayed. Click OK.
- In the preview window that opens, you can use the 3D camera tools to rotate, scale, or move the 3D object.
Rotate the 3D camera.
3D camera rotation.
Move the 3D camera.
3D camera slide. nine0003
Return to the home position of the 3D camera.
- If necessary, select the Show restoration check box. Photoshop displays various restoration colors such as Original mesh, Thickened walls, and Hole closed.
- You can also turn on Ray Tracing Preview. Viewing ray tracing allows you to more accurately reproduce the printed material. nine0010
- If you want to export the 3D printing settings to an STL file, click the Export button and save the file to the desired folder on your computer. This STL file can be sent to a network service server or moved to an SD card for printing with your own printer.
- View a summary of the 3D print object and click the Print button.
You can cancel the current 3D printing process using the menu item 3D > Cancel 3D printing. nine0036
3D printing utilities
Photoshop provides interactive step-by-step utilities that you can use to set up, calibrate, and maintain your 3D printer. These utilities can only be used when the 3D printer is turned on and connected to a computer.
- Select the menu item 3D > 3D Printer Utilities.
- Select the utilities you want to run.
Print plate calibration nine0003
Helps in leveling the printing plate. This utility includes the following general steps:
- Requires you to remove all residual print materials from the 3D printer.
- Initializes the print head.
- Allows you to adjust the amount of gap between the platen and the printhead at nine nozzle positions.
You can use this utility in wizard mode or manual mode.
Download Thread nine0003
Helps load filament into a Fused Deposition Modeling (FDM) 3D printer. To facilitate filament loading, Photoshop starts the head heating process and the filament loading mechanism.
Remove thread
Helps remove the filament from the FDM 3D printer. To facilitate the removal of the filament, Photoshop starts the head heating process and the filament loading mechanism.
Replace thread nine0003
Helps to replace the old filament in the FDM 3D printer with a new one. To make changing filament easier, Photoshop starts the head heating process and the filament loading mechanism.
- Follow the instructions on the screen.
Pack objects on the base plane
Sometimes you may want to print multiple instances of an object on the same panel.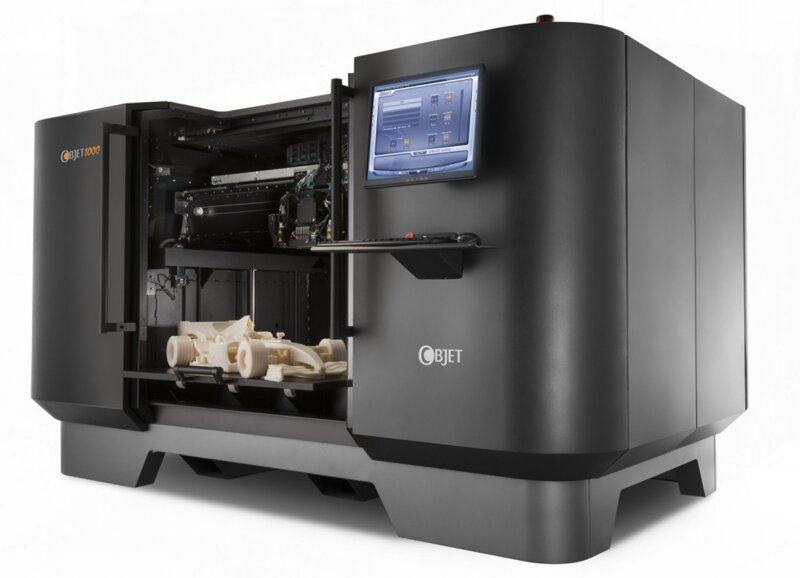 Do the following.
- Select the required objects in the 3D panel. nine0009 Select 3D > Pack Objects on Ground Plane.
- Start printing objects.
FAQ
Photoshop currently supports the following 3D printers:
- MakerBot Replicator 2
- MakerBot Replicator 2x
- ZCorp Full Color
- Mcor Iris
- MakerBot Replicator 5th Generation
Photoshop also supports several Shapeways.com and Sculpteo profiles. nine0003
The MakerBot Replicator 5th Generation Printer Profile does not yet support USB direct printing. You can export files to a USB drive and print them to a local printer.
Yes. Before printing, you can set a cross section to cut off part of the 3D model. Follow these general steps.
- Select the menu item Window > Workspace > 3D to switch to 3D mode.
- Open the 3D object you want to print. nine0010
- Select Scene in the 3D panel.
- On the Properties panel, select Cross Section.
- Specify the cross section parameters in the Properties panel.
- Select the menu item 3D > Apply Cross Section to Scene.
- Print the 3D scene.
The desired cross section must be dried before printing.
Yes. Follow these general steps. nine0003
- Select a material in the Stage panel.
- In the Properties panel, click the folder icon () next to Emboss/Transparency/Normals and load the texture. You can also specify a new texture to apply to the 3D model.
- When specifying a new texture, save this texture. The texture is applied to the 3D model as a bump map or transparency.
- Print a 3D model.
 Pop-up menus for additional available heads are displayed in the Print Properties panel. In the 3D workspace and in the 3D Print Preview window, the model appears in two colors. Printing a 3D model in two colors
 From a printing point of view, each layer of a 3D model is treated as a separate 3D object. You can optionally merge two or more layers (3D > Merge 3D Layers). nine0036
Related topics
- How to print a 3D object in Photoshop
- 3D painting
- 3D panel enhancements | Photoshop
- Photoshop 3D Documentation
Sign in
To come in
Account Management
quick tips for moving from a CAD model to a printed object / Sudo Null IT News
Message from the moderator: The article has been republished because was withdrawn from publication due to a technical error.Please be understanding. Thank you!
Whether it's just a hobby or a source of income, 3D printing is always based on product design. Those accustomed to traditional technologies will have to rethink the entire approach to product design and manufacture.
When the project is ready, a number of additional operations are performed: setting the orientation of the model and other parameters that ensure the proper printing process. In addition, it is necessary to take into account the fact that most 3D printers allow you to choose the degree of filling the model with cellular structures. The correct choice of this parameter provides protection of the object from deformation and destruction during the printing process, as well as significant savings in material and reduction in production time. nine0003
Finally, the last factor influencing the success or failure of the 3D printing process is the strength of the connection between the model and the table. If the workpiece is separated from the table during printing, then all the work will go down the drain.
Here, we'll walk you through the 3D printing process and give you a few simple tips for using the power of additive manufacturing in the design phase. In addition, we will dwell on the methods of preparing a finished project for printing, and also consider ways to securely fasten the workpiece to the table. nine0036
These guidelines apply primarily to Fused Deposition Printers (FDM) printers, but may apply to other types of printers as well. The process of obtaining a finished part by 3D printing is basically the same regardless of the method used.
Designing an object
Any 3D printing starts with construction. If you are developing a product yourself, then you need to build a 3D model of it in a computer-aided design (CAD) system to turn the designer's idea into reality. In this case, the object can be both very simple and very complex. However, too thin and too small models should be avoided. nine0003
3D-CAD from Siemens from this article for 49900r (90% discount), the promotion is valid until March 20, 2020. Read more>>
Save the file in a special format for printing
To print an object, its model must be saved in a special file format - for example, STL, which has become the de facto standard in the world of 3D printing. In this format, model surfaces are represented as a grid of triangles. Simple surfaces are broken down into a small number of triangles. The more complex the surface, the more triangles you will need. Today, other formats are used in 3D printing, in particular, the 3MF format developed by Microsoft. But the most common is still STL. nine0003
CAD-systems make it very easy to save the model in the desired format: just click the Save As command. To improve print quality, it is desirable to set a number of settings for saving to the STL format - for example, the tolerance during transformation and the angle of the plane. The lower the conversion factor and the better the angle, the smoother the printed part will be.
Opening the file in the slicer program
Most, if not all, 3D printers come with their own slicer software. The slicer loads the STL file created in the CAD system and cuts it into layers, and then creates a control program for the printer. nine0003
Positioning the model correctly in the print space
After entering the print settings, the model (or several models) needs to be placed on the printer table. You can print many objects on one table at once. At the same time, compared to printing a single object, the time slightly increases, but in general it still turns out to be less. Here are some tips for choosing the right model orientation.
Set parameters
In the slicer program, the user sets parameters such as print speed, material consumption, nozzle and desktop temperatures.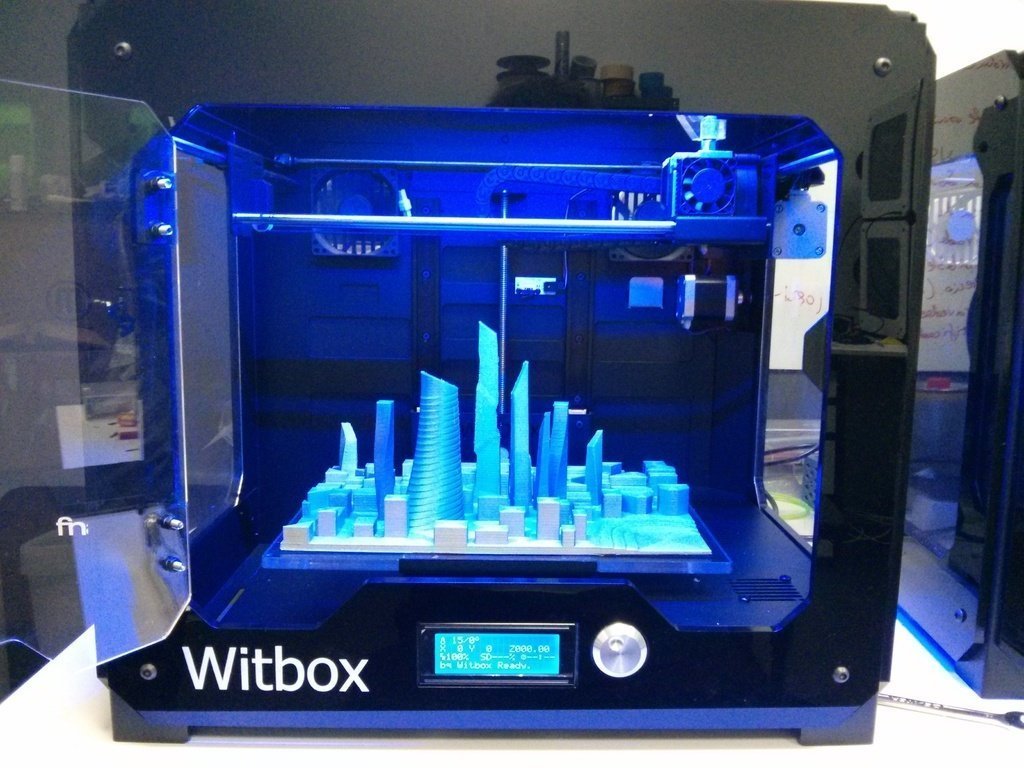 Most slicers have simple settings for beginners. In this case, most often there are also advanced settings so that experienced professionals can achieve optimal results. Advanced settings include percentage infill, amount of backing material, and type of backing or raft (this is a small, thin base that keeps the printed part stable. The backing is removed when it's finished). The number of options is truly endless. Specific settings vary depending on the brand of printer. It's easy enough to set them up. nine0003
Sending the control program to the printer
After setting the print settings, the placement of future objects on the table, their orientation and quality, it's time to finally start the printer. It is enough to press the Print button and find something to do while the production is in progress. Depending on the complexity of the design, the process takes from several minutes to several hours.
Finishing
Finishing includes removing the printed part from the table, as well as removing the support material by melting, mechanical separation or dissolution (depending on the design of the printer).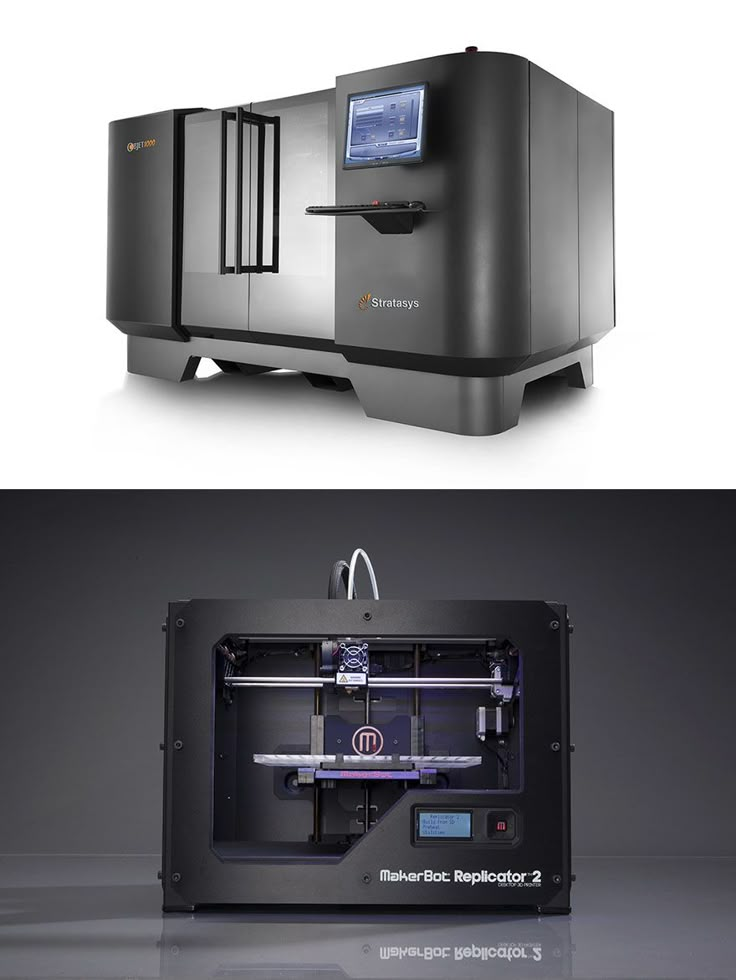 The part may require some light sanding or polishing, but overall a properly printed object looks good from the start. Other types of finishing are placing plastic parts in a container with acetone to smooth out surface roughness, gluing (if the dimensions of the structure exceed the dimensions of the 3D printer or individual elements of the object must have different orientations), drilling holes and painting. nine0003
3D printing process
3D printer design considerations
Eliminate sharp corners
If the direction of the surfaces changes abruptly (for example, a vertical wall intersects with a horizontal overlap), then such a model is difficult to print. The printer will build excessive inner surfaces, wasting too much material. There are two easy ways to prevent this: add chamfers to smooth out where the surfaces meet, or round the corners so the printer gradually builds a vertical surface.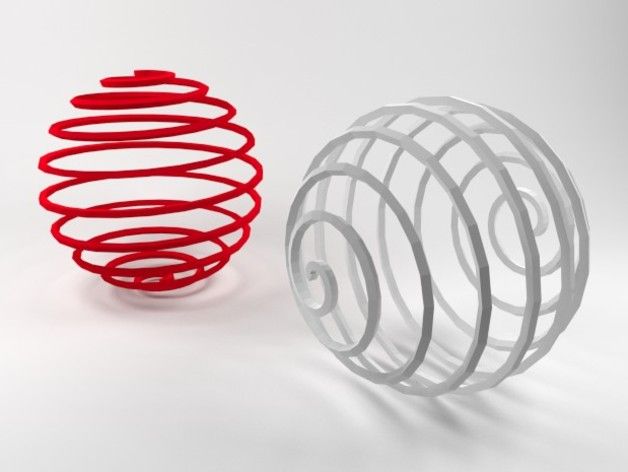 In addition, rounding will increase strength, since destruction most often occurs at sharp corners. nine0003
Elimination of thin walls and small geometries
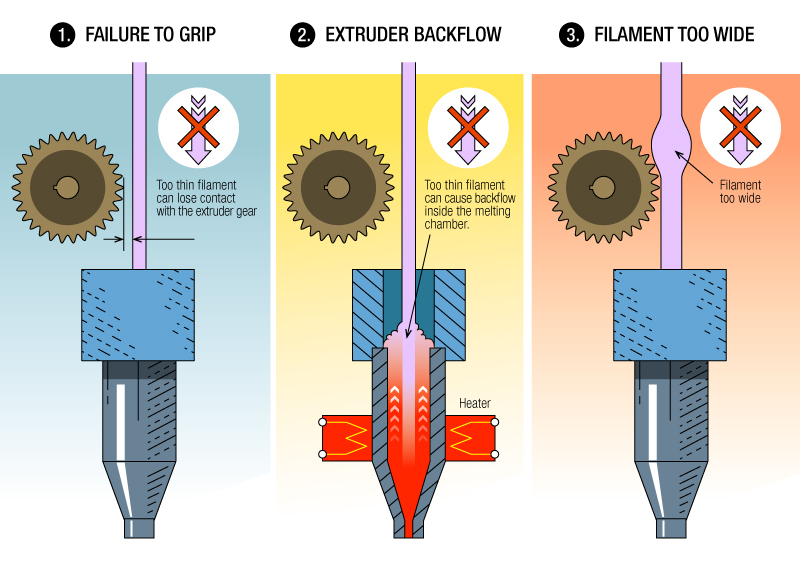
Layer by layer fusing technology consists in supplying hot plastic through a nozzle with the formation of a printed object layer by layer. The thickness of the extruded plastic layer cannot be made smaller than a certain limit, depending on the diameter of the nozzle and the speed of the print head. Excessively thin-walled details are difficult to print - often the result is a chaotic weave of fibers. If the part can be printed, it is very fragile and breaks easily. nine0003
Too thick walls - also bad
On the other hand, if the walls are too thick, they become brittle and crack easily. This is especially important when printing from materials other than resins, as excess thickness during the manufacturing process leads to internal stresses in the part.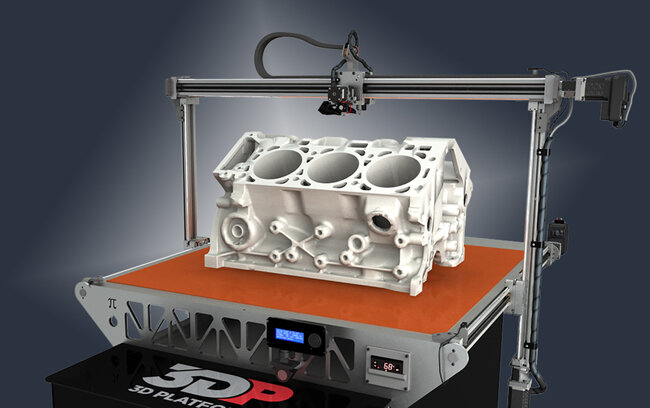 Even when printing from plastics, material is wasted on walls that are too thick and time is wasted.
Removing large overhangs
3D printers allow you to create amazing shapes and surfaces, but they are not capable of printing directly in the air. If there is a void in the part with material above it, additional support material must be used. Most slicers add material automatically, but require you to specify the orientation and volume of the support structure. Printers with a single nozzle create an array of thin columns, which then have to be broken off. The result is an uneven surface. Therefore, it is recommended to avoid large overhanging elements whenever possible in order to reduce the need for support material. nine0003
If such an element is unavoidable, you can try to flip the object. Most printers are capable of printing overhanging elements with an angle of about 45 degrees. At a certain height, the edge of such an element may sag somewhat.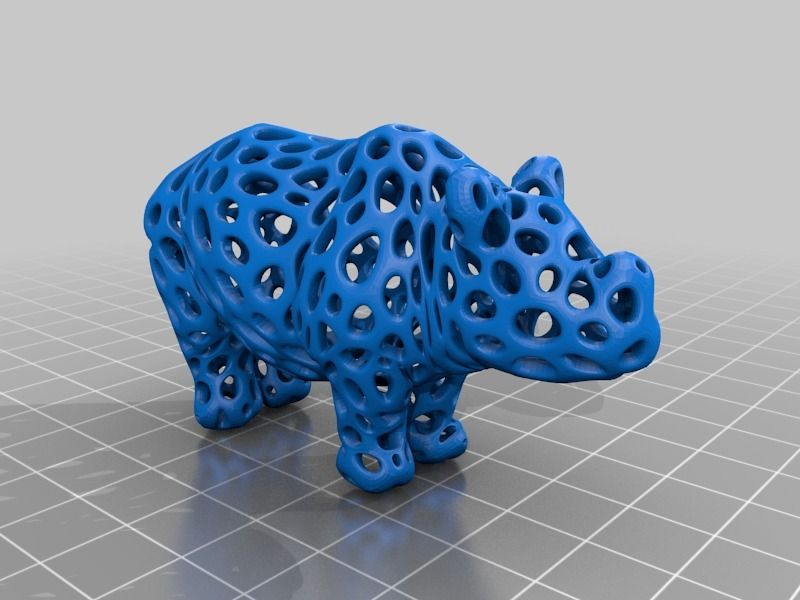 The actual capabilities of a particular printer are determined by trial and error.
Holes shrink
Remember that the part is made of heated plastic. As it cools, it inevitably shrinks. Therefore, holes and other critical structural elements have to be made larger so that after shrinkage their size is as close as possible to the required one. nine0003
However, if a tight tolerance hole needs to be made, it is better to print it in a smaller diameter and then ream it with a suitable tool. This is especially true for holes whose axis is parallel to the printer table.
Increasing the footprint
If the area of contact between the object and the base is small, the part may separate from the table during printing. To prevent this from happening, wide bases are added to the model legs, which are installed on the printer table. In general, the closer to the table, the more material must be added to the support. There are other ways to securely fasten the part to the table, which we will discuss a little later. nine0003
Special moves
The right approach to design makes printing easier. In addition, there are special post-processing techniques that are important to be aware of.
Place round surfaces vertically
The model should be oriented so that the minimum amount of support material is used. Ideally, it should rest on the table with a large flat edge. In addition, circular geometry must be placed so that the circular faces are vertical. If we look at the printer table from above, we should see a round silhouette of the object. In this case, the part comes out as symmetrical as possible with the formation of a solid round structure. nine0003
Place voids and holes vertically
If there are voids in the model (for example, it is a rectangular pipe), it is desirable to place such voids vertically in order to reduce the volume of the support material.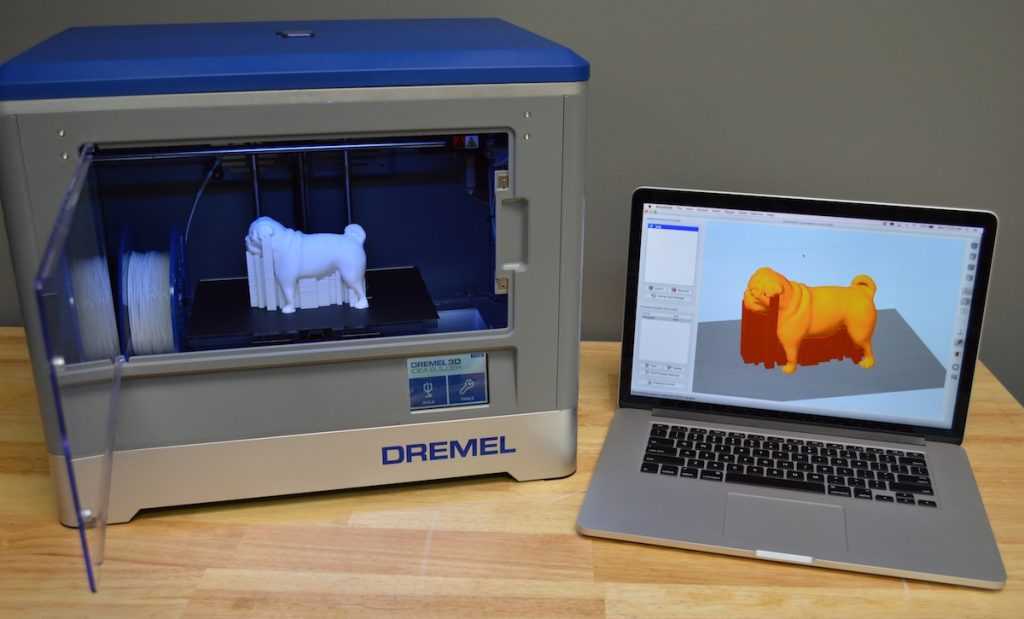 If you print the pipe in a horizontal position, you will have to provide support for the entire interior. If you put the pipe on the end, then no support is required at all.
The same is true for holes: to get a hole with a straight axis, it is best to print it vertically - in the form of a stack of rings, which avoids warping or deforming a round hole into an oval one. nine0003
Set print quality settings
Proper selection of print parameters, such as STL conversion tolerance and slicer software settings, allows parts to be produced with a surface quality that matches that of cutting. However, this entails an increase in print time. When choosing quality parameters, one should proceed from the purpose of the object: is it a finished product or a prototype? Will the part be visible or hidden? nine0036 The quality parameters also affect the shape of the holes in the part. In CAD files, holes are represented as a set of straight lines at an angle to each other. The higher the quality of the model in the saved STL file, the less the circle looks like a polygon.
Reducing the layer thickness
To obtain the best quality, especially when using layer-by-layer deposition technology, it is necessary to reduce the thickness of the layers. It does increase the print time, but the end result is worth it! nine0003
Optimizing the filling with honeycomb structures
In terms of strength, objects do not have to be solid. Similar to a honeycomb, printers can create a honeycomb infill that balances strength and saves expensive polymer material. However, if the printed part serves as a prototype for strength testing, and the serial product will be manufactured by traditional methods, and also if the part is subjected to certain types of mechanical stresses and pressures, a solid design will be preferable. nine0003
Choosing material
The success of printing largely depends on the correct choice of material.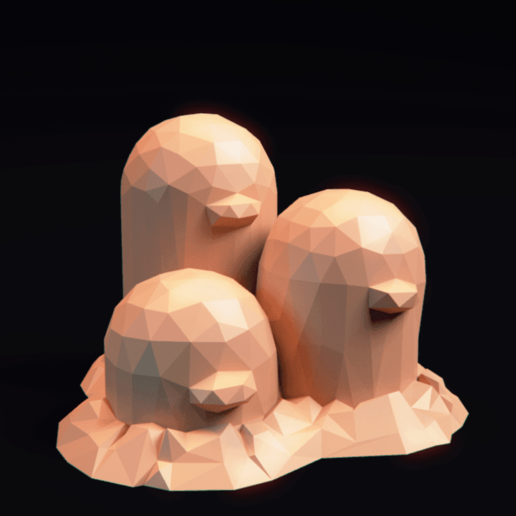 Materials have different properties. For example, the melting point of thermoplastic polyurethane (TPU) and polylactic acid (PLA) is lower than that of acrylonitrile butadiene styrene (ABS). In addition, the material is taken into account when choosing the type of support structures. For an object made of polylactic acid, supporting elements can be made from the same polylactic acid, since it will be quite easy to separate them from the finished part. If the part is printed from ABS plastic, then the support elements must be made from a different material, and it is better not to use such elements at all in thermoplastic polyurethane parts. nine0003
Cellular filling
A solid body is not always the best choice for 3D printing. Printing solid parts has its advantages, but the internal honeycomb structure saves both expensive material and time.
Creating objects with a specified degree of filling with honeycomb structures is a unique opportunity for 3D printing.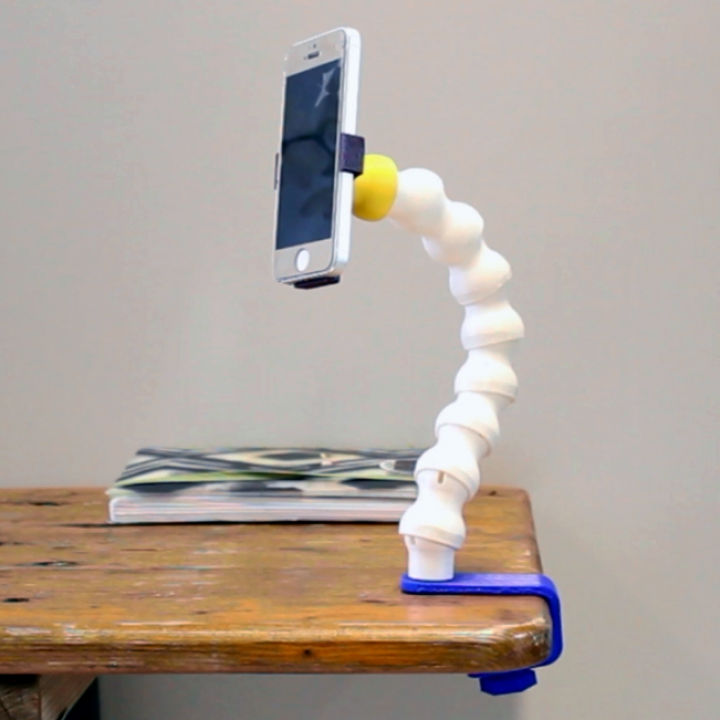 Moreover, it is not required to design such a structure: this is done by the slicer program. As a rule, it is enough to set only the percentage of filling (the closer it is to 100, the more solid the object will turn out) and select the type of cells, if the printer has such an opportunity. nine0003
In addition to saving time and material, the internal honeycomb structure has many other advantages.
Cellular filling prevents warpage
Printing large objects as a single piece introduces a danger of warpage. By reducing the infill percentage, the air during printing passes through the part, providing more uniform cooling and eliminating warping.
Cellular filling does not cause strength loss
Printing cells instead of solid material does not reduce the strength of the part. In many cases, a honeycomb part is strong enough for the chosen application, but lighter and less material intensive. nine0003
The function determines the choice of cell geometry
Most slicers support a wide variety of cell geometries. The optimal option is determined by the functional purpose of the object. Standard box padding simplifies printing, while hexagonal and triangular boxes add strength. Wave fill allows the object to bend or twist.
How do I choose the right filling percentage?
In general, the strength of an object increases as the percentage of infill increases. Most printers have a default infill percentage of 20, which is optimal in some cases but too high or too low in others. Consider mechanical stresses in the printed object and increase the percentage of infill in areas where greater strength is required. If high strength is not required, choose the lowest possible filling. This saves material and speeds up printing. Most often, the selection of the optimal percentage of filling is done by trial and error. nine0003
Ways of fastening the workpiece to the table
“Rafts”, “brims”, “skirts” – these terms sound funny, but they just refer to the three main ways of attaching a 3D printed part to a printer table. Let's take a look at each of these methods and their areas of application.
Skirt
The skirt involves creating a few rings around the object at the beginning of the print to make sure the plastic is extruded normally. The skirt is not in contact with the object at all. It surrounds the printable area and helps start the fusing process. When creating a skirt, a large volume of hot thermoplastic polymer passes through the nozzle. This prepares the printer for printing the part itself. This guarantees good adhesion to the table and obtaining smooth surfaces of the object. nine0003
Brim
The brim is a wide, flat area connected to the main object as a support base (think of a brim of a hat). It is very similar to a skirt, but connected to the model. In addition to all the advantages of a skirt, the brim keeps the edges of the object being made on the table.
When printing, the outside of an object often cools faster than the middle, causing the edges to curl. Brim prevents this phenomenon by holding the edges.
Raft
A raft is a detachable base, made in the form of a thin mesh platform, located under the entire object (which lies on the raft). To create a raft, the printer first prints a flat plate in two or three layers, and then begins to manufacture the object.
The rafts provide excellent adhesion to the table surface and also provide a strong print base. This is especially useful when making small and oddly shaped parts that do not fit well on the table, as well as thin-walled objects. nine0003
After printing is completed, in most cases the raft will separate easily from the part.
If the printer does not have a heated desktop function
Rafts are used if the printer does not have desktop heating.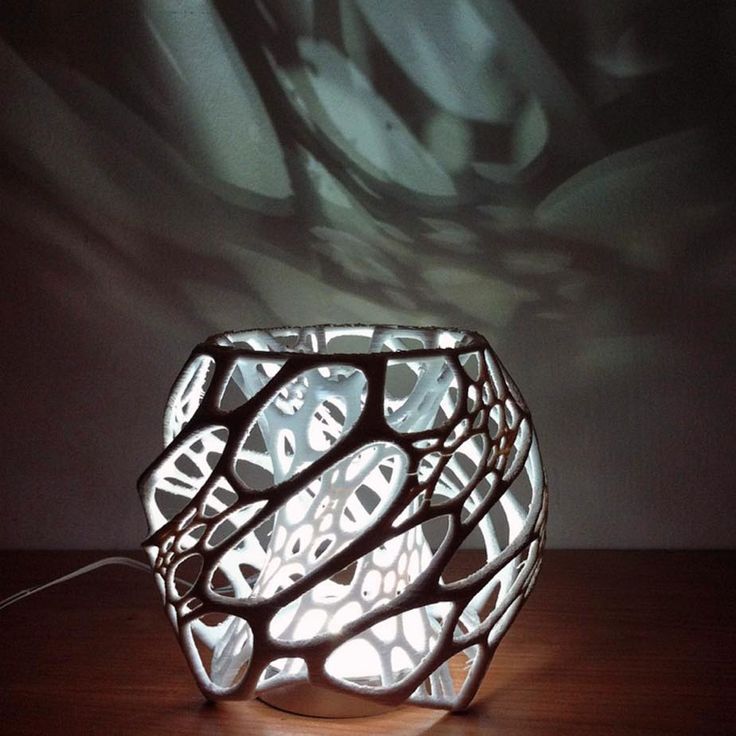 In this case, excessive adhesion becomes a problem.
An alternative method is to apply adhesive paper tape to the printer platform, with the edges down if possible (this protects the platform itself). You can also use packing tape, but it is usually more expensive. nine0003
If buckling does occur or the object separates from the table, apply a soluble glue stick to the adhesive tape. This will enhance adhesion.
Find out the features of a specific 3D printer and take them into account when preparing your model
3D printing is not only a science, but also an art. Effective design for subsequent 3D printing requires an understanding of the technological process, taking into account its features and the purpose of the future object. This will greatly improve print performance. nine0003
Using Solid Edge in 3D printing
Not all CAD systems are suitable for 3D printing
The capabilities of the applied system should not limit the designers. Our Solid Edge system is designed with the latest 3D printing technologies in mind. Various 3D printers and 3D printing services are supported.
Take it to the next level with specific techniques for designing 3D printed parts
Generative modeling in Solid Edge opens up new possibilities: the designer selects a specific material, sets the design space, allowable loads, restrictions and target mass of the part, and the system automatically calculates the desired geometry. As a result, 3D printing methods can produce the most complex shapes.
In addition, when building models, the use of the results of three-dimensional scanning is provided. Solid Edge successfully combines the traditional boundary representation of solid models (B-Rep) and the representation of surfaces in the form of a grid of triangles, which avoids time-consuming transformations that are fraught with errors. nine0003
If you've already downloaded an STL file for printing, our unique synchronous technology allows you to quickly and easily edit your imported models in Solid Edge in preparation for the process.