3D scanner instructables
6 DIY 3D Scanners You Can Build at Home
Creating a 3D model of a real object can be done extremely fast if you have a 3D scanner at home. The problem is: 3D scanners are expensive to buy new.
If you're looking for a solution, why not try building your own affordable 3D scanner at home? It might not create perfect 3D models, but it's a cost-effective alternative to buying a 3D scanner.
Is It Cheaper to Build a DIY 3D Scanner?
The cost of buying a decent 3D scanner ranges from $700 to $10,000 at the highest end. On the other hand, building a DIY 3D scanner can cost less than $200—some even as little as $35.
Depending on the resolution of your homemade 3D scanner, you will still have to work to tidy up the 3D model so that it can be used for things like 3D printing, game development, or perhaps design prototyping. But overall, it will still speed up the design process when compared to building a model from scratch.
1. Cheap 3D Printed 3D Scanner
This 3D scanner is built using 3D printed parts, featuring both open source software and open source hardware files. If you choose to install the maximum of four lasers, then the cost of the project comes in at $35 to $50. Once it's built, handling the digital scan will require some legwork to smooth out. But considering its price tag, it's well worth giving it a go.
You can find the STL files and a full build guide on Instructables. Besides the 3D printed components, you will need one to four lasers, a stepper motor, a turntable, and an Arduino Nano to bring it all together. One benefit of this project is that it's been built many times by community makers, resulting in plenty of images and feedback surrounding the project to help fill in any gaps.
2. DIY 3D Scanner Using a DSLR Camera
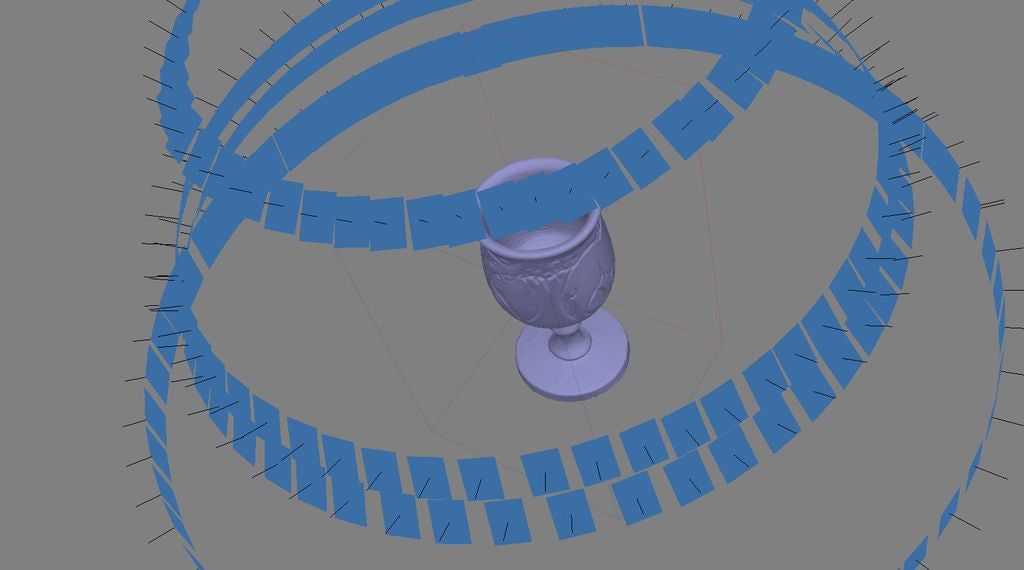
Another option for building a 3D scanner is to use a DSLR camera and a method called photogrammetry. At its most basic, it involves taking a lot of images of an object from different angles and stitching those photos together in a software program to create a 3D model.
Alongside a DSLR camera, you will need an Arduino, a stepper motor and driver, an LCD screen, and an IR LED. The goal of the hardware is to build a rotating platform that moves by set amounts so that your camera can photograph the object in a very detailed and controlled way. You can find a great explanation of the project on Instructables.
The real difficulty of this project comes in processing the photos. A good photogrammetry program is essential, and that can cost over $150 to license. There is some free software available, but it may come with limitations.
If you're wondering if there is an alternative solution, you can read our guide to how to turn everyday objects into 3D models without a 3D scanner.
3. Optical CT/3D Scanner With Arduino
For something a little different, in this project you will build a 3D scanner that also doubles as an optical CT scanner. This type of scanner will do the trick if you have objects that are semi-transparent, like a gummy bear or a segment of orange. Otherwise, you can use this setup with the photogrammetry method for regular 3D scans.
Everything in this build is enclosed inside a box. This allows greater control over lighting the object to produce sharper images. While it involves some woodworking and construction, the hardware is still powered by a humble Arduino Nano, plus additional parts that you can find at any hardware store.
A great guide is available on Instructables for building the box, alongside details for creating a sleek control panel for changing photo parameters on the go.
4. FabScan: Raspberry Pi + Arduino 3D Scanner
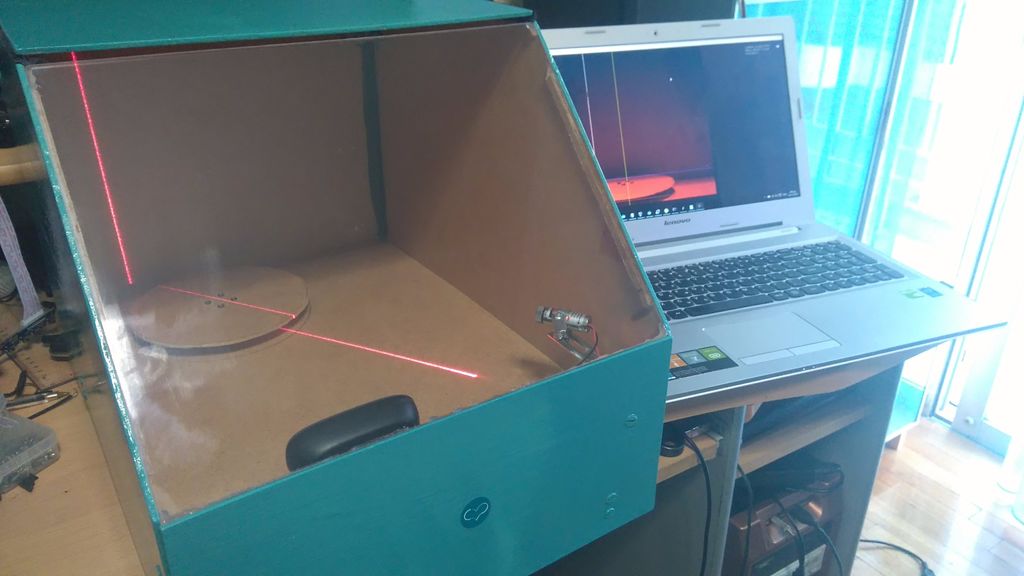
This 3D scanner uses both a Raspberry Pi and an Arduino to build a 3D laser scanner. What sets this build apart is that it can be operated remotely via a web browser on a phone.
Much like other DIY 3D scanners, a stepper motor and driver are used to rotate a turntable holding the object you want to scan. Additionally, you will need a line laser and a Raspberry Pi camera. You can find the guide and a full components list on Instructables.
While the creators have gone with a laser-cut MDF box, you can just as easily use spare parts lying around the home to create the enclosure.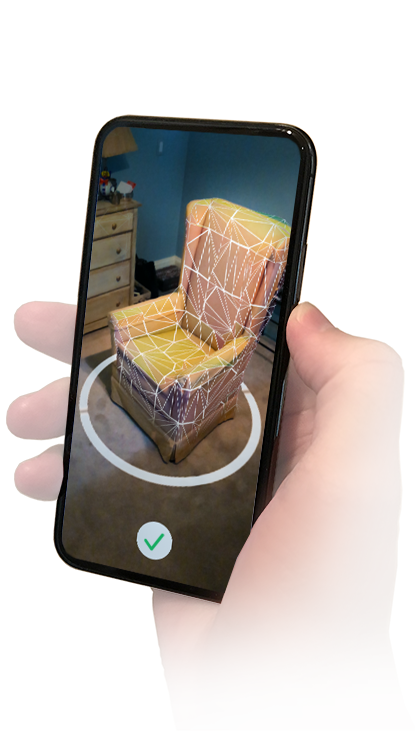 Alternatively, cardboard can work too, and painting it black will aid in diffusing the laser light so that it doesn't interfere with the scan.
Once you have a good scan of your object, you might be interested in 3D printing it. Haven't got a 3D printer? Here is our pick of the best 3D printers.
5. The Ultimate Human Sized 3D Scanner With Raspberry Pi
While most homemade 3D scanners are built to capture a small object, it's also possible to build a human-sized 3D scanner. The way to do this is with a lot of Raspberry Pis, as you can see over on Instructables.
The maker behind this project scaled up his 3D scanner using a whopping 47 Raspberry Pis plus a Raspberry Pi camera for each module. The goal was to use the photogrammetry method to take a photo of his subject from every possible angle. Because he wanted to capture a 3D model of his two-year-old son, this all had to happen instantly.
Incredibly, it works, and it works very well too. If you have the time and investment to buy a box full of Raspberry Pis, you won't be disappointed because the results are impressive.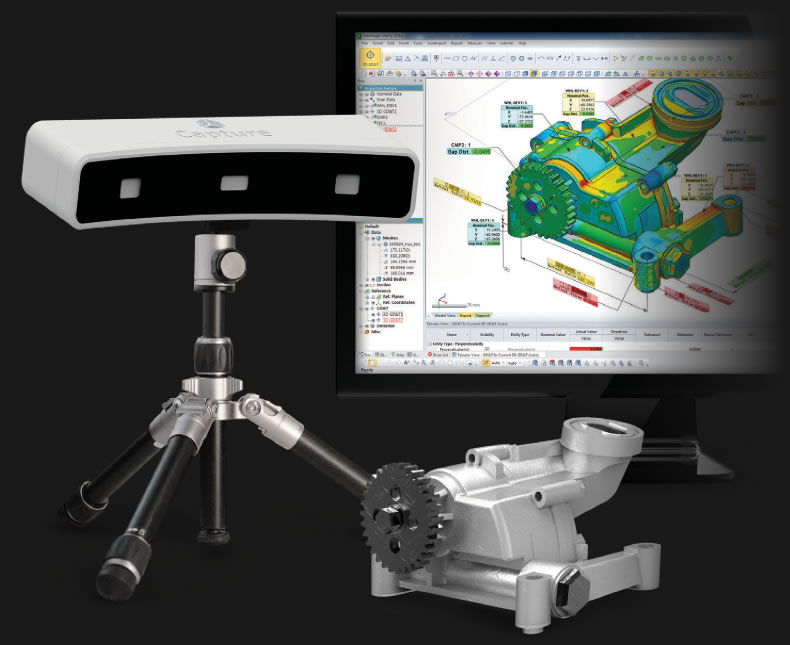 The maker says you can use fewer Pis and cameras and still get good results, especially if you only need to capture the front of a person’s face.
6. Standalone 3D Scanner
Maybe you're just after a simple and small 3D scanner that you can make over the weekend. If so, then this project will suit you. This 3D scanner on Instructables is designed to be all-in-one, meaning that the photos are compiled onboard and an STL file is saved directly to a memory card. Instead of compiling the photos in a separate photogrammetry program, this 3D scanner handles them for you.
While it doesn't produce incredibly detailed scans, it does make for a rapid way to take a 3D model straight to 3D printing. One thing to bear in mind, however, is that the dimensions of the 3D scanner structure need to be kept exactly as written in order to match the code.
Building a Homemade 3D Scanner
Putting together a 3D scanner at home isn't extremely difficult to achieve. When compared to the expensive price of commercial 3D scanners, it's well worth building a DIY 3D scanner yourself.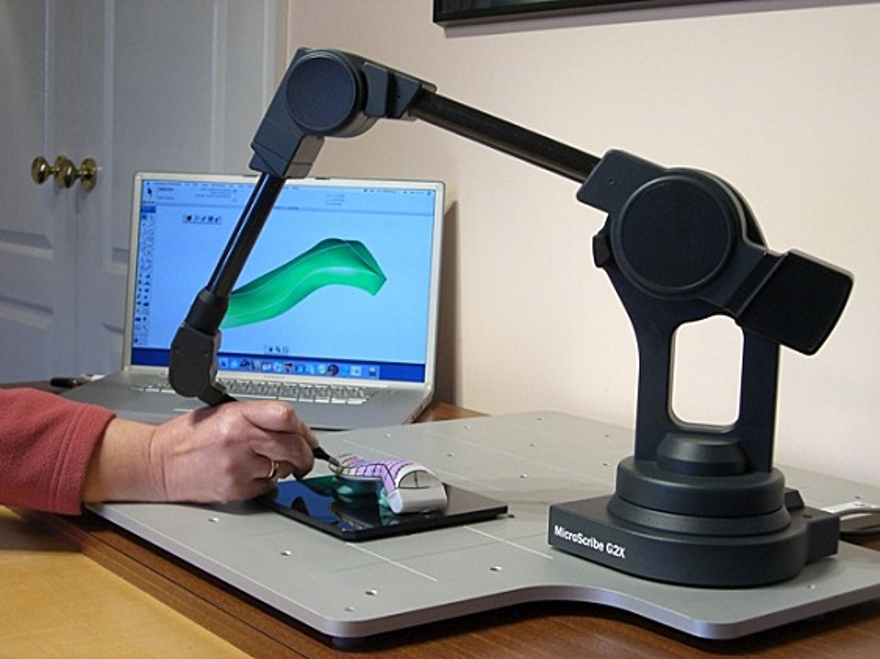
With a Raspberry Pi or Arduino and a few extra affordable parts, you'll be well on your way to creating a cheap and awesome 3D scanner.
John Price - Stereoscopic 3D Scanner Design Project
University of Kentucky Major: Computer Science Minor: Math Graduating May 2016 Individual Activity for John Price II _________________________________________________________________________________________________________________________________________________________________________________________________________ 2/7/2016 – 2/14/2016 I researched the internet for instructables and other information regarding building a 3D scanner, per Dr. Dietz’s suggestion. Many of the do-it-yourself scanners out there use the single camera with a laser line approach. I am having trouble finding good DIY information for this approach but have found a couple of academic papers that look promising. I found a paper that describes a structured light approach that uses a projector to project a greyscale light pattern on the object of interest and utilizes two cameras. Although, in our project, we would like to use a laser line instead of a greyscale projection, the pinhole cameral model and triangulation methods give some insight into the math behind using two cameras to scan an object. This paper can be found at http://mesh.brown.edu/byo3d/notes/byo3D.pdf. From my online research, I also discovered a powerful open source software library called OpenCV that we have decided to use for our scanner. Last, I found an instructable that has files for making 3D printed parts for mounting the cameras and laser to extendable tracks that radiate from a central printed platter. We can attach the stepper motor to the platter and rotate the platter in steps to get stereo images for each position of the motor. The website for the instructable is found here: http://www.thingiverse.com/thing:159981. Dr. Dietz said we are welcome to use his 3D printer to print any parts we need. _________________________________________________________________________________________________________________________________________________________________________________________________________ 2/15/2016 - 2/21/2016 I conducted more research regarding the stereo camera approach for 3D scanning. I also read through chapter 10 from Practical OpenCV (Technology in Action) by Samarth Brahmbhatt. This chapter discusses 3D reconstruction from a stereo camera setup. The technique is mathematically intensive and several pieces sections of code are given to illustrate how one might handle 3D reconstruciton using OpenCV. However, it is far from a DIY guide. Dr. Dietz had mentioned that he would be fine with our team using a DIY guide or online Instructable if we wrote part of the code ourselves and tried to improve upon it. I found an Instructable that uses an Arduino nano, a stepper motor, laser lines and a camera to make an inexpensive 3D scanner. The team could use the parts provided by Dr. Dietz, a laser line, a stepper motor and an Arduino nano, to build the scanner. The parts would not be the exact parts used by the Instructable I found here: http://www.instructables.com/id/Build-a-30-laser/ but the open source software was written to accept plugins. The team would write the plugins for the webcam provided by Dr. I will present the possibility of using this Instructable for our project when me meet n Tuesday, 2/23/2016. _________________________________________________________________________________________________________________________________________________________________________________________________________ 2/22/2016 - 2/28/2016 I worked on the design overview describing our 3D scanner project. What I wrote follows. With the advent of 3D printing, it is possible to print precision parts, or even toys and artwork at your desk. CAD tools can be used to design these items from scratch but in some cases a replica of an existing part is needed. In order to make a precise replica a 3D scanner is necessary. 3D scanners incorporate one or two cameras and a laser for the single camera option. Our scanner will use a single web camera, a laser, a stepper motor an Arduino Nano, a laptop and printed parts. We also use the source code from the Sardauscan Instructable (found here: http://www. Our goal is to have a scanner that requires minimal human interaction and is capable of making scans for the purpose of making parts usable by our client, Dr. Dietz. Dr. Dietz explained that his 3D printer is accurate to 100 microns. Therefore, we strive for a scanner that is as close to 100 microns of accuracy as possible. Last, the scanner will scan objects as large as Dr. Dietz’s printer is able to print; that is, about 1 cubic foot. In addition, I worked on the pseudocode for the plugins specific to the hardware we will be using for our project. The team met Sunday 2/28/2016 to work on the design phase and will be ready to discuss the design with Dr. Piwowarski on Wednesday, 3/2/2016. ___________________________________________________________________________________________________________________________________________________________________________________________________________ 2/29/2016 - 3/8/2016 I wrote the pseudocode for the three hardware plugins. __________________________________________________________________________________________________________________________________________________________________________________________________________ 3/21/2016 - 3/27/2016 I downloaded Cura to look at the STL files needed to print parts for our scanner apparatus per Dr. Dietz's suggestion. I alo signed up for Tinkercad so I can design a camera mount for the Webcam. The team met with Dr. Dietz to discuss printing parts and will meet on Tuesday to print them at Dr. Dietz's lab. _________________________________________________________________________________________________________________________________________________________________________________________________________ 3/28/2016 - 4/5/2016 I spent several hours in Dr. Dietz's lab printing parts and discussing the project. _________________________________________________________________________________________________________________________________________________________________________________________________________ |
3D Scanners - Pre-Purchase Instructions
In industrial and commercial applications - for examining building structures and taking precise spatial measurements, for digitally capturing crime scenes and cataloging works of art or fossils - 3D scanning has been used for many years. Meanwhile, 3D printing was gaining more and more popularity, especially among craftsmen and enthusiasts, and people wanted to read real objects and convert them into printable 3D models. nine0003
The market has of course responded, and today there are more low and very low price 3D scanners on offer than ever before. Prices for 3D scanners range from a few hundred to several thousand dollars, which should suit just about any budget. The decision on which 3D scanner to purchase depends entirely on what exactly it will be used for and how detailed you are going to scan objects.
Software Solutions
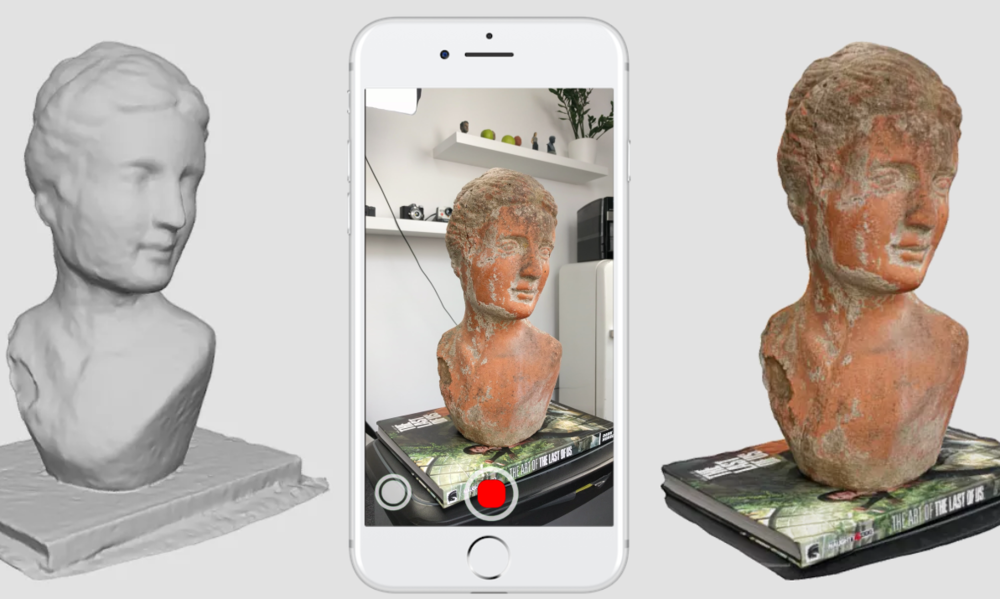
Depending on what you want to scan, you may not need to purchase a 3D scanner. It's possible that you already have the one tool you need to create 3D models, and this tool is in your pocket. There are several programs that take ordinary pictures, even taken on a smartphone, and then extrapolate the available data, creating a completely three-dimensional image. nine0003
This process is called 3D photogrammetry and starts by taking multiple pictures of the same object from different angles. The more images involved, the sharper and more detailed the final 3D model will be. This process may work on just three images, but for very detailed objects, dozens of them may be needed. Not only is this a less expensive option, it's also the best option for scanning 3D objects in public places or in the field where you don't want to carry additional 3D scanning equipment.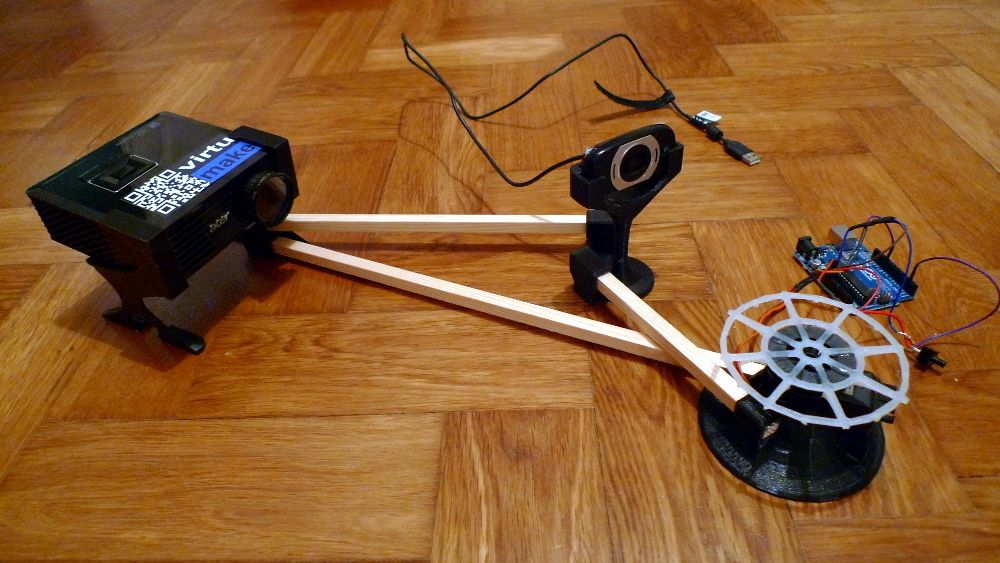 nine0003
Autodesk 123D Catch
Price: Free (or $9.99/month for 123D Premium)
Technology: 3D Photogrammetry
Because 123D Catch2 is a great part of the cloud ecosystem, 123D Catch2 is a great part of the Autoskde cloud ecosystem, so it’s a great part of the Autoskde Catch2 cloud ecosystem work on a smartphone or tablet. This makes it ideal for digitally capturing objects in public spaces that cannot be scanned in a studio—museum pieces, large structures, and natural formations. nine0003
Resolution: N/A
Pros: No 3D scanner needed, objects of any size can be captured, most program options are free, easy to use
Cons: Limited functionality, quality depends on lighting and number of source images ; may take several minutes to digitally capture an object, does not work well on humans or animals
Agisoft PhotoScan
Technology: 3D Photogrammetry
Agisoft PhotoScan is a stand-alone software suite specifically designed to generate high-quality 3D models from 2D photographs.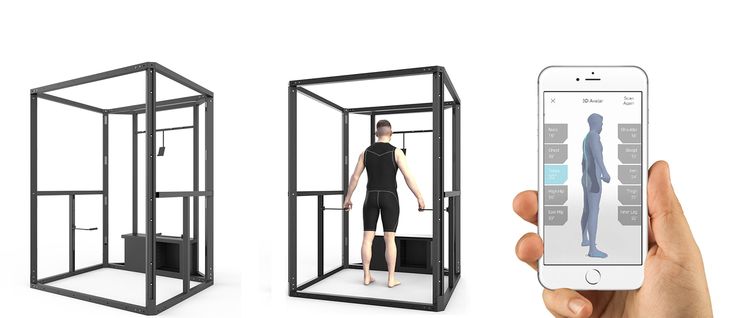 It was originally aimed at museums and libraries to work for the benefit of archiving collections of artifacts and works of art, so it is able to produce exceptionally detailed 3D models.
Resolution: N/A
Pros: Can create high resolution 3D models, one-time license is free, the program is easy to use, has many settings
Cons: Software needs to be installed on a computer, a high resolution camera is required
DIY options
If you can't afford to spend a few hundred dollars on a 3D scanner, there are also less expensive DIY options .
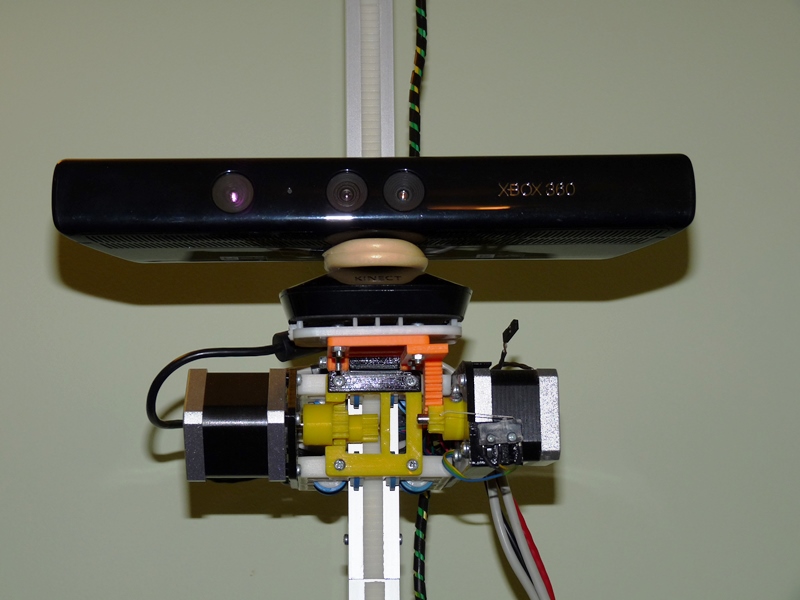
Xbox Kinect with ReconstructMe
Price: Kinect (various), ReconstructME (free)
Technology: RGB camera, depth sensor
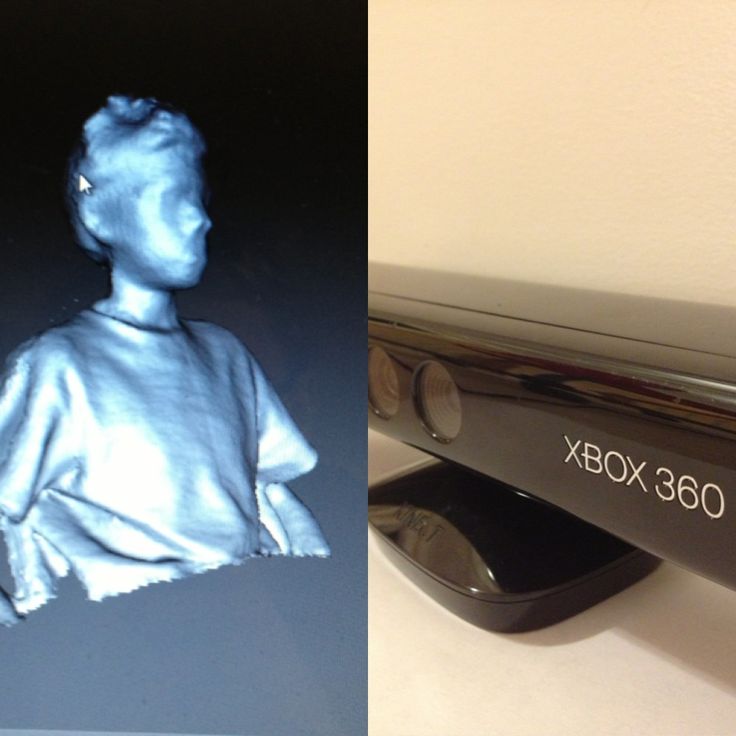
It's practically do-it-yourself, as it ends up assembling an inexpensive 3D scanner. Kudos to Microsoft for releasing a peripheral with a really powerful depth sensor and an RGB camera and leaving it open for use in third party applications! In this case, the combination of Xbox Kinect and free software like ReconstructMe is all you need to 3D scan people and objects.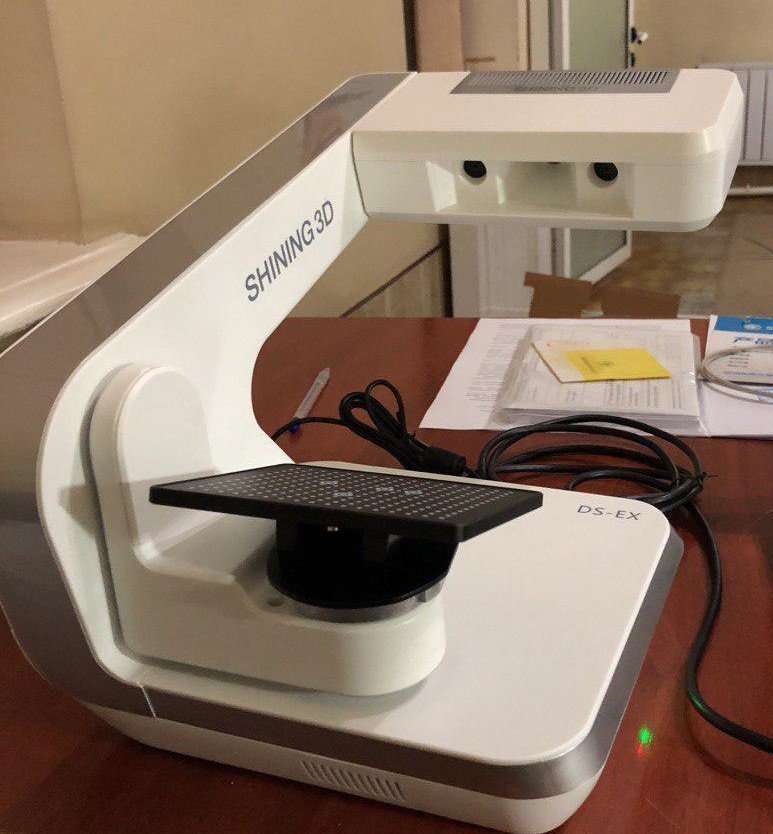
Resolution: When as
Pros: Cheap, flexible, free software
Cons: Windows only, limited resolution, unstable quality
BQ Ciclop
Technology: Laser triangulation
Ciclop is an open source desktop 3D laser scanner. The scanner uses printed components, so it can be made quickly and cheaply. This scanner can be purchased assembled or as a set of parts, and a parts list and free STL files are available online. Since the 3D scanner laser is a very delicate technique, self-assembly can be tricky and the results may vary depending on your skills. nine0003
Resolution: 0.5mm
Pros: Open source, build kit available, easy to modify and upgrade parts may not be as strong as traditionally made
Inexpensive 3D Handheld Scanners
A 3D handheld scanner, compared to a rotating 3D scanner, allows you to capture an object in a much wider range.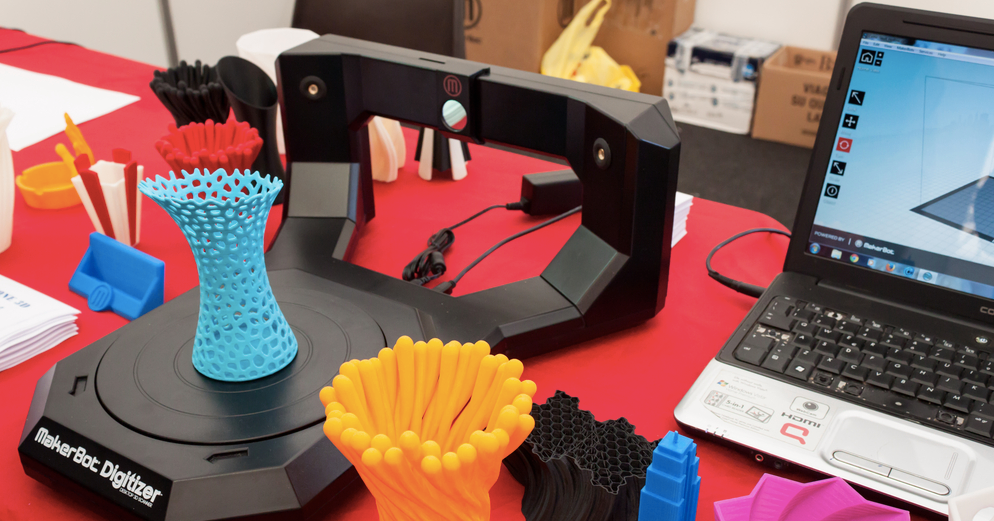 These types of devices are commonly used to scan people and large objects, and even low-cost models produce amazingly detailed results. Typically, it takes three to five minutes to scan an object the size of a person, and the more information you capture, the higher quality the final 3D scan will be. Such low-cost options may not be ideal for commercial applications, but for small businesses and individuals, this is the ability to quickly capture 3D data, including colors, patterns, and even texture. nine0003
XYZprinting 3D Scanner
Technology: Structured Illumination
XYZprinting's 3D scanner is one of the first devices to hit the market that uses the new Intel RealSense image capture algorithm. It is also the cheapest handheld spatial scanner on the market and is suitable for a wide range of applications.
Resolution: 1.5 mm
Pros: Low price, Intel RealSense technology, small size, portable
Cons: Windows only compatible, low resolution
Cubify Sense
Technology: Structured Lighting
Although the Cubify ecosystem is technically gone, 3D Systems continues to offer their 3D scanners.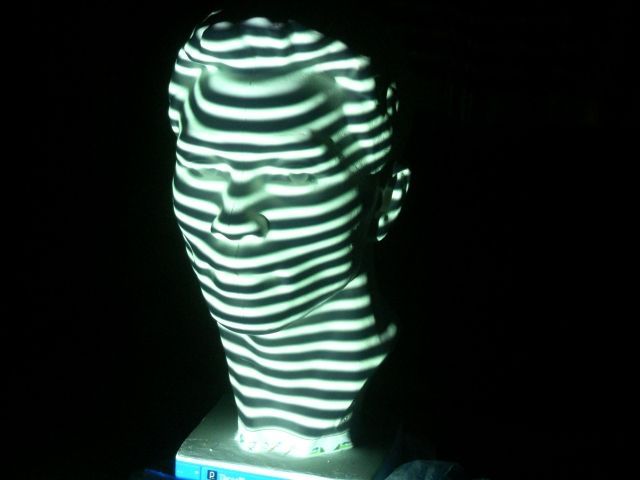 This handheld 3D scanner is easy to use, quickly converts scans into 3D printable files, and is backed by 3D Systems.
Resolution: 0.9mm
Pros: Small price, technical support, proven technology
disadvantages: Part of the non-working ecosystem Cubife, average scan, only under Windows
ISENSE 3D Scanner
9000 Technology: Structured lighting this 3000. the scanner from 3D Systems implies connection to the iPad and the presence of a powerful processor for obtaining 3D scans of quite good quality. A great option if you want maximum portability, because all you need is an iPad. nine0003 Resolution: 0.9 mm
Pros: Affordable price, portable, battery powered, works with iPad
Cons: Part of broken Cubify ecosystem, average scan quality, requires iPad
Sensor
Technology: Structured Illumination
Structure Sensor was one of the first low cost 3D scanners on the market, a successful Kickstarter project. The same technology is used in 3D Systems' iSense 3D scanner, so the two devices are almost identical. The Structure Sensor is completely portable and only requires an iPad. nine0003
Resolution: 0.9 mm
Pros: Cheap price, portable, battery powered, works with iPad
Cons: Average scan quality, requires iPad
Desktop 3D scanners
3D scanners use laser triangulation to capture high-quality details of small objects. These 3D scanners usually don't read colors and patterns, but they are accurate enough for all sorts of textures and details. There are, however, several models that fully read color and pattern data using either structured lighting technology or software implementations of the inverse transformation of laser reflection into color. nine0003Zmorph 2.0
Technology: Laser triangulation
The Zmorph 2.0 3D scanner is one of the most popular desktop 3D scanners on the market, and it also has excellent software. The device can not only capture fine details and texture, it also reads colors. It takes about five minutes to completely scan an object.
Resolution: 0.43mm
Pros: Good value for the price, color capture, portability, multi-format export
Cons: Average scan quality, limited scan size, colors may be changed or inaccurate
MakerBot Digitizer
Technology: Laser triangulation and textures, but does not distinguish colors. The scanner integrates seamlessly into the MakerBot ecosystem and users have access to technical support and a MakerCare service plan. nine0003
Resolution: 0.5 mm
Pros: Part of the MakerBot ecosystem, lightweight
Cons: Doesn't understand colors, doesn't capture reflective or transparent objects, expensive for this scan quality, only exports to STL
EinScan- S
Technology: Structured Illumination
The EinScan-3 desktop 3D scanner is one of the best of its type on the market. It distinguishes very small details, patterns and produces realistic colors. Unlike most desktop models, it uses structured lighting technology, which gives higher quality scan results. nine0003
Resolution: 0.17 mm
Pros: High quality scans, color capture, export to different formats
Cons: Only works with very small objects, not compatible with Apple OS
These are top options
The best 3D scanners available in any category, if we are talking about $10,000-$30,000 industrial devices. These models are ideal for a wide range of tasks, including scanning people, large and very detailed objects. The best available technology is at work here, these scanners offer the highest performance. However, these devices are primarily for commercial use, they are too powerful for home tasks. nine0003 RangeVision Smart
Technology: Structured Illumination
The RangeVision Smart 3D Scanner is the most portable desktop scanner available and can be set up outdoors to scan large objects such as cars with very fine scanning. It can also run on battery power, which is another plus for portability. The device has a flexibly adjustable tripod.
Resolution: 0.12 mm
Pros: Battery powered, high quality scans, color capture, export to various formats
Cons: Generates large files, expensive additional devices and accessories
DAVID SLS-3
Technology: Structured lighting
German David's 3D scanners are one of the best professional devices from David. They come with a host of accessories, including turntables, erection cranes and high-end software, making them very flexible. The SLS-3 is a scanner that ranks next to exceptionally high quality, powerful and modern industrial systems. nine0003
Resolution: 0.06mm
Pros: Very detailed scans, full color and textures, best in class, brilliant tech support and customer service, export to many formats
Cons: Too powerful for everyday needs , expensive
technologies, methods and principles of operation of 3D scanners
04/16/2021
Contents
-
- What is 3D scanning and what is it used for
- How 3D scanner
- 3D scan technologies operates
- Methods 3D scanning
- Contact 3D scanners
- Contact 3D scanners
- advantages and shortcomings and shortcomings and shortcomings and shortcomings Things to Consider When Choosing a 3D Scanner
- Applications
Currently, few people are not familiar with such a concept as 3D printing. Many companies are using modern 3D printers with might and main, recreating layouts of various shapes and sizes with their help. There are also those that recreate whole objects - not only small ones (for example, phone cases, souvenirs, sneakers), but also large ones (houses, engine parts, etc.). But all this would not be possible without 3D scanners. It is they who allow you to accurately copy almost anything - from huge buildings and structures to humans, animals, small objects and much more. nine0003
What is 3D scanning and what is it used for
Three-dimensional scanning is a technology that appeared in the 60s of the 20th century. It was created in order to transfer the physical parameters of the object into a digital format in the form of a three-dimensional model. The need for this naturally arose when people around the world increasingly began to use computers both in everyday life and in production.
The first samples of 3D scanners were quite simple and did not have wide functionality. Gradually, they became more complex and improved, making it possible to achieve an ever clearer image of the object. This has become especially relevant with the advent of lasers. nine0003
3D scanners allow you to transfer object data into digital format
3D scanning has opened up new opportunities in various areas of human activity - from the automotive industry and the military industry to design, medicine and cinema.
How a 3D scanner works
A 3D scanner is a device that examines an object by digitizing it using sensors and using the information received to create a three-dimensional model. In fact, a 3D scanner creates a digital copy of a physical object of any configuration and complexity. In this, it fundamentally differs from its predecessors - conventional scanners that can only read information from documents and photos. nine0003
The scanning process itself can take place in different ways - depending on the type of 3D device and the technology used, as well as on what object you want to process with it - moving or static.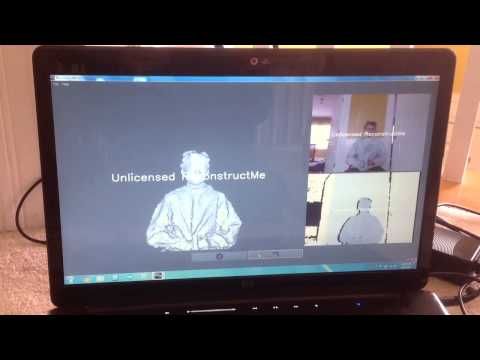
3D Scanning Technologies
There are 2 main types of 3D scanners - laser and optical. Their fundamental difference lies in how and with the help of what the “removal” of data takes place. Let's take a closer look at both.
Laser 3D scanning, as the name implies, uses a laser and can be carried out both at short and long distances from the object. nine0003
Laser Scanner
For the most part, 3D laser scanners work on the principle of triangulation, when the camera finds a beam on the surface of an object and measures the distance to it, after which a cloud of points is created, each of which has its own coordinates in space, and a 3D model is built. Their "advantages" are affordable price and ease of use combined with high scanning accuracy. Of the "minuses" - there are restrictions on the remoteness and size of the object. nine0003
Another type of laser scanner works by measuring the response time of a beam from the surface of an object - the so-called laser range finder. They are widely used where it is necessary to create 3D models of various buildings and structures. It is not advisable to use them at short distances, since in such cases the response time is very short and the accuracy of the data is reduced. Otherwise, this type of scanner is characterized by high scanning speed and the ability to read all the details. nine0003
The disadvantage of laser scanners is the impossibility of their use on moving objects. Then optical 3D scanners come to the rescue, which shoot with one or more cameras from different angles an object illuminated by a special projector. Based on the received image, a three-dimensional image is built.
Optical scanner
A "contraindication" for the use of this technology are reflective and translucent surfaces - shiny, mirror or transparent. But when scanning a person, they are simply irreplaceable. nine0003
3D scanning methods
Any object can be digitized both by contact and non-contact methods. In the first case, active interaction with the subject is necessary, in the second, accordingly, no. Both of these methods have their advantages and disadvantages.
3D contact scanners
They have a mechanical probe with a special sensor that measures parameters and transmits the collected information to the device. To do this, the object under study is placed on a special surface and fixed (if necessary). Such tight physical contact makes it possible to determine and then build a 3D image as accurately as possible, however, there is a small risk of damage to the prototype. nine0003
Non-contact 3D scanners
This category includes all devices capable of scanning at a distance. This is especially true for objects located in hard-to-reach places.
Non-contact 3D scanner
A stream of radiation (it can be ultrasound, light, X-rays or a laser) is directed to the object and reflected from it, it is recognized by the 3D scanner.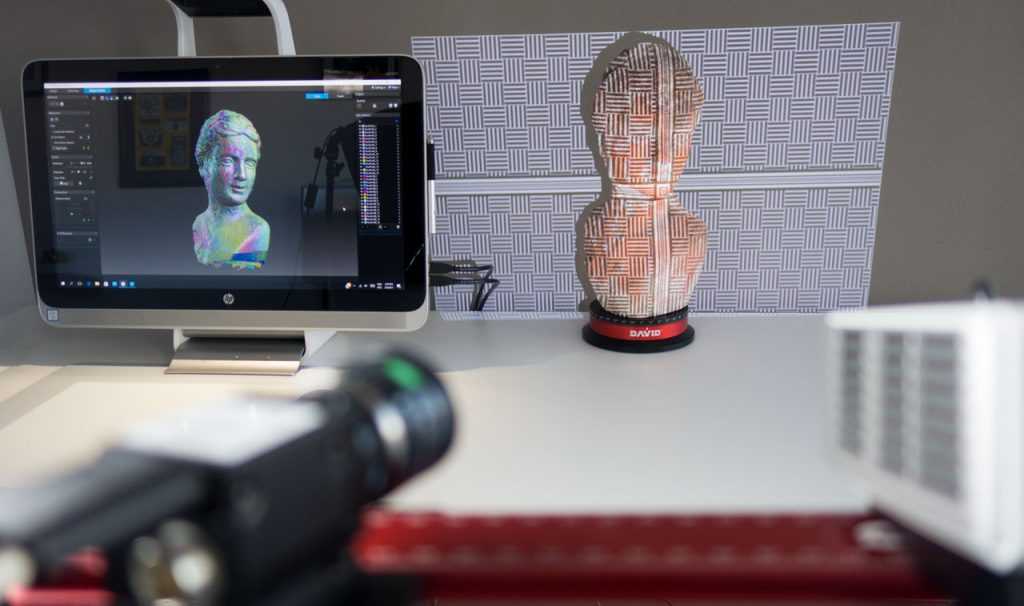 They are similar in principle to a video camera and may require the use of additional devices for better lighting. nine0003
Non-contact 3D scanners come in 2 types:
-
Active - work with a laser beam or structured light directed at an object, which, when reflected, give information about the location of the object in the form of coordinates.
-
Passive - use time-of-flight rangefinders that read the time and distance that the laser beam travels to the object, and so - for each point in space, which ultimately allows you to accurately recreate its three-dimensional image. nine0003
Desktop 3D scanners are very popular and widespread, since they are mostly simple and safe to use, do not require any special technical skills and are quite cheap. The EinScan-SE 3D scanner is one such example. It can be used both at home and in the office. It has access to the API of many popular 3D printers, which makes it possible to immediately print the created three-dimensional model.
Add to compare
Product added to compare Go
| Manufacturer | Thor3D |
Add to compare
Product added to compare Go
| Manufacturer | Shining 3D |
Add to compare
Product added to compare Go nine0003
| Manufacturer | Shining 3D |
Add to compare
Product added to compare Go
| Manufacturer | Range Vision |
Types of 3D scanners according to the principle of use
There is also a variety of species here. Let's highlight the main ones:
- nine0002 Manual: The are handy and simple models that are easy to use as they are quite compact and do not require special skills. True, their technical capabilities may be somewhat limited.
-
Portable: are mainly used for field work, they are convenient to take with you.

-
Desktop: have extended functionality and are used to create high-quality 3D models. Most often used in offices. nine0003
-
Stationary: are used, as a rule, in production, various enterprises, as they can scan a large number of objects of the same type at once. Mounted on special turntables.
Handheld 3D Scanner Calibry
Such a choice of products allows you to select the right model for a specific task. In some cases, scanners independently measure objects, in others - with the help of a person who sequentially moves the device until all the necessary information is collected. nine0003
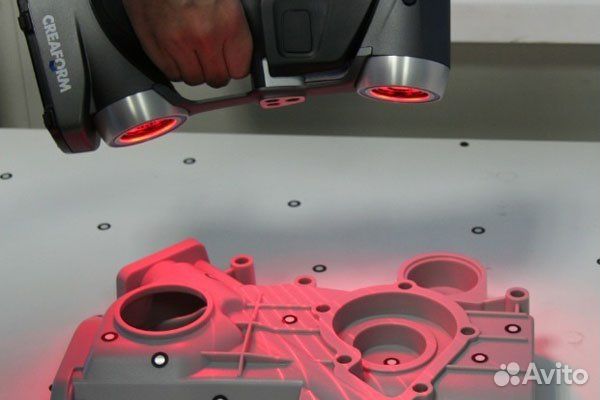
Such options for hand-held 3D scanners as Calibry are in high demand among buyers. Despite the apparent simplicity of execution, it has a high resolution and scanning accuracy, due to which it is able to digitize objects with a length of 0.2 to 10 meters.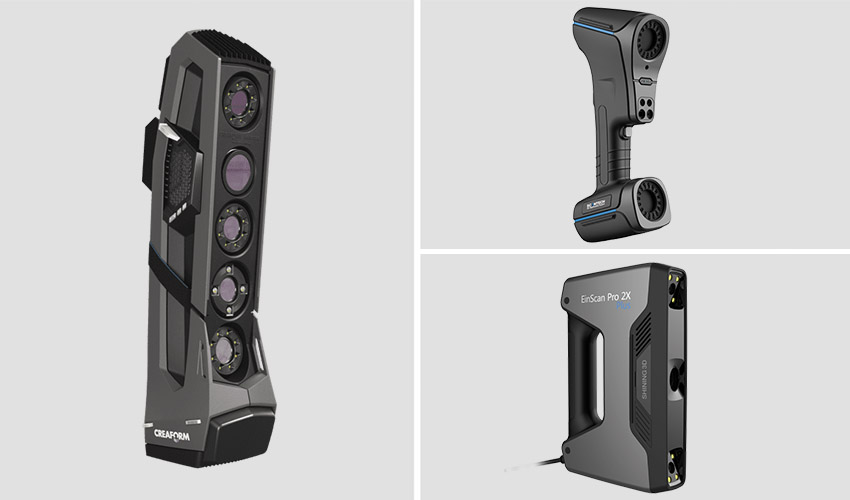 Objects that have a non-standard surface - dark or shiny, with a large number of corners and small details will not become a problem either. Among other things, its undoubted advantage is its low weight, only 900 grams. nine0003
Advantages and disadvantages of 3D scanners
Surely, many of the potential buyers are wondering: do you really need a 3D scanner to invest a lot of money in it? What can this acquisition give and will such an investment be justified?
3D scanning has become an integral part of any modern manufacturing process
In order to understand how much you need this equipment, we will list its advantages and disadvantages. nine0003
Benefits:
-
They make it possible to scan objects located at a remote distance and in places inaccessible to the presence.
-
They have the ability to "read" not only colors and images, but also to convey the texture of the surface.
-
Significantly speed up the process of "taking" data from any object, even a very complex one with a large number of planes. nine0003
-
A variety of models allows you to choose the most convenient version of the scanner, including manual or portable, which can be easily taken with you.
Weaknesses:
-
Some scanners are unable to recognize transparent or black and white objects. In this case, their preliminary preparation (treatment with a special composition) is required. nine0003
-
I do not always display complex objects correctly, with a large number of inserts and partitions.
-
To obtain a high-quality result, they require skills and abilities to work with certain computer programs for creating 3D models.
-
If the rules of operation are constantly violated, it may become necessary for expensive repairs to the equipment.
 nine0003
If you need high-precision and high-quality three-dimensional copies of objects, then you cannot do without a 3D scanner. It makes it possible to work in almost any conditions - indoors and outdoors, and with any objects by type and size. It is not surprising that now these devices are in great demand, which gives rise to the annual release of a large number of models, from which you can always choose the one that suits you in terms of quality and price.
Things to consider when choosing a 3D scanner
The computer equipment market offers a huge amount of all kinds of equipment, including devices for three-dimensional scanning. Navigating that variety is sometimes not at all easy: some buyers are only concerned about the cost, others are interested in the number of options (sometimes completely useless), but the most far-sighted look at the ratio of the first and second.
Choosing the right 3D scanner is a big deal
It is not always easy to take into account all the technical points that can significantly affect what result will be ultimately achieved.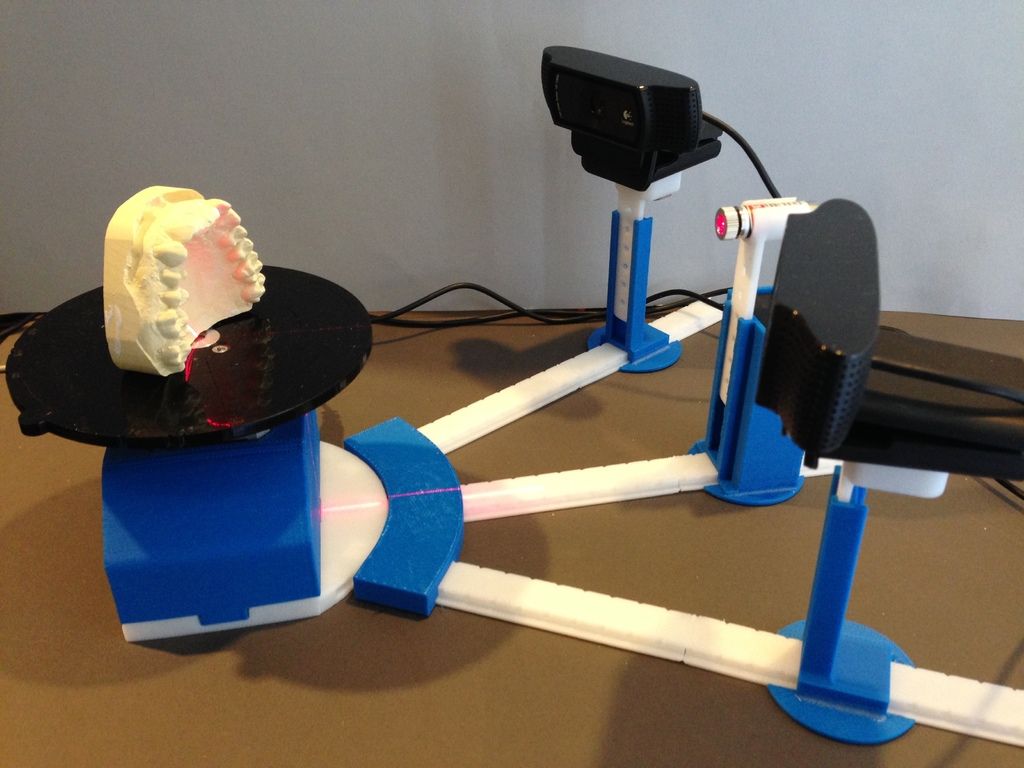 We will tell you what you should pay attention to if you are thinking about buying a 3D scanner.
Focus on the following parameters:
-
How high is the accuracy of the 3D scanner. This is one of the most important features. It needs to be targeted first. nine0003
-
Resolution also plays an important role. It follows from the first, since the accuracy of measurements and the quality of copying depend on the resolution.
-
In what range the device operates, how close / far it can be from the scanned object.
-
The scanning field is the parameters of that object, thing that it is able to process in 1 session. nine0003
-
Does the scanner capture various atypical types of surfaces with complex terrain - channels, partitions, holes, etc.).
-
Portability, mobility of the device - how easy it can be moved if desired, taken with you, its size.
-
The time it takes to prepare for work, as well as the duration of the digitization process itself. nine0003
-
The range of possibilities in terms of copying: are there any restrictions on shapes, textures, material, as well as operating conditions - temperature, light, etc.
Of course, the better the quality of the 3D scanner, the more expensive it is. However, you should focus primarily on the tasks that you face, and only then take into account everything else.
Applications
Three-dimensional scanners are in demand in many areas of human life. They are irreplaceable both in the industry, and for household needs. The range of their application is so wide that it is possible to list for a very long time. It's easier to say where they are not needed.
The most common areas of use are, of course, medicine, industry, architecture, construction, film industry and design.
For example, in dentistry, these devices allow you to create ultra-precise three-dimensional models of dentures.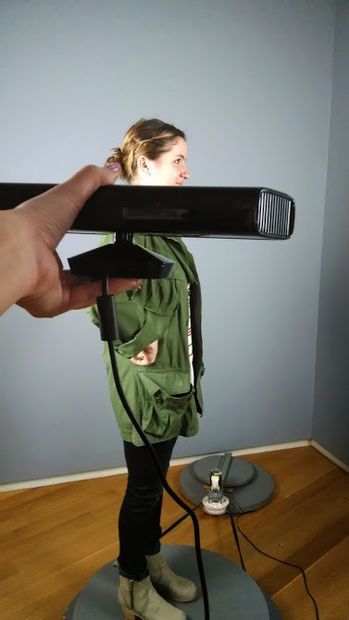 One type of such a scanner is Shining 3D's AutoScan DS-EX PRO, which does a great job with a variety of tasks while being quite affordable and reliable. nine0003
Medical 3D Scanner
In engineering, such technologies are also indispensable. Digital building prototypes are now much easier and faster to obtain than in the past, when it required multiple manual measurements and then entered into a database. Any physical object can now be recreated in three-dimensional form, moreover, in the shortest possible time and with a minimum error.
In cinemas, we can see with our own eyes "revived" fantastic characters, which were created using motion capture technology, which made them as realistic and impressive as possible. This would not have been possible without 3D scanners.
A few decades ago, it was even difficult to imagine all the things that we use all the time today. And in many ways this has become achievable thanks to three-dimensional digitization.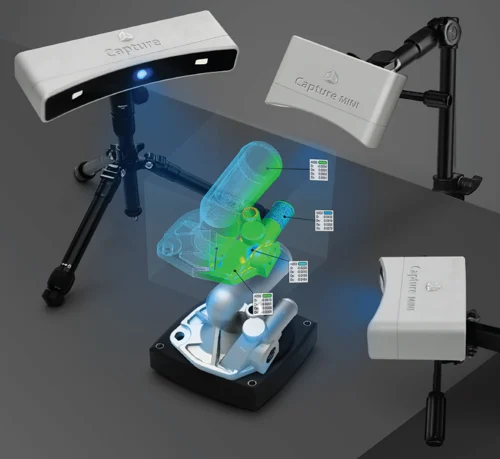


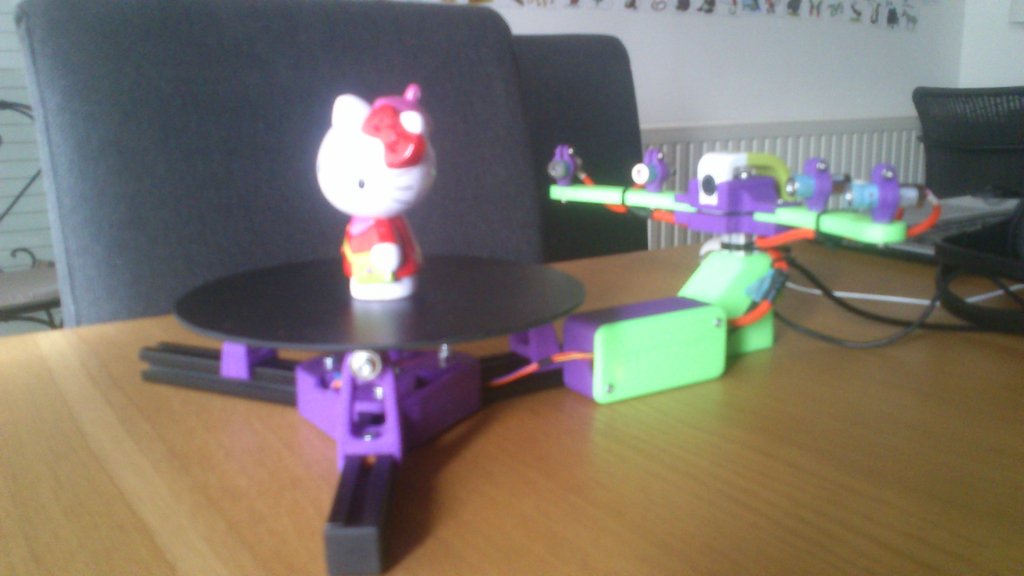 In addition, a stepper motor and central platter are used to rotate the object being scanned, in view of the camera, while the line laser projects onto the object of interest. However, our team is more interested in a stereo-camera with a line laser approach.
  This library has many powerful image processing functions. I also found a good textbook for learning OpenCV. It has a chapter devote4d to reconstructing 3D images from a stereo camera. The book is entitled Practical OpenCV (Technology in Action) by Samarth Brahmbhatt. I rented the Kindle version of this book from amazon.com for the rest of the semester.
 I read an article by Zhihua Lv and Zhiyi Zhang from Northwest A &F University in Yangling CHina entitled Build 3D Scanner System based on Binocular Stereo Vision printed in JOURNAL OF COMPUTERS, VOL. 7, NO. 2, FEBRUARY 2012. The article is found here: http://www.jcomputers.us/vol7/jcp0702-13.pdf. This article explores the technique of 3D scanning using a stereo camera setup with a single laser. The mathematical methods used to calibrate the camera and match points from the two separate cameras are discussed here.
  Due to the complexity of the image processing code that our team would need to write, I have reservations about pursuing the stereo camera approach. In fact, in the teams conversations with Dr. Dietz, he made it quite clear that this approach might prove too challenging. However, he also said he didn't want to tell us not to pursue this design. Given the amount of time the team has to produce a working scanner and the learning curve for OpenCV, I think using following and improving upon an instructable would be more realistic.
  Dietz.
 instructables.com/id/Sardauscan-sub-30-Opensource-3d-laser-scanner/) to create our scanner. We will write the plugins for the specific hardware we use (stepper motor, lasers and webcam) to interface with the Sardauscan source code.
  The plugins are for the specific camera, laser and stepper motor we will use. In addition, I met with Ryan and Layne to wrap up the high level design.
 In addition, the team met to discuss and create a testing plan. We will use stub programs to simulate the hardware output to the core program. That way we can do some testing before our plugins are actually coded. Once that is complete, we will finish coding our plugins.


