Raspberry pi 3d printer tutorial
How to Build Your Own 3D Printed Raspberry Pi Robot (Updated)
Skip to main contentTom's Hardware is supported by its audience. When you purchase through links on our site, we may earn an affiliate commission. Here’s why you can trust us.
(Image credit: Tom's Hardware)Update 7th August 2022: We've updated this article to include how to program the Explora in Python on page 2.
Original Tutorial Published June 4, 2022:
Building your own robot is one of the most satisfying things you can do. It combines mechanical, electrical, and programming skills together in a way few projects do.
I’ve been building robots for a couple of years now and love to expand my knowledge and skills by using different controller boards, motors, wheels, and sensors to detect the world around the robot.
Raspberry Pi robots are particularly impressive. The Raspberry Pi provides the robot with the full power of Linux and a plethora of Python libraries. With all of this power, it means we can add advanced machine learning, computer vision, and Internet connectivity into the mix. All this at an affordable price point and tiny form factor too.
Building Raspberry Pi robots from kits, such as Pimoroni’s Trilobot, or from a custom design such as Explora, is fun and helps develop skills such as programming in Python, mechanical design, and electronics. People love playing with robots and teaching them to perform tasks and move around the environment unaided.
Explora uses the Pimoroni Explorer pHAT (we included the Explorer HAT Pro in our best Raspberry Pi HATs guide) to control the motors and has a handy Python library to make this simple. Explora is programmed in Python and uses sensors to avoid obstacles and follow your handExplora can also be remotely controlled over Wi-Fi.
Explora can detect objects in front of it using an HC-SR04 ultrasonic range finder module. These modules come in either a 5v version or a 3.3v version (HCSR04+ or HC-SR04P).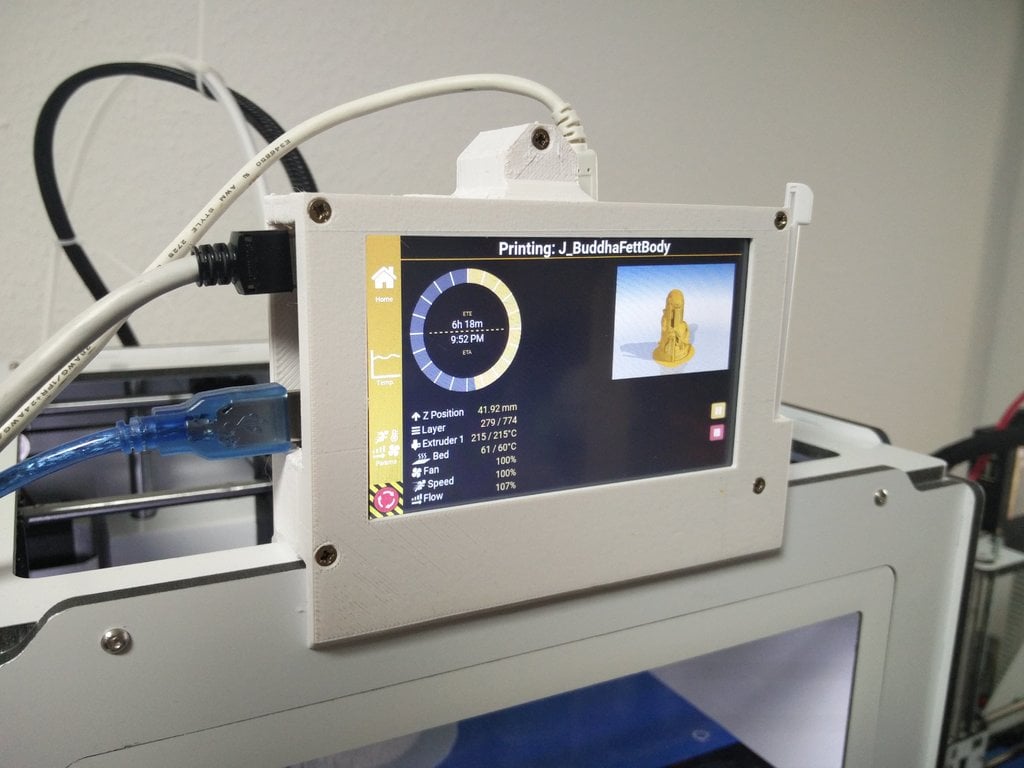 The Explorer pHAT is 5v tolerant, but it's best to get the HC-SR04+ or HC-SR04-P version to be on the safe side. Using the 5v version on a Raspberry Pi can damage the board.
Explora was designed using AutoDesk Fusion 360 . Each piece is a discrete component to enable easier 3D printing. Fusion 360 makes it really easy to export the models into STL files, ready for slicing and then 3D printing. To slice the robot parts (creating the instructions for a 3D printer to print the part) from Fusion 360 I use Cura, and then upload it to OctoPrint to manage the print jobs. The 3D printed parts are designed to be quick and easy to print, and the whole thing is easy to assemble using a couple of screws and wire up.
My personal choice of 3D printer is the Creality Ender 3 Pro and Ender 3 V2.
The electronics for the project are relatively straightforward and involve some soldering. You will need to solder wires to each motor and then to some Male DuPont cables (jumper jerky), one set per motor. You’ll also need something to hold the motors while you solder the wires to the tiny motor connectors which can be a bit tricky if you’ve not done this before. Some “helpful hands” or modeling clay is useful to keep the wires in place.
What You Will Need
- A 3D printer and filament
- 8 x M3 10mm screws and nuts
- 4 x N20 Motors
- 1 x Pimoroni Explorer Hat
- 1 x Raspberry Pi Zero 2 W / Raspberry Pi Zero W
- USB Powerbank battery pack
- 400mm of red wire - solid core is preferable over the braided wire
- 400mm of black wire - solid core is preferable over the braided wire
- 8 x M2.5 Stand-offs (with male screw)
- 4 x M2.5 Stand-offs (without male screw)
- 8 x M2.5 Screws
- 4 x Moon buggy wheels
- 4 x Male to female Dupont cables (200mm)
- Some velcro straps for the battery pack
- SD Card for the Raspberry Pi Zero
- PIR Obstacle sensor
Tools
- Soldering iron
- Solder and some flux
- Screwdriver
- Wire cutters
- Wire strippers
- Helping hands - for use with soldering
- A computer with an SD card reader slot
3D Printed Files
- 1x Chassis
- 4x Motor holders
- 1x Camera Holder
- 1x Camera back
- 1x Top section
Building Explora
(Image credit: Tom's Hardware)The print times for each of Explora’s parts depends on your specific printer and quality settings. I found the files took the following amount of time to print:
| # | Part | Approx Time to Print |
|---|---|---|
| 1. | Chassis | 5 hours 16 minutes |
| 2. | Top Section | 2 hours 22 minutes |
| 3. | Motor Holders - all 4 at once | 3 hours 44 minutes |
| 4. | Camera holder & Camera holder back at once | 2 hours 30 minutes |
I prefer to use PLA+ for my prints and usually have some white or yellow filament already in each printer, ready to go.
To Prepare Explora’s 3D Printed Parts
(Image credit: Tom's Hardware)1. Download the 3D printable STL files.
2. Slice the parts using Cura - We like to use Cura, but you are free to use an alternative. and don't forget to enable supports for the motor holders
3. Transfer the G-Code file from Cura to your 3D Printer. Save the G-Code file to an SD card (if that's how your 3D printer accepts files) alternatively you can use software such as OctoPrint that runs on a Raspberry Pi and presents a Web-based interface for managing 3D Print jobs. If you’re using OctoPrint you can drag the G-Code file over the left-hand side of the page and it will begin to upload the file, ready for printing.
4. Load the G-code and print - We used Octoprint to manage our print jobs
Wiring up Explora
(Image credit: Tom's Hardware)Soldering is an essential maker skill. Learning to solder opens up the entire world of electronics and this project could be your first steps on an exciting journey. If your motors come without any wires attached you’ll need to prepare your own wires and solder these onto the tiny motors. Soldering small parts can be tricky; you will need a steady hand and something to hold the motors while you hold the solder in one hand and the soldering iron in the other.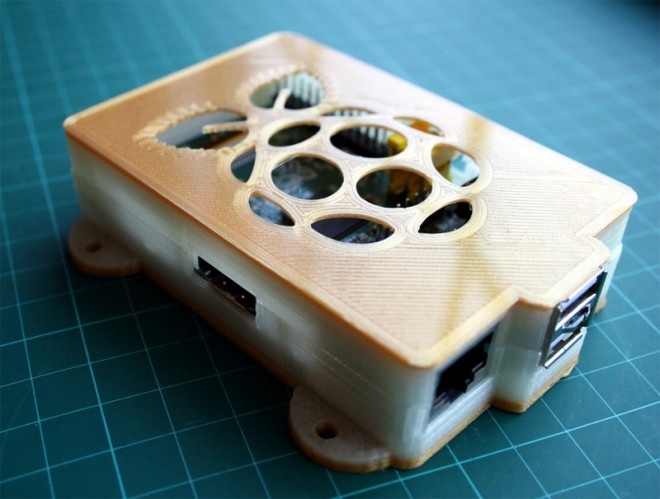
- Prepare the wires for soldering. Cut four strips of red wire 100mm long each and another four strips of black wire. We should have a pair of black and red wires for each motor.
- Strip wires. Strip about 4mm of wire from each end, exposing the copper wire. A good pair of wire strippers is an essential part of a maker's toolbox.
- Add Flux. Apply some flux to one end of the wire that will be soldered. Flux helps the solder run around the part correctly. Even if your solder comes with a flux core, a little extra flux will make soldering much easier.
- Tin the wires by adding a small amount of solder to the wires with your soldering iron. Tinning will help the wires solder to the small motor terminals
- Solder the red wire onto the motor terminal - you’ll notice a small + sign above the terminal that is the positive terminal. Take your time, as this can be tricky if you’ve not done it before.
- Push the wire through the hole in the terminal first to make a good mechanical connection and will help hold the wire in place as you solder, then solder the wire to the terminal.
- Repeat the last step for the black wire but this time solder the black wire to the Negative terminal on the motor.
- Twist red and black wires for strength. This will help strengthen the connection if you accidentally tug on the wires.
9. Solder the 40 pin header and 20 pin header to the Explorer pHat
(Image credit: Tom's Hardware)Assembly
The assembly part of the build won’t take long as it only involves screwing the four motor holders into the chassis using the M2.5 screw and nuts. Then we screw the standoffs into the chassis and Raspberry Pi Zero 2 W, and finally, we attach the Camera holders and top section.
1. Push each motor into a 3D printed motor holder. The motor holders ensure that the motor remains in place on Explora’s chassis. They also offer mechanical rigidity so that the motors do not move position in use.
2. Put a nut into each hexagonal pocket on the motor holder, then screw it from the top side of the chassis through to the motor holder into the nut. Don’t over-tighten as you’ll end up splitting the chassis. This will create a substantial connection between the motor holder and the chassis.
(Image credit: Tom's Hardware)3. Add stand-offs to the chassis by screwing four M2.5 screws into the bottom of the chassis, and screw on a stand-off barrel onto the exposed screw thread until it becomes tight against the chassis.
4. Add four stand-offs to the Raspberry Pi Zero, then attach the Explorer pHat.
(Image credit: Tom's Hardware)5. Screw the Raspberry Pi Zero into the Chassis stand-offs.
6. Push the Camera Holder into the Chassis.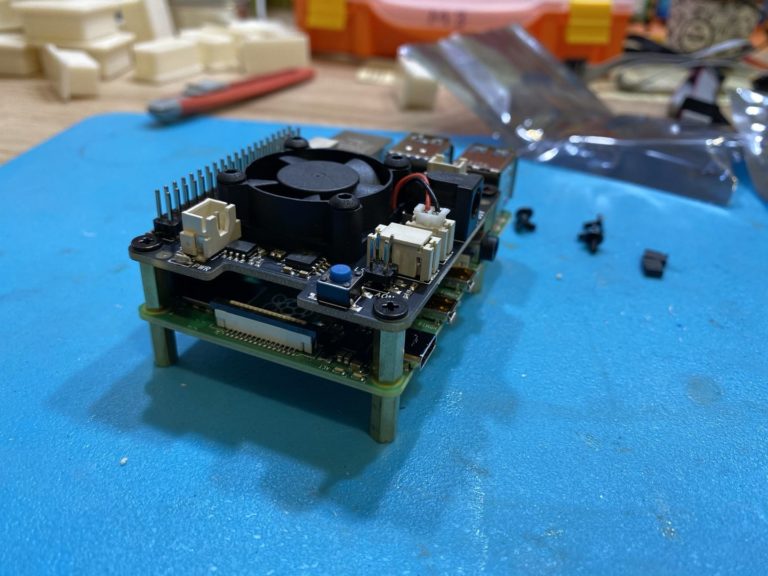 You may need to file off some material if it's a tight fit.
7. Push the ultrasonic rangefinder into the Camera Holder.
8. Push the female end of the DuPont wires onto the Rangefinder.
9. Push the male end of the DuPont wires onto Explorer pHATs 5v, GND, Output 1 to Trigger, Input 1 to Echo connections.
10. Push the Camera back into the Chassis.
(Image credit: Tom's Hardware)11. Add the last four stand-offs onto the Raspberry Pi Zero
12. Push the Top section over the two camera holders and screw the last 4 M2.5 screws from the top section into the standoffs
13. Using a velcro strap, secure the battery in place.
(Image credit: Tom's Hardware)14. Push the 4 wheels onto the ends of the motors. The motor axles are D-shaped, be sure to match the alignment of the axle to the wheel before firmly pushing on.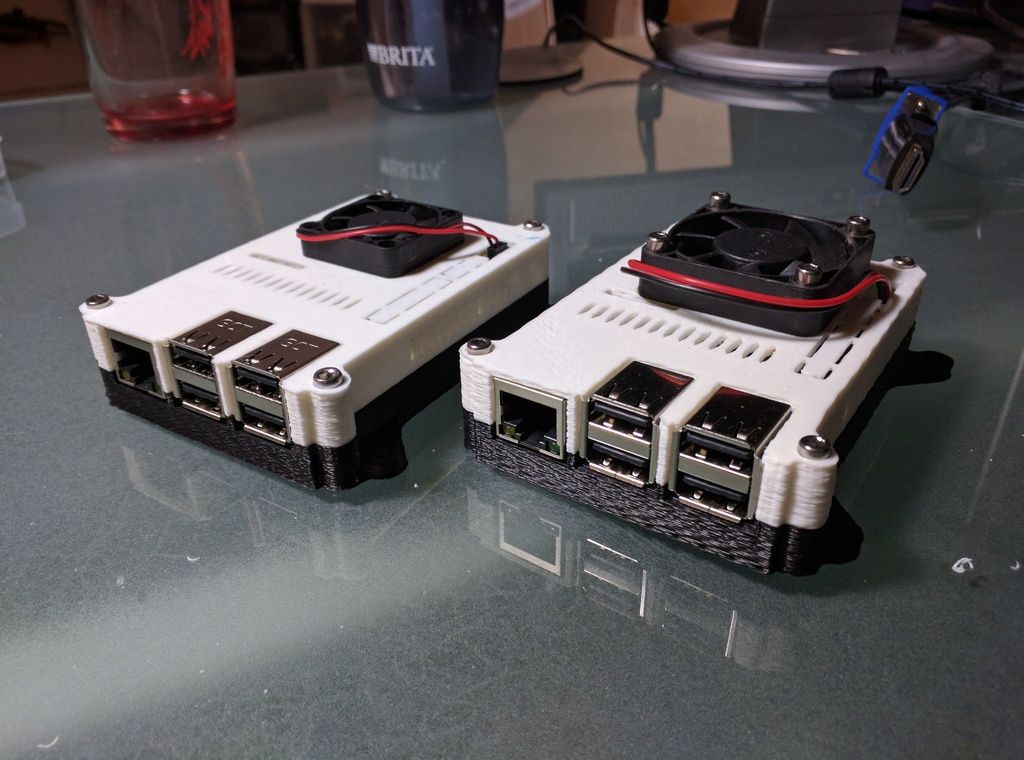
Preparing the Raspberry Pi
The Raspberry Pi needs a suitable OS to run the Python code to control the motors and optionally capture images. When the Raspberry Pi camera first launched a software library called PiCamera was provided to make it simple to capture stills and video. With the most recent release of Raspberry Pi OS ‘Bullseye’, this old library has been replaced with a library called LibCamera, which is not backward compatible with PiCamera. On the 32-bit release of Bullseye you can choose a legacy camera option from raspi-config, however, this option is not available on the 64bit release.
1. Using the official Raspberry Pi Imager tool, flash the latest 32-bit OS to a micro SD card. We use the 32-bit version of Raspberry Pi OS because the PiCamera library is currently not compatible with the 64-bit version of Raspberry Pi OS.
(Image credit: Tom's Hardware)2. Put the micro SD card into the SD card reader slot on your computer.
3. Select the micro SD card from the Raspberry Pi imager Storage menu.
(Image credit: Tom's Hardware)4. Click the Advanced (cog) button, and add your Wi-Fi SSID and password details to enable the Raspberry Pi to connect to the wifi automatically.
(Image credit: Tom's Hardware)5. Click on Enable SSH and create a username and password. SSH enables a remote to the Raspberry Pi using a terminal without the need for a monitor, keyboard, or mouse.
6. Click Write to begin flashing the image to the micro SD card.
(Image credit: Tom's Hardware)7. Insert the micro SD card into the Raspberry Pi and then power up the Raspberry Pi via the power bank.
Connecting to the Pi
1. Find out the IP address of your Raspberry Pi - you can usually do this from your router (or wherever your router gets its IP addresses from, or by typing:
ssh pi@raspberrypi.local
- where `pi` is the username you created earlier in step 5 above.
2. Launch Terminal - if you’re on Windows, you’ll need to use some terminal software such as Putty (https://www.putty.org). Mac and Linux computers have terminal build-in.
(Image credit: Tom's Hardware)3. SSH to the Raspberry Pi - Type `ssh [email protected]>` into the terminal to connect to the Pi. Linux / Mac users can use the following to SSH into the Pi. If you know the IP address you cal also type `ssh@<ipaddress>`, where <ipaddress> is the IP address of the Raspberry Pi.
ssh [email protected](Image credit: Tom's Hardware)
From the Raspberry Pi terminal, clone the Explora software repository. The software is on Github, and we can use the git clone command to download the latest version to our Raspberry Pi:
git clone https://www.github.com/kevinmcaleer/explora(Image credit: Tom's Hardware)
4. Install the Explorer Library via Pimoroni’s online install script.
curl https://get.pimoroni.com/explorerhat | bash
4. From the Raspberry Pi terminal, clone the Explora software repository. The software is on Github, and we can use the git clone command to download the latest version to our Raspberry Pi:
curl https://get.pimoroni.com/explorerhat | bash
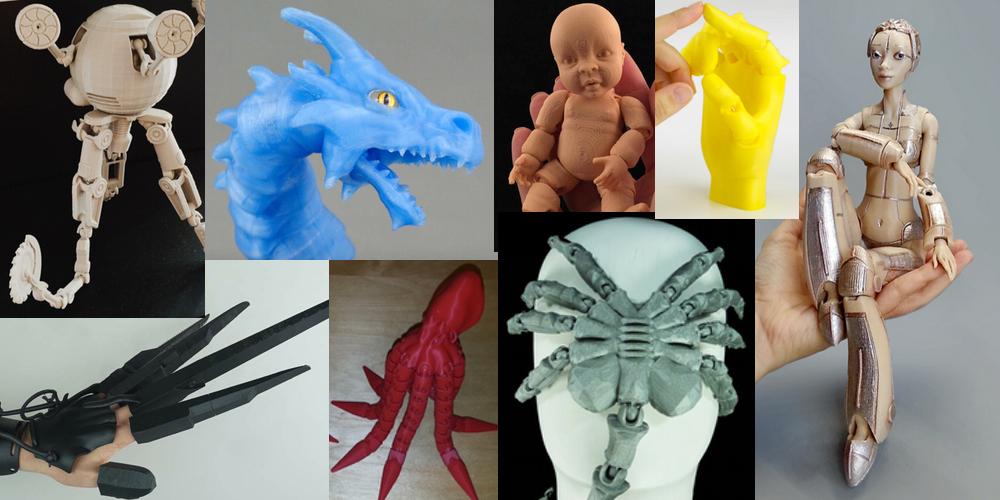
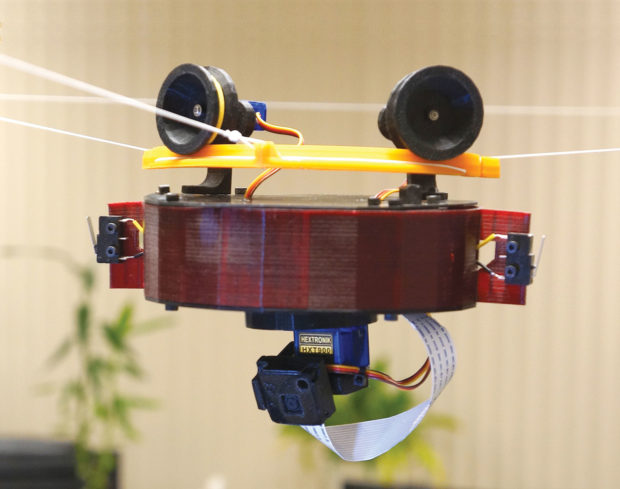
You should now have a fully assembled Explora robot on your desk, ready to receive your first Explora Python program. You can expand the capabilities of Explora by adding a LIDAR laser scanner and Raspberry Pi Camera such as the ones in the picture below.
Next, we create some programs for Explora in Python to move the robot around and detect objects.
- 1
Current page: Building Explora Robot
Next Page Programming Explora Robot
Topics
Raspberry Pi
Tom's Hardware is part of Future US Inc, an international media group and leading digital publisher. Visit our corporate site .
© Future US, Inc. Full 7th Floor, 130 West 42nd Street, New York, NY 10036.
Raspberry Pi 3D Printer Tutorial With OctoPrint: Ultimate Guide
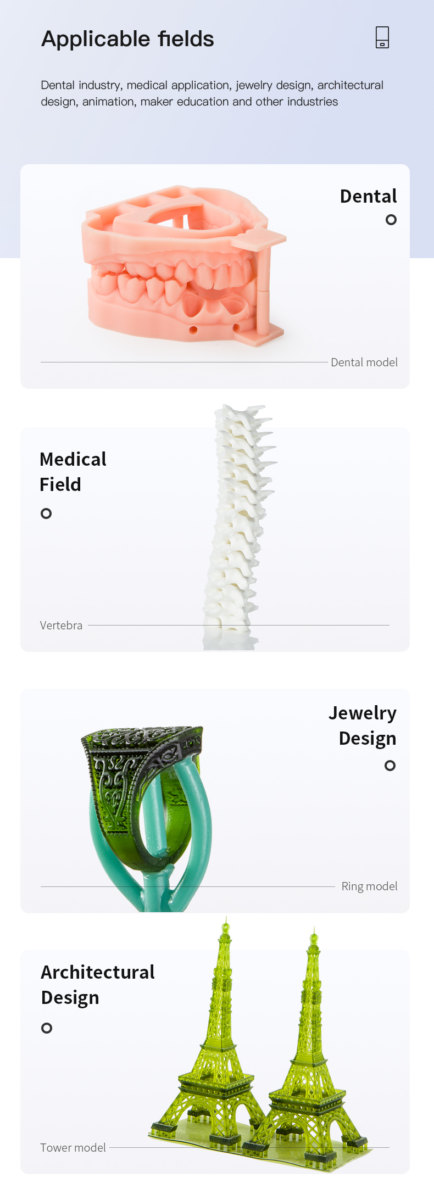
3D printing with Raspberry Pi might be a hassle without any proper tutorial. As a beginner, you should not feel intimidated by all the different methods and file types for 3D printing a predesigned object from its blueprint. But many industry-standard ways are most often used, with a Raspberry Pi and OctoPrint, indeed!
Raspberry Pi 3D Printer Tutorial With OctoPrint would cover the things one needs to control the already working 3D printer using a Raspberry Pi. This would also allow you to gain remote access and certain capabilities, such as monitoring the 3D printer from any location in this universe. But, as long as you have access to the internet.
This tutorial would include the ability to initiate printing. Cancel it, and modify the settings mid-print. All thanks to everyone’s favorite little pocket-sized-super-portable computer, aka Raspberry Pi.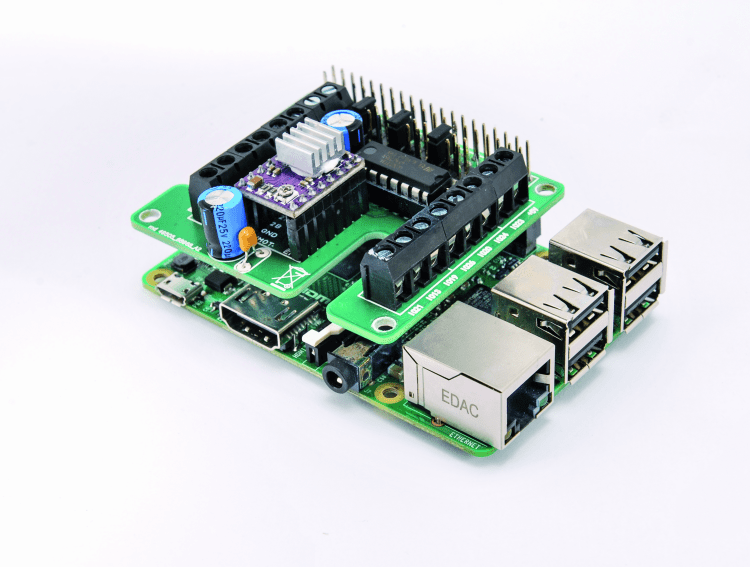
- A compatible 3D printer with the latest supported firmware and a USB connection
- An extra microSD card
- Internet connectivity (Wireless or wired)
- An Official touchscreen
- A Repetier Pro subscription (this is optional)
- A USB webcam (this is also optional)
If you are not already blessed enough to be a proud owner of a 3D printer. Then the initial step is to buy one. There are many kinds of 3D printers within every budget, starting as low as $180 and going over $2,800 with quality and reliable output; of course, the price plays an important factor in these quality differences.
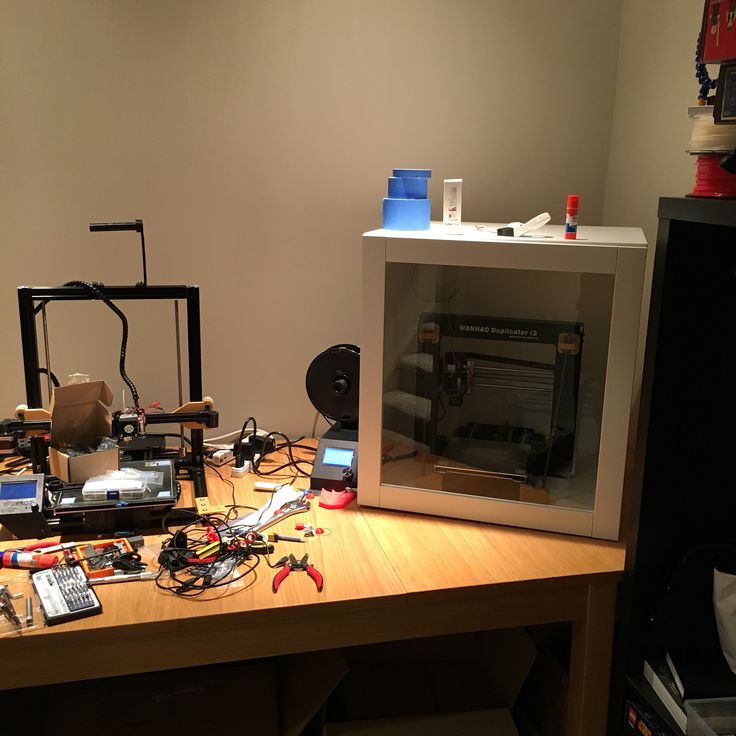
To make the cost of this tutorial minimal, we tried this project on a $200 budget DIY Desktop FDM 3D Printer from Gearbest. The printer came as a kit, and we had to do some adjustments and some web-surfing because of difficulty translating the instructions. This would be easy enough, even for a complete 3D printing beginner.
Octoprint isn’t some object that we can 3D print; it’s a great software/ web interface for the 3D printer. After installing Octoprint on the Raspberry Pi, you can easily not only monitor the prints and the temperatures but even can embed a webcam on the feed, consult a GCODE and a lot of other amazing kinds of stuff.
The Raspberry Pi is an impressive super portable pocket computer that allowed us to include certain extras; we added a webcam to keep an eye on the 3D prints live in OctoPrint. Moreover, this OctoPrint allowed us to couple up the system with a variety of different cool plugins to further improve the capabilities of the 3D printer through the OctoPrint web interface.
Overall, using the OctoPrint with Raspberry Pi to control a 3D printer via Windows 8 PC is easy and fun. Now, one wouldn’t be printing the objects near perfect from the very beginning. But as soon as you figure out what’s working and what’s not for the 3D printer, you will understand that 3D printing is indeed a rewarding activity.
We do not recommend anything less than a Raspberry Pi 3, which we have used for this tutorial/project. There have been many cases of fairly limited success when Raspberry Pi Zero is used with the OctoPrint. Although, if you have made up your mind to use it regardless, just note that you won’t be able to add an external camera to monitor the 3D prints, using an older version of Raspberry Pi, such as Pi Zero.
You can download the latest version of the OctoPi from the OctoPrint website. Lots of information and precautions, right? But now, the interesting part starts; below is a helpful illustrative tutorial on how to set up the OctoPrint on your Raspberry Pi.
OctoPrint on Raspberry Pi: Setting it upYes, setting up OctoPrint on a Raspberry Pi is easy! And almost every individual with a 3D printer is likely to have at least heard about it.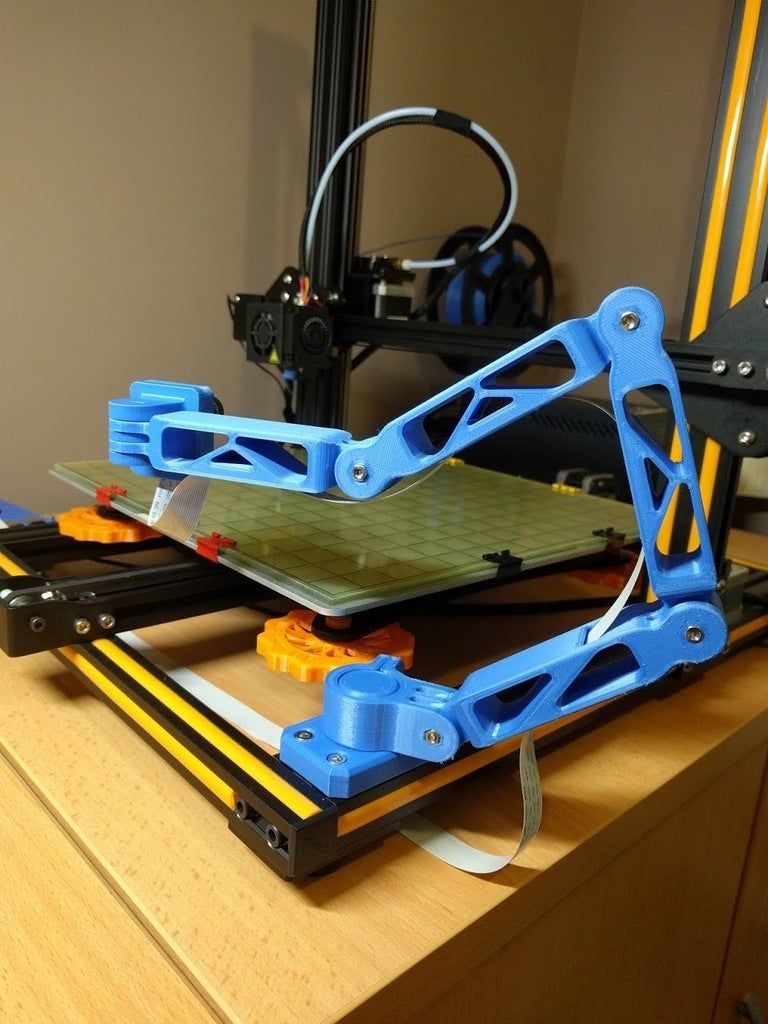 OctoPrint was created by Gina Häußge and managed by Guy Sheffer and her.
This software has the magic sauce needed to upgrade your current 3D printing workflow to the next level. And as mentioned earlier, it’s quite easy to set up. This tutorial will take you through a setup process step by step. It would also provide you with some useful tips & tricks alongside.
Before we start on how to install OctoPrint, let’s see what could be the top reasons why you might want to.
- OctoPrint is open-source software that would allow you to add a WiFi option to any 3D printer with a USB port.
- You will be able to drop files from a computer onto the printer,
- Start or stop prints,
- Monitor the 3D printer via live video feeds,
- Control all the motors,
- Control the bed temperature, extruder temperature, and more from your existing web browser.
OctoPrint basic requirementsOf course, with such great powers comes huge responsibilities.
“3D printers would have parts which are fairly hot to easily start fires, so ensure that you have a safe setup intact, which should include not letting the system run unsupervised”.
- Raspberry Pi 3 (or any newer version)
- A MicroSD card (also have some backup ones)
- The Raspberry Pi power brick.
- USB cables (the connector type would depend on your printer, mostly, it’s type A)
- A Webcam or Raspberry Pi Camera Module (this is optional)
- 3D-printed mount for the camera (also optional)
Using the Raspberry Pi with OctoPrint to control your 3D printer will give you more control over the 3D printer settings and help you produce 3D prints with higher quality. Handling a 3D printer with OctoPrint using the Raspberry Pi is easy and can be done in a few steps mentioned below.
1) Flash the OctoPrint software to a microSD card.
2) Connect the Raspberry Pi to the 3D printer.
3) Turn on the Raspberry Pi and make sure that the OctoPrint MicroSD card is inserted.
4) Visit https://octopi.local on any web browser. Download and print 3D models from Thingiverse or any other source, and use or create your 3D objects.
5) Now, Bring some Thai Curry to enjoy the live 3D print. It’s that simple; we were surprised too when we first tried it!
Tips and Tricks!Most 3D printer blueprints or designs from online sources such as thingiverse.com would be in the form of an STL file containing the object’s actual data and shape. In order to print a certain design, the file is required to be ‘sliced’; this converts the shape into an exact instruction for your 3D printer’s movements.
Slicers, for example, Cura, could be found online; however, Repetier-Host software for the PC does contain an inbuilt slicer. The software generates instructions for the printing; this will depend on your printer’s parameters, such as its size and shape.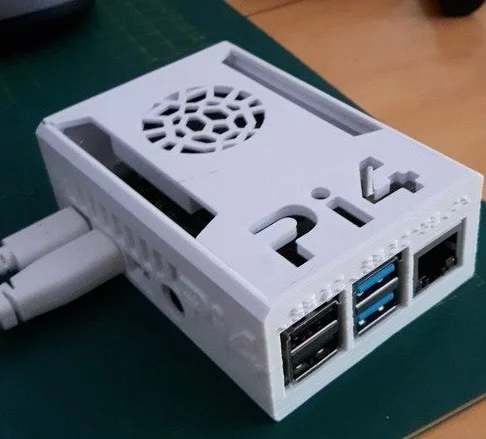
A G-code file is automatically created after the STL file is sliced; this file can be uploaded directly to the 3D printer and run to print the object.
Making the printer look good, lighting the 3D PrinterIf your 3D printer is kept in an enclosed space, we suggest you consider adding some lighting, such as LED strips or even lasers! This would not only make it look way cooler but also provide some illumination for the webcam and clearer and brighter images for you.
A stable
Internet connection for the 3D printer is very importantA stable and strong internet connection is required for the printer to run successfully. If the internet connection is somewhat poor, try connecting the Raspberry Pi via Ethernet.
Finally3D printing with OctoPrint is amazing and fun, but do you know what’s more amazing? It’s 3D printing your very own 3D printed smartphone case. We hope you enjoyed this tutorial, and stick around for more such amazing posts regarding 3D printing.
Raspberry Pi 3 and Raspberry Pi 4 power module. We feed the raspberries from the power supply of the 3D printer.
Hello everyone! Oh, and I haven't written anything interesting for a long time. It's time to stretch your fingers and share useful information. This article will focus on the power supply of the Raspberry Pi single-board computer. By and large, the topic is hackneyed. But I dug up something. Not the fact that infa is unique. But I got to the bottom of this myself, I hasten to share with you.
And so. This article will primarily be useful to 3D printers. But smart home lovers will also learn something useful. I won't pull. Who cares, welcome under cat.
Those who have been interested in the Ulti Steel 3D printer are most likely aware that it has a place to install a Raspberry Pi single board computer. What for? Well, here everyone decides for himself. Someone needs a print server, for example, based on Octoprint or Astroprint, so as not to rush from the printer to the computer and back with a flash drive. And someone is not satisfied with the functionality of the marlin and he wants a clipper. Anyway. In order for this feature to work, you need a single-payer. Well, since there is a place for it in the case, it is quite logical to put it there. But the question arises, how to organize food for a single-payer?
There are several options:
- Separate power supply
- DC-DC converter
- Expansion board
So, let's look at each of the options. Let's start in order
Hotel power supply, perhaps one of the most obvious options. But, as we know, 3 and 4 raspberries are very voracious and require powerful power supplies of at least 5 V 3A for stable, and if for good, then 5V 5A is better. Agree, not a lot. But among other things, the power supply must be of very high quality, because. if raspberries feel that the food is not organized enough for it, it will start complaining about it in the logs, and in some cases it may turn off.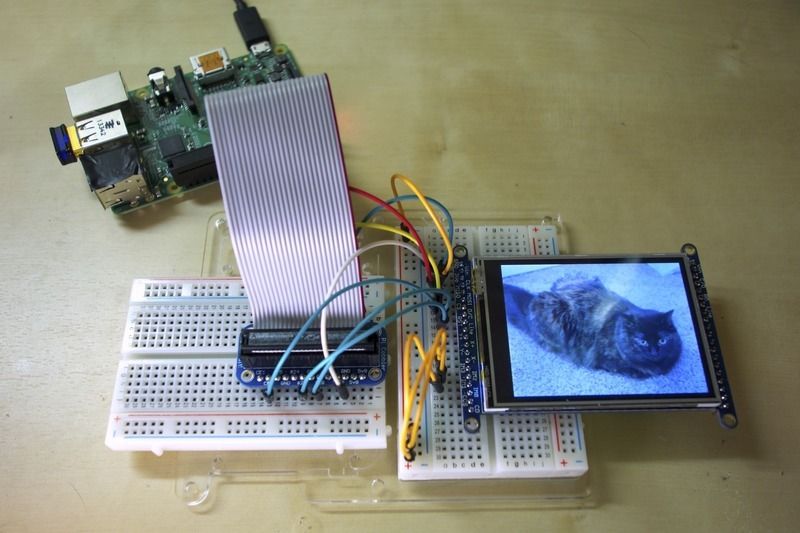
A good option for organizing such a power supply would be the Mean Well RS-25-5 power supply, however, here you may encounter a wiring and connection problem. Somewhere you will have to look for the appropriate connector (Miniusb or usb type-c) to connect this power supply to the Raspberry pi, or crimp the wires and power the raspberry through the GPIO comb. In addition, it is necessary to supply 220 volts (attention! dangerous voltage) to this power supply. you will have to fiddle around with the wires. Yes, and solve the issue of placing this power supply inside the 3D printer itself, because. fasteners for the second power supply is not provided.
DC-DC Converter. The Ulti Steel power supply has a solid power reserve and, in principle, nothing prevents you from installing a DC-DC converter and powering the raspberries through it. BUT! I have never seen a Chinese lower that can satisfy the exquisite nutritional tastes of the Raspberry Pi. Not a fact, maybe there are such, but I did not come across them. In this case, you will also have to tinker with the wires and the placement of additional modules inside the case.
Well, the third option is a power shield for Raspberry pi 3/4. The Chinese have enough of these shields, but not all of them are of good quality. The advantage of this solution is the ease of assembly and a minimum of wires. Because As a rule, such shields are installed directly on raspberries.
Not so long ago, while studying the issue of connecting hard drives to the Raspberry Pi, I came across an interesting seller of various expansion boards for raspberries. The store is called GeekBord (mda .. apparently their marketer is not very competent, who named the store with an error). Among the huge range of expansion boards for Raspberry Pi, the RasPi X710 board caught my attention.
The great thing about the RasPi X710 board is that it allows you to power your Raspberry Pi 3 or Raspberry Pi 4 with voltages from 6 to 36 volts! This range of supply voltages intersects with the output voltages of the power supplies of a very large number of 3D printers! Well, in my case, through it you can easily power the Raspberry Pi from the Ulti Steel power supply. (Output voltage b/p Ulti Steel 12 Volts).
In addition, the board comes in a shield form factor, which allows you to assemble a “sandwich” from RasPi X710 and Raspberry 3 B+. Well, of course, install this assembly on regular mounts.
All that remains is to remove the wire from the power supply and connect it to this board.
For those who are unsure or in doubt, this "sandwich" will work with both Ender 3 and Anycubic i3 mega. It remains only to solve the issue of its placement inside the case.
Well, as a cherry on the cake - the module has a fan that is installed like this. to cool the Raspberry Pi processor. Attention! The fan is specific - it works from 5 volts. But if desired, it can be turned off and generally dismantled.
The first impression of the board is positive! Good workmanship. Great build and soldering. There are no traces of flux. Works good. As long as I'm happy with everything. Let's see how it will show itself with long-term operation.
For those who are interested in the parameters of this power module, here is a link to the wiki with a description of all the characteristics and connection diagrams: http://raspberrypiwiki.com/X710
I ordered the module itself from the link RasPi X710
I hope this information was useful to you.
If you like the article and want to support the site and receive notifications of new materials, join our Vkontakte group: https://vk.com/ionline_by
If you want to be notified when new articles are released, connect yourself to PUSH notifications link: https://ionlineby.pushassist.com/
Raspberry Pi Archives - TriDashnik
Raspberry Pi
We will install Octoprint simply and quickly, omitting unimportant steps.
Read more »
Tags: OctoPi, OctoPrint, Raspberry Pi, RPi 2019-02-02 Section: Settings, Print server
Author: AKDZG Views: 12 851 4 comments
Hello reader!
In this article, we'll take a look at the details of setting up the brains of a Klipper-based printer, comparing it with Marlin4Kimbra, all installed and tested on a HyperCube Evolution printer under construction.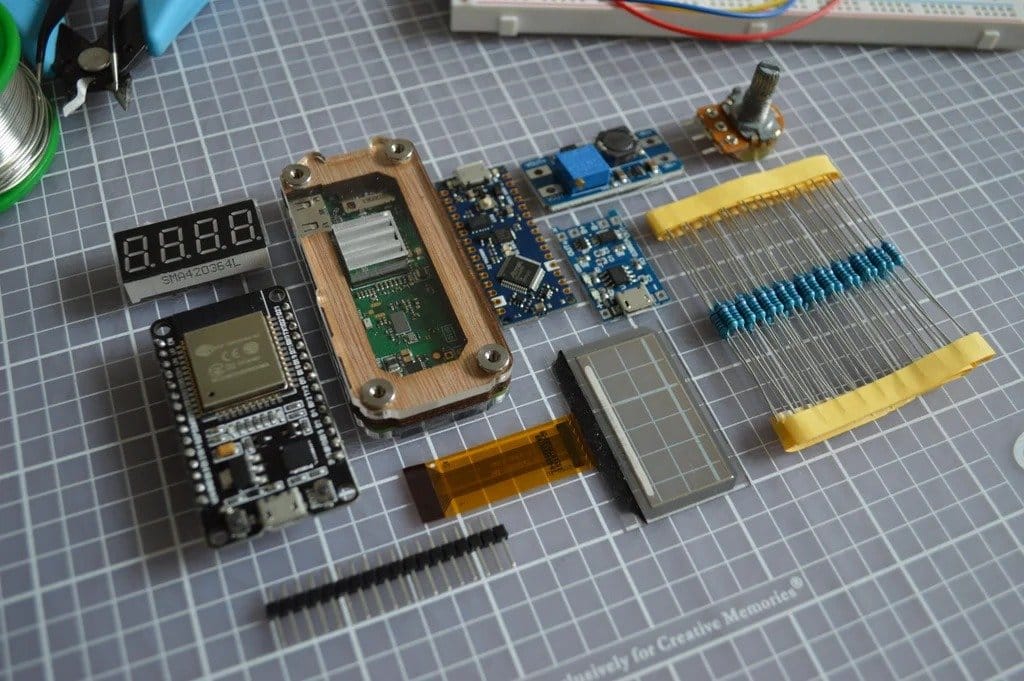 What kind of Clipper - we look in part 1. Read more »
Tags: 32bit, 8bit, Klipper, OctoPrint, Odroid, Orange Pi, OrangePi, RAMPS 1.4, RAMPS4DUE, Raspberry Pi 2017-12-14 Section: 3D printing, Firmware, Secrets and life hacks of 3D printing, Electronics
Author: StanislavI Views: 20 805 19 comments
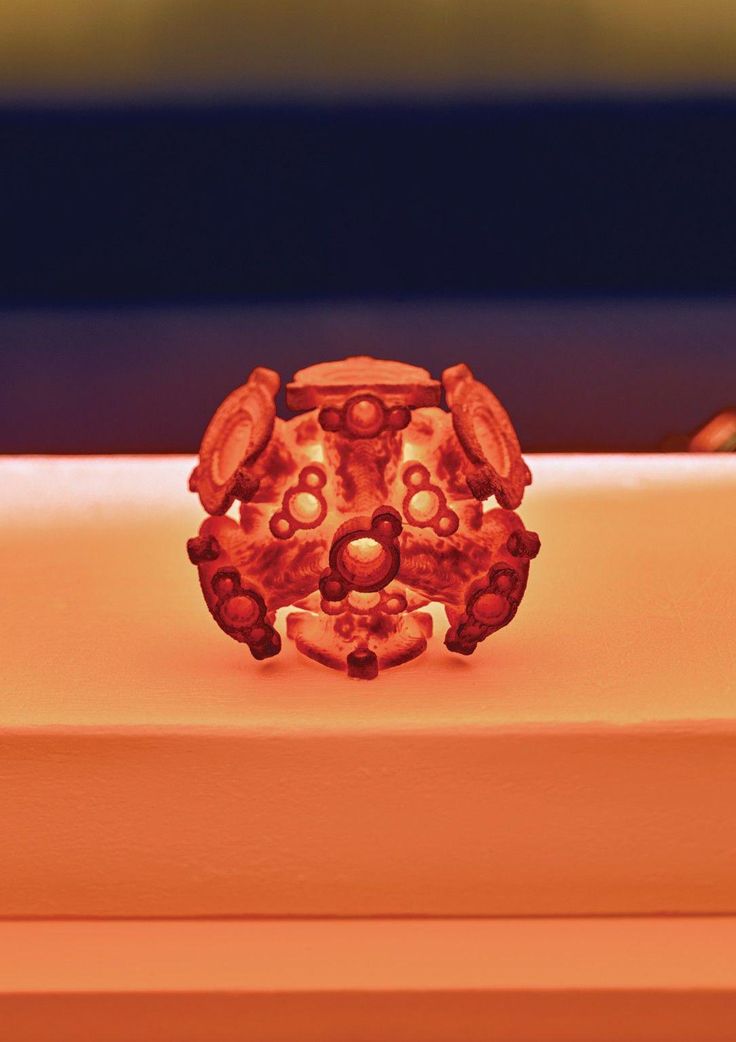
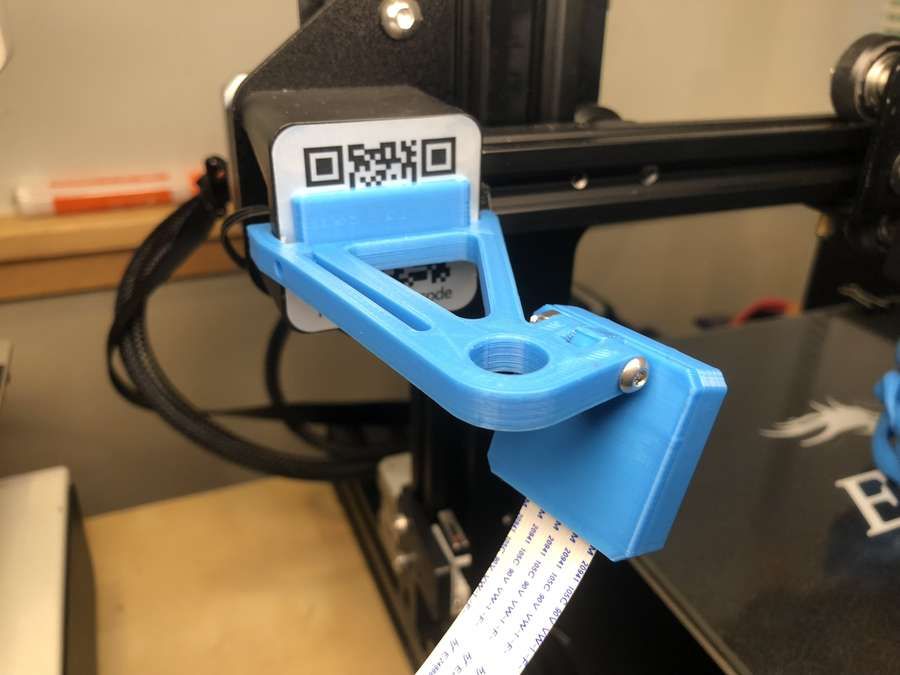
For optimal remote control of the 3D printer , visual information about the part's manufacturing is still needed. That is, you need to see the state of the manufacturing process. Perhaps it needs to be interrupted to reduce the loss of material if everything did not go as planned. For this, an online video of the process is enough, perhaps even with a low frame refresh rate.
I already have a OctoPrint print server running on a Raspberry Pi 2 and it is possible to control the printer from a distance. Now I am adding a camera. The choice fell on the inexpensive Pi camera . Link to Aliexpress. I will also write about the settings for the usual USB webcam .
Read more »
Tags: OctoPrint, Pi Camera, Raspberry Pi, RaspiCam 2016-01-27 Section: Settings, Print server
Author: AKDZG Views: 15 560 8 comments
Usually for simplified remote control of a 3D printer, TeamViewer is used, but it is not sharpened for printer control. On the other hand, why buy Raspberry Pi if you have an old laptop or netbook, because you can set up OctoPrint on Windows .
Initially OctoPrint was designed for low-power devices running Linux operating system, but it can also be installed on a computer running Windows operating system. This is what we'll do.
Read more »
Tags: OctoPrint, Raspberry Pi, TeamViewer, Yawcam 2015-12-19 Section: Settings, Print server
Author: AKDZG Views: 12 330 1 comment
After moving the 3D printer to another room, I have to constantly run with an SD card between the printer and the computer.