Prusa mini 3d printer review
Prusa Mini+ Review: A Small 3D Printer with Mighty Results
When you purchase through links on our site, we may earn an affiliate commission. Here’s how it works.
A small 3D printer 3D-printed by another 3D printer.
By Ash Hill
last updated
(Image: © Tom's Hardware)
Tom's Hardware Verdict
The Prusa Mini+ provides professional quality for 3D printing at home on a small scale while remaining suitable to newcomers with a robust online community.
Pros
- +
+ User-friendly design
- +
+ Easy to set up
- +
+ Professional-grade, high-quality prints
- +
+ Simple filament loading and unloading process
- +
+ Removable, magnetic print bed sheets
- +
+ Auto-leveling bed feature
Cons
- -
Limited build space
- -
Expensive
Why you can trust Tom's Hardware Our expert reviewers spend hours testing and comparing products and services so you can choose the best for you. Find out more about how we test.
The Prusa Mini+ 3D printer is a small FDM printer produced by Prusa. One of the best 3D printers you can buy, particularly if desk space is at a premium, this one is designed with makers in mind with a particular affinity to quality in both build and performance. Because this printer is smaller than previous models, users can expect a lower price compared to large-scale printers like the MK3.
This small form factor may also be more appealing to laboratory and classroom environments. Teachers and educators face a smaller bottom line and footprint with the Prusa Mini+ as opposed to full-sized 3D printers.
For those new to Prusa, this company was created and is still owned by Josef Prusa. Prusa designs proprietary 3D printers, accessories and tools. This ecosystem of products tend to work well together from Prusa's custom print slicing software to their very own line of filament known as Prusament.
The Prusa team is well-engaged with the community through a variety of platforms. You can find Josef Prusa himself appearing on the official YouTube channel There are also forums dedicated to 3D printing on the Prusa website.
Editor’s Note: Originally, Prusa sent us the Prusa Mini (non-plus) to review, which is the same as the Mini+ but lacks the SuperPINDA sensor. Prusa then sent us the $25 upgrade kit which allowed us to convert our unit to the Mini+. The Mini (non-plus) is no longer made.
Prusa Mini+ Specs
(Image credit: Tom's Hardware)Swipe to scroll horizontally
| Filament diameter | 1.75 mm |
| Supported materials | PLA, PETG, ASA, ABS, Flex |
| Filament sensor | Optional upgrade |
| Power panic | Future software upgrade, single layer accuracy |
| Ethernet | Yes |
| Wi-Fi | Separate Upgrade via ESP Wi-Fi module |
| Sensors | 3 Thermistors, 1 fan sensor |
| Calibration | Automatic, Mesh Bed Leveling |
| Print medium | USB, LAN |
| Firmware update interface | USB, LAN |
| PSU | 160W, external adapter (Mean Well or Delta - depending on region) |
Print Quality of Prusa Mini+
Prusa provides detailed instructions on how to optimize your prints from beginning to end. Following this process definitely yielded the best results and is necessary for getting the most out of the Prusa Mini+. If you play your cards right, you'll end up with very clean prints with smooth lines that have little to no stringing.
That said, no matter how nice your 3D printer is or how carefully you tweak the settings, your choice of filament plays a big role in quality. The Prusa Mini+ supports a wide range of filament — most of which is fairly standard like PLA, PETG and ABS. Prusa recommends using its official Prusa brand filament with its printers and it's clear why with some of the results we experienced.
The only issues I experienced with print quality were due to poorly stored filament. Too much moisture will cause bubbles and messy lines while printing. It's possible to dry the filament out in an oven on a low setting which is what I had to do in this case. As long as your filament is good quality and in good shape, this printer can handle it well. In the example pictures, the blue, gray, green and purple filament are third-party PETG while the sparkling black is official Prusament filament.
With everything dialed in properly, I had a go at printing everything from sample figurines provided by Prusa to complicated models designed to push it to the limits. One of the first tests was a little wind up car which uses a coiled spring for momentum. This was printed using Prusament filament from Prusa. It proved to be a rigorous toy car with gears that aligned perfectly. The coil,which was essentially a spiral of filament, even had enough spring when wound to propel the car a few feet.
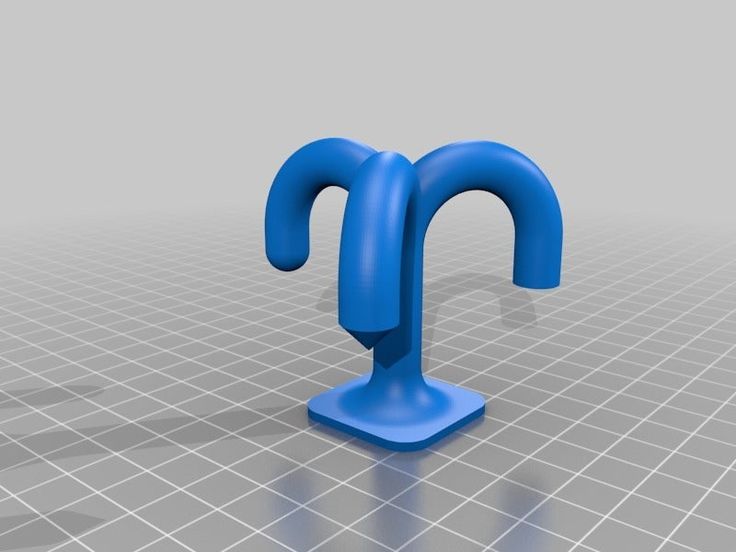
(Image credit: Tom's Hardware)I managed to print a few Benchy boat test prints with good quality. The overhangs printed well and there was minimal, if any, stringing between the edges of the boat door.
(Image credit: Tom's Hardware)The big benchmark was "The Torture Toaster!" by Clockspring on Thingiverse which has everything from angle tests to print-in-place gears. It took over 20 hours to print this bad boy but in the end it was worth the wait. The Prusa Mini+ had no trouble with the toaster and even pops toast out of the top when the lever is pressed.
Another determining factor in the quality of your prints is handled via software. Before loading a 3D model to be printed, it has to be converted into a file the 3D printer can use in a process known as slicing. Prusa provides a proprietary application just for slicing on the Prusa mini. Third-party and open-source applications like Cura will work, as well, but they don't hold a candle to the compatibility and ease-of-use you'll find with the official Prusa Slicer.
(Image credit: Tom's Hardware)The first thing you'll notice is the miniature design, highlighted in the name "Prusa Mini+". The Prusa Mini+ definitely earns its title of "Mini" with a single-unit design and small build volume of just 180mm x 180mm x 180mm. The small footprint stands out against other small-scale printers on the market like the Creality CR-10 Mini which has a separate base for the controls and a build volume of 300mm x 220mm x 300mm. It also has a slightly larger build plate than the Monoprice Select Mini 3D Printer V2 which measures in at 120mm x 120mm x 120mm. But you get more than size with the Prusa Mini+, it's backed with quality support from Prusa and a sizable online community.
What makes it +?
The Prusa Mini+ was preceded by the Prusa Mini. There are two main differences between the Prusa Mini and Prusa Mini+ including a Y bracket, which is easier on the assembly process for Prusa, and a SuperPINDA sensor. This is a temperature-independent sensor that doesn't require the use of a thermistor. It's used to improve the first layer calibration when printing and can be purchased separately for any user looking to upgrade for $25 from Prusa. It doesn't impact the final quality much, if at all, but it does streamline the calibration process. The old sensor would sometimes require another calibration between prints if the ambient temperature changed too much between the start of the last print and the next one. The SuperPINDA sensor means more time printing and less time calibrating.
One of the coolest aspects about the Prusa Mini+ design is how many components are 3D printed. If LCD screens could be 3D-printed, surely the Prusa team would have done it here. Everything from the extruder housing to the interface knobs were 3D printed for the final build. The main frame is constructed from extruded metal and the heated bed is made of glass.
Overall the construction feels sturdy. Moving the printer is easy and you don't feel any components give or wobble when handled. The printer also required little physical maintenance. There is no need to tweak anything like loose Y-belts under the bed.
Most of the unit comes mostly pre-assembled which is excellent for beginners who may not have assembly experience or teachers who may not have time to prepare enough printers for a classroom. Plus, it's just nice overall to have a fully assembled unit ready to print.
The bed is designed to be used with a few included magnetic sheets. These sheets vary in texture, each optimized for a specific type of filament. All of them make print removal an absolute breeze compared to printers without removable sheets. I recommend letting your print fully cool before removing it, however, as the bottom layer is often still warm from the heated bed and subject to warping if removed too soon.
Case in point, I used the Prusa Mini+ to print the body of a remote-controllable spiderbot which requires serious precision for final assembly. After the first print I was too hasty at removing the body from the printer. Because of the heated bed, the underside of the body had yet to cool and solidified with a slight warp.
It also features an auto-leveling protocol that runs before each print. This is a really interesting feature that doesn't exactly level the bed, but rather scans it for distortion and accommodates for it while printing. In fact, this is how the printer earned the "+" in its name. It uses a special sensor called a Super Pinda to calibrate the printing area. Users can upgrade the Prusa Mini to the Prusa Mini+ with this component alone.
In the Box of Prusa Mini+
(Image credit: Tom's Hardware)Here's a quick look at everything you can expect to arrive in the box—and yes, those are gummy bears. No, you cannot eat them, yet.
- Prusa Mini
- Magnetic Print Bed Sheets
- Power Supply
- Filament Holder
- Flash Drive
- Allen Wrenches
- Zip ties
- Instruction Booklet
- Sample Filament
- Gummy Bears
Setup of Prusa Mini+
Getting started with the Prusa Mini+ is easy, especially if you already have experience with 3D printers. Still, it's good practice to read through the manual as you can miss some important details and occasionally critical steps.
(Image credit: Tom's Hardware) Prusa provides a custom instruction manual just for the Prusa Mini+.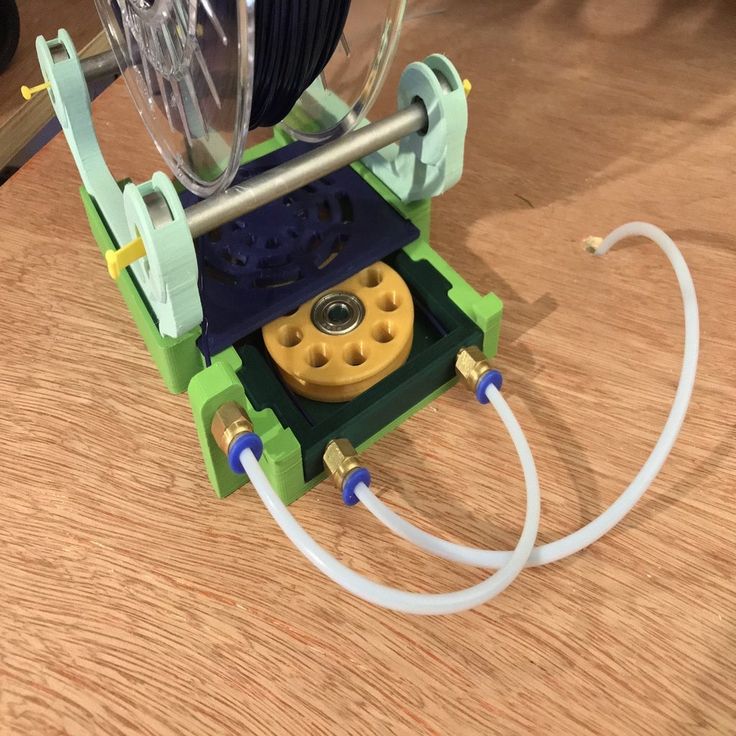 Read it carefully for the essential gummy bears eating step. Most of the setup process involves connecting cables and preparing filament for your first test print.
Filament for Prusa Mini+
(Image credit: Tom's Hardware)I experienced the best printing results when using the recommended Prusament filament. It seems to run more smoothly through the machine compared to off-brand options and cools into cleanly printed lines.
The Prusa Mini+ will work with off-brand filament and can still produce beautiful results with it. As always, make sure any filament you use has been properly stored and isn't too brittle. It should flex a little when bent.
Most of the serious testing I implemented was completed using the recommended Prusament filament. This is easiest to use right off the bat as the slicer had pre-programmed settings just for the Prusa-brand filament. Compared to off-brand PLA, it prints a little bit hotter but this may lend to the smooth, fine results it produces. Using the same settings on off-brand filament resulted in less-sturdy prints.
You can still create clean, reliable prints with other filament brands, but you will need to adjust the print settings in the slicer first. This Benchy was printed using UV-reactive PLA and has no bubbles, stringing or visible disturbances at all. However, I did have to experiment a little and ultimately chose a lower nozzle temperature to optimize the quality.
Necessary Software
PrusaSlicer is the official slicing application created by Prusa just for Prusa devices. Why does this matter? Open-source slicing programs require custom profiles for each printer they interface with. This profile contains detailed information about the printer like nozzle size, bed size, heat control, etc. Using the official slicer eliminates the need of profile management as it's designed specifically for Prusa printers. PrusaSlicer has been released for Linux, Windows and Mac operating systems.
If PrusaSlicer isn't your cup of tea, there's nothing stopping you from having a go with your favorite slicer of choice.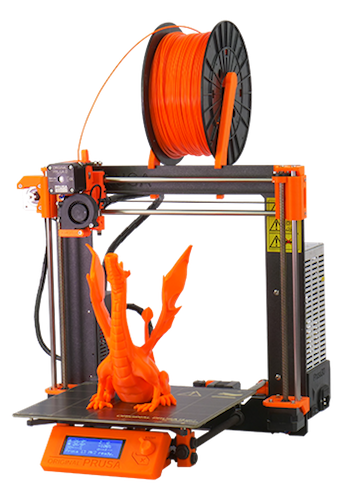 For testing purposes, I was able to slice a print using a Cura. However, I still experienced the best results with and ultimately recommend PrusaSlicer for prepping your 3D printer files.
Printing process on the Prusa Mini+
(Image credit: Tom's Hardware)The Prusa Mini+ has an LCD screen built into the base. It’s controlled using a 3D printed rotary knob that can be pressed like a button to make selections.
Loading and unloading filament can be a chore with many printers but that's not the case with Prusa Mini. It not only preheats the nozzle for loading and unloading but can reverse the filament wheels to push the filament out from the loading point. This makes it easier to switch between colors and reduces the need to flush the filament line.
The Prusa Mini+ does not have a built-in spool holder but rather uses a small stand that can be placed to the side and moved as needed. It's made from 3D-printed parts and features a few bearings that rotate the spool as the machine pulls fresh filament into the line.
The printing process is very easy and straightforward: slice your file, drop it on a thumb drive, load the file onto the Prusa Mini+ and print to your heart's content. The flash drive port is located on the side of the printer next to the power button. This is also the same side as the LCD screen, keeping all of the controls together in one location.
Alternatively, you can automate the process with the help of Octoprint. This is a third-party, open-source tool made to run on a Raspberry Pi. With it, you can control your printer remotely and even record time lapse videos of your prints. See our article on how to remote monitor your 3D printer with Octoprint.
The Prusa Mini+ isn't officially supported but I was able to get it up and running with no issues using a Raspberry Pi 3B+. There is also an officially supported Octoprint fork released by Prusa for their devices called PrusaPrint. The image is available on their website but it's designed only to work with the Raspberry Pi Zero W.
Overall, the Prusa Mini+ is an excellent-quality 3D printer capable of producing notably high-quality prints. It's clear the machine was designed by a passionate team with a knack for knowing what makers need most. While the Prusa Mini+ comes with praise-worthy quality, it also has a heavy price tag of $399 that makes it less accessible to shoppers on a budget. However, there is a Prusa Mini+ DIY kit that is not pre-assembled for $350.
If you're a maker looking for a quality experience and price isn't a concern (or maybe you’re just short on space), the Prusa Mini+ 3D printer is a great choice.
Ash Hill is a Freelance News and Features Writer at Tom's Hardware US. She manages the Pi projects of the month and much of our daily Raspberry Pi reporting.
Prusa Mini+ 3D printer review: The 3D printer for beginners
When you purchase through links on our site, we may earn an affiliate commission. Here’s how it works.
Other entry-level 3D printers cost less, but the Prusa Mini+ beats them with ease of use
Editor's Choice
(Image: © Prusa)
Tom's Guide Verdict
The Prusa Mini+ costs a bit more than bargain basement 3D printers such as the Monoprice Delta Mini v. , But it is more capable, reliable, and produces better quality than most entry-level printers.
Why you can trust Tom's Guide Our expert reviewers spend hours testing and comparing products and services so you can choose the best for you. Find out more about how we test.
Today's best Prusa Mini+ deals
No price information
Check Amazon
The Prusa Mini+ is a well-built, solid small 3D printer that’s ideal for those who want to experiment with 3D printing. We’ve seen cheaper printers aimed at beginners, from the Monoprice Delta Mini V2 to the XYZ da Vinci Nano. But you won’t mind paying up for the toughness and reliability of the Prusa Mini+, which is among the best 3D printers precisely because it’s so easy to use.
Prusa Mini+ 3D printer review: Price and availability
The Prusa Mini+ comes in two versions: a semi-assembled kit for $459 and a complete, start-from-scratch kit for $429. Both are available now from Prusa.
Most of the Mini+ is 3D printed itself, with the addition of pieces of extruded aluminum and metal rods to form the frame. The printer is not enclosed, so you’ll want to find a spot for it that avoids drafts or sudden temperature changes. The front of the printer includes a 2.8-inch LCD screen, with a combined control dial and button, plus a reset button.
(Image credit: Tom's Guide)The main feature of the Prusa Mini+ is the print bed, which uses a removable metal plate. When a print is finished, you can lift the print bed off and bend the plate to help remove it. This also means you can quickly start another print by swapping out build plates — a big plus if you want to use the printer a lot.
This print bed offers a 7x7x7-inch print area for a total of 343 cubic inches. That’s a decent size, especially for a smaller 3D printer. While that’s slightly smaller than printers such as the Adventurer 4, the Prusa Mini+ is big enough to handle most things you are likely to want to print.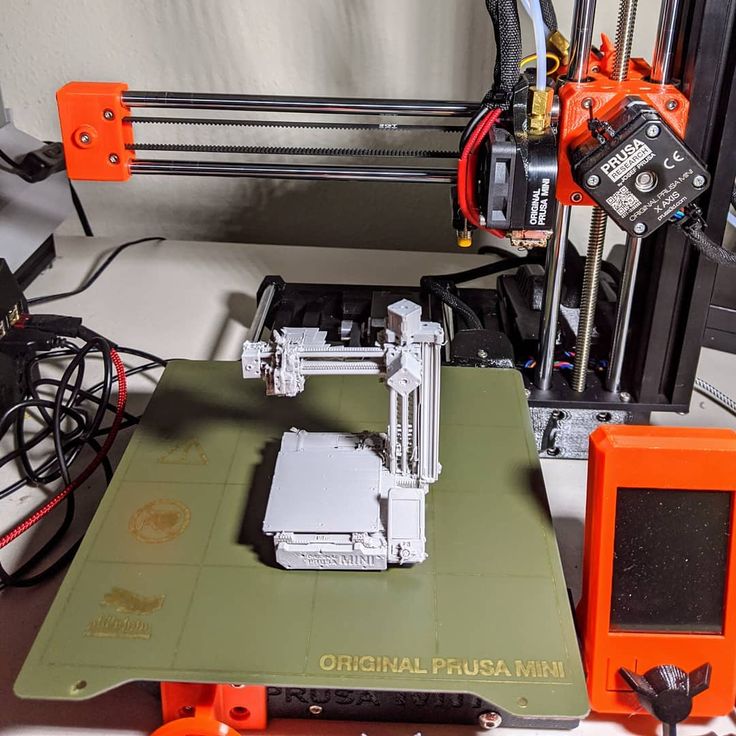
The Mini+ print head hovers above the print bed, moved by two motors that lift it and move it left and right. An additional motor moves the print bed back and forward. All three motors are quiet, so there are none of the usual crunching and grinding noises you’d expect to hear as a print is produced.
(Image credit: Tom's Guide)The Mini+ also has a neat holder for the filament spool, which uses four bearings to let the spool rotate freely. Another unusual feature is a filament sensor that detects when the filament runs out and halts the print in progress, giving you the chance to load another spool and save the print.
Prusa Mini+ 3D printer review: Setup
For this Prusa Mini+ 3D printer review, I tested the partly constructed kit, which is probably the better option for most people. The kit comes tested and calibrated, saving great hassle and heartache.
The build process is simple and well-described in the included manual. Some nice touches make it easier. Take the Cheatsheet, a printed guide showing all the screws and bolts at life-size. This avoids many of the common hassles of assembling a kit, like not realizing the difference between an M3X20 and an M3X25 bolt until you’ve already inserted it and can’t figure out why it doesn’t work.
The kit also comes with a small pack of Haribo bears, and the manual instructs you to eat these at various times during the process. I am not a big fan, so I substituted yogurt-coated raisins, which did not affect the build process and tasted better.
Once the Prusa Mini+ is built, you run through the calibration wizard, which tests the printer and helps you set it up. Again, this is well described in the manual and is mostly automatic. This walks you through loading the filament and setting the Z offset, the gap between the print bed and the tip of the filament extruder.
The Mini+ includes a sensor that detects the print bed, so you don’t have to level the print bed, but you need to set the Z offset, which involves running a test that squeezes a layer of filament onto the print bed, then looking to see how well this sticks and adjusting the setting to get the right height.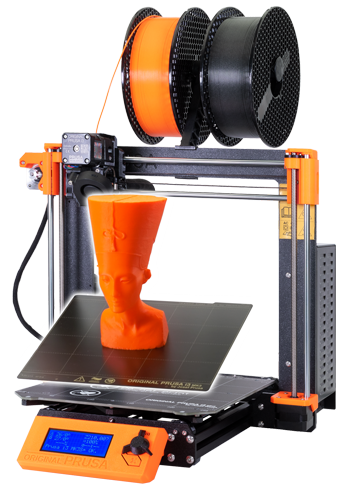 It isn’t difficult and is fairly obvious once you get it right.
Prusa Mini+ 3D printer review: Printing process
To print a 3D model on the Prusa Mini+, you must prepare it and create a print file. The Mini+ uses a program called PrusaSlicer, available for Windows, Mac and Linux. This program is very nice, with a simple, clean design that steps you through loading the model, positioning it for the print, and then creating the print file that you send to the printer.
For materials, profiles for generic PLA, ABS, and PETG and several Prusa filaments are installed by default. A huge number of user-created profiles for filament from other manufacturers can also be installed if required.
PrusaSlicer includes many powerful features — models can be duplicated, spun around, automatically arranged, and tweaked in many ways. You also enjoy a lot of control over the printing process, with features like adding fuzzy skin to a part of a print to create a fiber-like texture that provides more grip.
Once the print is set up, you save the print file to a USB drive and transfer it over to the Prusa Mini+. At the moment, the Mini+ does not support wireless printing. A basic monitoring app is built into that 3D printer that uses its ethernet connection, but there is no way to start or stop a print remotely. Prusa is working on this with its Prusa Connect service, which only works with the more expensive Prusa 3 printer at the moment; support for the Mini+ is promised in the future.
(Image credit: Tom's Guide)When you insert a USB drive containing a print file into the Mini+’s USB port, the printer’s LCD screen shows a preview of the print and the basic info, automatically selecting the most recent one. You can start the print with a single click of the controller. That lovely, simple touch makes things quicker and simpler: no more hunting through a long list of files to find the one you want.
The Prusa Mini+ is pretty quiet, producing only a slight humming noise as the motors turn, with the odd clonk or whirr as the printer head moves around. I wouldn’t want to try and sleep in the same room as it when printing, but it is certainly one of the quietest and least annoying printers I have tested.
When the print is complete, you remove the print bed and bend it to pop the print off. I had no problems with failed prints on this printer — all of my test prints printed correctly, popping off the print bed with ease.
Prusa Mini+ 3D printer review: Print speed
We found that the Mini+ was a fairly fast printer. When working in the 0.2mm quality print mode, our 4-inch high test model of the Thinker took 7 hours and 52 minutes. It could go faster, though, as switching to the 0.3mm Speed mode sped this up to just 4 hours and 22 minutes, although the print quality suffered somewhat.That’s still a bit slower than the Monoprice Delta Mini, which took 3.5 hours to do a similar print.
Prusa Mini+ 3D printer review: Print Quality
If you don’t mind the longer wait, the Mini+ can produce excellent quality prints. Printing in the Quality mode, I found that the Mini+ created excellent prints of all of our models, with smooth curves on the Thinker and sharp edges and tips on our geometric sculpture.
We did notice quite a lot of stringing on the geometric sculpture, though, where thin filament strings are left behind as the print head moves from one part of the print to another. We were able to deal with some of this with tweaks to settings in PrusaSlicer — specifically the retraction setting, which determines how the printer pulls the filament back into the print head when moving it from one part of the print to another. However, strings remained on some prints.
(Image credit: Tom's Guide)I also found excellent quality in our test where we produce a set of interlocking gears. These intricate parts fit together with very few issues, and the final mechanism turned smoothly and cleanly. The gears did need a bit of cleaning, though, as some small whiskers of filament stuck to parts of the print and had to be trimmed off with a sharp knife.
These whiskers can also be caused by the filament absorbing moisture, which underlies one of the issues with open-plan printers like the Mini+: you are at the mercy of your environment. Printers like the Adventure 4 that have sealed enclosures can filter the air and dry the filament, but the Mini+ can’t. Prusa offers an enclosure, which adds another $349 to the cost of the Mini+.
Prusa Mini+ 3D printer review: Materials
There are no restrictions on the printing material that the Mini+ can use. Any 1.75mm filament can be fed into the printer. The heated print bed (which can reach up to 100C/212F) and the hot extruder (which can get up to 280C/536F) can handle most materials, including the more exotic ones like Nylon and Polypropylene.
Prusa sells its own line of filaments, including several filaments made with wood and metal additions to provide a more natural texture. The metal ones require a hardened nozzle, though, as the metal particles in the filament wear away the Mini+’s standard brass nozzle. Prusa does not make these, but it does offer a great guide on where to get a hardened nozzle and how to adapt the printing process to them.
Prusa Mini+ 3D printer review: Verdict
There are plenty of cheaper 3D printers out there than the Prusa Mini+. These are often a false economy, though: cheaper printers require lots of calibration, testing, and tweaking to get good-quality prints. The Mini+ doesn’t make you jump through those hoops — all the prints I tried worked the first time and looked good, apart from some easily-trimmed whiskers. That’s worth a lot more than a lower initial price tag.
The overall Prusa Mini+ package is excellent, with easy assembly, friendly software and a straightforward printing process. If you want someone to be inspired by 3D printing rather than frustrated, the Mini+ is a great pick. Get this 3D printer for the beginner who wants to get into 3D printing and doesn’t mind spending a bit more on a printer that can grow with them.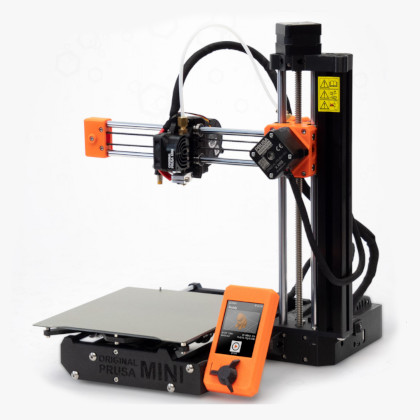
Richard Baguley has been working as a technology writer and journalist since 1993. As well as contributing to Tom's Guide, he writes for Cnet, T3, Wired and many other publications.
Pryushin Mini - for everyone?
ski
Loading
10/12/2019
7258
Miscellaneous
Prusa
X191012: Mini Prusa mini review for all makers old and young...
Greetings!
Josef's translation:
We're excited to announce our new Original Prusa MINI, a smart and compact 3D printing workhorse with all the bells and whistles you're used to when you buy an Original Prusa 3D Printer. 9The 0003
MINI features a 18 cm (7”) print volume cubed, removable spring steel bed covers, an Ethernet LAN port and optional Wi-Fi, all controlled by our new 32-bit "Buddy" motherboard with silent 2209 drivers from Trinamic.
And as "icing-on-the-cake", we actually managed to do this (and much more) for 349 USD / 379 EUR! Shipping will start at the end of November.
.
I invite you to lay out Pryusha's two-minute announcement "by the bones".
Regards,
Ski.
.
P.S.
Original Prusa MINI is here: Smart and compact 3D printer for everyone!•12 Oct. 2019 Prusa 3D by Josef Prusa
https://youtu.be/ipulB4_Xdm8
[]
Prusa Research Joseph Prusa Pruisa Mini
Follow author
Follow
Don't want
11
Article comments
More interesting articles
SEugeny
Loading
03/01/2023
5964
13
Subscribe to the author
Subscribe
Don't want
This office, "SIBOOR", sells kits for the Crow. Prices are not that small, but not...
Read more
1
Subscribe to the author
Subscribe
Don't want
On March 4 and 5, 2023, a two-day CAD/CAM COLLEGE course "Digital Technologies in Dentistry...
Read more
Roman 9002 Loading
03/28/2016
65554
218
Follow the author
Subscribe
Don't want
Treatment with acetone vapor.
I decided to write a post, thus answering the frequently asked ...
Read more
Read blogs
Original Prusa Mini+ 3D printer from the manufacturer Prusa Research - 3D printer owner reviews, description, specifications, photos, printed models on the Original Prusa Mini+ 3D printer
Brief characteristics:
Print technology: Fused deposition modeling (FDM/FFF)
Construction area, mm: 180x180x180
Printing material: ABS plastic, PLA plastic, hips, laybrick, Nylon, LAYWOO-D3, t-glass, NinjaFlex, PETG,
All specifications
Description of the 3D printer “Original Prusa Mini+”
Original Prusa Mini+
A personal-grade desktop 3D printer designed for maximum volume in a minimal footprint at an affordable price.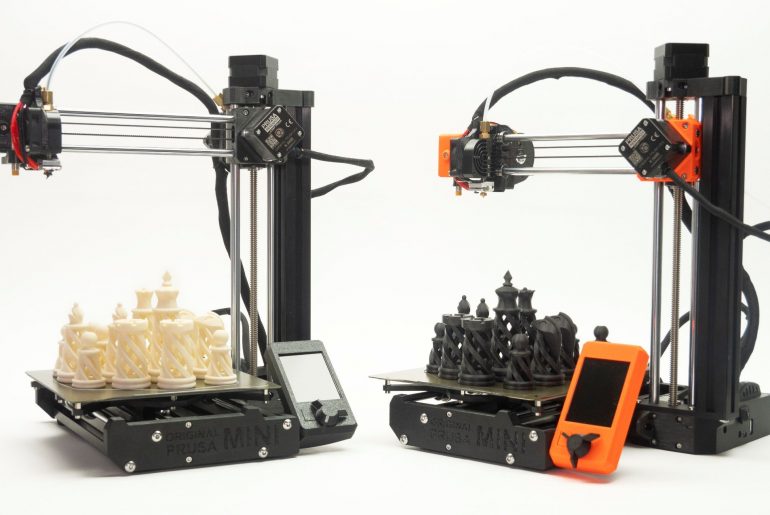 Equipped with a custom 32-bit motherboard with Trinamic 2209 quiet drivers, optional wireless (Wi-Fi) module, nine-point calibration system with SuperPINDA sensor that takes into account thermal stage deformation, color LCD screen and Bowden filament extruder with reducer ratio 3:1. Available fully assembled or as a DIY kit.
Original Prusa Mini+ Owners Articles
Show more
Popular 3D printers
Anet A8
1475 articles 1724 owners
Anet A8 3D printer is a budget 3D printer from China. Region...
3 offers from 12000 ₽
Anet A6
1133 articles 1610 owners
Anet A6 3D printer - Chinese version of RepRap project P.