Printing on 3d surface
How to print directly on to 3D objects - FESPA
We’ve heard a lot about 3D in the past three or four years. But, clever though it is, it’s hard to see it playing a big part in the established 2D printing sector.
Instead we’re starting to see a much quieter but more significant mix of 2D printing straight onto three-dimensional objects. It’s called “direct-to-shape,” (DTS) and it’s happening now.
The headline makers have been big and specialised industrial units, for printing digitally on bottling lines, beverage cans, industrial tubes and tile edges. However Heidelberg, the big German offset press maker, has plans to take a direct-to-shape product family into retail/consumer markets as well as commercial and industrial print.
At the entry level, direct-to-shape can increasingly be done on a smaller scale by small A3/A2 deep-bed flatbed printers that are the digital equivalents of small screen and pad printers.
Beer makes a splash
The heavy-industrial end of direct-to-shape saw a publicity splash in August 2015 when KHS, a big German maker of bottle filling lines, announced the first commercial installation of its “Direct Print Powered by KHS” system, first announced at the Dr inktec exhibition in Munich a couple of years ago.
This uses Xaar 1002 printheads arranged in an unusual vertical “skyscraper” arrangement, firing horizontally onto the straight cylindrical sides of the bottles. The bottles are rotated as they pass the print stations, giving wraparound graphics up to 70mm high on to bottles ranging from 40-125mm.
The first installation is at Browerij Martens, Belgium, the second largest beer brewer in Belgium. This is being used for relatively short, versioned print runs on PET beer bottles. PET isn’t much used for beer in Western Europe, though it’s more common in Eastern European countries.
The first publicly announced job was a promotional launch of a beer that showed a range of actors from the Belgian TV sitcom “FC De Kampioenen” to promote an October 2015 “Jubilee Generale.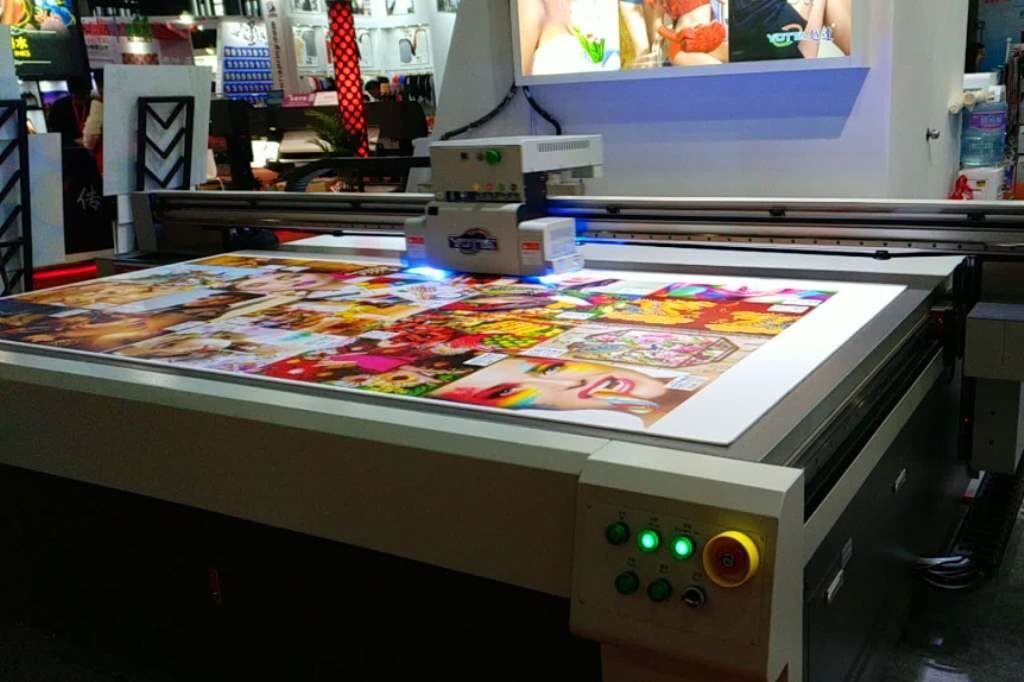 ” The Dagschotel PET beer bottles carry images of different actors which come to life using a special smartphone app and interact with one another if two bottles are placed next to each other.
Printed cardboard six-pack sleeves, Martens will be printing in tens of thousands if not more, but that’s still small beer in the drinks industry.
Krones, another big German bottle-filling line maker, announced an inkjet DTS project at Interpack in 2014. Its DecoType system has been developed in co-operation with Heidelberg, which has adapted its 4D technology with vertical Xaar 1002 heads, to print UV-cured ink on empty bottles made from PET, PP or PE. The printer is based on a carousel that takes bottles from a standard line and returns them after printing. Print heights up to 200 mm are possible.
The KHS installation at Browerij Martens.
According to project manager Andreas Kraus: “the advantage is flexibility. Each print can be different, you can integrate variable data to individualise and personalise products. A special advantage is that areas can be printed on in areas that cannot be printed today with conventional labels, like embossings, grooves or structure. This adds value to the container and we think and believe that this is the technology for the future.”
A YouTube video shows the system printing on the flatter sides of oval plastic bottles. There is a DecoType at a Beta site already, according to Jason Oliver, Heidelberg.
Tubes in a spin
Tube printing so far has seen more development than bottles. The German company Hinterkopf claims to be the first to have developed a digital tube printer, which it calls the D240. It is intended for printing on plastic and aluminium tubes, aluminium cans, cartridges, bottles, cups and other containers.
The price is about €2.5 million depending on the configuration and specification. Hinterkopf’s first production system was installed in July 2015 at Ritter, an Austrian company to the south of Augsberg. Ritter makes plastic products for sectors such as medical technology, road construction and landscaping. It has used screen printing and thermo transfers, but wanted something that could change between jobs faster.
“Customers buy ever smaller quantities to be delivered in shorter periods, so that we have to offer the service of stock keeping and just-in-time deliveries,“ says joint managing director Ralf Ritter. “We wish to be trend-setters in the print-on-demand business of plastic cartridges.”
Another tube printer has been developed by the Italian company Martinenghi, whose Michelangelo KX48P was announced in 2014. This can print in up to seven colours, including white, on tubes from 13.5 to 66 mm diameter and 50 to 280 mm in length.
In Switzerland, Wifag-Polytype has developed DigiCup, a direct printing system for square-sided plastic tubs, such as margarine containers. It uses Konica Minolta heads and was developed with help from UK integrator Industrial Inkjet Ltd. This treats the tubs as a combination of flat sides and conical side sections. It’s seen as an alternative to in-mould labels, where pre-printed plastic labels are placed into the injection moulds for the containers. Several have been installed already, the company says.
Heidelberg targets retailers
All the systems we’ve mentioned so far have been for “industrial” use and runs on standardised products such as bottles or tubes. Heidelberg in Germany has put a lot of effort into DTS and the first commercial product to carry its own name is for very short runs aimed at consumer good with online personalisation via web ordering. Heidelberg calls its DTS systems “4D” meaning 3D objects with an extra dimension of print applied to them.
In early 2014 it announced a DTS printer called Jetmaster Dimension, which has a robotic holder that rotates objects beneath an inkjet head. The first two commercial installations were made at the end of 2014, to Liechtenstein-based BVD Druck + Verlag and German Druckhaus Mainfranken, a print partner of web-to-print firm Flyeralarm.. Both are used to produce personalised footballs which can be ordered, customised and paid for online.
These two machines only print in black UV cured ink. However at the inPrint show in Munich in November 2015 Heidelberg is due to announce a four-colour model, with plans to introduce further types in 2016 including one with six axes of rotation, allowing a greater range of shapes to be moved under the print heads.
The company sees great potential for direct-to-shape in the longer term, saying “It will make the process of customising mass-produced goods faster, cheaper, and more flexible. End users are increasingly looking for personalized design options when shopping for mass-produced items such as sporting goods, footwear, furniture, and cars. High-quality printing with logos, text, and other graphic elements is usually their first choice.
“Inkjet printing offers the ideal solution, as it can deliver high-quality results in a wide range of colours on a huge variety of surfaces, without having to come into contact with the product.”
Oliver says that Heidelberg is already talking to retail organisations about installing in-store printers that will be able to offer customisation onto a range of objects, according to Jason Oliver.
Affordable DTS
In the past seven years a family of small format UV-LED flatbed inkjets have pioneered by Mimaki (and followed by Roland DG, Mutoh and some clever third party Mimaki-hackers). These will not print 100,000 items per hour, but they cost €20,000 to €40,000 and not millions.
They are typically used for small promotional print work, onto pens, gold balls, key gags, phone covers and similar. They can also be used for more conventional industrial applications such as switch and instrument panels.
Jigs can be used to hold multiple items in position for the printed image to register on top, and in some cases the jogs can rotate under the heads so for instance the edges of phone cases can be printed. Cylinder rotators can be used with single bottles and tubes.
Mimaki originally produced the A3 format UJF-3042 for objects up to 50 mm deep, but later models have increased this to 150mm. It has added the A2+ format UJF-6042 and the new UJF-7151 (710x510 mm bed format).
Roland DG first introduced the 305mm by 280mm format LEF-12 and later added the A3+ VersaUV LEF-20. Most recently Mutoh introduced the A3+ ValueJet 426UV. Several third party suppliers take existing small flatbeds (mostly Mimakis) and re-engineer them with deeper beds.
Mixed blessing?
Direct to shape printing has huge significance for several established sectors of the printing industry that today mostly use pad printing, screen process, self-adhesive labels or a variety of transfer methods such as dye sublimation or water-slide decals. It removes the separate print and application stage.
This may be a mixed blessing for established printers. On the one hand if they can adopt it themselves for items such as giftware, then it brings the usual digital advantages of short run and personalisation in an efficient package.
Inkjet printed PET bottles produced by Browerij Martens.
On the other hand, as KHS and Krones demonstrate, these DTS digital printers may end up going onto manufacturing and filling lines and cut out the need for outside print services. Probably what we’ll see is a mix of both, with small customers using outside services and the bigger ones being able to make the investment to bring the work inhouse.
by FESPA Back to News
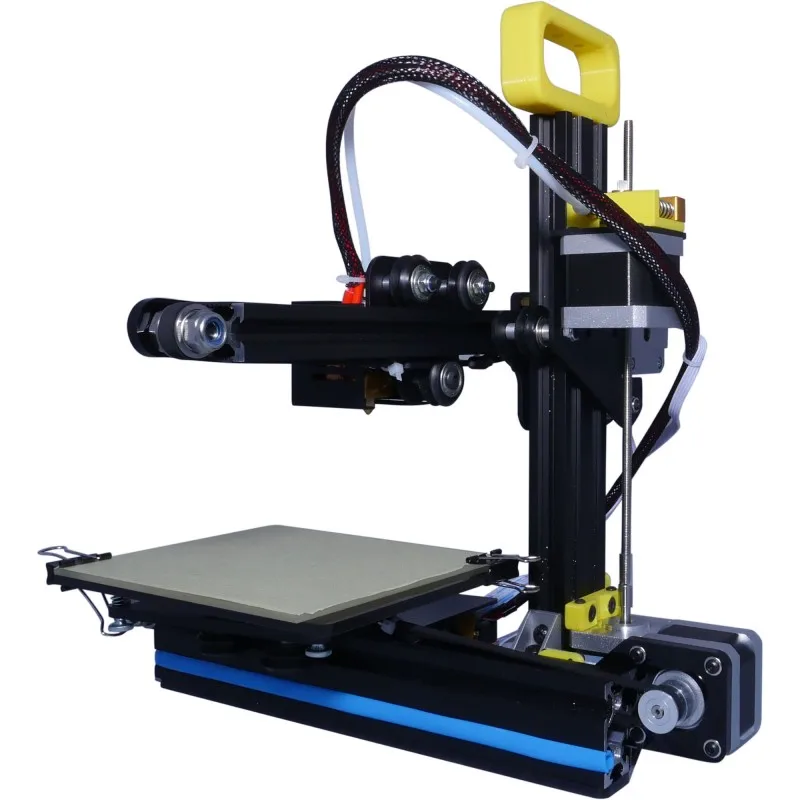
Best 3D Printing Surfaces For Your 3D Printer
Since I started 3D printing, bed adhesion was one of the most common topics I’ve seen online. Most people have issues with bed adhesion, and most of the time it’s caused by improper bed leveling. But there are other cases where the print surface is not the right thing for the job, or it’s low quality.
In this article, I will go over a few 3D printing surfaces which can be used with your 3D printer to improve adhesion and ensure a good printing experience.
Magnetic PEI Flex Plate
One of my favorite 3D printing surfaces out there is the Magnetic PEI Flex Plate. It’s also known under different names, like a Magnetic Spring Steel Sheet or PEI sheet.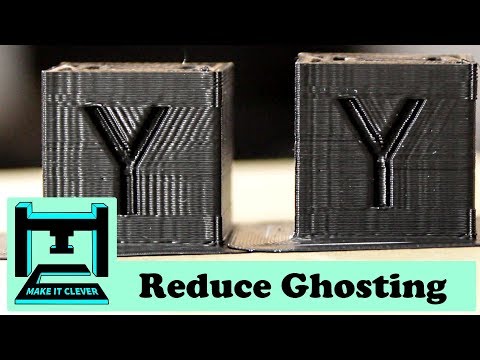
As the name implies, this is usually a flexible metallic sheet that has a PEI sheet applied to it and attaches magnetically to your heatbed. It’s made this way so you can remove the sheet when the print is completed, then flex the print surface to easily remove the printed model.
Probably the most popular PEI magnetic flex plate is the one with a powder-coated surface. But there are multiple versions out there. For example, you could get a double-sided powder-coated PEI sheet, but if you want more flexibility, you can choose one of the printing surfaces to be a smooth sheet of PEI. That way, you can control the finish of the printed model.
Just keep in mind that the smooth side will be less durable compared to the textured side, and if you’re not careful, it’s easy to scratch it. Below you can find an example of a damaged PEI sheet after I did some changes to the printer, and forgot to adjust the Z offset.
The PEI surface helps with adhesion, and it works for a wide range of materials, like PLA, PETG, ABS, and TPU, as long as you keep it clean and use the correct offset.
Here are a few sites where you can get PEI 3D printing surfaces:
AliExpress
Amazon
Banggood
BuildTak
My first contact with the Original BuildTak print surface was a few years ago when I reviewed the Raise3D E2. I used other BuildTak-like print surfaces in the past, but never the original. It was a good experience, and I didn’t have issues with adhesion as long as the Z offset was properly set.
Since then I also got in contact with BuildTak and they made me some custom print surfaces with the 3DPrintBeginner logo to use on my printers. I installed them, and I must say, I love the adhesion you get.
With the BuildTak print surface, you can easily print PLA and TPU without even heating up the print surface. PETG and ABS need a bit of heat due to the nature of the material, but adhesion is just excellent.
I recently printed my HexaHive Speaker Stands on the Sidewinder X2 which has a BuildTak surface applied to the glass surface. Even though the base of the model covers most of the 310×310 print surface of the printer, I was able to print SUNLU PETG without even heating the bed, over about 2 days of printing for each stand. It works really well.
It’s worth mentioning that Z offset calibration is crucial when printing on BuildTak because if you print too low, the model will actually fuse to the print surface and you can damage it.
Speaking of damage, BuildTak print surfaces are also more delicate when it comes to the hot nozzle touching the print surface. Avoid doing that if you don’t want to get small holes in it. Ask me how I know 🙂
Overall, the BuildTak print surface is excellent if you mostly print PLA, PETG and TPU as you can do it without heating the bed. But I can’t say it’s much better than a PEI sheet when talking about other higher-temperature materials like ABS, PC, or ASA.
After a while, the Raise3D E2 BuildTak surface started to “bubble up” on the sections where I was printing most often. This happened after more than a few hundred hours of print time, but I didn’t encounter anything like that with PEI, so BuildTak might need to be replaced more often.
Here are a few sites where you can get BuildTak 3D printing surfaces:
BuildTak
Amazon
Glass Mirror
There are a lot of people who like to use a glass mirror as a print surface for their 3D printer.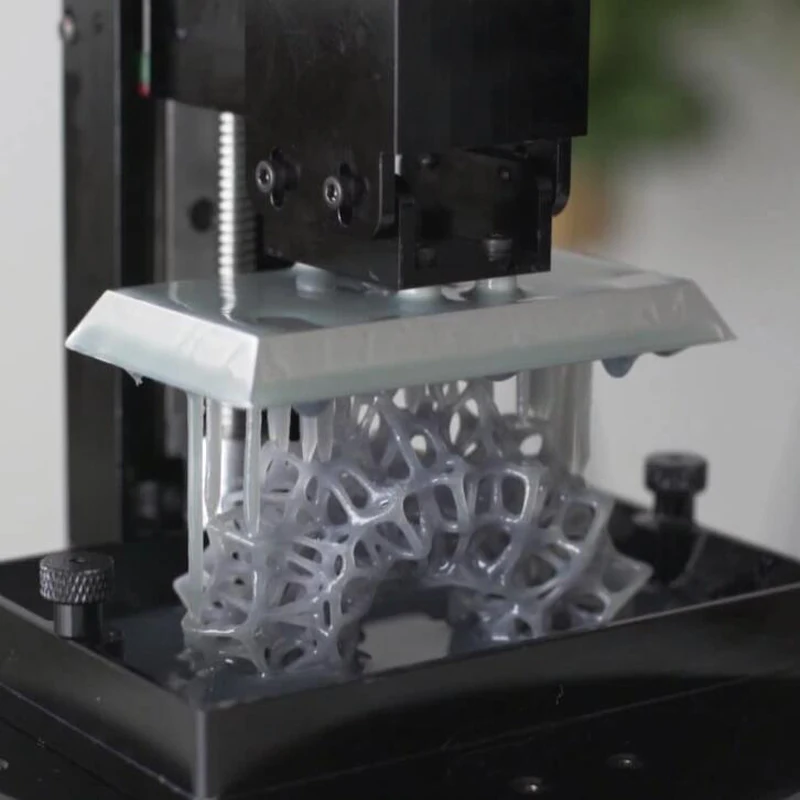 The most attractive feature of using a glass mirror as a print surface is the glossy finish you get on the bottom of your model.
Besides that, the cost of a glass mirror print surface is insignificant, considering you can get a piece of mirror the size of your heatbed for less than 10$. It’s widely available and you should have no trouble finding one.
You can print filaments like PLA and TPU directly on the glass surface, but for PETG and ABS, I recommend using some PVA glue stick to help with adhesion and also create a release layer. If you print PETG or ABS/ASA directly on the glass mirror, the filament can bond to the print surface.
One of the downsides of using a glass mirror as a print surface is the added weight, especially if you have a printer with a big heatbed. After you add the glass mirror to your heatbed, you might see increased ringing on your Y-axis. This only applies to cartesian 3D printers. Printers with a CoreXY movement system, where the bed only moves on the Z-axis is not impacted by this.
I used a glass mirror print surface only once, with my old Anet A8 3D printer. It worked fine at that time, but after I discovered PEI printing surfaces, I never looked back.
Ultrabase
The Ultrabase print surface was first launched by Anycubic, and it’s a glass print surface with a textured finish on the top. This textured finish helps with model adhesion when the surface is hot. When the print is completed, and the ultrabase print surface starts to cool down, the model releases itself.
Nowadays, there are a lot of Ultrabase-like printing surfaces which come as a default printing surface for most 3D printers. Printers like the Artillery Sidewinder X2 and Genius come with something similar, and Creality sells most of their printers with a “carborundum” print surface which is just a fancy name for the same thing.
You can print filaments like PLA, PETG, ABS and PETG with the same considerations as for a simple glass mirror print surface.
In some cases, the Ultrabase clone print surfaces work well, but I also encountered situations where adhesion was just not as expected, and I needed to use adhesion materials to get a consistent result.
If you are thinking about upgrading your printer and purchasing an Ultrabase print surface, I recommend checking out other 3D printing surfaces. Not because this one is not good, but there are other alternatives like PEI and BuildTak which are much better and weigh a bit less compared to this.
Here are a few sites where you can get Ultrabase 3D printing surfaces:
AliExpress
Amazon
Banggood
Garolyte / FR4 Sheet
These garolite sheets are also a good 3D printing surface because it is much lighter than glass and quite cheap. You can print most filaments on it, including PETG which doesn’t work that well on glass.
Maker’s muse has a good video about this printing surface with a lot of details and use cases, so I recommend watching it for more information.
I still like these FR4 sheets less than PEI magnetic flex plates because they still require the use of paper clips to hold them in place. Otherwise, I think they are a good alternative.
Here are a few websites where you can get FR4 3D printing surfaces
AliExpress
Amazon
Banggood
Textured and Holographic 3D Vinyl
You can also purchase textured 3D vinyl to use as a printing surface for your 3D printer. Sure, these are not made specifically for a 3D printer, but you can print PLA on almost anything so there’s no surprise people started doing this.
I’ve seen people install textured carbon fiber vinyl on their glass print surface, to get the same texture on the bottom of their prints.
Others are using this holographic film which has a nice rainbow effect that transfers to the model. If you like this effect, then order some, and please leave a comment with your results. I would love to see how it works, and what kind of useful applications you found. I am more of a matte finish person, so I didn’t try this yet.
Just remember that adhesion might not be the best with some filaments, and this should be used only in specific cases.
Here are a few sites where you can get Textured and Holographic 3D printing surfaces:
Amazon
AliExpress
Liked it?Consider supporting 3DPrintBeginner if this content helped. You can also join Patreon for exclusive perks! |
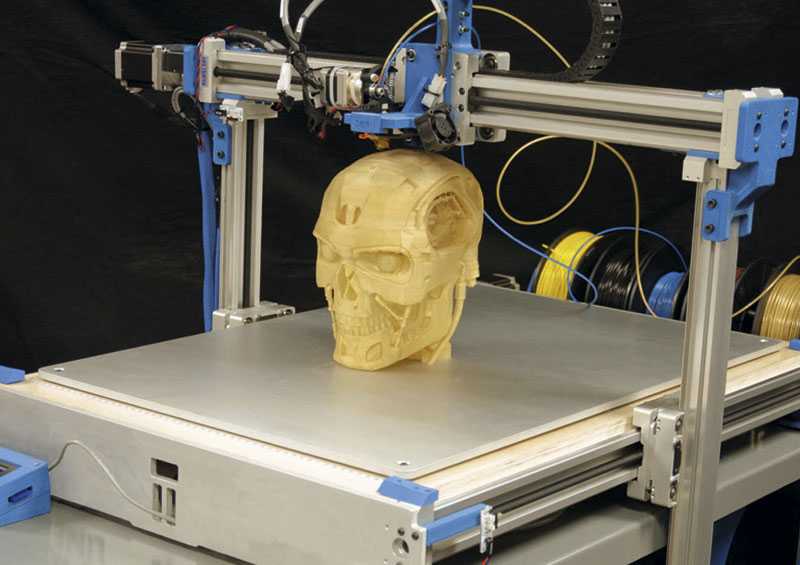
Plastic 3D printing: how to make surfaces smooth
It is believed that plastic 3D printing cannot produce products with smooth surfaces. The layering caused by the peculiarities of FDM construction does not allow them to be used as final products in cases where the aesthetics of the object is important. However, modern methods of post-processing plastic products make it possible to give finished products made on a 3D printer the desired qualities.
Sanding
The surface grinding process is one of the most affordable and common post-processing options for plastic products. Various grinding methods are used to prepare prototypes for presentation, check the assembly of structures, and process finished products.
Sanding can be done both manually and with the use of belt sanders (similar, for example, to wooden parts). It's a simple, cheap and effective way to give your plastic parts the right surface quality properties.
Generally all surfaces can be sanded well, except for very small parts. When it comes to very precise products, it is important to understand how much material you will remove in the process. Removing too much layer will change the structural features of the object. Therefore, before starting grinding, we recommend that you make control measurements and decide on the tool and intensity used for maximum accuracy.
Shot blasting
The process of blasting a surface with a stream of plastic (or metal) shot under the influence of compressed air. The operator directs the device nozzle to different parts of the product to eliminate layering and give the surfaces a uniform matte shade.
Sandblasting suitable for most FDM materials. The use of small plastic shot gives excellent results and does not harm products. Usually, it takes no more than 5-10 minutes to process one part. One of the disadvantages of this post-processing method is the limitation on the size of the product. Since the process takes place in a closed chamber, the maximum size of the product usually should not exceed 30-40 cm.
Sandblasting
Sandblasting differs from shotblasting only in the material used to affect the object. Sand grains allow processing faster. However, due to the geometry of the particles, they do not guarantee such a "delicate" approach to the impact on the surface, as is the case with plastic shot.
Acetone vapor treatment
The product is lowered into a closed tank, at the bottom of which there is a small amount of liquid acetone. The tank is then heated, causing the acetone to evaporate. Vapors interact with the surface of the object, dissolving about 2 microns. This allows you to make the surface of the plastic part smooth and shiny in just a few seconds.
This post-processing method provides a fast and uniform surface smoothing (without disturbing the geometry of the product). It is widely used in the production of consumer goods, medical instruments, and various prototypes. However, like shot blasting, pair smoothing has a size limitation.
Mass mechanized post-processing of plastic parts
There are also automated methods for mass in-line surface treatment of plastic products. For example, various industrial grinding equipment is used for this.
Interested in learning more about the post-processing options for 3D printed plastics? Call +7 495 646-15-33 and Globatek.3D specialists will answer all your questions.
Roughness and surface quality of 3D printing
07/25/2019 in Expert's Blog, Instructions, Observations, Science
The determining factor in print accuracy is the positioning accuracy of the 3D printer head. In the process of stacking layers on top of each other, a certain texture (layers) of 3D printing is created. Printing accuracy (i.e., print roughness) is determined by the following factors:
- Positioning accuracy of the extruder relative to the platform. (If you set the printer to move from point A to point B at a distance of 10 cm, then the accuracy of hitting point B determines the positioning accuracy.)
- Positioning accuracy of the table relative to the camera. (Similar to the first paragraph, only in height)
- Repeatability. (How accurately the pre-layer will differ from the next. This determines not only the accuracy of the positioning of the printer head, but also the accuracy of the material feed. If you print a part that is stretched vertically, that is, all layers are the same shape, then the “sameness” of the layers is repeatability.
- Associated factors. (speed, runout, shrinkage, and other factors as described in the instructions in the “3D Printing Accuracy” section.

If you have configured your 3D printer correctly, selected the right profile for printing, then all the above points should give the maximum quality. However, what? In general, this is a logical and correct question. What is the quality of a 3D printer using FDM technology? Namely, what is the maximum deviation and what is the surface roughness.
We conducted our own experiment to determine the roughness of a 3D printed part. Experiment files can be downloaded from the link. The experiment is carried out on a Picaso Pro 250 3D printer. The tensile samples printed in 3 modes served as products.
These modes were used for both lying and standing images. So that the gap then occurs both along the laying of the threads and across.
The results of the experiment are presented at the bottom of the page.
However, before the results, let's make, in my opinion, a very important digression. Your results will be comparable to ours only if QUALITY 3D printing is provided.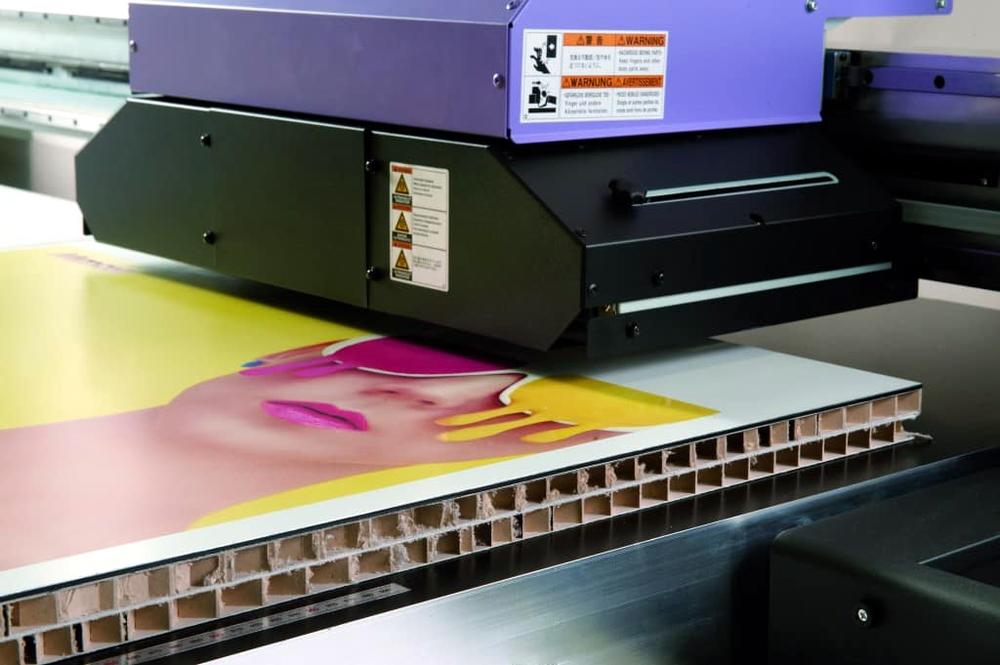 Let's try to explain what we mean by quality when we talk about 3D printing, using the example of one of the orders. Part of this order was printed in our office, and part was outsourced by our partners.
What is quality in 3D printing.
Sometimes there are situations when, due to the heavy workload, we have to place orders for 3D printing with our partners. We really don't like it! Why? Yes, because printing on a 3D printer is also a technological process, the same as milling or turning. This process, as well as others, has its own accuracy and quality of execution! In the photo you can see our part on the right and the part that came from partners on the left. As you can see the difference is obvious.
Let's take a closer look. Our item:
Smooth wall, bright color, good adhesion.
Detail from partners:
Snot, color, wall quality leaves much to be desired.
How to explain this?
The difference is in the details
The fact is that the basis of 3D printing is the correct preparation of the control program for the 3D printer.