Monoprice mp 200 3d printer
Monoprice Select Mini Review 2022
4
See Price
Let’s say you’re in the market for a budget 3D printer. It’s tough: there are models that are vastly overpriced, models that have to be manually assembled from parts, and some that simply aren’t good enough to justify even a very low price. What if you saw a printer far less expensive than the rest? Would you trust it?
Maybe you should. We’re talking, of course, about the Monoprice Select Mini. It’s an absolutely tiny printer designed for people looking to explore the world of 3D printing, without breaking the bank. So how does it hold up? Let’s find out!
| Filament Diameter | 1.75mm |
| Extruders | 1 |
| Supported Materials | PLA, ABS, HIPS, PVA, TPU |
| Connectivity | USB, SD Card |
| Printing Speed | 55mm/s |
| Build Volume | 4. |
Table of ContentsShow
Design
This printer’s design is about as simple as they come. It has a single extruder, and prints onto a heated bed. The build area is, as you’d expect, fairly small – roughly the size of a can of Coke. Still, this is about average for a printer in this price range, so there are no complaints on this front.
Since this printer is designed for beginners, we were pleased to see that it ships fully assembled and pre-calibrated. In fact, thanks to the four-post leveling system, you shouldn’t have to calibrate it too often. Instead, you can focus on the fun part: actually printing things.
You can control this printer either with a PC or directly, using the built-in screen to select models for printing. There’s also a USB port and SD card slot, and the printer actually includes a USB stick with models so you can get printing right away.
Printing
The first thing you should know is that the Select Mini is slow. Its top speed is about half as fast as its rivals, and worse, it tends to fail when running even at that. You’ll be far better served with a slow and steady approach. This seems to create the most consistent, high-quality models.
Now, bear in mind that this is a budget 3D printer. Despite this, we found its prints come out looking pretty good! Sure, you can still see the layers, and intricate details aren’t replicated all that well, but with a little patience (and post-processing), you’ll find you can actually do quite a lot with the Select Mini.
Budget 3D printers tend to have one characteristic in common: lack of versatility. You can expect to print with PLA, maybe ABS too, at best. Incredibly, the Monoprice Select Mini supports both of these materials, as well as HIPS, PVA, and TPU. It’s not even limited to using a proprietary filament, so you can really go wild.
Features
Part of this printer’s appeal is its simplicity. As such, it doesn’t have many advanced features to speak of. Rather, it tries to make things as easy for new users as possible. Take software, for instance: it works with Cura, Repetier, Simplify3D, and most other popular modeling or slicing programs.
As you grow more comfortable using a 3D printer, you might want to add some upgrades. The Select Mini is perfect for this, since its inner workings are easily accessible, and its firmware easily flashed. In fact, we’ve found guides for everything from changing the hot end to adding wireless functionality.
If you’ve used a 3D printer before, it’s unlikely that this model will blow you away. It’s aimed at beginners and has a price point to match, after all. However, if you’re completely new to printing and just want something to tinker with as you learn, there are a few models better than this one.
Cost
So how much do you think this printer costs? Brace yourself – it actually retails for around $190, making it among the cheapest 3D printers we’ve seen. Now, it’s not available directly from Monoprice anymore since they’ve released the Mini v2 for the same price. However, it can still be picked up by third-party retailers.
The freedom to use third-party filament means you can keep your material costs down. Evidently, if you want to print often, this will increase to some degree, but since there’s no support for exotic filaments, things shouldn’t get too out of hand.
This printer is perfectly priced and has enough versatility to corner the low-end market. Frankly, we’re amazed that this isn’t the go-to recommendation for people looking to get into 3D printing for the first time.
Support
Despite its low prices, Monoprice offers a 30-day money back guarantee on all its printers. Once you’ve committed to keeping the unit, a year-long limited warranty takes effect. This is pretty good coverage, especially since there’s no risk of breaking anything during assembly.
On the other hand, Monoprice only offers basic troubleshooting tips and 3D printing tutorials in its support section. You can use the ticket system, email, phone, or live chat to get more detailed help. Our only issue is that the returns link only works on some pages, throwing an error on others.
Honestly, this level of support was unexpected. Too often, low-end 3D printers try to sell their product and then wash their hands of it. That’s clearly not the case with Monoprice, and for that, we applaud them.
Review: Monoprice MP Select Mini 3D Printer
2016 is the year of the consumer 3D printer. Yes, the hype over 3D printing has died down since 2012. There were too many 3D printers at Maker Faire three years ago. Nevertheless, sales of 3D printers have never been stronger, the industry is growing, and the low-end machines are getting very, very good.
Printers are also getting cheap. At CES last January, Monoprice, the same company you buy Ethernet and HDMI cables from, introduced a line of 3D printers that would be released this year. While the $300 resin-based printer has been canned, Monoprice has released their MP Select Mini 3D printer for $200. This printer appeared on Monoprice late last month.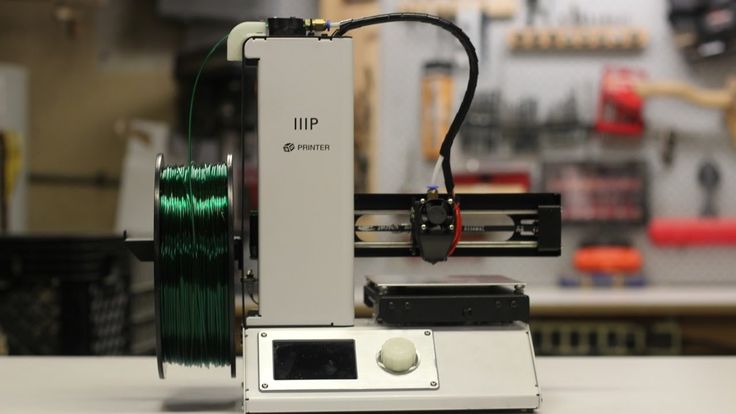
My curiosity was worth more than $200, so Hackaday readers get a review of the MP Select Mini 3D printer. The bottom line? There are some problems with this printer, but nothing that wouldn’t be found in printers that cost three times as much. This is a game-changing machine, and proof 2016 is the year of the entry-level consumer 3D printer.
Boring Specs
The standard Buddha from [kim]. This print exhibits Z banding, but that’s an issue with the slicer (Cura), and not the printerThe spec sheet for the MP Select Mini boasts a 120 x 120 x 120mm build area, 100 micron resolution, a heated build plate, and a printing speed of 55mm/second. Astonishingly, this printer lists Cura, Repetier-Host, ReplicatorG, and Simplify3D as the compatible software. This means that it speaks normal G-code.
Monoprice’s MP Select Mini doesn’t require special filament, and it can use the standard Open Source 3D printing software. This is in stark contrast to the XYZPrinting da Vinci from 2014. The da Vinci uses chipped, DRMed filament, and a proprietary interface instead of standard G-code. The MP Select Mini doesn’t pull any of these tricks, and is a minor miracle for a $200 printer.
Like most of the name brand printers found at CES last January, this printer is a rebadge of something already being made somewhere in China. The most likely suspect for a manufacture is a company called Infitary. You can buy a printer nearly identical to the Monoprice MP Mini on AliExpress right now, and it doesn’t seem Monoprice added anything special to this printer.
Judging by the spec sheet, I’d guess Monoprice doesn’t even know what they have on their hands here. The real specs for this printer are actually better than what Monoprice has published. This printer is capable of a layer height much smaller than 100 microns.
Prints
The first layer of Wade’s GearThe 3D Benchy. With this print, the printer demonstrated issues in cooling the filament and overhangs.Before showing off the prints the Monoprice MP Select Mini can produce, I must mention a simple fact: sample prints are not indicative of the quality of a printer. A 3D printer is just a CNC machine, and most of the work in turning an STL file into a real object is done by the slicer.
That said, there are a few things you can tell by looking at a few 3D print samples. Z axis wobble can be easily identified by looking at straight vertical walls. The ability of a printer to control the hotend temperature and use the fan can easily be seen in overhangs.
My first few prints were of Benchy, the tugboat 3D benchmarking tool. While not perfect, out of the box and with the recommended Cura settings, this printer produced a Benchy that is at least equal in quality from any other uncalibrated printer. With a little work in getting the right settings, I can see this printer producing Benchys that are at least equal to those produced by any other mid-range printer.
There is one glaring issue with the Monoprice MP Select Mini: the temperature control loop for the hotend is terrible. My printer has +/- 5 degree temperature swings over a period of several minutes, and this has been seen in other reviews of this model. The reason for this is an uncalibrated PID loop. Nearly every printer firmware has a PID autotune function that clears this problem right up. The firmware for this printer does not have a PID autotune function as far as I can tell.
 Notice a few breaks in the infill. This was printed at 260 degrees in PET-G
 Are the prints made on the MP Select Mini good? Yes, they can be. The MP Select Mini has a few problems, but none that won’t be easily fixed by the 3D printer community in a few months.
Teardown
This printer is built down to a price. The strange thing is, this fact really doesn’t show until you start taking it apart. The chassis is all metal, the X and Y axes are belt driven on 6 mm rods, the Z axis is leadscrew driven, and there’s really not much to write home about. The printer is built solidly, and I can easily foresee it standing up to a lot of abuse.
Back cover off
NEMA 17s for all motors (except Z)
The bottom guts
The Motors and Mechanics
The standard for all 3D printers, from the cheapest fleaBay specials to the high-end Lulzbots and Ultimakers, is stepper motors. If you have a 3D printer, chances are you own four or five NEMA 17 stepper motors. Are they the best solution? That’s arguable, but it’s the standard. The MP Select Mini bucks this trend with a circular, non-NEMA motor on the Z axis.
The Z axis is leadscrew driven with an M4 threaded rod. It’s weird, and the Z axis is tremendously slow. This, however, is a selling point Monoprice failed to mention. Because the Z axis lead screw’s thread pitch is so fine, this printer can produce objects with a very, very small layer height. [Prusa]’s calculator gives a very low theoretical minimum layer height for this setup. The minimum layer height is not 100 micron as the spec sheet says, but it can be taken as evidence Monoprice is underselling the capabilities of this printer. It does mean Z axis travel is very slow, but that really doesn’t matter.
The Electronics
Here is where the MP Mini Select shines. If you’re looking for the one game-changing feature of this printer, it’s the controller board.
Before I broke out the hex wrenches for the teardown, my only impression of the firmware and electronics came from watching the test prints being built. There was something very different about this machine: the acceleration. The acceleration ramp when travelling from one end of the bed to another is like nothing else I’ve ever seen on a 3D printer. It was smooth, precise, and almost beautiful to watch. I figured this was custom firmware. It was, but that’s only half the story.
The electronics board for this printer is a 32-bit ARM Cortex M3, a vast improvement over the 8-bit ATmegas found in almost every other 3D printer controller.
The brains of the entire printer, an STM32F103 microcontroller. 32-bit 3D printers have finally arrived.This printer is an exercise in how inexpensively you can produce a printer, and these efforts clearly show in the electronics board. There are only six chips on this board: four Hh5988 motor drivers (I assume off-brand clones of the popular A4988 stepper motor drivers), a buck converter (most likely for the LCD), and the microcontroller, an STM32F103 microcontroller. Yes, 32-bit printing is finally here.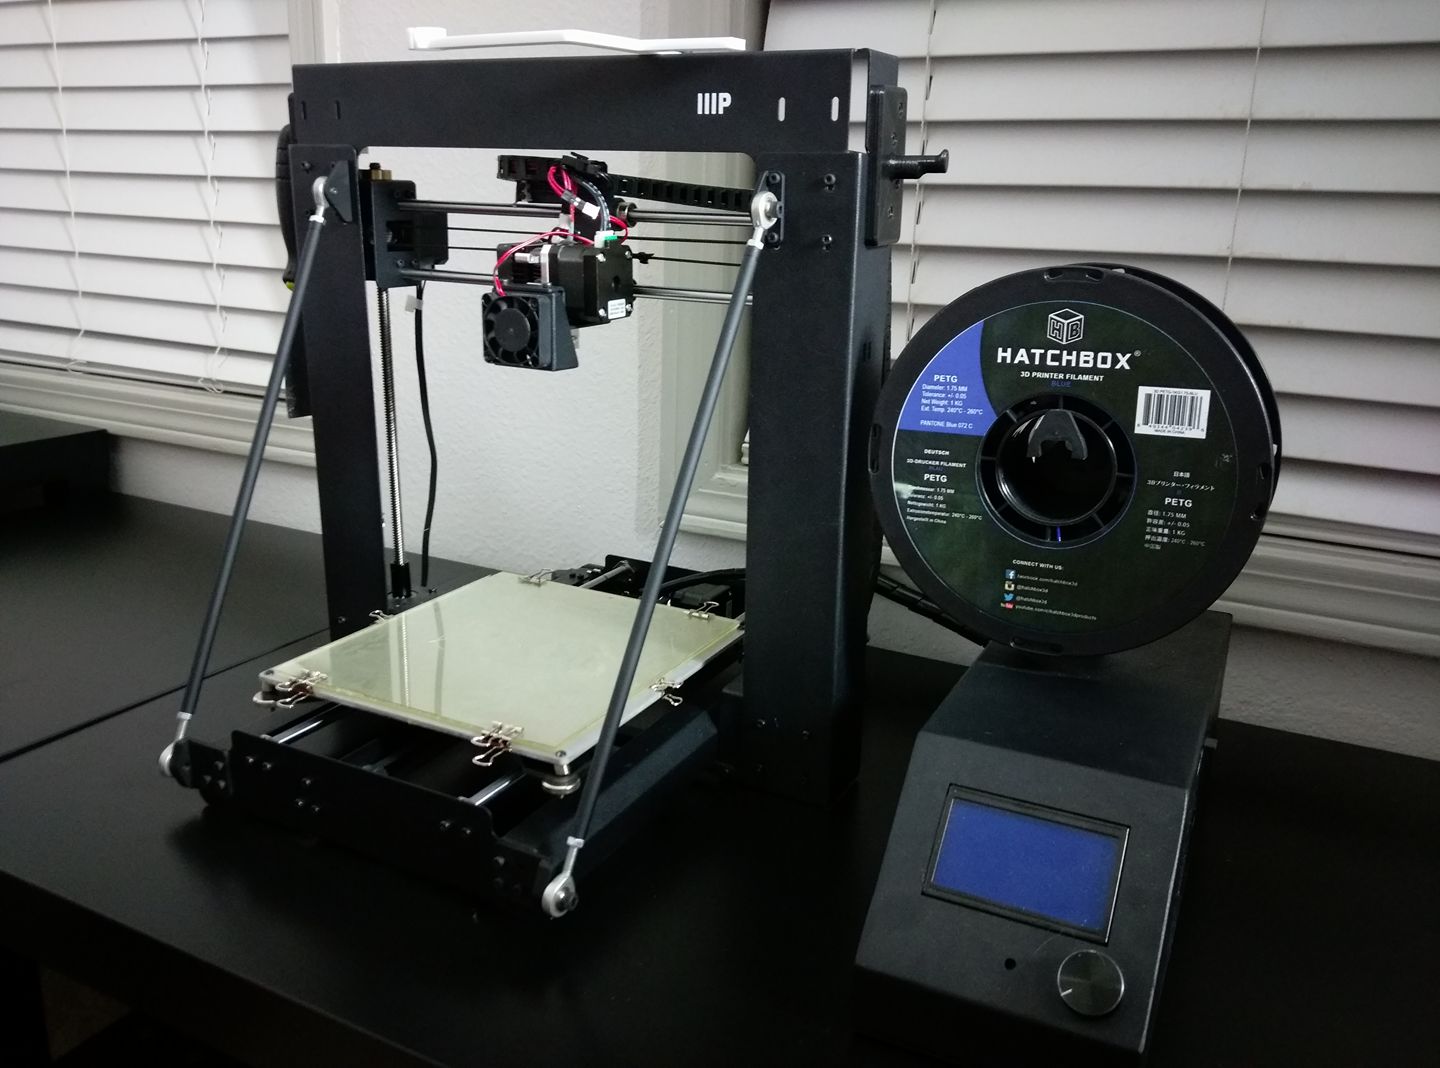
It is impossible for me to understate the importance of the ARM microcontroller in this printer. Until now, with the exception of the Smoothieboard, the vast majority of 3D printers have been built around ATMega microcontrollers. This is understandable given the historical context; the first RepRaps were developed around 2009 or thereabouts, and the Arduino was very big at the time. 3D printer controller boards were developed around these 8-bit microcontrollers, and development continues to this day.
Everybody recognizes that ARM microcontrollers are the future of 3D printer control boards. ARM micros are cheaper – the STM32F103 on this printer board is half the price of the ‘standard’ ATMega2560 or AT90USB found in every other printer controller. ARM chips are more powerful, allowing for smoother acceleration. ARM micros are just a better solution to the problem.
Despite these obvious realities, thousands of people have been working on 8-bit controller boards for the better part of a decade. There’s a lot of technical debt to pay off in the Open Source 3D printing world. This technical debt was just paid off by a random embedded dev in China. If you want to see the future of 3D printer controller boards, all you need to do is buy a $200 printer from China.
As far as the LCD and controls go, they’re exactly what you would expect. It’s a full color TFT, most likely the same model used in an old non-smartphone, with a single rotary button. I believe the LCD and button assembly connect to the printer board over SPI. The controls allow the user to load a file from the SD card, move the axes around, and set the temperature. It’s the bare minimum, but you don’t really need much more.
Heated Bed
On most consumer 3D printers – those that have a heated bed, anyway – you’ll find a PCB heat bed screwed or clamped to an aluminum or glass plate. This is the standard. The MP Mini Select doesn’t have a separate build plate and PCB heater. Instead, a thin sheet of aluminum is bonded directly to a PCB heater.
The PCB heat bed is bonded to an aluminum build plate
While this makes for a much cheaper build – you don’t have to add an aluminum or glass sheet to the BOM, in addition to any fasteners – I am afraid it won’t be as robust as the standard separate aluminum/glass build plate and heater. That doesn’t mean it’s a bad solution, just that a bonded aluminum sheet won’t be able to take as much abuse without warping.
An innovative, low cost hotend
The theme of this printer is being built to a price, and nowhere is this more apparent than the hotend. To the manufacturer’s credit, this hotend does use a standard heater cartridge and replaceable thermistor. This is the future of hotends, and even though you can still buy hotends with nichrome heater cores, these are on their way out.
The hotend. Note the air gap between the Bowden end and the beginning of the heat break. When changing out filament, it can jam in this air gap
The aluminum heatsink extrusion. This is the part that bolts onto the x carriage and holds the heat break.
The hotend consists of a 0.4mm brass nozzle screwed into a heater block, and a heat break screwed onto an aluminum heatsink extrusion. This is possibly the simplest hotend in existence, but that doesn’t mean it’s skimping on features. I haven’t taken this hotend apart yet, but I suspect it is an all metal hotend. There’s simply no space in the heat break for a PTFE liner. That’s amazing for what is apparently the cheapest hotend you can buy and allows the MP Select Mini to print in exotic plastics.
I would not recommend printing in exotic plastics, though. There is one feature desperately missing from this hotend: a second fan to cool plastic squirting out of the nozzle. The MP Mini uses a single 20mm fan to blow air over both the hotend heat sink and right on to the molten plastic coming out of the nozzle. This is a bad design, and combined with the poor temperature control in the firmware, results in poor bridging capabilities for this printer.
These Are The Upgrades You’ll Want
Every 3D printer needs upgrades. Some, like the Lulzbot Taz 6, come with just about everything you could want, but ideally you’ll still want to stick a Raspberry Pi in there for headless, networked printing capabilities. Cheap eBay kits? You’ll want a better build plate, a new extruder, and maybe a better hotend. The MP Mini is fairly well equipped, but there are a few extras you’ll want.
A New Build Surface
As mentioned above, the one-piece heated bed for this printer is one of the most interesting designs I’ve ever seen. The print surface that comes with the MP Mini, though, is just a large sheet of masking tape. This will last you a few prints, but after that you’ll want something better.
For this review, I used a 6″ wide strip of Kapton and glue stick, but the current ‘best material for a build plate’ is a sheet of PEI or Ultem mounted to the build plate with a sheet of 3M 468MP adhesive transfer tape. You can get a 12″ x 12″ PEI sheet from Amazon for $16, and a 12″ x 12″ square of 468MP Transfer Tape for $17. That’s four PEI build surfaces for the MP Select for $37, and will be an amazing maintenance free build surface for PLA, ABS, and (reportedly) PET.
A Raspberry Pi / Octoprint Setup
There are reports the MP Mini is loud. Mine isn’t, but apparently results may vary. In any event, you’ll want to install your printer somewhere out of the way – a workshop, garage, or basement – and let it do its thing for several hours at a time.
While you can print from an SD card (and I have exclusively), that still means that you need to sneakernet files between a computer and the printer. Octoprint removes the need for this sneakernet, and allows for remote control of a printer over a network. If you plan on using this printer for more than just the occasional trinket, an Octoprint setup will be a huge benefit. The instructions are available on OctoPrint.org. You’ll want the Raspberry Pi that has been gathering dust for several years, a USB WiFi adapter, SD card, and a USB power supply.
A Hotend Adapter
Print this thing. Print this thing now.Every hotend will die. Hotends are consumables. They last a while, though, and even after 100 hours of printing, there’s nothing to tell me the hotend on the MP Mini won’t last as long as any other hotend.
Unfortunately, there’s no source for direct replacements. If you want to replace the hotend on this printer, you’ll have to shell out another $200 for a new printer. Spending $200 on a new hotend is crazy, and any company that forces that on consumers will quickly go out of business.
If you buy this printer, this should be the first thing you print. I whipped up an adapter in OpenSCAD that puts an E3D hotend on the MP Mini printer. It bolts directly onto the X carriage. Is it perfect? No, but if you print this adapter out, you’ll be able to print a better adapter out with your new hotend. Just print that and tape it to the back of your printer. You’ll thank me later.
Should You Buy This Printer?
There are problems with this printer. It is a closed source design, and replacement parts are impossible to find. The firmware doesn’t have handy features like Marlin’s autotuned PID values. The fan design for the hotend needs work. This printer uses a Bowden setup, so flexible filaments – Ninjaflex and Semiflex – are unusable. Trust me, I tried.
Printer Comparison
The Monoprice MP Select Mini is, by any account, a My First 3D Printer™, so let’s compare apples to apples. The class of printers that can be called a My First 3D Printer™ aren’t the Lulzbots, Ultimakers, or other machines that cost $1500 and up. ‘Beginner’ 3D printers are better defined by the SeeMeCNC Eris, the Printrbot Play and Metal Simple, the Deezmaker Bukito, the Maker’s Toolworks MiniMax, the da Vinci printer, and [Prusa]’s i3 Mk2.
The Monoprice MP Select Mini stands out in its price range. This machine is only $200, and you’re getting features you won’t find in a $600 Printrbot. This is a game-changing machine, and I would recommend this to anyone looking for their first 3D printer. Thanks to Monoprice, the entire market for entry-level consumer 3D printers has been upended. $200 is almost impulse purchase territory, and Monoprice is going to sell a lot of these machines.
Now we have some work to do
When the da Vinci printer was released two years ago, an immense amount of effort went into reverse engineering the chipped filament and reprogramming the control board to speak normal G-code. Now the same work must be done on this printer.
The control board for this printer must be reverse engineered and duplicated. The first person to do that will lay the foundation for the next generation of RepRap control electronics. I would highly recommend putting the reverse engineering efforts on Hackaday.io. Perhaps more importantly, a proper, Open Source 3D printer firmware must be ported to this printer. Right now, many of the shortcomings of this printer can be fixed through a firmware update. With open, improvable firmware, combined with its decent hardware, it could be outstanding.
Even without a rewrite of the Marlin firmware and a clone of this electronics board, it’s still a fantastic printer. It’s not perfect, but it’s good enough for the thousands of people who will end up with one of these on their workbenches.
Overview of the budget 3D printer Monoprice Select Mini
3DPrintStory Reviews Overview of the budget 3D printer Monoprice Select Mini
Prices for desktop 3D printers continue to fall. There were times when a $600 3D printer was a delight and a desire to order it as soon as possible, but technology does not stand still, and developers and manufacturers are looking for new options to lower the price even lower. This review is dedicated to one of the budget 3D printers costing about $200 - Monoprice Select Mini.
It is worth noting that this inexpensive model breaks established traditions and did not start with Kickstarter, unlike others like M3D Micro, Tiko, OLO / ONO and Trinus, which attracted the attention of consumers and investors thanks to crowdfunding platforms (by the way, this is really an effective development strategy for small startups, but there is often a mismatch between expectations and the final product).
Monoprice is different. This is an American company that did not particularly bother with the development and production of its own 3D printer, but simply imported the Malyan M200 from China, hung its logo on it and put an attractive price of $199. What if you got a defective 3D printer? No problem, send it back and they will replace it for you.
A reasonable question arises: can such a cheap 3D printer compete with Ultimakers or Printrbots? And is it even worth comparing? We will try to answer these and other questions in the review below.
Features Monoprice Select Mini
- Available;
- Robust design;
- Easy to use;
- Predictable 3D printing at low speed;
- Works with any slicing software and standard 3D printing materials;
- Amenable to improvements and upgrades;
- I think we already mentioned the price?
Disadvantages Monoprice Select Mini
- Difficult to calibrate;
- Prints poorly at high speeds;
- Print table not protected;
- Faulty power supply;
- WiFi module not active;
- Unstable nozzle temperature;
- Strange quirks.
 ..
..
Short Verdict
The Monoprice Select Mini is a great 3D printer for the price. There is a heated table, easy to operate if you do not use high speeds, stable 3D printing quality.
Naturally, there are disadvantages. During operation, the temperature of the nozzle may change, and at high speeds, 3D printing errors occur. The calibration process takes a lot of time and the first time you have to tinker. Well, the most interesting thing is that the power supply burned out after 12 hours. But the latter, incorrect, can be attributed to an accidental marriage.
Despite all the shortcomings, the Monoprice Select Mini is a wonderful little 3D printer with many great features. In general, it performs in accordance with the information in the technical specifications, and the quality of the 3D printing even exceeded our expectations.
If you are not afraid to take it apart / put it back together, then you can do a few upgrades. The first thing to do is to replace the hotend and update the firmware to activate the WiFi module ( be careful! These upgrades have not been tested as part of this review and may damage your 3D printer! ). You can install the glass on the print table. Even with these upgrades, the price will still remain acceptable.
Would you recommend the Monoprice Select Mini as your first 3D printer? Yes, definitely.
Specifications and features Monoprice Select Mini
Monoprice Select Mini workspace 120 x 120 x 120 mm. The maximum resolution of 3D printing is 100 microns. Heated table. The 3D printing speed is 55 mm/s.
You can upload your 3D model via micro SD card or USB. The manual states that compatible slicing programs are Cura, Repetier-Host, ReplicatorG, and Simplify3D. This means that the Monoprice Select Mini recognizes the standard G-code, and this 3D printer is not tied to any particular software. Cura was used during testing for this review.
Monoprice Select Mini doesn't limit your media usage. You can print with any standard 1.75 filament using PLA or ABS thermoplastics. In our case, PLA plastic from ColorFabb was used.
These two points - the freedom to choose software and filament - are very important in this price range, because manufacturers such as M3D Micro and XYZprinting, which are Monoprice's main competitors in this niche, tend to use proprietary software and their own materials for 3D printing .
Unpacking and installation of the Monoprice Select Mini
Installation of the Monoprice Select Mini is quite simple. You can start typing within 20 minutes.
Inside the box you will find a 3D printer, a power supply, an imbus wrench for calibrating the table, a plastic spatula to scrape off the rest of the material from the table after printing, a 256 MB micro SD card and a micro USB cable.
One piece of paper contains a basic instruction and a link to a website where you can download the full version.
You will also find a rectangular steel sheet, the purpose of which is not clear at first. It turns out that this is a coil holder that is attached to the side of the main unit.
It is important to note that the Monoprice Select Mini kit does not include media test samples. So stock up on filament with a diameter of 1.75 mm.
You can use the wheel to adjust. The menu is well structured and easy to understand. You can start the calibration process, preheat the extruder and feed the filament.
Calibration can be somewhat difficult. In theory, it should be carried out even before shipment, in production, and you should have a piece of paper between the nozzle and the printing table. If it doesn’t work, then hex keys will come in handy here. It will be necessary to try and tighten the screws at the corners of the table so that the sheet still passes.
At this stage, the first important shortcoming of this model becomes clear. The printing table is made of aluminum and does not have a special protective film or coating on it. So stock up on blue 3D printing tape or install glass right away. Otherwise, the table will wear out very quickly and you will have to change it.
Well, one more bug that got out in our particular case. The power supply burned out after 12 hours of use. Foaming it was not difficult, but it was very unpleasant. You can probably throw it off for marriage, but in any case, be prepared for a similar turn of events.
Design and build quality of the Monoprice Select Mini
Very pleased with the build quality of the Monoprice Select Mini. The construction is strong, reliable, with a steel sheet metal case that hides all the electronics. So don't worry about shipping damage.
This 3D printer uses deposition modeling technology. The classical Cartesian coordinate system is used. The design is similar to Printrbot Simple. One cooler is used to cool the nozzle. It is likely that problems may arise during 3D printing with unusual materials.
The extruder has a diameter of 0.4 mm and can be heated up to 230°C. We have not been able to test how easy it is to change, but in the long run this is an important factor as the nozzle will still need to be changed over time.
Monoprice Select Mini Print Quality
Pre-loaded models will already be on the micro SD card. They are supposed to be optimized for 3D printing on the Monoprice Select Mini. So before uploading our own models, we printed test ones.
The cat was printed first. The resolution was 200 microns. Everything went well until the last layers. The upper part of the paw and ears could not be printed even once. There were 3 attempts in total.
G-code analysis in Simlify3D showed that the table accelerated up to 55 mm/s during the printing of the last layers. That is why the error was repeated. Quite a strange decision of the company - to provide a test model, which a priori will be printed with errors...
The second model that we printed is a test elephant. The resolution was also 200 microns and 10% infill. There were no problems! The result is excellent and you can see it in the photo below.
Next we moved on to our own models. We used Cura for slicing. This article reveals the excellent Cura settings for 3D printing on the Monoprice Select Mini and we used them.
We printed a classic 3DBenchy and Graphica model: a MEGA Ghost with 200 micron resolution and 10% infill, a V29 whistle with 200 micron resolution and 100% infill, and another 3DBenchy model with 100 micron resolution and 10% infill.
The simple 200 micron models worked well. There are no special problems with small protrusions and holes, although there are sagging. The layers are laid evenly along the X and Y axes.
The V29 whistle sounds as loud as intended, which means the partitions were printed correctly. The Graphica Mega Ghost with its long tongue also printed correctly. The hinge glided smoothly. The
3DBenchy at 100 microns worked well too. When you look at the photo, don't forget that this is a $19 3D printer.9.
We have noticed that most errors in 3D printing occur when the spool of filament clings or there is not enough adhesive coating on the printing table. This cannot be attributed to the shortcomings of the Monoprice Select Mini itself, since this is a global problem for all FFF printers.
During operation, the print table may block access to the control wheel. This point is implemented in the design is not very ergonomic.
Another disadvantage is that the nozzle temperature has an error in the region of 5°C.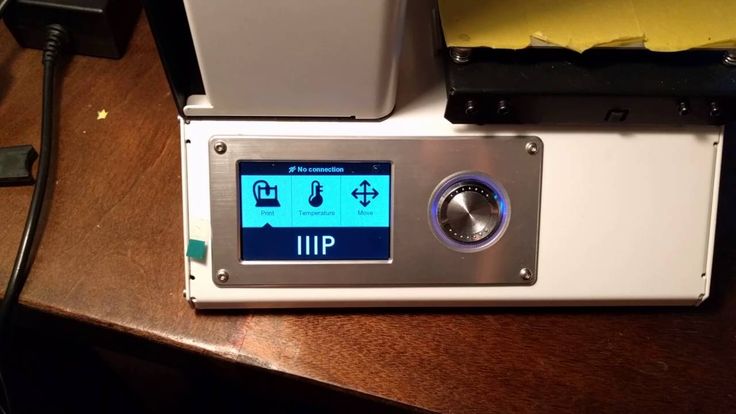 For example, when the 3D printing temperature is set to 215°C, it jumps between 213°C and 217°C on the control panel.
This does not particularly affect printing with PLA plastics, but may have a negative effect during 3D printing with materials that are more sensitive to temperature changes.
Finally, we printed a Low Poly Moai bust. We scaled the model by 50% and printed with 100 micron settings and 30% infill. It turned out well on the whole, the only small marriage is the influx of material on the chin. By the way, we observed the same effect when printing 3DBenchy with resolution settings of 100 microns.
Life hacks and upgrades Monoprice Select Mini
A few words about upgrading the Monoprice Select Mini 3D printer. There are no official upgrades! But here are a few options that you can try to implement on your own.
In our opinion, it is necessary to deal with the temperature of the extruder, make it more stable. For example, you can implement a PID temperature controller.
You can activate the WiFi connection by downloading the original Malyan M200 firmware. But be careful! This option has not been tested and there is a possibility that you may damage your 3D printer!
Monoprice Select Mini Summary
After testing the Monoprice Select Mini, this is one of the best 3D printers you can buy for $200.
But it's important to realize that the print quality can't be compared to the Original Prusa i3 MK2 or LulzBot Mini. Not to mention the more expensive models.
If you're looking for a small business 3D printer or just high-quality 3D without bugs, then the Monoprice Select Mini is not for you. In addition to the print quality, you will obviously not be satisfied with periodic bugs and a small workspace.
But if you are just starting to explore the world of 3D printing, then this is a great choice and a good alternative to the Chinese Anet A8 3D printer.
The Monoprice Select Mini has some drawbacks, but it's still a great option for learning and just having fun. It's easy to use and print quality rivals more expensive models.
Monoprice 3D Printers
For
For
Professional
Industrial
Personal
Commercial
3D printer type
3D printer type
Tabletop
Food
Professional
For home
Chocolate
Jewelry
Russian
Reprap
Dental
Full color
Industrial
Not expensive
Medical
For training
Material type
Material type
Plastic
606
Metal
50
Photopolymer
245
Other
144
Manufacturer
Manufacturer
3D Systems
84
PICASO 3D
8
Stratasys Ltd
38
Leapfrog BV
6
EnvisionTEC
51
Myriwell
4
3D-Experts
3
PrintBox3D
4
FELIXrobotics
11
Solidoodle
8
WANHAO
32
ROKIT
5
SeeMeCNC
4
mUVe 3D LLC
1
RepRapPro
5
Formlabs
9
Afinia
1
Airwolf 3D
6
Type A Machines
2
iRapid
1
RoBo 3D Printer
3
Mixshop Inc
4
IonCoreLtd
1
Old World Laboratories
1
XYZprinting
13
Panowin Technologies Co.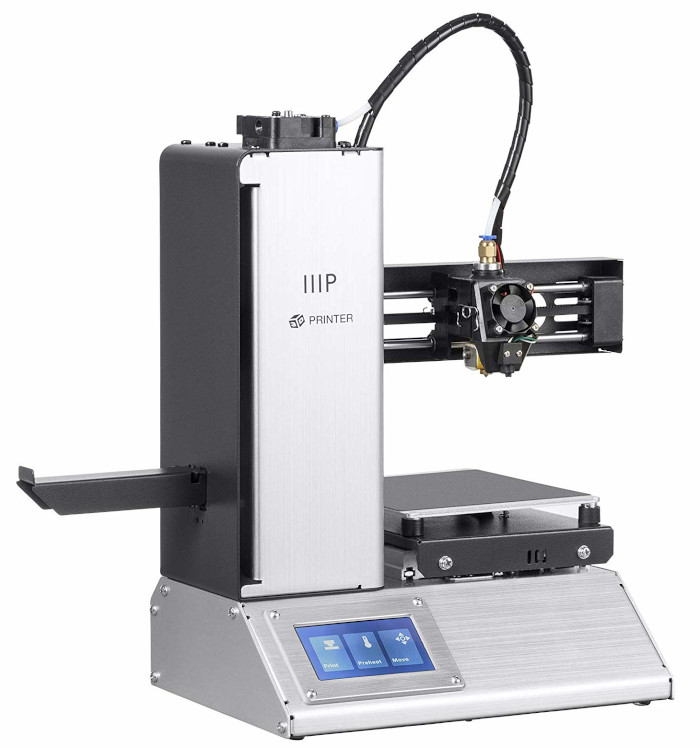 , Ltd.
2
MiiCraft
7
Portabee 3D Printer
2
Zeepro
1
Pirate 3D
1
Qualup SAS
2
BEETHEFIRST
3
Heacent
2
Robot Factory
2
Kuhling&Kuhling
1
3Dfactories
3
Tangible Engineering USA Corporation
1
DWS Lab
1
Sedgwick
2
3DJoy
4
Futura Elettronica
1
Makible Ltd
2
ALT Design
1
Active 3D
2
Trinitylabs
1
Sumpod Ltd.
4
Brahma3
1
Hyrel 3D
5
Omni3D
4
BCN3D Technologies
7
Boots Industries
2
ORD Solutions
2
Ironvault
1
2PrintBeta
3
Unique Design
3
Hot Proceed
1
3DD Plas
2
York3dPrinters
1
Code-P
4
Deezmaker
3
Ruian Maitian Network Technology Co
2
CB-Printer
1
Print Technologies Pty Ltd.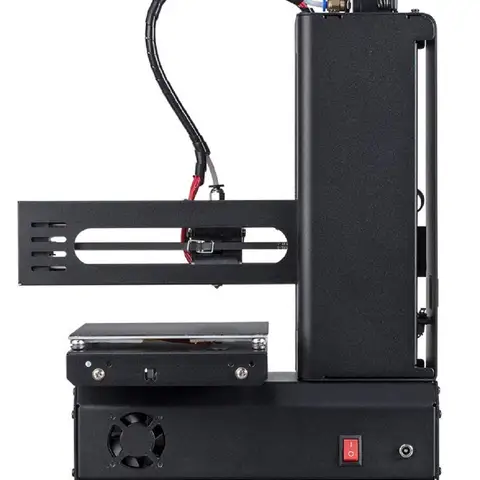
5
MaukCC
1
Choc Edge Ltd
2
Shenzhen WeisTek Co.,Ltd
5
Delta Tower
2
Tegelbeckers Ltd
1
Deltaprinter
1
MindKits
1
Robot Co, Ltd
1
Romscraj
2
Fabmaker
1
Peerbhai Robotic
1
Sintermask GmbH
1
KL Services Group Inc
1
Fochif Mechatronics Technology Co.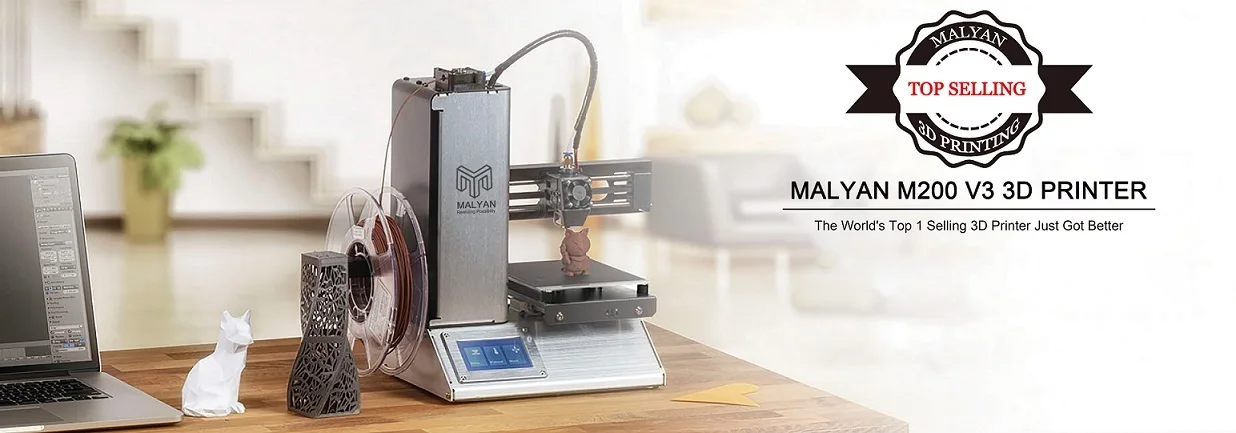 , Ltd
, Ltd
4
Teil3
1
Maker's Tool Works, LLC.
2
Gaminu
1
re:3D
1
inDimension3
4
Acuity Design
1
Essential Dynamics
1
Isis3D
1
Velleman
1
Kentstrapper
4
Blue Eagle Labs
1
Gubbels Engineering
2
Zortrax
8
3dBotic
1
MakerGear, LLC
1
Jelwek
1
it is 3D
2
Cablysa Systems, S. L.
L.
3
Ac123Dc
1
E3D Online
1
Hydraraptor
1
MakerBot Industries, LLC
8
Delta Micro Factory Corporation
3
Ultimaker B.V.
11
Solidscape Inc.
8
MBot3D
4
B9 Creations
4
Jinhua Flashforge Technology Co., Ltd
26
Tinkerine Studio Ltd
3
Aleph Objects Inc.
4
DeltaMaker
1
Reprap Austria
3
IC3D LLC.
1
Ultibots, LLC.
2
Intelligent Machine Inc.
1
Metamaquina
1
Shenzhen Mootooh Engineering Co., Ltd.
1
Multitec GmbH
3
German RepRap GmbH
3
Sharebot
17
Nova 3D
1
QU-BD Inc.
4
RDMCU
1
Full Spectrum Laser LLC
1
PieceMaker Technologies
1
Printbot, Inc
7
Terawatt Industries
1
botObjects
1
Lunavast
2
MakerFarm
3
NWRepRap
1
eMotion Tech
1
Printed Worlds
1
Reprapsource
1
Twelvepro Co
1
Replicator Warehouse
1
Stellamove Inc.
1
Make Mendel
6
Rapide 3D
2
Makealo
1
Crew Ltd.
1
Open cube
1
3D Kits
1
Coombes Solutions Ltd.
1
SHARK Limited Partnership
1
Smartfriendz
1
3DMonstr
1
Kikai Labs
2
THY3D
1
Tantillus
1
RepRap Diffusion
1
QSQM International Co.
1
Tumaker
1
Makism 3D Corp.
3
3dBotZ
1
ZMorph 3d
1
Eckertech Inc.
1
Imec Proto
6
miniFactory Oy Ltd
1
printMATE 3D
1
CMET Inc.
5
Arcam AB
6
3Geometry Manufacturing Systems Pvt Ltd
8
Electro Optical Systems
15
Trump Precision Machinery Co. , Ltd
, Ltd
4
Wuhan Binhu Mechanical & Electrical Co., Ltd.
11
Optomec Inc.
1
Shaanxi Hengtong Intelligent Machine Co., Ltd.
9
Matsuura Machinery Corporation
1
ExOne Company, LLC
6
Concept Laser GmbH
9
Instrument Tech Co,Ltd
7
UnionTech
8
Renishaw plc
2
D-MEC Ltd.
3
Realizer GmbH
5
SLM Solutions GmbH
5
Fabriconic LLC
3
Mark Forged
8
Keyence Corporation
2
SYS+ENG
1
Lithoz GmbH
1
DWS s.r.l.
12
Beijing TierTime Technology Co. Ltd
17
Carima
3
Mcor Technologies Ltd.
3
Asiga
11
Rapid Shape GmbH
14
solido ltd.
1
Blueprinter ApS
1
Kevvox Pte Ltd.
2
JER Education Technology Co., Ltd
1
Azuma Engineering Machinery Inc.
2
Space Monkey
1
Trimaker
1
Most Fun
1
Iniciativas 3D
1
IdeaLab 3d
1
MendBot Labs
Bonsai Lab
2
MakerDreams
1
i3Dbot Co. , Ltd
, Ltd
2
Natural Machines
1
Cyrus3D
ITALYmaker
Something3D
Cagelli Distribution
E Crew Vis
BigRep GmbH
2
Voxeljet Technology GmbH
5
Sciaky Inc.
Mankati
4
F&B rapid production
3
3D Quality
17
Workshop Churyumov
2
Unimix
2
Center for Additive Technologies
3
ENNOVA
1
Exclusive Solutions
2
Magnum
5
SHEKLA
1
D-Force
3
BigRep
4
Roland
1
Alphabet 3D
2
MAKEX
1
3D Master Kit
7
Shining 3D
25
3NOVATICA
3
AVS Robotics
1
IMPRINTA
11
Createbot
5
AIO Robotics
1
RK-3D
1
SPETSAVIA
3
3DiY
14
Wonwall
1
Apium Additive Technologies
3
3DSUN
1
Cheap3D
1
3rd
1
EGL3D
1
Creality 3D
42
UNIMATECH
2
VolgoBot
3
ZVER 3D
3
Zenith
2
MicroFactory
1
Hewlett Packard
2
Shenzhen Anet Technology Co Ltd
15
MASS PORTAL SIA
11
Cyberon
2
PHOTOCENTRIC
2
TotalZ
11
3dcon
2
Raise3D
6
OOO RUSSIAN ENGINEER
1
Vortex-3D
5
Flying bear
11
Print3D
5
ROBOINO
1
SoloPrint
1
Fun Distribution
1
Alekmaker
2
Cronos
2
TEVO 3D
9
3D printers from China
2
ZAV 3D printer
4
Epo3d
1
FLSUN 3D
3
WINBO
19
PROTOTYPE
1
UNIZ TECHNOLOGY
2
W2P Engineering GmbH
4
MAESTRO
1
3D printer Pi
1
Shenzhen Tronxy Technology Co
23
Kelandi
1
Geeetech
21
3DCeram
2
Omaker
1
Builder 3D Printers
6
Creatable Labs
1
ROBOZE
3
Desktop Metal
1
Sintratec
2
CreatBot
10
ANYCUBIC
29
3dlaboratorio
2
OOO SPC "Lasers and Equipment"
2
Prusa Research
6
Prismlab
3
ivilol
2
Geralkom-3D
7
EqMex
1
Tsar3D
2
Zhuhai CTC Electronic Co.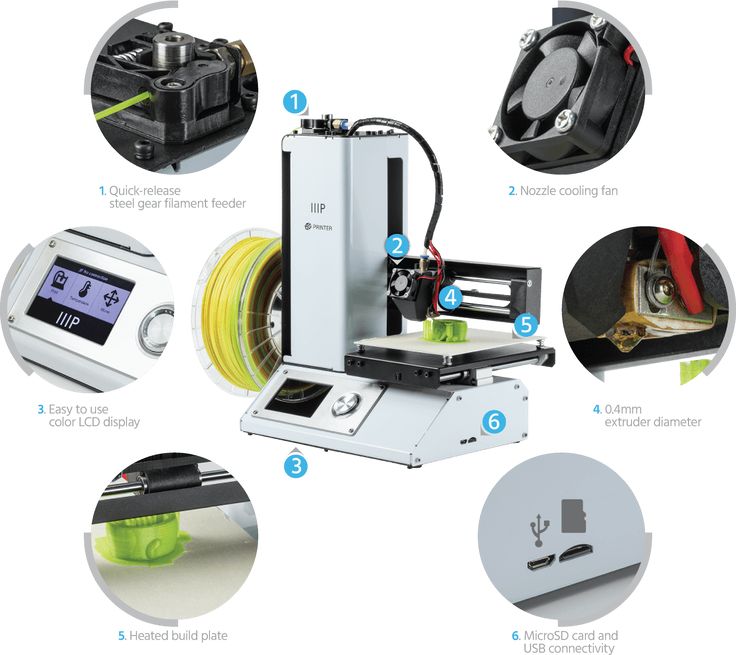 , Ltd
, Ltd
3
Shenzhen Aurora Technology Co., Ltd
6
Monoprice
1
Shenzhen Salon Technologies Co., Ltd.
1
Shenzhen Sundystar Technology Co., Ltd
2
Shenzhen Easythreed Technology Co., Ltd
1
WOW Innovation Technology Co., Ltd.
2
Jinhua Xingzhe 3D Technology Co., Ltd
1
Shenzhen Zhongxin Microscience Software Co., Ltd.
1
Shenzhen Yaying Trading Co. , Ltd
, Ltd
5
Z Bolt Co.
2
Anisoprint
1
Shanghai 3D ARTEL Science and Technology Co.
3
FABERANT 3D printers
1
Self-assembly 3D printers
4
Z Rapid Tech
21
Zonestar
13
3DGence
3
BLB Industries
1
Hard Light
1
Stereotech
2
TPM3D
7
Artillery
4
Phrozen Tech Co..jpg)


