Original prusa i3 mk3 3d printer review
Prusa MK3S+ 3D Printer Review: The Heavyweight Champ Continues to Dominate
Tom's Hardware Verdict
The Prusa MK3S+ continues to hold its own in a market saturated with low-cost competitors.
Pros
- +
+ PrusaSlicer provides best-in-class model slicing
- +
+ Flexible build platform sets the standard
- +
+ Automatic bed leveling
- +
+ Stealth Mode enables a nearly silent printing experience
Why you can trust Tom's Hardware Our expert reviewers spend hours testing and comparing products and services so you can choose the best for you. Find out more about how we test.
There are few 3D printers with as many industry accolades as the Prusa i3 MK3S+, and after spending some time with this printer, it’s easy to see why it’s one of the best 3D printers currently on the market. With a price tag of $999 for an assembled machine or $750 for a DIY kit, the price point of the MK3S+ is towards the high end for an open format consumer 3D printer, but the features of this machine and the ecosystem created by Prusa (they make their own hardware, software, filament, and more) have made the MK3S+ a formidable machine for anyone interested in taking their 3D printing game to the next level.
The features of the MK3S+ (silent stepper drivers, power-panic, etc.), noteworthy when originally launched, have largely become standard on lower-cost machines and may not seem particularly impressive on a spec sheet. However, clever software implementation and well-written documentation have created a machine that provides a best-in-class printing experience. For instance, the auto-leveling SuperPINDA probe of the MK3S+ maps the build platform for surface distortions, but the printer firmware is capable of storing multiple Z-offsets so you can switch build platforms without having to recalibrate every time.
The MK3S+ is a visually distinct machine; and the Prusa team has kept their black and orange color scheme for their smaller printer, the Prusa Mini+. The bright orange printed parts on the MK3S+ have created instant brand-recognition for the Prusa line of printers, and Prusa has doubled down on this by reinforcing their branding across their machine. In fact, you can find the word ‘Prusa’ printed, engraved, or etched into the MK3S+ in 25 places, 29 if you’re using a spool of their Prusa Polymers Prusament PLA material.
Specifications
| Machine Footprint | 16.5 x 16.5 x 15 inches (42.0cm x 42.0cm x 38.0cm) |
| Build Volume | 9.84 x 8.3 x 8.3 inches (250mm x 210mm x 210mm) |
| Material | 1.75mm PLA, ABS, ASA, PETG |
| Extruder Type | Direct Drive |
| Nozzle | .4mm |
| Build Platform | Magnetic Heatbed with removable PEI spring steel sheets |
| Power Supply | 240 Watts |
| Connectivity | USB, SD Card |
| Interface | 3.4-inch Mono LCD and click wheel |
| Filament Run-Out Sensor | Yes |
Included with Prusa MK3S+
The fully assembled Prusa MK3S+ ships with all of the accessories required to make your first print, and also includes enough spare parts to replace almost every fastener on the machine. The fully assembled MK3S+ also includes a bag of Haribo Goldbears, a signature addition from the Prusa team.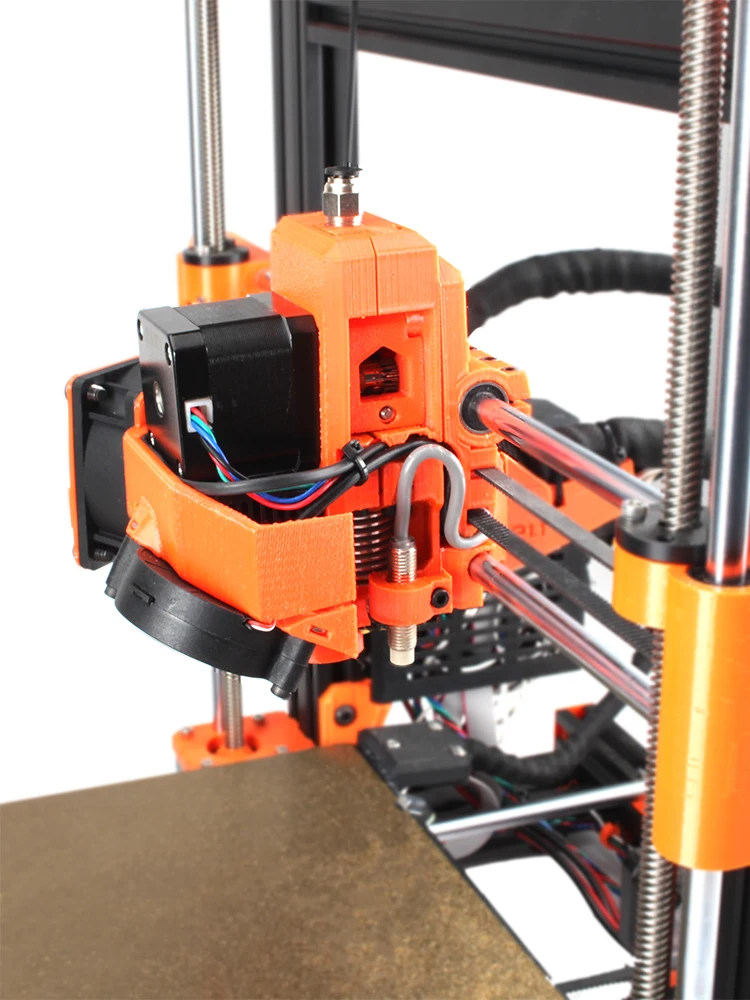
Image 1 of 2
(Image credit: Tom's Hardware)(Image credit: Tom's Hardware)The Prusa MK3S+ includes a full spool of silver PLA material, screwdriver, a metal part scraper, a glue stick (for adhesion), an isopropyl alcohol wipe, lubricant for the linear rails, power and USB cables, a sheet of stickers, a printed handbook, and a diagnostic printout that confirms the functionality of the mechanical and electrical systems.
Image 1 of 2
(Image credit: Tom's Hardware)(Image credit: Tom's Hardware)The usefulness of the handbook is hard to overstate. When you’re starting out with your first 3D printer, it can be difficult to pinpoint the cause of problems such as loss-of-extrusion, poor layer adhesion, or a clogged extruder. The included handbook is full of detailed photographs, troubleshooting workflows, and solutions to common problems. This is an invaluable resource for beginners, amateurs, and experts alike, and it’s clear to me that Prusa has set the standard for technical documentation.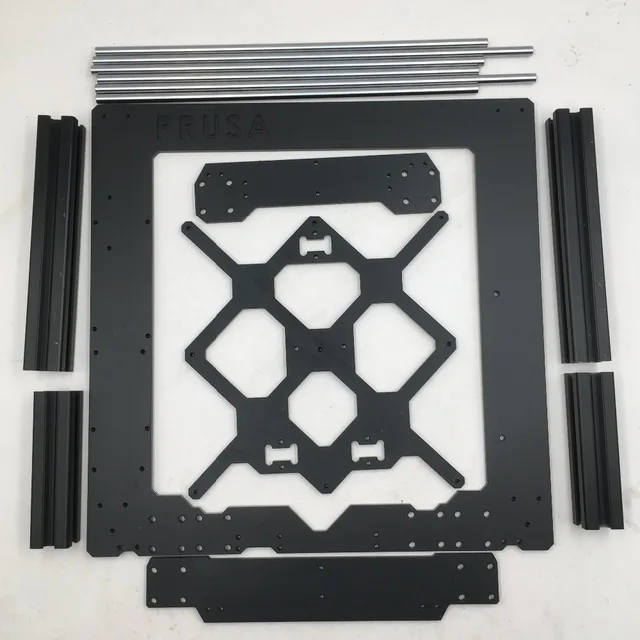
Setting up the Prusa MK3S+
(Image credit: Tom's Hardware)The Prusa MK3S+ ships with a completed print attached to the build platform. This print features a serpentine line with 90 degree angles, curves, and a solid block in the center with the Prusa logo facing upwards. This print serves to confirm that the printer is functional and has been properly assembled and calibrated. I was able to easily remove the print from the build platform by bending the steel sheet and carefully removing it.
(Image credit: Tom's Hardware)After powering on, the printer automatically runs through an initial setup process. This process involves calibrating the Z axis by running it all the way to the top of the printer, running the mesh bed leveling process to set the Z offsets, and loading the filament. This entire process only took me a few minutes, and the high level of automation involved means that the only thing I needed to do was insert the filament into the extruder after it had heated up.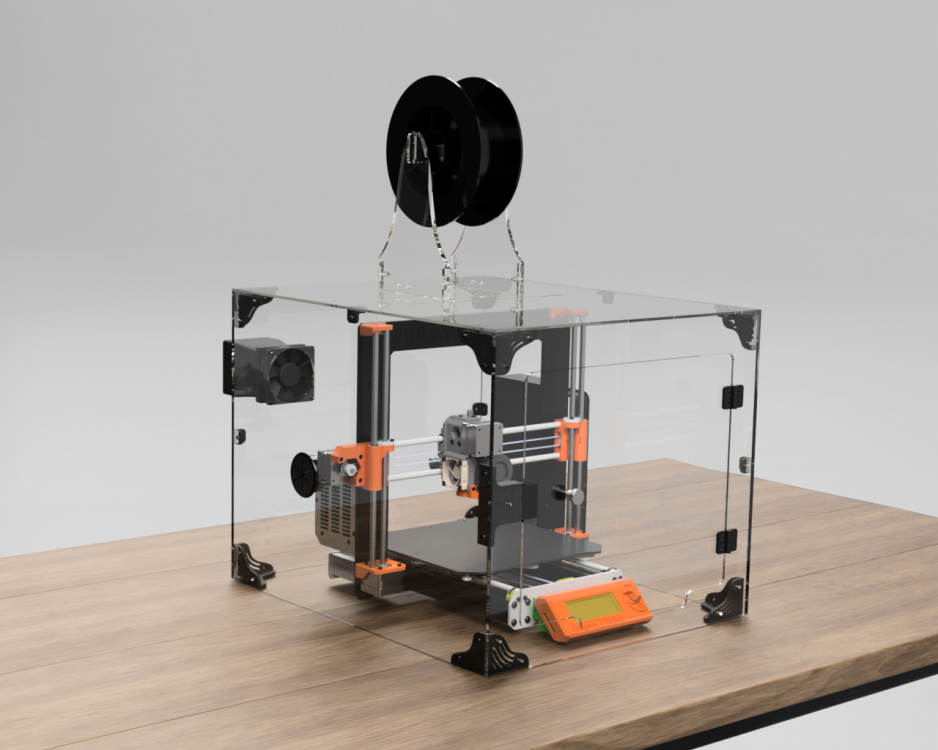
You might be surprised to find that the Prusa MK3S+ is based on the RepRap i3 (third iteration) frame, originally released in September of 2012. Despite this nearly decade-old release date, the MK3S+ is full of modern advancements and enough innovative features to still be a top contender in the prosumer 3D printer market.
Image 1 of 2
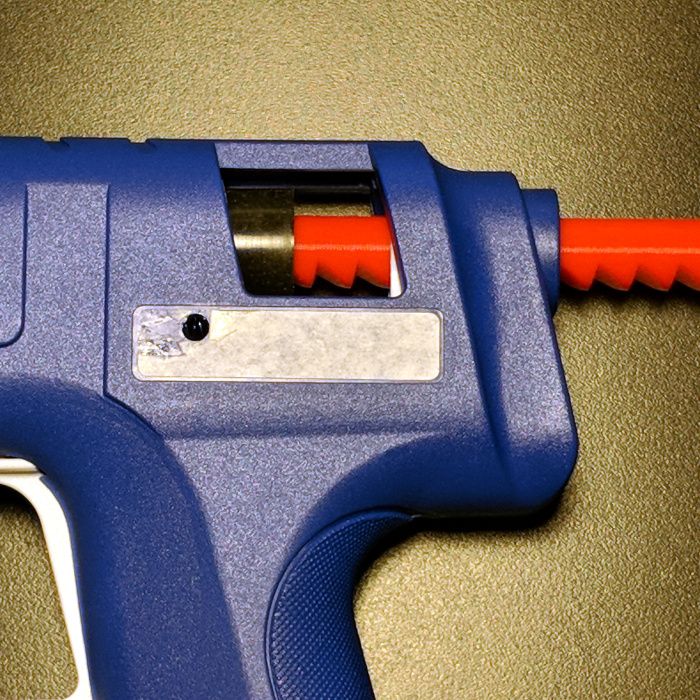
(Image credit: Tom's Hardware)(Image credit: Tom's Hardware)The bright orange color makes the 3D printed parts on the MK3S+ easy to spot. The brackets mounted to the printer are printed in-house by Prusa using their own Prusament PETG filament. These brackets are robust and sturdy, and the uniform appearance between the printed parts give the printer a professional appearance. This version of the MK3S+ shipped with orange printed brackets, but the printer is also available in an all-black variant. A large selling point of the MK3S+ is the open-source nature of the machine, which means the printed parts are all available to download if you want to download, modify, or print them out yourself.
The monochrome LCD interface and click-wheel on the MK3S+ is one of the few less-than-impressive features on this machine; it feels dated and the UI navigation can be a little clunky. This stands in contrast with printers like the Anycubic Vyper, a sub-$400 machine that features a bright and responsive color touchscreen that shows detailed print statistics during printing. This monochrome display was industry standard when the original 8-bit i3-style of printers was introduced, but it feels outdated when compared to recent printers with color touchscreens.
(Image credit: Tom's Hardware)The MK3S+ uses a filament spool holder that mounts directly to the frame of the printer. The T-shaped holder is able to hold two spools simultaneously, which is ideal if you plan on swapping between multiple colors to produce a multicolor 3D print. The direct-drive extruder on the MK3S+ feeds filament straight down into the hot end, so mounting the filament directly above the extruder gives the filament a straight path between the spool and the extruder.
At the heart of the MK3S+ is the 8-bit Einsy RAMBo board, housed in a 3D printed enclosure mounted to the frame of the machine. This board is equipped with Trinamic 2130 silent stepper drivers, user-replaceable fuses, and the cable management is clean and professional.
The features made possible by this board (power-panic, live-Z adjust, silent steppers) were all major leaps when originally introduced, but many of these features have made their way down to less expensive FDM 3D printers like the Elegoo Neptune 2. The interface feels sorely in need of an update, and the addition of a color touchscreen and a 32-bit board (such as the one equipped on the Prusa Mini+) would refresh this platform.
(Image credit: Tom's Hardware)The attention to detail on the Prusa MK3S+ is clear, and a perfect example of this is the wire management across the machine. Current-carrying wires are attached to the extruder module with zip ties that act as a strain-relief to prevent the wires from fatiguing and separating. The wires from the power supply are tucked neatly under the frame of the machine, out of sight and reach from users to prevent accidentally unplugging them during printing.
What Makes the Prusa MK3S+ Different?
It can be hard to understand why the Prusa MK3S+ costs so much more than a printer like the Creality Ender 3 Pro, which seems to have similar specs on paper. To understand why this machine is so much more expensive, we need to take a closer look at the individual components of the MK3S+.
(Image credit: Tom's Hardware)Critical to the success of the MK3S+ is its custom-made Delta 240 Watt power supply, mounted to the frame of the machine. This unit supplies 24V power to the bed with a max current of 10 Amps, which provides fast and reliable heating for printing high temperature materials like PETG and ASA. Less expensive machines typically use lower wattage power supplies, such as the 150W power supply used by the Flashforge Adventurer 3 Lite, which take longer to heat and can have difficulty maintaining a higher temperature.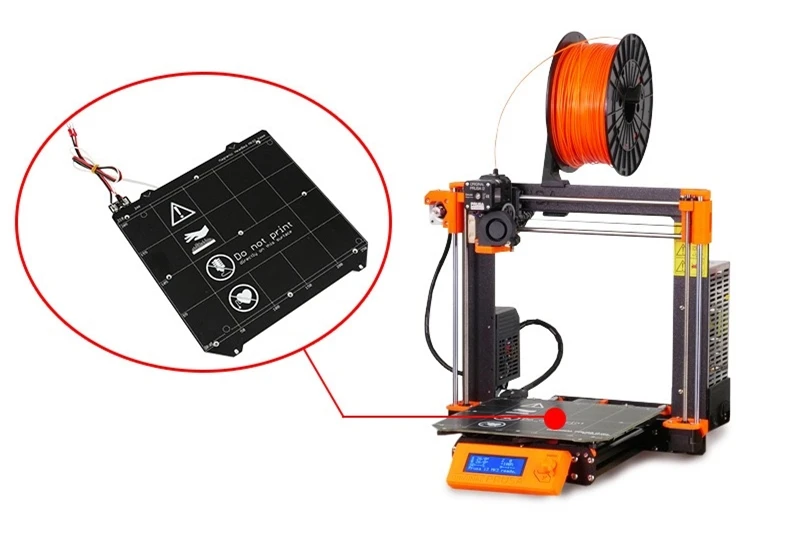
The 24V heated bed is able to reliably hit 100C, which is more than enough to allow high temperature materials like PETG and ASA to adhere to the build platform without delaminating. The magnetic build platform is firmly held in place without any clips or latches and can easily be removed once it cools to room temperature. PETG in particular is easy to remove from the textured surface of the textured spring steel sheet, and the MK3S+ build platform is best-in-class for high-temperature adhesion.
Image 1 of 2
(Image credit: Tom's Hardware)(Image credit: Tom's Hardware)The MK3S+ is equipped with a genuine E3D hot end, and it has the holographic sticker to prove it (seriously). E3D manufactures every component in the hot end from the nozzle to the heatbreak which means you are very unlikely to run into the type of manufacturing defects that occasionally pop up on less expensive printers (incorrectly drilled nozzles, degraded PTFE tube liner, etc. ) In addition, this nozzle is rated for a max temperature of 300C (572F), which is easily hot enough to extrude most common thermoplastics and even some higher-temperature engineering-grade materials like Nylon and Polycarbonate.
Image 1 of 2
(Image credit: Tom's Hardware)(Image credit: Tom's Hardware)The printed parts on the MK3S+ are a perfect example of a company applying its in-depth knowledge of a subject to its product. The printed brackets found on the MK3S+ have been printed in PETG, and the outward-facing textured surface shows the level of quality you can expect from using a textured sheet.
In addition, I appreciate that Prusa has applied DFAM (Design for Additive Manufacturing) principles to these parts. These DFAM principles include concepts like printing hexagons instead of circles for relief holes, which print without requiring support material, and printing brackets perpendicular to their intended load to create mechanically tough parts.
(Image credit: Tom's Hardware)The Prusa MK3S+ comes equipped with a SuperPINDA probe which is used for hands-free leveling of the build platform. The SuperPINDA (which stands for Super Prusa INDuction Autoleveling sensor) operates by detecting the proximity of the probe to the build platform and storing that information in firmware. The MK3S+ isn’t the first printer to use a probe for bed leveling, but the software implementation in PrusaSlicer means that after the printer has been set up, you can print without spending much time thinking about calibration.
Compared to the manual bed leveling process of a printer like the Creality Ender 3 Pro, the MK3S+ is faster, easier to use, and requires less trial and error. PrusaSlicer includes a “G80” command in the start G-code (the instructions the printer reads when making a part), and this command performs a ‘Mesh Bed Leveling’ which probes the bed in a 3x3 grid to create a mesh surface that is used for calibration. This mesh surface causes the Z-axis motors to undulate over uneven areas while the print head remains perpendicular in the X/Y axis.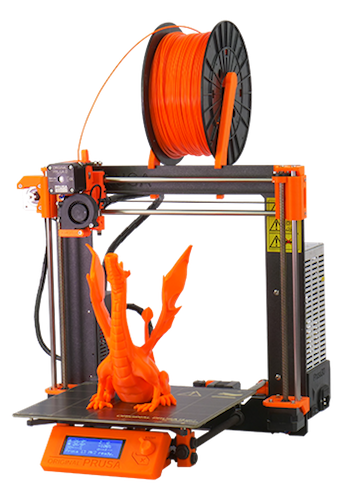 During my testing, I didn’t need to run a single non-print calibration on the printer after the initial mesh bed leveling.
Build Platforms on Prusa MK3S+
(Image credit: Tom's Hardware)Removing a printed part from the build platform of a 3D printer can be a challenging experience if the printer isn’t calibrated correctly. The Prusa MK3S+ attempts to solve this problem by using a removable build platform that is held in place magnetically and can be flexed to remove parts after the platform has cooled. I’ve tried many different types of build surfaces, and the smooth PEI sheet used by Prusa is by far one of the easiest to print on, remove parts from, and clean.
(Image credit: Tom's Hardware)Prusa also offers a textured steel build platform for the MK3S+ that has a gritty surface which can give printed parts a more uniform appearance. In fact, the signature textured look of the printed parts on the MK3S+ come from this build platform.
Parts printed on a smooth build platform will have a smooth bottom surface, which looks visually distinct from the striations on the sides of the part. By using a textured sheet, I was able to make prints that have a textured appearance on the bottom as well as the sides. This sheet is ideal for printing with PETG; the high print temperature of the material requires a textured surface to stick to, but also needs a surface that it can easily detach from.
Printing on the Prusa MK3S+
(Image credit: Tom's Hardware)The sample prints on the included SD card with the Prusa MK3S+ are a refreshing change from the sample parts that are typically included with low-cost 3D printers. The MK3S+ includes 16 pre-sliced parts that have been prepared for PLA with the total print time included in the file name. The sample prints vary in time from 23 minutes (a simple block with the word PRUSA on it) to almost 14 hours (a castle printed at .1mm layer height), and have all been prepared using sensible settings for the machine and highlight various features (variable layer height, multicolor printing, and fine .1mm layer resolution).
Image 1 of 2
(Image credit: Tom's Hardware)(Image credit: Tom's Hardware)One of my favorite sample parts is the planetary gear bearing that prints in a single print. I printed this model using the Prusament Jet Black PLA material, and after removing it from the build platform I was able to easily spin the gear freely. This part really highlights the ability of the MK3S+ to produce parts with functional strength and purpose in addition to parts designed with aesthetics in mind.
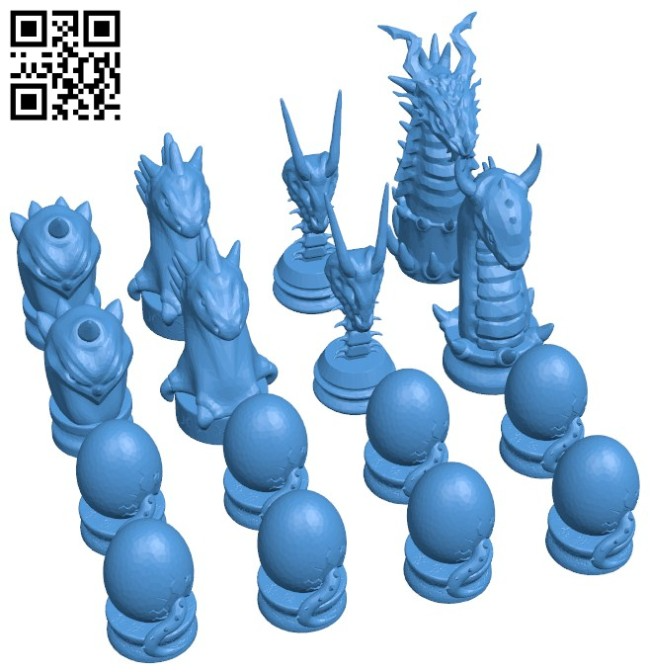
(Image credit: Tom's Hardware)Another stand-out sample print included with the MK3S+ is the dragon model titled Adalinda the Singing Serpent by Loubie3D. This model takes a little longer to print (about 8 hours), but the final print is another favorite of mine. Because this model was sliced by Prusa for the MK3S+ printer, the sample print comes out with a high level of detail and no unexpected settings that can cause problems (too many exterior shells, no retraction, etc. ) like the sample prints included with other FDM 3D printers.
Printing with PrusaSlicer on the Prusa MK3S+
(Image credit: Prusa)Prusa has developed its own in-house slicer for the Prusa MK3S+, called PrusaSlicer. PrusaSlicer is a fork of the confusing-to-pronounce Slic3r app, which is also a free and open-source app. Prusa has invested a considerable amount of time and effort in PrusaSlicer, and this has translated into one of the most powerful 3D printing slicer apps available for desktop 3D printers on the market.
(Image credit: Prusa)The current version of PrusaSlicer (2.3.3) includes profiles for printers by Prusa, Creality, Lulzbot, and more, and also includes a library of material profiles. In addition to these profiles, PrusaSlicer also includes multiple print setting profiles, which range from ultra-high detail at 0.05mm layer height to a draft mode which offers .3mm layers fast print speed at the expense of reduced quality.
Slicing Models in PrusaSlicer for the Prusa MK3S+
(Image credit: Prusa)PrusaSlicer is a feature-rich program with a simplified interface that is accessible to beginners, experts, and everyone in between. I’ve spent a lot of time in the PrusaSlicer settings, and I appreciate how much work Prusa has put into making almost every parameter of the printing process addressable without creating an overwhelming interface.
The settings are broken down into three primary categories: Print Settings, Filament Settings, and Printer Settings. Print Settings generally focuses on the speed / quality of the print, Filament Settings is used to determine temperature and extrusion parameters, and Printer Settings is used for global parameters and determining start / stop instructions.
(Image credit: Prusa)The primary interface offers three settings: Simple, Advanced, and Expert. Simple offers a stripped-down experience with only a few parameters able to be adjusted, while Advanced and Expert allow you to adjust the print on a more granular level.
PrusaSlicer Quality Settings for the Prusa MK3S+ / PLA
(Image credit: Prusa)| Material | Prusa Basic PLA, Silver |
| Layer Height | 0.20 mm |
| Infill Percentage | 15%, Gyroid |
| Print Speed | 45mm/second |
| Extruder Temperature | 215 degrees Celsius (419 degrees Fahrenheit) |
| Heated Bed Temp | 60 degrees Celsius (140 degrees Fahrenheit) |
| Print Time | 1 Hour, 34 Minutes |
There are few prints that are better at testing out a printer than the 3DBenchy, so I used the included spool of silver Prusa PLA to print this model out using the default .2mm Quality PrusaSlicer settings. I was impressed with the overall quality of the Benchy, and even with a highly-reflective material like a silver PLA which can highlight defects from uneven layers, the layers looked even and consistent throughout.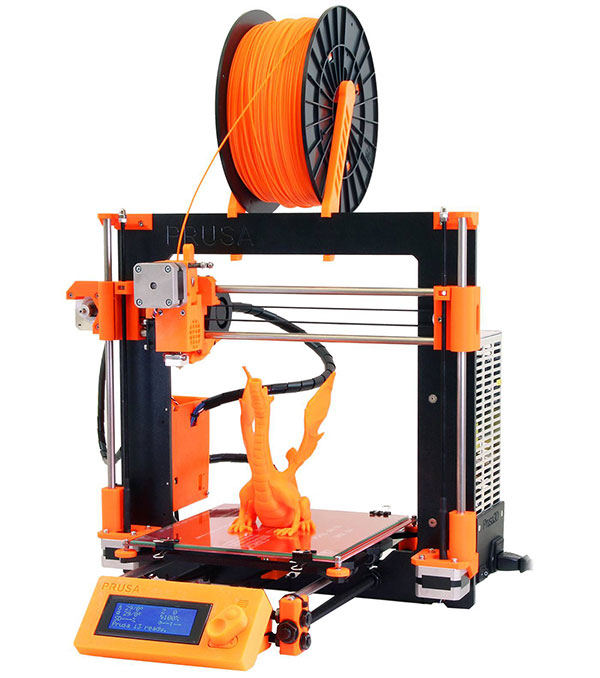
Image 1 of 2
(Image credit: Tom's Hardware)(Image credit: Tom's Hardware)The Benchy boat model is designed to highlight various features of a printer (such as the ability to print steep overhangs, small features, etc.), and a quick examination of the model shows that the MK3S+ performed very well and didn’t have any of the common defects typically seen on this model.
PrusaSlicer Spiral Vase Settings for the Prusa MK3S+ / PLA
(Image credit: Prusa)| Material | Prusament PLA, Galaxy Purple |
| Layer Height | 0.20mm |
| Infill Percentage | 0% |
| Print Speed | 60mm/second |
| Extruder Temperature | 215 degrees Celsius (419 degrees Fahrenheit) |
| Heated Bed Temp | 60 degrees Celsius (140 degrees Fahrenheit) |
| Print Time | 3 Hours, 9 Minutes |
Slicing a model using the ‘Spiral Vase’ mode in PrusaSlicer will automatically create a model that is composed of a single continuously rising helical contour, which allows models to be printed a fraction of the time it would normally take to print using multiple layers.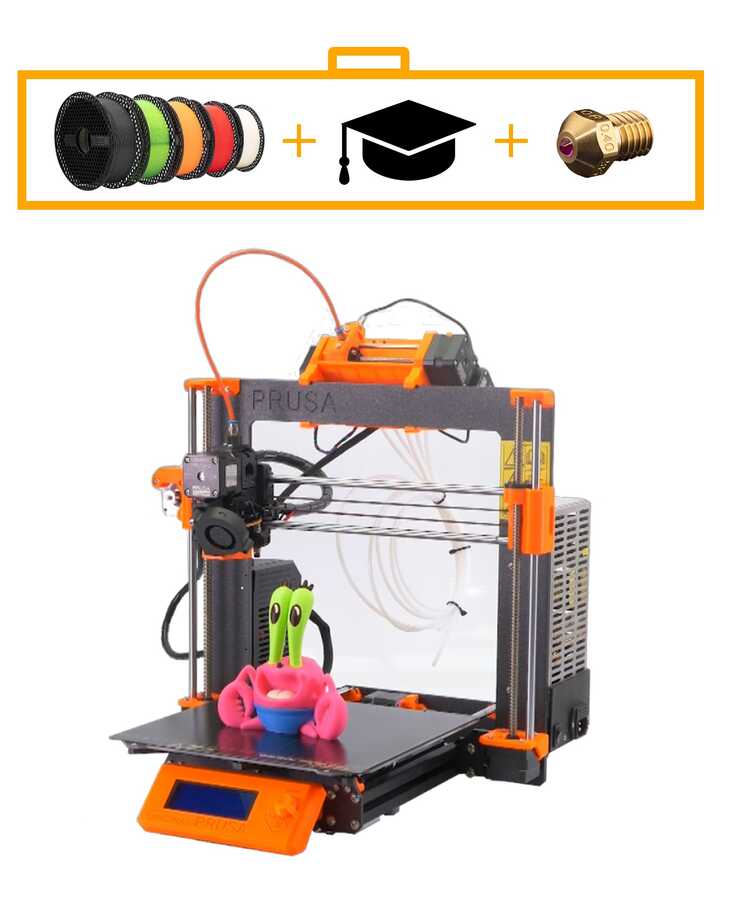 This mode is ideal for printing objects like vases or enclosures that only require a single contour as opposed to multiple contours and an infill structure. I printed the Curved Honeycomb Vase by eggnot to highlight this printing mode.
The Prusament Galaxy Purple is a favorite color of mine due to the glitter additive in the filament. This additive creates layer lines that are evenly blended and have a textured appearance. Combining this material with the Spiral Vase mode produces parts that look almost conventionally manufactured, with layer lines that are difficult to see. This model printed in just over 3 hours in Spiral Vase mode, as opposed to over 13 hours if it had been printed using conventional settings.
PrusaSlicer Speed Settings for the Prusa MK3S+ / PETG
(Image credit: Prusa)| Material | Prusament PETG, Chalky Blue |
| Layer Height | 0.2mm |
| Infill Percentage | 15%, Grid |
| Print Speed | 60mm/second |
| Extruder Temperature | 250 degrees Celsius (482 degrees Fahrenheit) |
| Heated Bed Temp | 90 degrees Celsius (194 degrees Fahrenheit) |
| Print Time | 4 Hours, 5 Minutes |
Image 1 of 2
(Image credit: Tom's Hardware)(Image credit: Tom's Hardware)PETG is a material that offers increased mechanical toughness, heat resistance, and flexibility when compared with parts printed with PLA.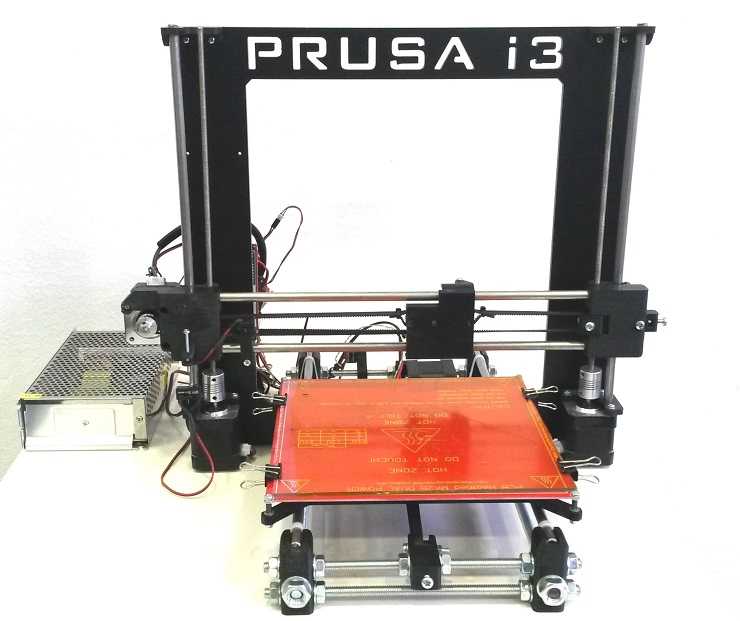 Prusa has taken advantage of these material properties by printing many of the components on the MK3S+ with PETG, which creates a rigid part that is able to withstand mechanical stress. PETG is also notoriously difficult to print with due to the high level of stringing that can occur when printing multiple parts simultaneously, but I didn’t have any issues when printing with the Prusament PETG material on the MK3S+.
Image 1 of 2
(Image credit: Tom's Hardware)(Image credit: Tom's Hardware)I used the default settings in PrusaSlicer to print the clamp model provided by Prusa that was designed specifically for PETG. This model features a functional thread, a flexible ball-and-socket joint, and can be tensioned without snapping the body of the clamp. The part printed in multiple pieces without stringing, and I was able to easily assemble it and verify functionality without damaging the clamp. If printed in a more brittle material (like PLA), I would expect the clamp to crack at a transition point on the body, but the PETG was able to hold tension without deforming or breaking.
PrusaSlicer 3MF Import for the Prusa MK3S+ / PLA
(Image credit: Prusa)| Material | Prusa Basic PLA, Silver |
| Layer Height | 0.20mm |
| Infill Percentage | 15%, Grid |
| Print Speed | 60mm/second |
| Extruder Temperature | 215 degrees Celsius (419 degrees Fahrenheit) |
| Heated Bed Temp | 60 degrees Celsius (140 degrees Fahrenheit) |
| Print Time | 2 Hours, 17 Minutes |
PrusaPrinters (the online file repository created and maintained by Prusa) offers the unique ability to share 3D printable files that have been pre-sliced and prepared for the MK3S+ with detailed print statistics available from the site. A perfect example of this is the Bag Clip by Andrei; a cam-driven bag clip that highlights the type of design freedom offered by a 3D printer.
This model has been uploaded as a . 3MF file that contains all of the information required to print, such as slicer settings, nozzle and bed temperature, and custom support structures (visibile in the screenshot above.) 3MF is an increasingly popular alternative to the STL file, which doesn’t contain much information aside from the raw geometry of a model.
This part printed flawlessly on the first try, and the provided .3MF (or .gcode) allows a user to send this file to anyone else with the same printer and material and feel confident that the part will be indistinguishable in appearance and performance. I’ve always thought of a 3D printer as the replicator from the Michael Crichton novel Timeline, which is able to produce identical objects at various locations by converting them into digital information. However, the success of a part is frequently beholden to the settings selected by a user for fabrication, so the ability to share the fabrication plans is one step closer to being able to send a physical product as a form of digital data.
At a price-point of $999 for an assembled printer (or $749 for a kit), the Prusa MK3S+ is a machine that doesn’t compromise on user experience and is absolutely one of the best 3D printers currently on the market. The MK3S+ has a professional and neat appearance, but the 8-bit monochrome LCD user interface might be a challenge for some users to get past, given the steep price. Interface aside, the prosumer features of the MK3S+ make it a stand-out machine for anyone who is looking for a reliable machine to produce functional parts without worrying about spending a lot of time tinkering.
If you are looking for a less expensive machine outside of the Prusa ecosystem, the Elegoo Neptune 2 (currently on Amazon for $180) offers similar printing size and features (with the notable exception of automatic bed leveling) at a fraction of the price but without the same level of robust support and documentation provided by the MK3S+ or any of the name-brand components like the E3D hotend. If you want the Prusa experience but are looking to spend a little less money, the Prusa Mini+ (available from Prusa for $399 assembled, $349 for a kit) is an excellent place to start.
Andrew Sink first used a 3D printer in 2012, and has been enthusiastically involved in the 3D printing industry ever since. Having printed everything from a scan of his own brain to a peanut butter and jelly sandwich, he continues to dive ever more deeply into the endless applications of additive technology. He is always working on new experiments, designs, and reviews and sharing his results on Tom's Hardware, YouTube, and more.
Prusa Mk3s Review - Review of the Original Prusa i3 Mk3s 3D Printer Kit
Prusa Mk3s 3D Printer review - Review of the Prusa i3 Mk3s 3D printer kit from Prusa Labs. Does it live up to the hype?
Original Prusa i3 Mk3s 3D Printer Kit review
Prusa Mk3s reviews are often by popular YouTubers who get 3D printers for free, sometimes sent by Josef Prusa himself. Not so here, I am not popular, and I bought both my Prusa printers (Mk2 and now Mk3s) myself!
Obviously, I wouldn’t buy a second Prusa if I didn’t enjoy the first, but they are far from perfect.
While my reviews are always honest and independent, I know there is a common rumor in the 3d printing community about reviewers having bias toward Prusa.
I can’t speak to the validity of that, I can only say I am not biased in any way, despite running one of the more popular Prusa-based Facebook groups and also supplementing my income with affiliate sales (this means my links earn me a small commission, but don’t change the price you pay).
In fact I often get static for maybe being overly critical about Prusa, as we will discuss in this here review.
Prusa Mk3s Kit or Pre-Made?
The first decision when looking at the Prusa Mk3s is if you want to buy the kit or have them build it for you.
Prusa Mk3s Kit is $749, or you can buy assembled for $999. Assembled has a lead-time of 3 weeks, while the kit is usually in stock.
Remember to add shipping and import duty ($110-$130) to these prices! The final price for the Prusa Mk3s kit to my door was CAD$1,227.94
The kit arrived well-packaged, I would guess the assembled version would too, just in a larger box.
Building the Prusa Mk3S kit is NOT like building an Ender 3, where it is partially assembled.
You have to assemble almost every tiny piece, and it is a chore. Perhaps I was overly vocal about what a pain it was to build, but I would even suggest it is a bit more involved than assembling the Mk2 was, due to the newer extruder assembly.
I have day job and family responsibilities, so It took me weeks (25 weeks to be precise – that is excessive, and you are unlikely to take that long!) due to grabbing 10mins or an hour here and there.
It’s fiddly, and with 3D printed parts with rough overhangs, things don’t always go together well first time. Expect to have tiny nuts falling and rolling under furniture constantly.
Unlike me, some people report enjoying the process. YMMV.
Important Note:
Notice I say it takes a long time, not that it is difficult!
In discussions in the Prusa Facebook Group, members estimate that you can build the Mk3S in 8-9 hours given a straight run.
Follow the online instructions. There are updates and comments to assist you.
It also helps a great deal to have a dedicated space for the build, so you are not having to get everything out and put everything away each build session if you do have to split up the assembly over days.
Now, obviously, at the end you will understand your 3D printer intimately, which does have value.
Just don’t go for the kit purely to save you money if you value your time at all, because it is going to take you a long time, which could cause you to resent the printer like I did – especially if your hobby time is limited.
Review the Prusa Mk3s Specs and Features
Once assembled, what do you get?
- 250mm x 210mm x 200mm Heated (120ºC), Removable, PEI Coated bed (I went for smooth, I have no idea why someone would want their prints to be textured!)
- E3D Extruder (max temperature 300ºC) with Bondtech gears
- Filament runout sensor
- Power out recovery
- Trinamic2130 stepper drivers detect skipped steps
- Quiet Noctua fan
- Auto bed level compensation
Understandably, given the long and proud history of the Prusa, it has a solid reputation in the community.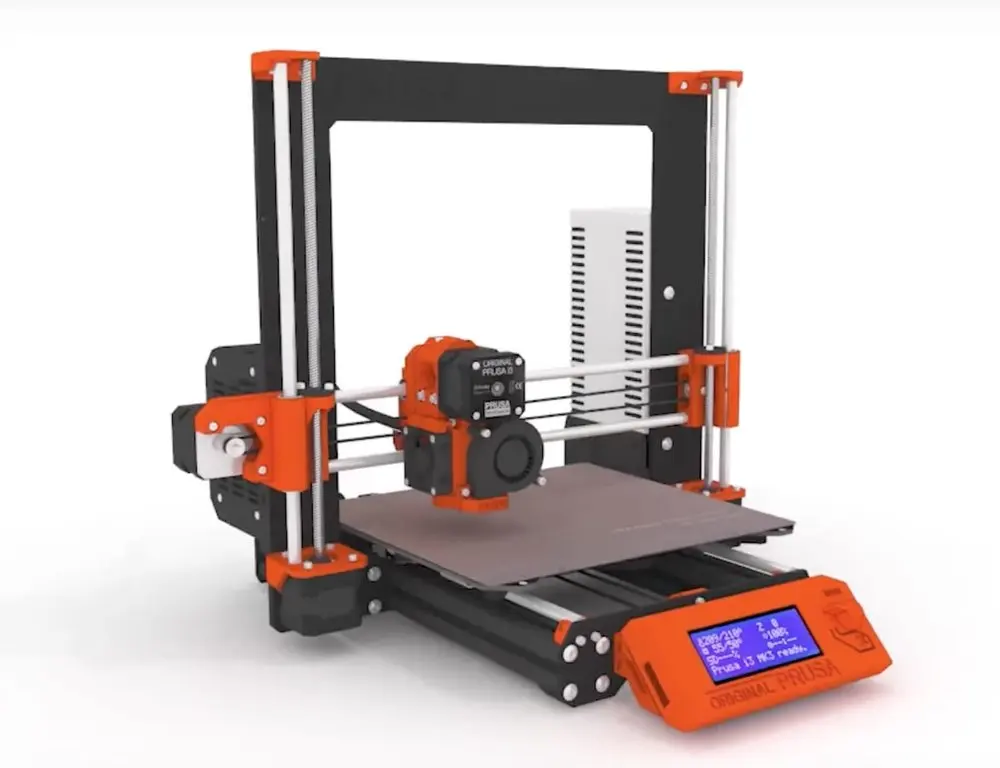 While the Mk3 had some wobbles on release, with complaints about print quality, beds, filament runout sensor, power supply hum, and so on, the Mk3s seems to have resolved those issues.
By appearances the Prusa is very much a hobbyist, tinkerer machine. It looks home-made, and of course, it usually is.
Color touch screens are more the norm at this price point in 2019It’s also quite old-fashioned in some respects, being made of 3D printed parts, no enclosure, an 8-bit main board, and sporting a monochrome LCD.
It’s not exactly the fashion challenger for the 2019/2020 season.
Of the machines in my hobby room, it appears the cheapest, while being the second most expensive after my monster-sized Craftbot XL.
Yes, zip ties. Really.It is, however, built out of top-of-the-line electronic and motion parts.
Sure, there are no linear rails that you might find in similarly priced machines, and there are still zip ties holding some vital parts in.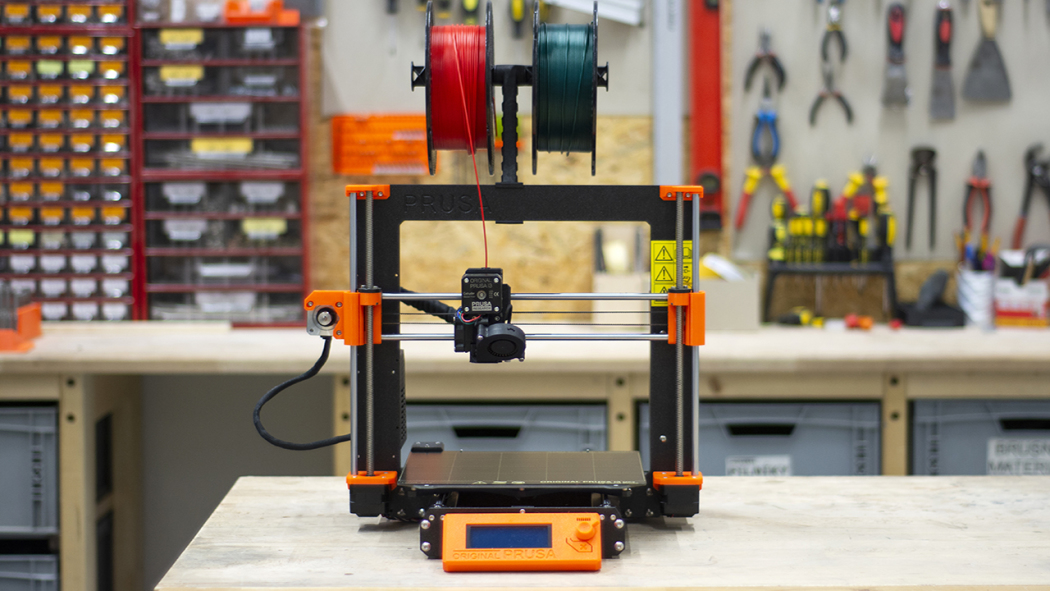 Yes, zip ties. In 2019.
That said, the components, and particularly the machine’s firmware, are amongst the best in this sub-$1,000 segment of the market.
In operation, even in ‘normal’ mode, it is super quiet.
Oddly, while Prusa make a bit marketing buzz around their expensive Prusament 3d printing filament … the filament included with your purchase is some no-brand stuff that many group-members have complained endlessly about.
Prusa Software Stack
To an extent, Prusa is a lot like Ultimaker, in that they control the hardware and software design, and even the filament if you are willing to pay a premium on your usual cost, so everything is tuned together.
The slicer, based on a fork of Slic3r, is excellent, but oddly, the built-in profiles for the Mk3s caused me some issues, such as stringing and very difficult to remove supports that caused bad surface quality.
Even the Marvin demo file included on the SD card printed badly, which I put down to the gcode being tuned for Prusa’s own filament rather than the PLA they included.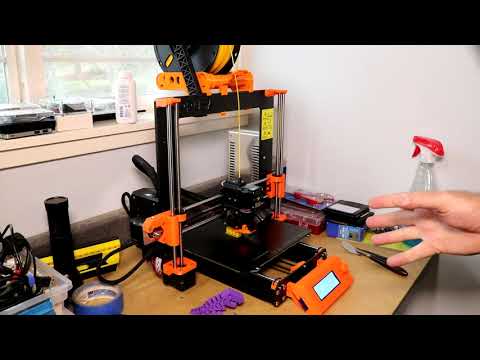
Fortunately, the community provides. I am now using the Pretty PLA profiles by Chris W.
When you slice a model in Prusaslicer it will post a message in the Gcode to remind you to update firmware. This nag could be annoying on a machine where you are lax in updating (eg. my Mk2), but is a boon on the Mk3s where I will get the benefit of incremental improvements.
Review the Prusa Mk3s Print Quality
As would be expected for a ~$1,000 printer, the print quality is great.
The Prusa mk3s is supposedly capable of 200mm/sec. It does seem capable of good speeds, but someone with more science than me would have to confirm the actual capability in practice.
What makes the Prusa an exception in this price-range, however, is the fact you can get this level of print quality without making any modifications or tuning.
So, really you are buying ease of use and convenience. While you could get multiple Ender 3 printers for the same price, and get close to the same output quality, you are going to have to put more effort and maintenance into the Ender 3.
Don’t get me wrong, you are not going to get resin-quality minis right out of the box, though I did try!
Who is the Prusa Mk3s good for?
The Prusa Mk3s is in an oddly unique spot in the market. It’s not a budget printer, for that I would recommend the Ender 3.
You could have multiple printers, a makerspace or print-farm starter set for the price of one Prusa, and you would get them faster because you can probably get the Ender 3 either locally or from Amazon.
If you are into 3D printing or electronics as a hobby, and you want to learn and tinker, then again I would go with the Ender 3. Especially if you are in the 3D printed tabletop community and want FDM for terrain etc.
But it is also not a prosumer printer, or a printer ideal for education, either. For those functions you ideally need an enclosure. In those markets I would look at Craftbot and Ultimaker.
Which brings us to another point for makerspaces or other environments where printers get worn-out and abused. Keep in mind, you can only get official Prusa parts from Prusa. Harry Brookes in the Facebook Group recommends a store on Aliexpress called Triangle Lab for 3rd party parts. I have not tried them myself. Joseph Tam has a Tindie store where he has compatible bed leveling probes and heated beds.
For pure print quality, for example small, detailed items like tabletop minis, I wouldn’t even suggest FDM, I would go for the Elegoo Mars, 100%. Note, Prusa does sell a resin printer, but it is over priced versus the Elegoo from what I can see.
The Prusa Mk3S is perfectly capable of printing good looking props and cosplay items, especially if you use something like Meshmixer to split into pieces. For larger cosplay items that you want to print in one go with no glue or seams, such as helmets and full armor pieces, due to the price and the print bed being not quite big enough, I would look to the Creality CR-10 range.
At this point we are left with the home or small office market of people who want to just hit print but don’t want to spend Ultimaker prices. For those people, the Prusa Mk3s excels.
Category: Reviews and Buying GuidesTag: printing3d, steemmakers, stem, technology
90,000 original review Prusa i3 MK3-the best 3D printer of spring 2019original review PRUSA I3 MK3-Best 3, D-printer of spring 2019
Writing of this original register The Prusa i3 MK3 was no easy task. Why? Because there are a lot of innovations that I want to talk about.
In February 2019, the MK3 received an upgrade to the MK3S. This is the only version you can buy in shop Prusa. It features an improved extruder, improved PINDA sensor, and other nice touches that make printing even more fun.
The original Prusa i3 MK3S is the “Best 3D Printer” according to All3dp.com and Make: Magazine, where MK3S also received an “editorial office” as a 3D printer with the highest rating in the 2019 digital manufacturing manual.
MK3S FUNCTIONALITY CAN BE EXPANDED WITH THE UNIQUE MULTI-MATERIAL UPGRADE 2.0 TO PRINT UP TO 5 MATERIALS SIMULTANEOUSLY.
Open source
First things first, this machine doesn't look too different from the old MK2 or even from many other i3 printers. Why is this design so popular? Because it is printer open source! Prusa has always published all design files for its machines, including the very first i3 that spawned thousands of derivative printers.
So yes, everything on this printer, from the frame, which of course is still just a metal frame, to the electronics and sensor boards, down to the firmware and improved slicer, everything now published on Github is licensed from open source, available to any person or company to use or modify their own products or projects. And it's just fantastic.
What's new in MK3?
Features & Design
After taking a closer look at our original Prusa i3 MK3 review, let's take a closer look at its features. This block is presented as a refinement of everything Prusa Research has achieved to date; it's more than just a reliability upgrade, but a new and improved desktop 3D printer with innovative technology.
Where previous models offered amazing print quality at a low price, the Prusa i3 MK3 aims to make FFF technology more intuitive and simple than before, with multiple sensors to alert users to potential problems and prevent failed prints.
There's more to say here, but let's summarize these new features:
- Filament sensor
- Power Panic
- Speed sensitive fans and quieter cooling Noctua
- Ambient thermistor and PINDA 2 with thermistor
- EINSY RAMBo motherboard
- Trinamic2130 drivers with layer offset detection, fast and quiet printing
- New Y-axis
- Bondtech extruder
- Magnetic Cotton MK52
- Powder Coated PEI Spring Steel Printing Sheet
- OctoPrint
Filament sensor uses an optical filament sensor to detect the presence and movement of a filament. This provides advance warning of when the filament is about to run out and the machine can pause printing and prompt the user to insert a new spool. It can also detect a stuck filament and recommend a "cold pull" to clear the nozzle and continue printing.
Other upgrades are Power Panic, where the Prusa i3 MK3 can recover and resume a print job after a power loss, and the new EINSY RAMBo motherboard, which is considered the most advanced 3D printer board for currently. How advanced is it? For example, it can monitor power, which allows it to detect blown fuses. On the other hand, it features Trinamic drivers which are very fast, quiet and can detect (and correct) layer misalignment during printing.
Elsewhere, the original Prusa i3 MK3 has a redesigned Y-axis for frame stiffness and an additional 10mm build volume at the Z-height. And there is an upgraded Bondtech drive extruder that grabs the filament from both sides to increase the pushing force of the filament and make it more reliable (especially for flexible filaments).
But perhaps the most obvious highlight of the Prusa i3 MK3 is the new MK52 magnetic heating plate that holds removable spring alloy steel sheets coated with PEI powder. When the sheet cools, it can be removed by simply bending the sheet inwards.
Setup
Whether you bought the Original Prusa i3 MK3 assembled or as a kit, the included 3D Printing Manual is a vital reference for your new 3D Printer. It contains all the necessary information about setup, calibration, printer materials and other frequently asked questions.
The steps for setting up and calibrating the machine are described in the assembly diagram below. But for advanced customization, we'd like to take a closer look at the three big benefits of the Prusa i3 MK3; panic sensor, crash detection and filament supply.
Testing these parameters on a regular 3D printer would be somewhat risky, perhaps even dangerous. Therefore, we do not recommend doing this on any machine other than the Prusa i3 MK3.
For the panic function, we connected it to a normal power supply with an on/off switch. We have started printing a model of Buddy, Prusa's pet. After about 20 minutes, we flipped the switch and waited 30 seconds before turning it back on.
And so, the Prusa i3 MK3 immediately detected a power failure and resumed printing exactly where it left off. Impressive!
Software
Oh yes, software. Any review of the original Prusa i3 MK3 would not be complete without discussing the software.
Simply put, users have many options when it comes to slicing their objects for printing.
The first and easiest option is PrusaControl . This is a simplified interface for coating your models. Select a thread from the list of presets, change the scale, orientation, line height and padding, and then generate your G-code.
This is a very good and efficient solution and is the software we used for most of the objects printed for this Prusa i3 MK3 review. The only downsides we could see were that if your requirements were a bit more complex then you should use something else.
For example, printing a chromatic vase requires a special "vase mode" that is standard in most other slicer software. Without it, you will end up printing a solid object that won't accept the flower no matter how hard you try. You won't find this in PrusaControl, which is a curious omission.
Instead, we turned to the second, more complex option; Prusa3D Slic3r MK3. This open source slicing software definitely has a vase mode. In fact, it has one hundred and one modes to turn it on and off, and it can be a little tricky for absolute beginners. But in fact it is the same platform as the PrusaControl, except for the stabilizer wheels.
For the third option, we tested printing on a Prusa i3 MK3 using a paid software slicer such as Simplify3D. It works pretty well; it already has the required printer profile and it might be more useful if you are experimenting with custom supports.
Completion
The temptation is strong to win the Original Prusa i3 MK3 review with a perfect score of 10. This is simply the best kit for the 3D printer money can buy. It's quiet, fast, and pleasant to use.
And its technological prowess is such that it will easily surpass the 3D printer three times the price. The crash detection and panic feature are great ideas that all 3D printers should offer as standard settings. And the removable print bed is something we didn't know we needed.
But we have to be objective in this Original Prusa i3 MK3 review, and there are one or two small issues holding it back. The main problem is that the filament sensor getting into the translucent filaments undermines our confidence in its operation.
Of course, this is an additional option and, of course, it does not prevent the printer from producing quality objects. And we fully expect the issue to be fixed in future production runs. But here and now, a mistake is a mistake and should not be discounted.
Are there viable alternatives to the Original Prusa i3 MK3? At this price and feature set, it would be pointless to even try. This 3D printer can be bought if you are looking for a low cost, sophisticated and market leading fused filament making machine.
Original Prusa i3 MK3S review
Today, if you are talking about 3D printers, there is one company that stands out from the rest and that is Prusa Research.
Its founder, Joseph Prusa, who gave the company its name, is not only the brains behind the operation, but also the figurehead and overall vision for the 3D printing circuitry.
He and his company bridged the gap between the open source software community and the commercial enterprise.
Prusa, man and machine, do things differently through customization and innovation at the core of technology. This means that if you invest in a model today, there is a high chance that it can be updated in the future, as all Prusa machines have done before.
The new Original Prusa i3 MK3S, like previous generations, is available in a variety of formats, free as printable parts and shopping list, as a kit you build yourself, or as an expert system that can be unboxed and ready to use .
I've built several in the past and this time Prusa sent a factory version. I have to say that the quality of the finishes, especially with the wiring, is a world apart from my usual wiring mess.
One observation from the start is that the Original Prusa i3 MK3S, being the latest version of the printer, looks pretty much the same as previous generations, but it's only upon closer inspection that you realize it's a completely different beast.
I'm looking at the S model which is a small upgrade for the MK3 so this review is for the original Prusa i3 MK3 with the S upgrade.0015
One of the things that made Prusa machines so popular is the open design, you can download the parts and print them, buy them as a kit or buy an expert build (Image credit: TechRadar).
(Image credit: © Image credit: TechRadar)
design
3D printers in their current form are not classic designs. While 3D printing technology is limited, product design is not. Although there are a few manufacturers such as Cel-Robox and MakerBot that have attracted product designers to the aesthetic.
Part of the reason is that the 3D community loves to tinker and the industry grew out of the Open Source community. Prusa of all companies remained close to the original community and still supports much of the research and development.
Thus, the MK3S, like previous generations, has an open design and appearance. It wouldn't look completely out of place in a garage or workshop, and would look less at home in a conscious design studio.
Looks can be deceiving and you shouldn't underestimate design - the Original Prusa i3 MK3S is one of the best printers on the market when it comes to print quality, but it's also the most versatile if you're prone to small tweaks.
The printer is for use, development, improvement and creation of your own; Prusa is the only widely available printer that allows you to do this.
Features
Let's see what makes the Original Prusa i3 MK3S different from most other printers.
First, there are options, parts for the printer can be printed from files downloaded from the Prusa site, and then with a little time and effort you can put together all the pieces you need to create your own.
It is doubtful if you will save yourself money, but if you are at a loss for a project, then this is a good challenge and more than possible.
The fact that there is a kit option is one of its most outstanding features; this is what drew me and many others to 3D printing in the first place. Build it and you will see how it works.
I have now built and designed my own 3D printer, so having one complete kit is a huge plus for me, but knowing that I may fiddle at some point, which is inevitable, I can upgrade the extruder if necessary. , mess with the firmware, well, that's all part of the fun.
What's New
Although the MK3S is very similar to the MK2 and the original, there are some major differences, and the MK3S has been designed and upgraded based on user feedback. The Model S is a slightly improved version of the MK3.
The Extruder has had several design changes from the previous version to make it easier to use and maintain, Prusa has also solved a small resonance issue. This issue has been overcome by moving the nozzle closer to the x-axis, which together with an updated fan helps improve print quality.
Redesigned extruder is now easier to use and maintain than previous versions and features the superior E3D V6 hot end (Image credit: TechRadar)
(Image credit: © Image credit: TechRadar)
Another improvement is the hybrid filament sensor; it combines a mechanical switch and an optical sensor. This circumvents the problems associated with printing with translucent and reflective filaments. An optical and mechanical sensor used in combination improves reliability when these filaments are loaded and ejected.
Notable Features
These new features may seem small, but combine the improvements that have already been introduced with MK3 and they were much more significant. The
Original Prusa i3 MK3S is one of the cheapest 3D printers on the market when it comes to the balance of print quality and reliability. The design has a lot to do with it, but the quality of the details won't slip.
E3D Hotend: This use of quality parts is highlighted by the E3D attachments. Developed by a team in the UK, these metalheads are known to be the best in the industry and are widely used. MK3S uses E3 V6.
Bondtech drive: The hot end is nothing without constant filament flow and the extruder delivers consistent filament with upgraded Bondtech drives. They grip the thread from both sides to reduce slip and increase pushing force. This type of gearing is especially useful for flexible filaments, which are notoriously difficult to print.
Automatic filament loading: Traditionally, filament loading can be difficult, but in this case, the filament is pushed into the extruder, and the sensor detects it and sucks it into the machine. Once you're in, you just need to select the type of filament.
Steel spring bed: Removing prints from the print bed can be a real problem, the original version of the i3 is equipped with a glass plate and clip clips to hold it in place. This has improved with the MK2 and there is now a magnetic HeatBed with a PEI alloy coated spring steel sheet.
A major new feature on the MK3S is a removable magnetic print platform that makes it easy to remove prints (Image credit: TechRadar).
This is quick and easy to remove and the quick bending of the sheet makes it easy to remove the print. The MK3S comes with a smooth PEI sheet, but there is also a textured powder coated version for more adhesion to materials like nylon.
Extruded aluminum frame: The rigidity of the original i3 depended on build quality with a long threaded bolt design. Design and assembly have taken a huge step forward with the aluminum extrusion introduced in the MK3 and used for the Y axis and high quality lead screws.
Like the original Prusa, the original Prusa i3 MK3S features several printed parts as well as high quality stepper motors, lead screws and bearings (Image credit: TechRadar).
Quiet motors: 3D printers such as 2D printers have a reputation for being noisy due to multiple stepper motors running.
The standard was Nema 17 which was relatively cheap, now Prusa uses the highest quality and pairs them with Trinamic2130 drivers with Noctua fan cooling. The addition of stealth mode now makes this printer much quieter than most other printers on the market.
Energy Loss Recovery: Anyone who 3D prints knows how long multiple prints can take; hours and sometimes days. There is nothing worse than losing power during this process. Usually with some useful sole, it is accidentally turned off or tripped over the cable.
MK3S has a full loss recovery, so if you lose all power, don't worry, the printer will restart from where it left off.
Avoid skip coats: This is not a common problem at first, but as your printer ages, you may experience issues with skipped layers. In addition to helping muffle the sound of motors, the Trinamic2130 drivers, along with the EINSY RAMBo motherboard, can detect misalignment or misalignment.
Finally, the P.I.N.D.A. 2 probes. The machine has two thermistors, one for checking the ambient temperature of the electronics, and a new P.I.N.D.A. 2 sensors that help adjust for temperature drift at the print level and ensure that the first following is always correct.
This pretty much covers the main new features and they combine more standard specifications.
Spec Sheet
Assembly volume: 25 x 21 x 21 cm
Memory capacity: Built-in LCD and SD card reader (8GB SD card included)
Nozzle size: 9004 mm (can be changed)
Layer height: 0. 05 mm (50 microns)
Bed: Automatic leveling bed
Printing surface: Heated bed with compensation of the cold angle
Spray: Automatic compensation for oblique axes
Software: PEO Printing platform
Materials: Vast material support
9000 kg filament included
Wattage: PLA 80W / ABS 120W
Setup & Materials
Weighing 7 kg and measuring 50 x 40 x 55 cm (L x W x H) with no spool holder attached, the printer does not by no means small. Take it out of the box, though, and the open design, wires neatly packed and tangled, and the printer won't feel overwhelmed.
The footprint of 50 cm x 40 cm is relatively large, but with an average kitchen worktop or table having a depth of about 60 cm, the size is suitable for placing on a desktop.
After installing the spool holder, you can attach it to the base unit, remove all zippers and packaging, and insert the power cord.
Fitting the filament is extremely easy. With the power on and automatic feeding, dip the end of the filament into the hole in the extruder, and it will be sucked in, then select the filament type, and after a few minutes, the melted filament will come out through the nozzle.
FFF printers are by far the most popular form of 3D printer, and as such, the MK3S has a huge selection of materials to use (Image credit: TechRadar).
When it comes to replacing the filament, take it out using the small LCD with the control board and the filament pops up and another filament can be installed.
It's just a case of going through a few flight checks, the handy paper manual included in the kit details them and then you're ready for your first print.
Before uploading my own models, I tested the printer using the 3DBenchy test model, as well as a couple of others that came pre-installed on the SD card.
One of the most famous 3D printing tests. The Original Prusa i3 MK3S produces clean prints at all quality settings with small thin strings and the highest quality (Image credit: TechRadar).
After a couple of hours the printouts are finished and there are no problems, missing printouts or errors. The quality of the prints was also exceptional.
After making sure the printer arrived intact, everything worked and nothing was mechanically out of place, I checked for firmware updates. This test was conducted using firmware version 3.7.1.
I also downloaded three different slicers with i3 MK3S profiles: Simplify3D, Cura 4.0 and PrusaSlicer.
Setting up the original Prusa i3 MK3S was easy enough with Simplify3D and Cura, and of course with the PrusaSlicer specially designed for this machine.
The PrusaSlicer is relatively simple with the application launching printer selection and options at the very beginning. Then it's just a case of loading a print-ready STL file and choosing the quality options you want.
For the internal software, this is impressive with a lot of options, both for settings and previews.
Navigating the app is straightforward, and one feature I like is flashing the firmware directly from the app after connecting via USB.
It also has some handy options such as "Place to Face" which is very helpful when turning the model into position, and "Cut" which allows you to cut the models in half. Then the parts can be exported as plates, they are a little watery, but this is convenient.
PrusaSlicer was reliable with no crashes in the test when used, and with support for STL, OBJ, AMF and 3MF it has excellent overall compatibility.
Few 3D printers have their own cutting software, but here Prusa created the PrusaSlicer which proves to be a formidable partner for the machine (Image credit: TechRadar)
There is an STL fix option which is a great addition, for simple fixes it worked well , but for larger and more complex models, she had a little more trouble.
After setting the parameters in PrusaSlicer, you can export the G-code to an SD card or print directly.
If you choose the card route, the SD card can be inserted into the side of the control panel on the front of the printer, and then the LCD user interface and control buttons will allow you to select the desired print.
This control panel not only activates filament loading and unloading, you can change filament and go into ultra-quiet mode while printing (Image credit: TechRadar).
(Image credit: © Image credit: TechRadar)
This interface and control board can also be used to interrupt printing if something goes wrong, calibrate if necessary, and there are many other options and settings you can delve into.
One of the notable features that I started using, despite the slight slowdown in typing speed, was stealth mode. This can be turned on while printing, so if you need to work and the printer noise gets too much, you can quickly enable Stealth mode as needed.