Note 10 plus 3d scanner
Galaxy Note 10+ 3D scanner app now available on the Galaxy Store
SamMobile has affiliate and sponsored partnerships. If you buy something through one of these links, we may earn a commission. Learn more.
Phone
By Abhijeet MishraLast updated: August 23rd, 2019 at 16:41 UTC+02:00
Samsung has published a new app called 3D Scanner on the Galaxy Store. The 3D Scanner app takes advantage of the ToF (time-of-flight) camera on the back of the Galaxy Note 10+ (and Note 10+ 5G) to scan and create 3D models of real-world objects. The Galaxy S10 5G and Galaxy A80 also have a ToF sensor and should technically support the app, but Galaxy Note 10 owners won’t be able to use it as the smaller Note 10 doesn’t have a ToF camera at the back.
Creating 3D models of real-world objects requires one to scan the object from all directions. Those models can then be transported as a GIF file for sharing with others and can also be added to pictures and videos captured with the camera. Samsung recommends objects sized between 20-80 cubic centimetres, and we also found that you need to make sure there’s nothing else around the object that you’re trying to scan when we tested it out, or you simply end up with a scan of the object and its surroundings.
We’ll test 3D Scanner on the Galaxy Note 10+ more thoroughly later on and will tell you all about it in our review of the device. For now, if you have the Galaxy Note 10+ (or a Galaxy A80 or Galaxy S10 5G), you can grab the app from the Galaxy Store by clicking this link on your phone. After it has been installed, you will find a shortcut to the app in the app drawer. You can also access 3D Scanner from Bixby Vision – just open the camera app, tap Bixby Vision, then switch to the apps panel.
If the app isn’t available for you via the Galaxy Store, you can download the APK file on your phone and install the app manually by navigating to the downloaded file in the My Files or other file manager app.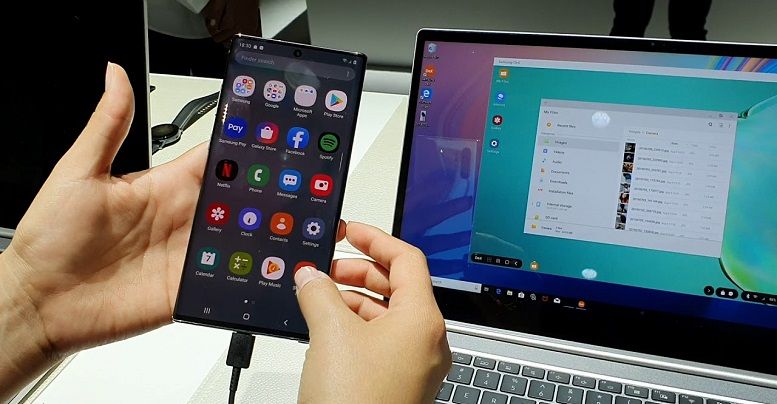 Download the APK file here, and let us know your experience with 3D Scanner once you’ve been able to use it on the Galaxy Note 10+ (or Note 10+ 5G). Also let us know if it works for you on the Galaxy A80 or Galaxy S10 5G.
Phone3D ScannerGalaxy A80Galaxy Note 10Galaxy Note 10 PlusGalaxy S10 5G
You might also like
Galaxy S10 5G gets January 2023 security update
Earlier this week, Samsung rolled out the January 2023 security patch to the Galaxy S10e, Galaxy S10, and Galaxy S10+ but the company left out the Galaxy S10 5G. Today, the Galaxy S10 5G is also getting the same security update. It is being rolled out to the international 5G variant of the device (SM-G977B). […]
- By Asif Iqbal Shaik
- 4 days ago
Galaxy Note 10 is the first Android phone to get January 2023 security update
While some Galaxy smartphones are still getting access to the December 2022 security update, the Galaxy Note 10 is way ahead.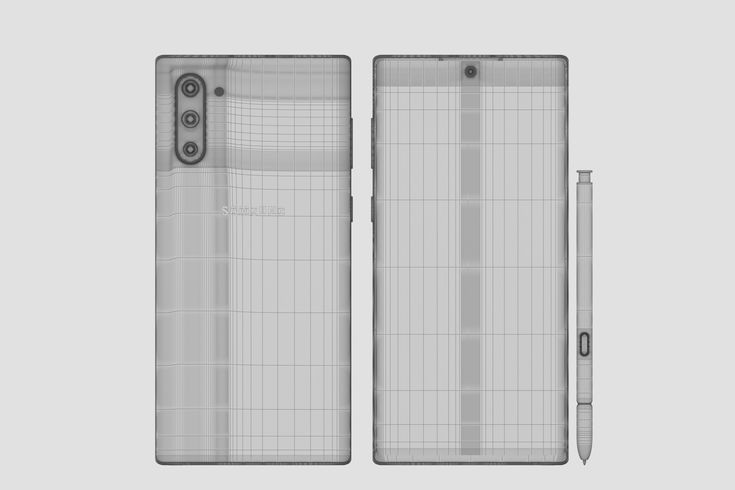 The smartphone has become the first Android device worldwide to get the January 2023 security update. The latest software update for the Galaxy Note 10 and the Galaxy Note 10+ comes with firmware version N970FXXS8HVL3. […]
- By Asif Iqbal Shaik
- 3 weeks ago
The excitement of big OS updates is over for all Galaxy S10, Note 10 models
Samsung’s announcement that it would provide some smartphones with three generations of Android OS upgrades back in 2019 impressed many of us, and we were even happier to learn later on that Samsung was bumping the total number of major OS upgrades for its flagships and some mid-rangers to four, basically out-Android Google itself. The […]
- By Abhijeet Mishra
- 4 weeks ago
Galaxy S10 5G gets November 2022 security fixes while users await an update that will never come
The Galaxy S10 5G, like the Galaxy S10e, S10, and S10+, is on a quarterly update schedule, and except the S10 Lite, none of the Galaxy S10 phones are eligible for the Android 13 update.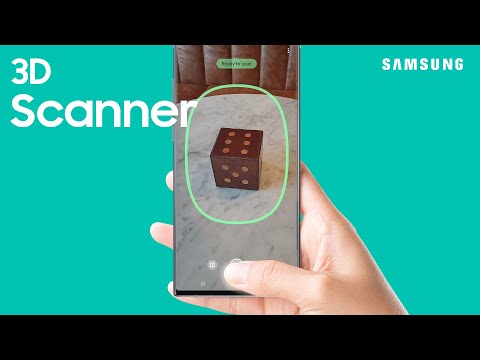 That leaves only minor updates focusing on security and possibly one or two more point One UI releases Galaxy S10 […]
- By Abhijeet Mishra
- 2 months ago
Galaxy Note 10, Note 10+ getting November 2022 security update in the US
Earlier this week, Samsung released the November 2022 security update to a bunch of its high-end smartphones, including the Galaxy Note 20 and the Galaxy Note 20 Ultra. Now, the company has released the new security update to the Galaxy Note 10 and the Galaxy Note 10+ in the US. The latest software update for […]
- By Asif Iqbal Shaik
- 2 months ago
New Galaxy S10 update improves camera, Bluetooth, and system stability
It hasn’t been long since the Galaxy S10 series got the October 2022 security patch, but Samsung is now rolling out another firmware update for the 2019 flagship lineup. With it come improvements to Bluetooth, stability, and the camera. The new update is available for the Galaxy S10e, the Galaxy S10, and the Galaxy S10+ […]
- By Mihai Matei
- 3 months ago
- Home
- News
- Galaxy Note 10+ 3D scanner app now available on the Galaxy Store
Samsung unveils new Galaxy Note 10 model with "instant" 3D scanning capabilities
0Shares
Samsung has unveiled its Galaxy Note 10 line of premium smartphones one of which comes equipped with 3D scanning capabilities. Described as a “groundbreaking first for the Note,” the Galaxy Note10+ is installed with a DepthVision camera, allowing users to scan objects for instant 3D rendering.
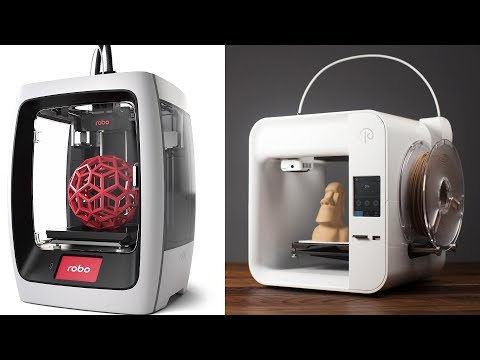
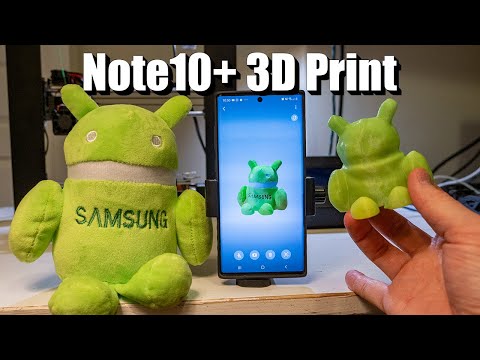
Samsung demonstrated the 3D scanning technology at the Note 10 launch event, where it was used to create photorealistic 3D model of a pink plushy named Bobby. At the unveiling, the Samsung presenter explained that the scans can also be used to make copies of the object in a 3D printer.
The Samsung Galaxy Note 10 mobile phone. Image via Samsung.ToF camera on the Samsung Note10+
The DepthVision camera implemented in the Note10+ operates using Time-of-Flight (ToF) 3D technology. ToF scanning measures the distance between the camera and an object by recording the time it takes for a beam of infrared light to reflect back to the camera. The depth of a scene is then captured and mapped using this pulse of light.
On the Note10+, the DepthVision camera’s ToF capabilities is limited within a 10x10x10cm by 80x80x80cm radius, and consists of two sensors.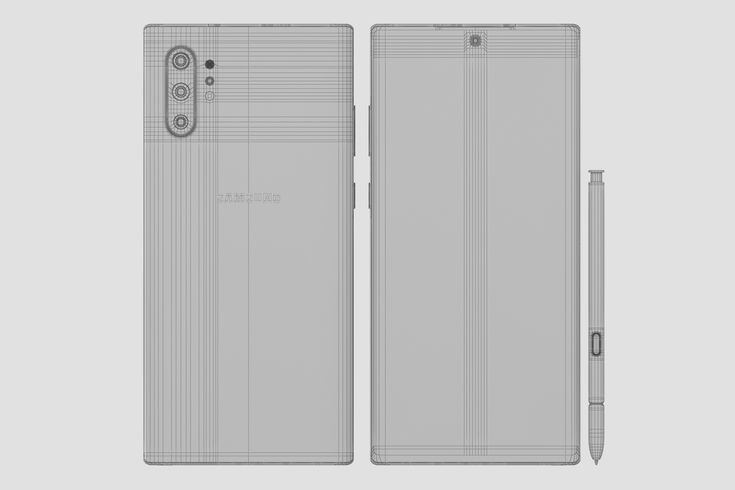 In order to utilize the 3D scanning on the Note10+, users are required to download the 3D Scanner app from Samsung.
During the demo at the launch event, Samsung’s DepthVision camera was used to scan the “Bobby” plush toy by pacing around it. The 3D Scanner app includes a circular guide on the screen, instructing users to keep the item within that area of the phone and helping them point the camera in the optimal direction for a 3D scan. Once the user walks a full circle around the object and captures all angles, the phone produces a 3D model of the object.
As well as using the scans for 3D printing, they can also be used as movable AR 3D renderings within videos, and can be made to imitate users’ movements with body tracking. You can watch a video of the live demonstration below.
3D scanning in smartphones
In 2015, Google unveiled its Project Tango smartphone that housed Intel’s RealSense 3D scanner. Since then, various companies specializing in 3D scanning have been creating apps and devices to turn your phones into more advanced 3D scanners. New Orleans-based mobile scanning specialist Scandy, for example, has created software that allows users with an external ToF sensor to capture 3D scans on their compatible Android devices. The company used the Tango augmented reality software platform from Google to create the object scanning application for smartphones known as Scandy Pro.
Now, many of the latest and high-end smartphones are being released already installed with ToF 3D scanning sensors. Alongside the Note10+, Samsung has also equipped a ToF camera on its newest Galaxy S10 model, whereas Chinese mobile phone developer Huawei implemented it in its flagship P30 Pro. The next-generation iPhone is also rumoured to have ToF 3D cameras as well.
Subscribe to the 3D Printing Industry newsletter for the latest news in additive manufacturing. You can also keep connected by following us on Twitter and liking us on Facebook.
Looking for a career in additive manufacturing? Visit 3D Printing Jobs for a selection of roles in the industry.
Featured image shows the Samsung Galaxy Note10. GIF via Samsung.
Tags DepthVision Galaxy Note10 samsung Samsung Electronics Time-of-Flight ToF
Anas Essop
Anas Essop is an English and Film graduate, who loves writing about the advancement of technology.
3D Scanning in Brief - Artec Studio Documentation 16
Before you get started with the user manual, we would like to show you how easy 3D scanning can be. This short overview will allow you to get an idea of the 3D scanning process using Artec 3D tools and get started quickly. If you prefer to start with detailed and comprehensive information, skip this chapter.
The figure below schematically shows a typical 3D scanning and processing procedure in the Artec 3D environment.
- Scanning
-
Working with the scanner, transferring data from the scanner to a PC (mobile device) for further processing.

- Cleaning
-
Rough cleaning of scans with Eraser . Removal of support and foreign objects.
- Alignment
-
Alignment of several scans of one object.
- Registration
-
Optimization of frame arrangement within one or several scans.
- Fusion
-
Create a model from scans.
- Postprocessing
-
Simplify the polygonal structure, smoothing and other optional steps.
Note
The need for these steps depends on the individual case.
Preparation
PC Requirements
In addition to the scanner, you will need a computer to create and process models in Artec Studio. Your computer must be running a 64-bit version of Windows 7, 8, or 10. The more powerful the computer, the better. The most critical components are random access memory (RAM) and graphics card (see the FAQ page for more information).
Activation
Warning
Do not connect the scanner to the computer yet! Read on for details.
-
Register an account on my.artec3d .
-
Log in and download Artec Installation Center from the main page.
-
Install Artec Installation Center. Enter your e-mail and password when prompted.
-
Connect the scanner to an electrical outlet and then to a computer using the USB cable.
-
Wait while Windows detects the scanner. Click Activate.
-
Click Install under Applications to run Artec Studio on your computer.
(See User Account, Scanner Activation and Offline Activation for details).
Scan
-
Launch Artec Studio, then point the scanner at the object.
-
Click on the scanner to start Preview mode . If your scanner does not have this button, first open panel Shooting .

-
Geometry + Texture - Standard mode, suitable for most applications
-
For older computers, mode Geometry is a good alternative
-
Realtime Fusion Mode creates a model in real time, allowing you to skip post-processing. Click Stop, then check Realtime Fusion and click Preview.
-
-
Make sure the subject is clearly visible, then press the button again to start recording. If possible, scan the object from all sides in one pass by smoothly moving the scanner around the object as shown in the figure below.
Note
When scanning, pay more attention to the image of the object on the screen than to the actual object.
-
If you hear a beep and a red error message is displayed, gently aim the scanner at the area you just scanned. There are several reasons for the error "Path tracking aborted":
-
A simple geometric object is being scanned
-
Scanning too small area of the object
-
You are moving the scanner too fast
-
-
Click to display the scan in Artec Studio.

Fig. 1 Scanning with Eva.
Rotate and scan (optional)
Rotate the object and scan any unscanned areas (press ). Capture in the current scan at least one area already captured in other scans, thereby facilitating alignment.
See also
-
Button and LEDs for Eva and Spider
See also
-
Scan settings,
-
Scan procedure,
-
Positioning modes, and
-
Real-time Fusion Scan.
Using the Autopilot
For beginners, the easiest way to get the final model is to use the Autopilot. Also, this mode saves time for advanced users. If you prefer to do all the steps manually, see Manual processing.
Autopilot is a special mode that allows users to get the final 3D model without going into post-processing details. It consists of two main parts: semi-automatic (editing and alignment) and automatic.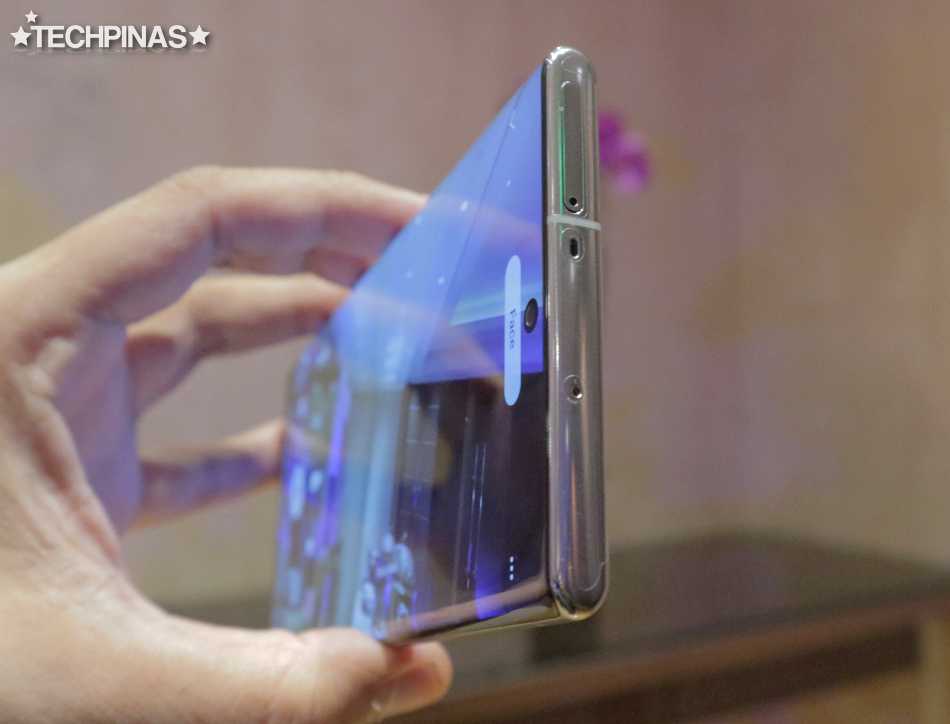
To get the model,
-
Press the Autopilot button in the left pane or press F9 .
-
Familiarize yourself with the points that you have to go through in this step-by-step mode (listed in the welcome dialog).
-
In the Workspace panel , check all the scans you plan to use, then click Next.
-
Next, specify the input parameters for the model creation step and click Next. The basic settings include the following:
Note
It is recommended to use tooltips that can be opened by pressing the button next to the option name.
-
Scan quality (geometry) . Click to determine if your scan has a good geometry using hint images.
-
Scan quality (texture) . Click , view the images and decide if your object scan has enough texture.
-
Difficult-to-scan surfaces . Check the box if your object has such surfaces.
 Use the images that open by clicking on the button for reference.
 -
Determine the size of object using the example images.
-
In most cases, you can leave the default values for the rest of the options in this window. For more complex use cases, you can adjust the settings, as noted in the sidebar.
-
-
If necessary, remove any extraneous objects that may interfere with processing and post-processing. Learn how to use Eraser in the Removing parts of the scan (Eraser) section.
-
When finished, click Next. If the object was captured in several scans, Autopilot will combine them and show the result. You can accept it or assemble the scans manually (see Manual Hard Alignment without Specifying Points).
-
Click Next.
-
The autopilot will start the processing procedure and then the post-processing procedure. When finished, a message will appear stating that the model is ready.
 Click the OK button.
Automatic steps can be combined as follows:
Machining
Global Registration
Delete polygon. noise
Fusion
Postprocessing
Small object filter
Polygon simplification. structures
Texturing
Please note that Autopilot mode does not implement such advanced techniques as HD Scan Reconstruction and Photo Registration.
Manual processing
Trimming the scene
When done, click File and select Save project . Close panel Survey . Now you can trim the scene.
Purpose: to remove auxiliary surfaces (eg table or floor).
Actions: Open Editor → Eraser → Clipping Plane. Follow the instructions on the panel.
Tip
Also use other Eraser modes (not just Clipping by plane) to remove unwanted objects from the scan.
See also
Scan editing.
Align
Tip
If you only have one scan (see panel Workspace ) or if you used Auto Align when scanning, you can skip this step.
Purpose: Align multiple scans.
Actions:
-
Mark two or more scans with , click Align and select these scans in the Rigid tab while holding down the Ctrl key.
-
Click Auto Level.
-
If the alignment failed due to lack of texture or overlap areas, manually match the characteristic points on the scans and click the Align button.
Fig. 11 Two scans: before and after alignment.
See also
See Alignment for details.
Global registration
Purpose: to optimize the arrangement of frames among all scans, thus preparing them for further processing.
Actions: Mark the scans using the checkbox, then click Tools → Global Registration → Apply.
Tip
If you see some obvious problems with preliminary ( Rough ) registration after scanning, try to resolve them by Global registration of each scan separately. See Global registration options.
See also
See Global registration for details.
Removing polygonal noise
Purpose: to remove individual fragments and polygonal noise.
Actions: Open Tools → Delete polygon. noise → Apply.
Fig. 12 Removing polygonal noise.
See also
See Editing Scans and Removing 3D Noise (Polygon Noise) for details.
Fusion
Purpose: create a model (single surface, as opposed to original scans consisting of many surfaces).
Actions: select Tools → Smooth Fusion → Fill Holes → All (Waterproof) → Apply.
Tip
For sharper surfaces, use Precision Fusion .
In any case, The 3D resolution of can be adjusted: the smaller the value, the more accurate the surface will be.
See also
See Creating Models (Fusion) for details.
Removing unwanted parts (optional)
Purpose: to remove polygonal noise and poorly scanned areas.
Actions: click Editor → Detail Removal Brush. Follow the instructions.
Fig. 13 Using the Delete Detail Brush.
See also
Editing scans
Simplifying the polygonal structure
Goal: to reduce the file size by reducing the number of polygons and avoiding significant distortion of 3D geometry.
Actions: click Tools → Simplify polygon. structures → Apply.
Fig. 14 Simplify the polygon. structures.
See also
See Simplify polygon structure for details.
Texturing
Goal: get a textured model.
Actions:
-
Click Texture .
-
Select the model (fusion result) and its original scans in the corresponding fields. See also Photo Registration.
-
Select texturing for Export → Apply.
See also
See Texturing and Photo registration for details.
Export, Measure, Publish
To export a model:
-
Open File → Export → Model .
-
Select the desired format, specify the destination folder and file name, and then click OK.
To measure model:
-
Open Measurement .
-
Choose from the following options:
-
Distance for distance calculation: points are connected by lines (linear) or curves along the model surface (geodesic)
-
Sections for calculating area and volume
-
Publish the model to viewshape. com by opening the panel File → Publish .
See also
Export of models, scans and point clouds, Measurement tools and sec:publish_to_web.
Tips and Tricks
-
You can restore the original settings using F10 → tab General Survey → Restore Default.
-
To return any parameter from panel Tools to the default value, click the button next to it. The absence of a button means that the parameter is currently set to the default value.
-
Capture screenshots using the keys Ctrl + Shift + S .
-
Annotate using the Measurements panel : use the combination Ctrl + LMB to point to the point where you want to place the label and enter text, then click or anywhere outside the label popup.
Samsung Galaxy Note 10 Problems we know so far
Samsung Galaxy Note 10 and Note 10 Plus have hit stores and have received mostly positive reviews so far. Both devices feature the latest hardware and Samsung has done a great job on the software side too. The devices should receive the Android 10 update from Samsung, which will be called One UI 2.0. While you're here, be sure to check out some of the coolest Galaxy Note 10 tips you must be using already.
However, like every other device on the market, the Note 10 duo also has its fair share of bugs and quirks. In this section, we'll take a look at some of the issues that Note 10 users have encountered and perhaps help you navigate rough waters.
No 3D scanner app
The Note 10 Plus' Depth Vision camera is one of the standout features of the device. It doesn't have many applications at the moment, but the ability to 3D scan an object is nothing short of awe-inspiring. Surprisingly, many users failed to find a 3D Scanner app to use this feature. If you are also unhappy with the oversight, there may be a solution for you.
Windows programs, mobile applications, games - EVERYTHING is FREE, in our closed telegram channel - Subscribe :)
Step 1. Download the unpublished 3D Scanner Application.
Step 2: Open Bixby Vision.
Step 3. Go to Applications and get access.
Galaxy Note 10+ signal problems
Maintaining a stable connection to make and receive calls is one of the prerequisites for any smartphone. The Samsung Galaxy Note 10+ is a flawless device on its own, but many users have experienced signal reception problems and dropped calls frequently.
Users have restarted their device several times and even performed several factory resets, but so far the problem has not been fixed. Samsung may release an update in the future, but for now, there's no other option but to stay put.
Linux on DeX is not supported on Note 10
Samsung DeX is one of the standout features of Galaxy flagship devices. It allows you to run all standard Android applications in a desktop environment. Running Linux on a mobile phone isn't a new idea, but DeX is really worth the "hassle". According to Samsung's official website, Linux on DeX is currently supported on select Android Pie devices, and surprisingly, the company's current flagships, the Note 10 duo, weren't included.
Users are frustrated with Samsung's handling and many have claimed that the Note 10's DeX functionality was one of the main reasons they decided to migrate in the first place. Samsung hasn't announced a rollout date or even said if they're working on adding the functionality to devices, but given how frustrated users are, don't be surprised to see an official announcement sooner rather than later.
Possible solution: No (sorry!)
Note 10 Activation failed
When you buy a $1,000 device, activating the device should be the least of your problems. Sadly, many Note 10 buyers have a hard time activating their device. From Sprint to AT&T and every other carrier, it's been an epidemic and Samsung is struggling to come up with an acceptable solution.
Possible solution:
If you are also dealing with something similar, there are a few steps you can take to potentially fix the problem.
Step 1. Insert a new SIM card into your Note 10. Make sure it is turned on.
Step 2: Go to the official Samsung website - Samsung.com. Log in using the same credentials that you used when placing the order. Click on My Account located in the top left corner of the page.
Step 3. Scroll down to the Carrier Activation section and click Continue. Click Carrier Activation.
Step 4. Go through and fill in the clues . You have successfully activated your Note 10 device.
Only 8 languages on Samsung keyboard
Like every other Samsung Galaxy smartphone, the Note 10 brothers use the Samsung keyboard by default. The keyboard is by no means bad, but it does have quite a few quirks.
On the Note 10, the keyboard appears to have a total of eight additional languages, which, as you might expect, excludes a number of other major languages. Frustrated with the problem, users have already contacted Samsung to get rid of it for good. The South Korean OEM has acknowledged that this is a known issue and cannot be fixed until a Samsung keyboard update is released. The company has yet to announce a tentative release date.
Possible solution: No (sorry!)
No hard Home button
Up until the Galaxy Note 9 / S9 devices, Samsung had an invisible home button built in that allows you to return home with a long press even when the screen is off. If you're using a previous generation Galaxy device, you'll probably find Samsung's new configuration a bit underwhelming.
The company has gotten rid of the invisible home button on the S10/Note 10 lineup, likely due to the in-display fingerprint scanner. The removal of such a famous feature did not sit well with most users, with many arguing that Samsung should have thought twice about removing it.
Canceled order?
After the introduction of Samsung's latest 2019 flagship, enthusiasts flocked to the official website trying to pre-order the devices.