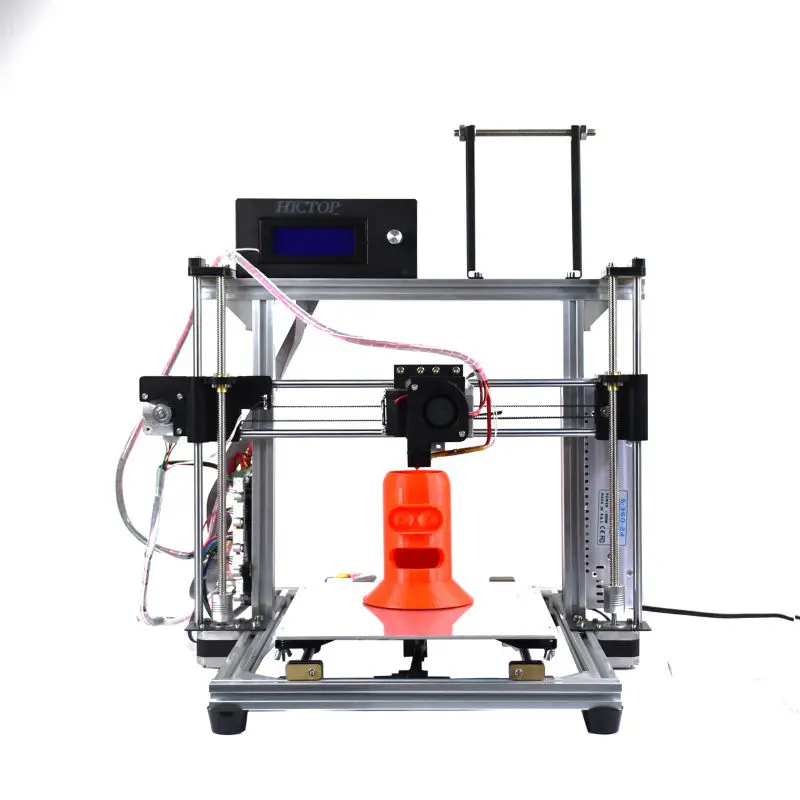
Micro extruder 3d printer
Micro Swiss NG™ Direct Drive Extruder for Creality CR-10 / Ender 3 Pri — Micro Swiss Online Store
Original price $ 119.95 - Original price $ 119.95
Original price
$ 119.95
$ 119.95 - $ 119.95
Current price $ 119.95
| /
SKU M3201
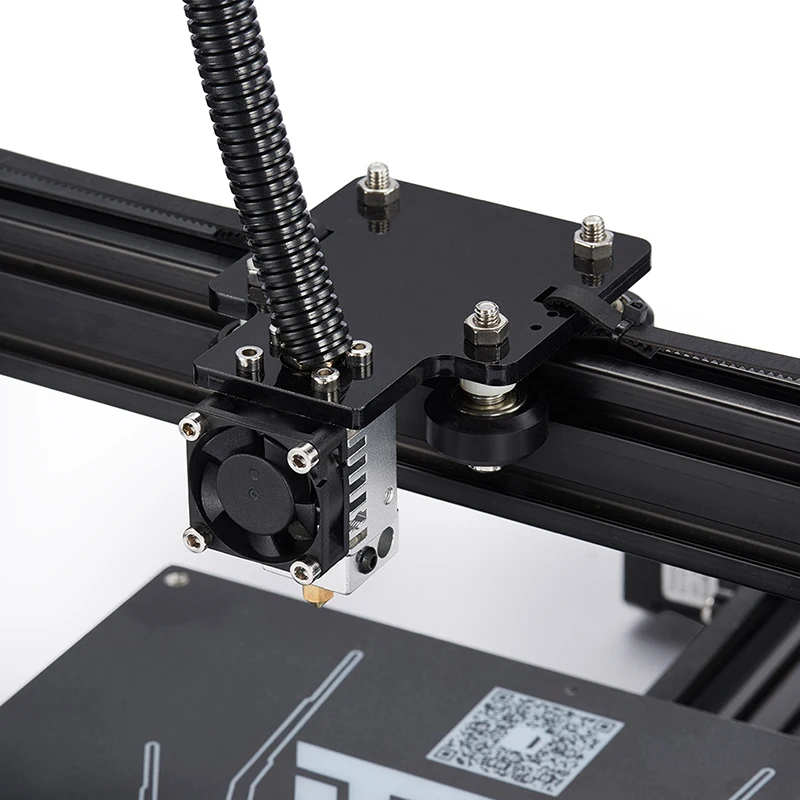
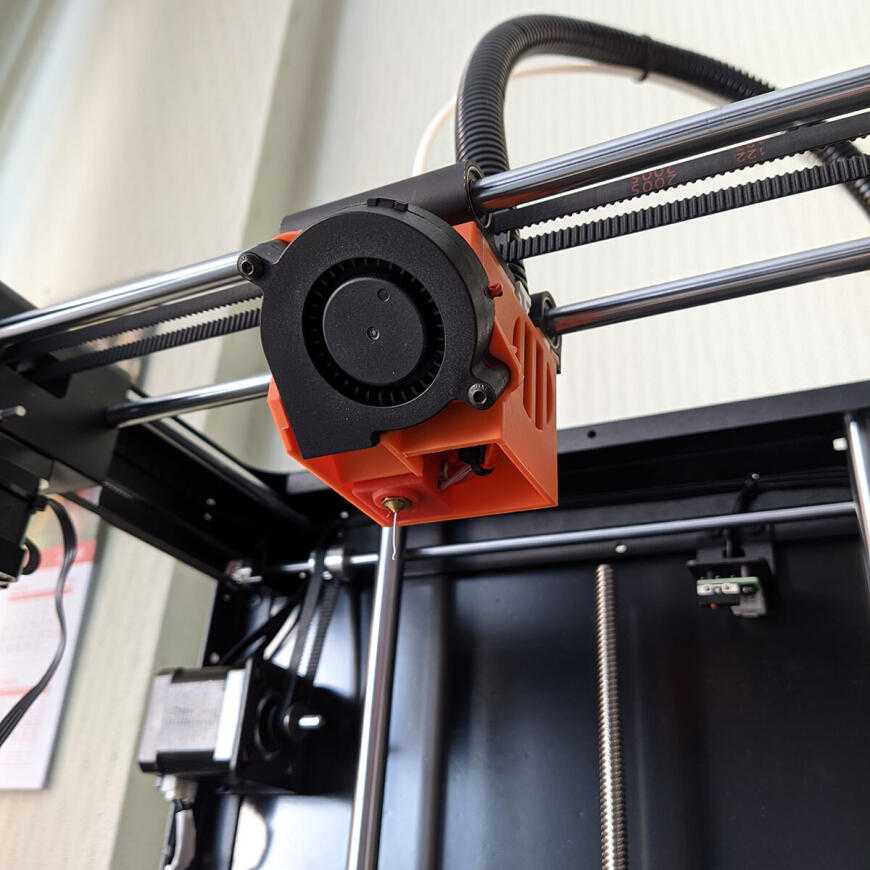
This extruder overcomes the shortcomings of all current counterparts on the market, to create an optimal printing experience for everyone.
With the Bevel Gear design, we are able to achieve the industry shortest filament path (less than 41mm). The unique motor placement allows for highly compact, low overhang design. This further increases system rigidity.
Features:
- Lightweight
- 3:1 Gear ratio
- Adaptable to wide range of 3D Printers
- Hardened steel, precision cut Dual Gear drive
- Industry shortest, highly constrained, TwinClad XT™ plated filament path
- Bevel Gear system allows a low overhang extruder mount
- Integrated with a Micro Swiss All Metal Hotend
Made in USA by Micro Swiss
Fits- CR-10
- CR-10s
- CR-10-S5
- CR-10-S4
- Ender 3
- Ender 3 Pro
- Ender 3 V2
- Sunlu S8
- Sunlu S8 Pro
- 1x Master Extruder Assembly
- 1x Adaptation plate
- 1x Stepper motor
- 1x Fan Shroud
- 1x Custom extension cable
- 1x Hotend assembly
Hardware:
- 1x Eccentric nut
- 1x M5 x .
8 x 30mm CAP SCREW
- 1x 5mm ID 10mm OD Washer
- 1x M5 x .8 Nylon Lock Nut
- 2x M5 x .8 x 20mm Nylon Patch CAP SCREWs
- 4x M2.2 x 8mm Thread Forming Screw for Plastic
- 4x M3 x 12mm Thread Forming Screw for Plastic
- 1x 7mm spanner wrench
- 1x 1.5mm Allen wrench
- 5x Zip Ties
Installation Instructions - PDF
Installation Instructions By Daniel at ModBot - Video
Installation Instructions By John at Tripod’s Garage - Video
Installation Instructions By Chris at Chris's Basement - Video
Installation Instructions By Chris at Embrace Making - Video
Downloads- Printable shrouds and brackets
- g-code for e-steps
- STEP File
Brass Plated MK8 Nozzles
A2 Hardened tool steel MK8 nozzles
M2 Hardened High Speed Steel Nozzle MK8 nozzles
Share this:Terrible
Don’t get me wrong, the quality of the prints with this print head is great, but:
- The bad design of the filament path makes it VERY difficult to load the filament
- The fan shroud made of plastic got deformed after printing at 260º in an enclosure
- The heating block is held by one screw, and will twist with the nozzle if you try to swap nozzle. If the fan shroud is still on, it will smash into it and deform the fan shroud. You have to take off the fan shroud and hold the heating block with pliers in order to swap the nozzle
I was very hyped about this product, but I got disappointed very bad. I feel like my money went down the drain.
Solid Extruder First Class Support
I got the NG extruder for a not yet supported CR10 V2. Customer Support sent me fantastic supplemental instruction and part suggestions. I was able to do the install in a few hours (one I had printed a new shroud). The extruder is a great design and has a very tight filament path. I am still exploring with it but to date it has met or exceeded all of my expectations.
If you have a CR10 V2, here are my additional supplemental instructions for installation:
https://jons3dprintingadventure.blogspot.com/2022/11/adding-microswiss-ng-direct-drive.html
Works perfect
I put it on my CR10 V3 that I have been having a lot of problems with and it’s like it fixed all the problems and started printing at excellent quality
Amazing addition to my CR10S Pro!!!
I love this direct drive.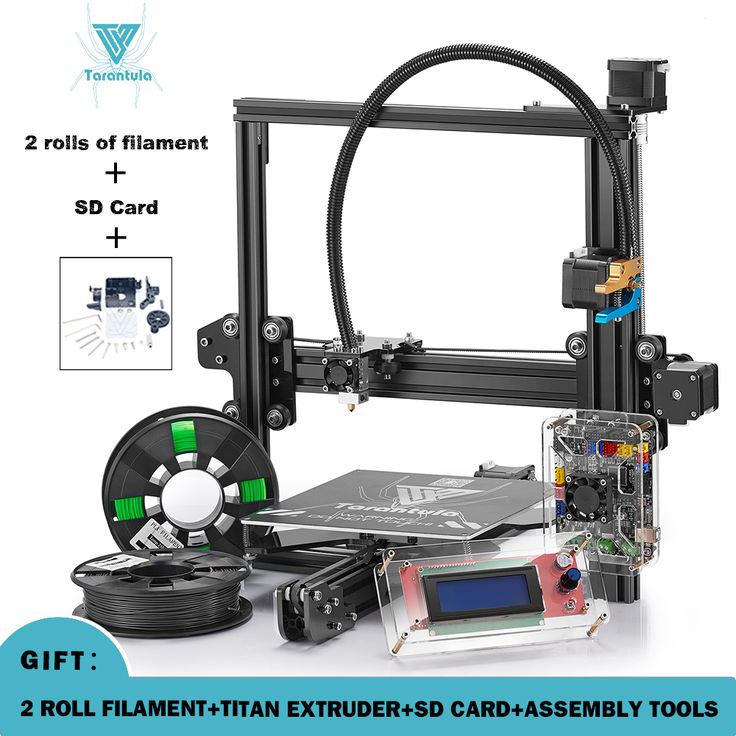 Have been printing at 100mm/second on my CR10S Pro flawlessly!!
Excellent Quality and made HERE!
Beautiful design and excellent prints!
123
Micro-Swiss 3D printer extruder - 3DJake International
Sort byRelevanceBestsellersCustomer ReviewsPrice, Low to HighPrice, High to LowNew arrivalsHighest Discount
-
Micro-Swiss Direct Drive Extruder for Creality CR-10 & Ender 3 2 Model types- Dual drive gear
- Easy filament loading
- For flexible filaments
-
Micro-Swiss Direct Drive Extruder for Creality Ender 5 2 Model types- Dual drive gear
- Easy filament loading
- Perfect for flexible filaments
-
Micro-Swiss Bowden Dual Gear Extruder- Reliable and firm filament grip
- More accurate extrusion movements
- CNC precision gears
-
Micro-Swiss Extension Cable for Direct Drive Extruders- 67 cm long
- Inexpensive replacement
-
Micro-Swiss NG Direct Drive Extruder for Creality CR-10 and Ender 3 series- 3:1 gear ratio
- Hardened steel dual gear drive
- Short filament path
-
Micro-Swiss Direct Drive Extruder for Linear Rails 2 Model types- Simple plug and play
- Ideal for flexible materials
- Good extrusion control
-
Micro-Swiss Motor Gear for Direct Drive Extruders- Precise CNC-milled teeth
- Hardened tool steel
- Inexpensive replacement
-
Micro-Swiss NG Direct Drive Extruder for Creality Ender 5 Series (Linear Rail Edition)- For printers with linear rails
- Lightweight
- 3:1 gear ratio
-
Micro-Swiss NG Direct Drive Extruder for Creality CR-10 and Ender 3 Series (Linear Rail Edition)- For printers with linear rails
- Lightweight
- 3:1 gear ratio
-
Micro-Swiss NG Direct Drive Extruder for Creality Ender 5 Series- Lightweight
- 3:1 gear ratio
- Hardened steel dual-gear drive
-
Micro-Swiss Tension Lever for Direct Drive Extruders- Inexpensive replacement
- With gear and shoulder screw
-
Micro-Swiss Hardware Kit for Direct Drive Extruders 1 set- Inexpensive replacement
- For Micro Swiss Extruder
-
Micro-Swiss Direct Drive Extruder for ExoSlide 2 Model types- Simple plug and play
- Ideal for flexible materials
- Good extrusion control
-
Micro-Swiss Tensioning Kit for Direct Drive Extruders 1 set- Inexpensive replacement
- For direct-drive extruders
All prices incl. VAT.
VAT.
Personal diaries
Subscribe to the author
Understand
we are not talking about it. At work, 4 large extruders are constantly crushing plastic, and they are boring. I wanted something homemade, warm and lamp-like and, of course, homemade.
The question arose to start like everything else with a drill (drill) for wood, or still go through this stage and immediately make a short screw according to all the canons of textbooks.
I immediately refused the drill, remembering that it cannot create normal pressure due to its shape, therefore the rod will in any case walk quite strongly even with broach and other dances.
Armed with a textbook on polymer machines, figured everything out, modeled a bit, asked friends to go to the factory to turn and mill. Turned on the eye here is a screw. with LD about 11.
Well, and behind it is a material cylinder in size with a small tolerance. There is no beating, the bearing has not yet been pressed, but everything spins by hand, does not chat, does not catch.
A bit of witchcraft and shamanism, heating pads, a motor, and an arduino came from the Chinese brothers. Well, the PID controller for heating pads, of course.
The external PID is in fact unnecessary, and ring heaters for 24v too. Let's convert to ssr + ring for 220v + PID control through a microcontroller. But for now, this is it. Presses 0.5-1kg / h, depending on what to press, presses without pulling evenly 1.9-1.8. You can force them to stretch out under their own weight by adjusting the confusion, lowering the bar with the hands of a meter to the floor below the extruder, it just comes out even 1.75.
Outwardly, so far, like this - Well, at work and to chat a little, I streamed to my channel. Sorry for the quality, I’m covered by quarantine in the hospital (no, I’m not sick) and it’s always difficult to escape home for a couple of hours.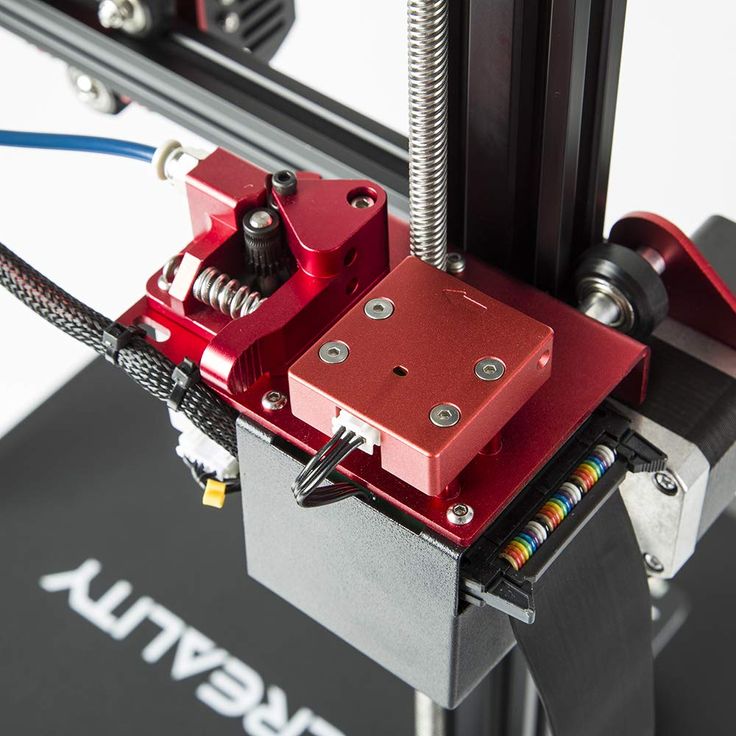 How did it happen.
Subscribe to the author
Subscribe
Don't want
18
Loading
10/19/2022
554
eight
Subscribe to the author
Subscribe
Don't want
I will leave here this collection for Exorcism and resurrection of boards from BTT
https://g...
Read more
four
Subscribe to the author
Subscribe
Don't want
We needed here some details for our large printer
I decided to cut them off. ..
..
Read more
DrProg
Loading
03/24/2019
15648
79
Subscribe to the author
Subscribe
Don't want
- How so, sick? After all, I strongly recommended that you do not visit such establishments at least a couple ...
Read more
Heatle 3D Printer Extruder - Complete Manual
Learn the basics of direct drive and Bowden extruders, hot and cold ends, nozzle sizes and materials, and find the best 3D printer cartridge for your needs.
The 3D printing process can be briefly described as follows: a filament of plastic material is fed into a heated metal block with a nozzle, where it is melted and extruded in a given form. This path is repeated, gradually building up until a solid three-dimensional object is formed.
The entire business task of handling the material, melting it and exiting for printing takes place in a block called 3D printer extruder .
In this article, we will look at the main sections of the 3D printer extruder, the options and advantages of different styles of extruders, popular models on the market, as well as cartridge heaters for 3D printers and other items.
What is an extruder
The 3D printer extruder is a set of parts that together process and move a plastic filament.
Some consider the extruder to be just the motor and associated parts that push and pull the filament, others the entire assembly including the heated part that melts and deposits the filament.
For simplicity, this article treats the entire assembly as an extruder. To begin with, while explaining the key components of a 3D printer extruder, we will divide it into two elements: a cold zone and a hot zone.
Cold zone
As the name implies, the cold zone is exactly that - cold. This is the top of the 3D printer's extruder system, into which the filament is fed and then passed into the hot zone to be melted and extruded onto the print bed.
The appearance and location of the cold zone on your 3D printer depends on whether it is a direct drive or Bowden drive extruder (both of which are detailed below).
There is no filament heating here. The cold zone consists of the extruder motor and gear train, which are usually mounted either on the printer frame or on the print head itself, depending on the type of extruder, and a PTFE tube to smoothly guide the filament into the hot end.
What happens in the cold zone?
With the heatsink removed on this e3D Titan Aero, we can see the inner workings of the 3D printer's extruder.
Essentially, the cold zone consists of a stepper motor, some form of gear, a toothed bolt or gear, a spring-loaded idler (usually a bearing of some kind) to hold the filament, and then a PTFE tube to guide the filament.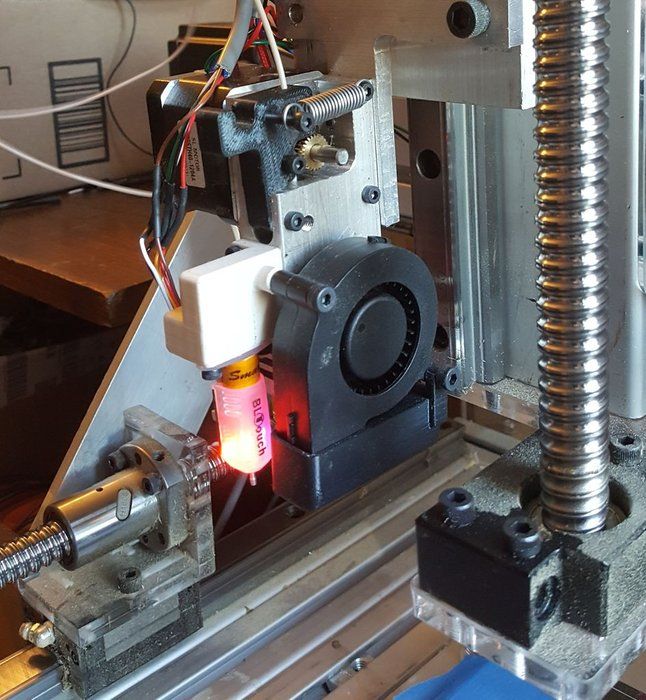
A humble stepper motor with a metal gear required for a 3D printer's extruder drives the filament extrusion in most if not all modern desktop 3D printers.
However, one stepper motor is not enough to feed the filament to the hot end. The parts attached to and operating the stepper motor drive shaft must physically grab the filament and push it on its way to the hot end.
In this cutaway view of a 3D printer extruder, we see a metal gear and a plastic gear with a toothed shaft.
This usually uses a combination of toothed gears and toothed bolts or shafts (in the image above we see a metal gear and a plastic gear with a toothed shaft) serving as a pressure wheel along with a bearing or other rigid frictionless material.
Here we see a plastic lever with an integrated bearing, an extension spring and a plastic gear with a toothed shaft. Together they apply pressure to the filament and force it through the extruder.
Alternatively, there are versions of the cold end of the 3D printer extruder that use a slightly different arrangement of parts to feed the filament. Such deviations are often claimed to provide increased traction and yarn delivery.
Here we see both sides of the Prusa i3 Mk3 cold end, including the Bondtech extruder gear train.
As mentioned, there are varieties of 3D printer extruder that use these parts in slightly different layouts. Each has its pros and cons. Next, we will look at what is the difference between a direct drive 3D printer extruder and a Bowden 3D printer.
Direct drive extruders
The direct drive 3D printer extruder is different in that it has the extruder motor directly above the heating unit. This arrangement minimizes the travel distance of the filament to the hot end and can enable more reliable 3D printing of flexible filaments.
The advantage of using direct drive is more precise retraction control.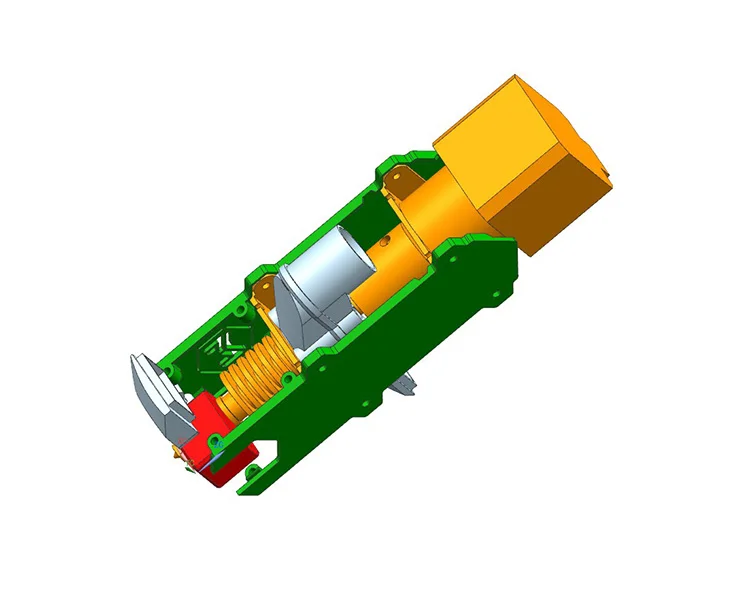 Due to the location directly above the hot end, there is less distance between the clamp and the thread passing through the thermal barrier into the heating block. Consequently, the filament has less room to bend and deform under pressure.
Bowden extruders
Bowden Style 3D Printer Extruder The does not mount directly on the top of the hotend like a direct drive 3D printer extruder, but the motor and gear assembly mounts on the frame of the printer. This gives this type of extruder an advantage over its head-mounted direct drive brother: speed.
By placing the mass of the 3D printer's extruder on the frame instead, the printhead is freed up to print at higher speeds without sacrificing print quality.
A side effect of placing the 3D printer's extruder this way is that the filament now has to travel a long way in a tube that's a fraction wider than it is. There should be enough room along the entire length of the tube for a slight bend in the thread. When pulling in the thread between strokes, this slack in the thread shortens the pull-in distance. Without correction (i.e., an increase in retraction), this results in a delay in relieving the pressure exerted on the hot end. In short, you can get confused if you don't change your retract settings.
Heating block (Hotend)
Inside the knot, known as the hot end, the filament passes into a heated chamber where it changes from solid to liquid. Sounds simple, and mostly it is. Although there is a lot more to make the filament silky extrude onto the build plate.
What happens in the heating zone?
The E3D Titan Aero combines a heating block and an extruder in one compact unit. The hot end usually only has the central parts of this image: the heatsink (and fan), the heating element (micro cartridge heater), the heater block, the thermistor, and the nozzle.
A typical 3D printer hot end consists of a specific sequence of parts. There is a slight difference depending on whether you are using PTFE/PEEK or a full metal hot end. Here we explain the all-metal hot block.
First, it is a filament supply tube. In both a Bowden 3D printer extruder and a direct drive extruder, it will just be a PTFE tube coming from your cold filament feeder.
You can sometimes find direct drive 3D printer extruders where the filament runs straight into the print head.
On a Bowden 3D printer's extruder, this feed tube inserts the filament directly into the thermal barrier via a heatsink. The thermal barrier that is screwed into the heatsink is often a threaded stainless steel (or other non-conductive metal such as titanium) tube.
Split in two (note the two separate threads in the image below - longer for the heatsink, shorter for the heater block) and machined on the inside, the thermal break allows the filament to pass freely into the extrusion nozzle.
Clockwise from bottom left: steel thermal barrier, aluminum heating block and brass nozzle.
But since we're dealing with precision and a material that liquefies for rapid recooling, the 's temperature management is critical. The thermal barrier, in combination with the heat sink, maintains a certain limit at which the filament is exposed to high temperatures.
The top, which is actively cooled by a heatsink and dedicated fan, prevents heat from escaping from the hot end and weakening the filament before it is where it needs to be for extrusion. This unwanted phenomenon is known as thermal creep.
The lower part of the thermal barrier is located inside the heater block together with the cartridge heater, the temperature switch thermistor and the nozzle.
The heater block, usually made of aluminum, ensures a smooth transition of the filament from the open end of the thermal break tube to the nozzle.
The temperature to melt the filament has to come from somewhere, and this is where the cartridge heater comes into play.