3D printer for small parts
Best 3D Printers for Small Parts & Fine Details
- Author
- Recent Posts
Martin
Besides many test devices, Martin now has his fourth own 3D printer running and prints as a hobby for friends, family and himself. He is happy to share his experience with each new article.
Latest posts by Martin (see all)
- BQ-Hurakan vs. Ender-3 V2 Neo | Comparison, Pros & Cons - November 10, 2022
- Mouse Ears (Brim Ears) vs. Warping in 3D Printing – Guide - November 10, 2022
- Ender-5 S1 vs. Ender-5 Pro | Comparison, Specs, Pros & Cons - November 9, 2022
Disclosure: Links marked with * are Affiliate Links. I earn from qualifying purchases if you decide to make a purchase through these links – at no additional cost for you!
3D printing has not only become popular in recent years, but there are also more and more affordable devices on the market. Spare parts for the household, car and workshop, toy figures and small works of art are created at home at the desk with the help of freely available CAD programs and the 3D printer. So far, so normal. But often the quality is not right.
So-called FDM printers are very widespread. The devices sometimes output quite rough components that are simply unsuitable as spare parts or in model making. SLA/DLP technology promises filigree printing results that are exact and, above all, have a smooth surface. How exact it has to be depends, of course, on your needs.
Resin: For impeccable results and smooth surfaces:
- Beginner: Anycubic Photon*
- Advanced: Formlabs Form 2*
FDM: Simple operation with somewhat rougher surfaces:
- Beginner: Creality Ender 3*
- Advanced: 3DWOX 1*
Table of Contents:
- 1 FDM or SLA/DLP?
- 1.1 FDM works with filament
- 1.2 SLA/DLP creates detailed resin parts
- 1.3 FDM for beginners?
- 2 How detailed do you want it to be? FDM printer for model making
- 2.
 1 Finer details: SLA printer
- 2.
- 3 The Best 3D Printers for Small Parts
- 3.1 Creality Ender-3
- 3.2 Anycubic I3 Mega
- 3.3 Sidewinder X1
- 3.4 3DWOX 1
- 3.5 Anycubic Photon
- 3.6 Formlabs Form 2
- 4 Create 3D Models: 3D Scanner, Software or Photogrammetry?
- 5 Conclusion: FDM Printers are Often Sufficient
FDM or SLA/DLP?
These are two fundamentally different technologies that not only work with different materials but also build them up in different ways. The extremely different results in terms of detail and fineness of the components can be explained by these differences.
FDM works with filament
PLA, ABS, PETG or Nylon*? These and many other polymers can be processed with 3D printers using FDM technology. FDM stands for Fused Deposition Modeling. This printing process is also sometimes referred to as FFF (Fused Filament Fabrication), which means roughly the same thing.
The 3D printer is fed with a roll of filament-formed plastic, which is melted in the device. The device outputs the melted material in layers, placing layer upon layer on top of each other to build the model. The finer and thinner the layers are dispensed, the smoother the surface will be later and the more details can be worked out.
The plastics harden when they slowly cool down. To prevent this from happening too quickly, one sometimes works with a heated printing plate or even a heated, closed printing chamber. Nevertheless, it can happen that the filament pulls threads in empty spaces between two individual parts, edges are not printed cleanly or components even collapse. Supporting structures are also necessary for filigree components and must be considered in the design.
How easily these structures can be removed later depends on the shape of the component – but this also contributes to uneven surfaces. Because wherever a structure has been removed, this leaves traces.
Some plastics are better suited for fine details than others because the plastics liquefy better, cure more cleanly, become harder overall or can be printed in extremely fine layers. Nevertheless, you can always see the individual layers in the finished model. Some filaments allow subsequent smoothing with acetone or another chemical.
SLA/DLP creates detailed resin parts
SLA technology allows for highly accurate, isotopic, and waterproof models. Stereolithography is the longest-used 3D printing process to date. Here’s how it works: A liquid resin made of photopolymer contains a workpiece that is gradually lowered. A laser moves step by step over the starting material, which hardens the desired shape via exposure. For filigree structures and extremely smooth surfaces, this is the preferred process.
3D printers for home use that work with the SLA process are equipped with a resin tank. You fill the resin, i.e. liquid synthetic resin, from the supply bottle into the tank for each printing process. After printing is complete, you can filter the remaining material and return it to the supply bottle – it is not lost.
Resin printing processes are used for the manufacture of precision-fit hearing aids and dentures as well as for functional components, prototypes and extremely delicate models. Components with high precision are also preferably produced using this process.
FDM for beginners?
There are a few reasons that speak more in favor of a 3D printer with FDM technology for home use. SLA printers, as already mentioned, work with synthetic resin. The material is highly toxic and can enter the body through contact with the skin – this should be avoided at all costs.
Anyone working with synthetic resin must wear disposable chemical-resistant gloves, chemical safety goggles and respiratory protection. The vapors of the synthetic resin must not be inhaled. So the infernal noise generated by the resin printer during work seems almost unimportant. Only when completely cured (i. e. after post-treatment under the UV lamp) is the material no longer toxic.
The second point that speaks against resin printing is the effort. These printers have to be cleaned. The material remaining in the tank must be filtered and filled back into the bottle. Material residues and cleaning agents must be disposed of properly. All of this costs time and requires professional expertise.
And a third point speaks against resin printing: Equipment and materials are cost-intensive. Whereas with FDM printing you only have to pay for electricity and filament, with resin printing you also have to pay for protective goggles, respiratory protection, gloves and cleaning agents.
Those who have not been involved with 3D printing for so long will be able to familiarize themselves with the subject more easily with the help of a filament printer. This is because FDM devices are safer to use and much less complicated. Depending on the printer used and the filament selected, the level of detail achieved by an FDM printer is usually sufficient for home use.
How detailed do you want it to be? FDM printer for model making
What at first sounds like a nice gimmick is actually a very important application for 3D printing: Both for RC model making and for model trains, cosplay and similar applications, the individual parts are taken from the 3D printer. Since the requirements in model making are not always the same, it is worth taking a closer look at the subject.
Which applications require which accuracy? And above all, which 3D printers come close to meeting the requirements? You can almost watch the market for 3D printers grow at the moment, with new manufacturers appearing seemingly every day. Many of them come from China, and often the print quality is not convincing. However, some devices have been on the market for so long that they have been extensively tested for one application or another. We rely on this experience here.
In RC model making, it has to be reasonably accurate, but the details of the printed parts are not that fine. The FDM printing process is completely sufficient for RC model making. However, you should try out which filament has the important properties for you and meets your requirements, because the plastics differ greatly.
Beginners usually work with PLA because the filament is forgiving, inexpensive and made from environmentally friendly material. ABS is considered similarly beginner-friendly.
Finer details: SLA printer
For miniatures, dioramas, architectural models and other applications, it simply has to be finer than the FDM printer can manage. Then a resin printer is the right choice. If you don’t want to mess around with the resin yourself, you can use an online printing service.
This is not only available for FDM technology, but also for other printing processes. Especially for people who do not print so often themselves, who have children or pets, this is a sensible alternative to their own resin printer.
The Best 3D Printers for Small Parts
The best tips are of no use if you don’t know what the individual printers really do. From the experience reports of other 3D fans and experienced model builders, you can find out which printers are really good with details, which ones work rather roughly, and above all, how good or bad the operation is.
The majority of people get along very well with FDM printers because for normal use the less expensive and easier to use devices are perfectly sufficient. Those who occasionally want to print finer parts can either familiarize themselves with his/her device and the different plastics (especially the material makes a lot of difference), or use a professional printing service for the few parts. On the other hand, if you really want to print fine details and the smallest parts often or all the time, you are better off with a DLP or SLA technology printer.
The ratio is somewhat unbalanced, which is why more FDM printers are presented than resin printers. By the way, one does not exclude the other: The relevant forums and communities let slip that many people will eventually purchase a DLP printer as a secondary device for the fine parts. Target group: architects: Architectural models in scales from 1:50 to 1:1000 naturally place very high demands on a 3D printer’s attention to detail.
Everyone has to decide for themselves whether having their own device in the office is a good idea. After all, printing costs not only money, but also time and nerves. If you don’t want to invest your valuable working time in working with the printer, you should outsource the creation of models for your customers to a 3D printing service. The devices that come into question in terms of quality and scope (keyword: size of the print space) for architectural models usually cost four- to five-figure sums, are very large and uninteresting for the hobby sector. Therefore, they are not considered in this article.
Creality Ender-3
Creality’s Ender-3* is great for most hobby applications and concept models, and presentation tools. The printer works with filament and comes as a kit, so you get to assemble your device yourself first. The price-performance ratio is excellent.
Check Price at:
Amazon*
3DJake*
The device is extremely affordable and popular. The setup is done quickly, the printer is equipped with a 24 V print bed that heats quickly. It works with a Bowden extruder, but it can also process flexible materials.
Material change and color change are possible. The project is open source and comes from China. This means that you can modify your 3D printer with the appropriate knowledge and thus achieve an even better print quality. The device works very accurately and, above all, quietly. The details in the print are fine enough for tabletop figures – but small grooves are still visible. What also speaks for the printer: The device is so popular that you can quickly find help in case you encounter a problem.
Anycubic I3 Mega
The I3 Mega from Anycubic* already costs a bit more than the Ender 3, works very well with various plastics and comes as a kit. It is well suited for printing illustrative samples, hobby and concept models, and presentation materials. This printer is also very popular and easy to use. The 3D printer is delivered partially assembled, so you don’t have to do much yourself.
Check Price at:
Amazon*
Pleasant is the touchscreen menu navigation, which is intuitive to use. The surface of the build plate on this device carries a special coating from which the models are very easy to detach after building – with excellent adhesion during printing. The device operates quietly and quickly, works reliably, but cannot be used well for flexible materials with Bowden extruders.
In case of problems, the large community of Anycubic I3 Mega fans on the Internet is happy to help, and customer support is also available.
Sidewinder X1
The Sidewinder X1* is also very affordable and suitable for home use, samples, models and presentation tools. The kit is delivered partially assembled, numerous tutorials and instructions for the assembly circulate on the web. The print volume is pleasant: the device allows 300 x 300 x 400 millimeters. The print quality is good, the device is solid and surprisingly well-made.
Check Price at:
Amazon*
3DJake*
The solid construction also allows high printing speeds. The Sidewinder X1 is equipped with a direct-drive extruder, so flexible materials can also be used well. Since the print bed can deform at higher temperatures, some users retrofit their own build plate made of cast aluminum with a silicon carbide surface.
The touchscreen allows easy operation, and the calibration of the print bed is simple. In addition, the device supports all currently available slicers. The printer is very fast, but this leads to vibrations on the device. This can mean qualitative sacrifices in the printed object, but it does not have to. This printer is also quiet and works extremely detailed and especially clean in the details. It is a good choice for model makers, cosplayers and architects.
3DWOX 1
Sindoh is the name of the manufacturer of the 3DWOX 1*, another FDM printer. The device is well suited for hobby and home applications, and can print hobby models with just as much attention to detail as objects for research and education. However, the device is not as inexpensive as the previously presented printers.
Sindoh – 3D1AQ – 3DWOX 1*Check Price at:
Amazon*
The device comes from South Korea and is praised by 3D printing fans as well as professionals for its excellent print quality. Unlike the models presented here, the 3D printer has a closed printing chamber that filters exhaust air with a HEPA filter. A live webcam sits in the print chamber and helps monitor all operations with the associated app. There is even a function for nozzle cleaning while still printing. The material selection is unlimited, open filament can be used just like the conventional cartridges.
The touch display makes for easy operation, but Sindoh uses its own slicer. The device is relatively quiet in operation, excellently manufactured and, above all, stable. For detailed, fine print objects, this 3D printer is a good choice.
Anycubic Photon
With a price comparable to the Ender 3, the Anycubic Photon* is one of the most affordable models available. The resin printer is just as well suited for detailed small objects, for concept models and art objects as it is for presentation tools and hobby applications. The desktop device uses an LCD as a light source and is therefore so much cheaper than SLA printers. Nevertheless, the print results are comparable in terms of fineness and accuracy for details.
Anycubic Photon*Check Price at:
Amazon*
3DJake*
The Photon from Anycubic is almost beginner-friendly in terms of operation, and most importantly, it comes as a ready-made device. So nothing more needs to be set up. The printer achieves resolutions of up to 0.047 millimeters in X and Y, and up to 0.025 millimeters in Z. This is much finer than any FDM printer would allow. However, the print speed is not that great, the device is very slow – normal for DLP printers.
The printing speed always depends on the layer thickness. If you print small parts in series, the printer is faster than an FDM printer, because a complete layer is always exposed at once. So you pack your model (if it fits in size) ten times next to each other, and the printer does all ten models on one layer at the same time. The printer is popular, and the user community is just as happy to help with problems as customer support.
Minus points: The build space for the Anycubic Photon is relatively small, working with resin places high demands on safety and hygiene, and the models have to be reworked. Nothing works here without gloves, safety goggles and respiratory protection. After building, the models must be cleaned with isopropyl alcohol and cured under UV light.
Formlabs Form 2
Things get even more professional with the Form 2 from Formlabs*. The 3D printer is a good choice for illustrative samples, concept models, art objects, presentation aids and even templates and molds. However, it is not as cost-effective as the Photon – in fact, it costs several times as much.
Check Price at:
Amazon*
The SLA printer produces the objects from the synthetic resin by means of a laser and delivers good and even very good results. The objects are extremely delicate, accurate and smooth. At the same time, the printer also has a stable design, works reliably and is easy to use. Not so pleasant is the small print volume, and the implications of resin printing along with the safety requirements are also unpleasant.
In addition, Formlabs’ Form 2 does not allow the use of third-party materials. The resin from other suppliers is certainly usable, but the print quality suffers extremely. The customer support is positively highlighted.
Create 3D Models: 3D Scanner, Software or Photogrammetry?
The 3D models for what is printed have to come from somewhere. Numerous models that other users have created are circulating on the Internet on the relevant platforms. If you don’t want to use this, you can build the model yourself digitally using a freely available program such as Tinkercad, Onshape or Fusion 360. Tinkercad is considered a solution for beginners and can be used intuitively; other CAD programs are more difficult to use.
But there is also the option of printing from “real” models. 3D scanners are available, simple devices are available in the three-digit dollar range. The sky’s the limit, and you’ll find scanners on the market for five-figure sums. Before printing, several steps are necessary. The original has to be scanned and then processed by software. This is not easy and does not always lead to the desired result. An alternative for non-reflective surfaces is photogrammetry.
It is important to know that the 3D printer can only produce clean details and very delicate, small parts if the template is correct – so a lot depends on the CAD software and the operator.
Conclusion: FDM Printers are Often Sufficient
Of course, there is no one best 3D printer for small parts and fine details. Depending on how delicate you want the print to be, how much money you want to invest and what previous knowledge you have, different devices will come into question for you.
Disclosure: This website is the property of Martin Lütkemeyer and is operated by Martin Lütkemeyer. Martin Lütkemeyer is a member of the Amazon Services LLC and other Affiliate Programs. These are affiliate advertising programs designed to enable websites to earn advertising revenue through advertising and linking to Amazon.com and others. Links marked with * are affiliate links.
7 Best 3D Printers for High Detail/Resolution, Small Parts – 3D Printerly
There are plenty of different 3D printers to choose from when it comes to finally getting one for yourself, but how do you know which one to get?
I decided to write this article for people that are looking for a 3D printer especially for high detail/resolution, as well as for smaller parts. The main two types of 3D printing is resin (SLA) 3D printing and filament (FDM) 3D printing.
Generally speaking, you’ll get the best quality models by getting a resin 3D printer since they have a minimum layer height a lot better than filament printers.
There is still a reason why some people would want a filament 3D printer while trying to create smaller parts, so I’ve included a few of them in this list.
Without further delay, let’s get into this list of the 7 best 3D printers for high detail and resolution.
Resin 3D printing is gaining too much popularity in the industry but one thing was slowing it down, and that’s the resin printer’s small size. The Anycubic Photon Mono X is the latest resin 3D printer that comes with a relatively large printing area at a reasonable price.
It has become a staple in the resin 3D printing industry as one of the larger machines that not only provide fast curing, but also comes with a durable monochrome LCD which lasts for around 2,000 hours of printing, unlike RGB displays.
There were a few issues in the initial version of the Photon Mono X but after taking notes from customers’ feedback, they have improved the machine to the extent that it is now considered one of the best resin 3D printers in the market.
If you are a lover of FDM 3D printers and think that printing with liquid on new resin 3D printers is messy, all your assumptions will be proved wrong after using the Anycubic Photon Mono X. It has the ability to offer 3D printed models of high resolution with fine details.
Features of the Anycubic Photon Mono X
- 9″ 4K Monochrome LCD
- New Upgraded LED Array
- UV Cooling System
- Dual Linear Z-Axis
- Wi-Fi Functionality – App Remote Control
- Large Build Size
- High-Quality Power Supply
- Sanded Aluminum Build Plate
- Fast Printing Speed
- 8x Anti-Aliasing
- 5″ HD Full-Color Touch Screen
- Sturdy Resin Vat
Specifications of the Anycubic Photon Mono X
- Build Volume: 192 x 120 x 245mm
- Layer Resolution: 0.
01-0.15mm
- Operation: 3.5″ Touch Screen
- Software: Anycubic Photon Workshop
- Connectivity: USB, Wi-Fi
- Technology: LCD-Based SLA
- Light Source: 405nm Wavelength
- XY Resolution: 0.05mm, 3840 x 2400 (4K)
- Z-Axis Resolution: 0.01mm
- Maximum Printing Speed: 60mm/h
- Rated Power: 120W
- Printer Size: 270 x 290 x 475mm
- Net Weight: 10.75kg
The Anycubic Photon Mono X is packed full of useful and practical features that current users are loving. One of the main features as previously mentioned is their large monochrome screen which reduces curing times to between 1.5-3 seconds per layer.
This is a massive improvement compared to the older resin 3D printers, known cure around 3 times faster. The build volume of 192 x 120 x 245 is the main selling point of this 3D printer, and it still maintains the high level of accuracy as smaller 3D printers.
The dual linear Z-axis provides you with plenty of stability during the printing process, along with a high quality power supply that can keep those longer 3D prints going strong.
The light array within the Mono X is upgraded for a more simple and uniform LED array which also translates to finer details, perfect for smaller parts.
In terms of bed adhesion, we have the lovely sanded aluminum build plate.
Many users have shown praise to the good level of bed adhesion. You’ll have to make sure the bed is nice and level, along with good bottom layers and exposure settings for the best results.
The control and operation of the Mono X is clean and smooth, since it has a colorful and large display that even shows you previews of your upcoming 3D prints.
Another lovely feature has to be the Wi-Fi connectivity that allows you to monitor the current progress, adjust key settings, and even pause/resume the print as you desire.
User Experience of the Anycubic Photon Mono X
Many users that mention this is their first resin 3D printer go on to show appreciation of just how excellent the print quality and final finish is. They went from quick assembly to flawless 3D prints without issues.
One user loved how smoothly everything moves and operates, commenting on its solid stability and how the leveling remains in place for plenty of 3D prints. Since the leveling system has a 4-point arrangement, it means you barely have to re-level this machine.
Unlike some other manufacturers out there, the documentation and guide is very easy to follow from start to finish.
You’ll hear about how your 3D prints will have “unbelievable detail” and gives you the ability to print plenty of small objects that you couldn’t with an FDM 3D printer.
The size of the printer, its printing speed, precision, ease of operation, quality of the models, and high details are some of the major reasons that make the Anycubic Photon Mega X people’s favorite and highly recommended 3D printer.
One buyer said that he uses this 3D printer to print all sorts of small parts and models for various applications.
Instead of being able to 3D print 10 miniatures on a previous resin 3D printer, one person who bought the Anycubic Photon Mono X went on to be able to 3D print 40 miniatures in a single run.
Pros of the Anycubic Photon Mono X
- You can get printing really quickly, all within 5 minutes since it’s mostly pre-assembled
- It’s really easy to operate, with simple touchscreen settings to get through
- The Wi-Fi monitoring app is great for checking on the progress and even changing settings if desired
- Has a very large build volume for a resin 3D printer
- Cures full layers at once, resulting in quicker printing
- Professional looking and has a sleek design
- Simple leveling system which stays sturdy
- Amazing stability and precise movements that lead to almost invisible layer lines in 3D prints
- Ergonomic vat design has a dented edge for easier pouring
- Build plate adhesion works well
- Produces amazing resin 3D prints consistently
- Growing Facebook Community with plenty of helpful tips, advice, and troubleshooting
Cons of the Anycubic Photon Mono X
- Only recognizes .
 pwmx files so you may be limited in your slicer choice
 - The acrylic cover doesn’t sit in place too well and can move easily
- The touchscreen is a little flimsy
- Fairly pricey compared to other resin 3D printers
- Anycubic doesn’t have the best customer service track record
Final Thoughts
If you are looking for a 3D printer that has fabulous features and offers you a large printing area so that you can print various models at the same time, you can’t go wrong with this 3D printer.
You won’t have to compromise on the model’s quality, details, and high resolution.
Go get the Anycubic Photon Mono X 3D printer on Amazon today.
The Qidi Tech S-Box is a well-structured 3D printer that is specially designed and manufactured by a respected professional team that mainly focuses on creating machines that can create some top-quality 3D prints with maximum ease.
Qidi Technology has great experience in manufacturing 3D printers as have been in the market for more than 7 years. The X Series of Qidi Tech includes 3D printers that are listed among the best 3D printers in the market.
The S-Box (Amazon) is an advanced 3D printer that is manufactured after experiencing all the ups and downs of 3D printers in the 7 years of their experience.
The detailed printing effect, top stability, unique design, professional structure, and ease of use are some of the major plus points of this 3D printer.
Features of the Qidi Tech S-Box
- Sturdy Design
- Scientifically Designed Leveling Structure
- 3-Inch Touch Screen
- Newly Developed Resin Vat
- Dual Air Filtration 2K LCD – 2560 x 1440 Pixels
- Third-Generation Matrix Parallel Light Source
- ChiTu Firmware & Slicer
- Free One-Year Warranty
Specifications of the Qidi Tech S-Box
- Technology: MSLA
- Build Volume: 215 x 130 x 200mm
- Layer Height: 10 microns
- XY Resolution: 0.047mm
- Z-Axis Positioning Accuracy: 0.
 00125mm
 - Printing Speed: 20mm/h
- Bed Leveling: Manual
- Materials: 405 nm UV resin
- Operating System: Windows/ Mac OSX
- Connectivity: USB
The Qidi Tech S-Box is another large resin 3D printer that can deliver fine details, high resolution, and some top-notch smaller parts. One key aspect that you’ll love is their one-key leveling system.
It’s a unique leveling structure that allows you to simple “home” the 3D printer, tighten up the one main screw, and have a leveled machine ready to use.
Many users of this machine love the professional look, as well as the structure being made up off cast aluminum from one-time molding.
This leads to better stability and mechanical structure, especially helpful for when you are printing multiple smaller models.
Similar to the Photon Mono X, you have a double-line guide rail, and it has an industrial-grade ball screw in the middle. Another great aspect is the Z-axis accuracy which can easily reach 0. 00125mm!
For the main driving forces of the S-Box, you have the TMC2209 drive intelligent chip to keep things running smoothly.
To get the best quality and detail, this 3D printer is equipped with a 10.1″ high precision screen where the light is very uniform. If you have a batch of smaller 3D prints that you want to create, you’ll be able to do that nicely with this machine.
User Experience of the Qidi Tech S-Box
The Qidi Tech S-Box is a lesser known resin 3D printer, but definitely a competitor that people should look into. One of the consistent things that people mention is just how top-class Qidi’s customer support is.
They are known to be very fast and helpful in their responses, even though they are based overseas, but let’s talk more about the printer itself!
When it arrives, you can expect it to be packaged up professionally, ensuring that it arrives to you in one piece.
Some of the key pros that you can expect is a large build size, where you can fit 3x more 3D prints on the build plate compared to “standard” resin 3D printers.
Not only that, but the detail and resolution on the resulting 3D prints is fantastic, even requiring very minimal post-processing. Users love how easy the leveling process is, as mentioned above, as well as how quiet it runs.
The overall cleanup is fairly easy since you have space to move around and you don’t have the removable lid like on the Photon Mono X.
It’s rated very positively on Amazon and several of its current users give it a solid recommendation to have by your side.
One buyer specifically purchased this 3D printer to print miniatures and jewelry prototypes because it was related to his profession.
He said that the Qidi Tech S-Box has never disappointed him even when printing 3D models with complex design and structure. This printer has the ability to show each minor detail from top to bottom.
Pros of the Qidi Tech S-Box
- The machine is easy to set up, and even beginners can use it with the instruction guide that comes with it.
- Qidi Tech S-Box has a sleek and modern construction and provides it extra durability for long-lasting service.
- You will get a smooth operation –no more complexity- with minimal settings.
- The customer service after the purchase and during the use is fantastic and satisfactory.
- As compared to other 3D resin printers, it offers excellent print precision.
- The S-Box uses a matrix LED array with 96 individual points of UV light for uniform lighting and better quality.
- The smart chip present in the Z-axis motor machine provides you the incredible precision that you demand.
Cons of the Qidi Tech S-Box
- As the machine is quite new, the community is not that large, so the customers feel difficulty interacting.
- Fairly expensive resin 3D printer compared to budget options.
- It does not have any connectivity option other than USB.
- The size is a bit large as it is almost two feet long and over a foot and a half high.

- It weighs almost 55lbs, and that is high too – the vat and built plate are pretty heavy!
- The connectivity ports and touchscreen electronics are at the machine’s side that covers the whole side of the table.
Final Thoughts
If you are looking for a resin 3D printer that offers a large build volume, this 3D printer is for you as it comes with a massive area of 215 x 130 x 200mm.
To get a 3D printer that can provide fine details and high resolution, go get yourself the Qidi Tech S-Box right now from Amazon.
Elegoo received a lot of appreciation for their Mars 3D printer series because of their high-quality prints at a reasonable price but they all have a build volume of standard size.
To keep their pace in the competitive market, Elegoo is including advanced features in their new 3D printers and the Elegoo Saturn (Amazon) is the latest and largest. This 3D printer is a direct competitor to the Photon Mono X and Qidi Tech S-Box.
There are plenty of amazing features that make Elegoo Saturn a considerable 3D printer while printing small parts, giving users some great print resolution and high details.
Its large build volume which is almost twice the size of a standard 3D printer and the monochrome LCD is another key feature that has brought many people to considering it for purchase.
Features of the Elegoo Saturn
- 9″ 4K Monochrome LCD
- 54 UV LED Matrix Light Source
- HD Print Resolution
- Dual Linear Z-Axis Rails
- Large Build Volume
- Color Touch Screen
- Ethernet Port File Transfer
- Long-Lasting Leveling
- Sanded Aluminum Build Plate
Specifications of the Elegoo Saturn
- Build Volume: 192 x 120 x 200mm
- Operation: 3.5-Inch Touch Screen
- Slicer Software: ChiTu DLP Slicer
- Connectivity: USB
- Technology: LCD UV Photocuring
- Light source: UV Integrated LED lights (wavelength 405nm)
- XY Resolution: 0.
 05mm (3840 x 2400)
 - Z-Axis Accuracy: 0.00125mm
- Layer Thickness: 0.01 – 0.15mm
- Printing Speed: 30-40mm/h
- Printer Dimensions: 280 x 240 x 446mm
- Power Requirements: 110-240V 50/60Hz 24V4A 96W
- Weight: 22 Lbs (10 Kg)
The build volume of the Elegoo Saturn sits at a respectable 192 x 120 x 200mm which is slightly smaller than the Anycubic Photon Mono X, mainly in the height. You should be able to get the Saturn at a cheaper price due to this.
It has the standard dual linear Z-axis rails for this larger resin 3D printer to be able to stabilize your 3D prints while they are being created. It shares many similarities with the Mono X in this regard and with other features.
You’ll appreciate the 54 bright UV LED matrix lights within the base of the 3D printer and the 9″ monochrome LCD that provides the power and 405nm lighting system to harden the photopolymer resin.
Print quality, fine detail and high resolution is something several current users of the Saturn enjoy. If you have smaller parts that you want to 3D print, you can’t go wrong with this machine.
User Experience of the Elegoo Saturn
One of the buyers said in his feedback that this 3D printer was far better than his expectations and gave it an A+ grade in print quality. The user added that it only took less than 10 minutes to complete all the processes from unboxing to assembly.
If you want something that is simple to set up, yet can provide top quality 3D prints, it’s a great choice to go for.
Because of its advanced features such as the sanded metal build plate, and the sturdy and strong mechanisms, this 3D printer offers a tremendous 3D printing experience.
As this 3D printer has a flat build surface, if you calibrated your 3D printer in the right manner, you may never face any adhesion issues as many users have claimed. The prints sticks very well to the build plate and can be removed easily as well.
One of many buyers said that they have been using this 3D printer for many months and they are happy because the Elegoo Saturn provides them with consistent high quality and detailed prints without any hassle.
Pros of the Elegoo Saturn
- Outstanding print quality
- Accelerated printing speed
- Large build volume and resin vat
- High accuracy and precision
- Rapid layer-curing time and faster overall printing times
- Ideal for large prints
- Overall metal build
- USB, Ethernet connectivity for remote printing
- User-friendly interface
- Fuss-free, seamless printing experience
Cons of the Elegoo Saturn
- Cooling fans can be slightly noisy
- No built-in carbon filter
- Possibility of layer shifts on prints
- Build plate adhesion can be a little difficult
- Been having stock issues, but hopefully, that gets resolved!
Final Thoughts
If you are looking for a 3D printer that is easy to use, easy to assemble and provides a large build volume in this reasonable price range, this is one of the most-loved options out there.
Go straight over to Amazon and get the Elegoo Saturn for your 3D printing needs.
The Prusa i3 MK3S+ is a well-known 3D printer and it is one of Prusa Research’s flagship 3D printers. It has been designed and improved by adding a lot of updates and improvements to the previous Prusa i3 3D printers.
This goes all the way back to 2012 in which the original model was released.
As the Prusa i3 MK3S+ 3D printer comes from the RepRap tradition of 3D printers and has been improved steadily over the years, this 3D printer is highly suitable to be used for printing high resolution, small parts.
This 3D printer is claimed to be one of the best filament 3D printers when it comes to printing 3D models where fine details matter the most. This factor makes it the best suitable choice for the hobbyist and professionals.
Several people use Prusa 3D printers for print farms where they are 3D printing specific orders or parts for individuals and businesses. It’s one of those reliable machines that you can count on in the long run.
Features of the Prusa i3 MK3S+
- Fully Automated Bed Leveling – SuperPINDA Probe
- MISUMI Bearings
- BondTech Drive Gears
- IR Filament Sensor
- Removable Textured Print Sheets
- E3D V6 Hotend
- Power Loss Recovery
- Trinamic 2130 Drivers & Silent Fans
- Open Source Hardware & Firmware
- Extruder Adjustments to Print More Reliably
Specifications of the Prusa i3 MK3S+
- Build Volume: 250 x 210 x 210mm
- Layer Height: 0.
 05 – 0.35mm
 - Nozzle: 0.4mm default, supports many other diameters
- Max Nozzle Temperature: 300 °C / 572 °F
- Max Heatbed Temperature: 120 °C / 248 °F
- Filament Diameter: 1.75mm
- Supported Materials: PLA, PETG, ASA, ABS, PC (Polycarbonate), PVA, HIPS, PP (Polypropylene), TPU, Nylon, Carbon filled, Woodfill, etc.
- Max Travel Speed: 200+mm/s
- Extruder: Direct Drive, BondTech gears, E3D V6 hotend
- Print Surface: Removable magnetic steel sheets with different surface finishes, heatbed with cold corners compensation
- LCD Screen: Monochromatic LCD
You’ll find plenty of top class features on the Prusa i3 MK3S+ that set it up to be one of the best 3D printers on the market.
It has gone through plenty of iterations such as the newly rebuilt extruder, plenty of practical sensors, and the modern magnetic heatbed which has a PEI spring steel build surface that can be replaced easily.
This multi award-winning 3D printer can create some amazing models with high resolution and fine details without breaking a sweat. Prusa decided to add in a fresh SuperPINDA probe which translates into much better first layer calibrations.
They also have some high quality Misumi bearings for improved stability, as well as other positive adjustments that give users a brilliant 3D printer.
You can get the MK3S+ as a fully-assembled 3D printer which can be plugged in straight away or as a kit which you can assemble yourself. Plenty of current users of this 3D printer have given it much praise for its reliability and consistency.
User Experience of the Prusa i3 MK3S+
Setting up a 3D printer is a complex job for many users. With this 3D printer, once you have assembled it, setting the printer up is extremely easy.
One buyer said in his feedback that this 3D printer comes with an auto-bed leveling and a simple filament loading system which makes it easy for the users to use and operate.
Once you start your printing process, you will begin to notice the printing quality, efficiency, and capabilities of this 3D printer. The Prusa i3 MK3S 3D printer rapidly and consistently produces 3D models of high quality with fine details and high resolution.
This 3D printer emits almost no sound while operating. One user said that the motherboard of the i3 MK3S is so quiet that you can 3D print your models and read books in the same room without any disturbance.
This is mainly due to the Trinamic 2130 drivers along with the very silent fan. There is a specific setting called “stealth printing mode” which you can implement to make the MK3S+ even quieter.
Another key thing that users love about this machine is just how fast is can 3D print, with a maximum speed of 200m/s! One user mentioned how another one of their respectable 3D printers could only manage about half the speed at best.
Pros of the Prusa i3 MK3S
- Easy to assemble with basic instructions to follow
- Top-level customer support
- One of the largest 3D printing communities (forum & Facebook groups)
- Great compatibility and upgradability
- Quality guarantee with every purchase
- 60-day hassle-free returns
- Produces reliable 3D prints consistently
- Ideal for either beginners and experts
- Has won many awards for the best 3D printer in several categories.
Cons of the Prusa i3 MK3S
- No touchscreen
- Doesn’t have Wi-Fi inbuilt but it’s upgradable
- Fairly pricey – great value as stated by its many users
Final Thoughts
If you are looking for a 3D printer that can be considered as one of the best on the list when it comes to quality, high resolution, details, price, and value, this 3D printer cannot be ignored.
It’s the choice I’d make if you want to go for a filament 3D printer rather than resin.
You can visit their official website and place an order for the Prusa i3 MK3S+ 3D printer.
The tag line of the Creality LD-006 is “Unleash Your Creativity, Open Up New Possibilities”.
It is not only a tagline but a promising phrase that will help you to improve your printing experience if you are a beginner and get prints of much better quality if you are a professional.
There is always competition between various 3D printer brands and Creality never fails to compete with the other well-known brands. Using this 3D printer will give you proof of its advanced features and powerful specifications.
Features of the Creality LD-006
- 9″ 4K Monochrome Screen
- Rapid Printing
- Larger Print Size
- Directional UV Matrix Light Source
- Stable Dual Linear Guide Rails
- 3″ Color Touchscreen
- Built-In Air Purification System
- New Convenient Vat Design
- Custom Punched Release Film
- Hassle-Free Leveling
- Sanded Aluminum Build Platform
Specifications of the Creality LD-006
- Build Volume: 192 x 115 x 250mm
- Layer Resolution: 0.01 – 0.1mm (10-100 microns)
- Printing Speed: 60mm/h
- Exposure Times: 1-4s per layer
- Display: 4.3″ Touch Screen
- Material: 405nm UV Resin
- Platform Material: Aluminum Alloy
- Machine Weight: 14.3Kg
- XY Axis Precision: 0.05mm
- LCD Resolution: 3840 * 2400
- Machine Size: 325 x 290 x 500mm
- Resin Vat: Metal
The LD-006 sports a high quality 8. 9″ 4K monochrome display along with a large build volume 192 x 120 x 250mm, allowing you to 3D print plenty of smaller, high detailed models on your build plate at once.
You have much more freedom for taking on those larger projects, and you can always split big models into separate pieces and stick them together after for some real size.
Single layer curing times are significantly reduced with the monochrome screen, giving single-layer exposure times of 1-4 seconds. Compared to the older 2K screens, this is a large improvement, in quality and time reductions for printing.
With such a large 3D printer, you want good stability for the best quality, so Creality made sure to install some high quality dual linear guide rails with a T-rod for serious precision.
It is said to provide 35%+ more stability than a single Z-axis rail. Some larger resin 3D printers who stuck with those single rails have been known to deliver less quality, so this is a great upgrade for your print output.
The touchscreen is one of the best looking screens I’ve seen in larger resin 3D printers, giving a futuristic and clean design to it. You’re getting high resolution and a better user experience with this feature.
The CNC-processed aluminum body and sanded stainless steel curing platform leaves you with you much better first layer adhesion. Since resin is a liquid, getting the best adhesion can be difficult in some cases.
User Experience of the Creality LD-006
One of the users said in his feedback that he 3D printed a resin ring with this 3D printer and the results are more than awesome.
The surface is smooth and the dimensions are completely accurate. A user said that he has the best experience while using this 3D printer when it comes to printing jewelry or a prototype of jewelry.
Another buyer shared his experience by saying that he is a doctor and loves to do 3D printing. The user printed a detailed replica of a spine and dental impressions so that they can be placed in the clinic.
After the completion of the model, the print was showing details to the extent that they can be used to study bones in colleges and universities.
People are happy with its state-of-the-art build plate and stable z-axis, but the factor of manual bed leveling is the part that is not much appreciated but because of the printer’s final results, this minor issue isn’t too significant in the long-run.
Pros of the Creality LD-006
- Large build volume
- Quick layer curing times
- Stable printing experience due to dual linear axis
- Great precision and detail in 3D prints
- A durable and reliable machine that should produce consistent quality
- The monochrome screen means you can print without replacing the LCD for 2,000+ hours
- Easy operation with the responsive touchscreen
- Great air filtration to help reduce those strong resin odors
Cons of the Creality LD-006
- No built-in Wi-Fi or Ethernet connectivity
- Fairly pricey but good value overall
Final Thoughts
Creality is a well respected manufacturer of 3D printers, and they definitely made sure to put some real effort in the design and function of this 3D priner.
You can check out the Creality LD-006 from 3D Jake.
Elegoo is a great name in the 3D printing industry and the Elegoo Mars 2 Pro is one of their initially released 3D printers. When it comes to resin or SLA 3D printing, it shouldn’t be a surprise to find this 3D printer in the list of best 3D printers for high details and resolution.
The Elegoo Mars 2 Pro is a 3D printer that has the capabilities to provide high-quality 3D prints and can bring you the best results, all at a budget price.
Relative to other budget resin 3D printers, the build volume of this 3D printer is very respectable, allowing users to print models from regular miniatures to industrial-grade parts that mainly require fine details and high resolution.
Features of the Elegoo Mars 2 Pro
- 8″ 2K Monochrome LCD
- CNC-Machined Aluminum Body
- Sanded Aluminum Build Plate
- Light & Compact Resin Vat
- Built-In Active Carbon
- COB UV LED Light Source
- ChiTuBox Slicer
- Multi-Language Interface
Specifications of the Elegoo Mars 2 Pro
- System: EL3D-3.
 0.2
0.2 - Slicer Software: ChiTuBox
- Technology: UV Photo Curing
- Layer Thickness: 0.01-0.2mm
- Printing Speed: 30-50mm/h
- Z-Axis Accuracy: 0.00125mm
- XY Resolution: 0.05mm (1620 x 2560)
- Build Volume: (129 x 80 x 160mm)
- Light Source: UV Integrated Light (wavelength 405nm)
- Connectivity: USB
- Weight: 13.67lbs (6.2kg)
- Operation: 3.5-Inch Touch Screen
- Power Requirements: 100-240V 50/60Hz
- Printer Dimensions: 200 x 200 x 410mm
The Elegoo Mars 2 Pro is a resin 3D printer has some nice features that help you operate things smoothly, from unboxing to getting your final 3D print.
The 8″ 2K monochrome LCD is two times faster than your standard RGB LCD screens and provides more stable performance.
Unlike other plastic printers you may find on the market, the Mars 2 Pro is made of CNC machined aluminum from build platform to resin vat. It has a very solid build quality and high durability like a reliable workhorse that always gets its work done.
You also have some linear guide rails to provide a consistent and steady motion throughout the printing process.
The build plate has been sanded to create a stronger adhesion between the cured resin and the surface. When you compare this to some older models of resin 3D printers, you’ll be sure to get a much higher success rate for printing your models.
The Elegoo Mars 2 Pro comes with built-in active carbon. Built-in activated carbon could absorb the fume of resin.
Working together with the turbo cooling fan and silicone rubber seal, it should filter any strong odors, giving you an improved printing experience.
User Experience of the Elegoo Mars 2 Pro
There’s no shortage of positive reviews for the Elegoo Mars 2 Pro all over the web, with many claims of it creating some of the most detailed and high resolution 3D prints.
One user who previously used FDM filament 3D printers for their D&D miniatures took their quality to the next level with the Mars 2 Pro. When you compare the quality from an Ender 3 to this machine, the differences are very clear.
Setup and operation has really been simplified by the manufacturer, knowing that users love a seamless process. Leveling the build plate is a breeze and your first 3D print is likely to be a success as long as you follow the instructions.
It comes with all the tools you need to create some awesome small or even larger resin 3D prints. If you are a beginner to 3D printing and want to get some excellent quality, you can join tons of other users who are achieving this today.
The inclusion of an angled plate holder allows you to let excess resin drip off the model and back into the resin vat rather than wasting it.
Pros of the Elegoo Mars 2 Pro
- Outstanding printing quality
- Fast layer curing time
- Inclusion of an angled plate holder
- Rapid printing process
- Large build volume
- Less to no maintenance
- High accuracy and precision
- Robust build and sturdy mechanism
- Supports multiple languages
- Long lifespan and high reliability
- Stable performance during long-term printing
- Comes with extra FEP sheets
Cons of the Elegoo Mars 2 Pro
- LCD screen lacks a protective glass
- Loud, noisy cooling fans
- Z-axis does not have a limiter switch
- A slight decrease in pixel-density
- No top-down removable vat
Final Thoughts
If you are looking for a 3D printer that can not only bring your fine details and high-resolution 3D print but is actually known for these qualities, this 3D printer may be for you.
You should check out the Elegoo Mars 2 Pro 3D printer on Amazon right now.
The Dremel Digilab 3D45 comes in as the 3rd generation series of Dremel’s 3D printers which is considered as the best generation by the manufacturer.
It was specially designed in a way that anyone from a beginner to an experienced user can print their designed 3D model without any hassle.
In collaboration with Dremel’s Lifetime Support, this 3D printer is extremely reliable and can be used efficiently where you need to print a lot of 3D models.
Because of its collaboration with the Dremel’s Lifetime Support, Digilab 3D45 is well known in the market as an extremely reliable and efficient 3D printer when it comes to getting 3D models with high detail and resolution.
The Dremel Digilab 3D45 (Amazon) comes as a ready-to-use product because you can start your 3D printing princess right out of the box.
Features of the Dremel Digilab 3D45
- Automated 9-Point Levelling System
- Includes Heated Print Bed
- Built-In HD 720p Camera
- Cloud-Based Slicer
- Connectivity Through USB and Wi-Fi Remotely
- Fully Enclosed With Plastic Door
- 5″ Full-Color Touch Screen
- Award-Winning 3D Printer
- World-Class Lifetime Dremel Customer Support
- Heated Build Plate
- Direct Drive All-Metal Extruder
- Filament Run-Out Detection
Specifications of the Dremel Digilab 3D45
- Print Technology: FDM
- Extruder Type: Single
- Build Volume: 255 x 155 x 170mm
- Layer Resolution: 0.
 05 – 0.3mm
 - Compatible Materials: PLA, Nylon, ABS, TPU
- Filament Diameter: 1.75mm
- Nozzle Diameter: 0.4mm
- Bed Levelling: Semi-Automatic
- Max. Extruder Temperature: 280°C
- Max. Print Bed Temperature: 100°C
- Connectivity: USB, Ethernet, Wi-Fi
- Weight: 21.5 kg (47.5 lbs)
- Internal Storage: 8GB
Automating parts of your 3D printing process makes things that little bit easier. The DigiLab 3D45 has an automated leveling system which accounts for and detects the smallest discrepancies, allowing you to get more successful, high quality prints.
It is an automated 9-point leveling system with a built-in automatic leveling sensor, with the aim to bring you serious precision and reliable printing over several years of your journey.
We need a good heated print bed to print certain types of materials, or to help that bed adhesion. This 3D printer comes with a heated build plate which heats up to 100°C.
Along with the built-in camera, you have access to Dremel Print Cloud, the cloud-based slicer specially made for Dremel 3D printers.
It is a fully enclosed 3D printer along with a see through plastic door so you can keep an eye on your prints. This helps with improving print quality and delivering a quieter printing operation.
The large, full-color touch screen makes it easy and intuitive to navigate and operate the printer functions and settings. This built-in touchscreen is very responsive to touch and also helps in loading filament.
User Experience of the Dremel Digilab 3D45
One user who currently has two Dremel 3D45’s praises just how great they are. The main thing this user likes about this 3D printer is how easy it is to use and get some amazing print quality.
Dremel is a very trusted name, and they made sure they put some serious thought and design into this machine. They’ve improved over the previous 3D printers to ensure that you can 3D print with many types of materials.
This does have somewhat of an upper hand over some of the resin 3D printers in this list because you can print with some really strong materials like Carbon Fiber or Polycarbonate filament. It’s capable of reaching high temperatures of 280°C
It is recommended to switch to a hardened nozzle to print those “exotic” or abrasive filaments.
Users find the operation very smooth and simple to navigate. The noise levels are pretty low since it is fully enclosed, so you don’t have to worry about loud noises throughout your work area.
One buyer said in his detailed feedback that this 3D printer can offer 3D prints of a high level of quality, details with the bonus of reliability.
The printer has a direct drive, all-metal extruder which is clog-resistant and allows you to print 3D models consistently.
Its built-in automatic bed leveling system brings an enhanced level of precision that allows printing models with fine details and high resolution without any hassle.
One thing that is liked the most is that the filament run-out detection sensor resumes the printing process right from the point where it was paused without any errors.
Pros of the Dremel Digilab 3D45
- The print quality is very good and it’s easy to use as well
- It has powerful software along with being user-friendly
- It prints through a USB thumb drive via Ethernet, Wi-Fi, and USB
- It has a safely secured design and body
- Compared to other printers, it is relatively quiet and less noisy
- It is easier to set up and use as well
- It provides a 3D comprehensive ecosystem for education
- The removable glass plate allows you to remove prints easily
Cons of the Dremel Digilab 3D45
- Limited filament colors compared with competitors
- The touch screen is not particularly responsive
- There is no nozzle cleaning mechanism
Final Thoughts
With its high-quality prints, fine details, precision, high resolution, versatility, and high-performing functions, the Dremel Digilab 3D45 is not only good for small parts that need details but from large prints as well.
You should check out the Dremel Digilab 3D45 on Amazon today.
Small 3D Printer for Big Jobs
The ProJet 1200 is one of 3D Systems' most interesting products. This is an affordable 3D printer with high-precision printing from photopolymer materials. Its main functionality is the printing of burnt-out master models. However, this is not all the possibilities of using this 3D printer. Today it is actively used not only in dentistry and jewelry production, but also in design, industry, design, and medicine.
Technology and print quality
The ProJet 1200 delivers print quality typical of a professional 3D printer: high precision and exceptional fine detail resolution. This micro-SLA 3D printer is great for jewelry, dental and other models that require a combination of miniature and maximum quality.
ProJet 1200 Benefits
- Fast printing. This makes it indispensable in the manufacture of products in a short time. Convenient cartridges allow you to easily change materials.
 Network connectivity ensures that all your employees can have seamless access to control the ProJet 1200. The
 - ProJet 1200 is small and economical. It spends a minimum of electricity, the cost of each mm of your product will be minimal. For example, printing a prototype jewelry ring will cost less than $1.
- High precision in the elaboration of all small fragments, no matter how complex the pattern and geometry of your product. The ProJet 1200 is ideal for dental and jewelry applications. You can easily produce master models suitable for further foundry work, or high-quality prototypes of the necessary parts. The
- ProJet 1200 creates smooth, high-precision parts with wall thicknesses as low as 30 microns. It works with six materials of different properties, guaranteeing its multitasking.
Applications
1. Dentistry and Jewelry
The ProJet 1200 3D printing speed is 14mm/h vertically, which allows you to create up to 12 dental master models per hour and 5 rings in 2 hours. Thanks to materials specially created for the respective niches, the models are as accurate as possible, smooth, and burn out perfectly, leaving ideal molds for casting in their place.
2. Engineering and Manufacturing
The ProJet 1200 is often used in the production of small quality samples or end products. Thanks to the speed and accuracy of printing, coupled with energy efficiency and a choice of 6 colors, the machine has proven itself in engineering and manufacturing. The resulting micro-parts combine the strength and precision needed to design products such as electrical connectors, buttons, robotics components, valves, latches, electronic devices, and more.
3. Design & Engineering
Many professional artists and designers use the ProJet 1200 to produce micro parts for toys, figurines, car and aircraft models. This printer is the work tool of many industrial designers. Especially often it is used in the development of consumer electronics. The expanded choice of materials provides even more opportunities for creativity.
Materials
In addition to the casting possibilities offered by FTX Cast, fabricators can take advantage of the new FTX Gray, a high contrast gray material ideal for modeling and reproducing fine details, and FTX Clear, a clear, colorless material that can be used to fabricate miniature parts and end-use items. For example, the material is ideal for cyberpunk lovers to print transparent keyboard buttons, under which the electrical circuit will be visible, or supports for microcircuits.
The ProJet 1200, together with FTX Gold and Silver materials, allows engineers to quickly and accurately prototype desired products on the desktop. In the jewelry industry, you can create jewelry in the colors of the originals - silver and gold.
FTX Green is ideal for dental prototypes due to its strength. The material burns out well, allowing you to create high-quality casting molds.
“The creation of the additional five materials has provided many new opportunities for dental technicians, jewelers, artists and engineers,” said Buddy Byrum, vice president of 3D Systems. “Now a jeweler, for example, can create a sample of a gold or silver ring, so that the client can clearly appreciate all the nuances of the future jewelry.
Case Studies
The Institute of Bionics (Melbourne, Australia) is working with evok3d to develop an artificial eye that can compensate for patients' lost vision. They actively use the ProJet 1200 3D printer to make the prototype of the eye, as well as the mold for casting it.0014
Introduction
FDM technology is best suited for rapid, low-budget prototyping. Layer lines are usually visible in FDM prints, so post-processing is essential if a smooth surface is to be achieved. Some post-processing techniques can also make a print more durable by changing the degree of its elastic properties, density, structural and textural features.
In this article, we will discuss the most common post-processing techniques in FDM.
Post-processed FDM prints (left to right): cold welded, void filled, raw, sanded, polished, painted and epoxy coated. Photo 3dhubs.com
Removing supports
Removing supports is usually the first step in post-processing for any 3D printing technology that uses them. In general, props can be divided into two categories: standard and soluble. Unlike other post-processing methods discussed in this article, the removal of props is mandatory and does not result in improved surface quality.
Initial printout with props, poor prop removal, good prop removal. photo 3dhubs.com
Removal of standard props
Tools
- Wire cutters, needle nose pliers, tongs
- Toothbrush, brush
| Finishing | ★ ☆ ☆ ☆ ☆ |
| Approvals | ★ ★ ☆ ☆ ☆ |
| Speed | ★ ★ ★ ★ ☆ |
| Suitable for | all thermoplastics FDM |
Process
Normally the backups come off the printout without problems, and hard to reach places (such as holes or cavities) can be cleaned of the backup material with an old toothbrush. Proper placement of support structures and correct print orientation can significantly reduce the negative impact of supports on how the final printout will look.
Pros
- Does not change the overall geometry of the part.
- The process is very fast.
Cons
- Does not remove layer lines, scratches or other surface defects.
- If excess material or marks remain from the support structure, print accuracy and appearance suffer.
Soluble Support Removal
Instrumentation
- Solvent resistant container
- Thinner
- Ultrasonic cleaner (optional)
| Finishing | ★ ★ ★ ☆ ☆ |
| Approvals | ★ ★ ☆ ☆ ☆ |
| Speed | ★ ★ ★ ★ ☆ |
| Suitable for | all thermoplastics FDM |
Process
Soluble support standard materials are removed from the printout by immersing it in a reservoir of the appropriate solvent. Supports are usually printed:
- HIPS (usually with ABS)
- PVA (usually with PLA)
A glass container like a preservation jar is fine. Any non-porous vessel is suitable for water treatment. To quickly remove props from HIPS/ABS printouts, you will need a solution of equal parts D-limonene and isopropyl alcohol. Many other support structure materials such as PVA (with PLA) dissolve in normal water.
Pro Tips
Shorten the solution time by using an ultrasonic cleaner and changing the solvent as it becomes saturated. A warm (not hot) solution works faster - heating is useful if there is no cleaner.
Pluses
- Complex geometry is allowed for which the standard method of removing props is not possible.
- Smooth surface at the support points.
Cons
- Incorrect dissolution of the props can cause discoloration and skewed printouts.

- Does not remove layer lines, scratches or other surface imperfections.
- May cause small holes or holes if soluble material seeps into the object during printing.
Cleaning with a skin
Starched by a SHIC SLOT ABS ABS ABS PRIVEL
Instrumentation
- Folder Paper with grain
on 150, 220, 400, 600, 1000 and 2000 - Wiping cloth
- Toothbrush
- Soap
- Face mask
| Finishing | ★ ★ ★ ★ ☆ |
| Approvals | ★ ★ ★ ☆ ☆ |
| Speed | ★ ★ ☆ ☆ ☆ |
| Suitable for | all thermoplastics FDM |
Process
Once the props have been removed or dissolved, sanding can be done to smooth the part and remove any obvious defects such as smudges or prop marks. Which sandpaper to start with depends on the thickness of the layer and the quality of the print: for layers of 200 microns or less, or for prints without blotches, you can start with sandpaper at P150. If there are blobs visible to the naked eye, or the object is printed with a layer thickness of 300 microns or more, stripping should begin with P100.
The process can be continued up to P2000 grit (one approach is to go to 220, then 400, 600, 1000 and finally 2000). Wet sanding is recommended from the very beginning to the very end - this will avoid excessive friction, which can lead to an increase in temperature and damage the object, as well as contaminate the sandpaper itself. Between sanding, the printout should be cleaned with a toothbrush and washed with soapy water, then wiped with a cloth to remove dust and prevent it from sticking together. Even P5000 can be sanded to achieve a smooth, shiny FDM part.
Pro Tricks
Always sand in small circular motions - evenly over the entire surface of the part. It may be tempting to sand perpendicular to the layers, or even parallel, but this can lead to gouges. If the part is discolored or has a lot of scratches after sanding, it can be heated a little to soften the surface and allow some defects to smooth out.
Pros
- An exceptionally smooth surface is obtained.
- Further post-processing (painting, polishing, smoothing and epoxy coating) is greatly facilitated.
Cons
- Not recommended for double or single shell parts as sanding may damage the printout.
- The process is difficult in the case of sophisticated surfaces and the presence of small details in the object.
- If the grinding is done too aggressively and too much material is removed, the appearance of the part can be affected. Acetone for ABS. Dichloromethane for PLA, ABS
- Sponge Applicator
| Finishing | ★ ★ ☆ ☆ ☆ |
| Approvals | ★ ★ ☆ ☆ ☆ |
| Speed | ★ ★ ★ ★ ★ |
| Suitable for | all thermoplastics FDM |
Process
If the size of the object exceeds the capacity of the printer, the object is printed in parts and then assembled. In the case of PLA and some other materials, assembly can be done with Dichloromethane or a suitable adhesive (the choice of adhesive depends on the plastic). In the case of ABS, it is possible to "weld" with acetone. The mating surfaces should be slightly moistened with acetone and squeezed tightly or clamped and held until most of the acetone has evaporated. So the parts will be held together by chemical bonds.
Pro Tricks
Increasing the surface area of the acetone contact increases bond strength. Tongue-and-groove to help.
Pros
- Acetone does not change surface color as much as most adhesives.
- After drying, the compound acquires the properties of ABS, which makes further processing easier and more uniform.
Cons
- The bonding of ABS parts by cold "welding" with acetone is not as strong as if the part were printed as a whole.
- Excessive use of acetone can dissolve the part and affect final appearance and tolerances.
Void Filling
Black ABS Printing, Filled and Sanded
Tool Kit
- Epoxy (for small voids only)
- Automotive body filler (for large voids and joints)
- ABS filament and acetone (only for small voids in ABS printouts)
| Finishing | ★ ★ ☆ ☆ ☆ |
| Approvals | ★ ★ ★ ☆ ☆ |
| Speed | ★ ★ ★ ☆ ☆ |
| Suitable for | all thermoplastics FDM |
Process
Unusual voids may come out after the part has been ground or the soluble props have been dissolved. These voids are formed during printing when the layers are incomplete due to any restrictions on the trajectory of the print head, which is often inevitable. Small gaps and voids can be easily filled with epoxy and no additional treatment is required in this case. Larger gaps or voids left by assembling a multi-part object can be filled with automotive bodywork filler, but the printout will then need to be re-sanded. Putty works great, is easy to process with sandpaper and can be painted. Moreover, the parts connected by such a filler, or voids filled with it, turn out to be stronger than the original plastic.
Slots in ABS printouts can also be filled with ABS thinned with acetone, which reacts chemically with the ABS object and seeps into existing voids. It is recommended to make such a putty from 1 part ABS and 2 parts acetone, then it will not spoil the surface if used correctly.
Dichloromethane works on all plastics: ABS, PLA, HIPS, SBS, etc.
Epoxy is also useful if you want to make your 3D printed part more durable
Pros
- Epoxy filler is easy to sand and prime, resulting in an excellent surface for painting.

- ABS solution of the same filament will give the same color so nothing will show up on the surface.
Cons
- Auto body filler or other polyester epoxy adhesive is opaque when dry and will leave discolored areas on the printout.
- Additional processing required to achieve a uniform surface.
- If the grinding is done too aggressively and too much material is removed, the appearance of the part can be affected.
Polished
PLA model, polished. Photo rigid.ink
Tools
- Plastic Polishing Compound
- Sandpaper for P2000
- Wiping cloth
- Toothbrush
- Polishing pad or microfiber cloth
| Finishing | ★ ★ ★ ★ ★ |
| Approvals | ★ ★ ★ ☆ ☆ |
| Speed | ★ ★ ☆ ☆ ☆ |
| Suitable for | all thermoplastics FDM |
Process
Once the part has been sanded, a plastic polish can be applied to the part to give a standard ABS or PLA object a mirror finish. After the part has been sanded for 2000, it is necessary to remove dust from the printout with a cloth and rinse the printout under warm water using a toothbrush. When the object is completely dry, buff it on a buffing pad or microfiber cloth, adding a polishing compound as you go, such as polishing jewelry. They are designed specifically for plastics and synthetics and give a long-lasting shine. Other plastic polishes, such as those used to polish car headlights, also work well, but some of them contain chemicals that can damage the printout.
Pro Tricks
To polish small parts, place the polishing wheel on your Dremel (or other rotary tool such as a power drill). For larger and stronger parts, you can use a grinder, just make sure that the part does not stay in one place for too long, otherwise the plastic may melt from friction.
Pros
- The part is polished without solvents that can warp it or change its tolerances.
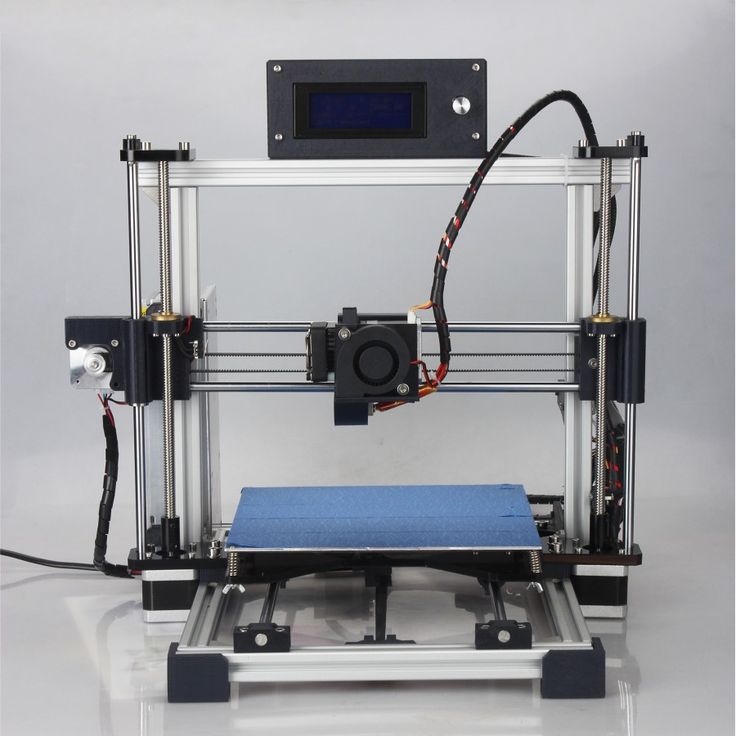
- When properly ground and polished, a mirror-smooth surface is obtained, very similar to cast.
- Polishing and deburring plastics is extremely economical, making this a very cost-effective method of achieving a quality finish.
Cons
- If you want to achieve a mirror-smooth surface, the part must be carefully ground before polishing, which may affect tolerances.
- After polishing, the primer or paint no longer sticks.
Primer and paint
Gray PLA FDM print spray painted black. 3dhubs.com
Tools
- Wiping cloth
- Toothbrush
- 150, 220, 400 and 600 grit sandpaper
- Aerosol Primer for Plastics
- Finish paint
- Polishing sticks
- Polishing paper
- Masking tape (only if multiple colors are expected)
- Nitrile gloves and matching face mask
| Finishing | ★ ★ ★ ★ ★ |
| Approvals | ★ ★ ★ ☆ ☆ |
| Speed | ★ ☆ ☆ ☆ ☆ |
| Suitable for | all thermoplastics FDM |
Process
After the printout has been properly sanded (it is enough to reach P600 when painting), it can be primed. Aerosol plastic primer should be applied in two coats. This primer is intended for subsequent painting of models, provides an even coating and at the same time thin enough not to hide small elements. Thick primer, which is sold in hardware stores, can clump, and then you have to seriously work with sandpaper. Apply the first spray coat with short pressures from a distance of 15-20 cm from the object, trying to do it evenly. Let the primer dry and smooth out the unevenness with 600 grit sandpaper. Apply a second coat of spray with light, quick pressures, also very gently and evenly.
When the priming is completed, you can start painting. You can paint with artistic acrylic paints and brushes, but a spray gun will provide a smoother surface. Hardware store spray paints are thick and viscous and difficult to control, so use paints that are designed specifically for modeling. The primed surface must be sanded and polished (sanding and polishing sticks, which are used in nail salons, can be purchased online, they are great for our task), and then wiped with a cloth. The paint should be applied to the model in very thin layers, the first layers should be transparent. When the paint finish becomes opaque (usually 2-4 coats), let the model rest for 30 minutes to allow the paint to dry completely. Carefully polish the paint layer with manicure sticks, repeat the procedure for each of the colors (between each applied paint).
Separate parts of the model can be covered with masking tape so that the colors, if there are several, do not mix. When painting is complete, remove the masking tape and polish the object with polishing paper. Polishing paper, such as 3M or Zona, comes in a variety of grits and is a relatively new product. It is sold in packs in various online stores, and after processing with this paper, the ink layer or topcoat will literally shine - and nothing else can achieve this effect. Apply 1-2 coats of top coat to protect the paint and let it dry completely. The top coat is selected in accordance with the recommendations of the paint manufacturer.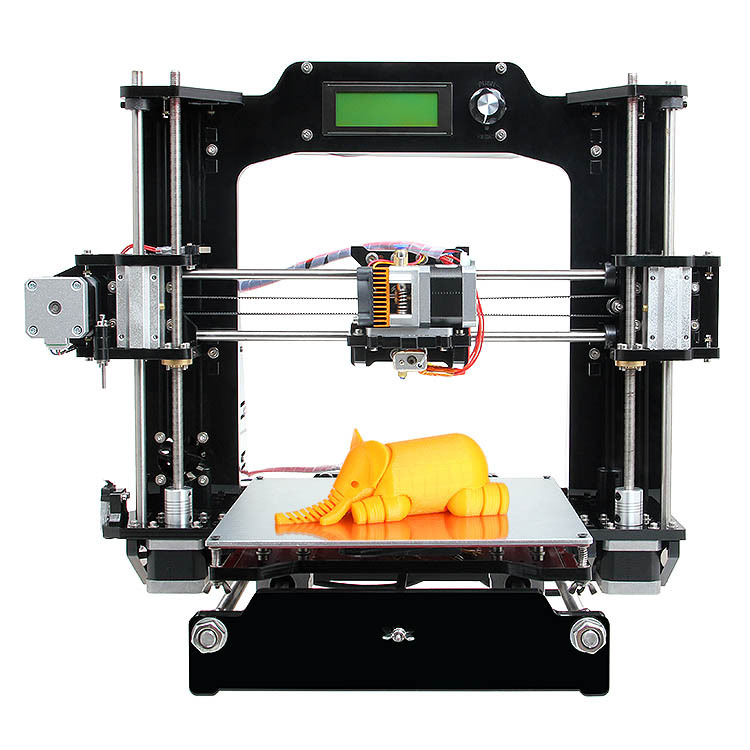 If the topcoat and paint are incompatible, it can render your entire painting job meaningless, so compatibility is very important here.
Pro Tips
Don't shake the can when spraying! It is important not to mix the pigment or primer with the propellant (propellant gas), which will cause bubbles to form in the spray. Instead, the can must be rotated for 2-3 minutes so that the mixing ball rolls like a pearl, and does not strum.
Pros
- Excellent result, if you take into account all the nuances of the process and practice.
- You can do anything with the final look of the object, no matter what material it is printed on.
Cons
- Primer and paint increase the volume of the model, which affects tolerances and can be a problem when it comes to a part of a larger object.
- High quality spray paint or spray gun increases costs.
Vapor smoothed
Vapor smoothed black ABS printed hemisphere
Tools
- Cleaning cloth
- Solvent resistant sealed container
- Thinner
- Paper towels
- Aluminum foil (or other solvent resistant material)
- Face mask and chemical resistant gloves
| Finishing | ★ ★ ★ ★ ☆ |
| Approvals | ★ ★ ☆ ☆ ☆ |
| Speed | ★ ★ ★ ☆ ☆ |
| Suitable for | all thermoplastics FDM |
Process
Line the bottom of the container with paper towels, if possible along the sides. It is critical that the vapors cannot damage the container and that the container itself is sealed. It is recommended to use a glass or metal container. Apply enough thinner to the paper towels so that they are wet but not soaked - this will also help them adhere better to the walls. Acetone is famous for its ability to smooth out ABS. PLA can be smoothed with a variety of other solvents (dichloromethane works well), but this plastic tends to be much harder to smooth than ABS. When working with any solvents, please follow the safety precautions for handling chemicals and always take appropriate precautions. Place a small "raft" of aluminum foil or other solvent-resistant material in the center of the paper towel-lined container. Place the printout on the "raft" (either side of your choice) and close the lid of the container. Steam polishing can take varying amounts of time, so check your printout periodically. To increase the speed of polishing, the container can be heated, but this must be done carefully so as not to cause an explosion.
When removing the printout from the container, try not to touch it in any way, leave it on the “raft”, take them out together. In all those places where the printout has come into contact with something, there will be defects, since the outer layer will be under-dissolved. Before working with it, let the printout completely “breathe” so that all solvent vapors have evaporated.
Many aerosols and/or solvent sprays are flammable or explosive and their vapors can be harmful to humans. Be extremely careful when heating solvents, always handle them and store them in a well ventilated area.
Pros
- Many small blotches, as well as many layer lines, are smoothed out without additional processing.
- The printout surface becomes exceptionally smooth.
- The procedure is very fast and can be done using widely available materials.
Cons
- Does not “heal” gaps, does not completely hide layer lines.

- During the smoothing process, the outer layer of the printout dissolves, which greatly affects the tolerances.
- Negatively affects the strength of the printout due to changes in the properties of its material.
Immersion
PLA model immersed in dichloromethane. Photo 3dpt.ru
Tools
- Solvent resistant container
- Thinner
- Eye hook or cog
- Heavy wire for sculpture or landscaping
- Dryer or drying rack
- Face mask and chemical resistant gloves
| Finishing | ★ ★ ★ ★ ☆ |
| Approvals | ★ ☆ ☆ ☆ ☆ |
| Speed | ★ ★ ★ ★ ☆ |
| Suitable for | all thermoplastics FDM |
Process
Make sure the container you are using is wide and deep enough to completely submerge the printout in the solution. Fill the container with the appropriate amount of solvent - be careful not to splash. As with vapor smoothing, ABS dip smoothing can be done with acetone, which is easy to find in the store, and for PLA, dichloromethane can also work well with ABS, HIPS, SBS, PETG, and many other materials. PLA is quite resistant to solvent smoothing, so it may take several passes to achieve the desired result. Prepare the printout for dipping by screwing a hook or eye screw into it in an inconspicuous place. Pass the wire through the eyelet or wrap the wire around the screw so that the printout can be immersed in the solvent. If the wire is too thin, it will not be able to withstand the buoyant force on the printout, and it will be difficult to sink the object.
Once the printout is ready, use a wire to completely immerse it in the solvent for a few seconds. Remove the printout and hang it by the wire in a dryer or on a drying frame to allow the solvent to completely evaporate from the surface.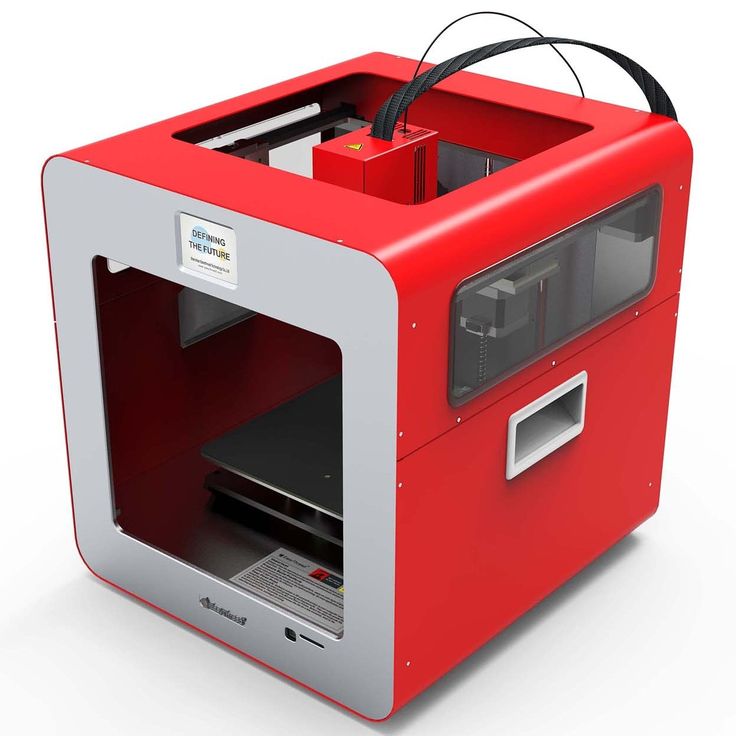 After ejection, the printout can be gently shaken to facilitate the drying process and ensure that no solvent has accumulated in the depressions.
Pro Tricks
If an opaque whitish coating appears on the printout after drying, this can be corrected by holding the object over a solvent bath for a while so that its vapor slightly dissolves the surface. This restores the original color of the printout and achieves a shiny outer layer.
Pros
- The printed surface is smoothed much faster than steam polishing.
- Significantly less fumes are generated than other solvent polishing methods, so this method is less hazardous.
Cons
- The surface is smoothed very aggressively, so you can forget about tolerances.
- Immersion for too long can result in complete deformation of the object and a significant change in material properties.
Epoxy
Black ABS print, half epoxy coated, half uncoated
Tools
- epoxy two-component 04
- Sponge Applicator
- Mixing container
- Sandpaper P1000 or finer
| Finishing | ★ ★ ★ ★ ☆ |
| Approvals | ★ ☆ ☆ ☆ ☆ |
| Speed | ★ ★ ★ ★ ☆ |
| Suitable for | all thermoplastics FDM |
Process
After the printout has been cleaned (preliminary cleaning gives the best end result), wipe it thoroughly with a cloth. Mix the resin and hardener in the proportion indicated in the instructions, accurately measuring all volumes. The curing process of epoxy resin is exothermic, so glass containers and containers made of materials with a low melting point should be avoided. It is recommended to use containers that are specifically designed for mixing epoxy resins. Incorrect ratio of resin and hardener can result in longer curing time or no curing at all and result in a permanently sticky substance. Mix the resin and thinner as directed in the instructions - carefully, in smooth movements to minimize the amount of air bubbles remaining inside the mixture. Very little epoxy is needed, and most of these resins only work for 10-15 minutes, so plan accordingly.
Apply the first coat of epoxy with a sponge applicator, being careful not to build up in crevices and small parts. When the printout is sufficiently coated, allow the resin to fully cure - as described in the instructions that came with it. One coat may be sufficient, but for optimum results it is best to lightly sand the printout with fine sandpaper (on P1000 and above) to eliminate any imperfections. Wipe off the dust with a cloth and, in the same way as before, apply a second layer of epoxy.
Pros
- A very thin coat of epoxy won't affect tolerance too much (unless the printout has been sanded too hard first).
- A protective shell forms around the object.
Cons
- The layer lines will remain visible, they will only be covered by a smooth shell.
- If too much epoxy is used, it can flood parts and edges, and the surface can appear greasy.
Metallization
FDM printed structural element nickel plated with Repliform RepliKote technology
Tools (for homework)
| Finishing | ★ ★ ★ ★ ☆ |
| Approvals | ★ ★ ★ ☆ ☆ |
| Speed | ★ ★ ★ ★ ☆ |
| Suitable for | all thermoplastics FDM |
Process
Electroplating can be carried out at home or in a professional workshop. To do everything right, you need to be well versed in the materials, in what is actually happening - and at home these opportunities are usually limited. In order to achieve excellent surface quality and to have more plating options, including chrome plating, it is best to use the services of professional workshops. The copper galvanization process will be described below as an example.
At home, you can galvanize with copper or nickel, and this coating will then serve as the basis for galvanizing with other metals. It is critically important that the printout surface be as smooth as possible before it is galvanized. Any bumps and lines in the layers will be enhanced as a result of the process. Prepare the sanded and cleaned object for plating by coating the plastic with a thin coat of high quality conductive paint, or with a graphite and acetone solution for ABS printouts. Allow the conductive coating to dry completely, sand if necessary to ensure a smooth surface. At this stage, it is extremely important not to touch the printout with bare hands or to wear gloves, because sweat marks on the object will certainly affect the quality of the galvanization.
Insert a screw or eyelet in an inconspicuous place on the printout and connect it to the negative terminal of the rectifier. This will be the cathode. Connect the copper anode to the positive contact of the rectifier. Fill the container with enough copper plating solution so that the printout is completely covered with it. Immerse the anode in the container and turn on the power. After the rectifier is turned on, immerse the printout in the container, making sure that it does not touch the anode anywhere. Beware! When the object is already in the bath, the galvanization system is active, and contact with the solution, cathode or anode can be traumatic. Set the voltage on the rectifier to 1-3 Volts, and the process will go to full metallization. To speed things up, the voltage can be increased, but not more than 5 volts. When enough metal has deposited on the printout, simply turn off the power and dry the object with microfiber towels. When it's dry, varnish the object to protect it from corrosion.