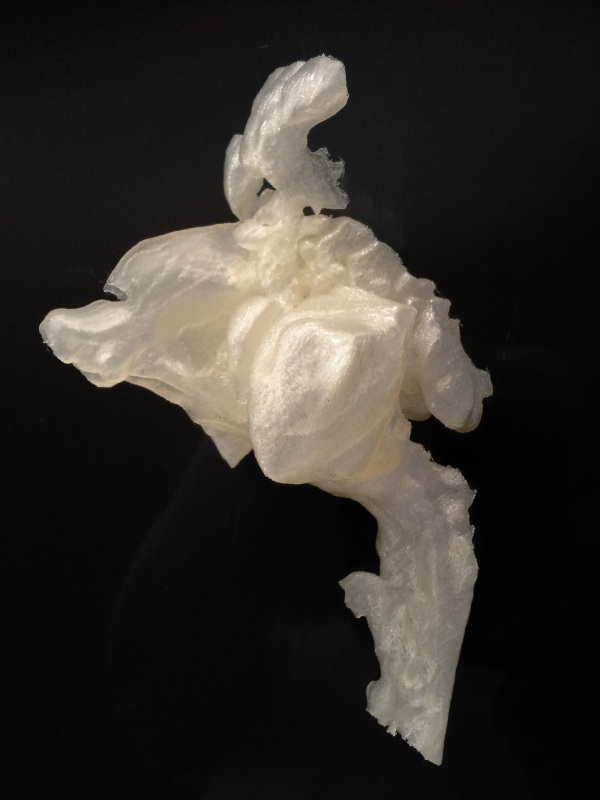
Messed up 3d print
Epic 3D Printing Failures 2022
3D printing is gaining momentum thanks to the wide availability of 3D printers for any pocket. Still, newbies and even experienced hobbyists sometimes run into epic 3D printer fails.
Gambody has compiled a list of failed 3D print results that can motivate you to never give up. Learn why your 3D prints keep failing and fix the problem to create fantastic, highly detailed, and smooth 3D prints.
3D Printer Fails
If, until recently, 3D printing was an activity that few could afford, it is now being used by people with various professional backgrounds. This is mostly due to the increased coverage it receives from online mass media outlets and big companies that specialize in 3D printing.
Additive manufacturing is still relatively new so people are curious to learn how to handle it and what can one do once it gets to the grips. But before that, you might mess up and experience unpleasant 3D printer fails.
However, don’t despair. You are not alone in your ‘misery’. Many have messed up before you as well, and their failed 3D prints can help you learn the lesson virtually and avoid the practical mistakes made by you.
Read also: Best Online 3D Printing Service for Hobbyists 2022
Why do my 3D prints keep failing?
3D print failures happen all the time. There are different factors to consider when someone asks, “Why do my 3D prints keep failing?”
Here are the most common reasons for failed 3D prints:
- Your 3D printer settings;
- Incorrect bed leveling;
- Wrong build material for the 3D model;
- Ignoring the 3D printer specs, and much more.
Every beginner and advanced user who doesn’t want to end up with a failed 3D print should keep in mind several things before turning on their 3D printer.
We’ve rummaged through the Internet and found over 20 photos of the funniest and awkward 3D printer fails that you can see below. Take a moment to scroll down and see all of them.
Filament 3D Print Fails
FDM 3D printer fans know the role of filament, which should be of high quality and installed correctly to prevent 3D printing fails.
There can be numerous reasons for catastrophic 3D printer fails because of poor quality filament or incorrect hanging of the spool. See photos below of the destruction caused to 3D prints by the filament issues.
3D Print Fails Halfway
Sometimes your 3D printer fails when you are half done with your 3D printing project. Why can it happen?
The project can require more than one spool of filament. Thus you might have to do the mid-print filament swap and screw up. It is how your 3D print fails halfway, and you share photos of your disaster with your friends.
Image: PinterestWhen you know that you will have to switch filament in the middle of your print, it is best to adjust the settings of your slicer and point to the layer when such a switch is necessary. Using Cura settings or other slicer options, it is simple to follow your printing process and see what layer is being made right now.
Having full control over your 3D printer settings will minimize errors. But it could still be possible that your 3D print fails halfway because of filament run-out or other printer issues.
3D Print Fail During Filament Switch
When you are working on a big or multicolor 3D print you might need to switch filament right in the middle of your project. And if you are not patient enough or make a mistake while manually changing your spool, your 3D print fails halfway and ruins all the fun.
Learn how you can 3D print with two colors using a one-extrusion printer. And see images of 3D printer fails shared by people who either tried to switch colors and failed or who ran out of filament amid their print and unsuccessfully tried to install a new spool.
On your end, you should be very attentive when switching filament. If you are playing with colors to create pretty layers, be sure to switch at the right time. You can use your clock alarm and pause your 3D printer at the same time for each layer. Then switch the 3D printing material and keep printing until you create the desired effect.
Failed 3D Prints: Other Reasons
The filament is not the only thing that can cause problems and lead to failed 3D prints. There can be other issues to consider when you wish to never see how your 3D printer fails and upsets you.
Image: CunicodeExplosions
If you search YouTube for 3D printer fails, you will see many videos with 3D printer accidents and even explosions. And though 3D printers don’t easily explode, you still should learn more about 3D printers on fire and the way to protect them.
Screenshot from a YouTube video by rwg42985One YouTube user by the nickname of rwg42985 showed a video with an exploded spool that caused 3D printing failures. Such things don’t happen every day, but you should be aware of situations when re-spooling your filament can cause real danger to your project and printer.
It is a must to learn how to store filament because when 3D printing material is stored in a room with incorrect humidity, it can easily cause 3D print fails. Ensure your filament is always dry before you begin working on a new project.
Failed Connectors
A failed 3D print can be the result of connectors failing to work correctly. Usually, when you are using an FDM 3D printer with filament, there is a push-fit connector that keeps feeding the plastic 3D printing material into the special PTFE tube.
The printing failures don’t occur when the extruder motor feeds the 3D printing material correctly. But if something goes wrong and connectors stop working, the motor is not doing its job correctly and the filament is not getting into the hot end smoothly.
Image credit: ImgurIf you wonder, “Why do my 3D prints keep failing?” and connector cause this issue, you should get a more expensive and high-quality connector that will keep doing its job correctly and won’t lead to a failed 3D print ever again.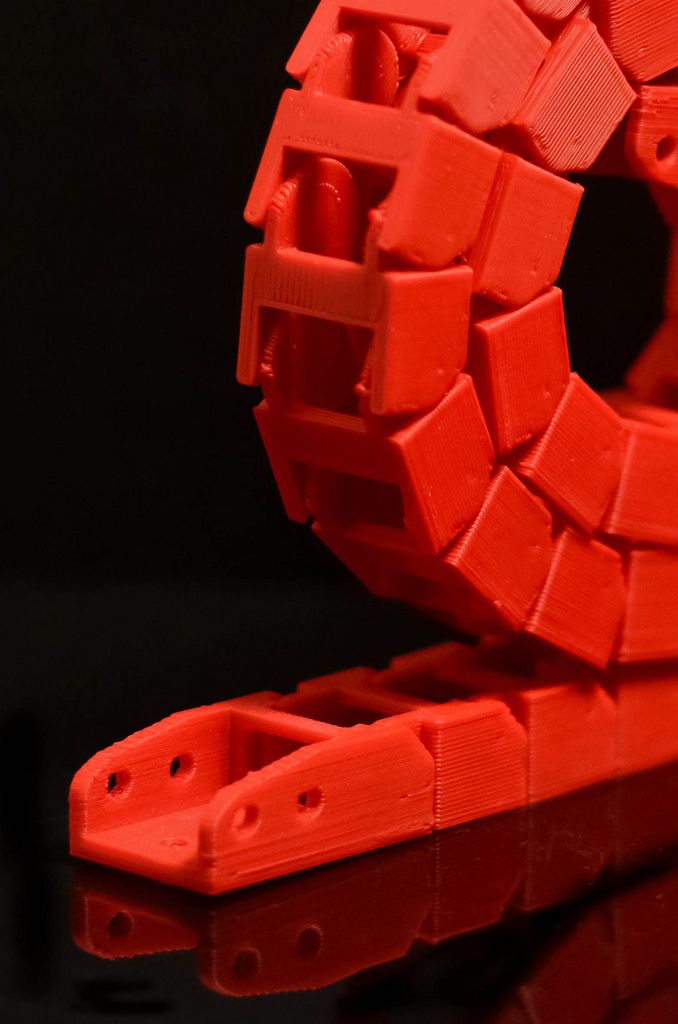
Heat Block Issues
Another thing that can happen to a 3D printer running unattended is your hot heater getting loose. If it happens while your device is building your new model, you can expect a 3D printing failure.
Only look at the photo shared by Reddit user OpusMcn who was hoping to do some prints overnight. Something went wrong with the 3D printer, and the hot end heater got loose leading to a heating element falling onto the 3D print.
Image credit: Reddit user OpusMcnIt is great if you use thermal protection to prevent any runaway issues on top of securing the heating block well. Your 3D printer should stop powering your hot end heater if it falls. Otherwise, there are possibilities of fire that could burn your room or house completely.
Z-axis, X-axis Fail
Until your 3D printer fails, you will enjoy watching the Z-axis and X-axis working hard to help you turn a 3D printing model into a physical figurine. However, people like Chris Cecil who once faced an unpleasant failed 3D print know that things don’t always go as planned.
His machine chose to jump from the table and whatever it was trying to build became a failed 3D print. Thus, it could be a great idea for you to either secure your 3D printing machine to avoid similar problems or use it on the wide and long table.
Failed Calibration
Sometimes, you can have problems with your 3D printer that repeat every once in a while. Chris Templeman who was making thousands of roosters for a holiday in 2017 experienced many 3D printing failures.
To make the art exhibit called “Make and Take” real, the artist went through the most epic 3D printer fails until he succeeded. And now you can learn how to save your plastic and not waste big amounts of it.
Image credit: Chris TemplemanJust stay near your machine and don’t leave it unattended for hours and nights. It is your best way to prevent anything like this 3D printing rooster disaster.
Read also: Best 3D Printing Websites with Free 3D Print Models 2022
3D Resin Print Fails Halfway
Not only FDM printers lead to a failed 3D print.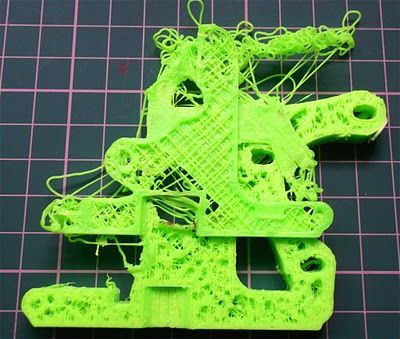 Users who prefer to build 3D printing models in the resin can also get some unpleasant moments that must be fixed.
If you ever see your failed print stuck to your FEP sheet, there is a video that can help you to get it off your resin 3D printer. Thanks to YouTube user Dylan Kowalski, you can now fix the problem if a 3D resin print fails halfway or at the very beginning of your project.
Bed Adhesion Fail
When Reddit user Cheetawolf tries printing PETG on the Creality Ender 3 machine and chooses a 240C temperature setting for PETG plus 70C temperature for PEI sheet, his 3D printer fails to provide a good result. It happens so often that out of 10 attempts about 7 are 3D printing failures.
Is it poor bed adhesion? It is hard to say because some users cannot print PETG well and also end up with various issues.
So, if you wish to work with PETG, search for good advice from users who own the very same printer brand and already tested the material and learned to achieve good results.
Image credit: Chris CecilMore 3D Printing Failures
There are many other 3D printer fails worth looking at. Gambody has gathered many photos of catastrophes some 3D printing enthusiasts experienced.
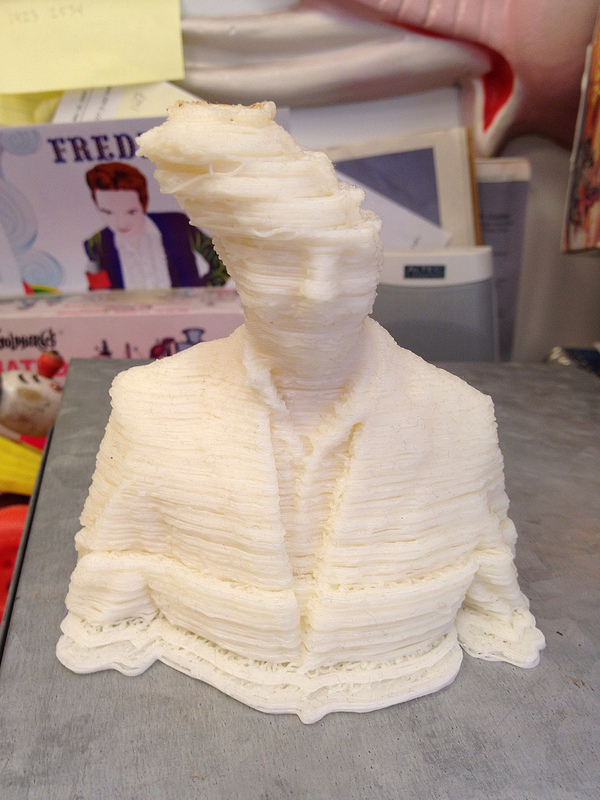
Image: fakerbots.com Image: fakerbots.com Image credit: Flickr Image: Fred Kahl Photo: Trammel Hudson Picture: Flickr Image: fakerbots.com Photo: Pinterest Image: Pinterest Photo: Pinterest Picture: Chris Cecil Photo: Chris Cecil Photo: Tumblr Picture: Tumblr Photo: Tumblr Image: WatzIf you have 3D printer fails of your own, do share them in the comments below. We’re all eagerly waiting to see some epic stuff. And although your machine cannot apologize for failing you, there is Gambody 3D Printing Community on Facebook that can always support you and share some stunning tips and advice.
(Visited 4,238 times, 1 visits today)
Author
A 3D printing website where users can buy and sell 3D printer files.
Persistent 3D Print Failure? Here’s What To Look For « Fabbaloo
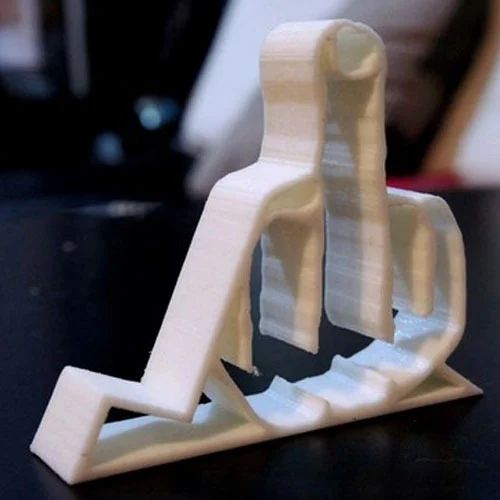
A failed 3D printThe problem: you keep printing an item on your desktop 3D printer but it always fails. Solution? Read on.
I’ve seen this plenty of times when using plastic extrusion 3D printers and have come to realize there are several standard issues that might be causing the problem. It’s considerably frustrating as prints may take quite a while to complete and you’re wasting much time as well as filament.
The situation is common: you start a print to run overnight and in the morning you check the 3D printer only to find a pile of spaghetti. Even worse, melted – and now solidified – plastic might be embedded in the components of your machine. In the worst case you might actually wreck your machine.
It’s best to avoid these situations. Here’s a few things to consider if you’re having consistent problems printing a particular 3D model.
Bed Level? The most obvious problem you may encounter is that your print surface may be slightly unlevel. This means that in part of your 3D print’s first layer the extruder will be too high, while in the rest it will be too low. For a very small portion of the print surface it will be at the correct height. For machines that do not have an auto level function, you should ensure the machine is in fact level.
In some extreme cases the print surface itself is bent and thus cannot be properly leveled. This tends to happen only in older machines with non-metal print beds, such as acrylic.
ACTION: Level your print surface using the standard approach for your machine.

Z-Gap Wrong? Even when a desktop 3D printer is completely level, there is still the matter of ensuring the gap between the nozzle and the print surface is optimum. If it’s too much, then the first layer will not be sticking properly and likely will come loose later on. If it’s too tight you may find the print sticking too much when completed, or in some cases the extrusion may stop due to back pressure from a very tight squeeze pushing the filament.
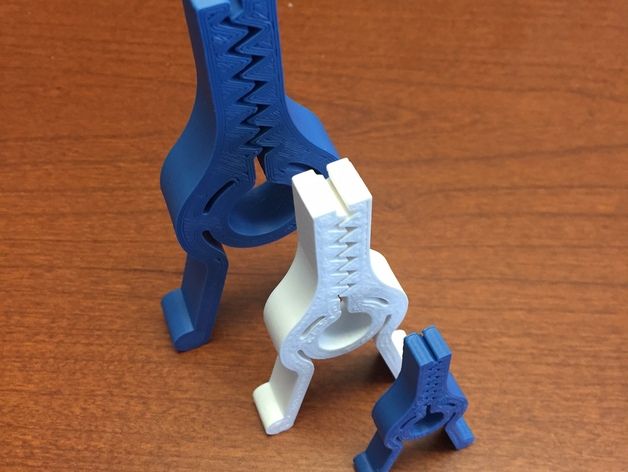
Another failed 3D printACTION: Set the z-gap properly with a test print. Some machines actually allow you to tweak this on the fly, which you should almost always do during the first layer.
Print Surface Unclean: Very often people are handling the print surface and inadvertently leaving oils and other material. You can’t necessarily see it, but it can affect the adhesion properties of some plastics. There’s also the possibility of crud leftover from previous prints should should be removed. Each new print should face an unpolluted print bed.
ACTION: clean the print bed with appropriate solutions. Usually this means isopropyl alcohol, but check with your 3D printer manufacturer.
Filament Snagging? The plastic extrusion 3D printer will work only so long as filament is being delivered to the extruder. This means that your filament spool should rotate smoothly without much effort. Sometimes you can find the spool having too much friction on its mount, which can put undue stress on the extruder that could even slip.
ACTION: Ensure the spool rotates smoothly and even lubricate if necessary.
Knots: Another possibility is that the filament itself is knotted up. This occurs when you accidentally let the end of the filament slip underneath other strands, typically when changing spools.
ACTION: Always hold on to the loose end of the filament and stick it in the holes in the filament spool.
For untangling, try this.
Flat Bottom? A print will stick if there is sufficient surface area on the bottom of the 3D model. But although your 3D model might LOOK like it’s flat, it may NOT BE SO. If this is the case, you might be surprised to find your first layer is fantastically smaller than you thought and is insufficient to stick.
ACTION: Use a 3D modeling tool to inspect the bottom of the 3D model before printing. If necessary, use a Plane Cut to slice off a wee bit of the bottom to ensure it’s truly flat.
Enough Bottom? What is the ratio of surface area of the bottom to the rest of the print? Do you expect to 3D print a large object and have only a 4mm square area support it? I think not.
ACTION: Make sure the bottom of the 3D model is sufficient to support the rest of the model. Reorient if necessary.
Temperature Correct? Sometimes layers aren’t sticking together properly in mid print and depending on the model’s geometry it might cause a failure. This could be because you’re 3D printing at a temperature that’s a bit too low.
ACTION: Increase the print temperature slightly and ensure those layers really fuse into each other.
First Layer Adhering? You hit print and walked away, believing the print would actually work? Hahah, you should NEVER do that!
ACTION: Always, always, always observe at least the first layer of the print to ensure there is a good, strong base for the remainder of the print to build on.
Supports too Tall? Some 3D models require support structures, but depending on the geometry, the supports might be very, very tall and very, very fragile. It’s possible they’ll tip over before they get to the part they were supposed to support, simply by the actions of the extruder moving along the top.
ACTION: Look at the support tool path in a GCODE viewer and decide if it’s really too tall.
If so, consider changing the support structure in your slicing tool to be more robust, or reorienting the 3D model to reduce the size of the supports. Another option: Meshmixer supports.
Wrong Material? Very often you’ll see warped prints, typically starting at the corners of the 3D model. This is caused by the thermoplastic shrinking slightly, and this effect is amplified over long axes. You’ll usually see the ends of a long piece lifting. If they lift too much they could detach entirely from the print bed and cause print failure.
ACTION: Consider printing in a less warp-prone material like PLA instead of ABS, or using a 3D printer with a heated chamber.
That’s the list, but I am sure there are more failure possibilities. However, these are the ones I hit most often.
Know them, and they won’t burn you.
3d printer defects: errors, main problems
Causes of Defects in 3D Printing and How to Fix Them
Buying a 3D printer is only half the battle. A beginner printer has a lot to go through. First, he will learn how to set up the device, calibrate the print head, set the necessary parameters, and test different types of filaments. But that's not all. The most unpleasant thing that can appear during operation is printing defects. And they need to be eliminated.
- What are 3D printing defects?
- Classification of defects
What are 3D printing defects?
After the printing process is completed, various defects can be found on the finished model. Most often they are associated with improper distribution of plastic. Defects appear for various reasons. But the main result is always the same - the model is damaged, you need to do the project on a new one. Printing defects cause downtime. Lost time and meters of filament.
Important! Within the framework of this article, defects that occur on FDM printers will be described. These are models of printing devices operating on the technology of hot deposition of plastic.
Sometimes mistakes can be seen right from the start. For example, when printing the first layer of a model. In these and other cases, it is necessary to prevent the defect in time. However, the press all the same should be stopped. But this way you can save material and time. This article will discuss the most common defects, as well as ways to eliminate them. At the end of the article, a comparative classification of faults will be given.
Layer displacement
The second name of this defect is skew. There are several options for the development of events at once. The skew can be slightly noticeable, with a slight deviation along the Z axis. The second option is a strong offset, the model is printed in pieces. In all these cases, the reason lies in the mechanical part of the printer.
Solutions:
- Check tension belts. They should be clearly in the grooves. It is not allowed to fray or stretch the belt. Sometimes it is easier to replace the entire set of belts with a new one.
- Sometimes small misalignments are caused by an incorrectly set pulley. Make a mark with a black marker before printing, after the end of the process, check the result. Calculate the difference. Tighten the problem area if necessary.
- The printer's Y and X axes are not properly aligned. They are not perpendicular to each other. They need to be set at 90°.
Attention! In rare cases, the problem is electrical. This option must be disassembled separately, armed with a multimeter.
The first layer does not stick
The initial layer acts as a foundation. If it "floats", then the whole model will get the wrong geometry. The second and subsequent layers may slightly shift the entire workpiece. The most unpleasant thing is that this defect can be found at the very end of the print.
Solution methods:
- Platform calibration.
 If the print bed is skewed, there is a good chance that the first layer will not stick. It is best to check platform calibration before starting printing. Many 3D printing programs help to go through this setting in a semi-automatic mode.
 - Wrong print nozzle height. Another point worth considering. Most often, the extruder height setting is set through the printer parameters: Edit Process Settings → G-Code. They are located in the main menu of the device.
- The first layer was printed too quickly. The plastic just didn't cure. This setting must be found in the menu of the printing device. Approximate location: Settings → First Layer Speed. It is worth setting the print speed of the first layer 50% lower than the rest.
- Plastic cooling temperature. This option can be found on printers with a cold platform. The filament hits a cold surface, quickly hardens and rebounds. Here you need to experiment with the settings for the melting temperature of the filament or initially take a printer with a heated surface.
Important! Poor adhesion can be caused by covering material placed over the platform. Different glue, tape, adhesive tape - all this can repel plastic.
Pimples on the model
This also includes such defects as “snot”, swelling, sagging. All these faults are of approximately the same nature. They are related to the operation of the extruder. As it moves, it should stop, then start working again. Not all devices can lay even layers without defects. This is how the irregularities described above appear.
Solving methods:
- Retract and coast setting. The first parameter is responsible for starting the extruder. In this case, you need to configure the retraction through the device menu: Edit Process Settings → Extruders. Here you need to find the parameter Extra Restart Distance. Try reducing the fill length.
 When unevenness occurs when the nozzle stops, you need to tighten the roll-on stroke (roll-up movement). This setting is referred to as Coasting. It is in the same section where the retraction is set.
 - It is better to avoid retraction and coasting altogether. That is, the filament must be flush with the edge of the nozzle. This parameter is especially critical for Bowden printheads. Another option is to set up retraction. You need to find the Advanced tab. It contains the Ooze Control Behavior setting. This option controls filament leakage and retraction start time.
If minor defects are still present, it is worth pointing out the entry points to the printer. This setting is found in the Edit Process Settings menu on the Layer tab. For example, you can leave small flaws inside the shape, starting printing from the inner layers.
3D printer won't print
This is one of the scariest things for a beginner 3D maker. The device appears to be broken. However, in most cases this is not the case. The printer turned on, but did not start to push through the plastic? There are four reasons for this.
Solutions:
- Plastic does not come out of the extruder due to leakage. This can often be seen in some cheap Chinese models. The filament is preheated in the extruder, it can seep through the hot end. The same effect can be observed after the end of the work. In this case, printing starts 3–4 seconds after the start. Automatic broken geometry of the first layer. To avoid this defect, experienced printers make the so-called skirt. This is a thin circle of filament around the future model. It is printed to bring the printer to life and fill the nozzle with plastic.
- The extruder is too close to the platform. The plastic just gets stuck inside the nozzle. The situation continues on the second layer. Only by the 3rd or 4th layer does the plastic begin to come out. The solution is to adjust the Z-axis height through the G-Code command.

- Sometimes the filament is simply chewed off by the drive gear. This is the part that pushes the thread forward. If a small amount of filament shavings is visible near the printer, it is likely that the gear has worn off the filament. You need to calibrate this node.
- Clogged extruder. There may be several reasons: ordinary dirt or rubbish, plastic coked inside the extruder, poor cooling of the filament. Mechanical cleaning of the nozzle with special needles or drills will help. They are sold in specialized stores.
Important! Just do not need to clean the nozzle with a screwdriver or other improvised tools. You can completely ruin the extruder.
Prints in the air
Various users are experiencing the same problem. The reasons for printing by air are related to setting new plastic settings in the slicer. Sometimes a defect appears due to incorrect setting of the Z axis.
All solutions come down to the fact that the user needs to carefully study the G-code of the printer. Sometimes the reason lies in the lowered Z-axis height settings. You can also see the print step here, perhaps it exceeds the required parameter. In the slicer, you need to check the plastic installation parameters. View the heating temperature of the nozzle and platform. All settings must be checked manually. When importing a profile, the left parameters can be picked up.
Prints in reverse: how to fix
A rare defect that is not always visible at the start of printing. That is, the model comes out normal, but mirrored. Such malfunctions are often found in Chinese kits or noname devices. There are two solutions. One is simple, the other is more difficult.
Methods of solution:
- It is necessary to invert one of the axes: X or Y - it does not matter. But only one. This can be done by flipping the contacts on the power board or on the motor itself.
- Invert axis via device firmware. This method is suitable for advanced users who are familiar with programming skills.

In any case, it's better to first check all the settings in the slicer again, only then go into the electronics of the device.
Layers skipped
The finished model shows that one or more layers have been skipped. This is eloquently evidenced by the gaps in the finished model. In rare cases, this defect is associated with insufficient extrusion. Perhaps there are problems with the capture and supply of the filament. Sometimes the reason lies in the wedging of the Z axis.
Solution methods:
- Check the mechanical part of the printer. If gaps began to appear frequently, you need to arrange an unscheduled maintenance of the device. Examine all shafts. Check that they are level and not misaligned. Power off the printer, try moving the head with your fingers. If resistance is felt, then one of the shafts is not installed correctly.
- Bearing wear. This element may simply wear out. You can see that the printer vibrates slightly. There is an unusual sound when printing.
 Diagnose a breakdown in the same way as the shaft. Turn off the power and move the extruder with your hands to find the problem part.
Attention! Remember to maintain your printer regularly. Lubricate the shafts with special oil. For example, for sewing machines. Before lubricating, clean the moving parts from dirt and plastic residues. Just don't overdo the oil. A large amount of lubricant can lead to the opposite effect.
Doesn't print in the center of the bed
Some users are having trouble printing on one side of the bed instead of the center. At the same time, in the slicer, the model is clearly in the center. There may be several solutions here.
Methods of solution:
- Slicer settings are down or incorrectly set. It is necessary to change the characteristics of the kinematics. Set the Delta robot parameter instead of the Cartesian robot. You also need to set the size of the table, equal to the square inscribed in the specified print area.
 In this case, set the Origin Offset parameter to half the side of the square.
 - Try to adjust the position of the X-axis limit switch. In some cases, it is moved a little to the right.
What are the problems with the 3D printer test cube?
This figure is used to check the print quality. Naturally, during the test, she can clearly demonstrate where there are problems. It can be completely different defects. Most often, the test shows bulges and dents on the model.
Such defects result from overheating and shrinkage. To find out for sure the cause and eliminate these factors, you need to print four cubes in different angles. For some ABS plastics, you need to reduce the temperature, as well as turn on the blower by 5-10%.
3D printing echo
This problem can be described as thin stripes that form when printing layer by layer. That is, the final model does not have a formed and even surface. There is waviness (echo) on the edges. This defect is also called ringing on the walls. Typically, two factors are the cause: print speed and vibration.
Solutions:
- Reduce vibration. Make sure the printer is on a level and stable surface. Assess the condition of the bearings. Replace them if necessary.
- Inspect the shafts. Clean them of dirt and dust, lubricate with oil.
- Reduce the print speed through the printer settings.
Try changing the typing speed first, then check the mechanics.
Interesting! Even a single loose bolt can cause strong vibrations. Check all fasteners. Pull the bolts.
Salmon leather
This defect is somewhat similar to the previous one. Only there are no obvious waves or ripples. The defect manifests itself in the form of a pattern. It is similar to the representation of heights on topographic maps or the structure of salmon skin that is drawn on the walls of the model. In English resources it is called salmon skin. The defect appears due to two reasons: vibrations and incorrect characteristics of the current coming to the motors.
Solutions:
- Remove any vibrations that may occur in the device. Tighten the bolts and check the frame geometry. You can also slightly reduce the print speed.
- Installation of a special impulse reducer (TL-Smoother) in the circuit between the driver and the axle motor. This solution balances the current indicators. The edges are more even.
Salmon skin defect is common on DRV8825 stepper motor drivers.
Ripple
In this case, we are talking about the partial impact of waves on some parts of the model. The ripples are often of the same nature as the echo. It is also tied to vibrations and the speed of the extruder. However, unlike waves, ripples are especially pronounced at sharp corners, when the nozzle abruptly changes direction.
Methods of solution:
- Reduce the print speed.
 You need to find the Edit Process Settings menu in the printer settings, and then open the Other tab. Change two settings: Default Printing Speed and X/Y Axis Movement Speed. The first is responsible for the speed of all movements of the nozzle, the second - the speed in the absence of plastic supply. Sometimes the reason lies in the factory firmware. It initially indicates increased extruder acceleration.
 - We remove vibrations. Check the geometry of the device, stretch all the bolts, assess the condition of the shafts and bearings. Lubricate the device if necessary.
We recommend checking the print speed settings first.
Poor filling
If the figure is not filled enough, this means that it will not receive sufficient strength. The model may simply break or crack. Usually the causes of poor coverage lie in the slicer settings or print speed settings.
Solutions:
- Try changing the fill pattern. It is indicated by the Internal Fill Pattern parameter. There are presets in the settings with complicated filling options that give more strength to the finished model: Grid, Triangular and Solid Honeycomb. The printing time will increase, but the strength will also increase.
- Reduce print speed. The fast movement of the print head results in less infill. You need to tweak this parameter through the settings of the device itself or through the slicer parameters.
- Change extrusion width parameter. Some 3D printing programs allow you to set different infill values for individual elements. For example, for the outer layers, set the size to 0.4 mm, for the inner layers - 0.8 mm. These settings can be viewed in the menu Edit Process Settings → Infill. In it you need to find the parameter Infill Extrusion Width. It is shown as a percentage. The higher the number, the thicker the layer.
Attention! When setting the Infill Extrusion Width parameter, make sure that the set value (in percent) is supported by the printing program (slicer).
Plastic is leaking from the extruder threads
This fault can be attributed to local printer failures, although they can create a number of defects in the form of “snot” on the model. Plastic oozes through various slots, flows down the extruder thread, exits the opening of the heating element. There may be several options for solving the problem.
Solutions:
- Check all screw connections. Sometimes a caked piece of plastic gets stuck between them. It creates a gap, the filament flows out.
- Clean and polish the surfaces of the thermal barrier tube and nozzle. Installing a fluoroplastic washer or winding a fum tape can also help.
- Reinforced cold drawing of threaded connections.
Attention! Sometimes the reason lies in a manufacturing defect. Nothing can be done here. Just completely change the extruder.
Plastic does not come out of the nozzle
For some reason, the printer stopped feeding filament. The device continues to make noise with the engines, but the plastic does not come out of the nozzle. There may be several reasons and solutions for this.
Solving methods:
- The plastic is out. For some printers, the filament spool is covered with a casing. Therefore, it is impossible to immediately understand that the thread is over. Check for material in the spool.
- The thread has broken. There was a gap between the hot end and the extruder. A common cause is with Bowden printheads. Perhaps the problem is with the filament itself. You need to try other material.
- Low plastic melting point set. The thick filament cannot pass through the narrow nozzle opening. Recommended temperature parameters for different types of plastic: PLA - heating t 180 °C, table heating t 60–80 °C; ABS - heating t 240 °C, table heating t 110 °C.
Interesting! Sometimes a clogged nozzle is causing the print to stop. This can happen even during work.

Model delamination
Visually, this defect looks like an accordion. In some places, the layers move away from each other. At the same time, it is clear that this is not a pass, but the absence of sticking of plastic. Layer separation occurs due to incorrect setting of the filament thickness or its melting temperature.
Solving methods:
- Reduce layer thickness (height). Here you need to follow the rule: the maximum layer thickness should be no more than 80% of the nozzle diameter. Otherwise, the layers will not stick to each other.
- Raise the melting point of plastic. If the height parameter is in order, then you need to look at the temperature settings. For example, the optimum melting temperature of ABS plastic is 220–240 °C, but some users set it to only 190 °C. You can increase the melting temperature in the slicer settings: Edit Process Settings → Temperature.
If standard temperatures are not suitable, try raising the setting by 10 °C. See if the adhesion of the layers improves or not.
3D printer extruder does not heat up
At the same time, the device shows 100% heating power, the set temperature is on the display, but the extruder is cold. In most cases, the cause lies in a break in the wires or in the heating element itself. Ring all circuit elements after the controller. To cut off problems on the heating element, apply 12 V to it. It should start to heat up.
Attention! Newer printers may encounter factory extruder defects. This element needs to be changed. There is no point in repairing the item.
Plastic falls in waves
Another name for this defect is “elephant foot”. In this case, the upper layers of the model are pushing against the lower parts, causing a wave effect. It sort of descends from top to bottom, forming a thick layer at the base of the model. This problem is especially common on models of printers with a heated bed.
Methods of solution:
- Find the optimal temperature regime between heating the table and blowing the model. Lower the heating temperature in steps of 5 °C. It is important to find a balance here, when the lower layers have already gained strength, but still retain adhesive properties for the following layers.
- Calibrate the table. Try applying the default settings. If the problem persists, slightly change the Z-axis height settings. Calibrate the new settings on the test cube. This is the base shape that clearly shows how the layers are laid down.
- Chamfer the base. The option is suitable for homemade devices. You need to start with a bevel of 5 mm and 45 °, after which you can make small adjustments.
Wall gaps
Such defects can be found when printing rather thin walls in the model. For example, when the extruder nozzle prints strips up to 0.4 mm thick, and the user needs to make a 1 mm edge. In such places, cracks may appear at the joints of the two layers.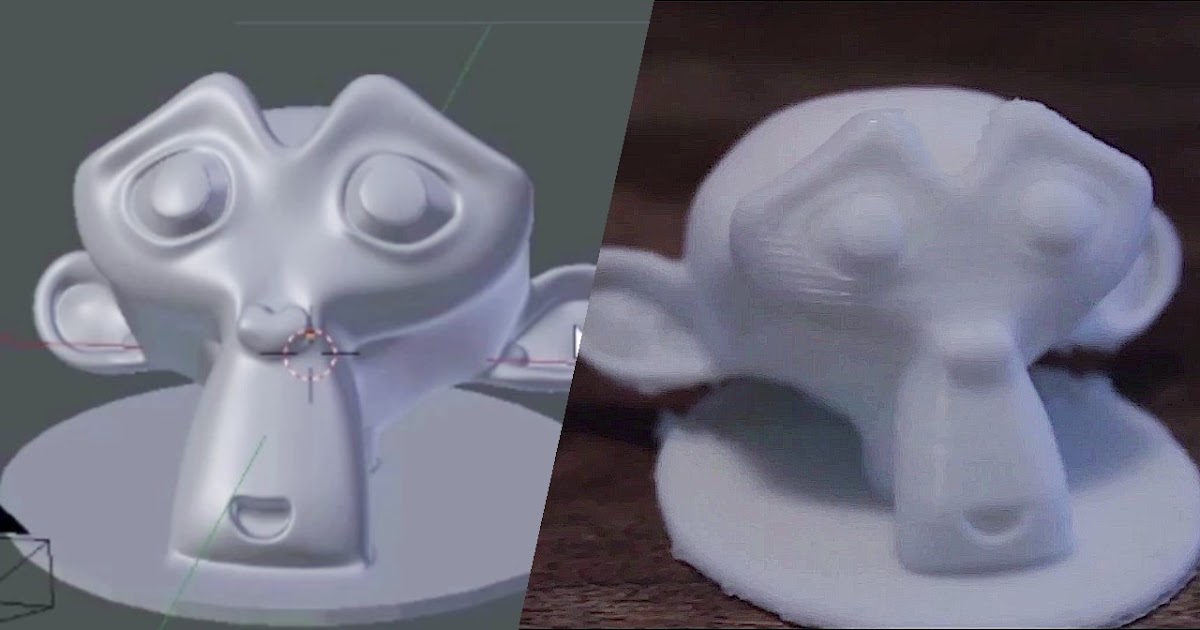 Typically, the defect is eliminated through the adjustment of the slicer.
Solution methods:
- We need to find the setting that is responsible for the wall thickness. Usually they are in the menu: Edit Process Settings → Advanced. Here you need to find the Gap Fil parameter. He is just responsible for overlapping areas and filling the gaps between thin walls. Check the box next to Allow gap fill when necessary. There is also an alternative. Go to the Infill tab and tweak the Outline Overlap parameter.
- Simply adjust the extrusion width. Increase the parameter value if possible. The strip width can be set on the Extruders tab via the Edit Process Settings menu.
Try and experiment to get the best fit.
Web
A special case of filament leakage, when sloppy plastic threads remain between the parts. This happens for the same reasons as influxes. The solution methods are exactly the same:
- Changing the speed and distance of thread retraction.
 Full instructions are listed above.
 - Lower print temperature. Try tweaking this setting to reduce the fluidity of the plastic. Here you need to be careful. Excessive decrease in temperature can lead to a delamination defect.
- A separate solution is to set a parameter in the slicer that launches the print head in a long and winding path over empty space. The web falls near the model without sticking to its walls. No bridge is formed between the layers. To enable this option, go to the advanced settings of the slicer (Advanced). Check the box next to the Avoid crossing outline for travel movement option.
Interesting! Some 3D makers do not consider a web defect as something serious. They simply cut off the excess filament with a knife after the print is finished.
Extruder does not feed plastic
This problem is in the filament feed mechanism. Or the nozzle is too close to the table.
Solution methods:
- Check the plastic filament.
/91f3dfd02cdc286.s.siteapi.org/img/70095ab103eae1c6a64808b85496f592e398cf55.jpg) It may have burrs on it. The feed gear has slipped. Check the condition of the thread, you may need to tweak the gear settings a little. Or change the plastic.
It may have burrs on it. The feed gear has slipped. Check the condition of the thread, you may need to tweak the gear settings a little. Or change the plastic. - Calibrate the table position. Raise the Z-axis slightly.
Sometimes the extruder will not feed plastic due to a clogged nozzle. It needs to be cleaned up.
Classification of defects
Almost all defects are one way or another related to two reasons: a malfunction of the mechanical part of the printer or incorrect software settings. Based on these parameters, it is possible to make a classification based on the most common problems in printing:
- Deterioration of nodes and the absence of a normal fastener feed. This parameter affects vibrations, nozzle movement trajectories.
- Poor extruder maintenance. The print head needs to be cleaned from time to time, to remove the sintered filament.
- Inaccurate (wrong) calibration of the platen and nozzle height. Another common mistake that causes a lot of print defects.

- Problems with printer settings. Most often solved through manual setting of parameters or adjustment of the G-code.
- Lost settings in the slicer. This includes: changed parameters, errors or inaccuracies in the firmware.
- Poor quality filament. The problem may lie in the quality of the plastic. It is necessary to monitor its condition, quantity. If necessary, try to replace the manufacturer, or even switch to another type of filament.
- Electrical problems. To find such a malfunction, you need to arm yourself with a multimeter and ring all the circuits after the controller.
- Factory defect. The problem is solved by replacing a low-quality part.
These are the main printer malfunctions that in one way or another affect its operation, which leads to printing defects. The printer may have several problems at once. They will lead to the appearance of a group of defects. You need to be able to recognize the first signs of breakdown in time and eliminate them.
Important! At least once every two weeks, pay attention to the mechanics of the printer, carry out maintenance on the device. Clean the nodes, lubricate the shafts with oil. Check the platen and extruder calibration.
Defects during printing are annoying. An experienced 3D maker should be able to recognize and classify a malfunction in time. Knowing the causes will help to quickly eliminate the breakdown. The user will not spend a lot of time and effort to eliminate the defect, and will not lose money on a damaged filament.
- 07 March 2021
- 14403
Get expert advice
Free STL file DAMAGED GRUB・3D printer design for download・Cults
Spotted fly
Free
Best 3D printer files in Game category
Purple Worm
Free
Orbiter Marble Run
€2. -fifty% 1.21 € 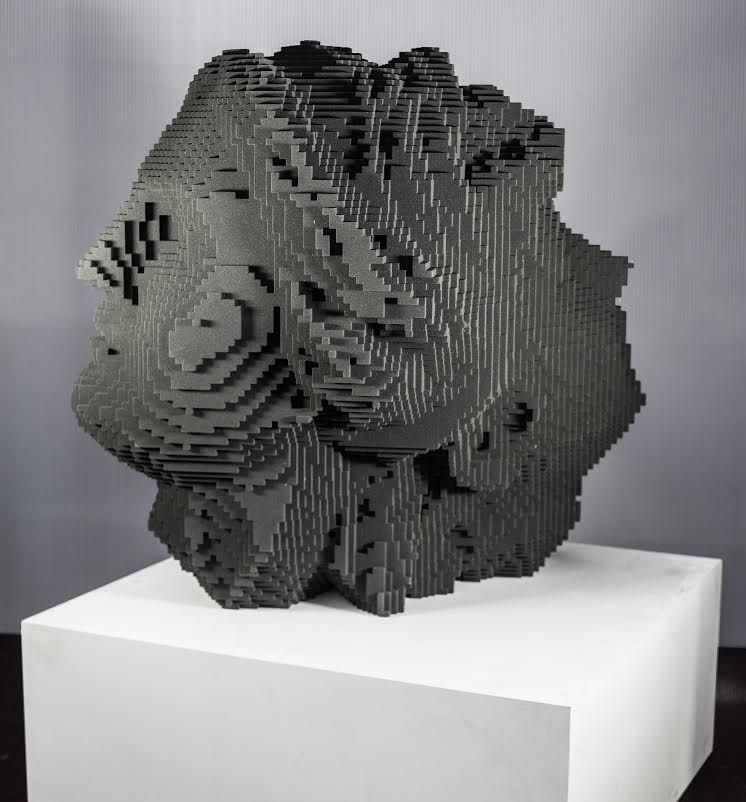 42
42
On-site flexi-print Santa Claus with skis
2,50 €
Renault 5 Turbo Gaslands
3.99 €
Deactivated
Kirby Whispy Woods Plant Pot
Free
Square Wooden Treasure Chest - Multimaterial
1.94 €
Reaper Overwatch
Free
Bestsellers in the Game category
Leo Foo
€5.50
Octopus 2.0
3.90 €
Fighting director
1. 46 €
46 €
Good Flexi Dragon
1.77 €
Off-road vehicle
2 €
Cute flexi unicorn
1.05 €
Bicycle
1.40 €
Altair Amberwatch
9.76 €
Catafrac Heavy Armored Warriors - Civil War Wargear Pack
2,50 €
Chopper motorcycle print-in-place
1 €
Healer conversion kit SM
6 €
Articulated dragon
3.90 €
Heavy Imperial Fire Support Weapon [Preliminary Support]
5 €
Vodfolk Explorer
9. 76 €
76 €
Beaky Boyz Builder: PF_MK-Six
€12.20 -fifteen% 10.37€
Lazy Cat
3,90 €
Do you want to support Cults?
Do you like Cults and want to help us continue our journey on our own ? Please note that we are a small team of 3 people, so supporting us in maintaining activities and creating future developments is very easy. Here are 4 solutions available to everyone:
-
AD: Disable the AdBlock banner blocker and click on our banner ads.
-
AFFILIATION: Shop online with our affiliate links here Amazon.
-
DONATIONS: If you want, you can donate via PayPal here.

Learn more