I materialize 3d printing
Online 3D Printing Service | i.materialise
Oops...Seems your browser is blocking cookies. Please adjust your settings to accept cookies.
i.materialise is your online 3D printing service. Upload your 3D model, choose from 100+ different finishes and materials, select the size of your print, receive a price quote instantly and let us take care of printing and shipping your products.
How to Get Started
How to Order a 3D Print
Upload your 3D file
Select material, color & finish
Get an instant price & order
Let us take care of production
Receive your products
Why Order 3D Models on i.
Get Instant Prices
Upload your 3D file and get an instant price, no login required »
Online Marketplace
Did you print a great product? Open a shop and start selling today! »
Materials
20 Different materials including plastics, resins and metals »
Rush 3D Printing Service
Printing Polyamide in less than 48 hours »
Educational Discount
10% discount for students and teachers »
Expertise
Over 25 years of Additive Manufacturing experience »
Upload and Order Your 3D Model
Get instant prices for your 3D design seconds after uploading. With no registration or login required, several user-friendly interfaces for uploading, and over 40 accepted 3D files formats, we’ve got you covered.
Single Upload
Upload and edit one 3D file at a time.
Upload and edit one 3D file at a time
Upload 3D File
Multiple Upload
If you would like to order multiple files, you can upload up to 20 files in one go.
If you would like to order multiple files, you can upload up to 20 files in one go.
Upload Multiple Files
Container Upload
Put multiple small parts in a grid container and print them all together.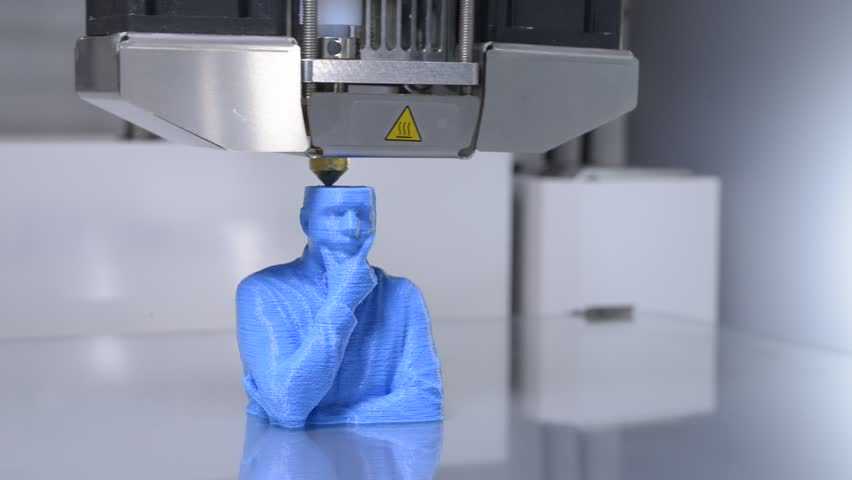
Put multiple small parts in a grid container and print them all together.
Learn more
Choose from a wide range of 3D Printing Materials
From titanium to multicolor+, polyamide, 18K gold and more, i.materialise has what you’re looking for. With 20 different materials and over 100 possible color and finish combinations, we offer only the highest quality to turn your ideas into 3D printed reality.
Resins
Perfect for smooth surfaces, high-quality, detailed prints and a huge variety of finishing and post-processing possibilities.
Polyamide (SLS)
A strong, flexible nylon material that is available at a reasonable price and offers a wide variety of colors and finishes.
Multicolor+
Perfect for strong, full-color models that are equally as good as injection molded parts.
925 Sterling Silver
A precious metal with a very high electrical and thermal conductivity. The material is very malleable and shines brightly after polishing.
Titanium
Light, strong, corrosion-resistant metal for functional parts, spare parts and jewelry.
Brass
An incredibly versatile precious metal that is available in a wide variety of colors and plating.
Discover More
Trusted Partner Of
Upload 3D Model | 3D Printing Service
Upload 3D Model | 3D Printing Service | i. materialise
Oops...Seems your browser is blocking cookies. Please adjust your settings to accept cookies.
drag and drop it like it’s hot
Analyzing your design
Please wait for a few seconds while we update the 3D viewer with the repaired model.
Something went wrong while updating your model. Please try again.
No results found.
Sorry! Something went wrong. Please refresh the page and try again.
Upload 3d model
Share Your Model Recent models
3D model workspace
Materials
Loading.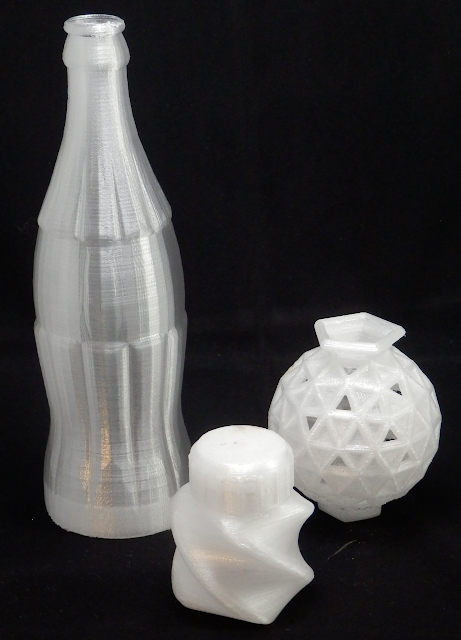 ..
..
Colors and Finishes
Loading...
{{$select.selected.name}} No results found.
Scale
Quantity
Price
{{vm.getProductProcessingStateKey() | translate}} Calculating
Discounted price
By clicking ‘Accept Repair’, I understand that the repair may have altered the geometry of my model.
(*) If the model is 3D printable in the requested material
Materials
Analyze
Optimize
3D Printing
- How It Works
- 3D Printing Materials
- 3D Printing Technologies
- Hire a 3D Designer
- Educational Discount
Business
- Manufacturing Partnership
- Referral Partnership
- White Label Integration
- Crowdfunding
- API
Support
- Contact Us
- Shipping Info
- Tutorials
- 3D Design Tools
Shop
- Shops
- Designers
- Open a Shop
Community
- About Us
- Blog
- Forum
Terms and Conditions Privacy Policy Cookie Statement Sitemap
© Copyright 2022 Materialise nv, all rights reserved. “i.materialise” is a registered trademark of Materialise nv.
3D printing for "dummies" or "what is a 3D printer?"
- 1 3D printing term
- 2 3D printing methods
- 2.1 Extrusion printing
- 2.2 Melting, sintering or gluing
- 2.3 Stereolithography
- 2.4 Lamination
- 3 Fused Deposition Printing (FDM)
- 3.1 Consumables
- 3.2 Extruder
- 3.3 Working platform
- 3.4 Positioners
- 3.5 Control
- 3.6 Varieties of FDM printers
- 4 Laser stereolithography (SLA)
- 4.1 Lasers and projectors
- 4.2 Cuvette and resin
- 4.3 Types of stereolithographic printers
3D printing term
The term 3D printing has several synonyms, one of which quite briefly and accurately characterizes the essence of the process - "additive manufacturing", that is, production by adding material.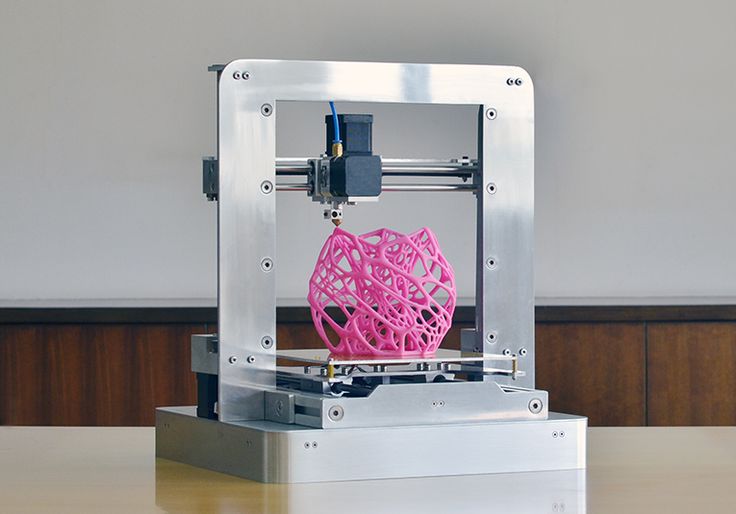 The term was not coined by chance, because this is the main difference between multiple 3D printing technologies and the usual methods of industrial production, which in turn received the name "subtractive technologies", that is, "subtractive". If during milling, grinding, cutting and other similar procedures, excess material is removed from the workpiece, then in the case of additive manufacturing, material is gradually added until a solid model is obtained.
Soon 3D printing will even be tested on the International Space Station
Strictly speaking, many traditional methods could be classified as "additive" in the broad sense of the word - for example, casting or riveting. However, it should be borne in mind that in these cases, either the consumption of materials is required for the manufacture of specific tools used in the production of specific parts (as in the case of casting), or the whole process is reduced to joining ready-made parts (welding, riveting, etc. ). In order for the technology to be classified as “3D printing”, the final product must be built from raw materials, not blanks, and the formation of objects must be arbitrary - that is, without the use of forms. The latter means that additive manufacturing requires a software component. Roughly speaking, additive manufacturing requires computer control so that the shape of final products can be determined by building digital models. It was this factor that delayed the widespread adoption of 3D printing until the moment when numerical control and 3D design became widely available and highly productive.
3D printing techniques
3D printing technologies are numerous, and there are even more names for them due to patent restrictions. However, you can try to divide technologies into main areas:
Extrusion printing
This includes methods such as deposition deposition (FDM) and multi-jet printing (MJM). This method is based on the extrusion (extrusion) of consumables with the sequential formation of the finished product. As a rule, consumables consist of thermoplastics or composite materials based on them.
Melting, sintering or bonding
This approach is based on bonding powdered material together. Formation is done in different ways. The simplest is gluing, as is the case with 3D inkjet printing (3DP). Such printers deposit thin layers of powder onto the build platform, which are then selectively bonded with a binder. Powders can be made up of virtually any material that can be ground to a powder—plastic, wood, metal.
This model of James Bond's Aston Martin was successfully printed on Voxeljet's SLS printer and blown up just as successfully during the filming of Skyfall instead of the expensive original
sintering (SLS and DMLS) and smelting (SLM), which allow you to create all-metal parts. As with 3D inkjet printing, these devices apply thin layers of powder, but the material is not glued together, but sintered or melted using a laser.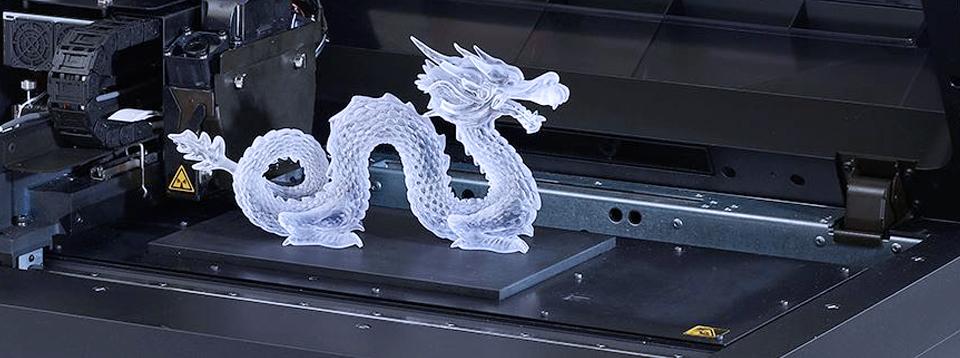 Laser sintering (SLS) is used to work with both plastic and metal powders, although metal pellets usually have a more fusible shell, and after printing they are additionally sintered in special ovens. DMLS is a variant of SLS installations with more powerful lasers that allow sintering metal powders directly without additives. SLM printers provide not just sintering of particles, but their complete melting, which allows you to create monolithic models that do not suffer from the relative fragility caused by the porosity of the structure. As a rule, printers for working with metal powders are equipped with vacuum working chambers, or they replace air with inert gases. Such a complication of the design is caused by the need to work with metals and alloys subject to oxidation - for example, with titanium.
Stereolithography
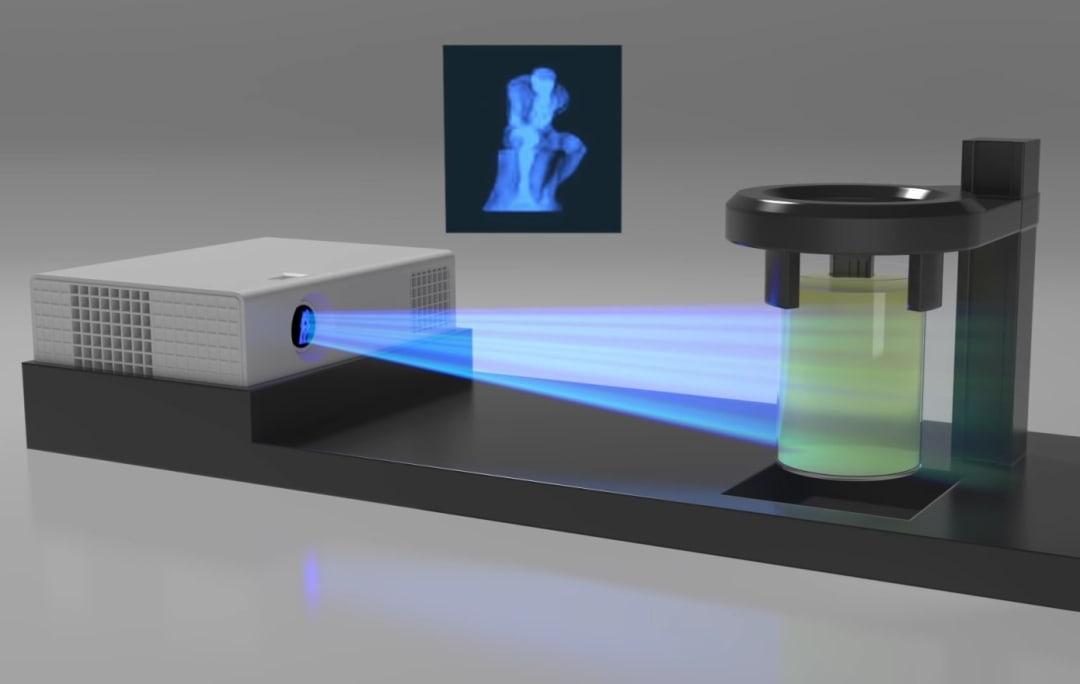
How an SLA printer works
Stereolithography printers use special liquid materials called "photopolymer resins". The term "photopolymerization" refers to the ability of a material to harden when exposed to light. As a rule, such materials react to ultraviolet irradiation.
Resin is poured into a special container with a movable platform, which is installed in a position near the surface of the liquid. The layer of resin covering the platform corresponds to one layer of the digital model. Then a thin layer of resin is processed by a laser beam, hardening at the points of contact. At the end of illumination, the platform together with the finished layer is immersed to the thickness of the next layer, and illumination is performed again.
Lamination
Laminating (LOM) 3D printers workflow
Some 3D printers build models using sheet materials - paper, foil, plastic film.
Layers of material are glued on top of each other and cut to the contours of the digital model using a laser or a blade.
These machines are well suited for prototyping and can use very cheap consumables, including regular office paper.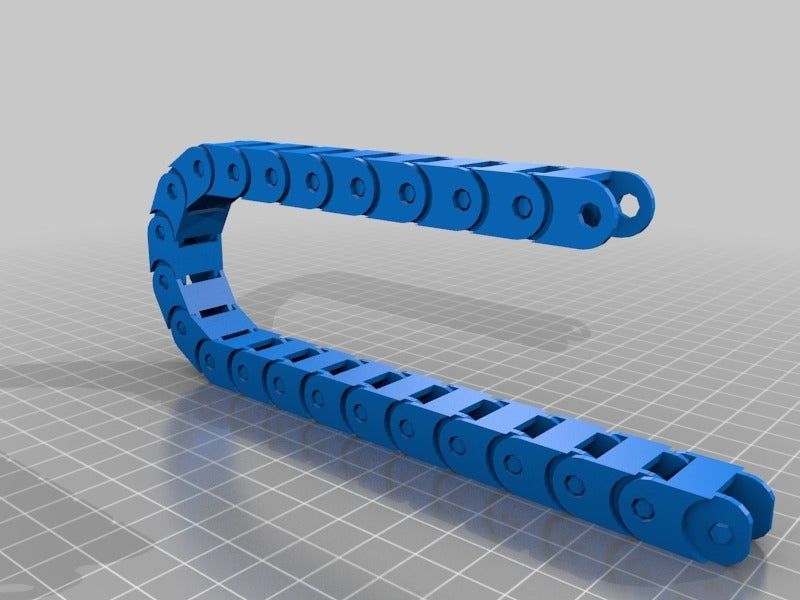 However, the complexity and noise of these printers, coupled with the limitations of the models they produce, limit their popularity.
Fused Deposition Modeling (FDM) and Laser Stereolithography (SLA) are the most popular 3D printing methods used in the home and office.
Let's take a closer look at these technologies.
Fused Deposition Printing (FDM)
FDM is perhaps the simplest and most affordable 3D construction method, which makes it very popular.
High demand for FDM printers is driving device and consumable prices down rapidly, along with technology advances towards ease of use and improved reliability.
Consumables
ABS filament spool and finished model
FDM printers are designed to print with thermoplastics, which are usually supplied as thin filaments wound on spools. The range of "clean" plastics is very wide. One of the most popular materials is polylactide or "PLA plastic".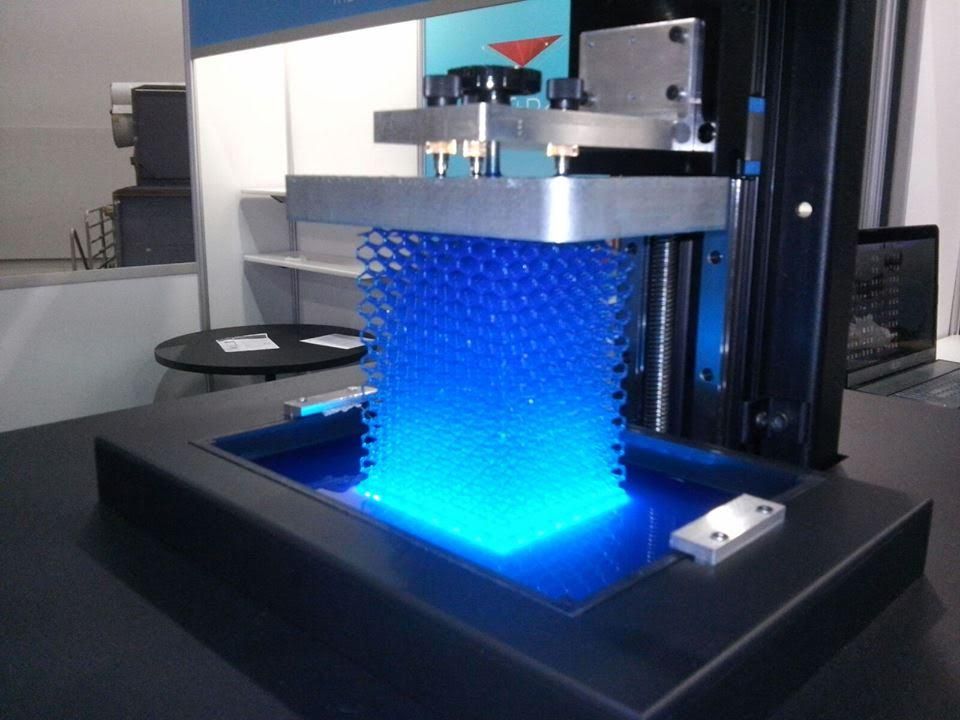 This material is made from corn or sugar cane, which makes it non-toxic and environmentally friendly, but makes it relatively short-lived. ABS plastic, on the other hand, is very durable and wear-resistant, although it is susceptible to direct sunlight and can release small amounts of harmful fumes when heated. Many plastic items that we use on a daily basis are made from this material: housings for household appliances, plumbing fixtures, plastic cards, toys, etc.
In addition to PLA and ABS, printing is possible with nylon, polycarbonate, polyethylene and many other thermoplastics that are widely used in modern industry. More exotic materials are also possible, such as polyvinyl alcohol, known as "PVA plastic". This material dissolves in water, which makes it very useful for printing complex geometric patterns. But more on that below.
Model made from Laywoo-D3. Changing the extrusion temperature allows you to achieve different shades and simulate annual rings
It is not necessary to print with homogeneous plastics.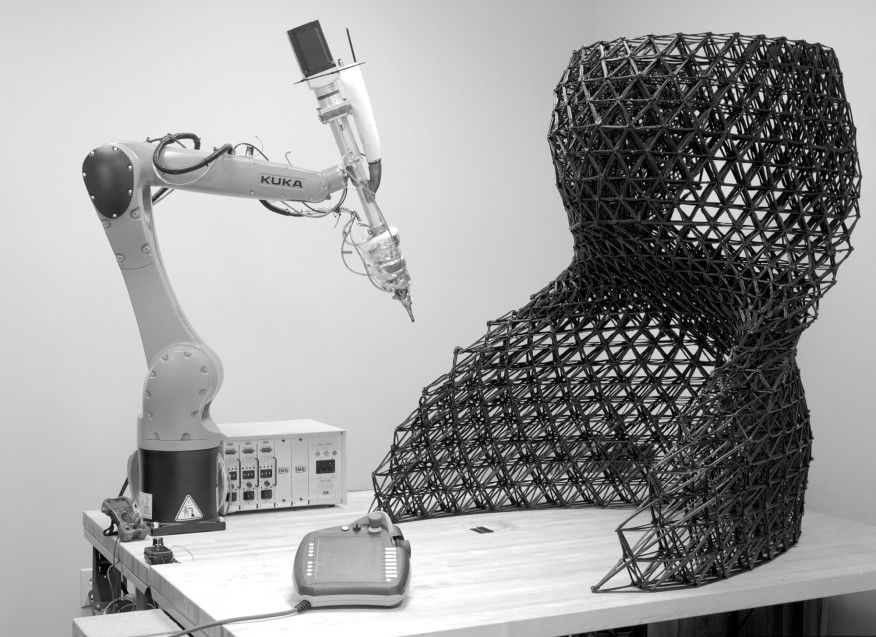 It is also possible to use composite materials imitating wood, metals, stone. Such materials use all the same thermoplastics, but with impurities of non-plastic materials.
So, Laywoo-D3 consists partly of natural wood dust, which allows you to print "wooden" products, including furniture.
The material called BronzeFill is filled with real bronze, and models made from it can be ground and polished, achieving a high similarity to products made from pure bronze.
One has only to remember that thermoplastics serve as a binding element in composite materials - they determine the thresholds of strength, thermal stability and other physical and chemical properties of finished models.
Extruder
Extruder - FDM print head. Strictly speaking, this is not entirely true, because the head consists of several parts, of which only the feed mechanism is directly "extruder". However, by tradition, the term "extruder" is commonly used as a synonym for the entire print assembly.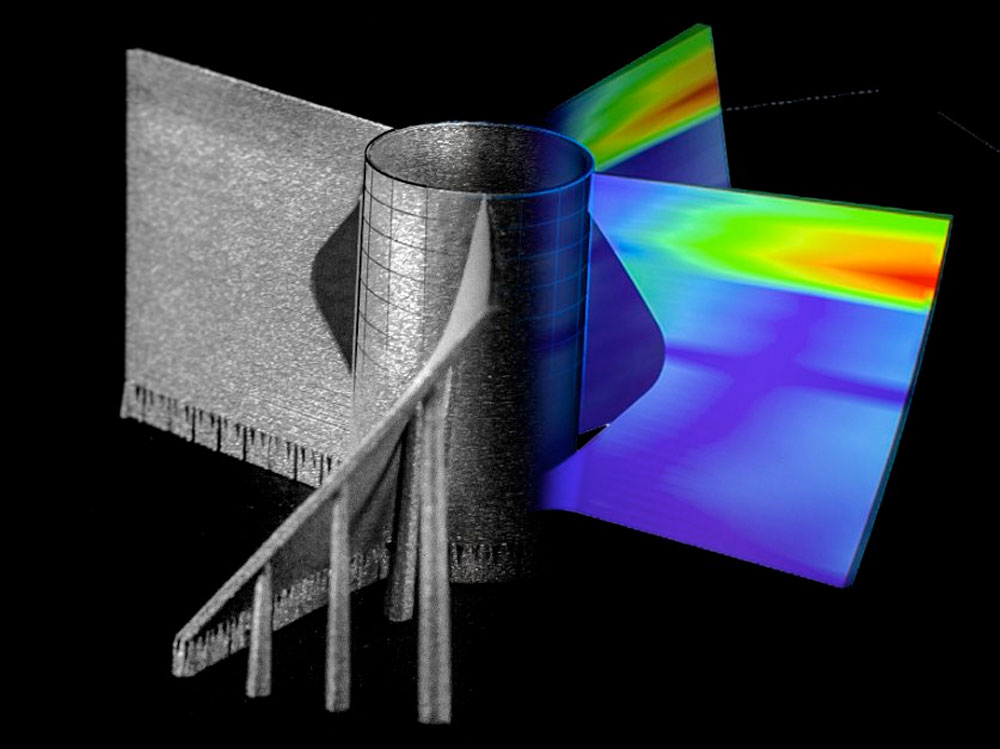
FDM extruder general design
The extruder is designed for melting and applying thermoplastic thread. The first component is the thread feed mechanism, which consists of rollers and gears driven by an electric motor. The mechanism feeds the thread into a special heated metal tube with a small diameter nozzle, called a "hot end" or simply a "nozzle". The same mechanism is used to remove the thread if a change of material is needed.
The hot end is used to heat and melt the thread fed by the puller. As a rule, nozzles are made from brass or aluminum, although more heat-resistant, but also more expensive materials can be used. For printing with the most popular plastics, a brass nozzle is quite enough. The “nozzle” itself is attached to the end of the tube with a threaded connection and can be replaced with a new one in case of wear or if a change in diameter is necessary. The nozzle diameter determines the thickness of the molten filament and, as a result, affects the print resolution.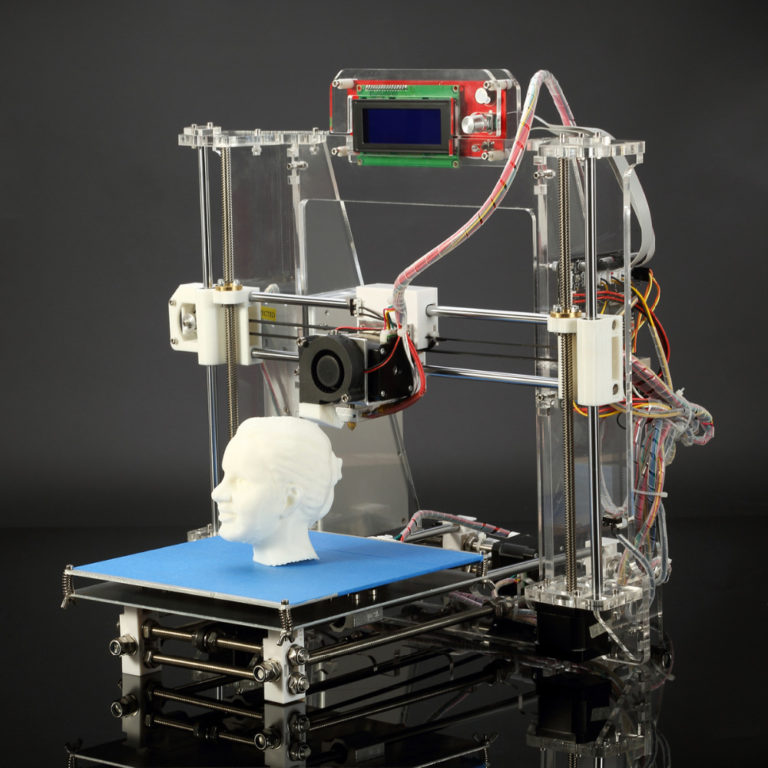 The heating of the hot end is controlled by a thermistor. Temperature control is very important, because when the material is overheated, pyrolysis can occur, that is, the decomposition of plastic, which contributes both to the loss of the properties of the material itself and to clogging of the nozzle.
PrintBox3D One FDM Printer Extruder
To prevent the filament from melting too early, the top of the hot end is cooled by heatsinks and fans. This point is of great importance, since thermoplastics that pass the glass transition temperature significantly expand in volume and increase the friction of the material with the walls of the hot end. If the length of such a section is too long, the pulling mechanism may not have enough strength to push the thread.
The number of extruders may vary depending on the purpose of the 3D printer. The simplest options use a single print head. The dual extruder greatly expands the capabilities of the device, allowing you to print one model in two different colors, as well as using different materials.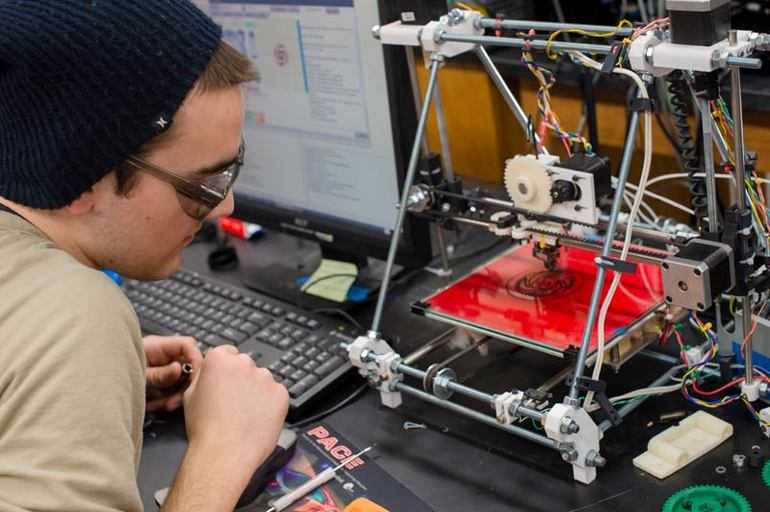 The last point is important when building complex models with overhanging structural elements: FDM printers cannot print “over the air”, since the applied layers require support. In the case of hinged elements, temporary support structures have to be printed, which are removed after printing is completed. The removal process is fraught with damage to the model itself and requires accuracy. In addition, if the model has a complex structure with internal cavities that are difficult to access, building conventional supports may not be practical due to the difficulty in removing excess material.
Finished model with PVA supports (white) before and after washing
In such cases, the same water-soluble polyvinyl alcohol (PVA) comes in handy. Using a dual extruder, you can build a model from waterproof thermoplastic using PVA to create supports.
After printing, PVA can be simply dissolved in water and a complex product of perfect quality can be obtained.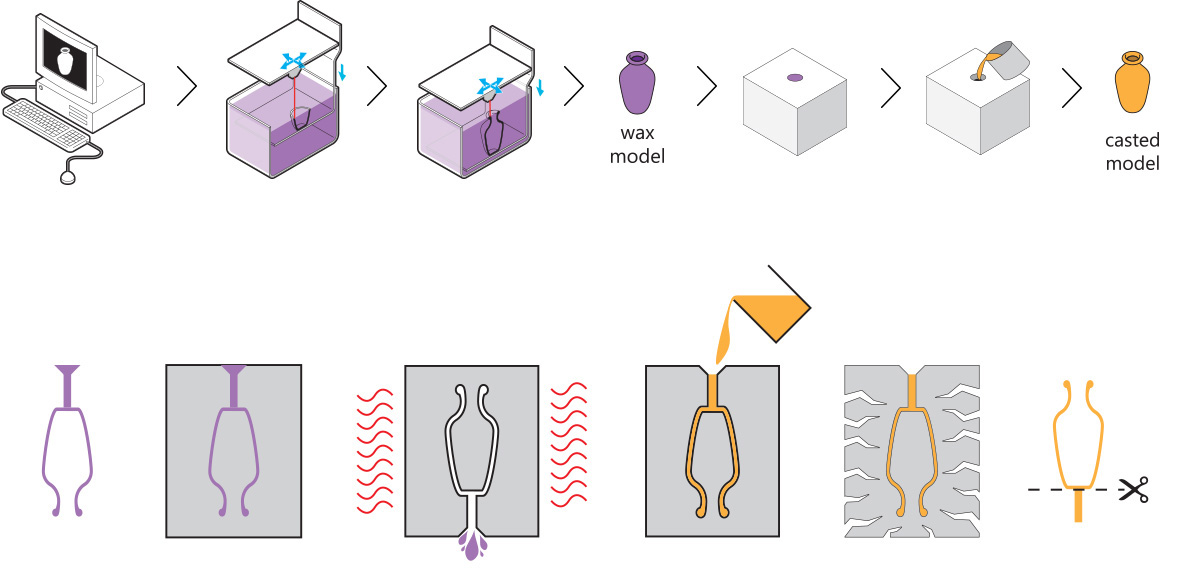
Some FDM printers can use three or even four extruders.
Working platform
Heated platform covered with removable glass work table
Models are built on a special platform, often equipped with heating elements. Preheating is required for a wide range of plastics, including the popular ABS, which are subject to a high degree of shrinkage when cooled. The rapid loss of volume by cold coats compared to freshly applied material can lead to model distortion or delamination. The heating of the platform makes it possible to significantly equalize the temperature gradient between the upper and lower layers.
Heating is not recommended for some materials. A typical example is PLA plastic, which requires a fairly long time to harden. Heating PLA can lead to deformation of the lower layers under the weight of the upper ones. When working with PLA, measures are usually taken not to heat up, but to cool the model. Such printers have characteristic open cases and additional fans blowing fresh layers of the model.
Calibration screw for work platform covered with blue masking tape
The platform needs to be calibrated before printing to ensure that the nozzle does not hit the applied layers and move too far causing air-to-air printing resulting in plastic vermicelli. The calibration process can be either manual or automatic. In manual mode, calibration is performed by positioning the nozzle at different points on the platform and adjusting the platform inclination using the support screws to achieve the optimal distance between the surface and the nozzle.
As a rule, platforms are equipped with an additional element - a removable table. This design simplifies the cleaning of the working surface and facilitates the removal of the finished model. Stages are made from various materials, including aluminum, acrylic, glass, etc. The choice of material for the manufacture of the stage depends on the presence of heating and consumables for which the printer is optimized.
For a better adhesion of the first layer of the model to the surface of the table, additional tools are often used, including polyimide film, glue and even hairspray! But the most popular tool is inexpensive, but effective masking tape. Some manufacturers make perforated tables that hold the model well but are difficult to clean. In general, the expediency of applying additional funds to the table depends on the consumable material and the material of the table itself.
Positioning mechanisms
Scheme of operation of positioning mechanisms
Of course, the print head must move relative to the working platform, and unlike conventional office printers, positioning must be carried out not in two, but in three planes, including height adjustment.
Positioning pattern may vary. The simplest and most common option involves mounting the print head on perpendicular guides driven by stepper motors and providing positioning along the X and Y axes.
Vertical positioning is carried out by moving the working platform.
On the other hand, it is possible to move the extruder in one plane and the platforms in two.
SeemeCNC ORION Delta Printer
One option that is gaining popularity is the delta coordinate system.
Such devices are called "delta robots" in the industry.
In delta printers, the print head is suspended on three manipulators, each of which moves along a vertical rail.
The synchronous symmetrical movement of the manipulators allows you to change the height of the extruder above the platform, and the asymmetric movement causes the head to move in the horizontal plane.
A variant of this system is the reverse delta design, where the extruder is fixed to the ceiling of the working chamber, and the platform moves on three support arms.
Delta printers have a cylindrical build area, and their design makes it easy to increase the height of the working area with minimal design changes by extending the rails.
In the end, everything depends on the decision of the designers, but the fundamental principle does not change.
Control
Typical Arduino-based controller with add-on modules
The operation of the FDM printer, including nozzle and platform temperature, filament feed rate, and stepper motors for positioning the extruder, is controlled by fairly simple electronic controllers. Most controllers are based on the Arduino platform, which has an open architecture.
The programming language used by the printers is called G-code (G-Code) and consists of a list of commands executed in turn by the 3D printer systems. G-code is compiled by programs called "slicers" - standard 3D printer software that combines some of the features of graphics editors with the ability to set print options through a graphical interface. The choice of slicer depends on the printer model. RepRap printers use open source slicers such as Skeinforge, Replicator G and Repetier-Host. Some companies make printers that require proprietary software.
Program code for printing is generated using slicers
As an example, we can mention Cube printers from 3D Systems. There are companies that offer proprietary software but allow third-party software, as is the case with the latest generation of MakerBot 3D printers.
Slicers are not intended for 3D design per se. This task is done with CAD editors and requires some 3D design skills. Although beginners should not despair: digital models of a wide variety of designs are offered on many sites, often even for free. Finally, some companies and individuals offer 3D design services for custom printing.
Finally, 3D printers can be used in conjunction with 3D scanners to automate the process of digitizing objects. Many of these devices are designed specifically to work with 3D printers. Notable examples include the 3D Systems Sense handheld scanner and the MakerBot Digitizer handheld desktop scanner.
MakerBot Replicator 5th Generation FDM Printer with built-in control module on the top of the frame
The user interface of a 3D printer can consist of a simple USB port for connecting to a personal computer. In such cases, the device is actually controlled by the slicer.
The disadvantage of this simplification is a rather high probability of printing failure when the computer freezes or slows down.
A more advanced option includes an internal memory or memory card interface to make the process standalone.
These models are equipped with control modules that allow you to adjust many print parameters (such as print speed or extrusion temperature). The module may include a small LCD display or even a mini-tablet.
Varieties of FDM printers
Professional Stratasys Fortus 360mc FDM printer that allows printing with nylon
FDM printers are very, very diverse, ranging from the simplest homemade RepRap printers to industrial installations capable of printing large-sized objects.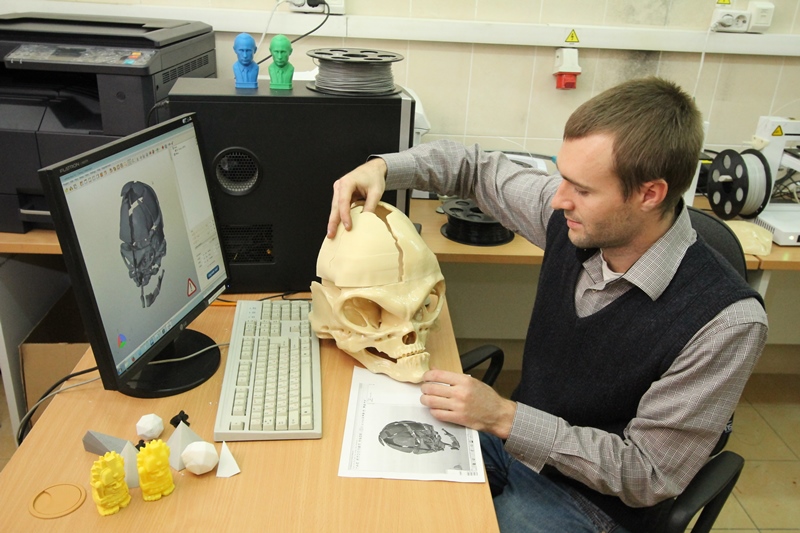
Stratasys, founded by Scott Crump, the inventor of FDM technology, is a leader in the production of industrial installations.
You can build the simplest FDM printers yourself. Such devices are called RepRap, where "Rep" indicates the possibility of "replication", that is, self-reproduction.
RepRap printers can be used to print custom built plastic parts.
Controller, rails, belts, motors and other components can be easily purchased separately.
Of course, assembling such a device on your own requires serious technical and even engineering skills.
Some manufacturers make it easy by selling DIY kits, but these kits still require a good understanding of the technology. RepRap Printers
And, despite their "homemade nature", RepRap printers are quite capable of producing models with quality at the level of expensive branded counterparts.
Ordinary users who do not want to delve into the intricacies of the process, but require only a convenient device for household use, can purchase a ready-made FDM printer.
Many companies are focusing on the development of the consumer market segment, offering 3D printers for sale that are ready to print “right out of the box” and do not require serious computer skills.
3D Systems Cube consumer 3D printer
The most famous example of a consumer 3D printer is the 3D Systems Cube.
While it doesn't boast a huge build area, ultra-fast print speeds, or superb build quality, it's easy to use, affordable, and safe: This printer has received the necessary certification to be used even by children.
Mankati FDM printer demonstration: http://youtu.be/51rypJIK4y0
Laser Stereolithography (SLA)
Stereolithographic 3D printers are widely used in dental prosthetics
Stereolithographic printers are the second most popular and widespread after FDM printers.
These units deliver exceptional print quality.
The resolution of some SLA printers is measured in a matter of microns - it is not surprising that these devices quickly won the love of jewelers and dentists.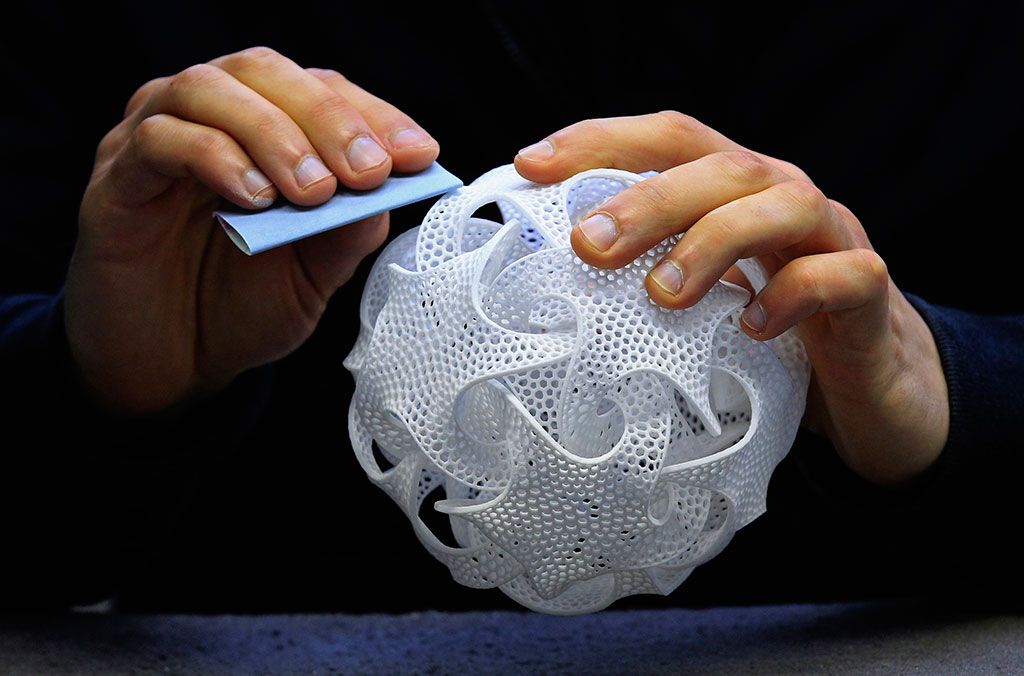
The software side of laser stereolithography is almost identical to FDM printing, so we will not repeat ourselves and will only touch on the distinctive features of the technology.
Lasers and projectors
Projector illumination of a photopolymer model using Kudo3D Titan DLP printer as an example
The cost of stereolithography printers is rapidly declining due to growing competition due to high demand and the use of new technologies that reduce the cost of construction.
Although the technology is generically referred to as "laser" stereolithography, most recent developments use UV LED projectors for the most part.
Projectors are cheaper and more reliable than lasers, do not require the use of delicate mirrors to deflect the laser beam, and have higher performance. The latter is explained by the fact that the contour of the whole layer is illuminated as a whole, and not sequentially, point by point, as is the case with laser options.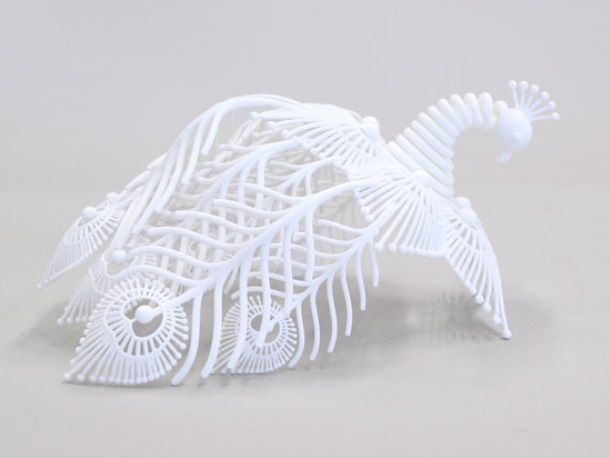 This variant of the technology is called projection stereolithography, "DLP-SLA" or simply "DLP". However, both options are currently common - both laser and projector versions.
Cuvette and resin
Photopolymer resin is poured into a cuvette
A photopolymer resin that looks like epoxy is used as consumables for stereolithographic printers. Resins can have a variety of characteristics, but they all share one key feature for 3D printing applications: these materials harden when exposed to ultraviolet light. Hence, in fact, the name "photopolymer".
When polymerized, resins can have a wide variety of physical characteristics. Some resins are like rubber, others are hard plastics like ABS. You can choose different colors and degrees of transparency. The main disadvantage of resins and SLA printing in general is the cost of consumables, which significantly exceeds the cost of thermoplastics.
On the other hand, stereolithography printers are mainly used by jewelers and dentists who do not need to build large parts but appreciate the savings from fast and accurate prototyping.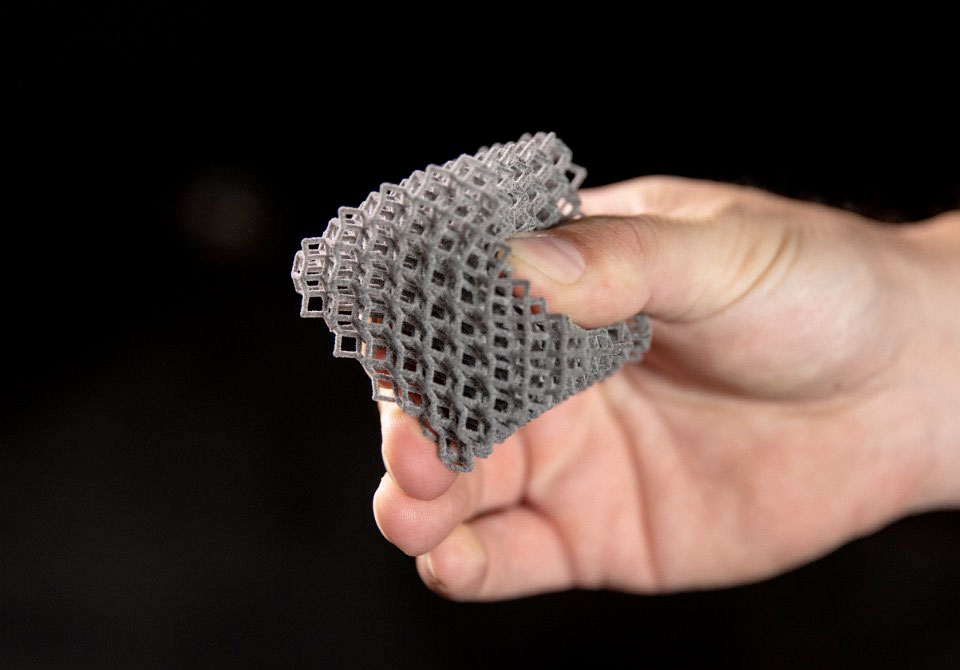 Thus, SLA printers and consumables pay for themselves very quickly.
Example of a model printed on a laser stereolithographic 3D printer
Resin is poured into a cuvette, which can be equipped with a lowering platform. In this case, the printer uses a leveling device to flatten the thin layer of resin covering the platform just prior to irradiation. As the model is being made, the platform, together with the finished layers, is “embedded” in the resin. Upon completion of printing, the model is removed from the cuvette, treated with a special solution to remove liquid resin residues and placed in an ultraviolet oven, where the final illumination of the model is performed.
Some SLA and DLP printers work in an "inverted" scheme: the model is not immersed in the consumable, but "pulled" out of it, while the laser or projector is placed under the cuvette, and not above it. This approach eliminates the need to level the surface after each exposure, but requires the use of a cuvette made of a material transparent to ultraviolet light, such as quartz glass.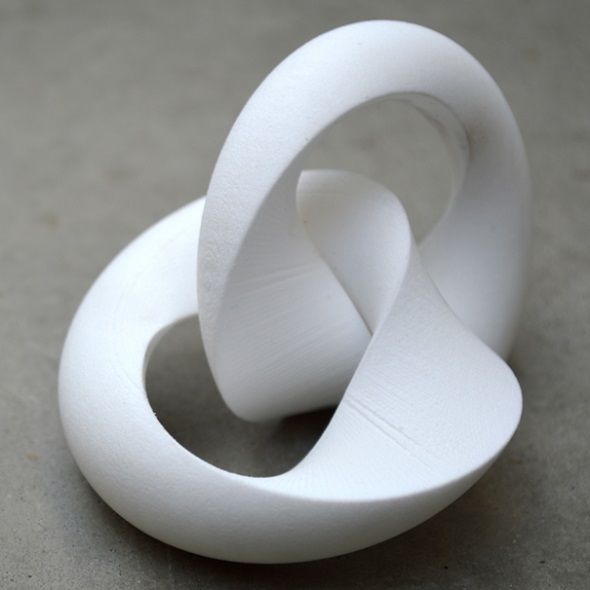
The accuracy of stereolithographic printers is extremely high. For comparison, the standard for vertical resolution for FDM printers is considered to be 100 microns, and some variants of SLA printers allow you to apply layers as thin as 15 microns. But this is not the limit. The problem, rather, is not so much in the accuracy of lasers, but in the speed of the process: the higher the resolution, the lower the print speed. The use of digital projectors allows you to significantly speed up the process, because each layer is illuminated entirely. As a result, some DLP printer manufacturers claim to be able to print with a vertical resolution of one micron!
Video from CES 2013 showing Formlabs Form1 stereolithography 3D printer in action: http://youtu.be/IjaUasw64VE
Stereolithography Printer Options
Formlabs Form1 Desktop Stereolithography Printer
As with FDM printers, SLA printers come in a wide range in terms of size, features and cost. Professional installations can cost tens if not hundreds of thousands of dollars and weigh a couple of tons, but the rapid development of desktop SLA and DLP printers is gradually reducing the cost of equipment without compromising print quality.
Models such as the Titan 1 promise to make stereolithographic 3D printing affordable for small businesses and even home use at around $1,000. Formlabs' Form 1 is available now for a factory selling price of $3,299.
The developer of the DLP printer Peachy generally intends to overcome the lower price barrier of $100.
At the same time, the cost of photopolymer resins remains quite high, although the average price has fallen from $150 to $50 per liter over the past couple of years.
Of course, the growing demand for stereolithographic printers will stimulate the growth in the production of consumables, which will lead to further price reductions.
Go to the main page of the Encyclopedia of 3D printing
13 notes about 3D printing, after 3 years of owning a 3D printer / Habr
This article will be, first of all, of interest both to those who have directly dealt with 3D printing, that is, who owns a 3D printer, but also to those who are just about to join the ranks of 3D printers and are thinking about buying their own printer.
As part of this article, I would like to share my observations, as a direct owner of a 3D printer, for more than 3 years.
Despite the fact that 3D printers have been known for a long time and, in my memory, have become widely used, judging by the information on various resources, starting around 2010 (I may be wrong, these are my subjective observations), for a long time I ignored this area, it’s hard to say why…
Probably, he considered it some kind of “childish pampering”, another hype topic, for which there is simply not enough time…
The fracture happened when one of the wheels on my travel suitcase wore out. You know, a big plastic suitcase, with four spinning wheels on the bottom. Unfortunately, it is a “rather disposable thing”, due to the lack of bearings on the wheels, which is why the wear of the friction point of the axle and wheel allows the suitcase to last no more than one or two seasons.
And it’s like “lightning flashed in the middle of the day: 3D printer!” It is with his help that I can fix this problem! Looking ahead, I’ll say that I didn’t succeed in fixing the suitcase in this way, so I had to use a different approach . ..
..
As a result, I "upped" him - by installing wheels from unnecessary roller skates. Thanks to this “up”, the suitcase has become a real all-terrain vehicle and, even being very loaded, it rides easily - pushed forward even with “one finger”. And even in the snow, 5-6 cm thick. A tank, not a suitcase turned out! By the way - I took spinning wheeled "units" in Leroy. Then he took off and threw out his native plastic wheels, inserting from roller skates:
But this thought itself became a kind of trigger that allowed me to finally join the world of printers and buy my first 3D printer.
Like many, before buying it, I studied various forums and sites for a long time, delving into all the subtleties. And for some reason, I immediately liked the type of printer called the delta printer. Probably because during operation it looks like some kind of "alien device".
If at your leisure you like to sit “looking into the carpet”, then with the advent of such a printer you will have a much more interesting activity, even, one might say, hypnotizing :-))
And this, in fact, is my delta (if anyone interesting), which went, let's say, "ultimate up": all the electronics were placed upstairs, on a self-made welded frame, covered with polyethylene and a magnetic door was made.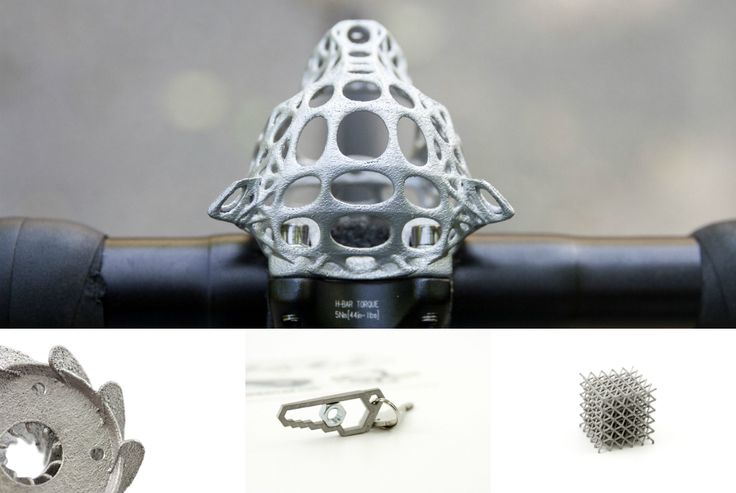 The coil with a bar is installed at the top, on the frame. The axis on which the coil is put on is machined on a lathe from aluminum and a bearing from the VAZ timing is inserted into it. As a result, the coil - "rotates even from the passage of a fly nearby":
Well, yes, I won’t argue for a long time, let’s start reviewing the main facts that I have accumulated as a result of owning this car ... The facts are purely subjective and may differ from your vision. In any case, I will be glad to comments, clarifications, etc.
▍ NOTE 1. Delta is good, but...
Here I should give a number of my observations regarding the delta printer:
- It contains a completely finished frame of the future box, which makes it easy to form a heat chamber. I understand that many printers are made in the form factor of a “certain box” (but this point cannot be ignored), which greatly facilitates the process of wrapping this box with heat-insulating material.
 In my case, as such a material, I used a plastic film.
 - Already thanks to its design, delta allows you to work at much higher speeds than XY printers. By the way, it is on the delta principle that many modern high-speed industrial robots are built to sort various parts directly on the conveyor belt:
However, this plus does not allow to fully realize the occurrence of parasitic vibrations, even despite their suppressors:
Thus, accurate printing is possible, only at speeds (at least that was the case for me), no more than 60 mm per second. A complex procedure for aligning the movement of the head parallel to the table, which is why, for many, the so-called "lens" appears. People struggle with it with varying degrees of success, but I have not encountered this on my printer and for me, therefore, the “lens” has never been a problem. At the same point, it is worth noting the calibration of the table, which was initially absent on the first deltas, and I had to use an external third-party solution from one American do-it-yourselfer called EZBED.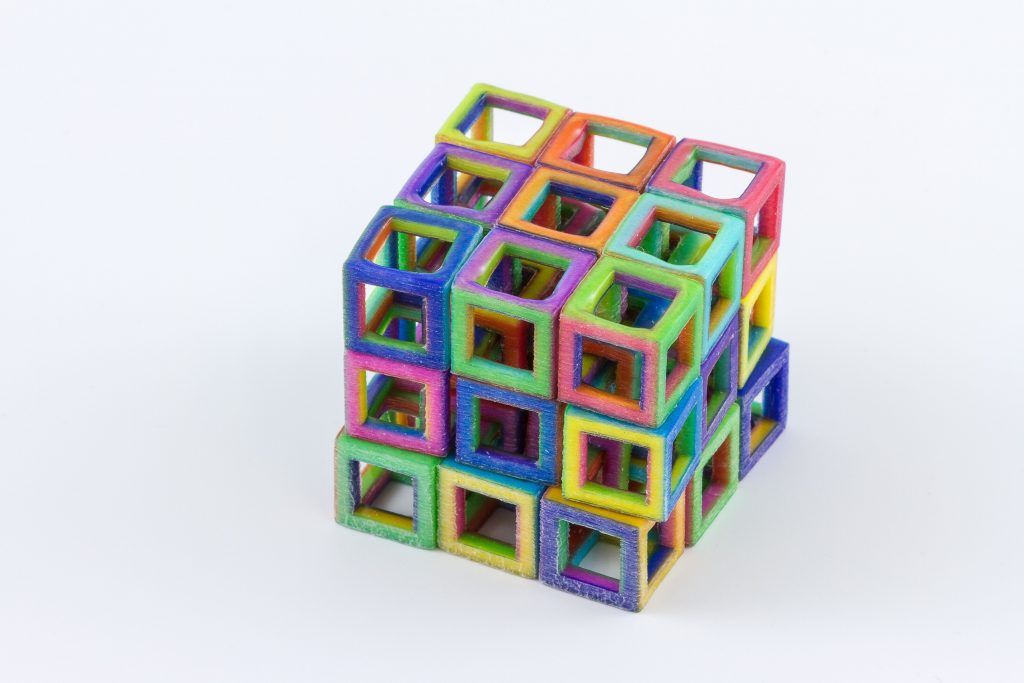 This solution was a hardware-software complex that allows you to quickly and easily calibrate the printing table, that is, to let the printer understand its geometry. Modern printers do not have this issue as they come with a built-in calibration solution. It is worth noting that I solved this problem by attaching a limit switch to the print head, and using the Marlin-1.1.9 firmware.
▍ NOTE 2. "Size doesn't matter..." :-)
When I got the printer, I was impressed by the possibility of huge printouts, a la the handguards of some futuristic rifles, huge body parts, etc.
However, if you try to analyze the results of your many years of practice, it turns out that in most cases, rather small objects were printed that easily fit in the palm of your hand, a maximum of two palms. Despite such a seemingly small size, the printing of these details took a significant amount of time. Of course, this very much depends on which nozzle you print with. But, despite this, it is difficult to disagree with the fact that most of the printed parts will be quite utilitarian and small in size.
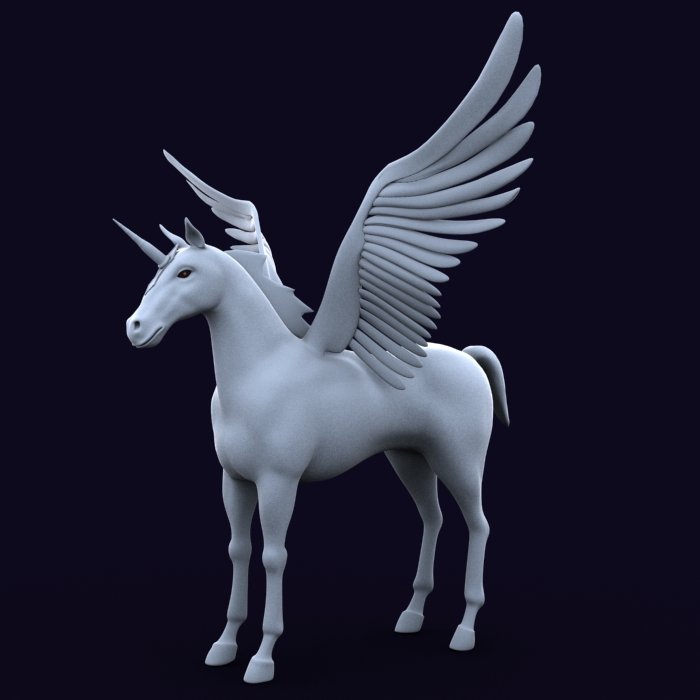
Therefore, to be honest, the need for a printer that allows you to print "Venus de Milo in life size" is not obvious.
Of course, you can object to me that “I’m going to buy a printer, I’ll get used to it a bit and I’ll get started!!!”
Here you need to take into account one simple point: there are no universal things. And in order to understand how much 3D printing in general and your printer, in particular, you will need to solve your problems, and how much it will be able to solve such problems, you just need to first try the 3D printing method personally and then a lot will become clear to you .
Therefore, for a beginner, I recommend taking a small printer that allows you to print extremely small items that fit in the palm of two. With such a device, you will definitely never lose, as it will always be needed. In addition, with its help you will be able to get used to the printing process and, if necessary, purchase a larger device, already clearly understanding its capabilities and ability to solve your set of tasks.
▍ NOTE 3. What kind of printer to get.
Based on the foregoing, I do not recommend taking a delta printer and this can be said right away.
Not because it is bad, in fact, it prints quite accurately, its main problem (in my opinion) is the inability to print rectangular flat, fairly large case components, as well as the inability to fully realize high-speed work, since the quality drops critically. Here it turns out to be a rather offensive situation - the printer can work quickly, but this cannot be done, since the quality will be “nothing”.
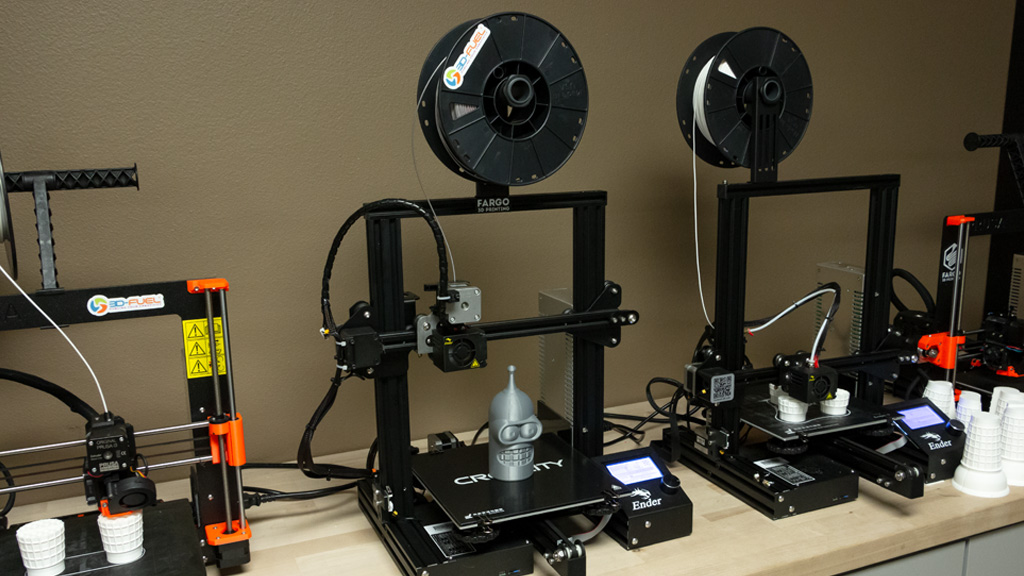
And then what kind to take? Depending on the budget and capabilities, I recommend taking any cube printer, for example, the same Core XY (the head moves, and the table goes down as the model “grows”, from top to bottom):
Image source: thingiverse.com
Such a printer allows you to easily print fairly large flat parts of cases, has good speed and accuracy. In addition, the presence of a rigid box-shaped frame allows it to be easily covered with polyethylene to create a sealed heat chamber. In addition, the very fact that the table does not move while working reduces the number of problems with model peeling.
However, the advantages of this printer will not be fully revealed if it has a direct extruder. On the one hand, it will allow printing with rubber-like materials, on the other -
large inertia and head weight. And these are parasitic vibrations, wear of the fur. parts, etc. (like everything in life, “we treat one thing and cripple another” :-))
At the initial stages, this may not be necessary, but in the future it may be necessary to print, for example, tires for your homemade car. And with this, the Bowden extruder has obvious problems. Although, in fairness, printing with such a rubber-like material is far from a daily need. However, whoever seeks will always find: over time, I found a way to “upgrade” my printer with a Bowden extruder to print with flexible materials. "Crutches" of course. But even so.
By the way, there are printers of a cheaper type, the so-called "drygostol", printing by moving the table and head:
They are inexpensive, moderately accurate, but they require a sufficiently high-quality gluing of the printed model to the table, because the table moves, and the model can come off when the table is jerked sharply. When printing large models, this can be a problem.
▍ NOTE 4. What to print with?
It's only a matter of taste and purpose. That is, if your printout will only stand on a shelf and should differ in some kind of aesthetic appearance, these are some requirements, if the printout is an engineering part that will be operated under conditions of increased mechanical load, these are different requirements. That is, in the first case, you can use any PLA, SBS plastics, and others with similar properties.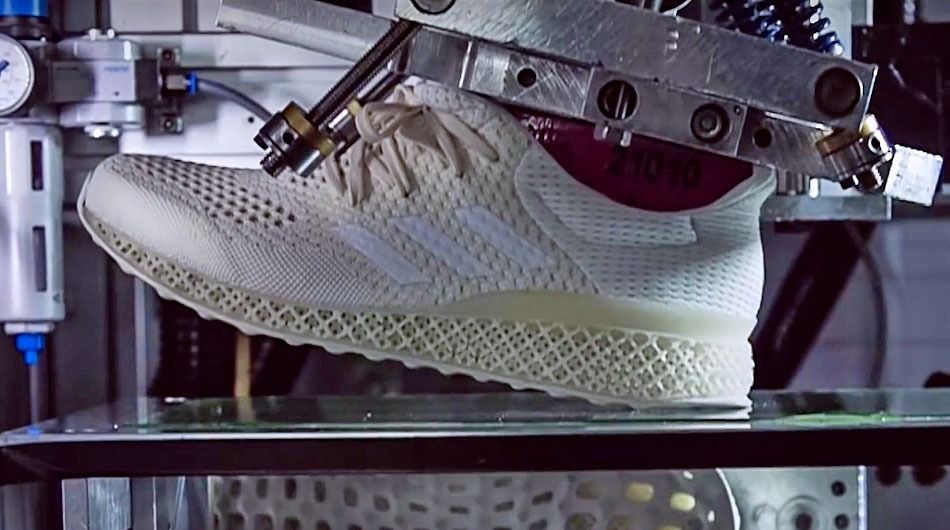
For engineering parts, for example, I only use ABS. It combines high hardness, strength and low price. Although I understand that now this last statement will cause a storm of comments in the style of “no! - there is even stronger, even better, the same PETG, etc. ":-)
Just here I wanted to say that thanks to the low price and the practical experiments that I conducted with ABS plastic, I realized that it is completely meets all my requirements.
However, the fact that ABS plastic releases carcinogenic substances when heated is quite annoying and forces you to take measures to prevent poisoning. For this, my printer prints completely closed and on an open balcony. After printing, the printer chamber opens, and it remains open in this form until it is completely ventilated and cools down.
▍ NOTE 5. "ABS is difficult to type on, it separates, peels off the table, and in general..."
With a properly configured printer (in my case, at a print temperature of 205 degrees, a thermal chamber and a desktop temperature of 100 degrees), the use of auxiliary techniques, for example, among which, one can name the so-called ABS juice (which is ABS- plastic dissolved in acetone), you can create wear-resistant and durable things, without any hypothetical problems.
For example, my printer has been printing for many hours at temperatures well below freezing. And this happened more than once, not twice, not three! And the print quality was excellent:
12-hour ABS printing at -4 C
At one time, I wrote a fairly detailed article on this topic and I will try to give the main excerpts from it. The essence of the issue here is as follows: due to the fact that different GOSTs are used for the production of acetone, acetone differs in quality. Despite the fact that it would seem that “acetone is also acetone in Africa,” nevertheless, one type of acetone can differ significantly from each other. For example, ordinary acetone, which can be bought at any hardware store, such as "1000 little things", "store near the house" and the like, is very low quality acetone, smells disgusting (although someone like it, maybe someone likes its pleasant building aroma and "aftertaste" :-))).
In contrast, there is a much higher quality acetone, which, however, is not found at all in any household stores, even large chain stores, such as Auchan or Leroy Merlin.
This type of acetone is found exclusively in shops that sell varnishes and paints for automotive work - that is, these are highly specialized shops for auto repair shops:
Acetone, which can be purchased there, is of excellent quality, smells almost like alcohol, quickly disappears,
:-) - this is a joke, of course, don't even try it.
However, its main advantage, compared to household type acetone, is that it perfectly dissolves ABS plastic and does not allow it to precipitate. For me personally, it was a very surprising observation when the same ABS plastic was perfectly dissolved with acetone from an auto shop, and completely precipitated when I tried to use household acetone (I just ran out of good acetone, and I had to use "what is ").
So if you want perfect results every time, this is the right acetone. It should be labeled "for professional use":
▍ NOTE 7.
 What about ABS juice?
 "ABS juice" is what printers call a mixture of acetone and pieces of ABS plastic dissolved in it. This mixture is smeared on the surface of the desktop before printing and allowed to dry. Thanks to this spread, the model easily sticks to the desktop and does not peel off during the printing process. After printing is completed and the platen has cooled down, the model can be easily separated.
All that needs to be said here is that, after trying different approaches over time, I settled on the use of flexible metal spatulas, also called “Japanese-style spatulas”:
According to the results of many tests, this method of spreading turned out to be one of the most convenient options, such spatulas can be cleaned very quickly and easily after work. In other words, highly recommended!
▍ NOTE 8. "Yes, nothing sensible can be done on it, I indulged a little and decided to sell it - you can't use it for anything good anyway"
I absolutely disagree with the statement above, which is periodically heard from newcomers to 3D printing. You can even say more: at the moment I can’t even imagine how I used to live without a 3D printer! Since it is he who makes it possible for any do-it-yourselfer to significantly expand their capabilities and make piece products, almost of factory quality! Of course, for this, the appropriate hands must be applied to the 3D printer, but that’s another question… and take on things that I would never have thought to take on before!
For example, among my homemade products, the following can be listed:
- Heated sole for boots, which is a hose integrated into the insole (and filled with household silicone from a household store), through which water flows, heated with a catalytic type hand warmer. Water is pumped using a small peristaltic pump. The engine with a metal gearbox, which is used in the creation of this pump, allows you to develop a force of 3 kg, which is even redundant for this homemade product. The engine is powered by Peltier elements mounted next to the catalytic heater.
 The project is currently in progress.
- Centrifugal water pump mounted on the shaft of an internal combustion engine that drives a high pressure wearable air compressor with a pressure of 500 bar. The pump pumps coolant through the casing of the high pressure pump, or rather its second stage. Despite the fact that the pump is 3D printed and runs at over 6000 rpm, nothing “fell apart, fell apart, didn’t break.” As you can see in the photo, the pump is installed instead of the “starter”, that is, the armstarter. The compressor scheme as a whole is as follows: 2 engines. Connected by clutch. One is heavy duty. The second is modified and turned into a high pressure compressor:
Yes, before assembling this, I also did not believe that this was possible. Moreover, even when I collected it, I did not believe my eyes :-))). However, it is a fact…
- I printed a number of Rank-Hilsch test tubes, the essence of which I have described in detail in this article.

- Mass of over 100 parts printed to create 10 internet controlled robots. There was also a detailed article about this here.
Well, and a bunch of all sorts of useful and not very crafts. As you can see from my crafts above, I have a special passion for creating some useful things, a utilitarian direction. That is, so that the printout is useful, and does not belong to the type “yyy breathe, Mikola, what am I doing here” :-), and then put it on the shelf and that's it. Although, engineers are also not alien to beauties, and this will be my next fact below.
▍ NOTE 9 Proper placement of the model when printing is half the battle
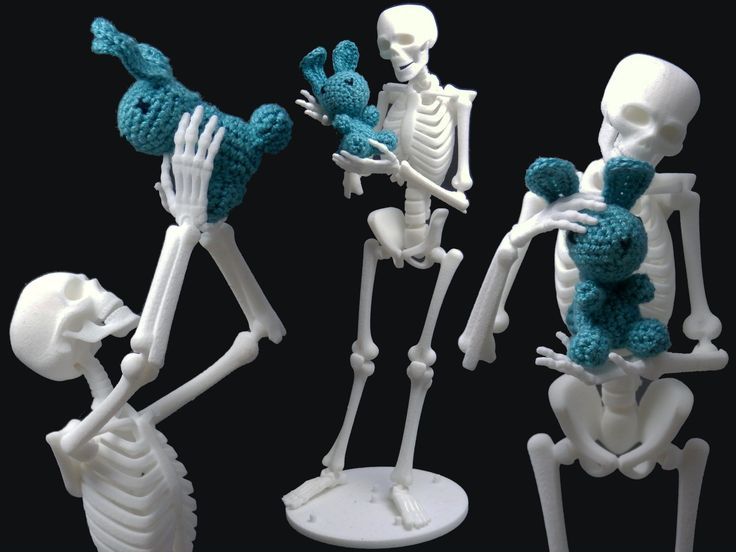
It would seem an obvious fact, but many underestimate it. Here I mean the following: by experience, I accidentally discovered that when printing various statues (in which I, completely unexpectedly for myself, discovered another passion of mine), it is advisable to place the statues at an angle to the printing table.
This allows the layers in the print to run at an angle of approximately 45-50 degrees to the model. The result of this is that the printed model is almost completely invisible layers and the model looks like it has been post-processed, but at the same time retains a deep matte color, which, to my personal taste, is more like a marble than a glossy result of processing in an acetone bath :
An additional advantage of this method is that the layers going at an angle of 45-50 ° to the model give it additional strength. This is especially true for printing statues, which contain many thin elements that are easily chipped when the statue is accidentally dropped from a table or shelf (learned from bitter experience, this happened to me many times, and ruined some fairly decent prints).
That is, layers running across the model, if the model has a large extension in height, does not allow it to maintain sufficient strength. For better understanding, I tried to illustrate this point in the figures below:
▍ NOTE 10.
 "Blurring" must be taken into account when printing, especially if the model is made up of separate parts and must be assembled by joining these parts to each other, entering into each other, etc.
 I tried to illustrate this point in the figures below. The implication here is that if you're printing a composite model, you need to correct for the amount of bleed on the plastic (I'm not sure what it's called, but at least I tried to convey what I mean). If this is not taken into account, then the model will not fit.
For example, in my case this correction is 0.2 mm per diameter - if I want the model to fit more tightly; if I need a free joint, without excessive density, then 0.3 mm per diameter:
That is, suppose that the blue part has a size of 10x10mm. So it must be modeled in a CAD program as 9.8x9.8 mm (if we want it to sit tight) or 9.7x9.7 mm (to sit freely). Well, or expand the hole in the green part, and leave the blue one as it is.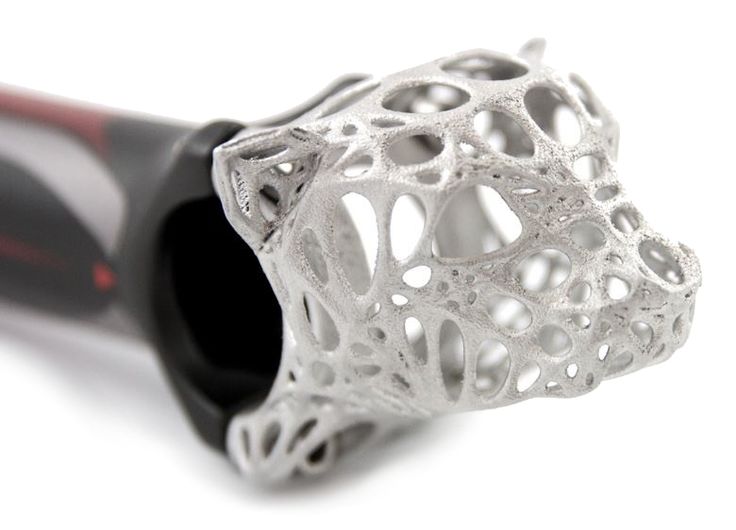
This is often a problem when you download a prefabricated model from the Internet - but it is not going to, even if you crack! And because no amendments have been made…
For your particular case, the amendments may be different.
▍ NOTE 11. What if...
In fact, this note complements note number 8. Using a 3D printer allows you to create metal parts using a printed 3D model. For this, the casting method is used according to the lost wax or burnt model. In our case, we will deal mainly with metal casting on a burnt model.
Briefly it looks like this: printing a 3D model (using PLA plastic) → pouring it with plaster → burning PLA plastic, simultaneously with burning the mold, in a conventional stove oven → pouring the resulting shape with molten metal (melted in a conventional microwave) .
Image source: 3dtopo.com
I told about a simple method of melting metals in a home microwave oven here.
There was even a good article about casting on Habré.
▍ NOTE 12. Durability?
Despite the fact that ABS plastic is called exposed to ultraviolet radiation and, accordingly, burns out, losing its strength in the sun, in my practice, even printouts that are constantly exposed to the sun have not lost their strength and color at all, continuing to be successfully used and Currently.
It should also be added here that the printouts are not only constantly exposed to the rays of the sun, but also work continuously in damp conditions!
As such printouts, I can give an example of winglets for technical cranes, which I printed out, but, unfortunately, did not photograph this process; as well as fasteners on shoes that I use “both in the snow, and in the heat and in the pouring rain, and in general are always with me”:
▍ NOTE 13. And what about the thread?
Periodically, there is a need to print parts containing a particular thread.