Masking tape 3d printer
Blue Tape for 3D Printing: The Complete Guide [2021]
3D Printing has rapidly grown in popularity and accessibility. What used to only be possible in advanced laboratories is now possible in the comfort of the home!
Whatever your purpose for 3D printing, whether professionally or just for fun, there are many components that play into the quality of the final product. One of the most important is bed adhesion.
Here is the ultimate guide to 3D printing with blue painters tape.
3D Printing Bed AdhesionWhat is 3D printing bed adhesion?Bed adhesion in 3D printing is how well the printed plastic parts are able to stick to the build plate. Good bed adhesion means that the plastic will not be easily removed or nudged, while poor bed adhesion means that it might move around during the printing process.
Essentially, as the filament hardens on the build plate, bed adhesion is what keeps everything in place. If the plastic pieces become top-heavy or get bumped, adhesion to the build plate is what keeps everything in place.
Bed adhesion is an important part of the 3D printing process. Luckily, there are special products designed to create the perfect amount of bed adhesion. Here are the reasons why bed adhesion is so crucial in 3D printing.
Not enough adhesion
If the 3D printed parts are loose enough to move around during the printing process, it can ruin the entire build. 3D printing requires exact measurements, so any sort of movement can misalign the entire build.
Too much adhesion
Alternatively, if the build plate has too much adhesion, it can be difficult to remove the plastic components. Any particularly thin pieces can potentially become damaged by the greater force required to remove them from the adhesion.
What kind of adhesives are used for 3D printing?Options for 3D Printing Bed Adhesion
PEI Sheets
PEI sheets, or Polyetherimide sheets, are adhesive plastic sheets designed to withstand the cycles of heat in 3D printing. On one side, they adhere to the build plate, and on the other they allow you to build your 3D prints.
While are supposed to be reusable for up to a month, the soft plastic can be dented and damaged very easily. A build plate that isn’t perfectly level can ruin a print. Investing in a PEI sheet can be risky because if it is damaged during an early print, the sheet can become unusable.
Adhesive Spray
Another option for bed adhesion is adhesive sprays. You simply spray the adhesive onto the plate and start printing. This route is easy and allows you to maintain a level bed. Plus, cleaning up is simple too, as most sprays are soluble in water.
Even though this is certainly a convenient method of getting your prints to stick, it is not the most effective. Getting an even stickiness to the bed with a spray can be difficult, and often it can be hard to get the bed to be sticky enough.
Glue
Using a glue stick is a way to keep your prints in place during 3D printing. Special glue designed for 3D printing is available at a relatively low cost. All you have to do is rub the glue stick where you are going to be printing, and the printer will take care of the rest.
However, like PEI sheets, they can create an unlevel bed. If too much glue builds up in one spot, the print can become crooked. Also, clean up can be kind of a pain because the glue will stick to the plate and the print.
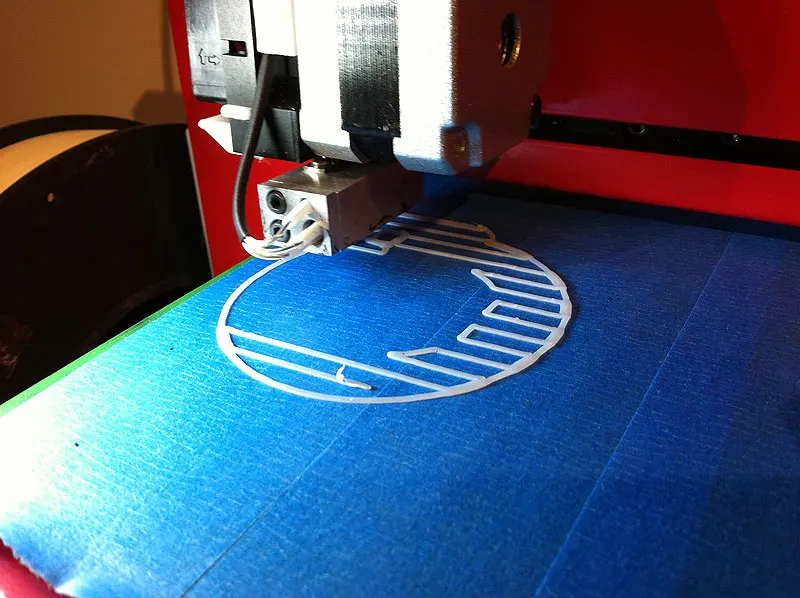
Blue Painter’s Tape
Specialized blue painter’s tape is a great option for creating bed adhesion. The porous nature of the blue tape allows PLA nylon, and other filaments to stick directly to the back of the tape. Painter’s tape is also heat resistant so it can withstand heated beds and the heat of the filament.
While it does take some set up, the price of the supplies and the quality of the printed parts are unmatched.
How to Use Blue Tape for 3D PrintingClean the Surface
Before you start applying the tape, you should clean your printing bed of all residue. This lets the tape stick and helps to keep your plate level.
Taping a 3D Printer Bed
While it will take a few minutes to properly tape your build plate, the prep work is not too difficult and can quickly be mastered.
With the adhesive side down, lay the tape down side by side. You want to be as precise as possible with this step so that there are no gaps that could let the filament through, but you also do not want any overlap of the tape which would cause the surface to be uneven.
Tape Diagonally
A key tip for taping a build plate is to lay the pieces of tape diagonally. When laying out the pieces side by side, start from one corner at a forty-five degree angle and work your way over.
This is helpful because it keeps the tape from warping with the print. If the straight edges of the print line up with the straight edges of the tape, the tape can lift off the plate as the filament cools.
Remove Bubbles with a Scraper
As you lay the pieces of tape down, be sure that there are no bubbles underneath the tape. To ensure this, run a scraper over every piece as you place it.
You want to be gentle so that you do not damage or tear the tape, but you must be firm enough to remove any imperfections. If there is a piece of tape that becomes unusable, tear it off and try again; it is better to waste one piece of tape than an entire print!
Trim the Tape
When sizing up the strip of tape, pull it so it is longer than the width of the plate. Then when placing it, be sure to leave plenty of slack on either side of the plate. With a sharp razor, carefully slice the ends of the tape so it is flush with the sides of the plate.
If you don’t have a razor, it is also an option to wrap the excess tape underneath the bottom of the plate. However, this can affect the leveling of the build plate.
Avoid Touching the Top of the Tape
During this whole process of taping your build plate, try to touch the top of the tape as little as possible. The oils in your fingers can affect the porousness of the tape.
If you are trying to print onto tape that you have been touching a lot, the oils from your hands may keep your parts from adhering to the tape. It is not so impactful that you need to wear gloves to place the tape, but just keep your contact to the tape at a minimum.
Preparing the Surface of the Tape
Once you have your blue painter’s tape on the build plate, there are various ways you can prepare the surface of your tape. Depending on what kind of adhesion you are looking for, you can use different methods for your own work.
You want to find the best balance between adhesion and clean removals that you can. If it has too much grip, the parts will not be easily removed. This could rip the tape or damage the parts. Too little adhesion will keep the printed parts from staying in place.
Unprepped Blue Tape
Leaving the blue tape untreated is a viable way to get adhesion. The porous nature of the tape allows the filament to attach itself, keeping your printed parts in place.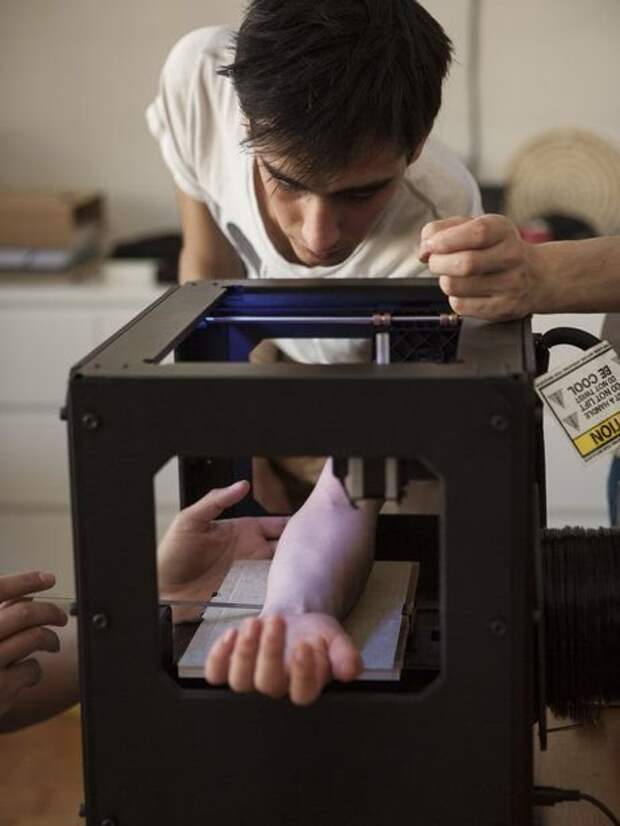
This method of adhesion should give you extremely clean removals. However, for prints that are top-heavy or unbalanced, you may need more adhesion to keep them steady and attached.
Scuffed Blue Tape
A simple trick you can use to add more adhesion to your blue tape is to scuff up the surface. Just take a dry sponge and rub-down the spot that you want to add adhesion to. By doing this, you increase the porousness of the tape, allowing the filament to stick to it even more.
This increases the adhesion of the tape, but it still allows for very clean removal of printed parts. The downside is, it will limit the lifespan of your tape. If you continue scuffing the same spot print after print, the tape will become worn down more quickly and will stop giving you quality results.
Glue on Blue Tape
Another option to greatly increase adhesion is combining blue tape with other methods of adhesion. Spraying hairspray or adhesive spray on top of the tape can give it more grab, and adding glue to the tape can increase it even more!
However, adding too much adhesive can cause problems. If you have a print with a large surface area stuck to the tape, it can be very challenging to remove it cleanly from the build plate.
Additionally, while you can clean glue and spray off of the build plate, you cannot clean it off of tape. Using alcohol to clean glue off of the tape ruins porousness, making it unusable for future prints.
When to Add More Adhesion to the Build Plate
The typical rule of thumb is the more surface area that is in contact with the plate, the greater the adhesion will be. This is a good rule to take into account when dealing with bed adhesion. Blue painter’s tape will already provide great adhesion even without any added prep work.
Large-Based Parts
If your printed part has a wide base that will be making a lot of contact with the build plate, it could be unwise to add more adhesion. It could become difficult to remove the part even without added adhesion.
Small-Based Parts
On the other hand, printed pieces that have small legs or slim bases will not attach as firmly to the tape. These pieces may need additional adhesion to keep it in place.
The best way to remove a 3D printed part from a taped bed is simply to wrench it loose with your hand. Do this carefully though, because applying too much force could snap your part.
You want to use this method if you can because it will preserve the quality of your tape, letting you use it again for future prints. However, if the adhesive of the tape is too strong, use these tricks to remove your printed parts safely.
Pry with a Putty Knife
After trying to wiggle the printed part free with your hand, the next course of action should be to use a putty knife to pry the piece off of the plate. If you can, slide the knife under a corner and work around the part, gently prying the piece free.
Remove the Tape
If that does not work, then the next step will be to remove the tape from the build plate. You can use your knife to make tears in the tape so you can remove it all.
Spray Isopropyl Alcohol
It is possible that the tape will tear up everywhere except for underneath the part. In this instance, you will want to spray or rub a solution made up of alcohol and water around the base of the piece. Wait a few seconds and the printed part and the tape underneath should remove easily.
Adjust the Height of the Nozzle
If your printed pieces are so hard to remove that you need to resort to removing the tape and spraying alcohol after every print, you may just need to adjust the height of the nozzle. The filament might be taking too long to cool between leaving the nozzle and contacting the plate, so it is seeping too deeply into the pores of the tape.
Start by raising the distance between the nozzle and the build plate by .1mm for your next print. Then continue raising it by this increment until you find that your parts are easy to remove but still have enough adhesion to the bed to get the job done.
When to Remove Blue Tape from a 3D Printer Bed
If you treat your blue tape carefully, you can get several weeks of use (up to 20 prints) out of a single taping. The more care you take with placing and maintaining your tape, the longer it will work for you.
If you need to apply alcohol, tear up the tape, or the filament stops sticking to it, you will have to apply a fresh layer of tape to the build plate.
How to Remove Blue Tape from a 3D Printer Bed
Once you decide that it is the proper time to remove the tape, the process is as simple as unsticking it from the plate. If you have trouble getting it off in spots where parts were built, spray some alcohol and wait ten seconds. It should come off cleanly after that.
Once you have removed all of the tape, you should clean the build plate with alcohol so that there is no adhesive residue left behind. Once you have a clean build plate, you are ready to retape it to begin your next print!
Common QuestionsDoes blue painter's tape work on heated beds?
Because blue painter’s tape is heat resistant, it is able to withstand the heat generated by a heated 3D printing bed. Quality painters tape will not come loose from the bed or become misshapen from the heat.
PLA and PETG are the best filaments for sticking to blue tape. They seep into the tape, allowing for grip to take place with no extra adhesives applied. ABS will stick to blue tape if you add some sort of extra adhesive.
Can masking tape be used for 3D printing?While masking tape can be used for 3D printing, it is not nearly as effective. Even though a roll of masking tape is similarly priced to blue tape, the rolls are typically slimmer so it takes more tape to cover the build plate.
Additionally, masking tape does not remove cleanly like painters tape does, meaning you will have to work a lot harder to clean your build plate once you are done with a layer of masking tape.
Is investing in blue tape to improve bed adhesion worth it?YES! Blue painter’s tape is an extremely cheap way to get bed adhesion for your 3D prints.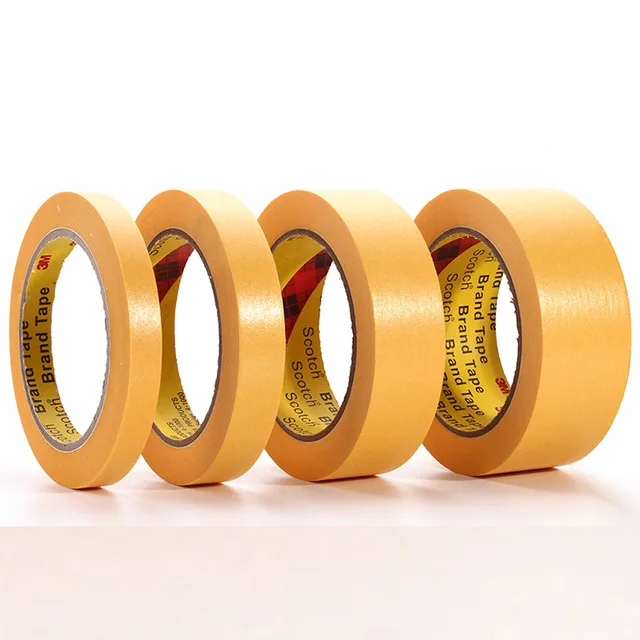 With other products, you need to worry about potentially damaging your bed adhesives, but a build plate can be covered with blue tape for less than a dollar.
Blue tape is cheap, resilient, and simple to use. If you need a simple solution to your bed adhesion problems, blue tape could be the answer you are looking for.
Shop Blue Painter's Tape
A Guide to Using Tape in 3D Printing
3D Insider is ad supported and earns money from clicks, commissions from sales, and other ways.
As advanced as 3D printing technology has become, it’s not beyond simple solutions to its inherent issues. From DIY enclosures to safety pins as nozzle-cleaning implements, everyday items have proven to be valuable in the practice of 3D printing.
One of the more useful tools in the arsenal of a 3D printing professional is adhesive tape. Granted, you can’t use just any tape for 3D printing, but you also don’t need to look beyond your standard hardware aisle. What kind of situation calls for adhesive tape and how should it be used?
Why use tape?
One of the most important steps in 3D printing is making sure that the base layer of the print sticks to the print bed. If you fail at this, you will likely end up with a print that collapses eventually, has corners that curl upward, or layers that shift out of place. Most time, the plastic filament cannot achieve this state of perfection on its own – you will have to help it with some adhesive.
Tape remains one of the more popular options for adhesive aids in print beds. Not everyone likes it – some users swear by it while others will actively avoid using it. This is a matter of personal preference and there is no definitive resolution to this debate.
To help you decide if tape is a good adhesion option for you here are its merits:
Tape is inexpensive
For less than $20, you can buy multiple rolls of tape which should be enough to tide you over for months. Although there are also other cheap options, tape is still a lot less expensive compared to specialty 3D printing surfaces like PEI or BuildTak.
Tape is easy to remove
There are two aspects to bed adhesion – it should help a print stick to the bed but still allow it to be removed with ease once printing has been finished. An adhesive that sticks too well tends to result in damaged prints, or worse, a damaged print bed. When you’re done printing, just peel off the tape from the bed. It’s a no-fuss, foolproof method.
Despite its good points, a lot of 3D printing professionals consider using tape to be more trouble than it’s worth. Compared to other adhesion options, these are some of the “pain points” of using tape:
Difficult to apply
A common alternative to tape is glue stick. Applying glue stick to a print bed is just a matter of swiping the stick several times on the bed, making sure that every centimeter of it is covered. This takes just a few seconds and does not require a lot of skill.
Applying tape is a different matter altogether. Tape has to be applied in side-by-side strips that touch each other but do not overlap. Anything less than a perfect application of tape will result in a bed that is no longer level. If you mess this up, you can end up having even worse bed adhesion problems.
For some people, the value of tape in bed adhesion is not worth the time and effort to apply it perfectly. Compared to any other bed adhesive, tape requires an exacting eye, steady hands, and a LOT of patience.
Creates rough bottom surfaces
If you use a glass print bed, one of the biggest benefits you’ve likely noticed is that prints come out with perfectly smooth bottom surfaces. This is merely an impression of the surface of the glass bed.
Layering tape on top of that glass bed effectively eliminates this advantage. Whether you use painters’ tape or masking tape, the bottom surface of your finished print will take on the fuzziness of the tape. This can be remedied with some sanding and polishing, but it still creates extra work during post-processing.
By providing a surface for the filament to latch onto, tape massively enhances the ability of the filament to stick to the print bed. Tape application is one of the go-to solutions for bed adhesion problems. It’s inexpensive, elegant, and does not rely on fancy 3D printing accessories.
The types of tape used in 3D printing
The first thing you need to know is that you can’t just use any tape you have lying around the house for your 3D printer. More likely, you will have to order some fancy tape from a specialty store. Thankfully, these tapes aren’t exactly rare.
Blue painters’ tape
Blue painters’ tape is the classic tape used in 3D printing. Designed specifically to not leave an adhesive residue after removal, this tape is appropriately used mostly when painting walls and furniture. This very same characteristic lends itself well to 3D printing.
Painters’ tape is cheap because it’s basically paper with adhesive. It’s cheap, can be bought anywhere, and is very easy to apply. There are also smoother varieties of standard painters’ tape, which would be ideal for reduced post-processing work.
Ideally, blue painters’ tape should peel off your print bed without leaving residue. The only problem is that painters’ tape is not exactly designed for high-temperature applications. If you’re printing with a heated bed, the heat may end up mobilizing some of the adhesive in the tape and transferring them to the bed.
Another drawback of painter’s tape is that it peels off a bit too easily. Thus, you’re likely to end up with a finished print that has a stubborn layer of painter’s tape at the bottom.
Kapton tape
In technical terms, Kapton tape is made of a polyimide material. It is generally used as insulation for electrical wires and circuits. With this in mind, we can expect Kapton tape to better handle heavy-duty situations.
In the field of 3D printing, the main advantage that Kapton tape brings to the table is its heat stability. Standard Kapton tape can withstand temperatures of up to 270 degrees C without its adhesive breaking down. This makes Kapton tape the ideal choice for printing in heated beds.
On the flip side, applying Kapton tape is a lot harder than painters’ tape. Kapton tape has this stubborn consistency that makes it more prone to having trapped bubbles. For this reason, we recommend buying Kapton tape that is as thick as possible. Trust us, this is going to save you a lot of headaches.
Another problem with Kapton tape is that it sticks a little too well to the print bed. Removing the finished print from the print bed is not an issue. However, when the tape gets damaged, it’s very hard for the tape strips to come off cleanly. You’re more likely to end up tearing away at the residual Kapton strips with frustration.
Kapton tape is only a little more expensive than masking tape or blue painters’ tape, so the price isn’t really an issue. You might have problems finding Kapton tape in nearby stores, though, so it’s best to just buy them online.
High-temperature polyester tape
An unconventional choice, high-temperature polyester tape combines the best characteristics of Kapton tape and blue painters’ tape. It’s easy to apply, withstands temperatures of up to 200 C (more than enough for 3D printing), and does not flake off easily upon removal.
Just like Kapton tape, the polyester tape is more commonly used to insulate electrical connections. A suitably high-performance material, polyester tape has excellent tear resistance and has an aggressive adhesive.
The only downside of polyester tape is that it’s significantly more expensive than both blue painters’ tape and Kapton tape. However, a case can be made that the durability of polyester tape makes it the more practical option over the long run. Stronger than Kapton tape, a layer of polyester tape can conceivably be used several more times before it has to be replaced.
Tips on using 3D printing tape
One of the main reasons why a lot of people don’t like using tape on print beds is because of how much work it entails. Let us tell you now that it is hard and that you’re likely to mess up the first few times. Here are some tips to help you get ideal results and lower the learning curve somehow.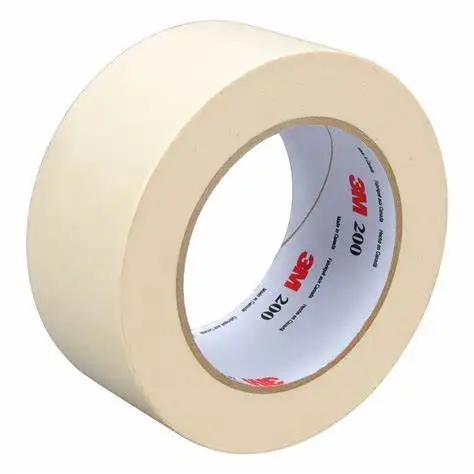
1. Take your time
Laying down the tape so that they neither overlap nor have any gaps can be one of the more frustrating parts of using tape for 3D printing. There’s really no secret to this but to take things slowly. With some practice, this whole process should get easier eventually.
2. Tape diagonally
As sticky as tape is, it can still come off from the print bed. This commonly happens when the print warps in the same direction as the tape, effectively pulling it off. To avoid this from happening, it is good practice to lay down the strips of tape diagonally. Start from one corner of the print bed to the opposite corner and lay down the other strips accordingly.
3. Make sure the bed is clean
Oil and dirt are the mortal enemies of any adhesive. Before laying down tape on your print bed, make sure to wipe it down with some water and let it dry. If there’s some leftover adhesive in your bed, you may need to wipe it off with some acetone.
4.
 Avoid touching the top surface of the tape
Accordingly, leaving any fingerprints on top of the tape will cancel out any of its positive effects on bed adhesion. If you need to wear gloves while laying down the tape, do so. Keep this tip in mind whenever you handle the print bed, especially if you plan on reusing that layer of tape for several projects.
5. Use a scraper to remove bubbles
Ensuring that the layer of tape has no bubbles is one of the more challenging aspects of laying down tape. If you’re doing this for the first time, then it’s worth assuming that it’s unavoidable. In case this happens, make sure to have a scraper on hand.
Run the scraper along each strip of the tape as you lay it down to check if there are any trapped air bubbles. With a bit of force, you should be able to push out the air bubbles. Just don’t be too forceful with it, lest you end up tearing the tape layer you have worked so hard for.
6. Aim for perfection
Getting the layer of tape is hard and takes a lot of practice but getting it right the first time is well worth the effort. Does your tape layer have an air bubble that cannot be removed? Did you end up with several overlapping strips of tape?
It is often better to rip off the erring strips and start over than to push through with a less-than-perfect application. The alternative would be to print with a tape layer that could end up ruining your print – which will have you starting over regardless, only you’ve wasted more time and your 3D printing filament.
Final thoughts
Tape is just one of those household items that are surprisingly useful in 3D printing. More specifically, tape is one of the more effective to one of the most pressing problems in 3D printing – bed adhesion.
To be clear, not everyone who uses 3D printers favors the use of tapes for bed adhesion. They do take a lot of work to use, and there are certainly more convenient options like glue stick or hair spray. However, tape offers enough advantages for it to be worth considering. If you haven’t used tape before, then it would be a great idea to at least give it a try.
Warning; 3D printers should never be left unattended. They can pose a firesafety hazard.
From classics to mysticism. My print surface test.
Subjects:
1. Blue MARALSTSCH
2. Capton tape
3. film Lomond Self -adgeSive Inkjet Film 1708411
4. Sitall glass
9000 5. Catalyst - beer - beer 'Velkopopovicky KozetBlue masking tape
Great for printing small PLA parts without heating the bed. With an increase in the area of \u200b\u200bthe part, the edges rise along with the adhesive tape.
Kapton tape
I glue fresh tape, smear 'Light Goat' beer on a table warmed up to 110 degrees.
The bottom surface of the part (ABS) is smooth, except for the corners, which were unpleasantly raised. It does not adhere very well to fresh beer and the beer itself remains a brown film on the bottom surface of the part.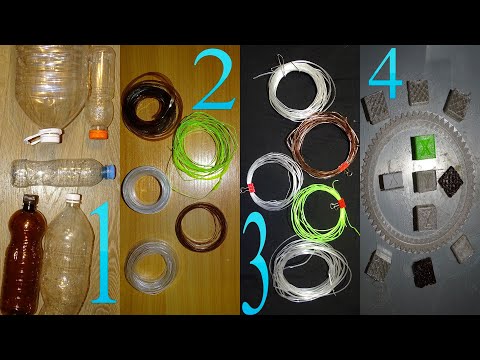 Beer is easily washed off with water. The part separates well from the table after cooling, but it cannot be left overnight. The plastic begins to pull the tape and air bubbles form under the tape.
Such a surface after a few days of printing
Left the part overnight and the kapton wrinkled.
The bottom surface is glossy, but bubble holes remain
Lomond film
I looked at this film for a long time, but the moment came when it was time to replace the Kapton and I decided to experiment. I cut the film into two equal sheets and glued one onto the washed surface of borosilicate glass.
I completely forgot that the top layer of the film must be thoroughly washed off with water. At first, the ABS filament did not want to stick to the surface. After several calibrations of the nozzle relative to the table, the print still went..jpg) But the result did not satisfy me at all - the corners of the part were raised.
But the result did not satisfy me at all - the corners of the part were raised.
After the first print, there are air gaps under the film along the contour of the part.
I rubbed the surface of the film with my finger and remembered that the top layer needed to be washed off, which I did.
Sweat this bottom surface is obtained from ABS parts at Lomond. Minus one - it is very difficult to tear off the detail from the film.
After a few days of printing, air bubbles begin to increase and appear on the underside of the part. But this film is much denser and stronger than Kapton tape, so you can print much more before the appearance of obscene-sized bubbles.
Bubbles under the film.
Sitall glass
Let's move on to the mystical-cosmic material. So far, unexplored material that few people held in their hands.
Sitalls are crystalline materials obtained by introducing catalysts into molten glass, as a result of which crystallization centers appear in the volume of the material, on which crystals of the main phase grow. The term "sitalls" was proposed by the professor of Moscow Chemical Technology Institute. DI. Mendeleeva I.I. Kitaygorodsky and comes from the words "glass" and "crystal" . For the first time glass-ceramics were made in the 50s. 20th century Materials similar to sitalls are called pyroceram, devitroceram, glassceram abroad. Glass-ceramics have high strength, hardness, wear resistance, low thermal expansion , chemical and thermal resistance, gas and moisture impermeability.
Packaging
Wipe thoroughly with 646 Thinner. Reconfigured the dimension along the Z axis. Started printing the gear from the Prusa i3 Rework kit. ABS 265 degrees, table 116 degrees.
The result disappointed me.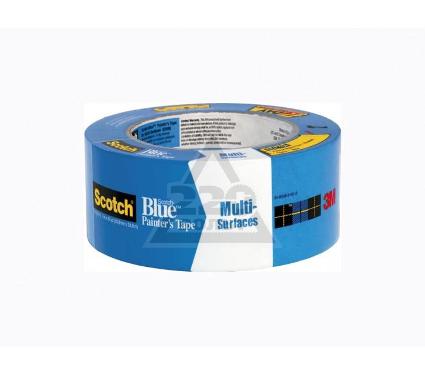 At 76 degrees on the table, the part is removed by hand, as if it had just been placed on glass.
Added 2 degrees to the table.
Brim cannot be printed. At a table temperature of 85 degrees, the part can be removed from the glass.
Now I wonder how Brim works. I'm printing an extruder part from the Prusa i3 Rework kit. If Brim will hold parts with a large bottom area, then this will be ideal, but so far I have not noticed any advantages in adhesion.
Table 118 degrees.
Looks like Kapton without beer so far.
Table 122 degrees. Model cal.stl from the Mendel90 project. I lowered the nozzle along Z by 0.1 mm.
Additional bubbles have appeared on the bottom surface of the part.
Tried to remove underprinted part from hot bed (119 degrees). Came off very easily.
I wiped the glass with alcohol - no effect.
Since the effect is like that of Kapton without beer, I decided to smear it with beer. The temperature of the table is 118 degrees.
This result is already acceptable. It shoots great.
A little tack on a large part, just like beer should be.
My findings
Blue tape. Great for small PLA parts. Does not require table heating.
Kapton tape. Good for medium sized ABS and PLA parts. It is obligatory to heat the table and apply a layer of beer. Brim is required. If you print infrequently, then enough for a long time.
Lomond film 1708411. PLA did not print with plastic. Well suited for large-sized ABS plastic parts, until the moment comes to remove the part, it is very difficult to tear off (you can hit the part sideways). Brim (Brim) is not needed - gears without Brim are great. Dyuzhit longer kapton. Recommended for perfectionists.
Sitall glass. Printed with ABS only. Brim is required. The bottom part is glossy. On clean glass, the edges bend like on Kapton without beer. Be sure to smear with beer and get the 'eternal' kapton. The part can be easily removed already at 80 degrees on the table. Ideal for those who want to automate the process of removing a part from the table using a manipulator or improvised men :)
everything you need to know
Many 3D printer owners experience parts coming off the table during 3D printing. Let's take a look at the causes and solutions.
What is adhesion?
The very concept of "adhesion" means the adhesion of surfaces of dissimilar bodies. In 3D printing, platform adhesion is the ability of the plastic that a part is made of to adhere to the surface of the stage during printing.
If the adhesion is insufficient, then the parts to be produced may be deformed or even detached from the table. During 3D printing, the part must be firmly attached to the platform, and after completion, it should be easy to remove. Filament manufacturers typically recommend adhesives for their filaments, and 3D printer manufacturers offer worktables in aluminium, glass, stainless steel, or even with specialty coatings. All this helps the plastics stick better during printing, but there are no working surfaces that are equally well suited for all types of plastics.
Also, do not forget about thermal expansion, which causes a change in the dimensions of manufactured parts at different temperatures. The difference in temperature between the bottom and top of a part can cause the edges of the part to peel off during 3D printing. This mainly applies to materials such as ABS, which require a heated worktable to work with. When printing with these materials, the layers need to cool down a bit to be able to build a 3D object at all, but not so much as to cause peeling at the edges.
In this article, we will look at what affects adhesion and how to solve many problems in terms of adhesion of products to work surfaces.
3D Printer Enclosed Chamber
For high heat shrink materials, the best option is to use 3D printers with an enclosed chamber to keep out drafts and retain heat. Many printers are equipped with an active chamber heater that maintains the desired temperature and does not allow the parts to cool. A uniform background temperature during 3D printing reduces warping and ensures better adhesion.
Owners of open printers have to come up with various devices (for example, boxes) that cover the 3D printer to keep heat, or build heat-retaining walls around the printed model, which increases printing time and filament consumption.
First coat adhesion
The first thing to look at is first coat adhesion. This is one of the most common problems faced by almost all printers. If the first layer is laid unevenly, then the percentage of rejects for the rest of the part increases very much, so it is very important to solve the issue of adhesion of the first layer before 3D printing.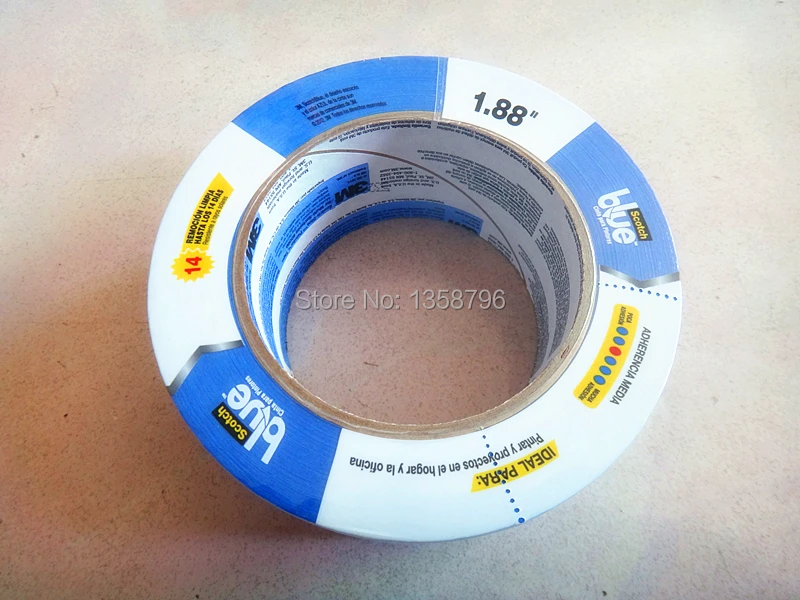 In most cases, the problem is solved by calibrating the work table and adjusting the distance between the nozzle and the work surface.
It is important to correctly set the distance between the nozzle and the stage surface
Brim and Raft methods table. Brim or Raft increase the contact surface of the plastic with the work surface around the lower layers and thereby increase traction.
Underlays or Rafts consist of several layers and are horizontal grids of filament located under the model. The raft is used as a base for the first layers of the product and is designed to increase the level of adhesion. In addition, the raft helps to level the surface of the table: if there are irregularities on the surface, they are leveled to a certain extent by the substrate, and the model is printed already on a flat base. Another advantage of rafting is that it reduces the chance of problems due to too much or too little gap between the nozzle and the table when laying the first layer.
Brim is used to stabilize small patterns or "islands" (separated areas of the printed product). Brims increase the contact area and help the model stay on the table if it comes into contact with the surface in small areas.
Stage temperature and adhesion promoter
After calibrating the platform and adjusting the gap between the nozzle and the stage surface, let's move on to the next question. The next reasons for poor adhesion may be the wrong stage temperature (if the 3D printer has a heating option) and the wrong selection of adhesion promoters for a particular filament.
Working stage temperature selection
One of the common causes of poor adhesion is the wrong stage temperature selection for a particular material. When the molten filament is applied to the table and then cools, deformation occurs. If the temperature of the stage is incorrectly selected, the outer edges of the printed product are compressed, and we get warpage: the edge of the product comes off, clings to the nozzle, and the product completely comes off the platform.
Usually, 3D printing filament manufacturers list the recommended heating temperature for the stage on their website or boxes. For the most common materials, you can use average values.
Sample worktable temperatures for some materials:
- PLA: 60°C
- ABS: 100-110°C
- PETG: 85°C
- Nylon: 100°C (depending on material composition)
- Polycarbonate: 110°C (the warmer the better)
Worktable temperatures for each plastic manufacturer may vary. You can choose the optimal temperature only empirically.
The table below shows the recommended temperatures for 3D printing with REC 3D plastics:
| PLA | ABS | Relax (PETG) | TPU D70 | PP+ | Eternal (ASA) | RUBBER (SEBS) | Easy Flex (TPU A95) | Flex (TPEE) | PVA |
| 0-60°C | 90-110°C | 20-60°C | 20-60°C | 20-40°C | 80-110°C | 90-110°C | 30-60°C | 60-80°C | 50°C |
Scroll →
| HIPS | Cast (PMMA) | PSU | PEEK | Friction (PA12+GF12) | Biocide PETG | rPETG | FormaX | GF MAX | UltraX | Clotho ABS |
| 90 110°C | 90-110°C | 140-160°C | 130-145°C | 100-110°C | 60-80°C | 60-80°C | 95-110°C | 90°C | 120-135°C | 110-115°C |
Adhesion agents
Additional agents are often used to improve adhesion and reduce the risk of damage to the glass surface of the worktable, such as 3D printing varnish or glue, PVA glue, stationery glue stick, dissolved ABS plastic (the so-called "ABS juice"), blue tape, etc. One tool for printing all types of plastics will not be enough. In our article, we will not consider such folk remedies as beer or sugar syrup, but will focus on more traditional methods.
Primary adhesives:
Varnish or glue for 3 D- printing
Hairspray times are long gone, and now almost no one uses them due to low efficiency. More effective adhesives for 3D printing have come to replace.
Typically, 3D printing varnishes and adhesives are formulated to take into account the properties of various filaments and allow the first layer of the printed model to be reliably adhered to the desktop. Simply put, these are universal tools suitable for working with multiple types of filaments.
There are already quite a few manufacturers of 3D printing varnishes and adhesives on the market in various volumes and for any budget. It's not worth saving - one bottle will be enough for several months of printing, and you will save your nerves and time spent on reprinting damaged parts.
Easy to use: spray varnish or glue on the platform and spread it evenly over the surface with a clean, soft cloth.
ABS - juice
Composition for those who like to save money or who do not have glue or varnish on hand. It is made simply: finely chopped ABS rod or the remnants of a previous printing with ABS plastic are immersed in acetone and after a few hours a thick solution is obtained that can be applied with a brush even on a cold platform.
This method is very reliable as an additional adhesive, but when 3D printed, the acetone evaporates and creates an unpleasant odor.
PVA glue , stationery glue stick
PVA glue is applied to the work surface with a brush and rubbed until a uniform thin layer is obtained. As a rule, when hardening, the glue becomes transparent. After drying, you can start 3D printing. The method is not bad, but the reliability of such a method is doubtful.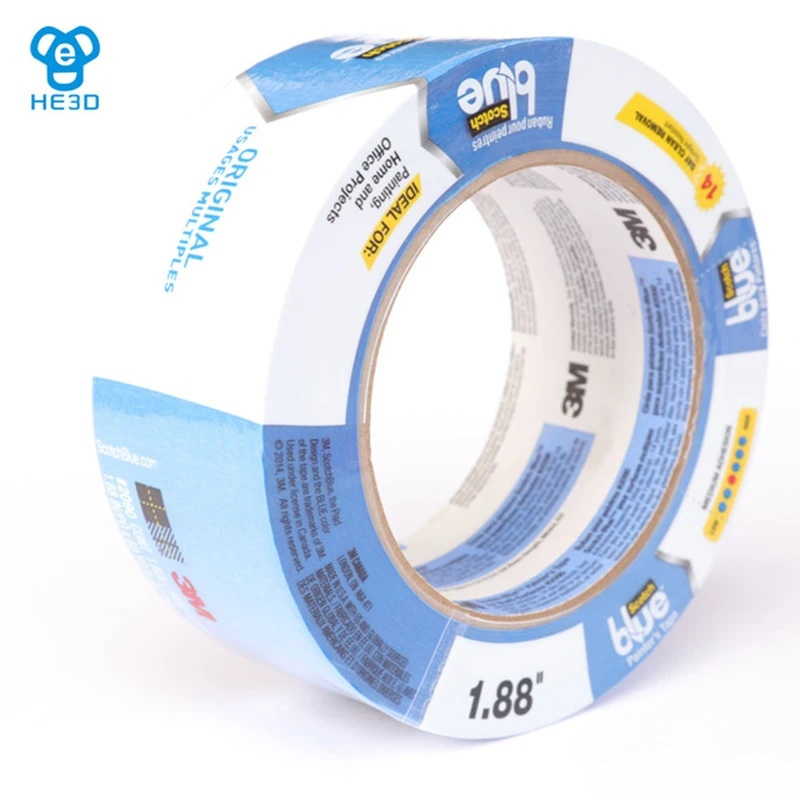
Stationery glue stick is mainly used when there is nothing else at hand. The most popular option is Kalyaka-Malyaka glue. The glue is applied in one layer, after the platform cools down, the part is easily separated, and the glue itself is easily washed off the glass and from the printed part.
Kapton film, blue masking tape and film Lomond
Masking tape is more suitable for 3D printers without heated platform. The adhesive tape is carefully glued to the entire area of the table and allows you to print small details without heating the table. This option is especially suitable when working with PLA plastic, however, with an increase in the area of \u200b\u200bproducts, the edges of the parts can come off along with the adhesive tape, so the relevance of this method is limited. More often, Kapton tape or Lomond film is used.
On Kapton tape, the lower surface (the sole of the product) is very smooth, the parts are well separated after cooling, but you can’t leave the product on a cooled table, as the plastic pulls the tape together and air bubbles form under it.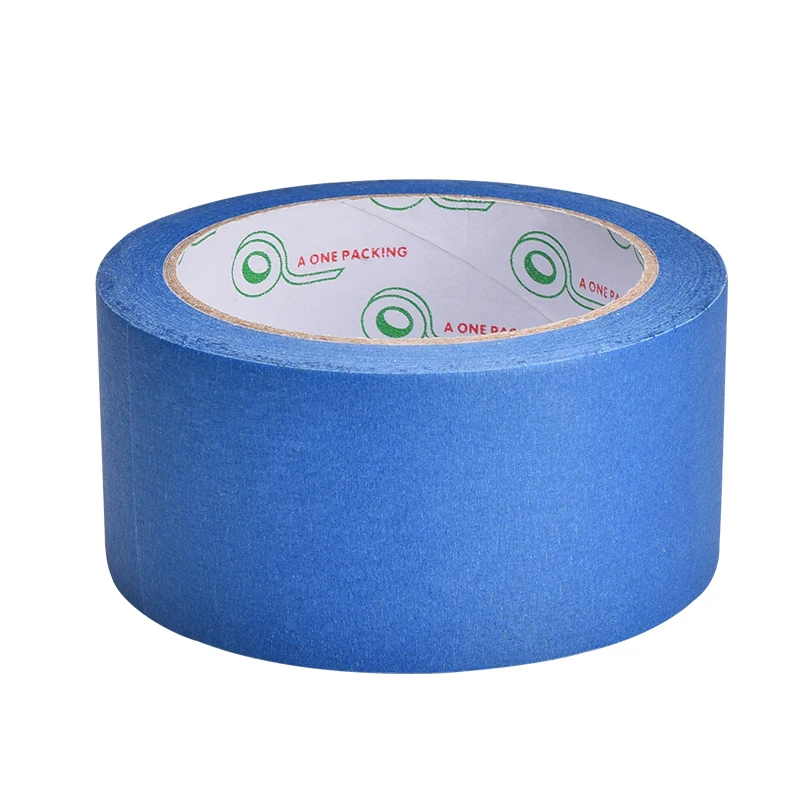 When 3D printing on Kapton tape, it is necessary to heat the platform and additionally smear the adhesive tape with glue. Suitable for 3D printing of medium-sized products.
Lomond film was popular until various adhesive formulations appeared. After gluing, the top layer on the film itself must be washed off for better adhesion. Details after printing on such a film are quite difficult to tear off. Over time, bubbles also form under the film, so the film must be changed regularly. Suitable for 3D printing large items.
Additional points to keep in mind:
PLA- plastic is the most unpretentious polymer. For stable printing with polylactide, it is not necessary to treat the surface of the table with additional adhesives, a clean glass surface is sufficient. A prerequisite is that the platform is heated to 60°C. If the platform is not heated, then it is better to print using adhesive agents - varnish, 3D printing glue or blue tape for small parts.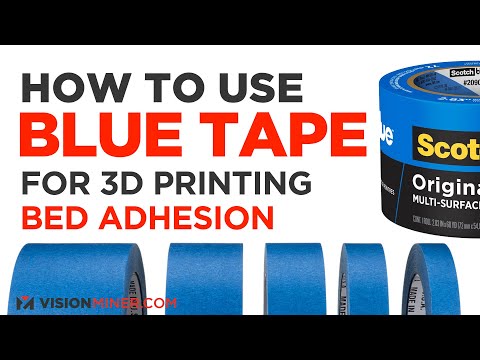
PLA also loves airflow, so keep the fans on full.
ABS- plastic shrinks a lot and needs help to better adhere to the surface. The main types of additional tools are varnish or glue for 3D printing, ABS glue, stationery glue stick, PVA glue.
When working with ABS, the platform must be heated to 100-110°C. It is advisable to use 3D printers with closed cameras that support high background temperatures. When 3D printing on open printers, it is necessary to use a heat-retaining cocoon around the model. Many slicers already offer this feature. Blowing of products made of ABS plastic is highly undesirable, as cracking of parts in layers and detachment from the working surface due to shrinkage can occur.
PETG is a very easy to work material that does not require high temperatures or fine print settings. Plastic has excellent adhesive properties and adheres very strongly to clean surfaces. On the other hand, high adhesion can lead to separation of pieces from glass tables when products are separated, so it is advisable to apply separating layers on the work surface - the same glue or varnish for 3D printing.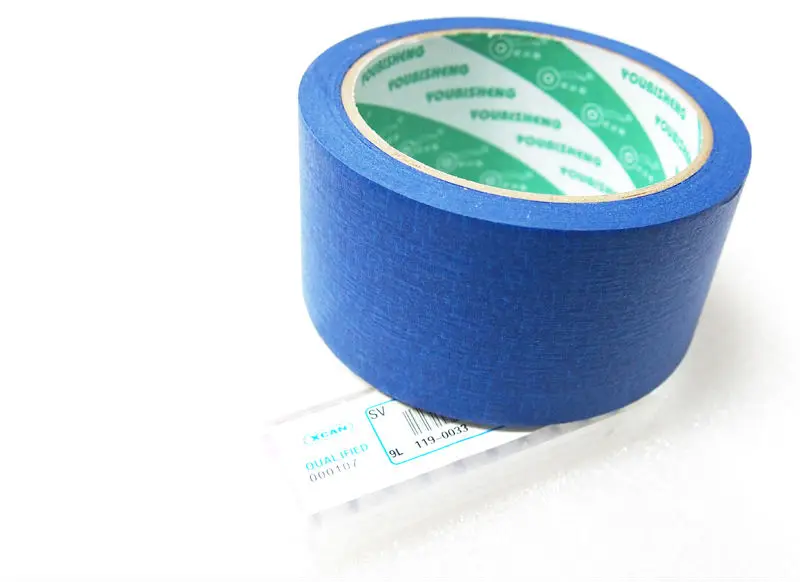 This will help both separate products and prevent damage to the glass.
Flex has high adhesive properties, bonding well not only between coats, but also to work surfaces. Again, it is advisable to use 3D printing varnish or glue to avoid damaging the glass. Film coatings are not recommended.
In the case of composite adhesive materials, the choice of adhesive agents is mainly determined by the type of material serving as the base. Usually recommendations for preparing for 3D printing with composites can be found on the manufacturer's website. If not, please contact technical support for advice.
For example, the FormaX composite from the X-line range is based on ABS plastic, but the properties of the composite material differ from pure ABS due to the presence of carbon fiber filler. Formax is not characterized by cracking in layers, but the composite requires the use of additional adhesive agents, so the manufacturer recommends using varnish or glue for 3D printing
Material storage and drying
The effect of moisture on filaments can be both cosmetic and functional.