3D printing cabinets
9 Amazing DIY 3D Printer Enclosure Ideas – Clever Creations
Image: Jure Korber
Our site is reader-supported. When you buy via the affiliate links on this site, we will receive a commission at no cost to you. All opinions remain our own. Learn more
Open-frame 3D printers, like the Ender 3, have become a common sight amongst consumer printers. Open frames help to keep the manufacturing costs low but make it difficult to 3D print with high-temperature filaments such as ABS and Nylon.
A 3D printer enclosure is an ideal solution for this issue. It increases the safety of your printer and isolates it from the external environment. 3D printer enclosures can be bought off-the-shelf, but there are also plenty of DIY enclosures made of cardboard, plastic, or metal.
Let’s take a look at some of the best DIY 3D printer enclosures that you can build for your printer that do not cost a fortune!
Why Use a 3D Printer Enclosure?
Open-frame hobbyist 3D printers offer limited material compatibility and safety. They expose components to dust and dirt and have no air-filtration system. There is also a risk of pets and children interfering with the 3D printing process or touching the hot elements of the printer.
An enclosure minimizes these drawbacks by isolating the 3D printer in an enclosed space. It helps to maintain a constant temperature which comes in handy when 3D printing with high-temperature filaments like ABS and Nylon. It further aids in noise reduction, making 3D printing at home or in offices more convenient.
You can also add an air filtration system to the enclosure to filter out any 3D printer fumes, thus increasing the safety of your 3D printing area. Not to mention, enclosures also make 3D printers more aesthetically pleasing and easier to integrate into your workspace.
To summarize, a 3D printer enclosure increases the material compatibility, print quality, and usability of your printer.
Which Enclosure to Get?
There are a few options when it comes to 3D printer enclosures.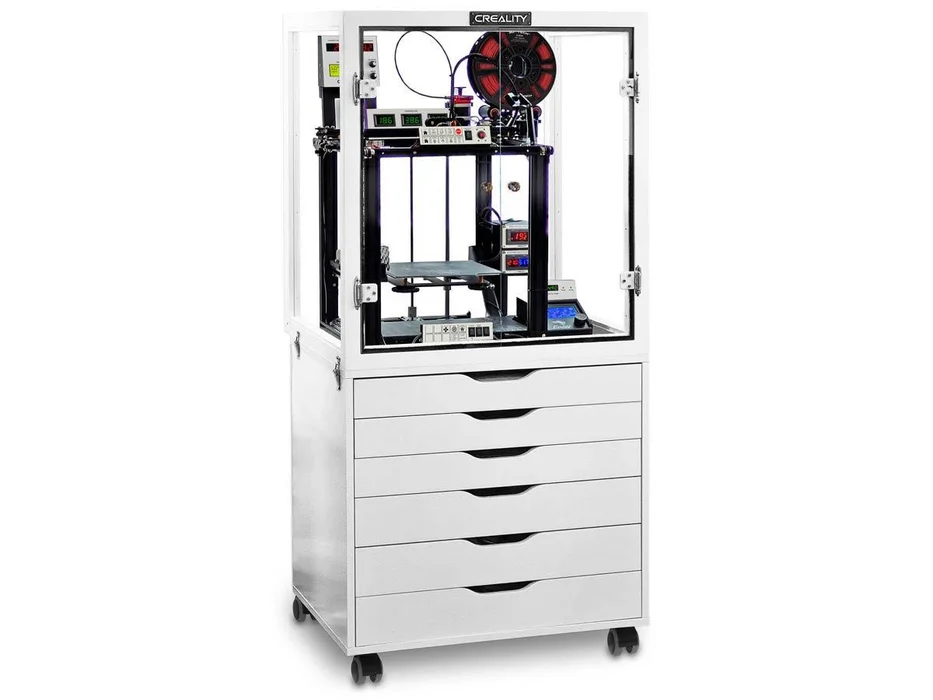 You can buy an enclosure off-the-shelf or make your own from scratch.
DIY 3D printer enclosures can be cheap if you want them to be, but they do require a bit of effort and time to put together. The best enclosures are made from materials that are both sturdy and have good thermal insulation properties.
If you’re looking for an enclosure that is easy to set up and does not require any DIY skills, then we suggest buying an off-the-shelf 3D printer enclosure. These are typically made out of plastic or aluminum and come with all the necessary fixtures and fittings.
Another alternative is to simply buy an enclosed 3D printer, but those come at a significantly higher cost.
Recommended:
The 9 Best Enclosed 3D Printers
Whichever direction you choose to go in, make sure to measure if you have enough space on your 3D printer table or workbench.
If you want a 3D printer enclosure that is fully customized to your 3D printer model and specific needs, then you will have to make your own. Now let’s look at some cheap and creative DIY 3D printing enclosures!
Cheap 3D Printer Enclosure Ideas
DIY Enclosures
IKEA LACK 3D Printer Enclosure
Image: Mikolas Zuza via Prusa3D
The IKEA Lack enclosure is a recognizable and robust DIY 3D printer enclosure. It is cheap, easy to build and customize, and is modular enough to accommodate any future changes in the enclosure design.
This enclosure uses a couple of IKEA Lack tables stacked on top of one another. You can use these tables as per your preferences. Usually, though, the top one is used as a 3D printer bay, with the bottom one for storing tools. The design allows you to move your power supply outside and protects the electronics from high temperatures.
There are a variety of designs available for free with detailed guides, and you can build them within a day. The IKEA Lack table enclosure is great for small to medium-sized 3D printers like the Prusa i3 MK3S+ and Creality Ender 3 as it is. And with some 3D printed leg extensions, you can even fit taller printers like the Creality CR-10 Smart Pro.
If you want to make things as easy as possible, you can even buy the required plexiglass panels as a pre-made kit.
DIYE Pack of 5 Plexiglass V1 1/8 Acrylic Sheet for IKEA Lack 3D...
Check PriceAluminum Extrusion Enclosure
Image: Namsted via Imgur
Aluminum extrusions are a great and easy way of building a structural frame. These are lightweight, strong, and easy to machine, making them ideal for building a 3D printer enclosure.
This aluminum extrusion enclosure gives better stability and durability than the IKEA Lack design. The maker has used custom-sized aluminum extrusions to accommodate a Prusa i3 MK3S+ 3D printer in the middle.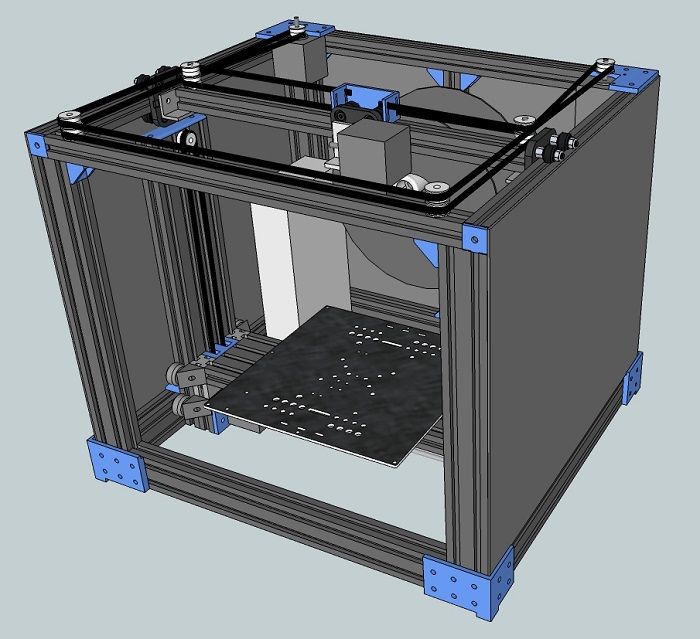 The top is used for filament spools, and you can store your tools in the bottom section.
The enclosure is covered up with acrylic panels on all four sides, giving the print chamber good visibility. You can adjust the height of all four feet to get a leveled horizontal plane.
The project is not for beginners, as you will need to have some experience with machining and building things. But, if you’re up for it, it will prove to be an excellent learning project for you. An aluminum enclosure is very customizable, lasts longer, and acts as a perfect house for your 3D printer.
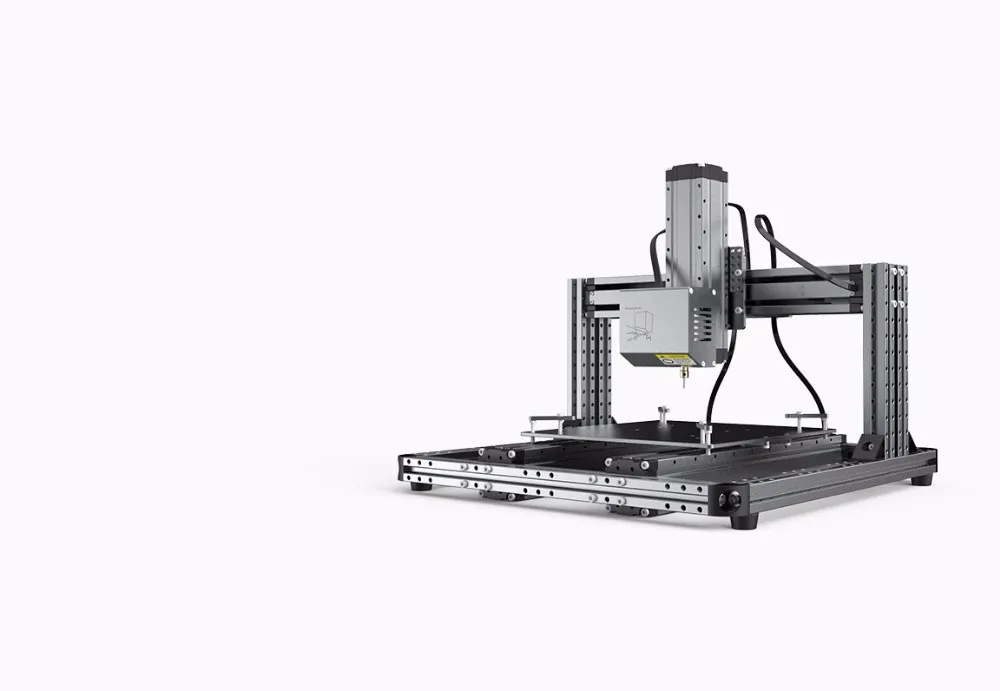
DIY Smart 3D Printer Enclosure
Image: Jure Korber
This smart 3D printer enclosure comes with a suite of electronics and sensors. It has a 3.5 inch LCD screen, a smoke detector, door sensors, air filtration, temperature, humidity sensor, and controllable LED lighting.
The 3D printer enclosure is divided into two compartments. The bottom one is explicitly designed to fit a Prusa printer and the top one to store eight spools of 1 kg filaments at a time. The enclosure has a custom PCB board that lets you easily wire up and control its various features.
You can get the STL files of certain 3D printed parts for free on Thingiverse. But if you want a detailed guide, along with BOM, build photos, and other aids, you will have to pay a fee to the designer. If you have the time and money, a smart 3D printer enclosure like this is an excellent DIY 3D printer enclosure for most popular open-frame 3D printers
Sound-Insulated Enclosure
Image: Spare Time Shop via YouTube
Open-frame 3D printers can get noisy, and the constant buzzing and the whirring of stepper motors can get irritating after a while. This issue is most relevant if you 3D print in a living space or an office environment. This is where this sound-insulated enclosure steps in.
As far as traditional enclosures go, they reduce noise up to a certain extent; yet, a sheet of acrylic can only do so much in terms of noise reduction.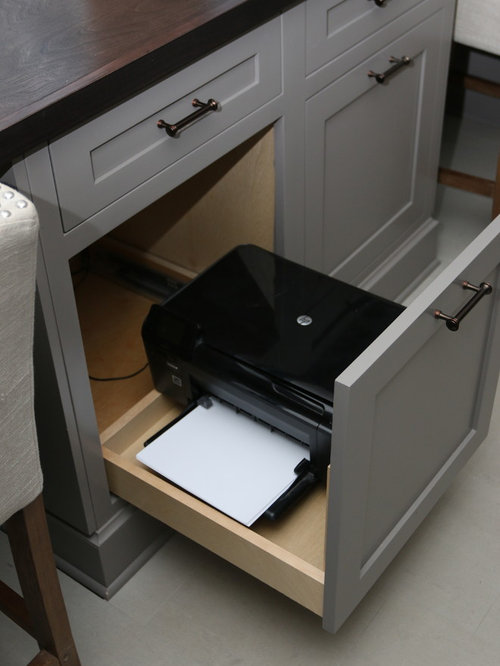 This sound-insulated enclosure, on the other hand, is made of wood, which has an acoustic foam lining to absorb the 3D printer noises.
This enclosure is big enough to accommodate a Creality CR-10 with filament spool and has dual doors and a transparent window to easily view your 3D printer. You can place the electronics of the CR-10 on the outside of the box, letting you control your 3D printer without opening the build chamber.
The enclosure is relatively easy to build and reduces noise considerably. The sound-insulated enclosure is a great option to get rid of any noises and 3D print in your living areas.
IKEA Pax 3D Printer Enclosure
Image: DollaSign via Reddit
This IKEA Pax enclosure is a wardrobe for your 3D printers. It is cost-effective and saves a lot of floor space when you want to enclose many 3D printers. Compared to the Lack enclosure from above, it offers similar functionality, albeit in a smaller footprint and relatively budget pricing.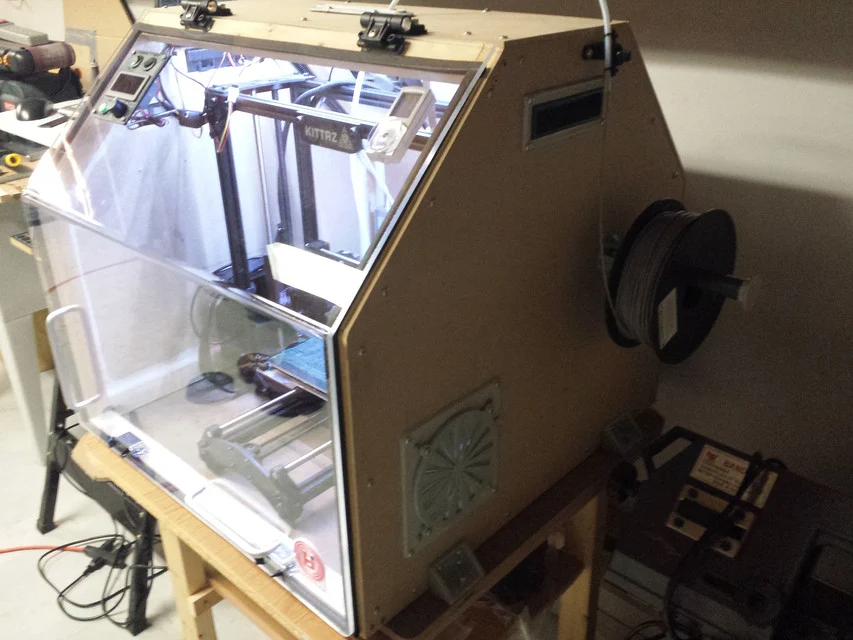
You can stack up to three 3D printers in the PAX enclosure and still have some room left for filament spools, tools, and other electronics. All power supplies can sit outside the enclosure, thus protecting them from high temperatures. To add to its functionality, you can include some Neopixel LED lights.
Because the shelves are modular, you can easily move them around to fit 3D printers of varying heights. The major drawback of the PAX design, however, is its lack of transparent panels. Other than that, the IKEA PAX enclosure is an easy, quick and cheap solution for enclosing many 3D printers at once.
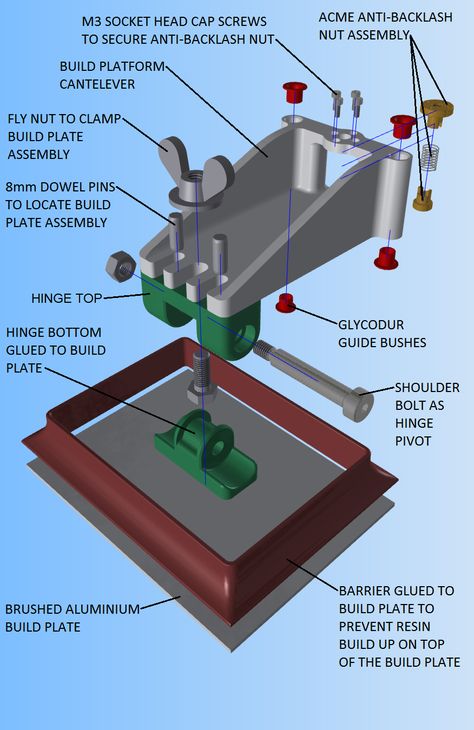
Resin 3D Printer Enclosure
Image: majorbrogains via Reddit
Even though resin 3D printers come with an enclosure, you need a separate space to store the printers, resin bottles, and prints like your 3D printed miniatures. This enclosure is an IKEA BRIMNES cabinet with ample space to store and display all your resin 3D printing equipment and minis.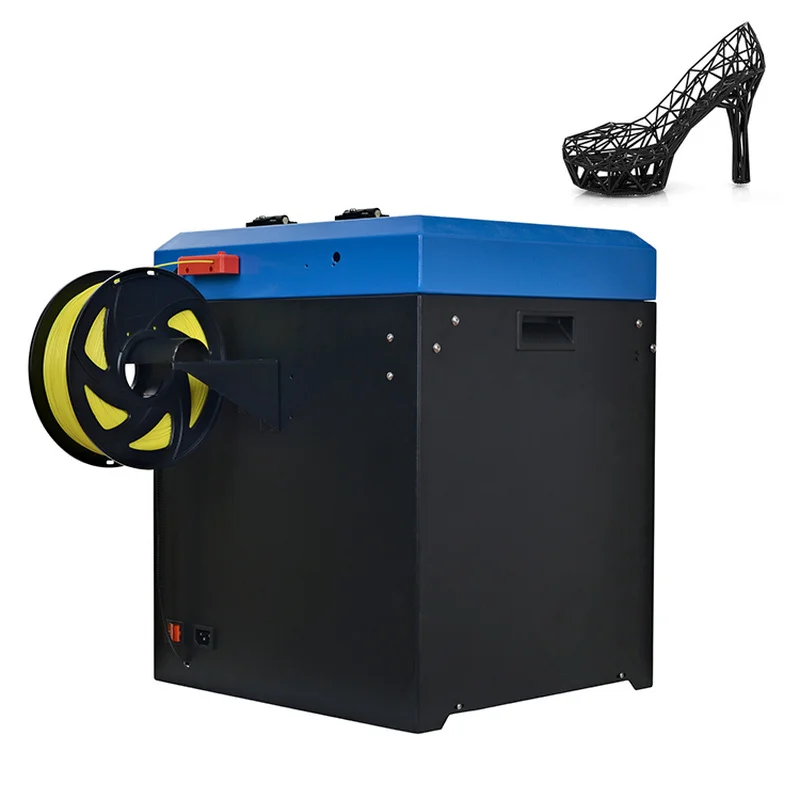
The entire cabinet is divided vertically into two separate parts, giving you the ability to efficiently sort out your goodies. You can store the 3D printer itself in one half, while the other half can take in a washing station. And with a bit of DIY, you can vary the shelves’ heights and customize them to perfectly fit your minis’ collection, resin bottles, and other resin 3D printer accessories.
There is air ventilation within the enclosure with the exhaust on the top. It helps to throw out harmful 3D printer fumes and keep away the foul smell. You have enough space to accommodate popular resin printers like the Elegoo Saturn S and Phrozen Sonic Mighty 4K.
Considering the price, ease of use, and accessibility, using an IKEA BRIMNES as DIY 3D printer enclosure is an excellent solution for clearing up your resin workplace.
Repurposed Dishwasher Enclosure
Image: antialiasedpixel via Reddit
Repurposing things is an excellent avenue in the DIY area, and what better way than to use an old dishwasher as a 3D printer enclosure.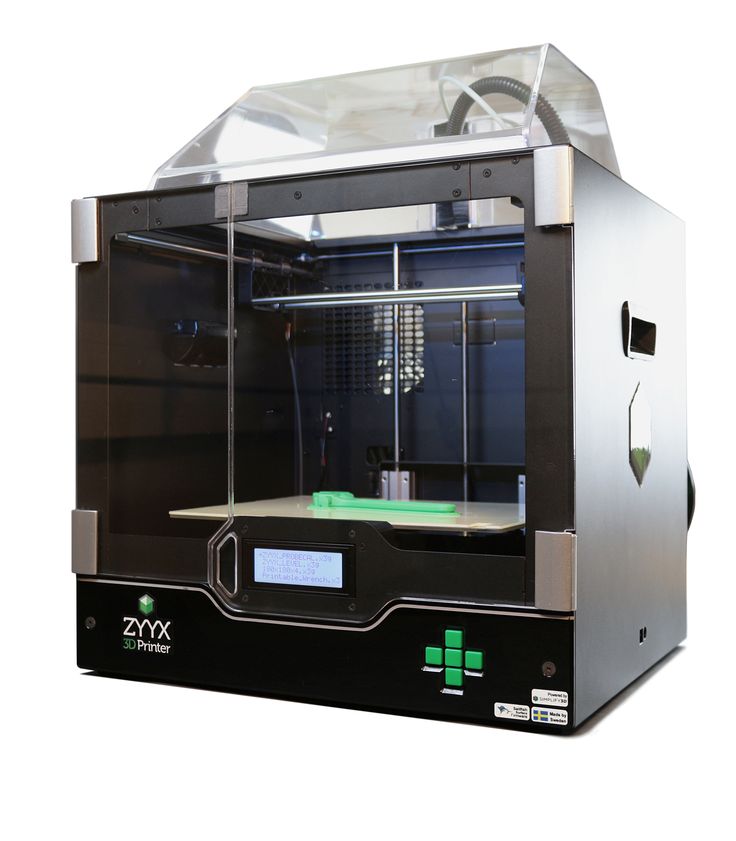 This one easily fits an Prusa i3 3D printer and still has room at the top to mount a filament spool.
The Prusa’s footprint is 16.5×16.5×15 inches, while the area within the dishwasher is 21x23x25 inches. This dishwasher has enough room to fit in the Creality Ender 3 (Pro/V2) and others of similar sizes. And the spare room that’s left can be utilized to fit in some LEDs, a Raspberry Pi, and a webcam for remote monitoring and control of the 3D printer.
The main disadvantage is that there is not much room for further customization. You will need to change the dish washer to accommodate any future updates to the 3D printer, not very practical!
Otherwise, the enclosure is one of the best ways to repurpose an old machine into something useful and save some money.
Ready-to-Buy Enclosures
Official Creality Enclosure
The official Creality enclosure is one of the best ready-to-use designs to cover up your 3D printer. While it is designed for Creality 3D printers, you should have no issues using it for other 3D printers of similar sizes.
The enclosure uses aluminum rods for its structural strength and an aluminum-lined fabric to enclose the 3D printer on all its sides. The internal aluminum lining is made up of flame-retardant material.
The Creality enclosure does a good job at keeping hot air inside and maintains stable temperatures well. It also comes with a single window on the front of the box to view your 3D prints in progress.
With a little bit of wiring, you can move out the LCD controller and power supply to the outside of the enclosure to work with even higher temperatures. For just under $70.00, the Creality’s Enclosure is an effective solution to print with warping filaments while keeping fumes in and dust out.
Creality Ender Enclosure for 3D Printer, Fireproof Dustproof 3D.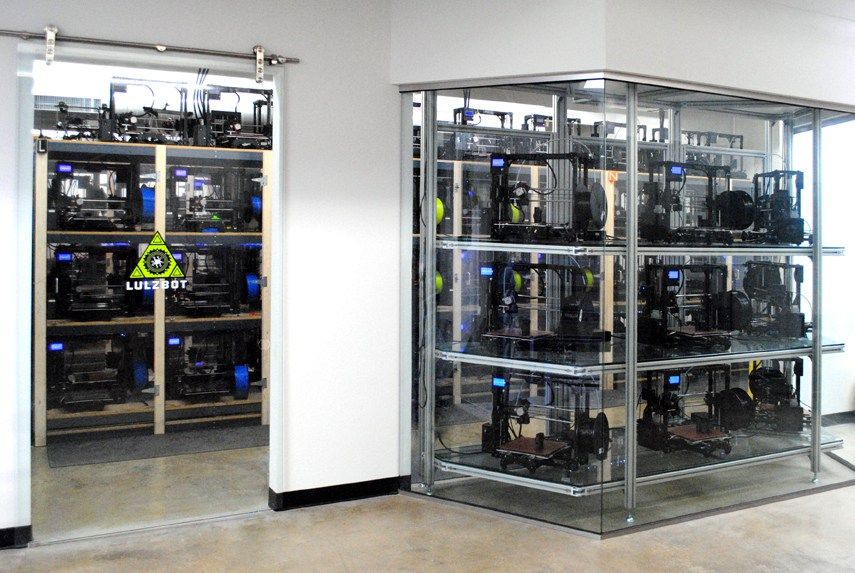 ..
..
Photography Lightbox
Image: Make360
While a photo lightbox is not designed for 3D printers, it does a great job as a 3D printer enclosure. It doubles as both a photo studio tent and an enclosure and gives you great lighting for pictures of your 3D prints.
This lightbox has two adjustable LED bars that cumulatively house 126 LED lights giving you a bright and well-lit inside area. It also gives you four PVC backgrounds for shooting various scenes and highlighting different shades of your 3D prints. And you can adjust the front cover to either fully cover up the 3D printer, or keep it open for ventilation.
It is a decent step up over the Creality enclosure and aids in photographing and taking videos of your 3D prints. The enclosure is easy to assemble and use, while also being convenient to store when necessary.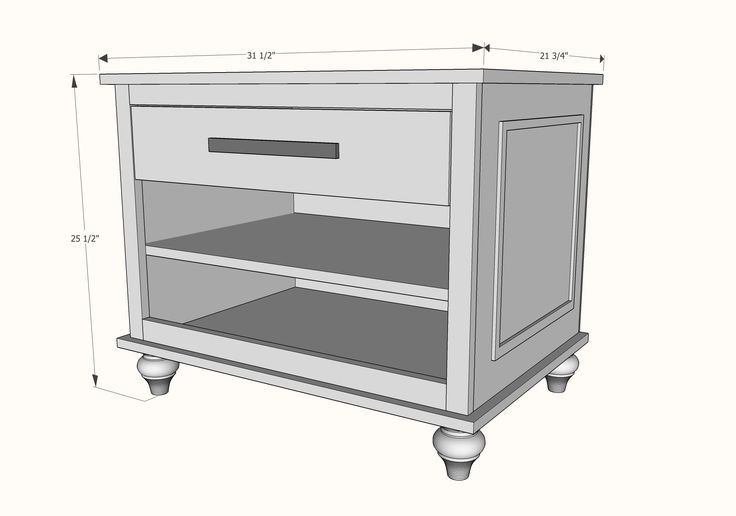
This enclosure is an ideal choice for enclosing your 3D printer and still having the flexibility to use it as a photo lightbox when you need it.
Photo Box, SAMTIAN Photo Light Box 32x32x32 Inches 126 LED Light...
2,456 Reviews
Check PriceBuying or making a DIY 3D Printer enclosure: What to consider
Size
The size of the DIY enclosure should be just enough to fit your 3D printer. It should not be too big, as this makes it more difficult to heat the print area and makes it harder to move around if you need to.
Ease of Access
You should be able to easily access your 3D printer when it is in the DIY enclosure. Locking latches are a great addition that lets you lock and open the enclosure at will
Material
A DIY 3D printer enclosure should be made of a durable and heat-resistant material. The material should also be easy to clean. Plexiglass is a good option for 3D printer enclosures as it is durable, easy to clean, and heat resistant.
Smoke Alarm
Installing a reliable smoke alarm at the top of the enclosure can alert you in time if your 3D printer catches fire. It is a worthwhile investment that can help keep you safe.
First Alert SCO501CN-3ST Wireless Interconnected Combination Smoke...
4,171 Reviews
Check PriceFire Suppression
If you want to be extra safe, you can install a fire suppression system that kicks in when the 3D printer enclosure gets too hot. A popular choice is the Blazecut T-series.
Soundproofing
One of the main disadvantages of 3D printing is the noise it produces.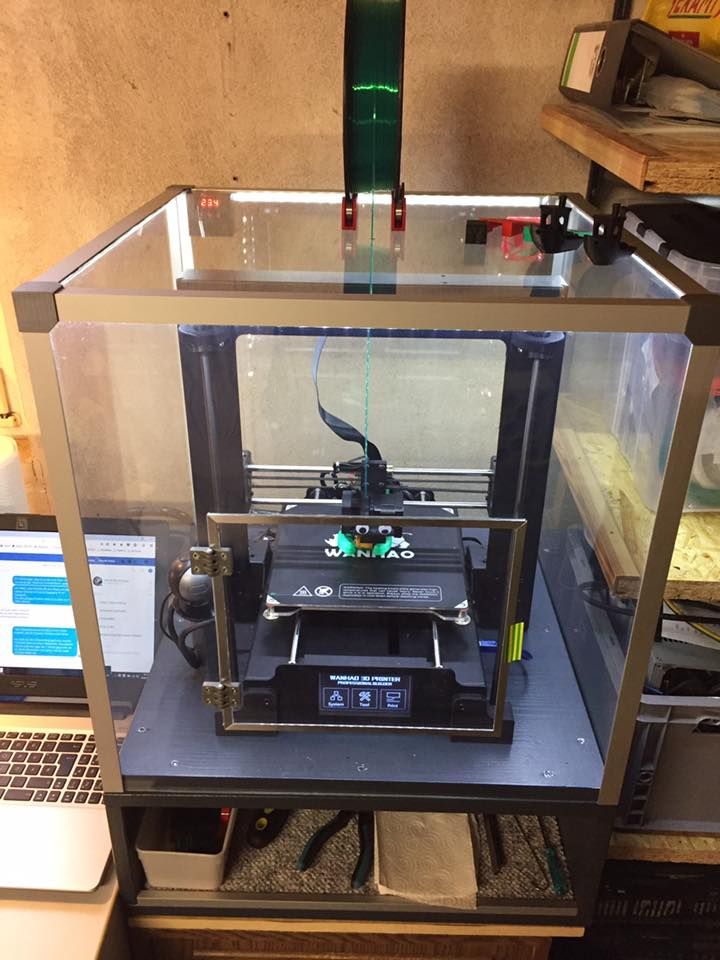 This can be a problem if you are trying to print in a shared space or if you just want to keep the noise down.
3D printer enclosures can help with this by soundproofing the area around the printer. Adding acoustic foam panels to your enclosure will help reduce sound levels significantly. Always make sure you get fire resistant ones, however.
TroyStudio Acoustic Studio Absorption Foam Panel, 12 X 12 X 2 inches...
Check PriceWindows
Adding a window to the 3D printer enclosure can help you monitor the progress of your 3D prints.
Lighting
You might want to consider installing LED lights inside the 3D printer enclosure. This will help you see the 3D prints better and also aid in taking pictures or videos of them.
Price
The price of 3D printer enclosures can vary depending on the size and features. 3D printer enclosures can be bought or made. If you are making your own 3D printer enclosure, you will need to factor in the cost of all the materials as well as your time.
Frequently Asked Questions
Is a 3D printer enclosure necessary?
A 3D printer enclosure is not strictly necessary, but it can be beneficial in terms of safety and maintaining optimal printing conditions. Enclosures can help to minimize drafts and other external factors that can impact the print quality, and they also provide a barrier between the hot printer components and curious fingers (especially important if you have young children or pets in the home).
If you are interested in purchasing a 3D printer enclosure, there are many different options available on the market to suit a variety of budgets and needs.
How do 3D printer enclosures work?
3D printer enclosures work by creating a controlled environment for the 3D printer. This helps to protect the 3D printer from dust, debris, and fumes. It also helps to maintain a constant temperature around the 3D printer, which is important for preventing warping of high-temperature filaments.
How do you enclose a 3D printer?
A 3D printer can be enclosed in a variety of ways. Some printers come with an enclosure that is already built in, while others use the addition of an enclosure for safety reasons.
One common way to enclose a 3D printer is by using a box made out of cardboard or plastic. The box should be large enough to fit the printer and the printing material, and it should have openings for the print head, filament feeder, and other cables. The box can be sealed shut with tape or clamps to keep fumes and heat from escaping.
Another option is to build an enclosure out of plywood or acrylic sheeting. This type of enclosure is more permanent and can be customized to fit the specific needs of the user and 3D printer.
Do 3D printer enclosures need ventilation?
3D printer enclosures do not need ventilation if the material being printed is not fumes-emitting.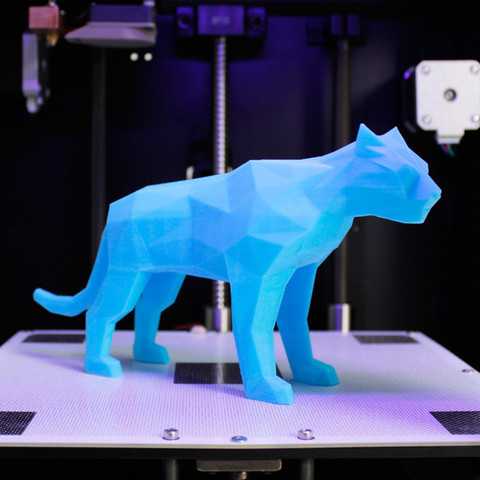 If you are printing with PLA, for example, there should be no issue with keeping your enclosure sealed. However, if you are printing with ABS, it is recommended that you provide some form of ventilation to deal with the build-up of fumes.
Do I need an enclosure for PLA printing?
PLA prints very well without an enclosure, so you likely don’t need one unless you’re printing in extremely cold temperatures. If you do want to use an enclosure, make sure it’s well-ventilated so your print doesn’t overheat.
How hot should a 3D printer enclosure get?
There is no definitive answer to this question as it depends on the specific 3D printer and filament being used. As a ballpark range, a temperature somewhere between 30 and 60 degrees Celcius is the right range for FDM 3D printer enclosures.
Should I enclose my Ender 3?
You should enclose your Ender 3 if you want to protect it from dust, dirt, and other debris. Additionally, enclosing your printer will help to maintain a consistent temperature and protect against accidental contact.
An enclosure is one of the top Ender 3 upgrades we recommend people to start with when modding their printer.
Recommended:
The Best Ender 3 (V2 / Pro) Upgrades
Should a 3D printer enclosure be airtight?
There is no single answer to this question as it depends on the specific printer and application. In general, though, airtight enclosures can be helpful in preventing fumes and particles from escaping the printer and contaminating the environment. They can also help protect the printer from dust and other debris.
However, if the enclosure is too tight, it can create problems with heat retention and airflow, which could lead to a decrease in printing quality or even damage to the printer. It’s important to find a balance between creating an effective enclosure and maintaining optimal printing conditions.
Conclusion
A 3D printer enclosure is an effective way to increase your 3D printer’s material compatibility. It further aids in printing with warping filaments like ABS and Nylon by maintaining a constant temperature. It saves the printer from external dirt and dust and improves the print quality.
With DIY 3D printer enclosure designs, you have the flexibility to customize the enclosure to your specific needs and install as many features as you’d like in it. It is also relatively easy to build a cheap, low-cost solution, for example with a simple cardboard box.
But, it can be tedious for many users, requiring lots of time, effort, and money. Whereas the ready-to-buy designs lack customizability but offer an easy, quick, and cheap solution.
Let us know your thoughts on the list, and if you have anything else to add, feel free to comment below.
Best Safe and Functional Printer Cabinet
Fans of FDM 3D printing who wish to minimise or eliminate warping and shrinking can think of getting a 3D printer enclosure. Such a printer cabinet offers many advantages, but it does not suit everyone. Therefore, you must know all the pros and cons.
In this post, you will find a list of ideas for extra DIY safe and functional protection for your 3D prints and small or large 3D printer. Maybe you will decide to make one for yourself.
3D Printer Enclosure
While resin 3D printers are enclosed, FDM machines mainly comprise a frame and bed and have no printer cabinet.
Enthusiasts working with PLA at 60˚C (140°F) can run their Creality Ender 3, CR-10, Anet A8 and other devices without an additional box. However, those who are making figurines and projects of ABS at 105˚C (221°F) will benefit from a DIY 3D printer enclosure.
A 3D printer cabinet is a shell (box) that keeps the temperature in, protects the area from dust and models from warping. It plays an essential role in stabilising the “heat atmosphere” and helps the first layers stick well to the bed.
Tips for making 3D printer enclosure DIYYou do need a 3D printer enclosure if:
- You wish the temperature within the print area to be more stable when printing with ABS;
- You want to protect your FDM printer from dust;
- You need to organise your working space;
- You hope to reduce the 3D printing noise;
- You expect the 3D printer cabinet to low down the toxic fumes appearing while you are printing with ABS.

What you must decide:
- How much you can spend on a DIY 3D printer enclosure kit;
- You are ok with a cheap look, or you are concerned with the aesthetic look;
- Whether you need full access to your 3D printer or you would like to limit accessibility for your kids and pets.
When you have all the answers, you need to make a decision. Would you prefer a homemade DIY 3D printer enclosure or ready-to-buy accessory explicitly made for Creality Ender 3, CR-10, Anet A8 or a different machine?
Read also: Incredible Stuff You Can Make with a 3D Printer
DIY 3D Printer Enclosure
It does not matter if you add good ventilation to your room and extraction system to exude the toxic fumes or not. You can always build your DIY 3D printer enclosure kit from household items and transform other products into such a box.
Decide if you want to place all components (filament spool, power supply, display, control boards) inside the 3D printer cabinet or outside.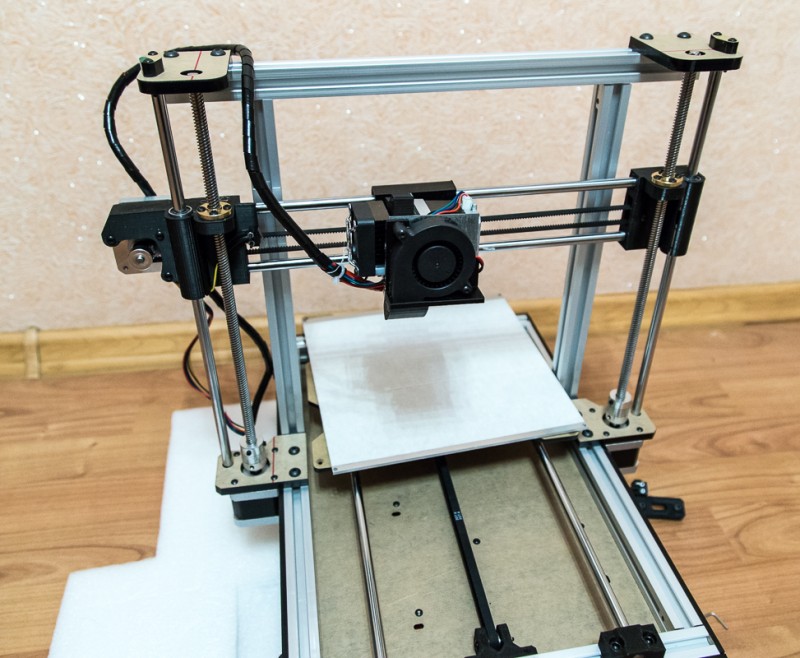 It is best to choose non-flammable material for DIY 3D printer enclosure instead of using ordinary boxes, polystyrene and other combustible materials. Besides, a smoke detector inside the box can help you prevent fire.
1. Cardstock Boxes
The simplest, fastest and cheapest DIY 3D printer enclosure is made of a shipping box. The big cardstock boxes can be found in numerous households and at post offices. You can go with a size bigger than your home machine with enough space for all the moving parts.
It is quick to cut “windows” and “doors” in your cardstock box and place it over the 3D printer. If you need to upgrade your machine or access it, all you have to do is remove your self-made cabinet.
Cardstock boxes turned into 3D printer enclosures by Reddit users Prashant Kumar and u/SkipopotamusPros: cheap (often 100% free), easy and fast to make.
Cons: flammable, extremely dangerous, requires a smoke detector and your control.
2. Plastic Boxes
The market has many transparent plastic boxes, which you can turn into a DIY 3D printer enclosure. You will need your time, some skills and instructions (or your fantasy) to build such a 3D printer cabinet yourself. But the variety of containers makes it easy to find the right size and price.
Sometimes you will have to combine two or even three plastic boxes if you need a tall or super-wide enclosure. It might be necessary to cut windows, holes for cables, make doors that open and close, etc. Many enthusiasts use plexiglass which is a solid, transparent plastic made of polymethyl methacrylate because it is durable and not as fragile as glass.
DIY enclosure made of plexiglass by Reddit user u/jackacelivesPros: transparent walls that let you follow the 3D printing process, great custom opportunities to build your perfect printer cabinet.
Cons: the price can be high, time-consuming assembly or construction from scratch, flammable, dangerous, requires a smoke detector.
3. Photo Studio Shooting Tent
Portable and professional photo studio shoot tents and light boxes can become an excellent 3D printer enclosure, although they always cost money.
Such a box can play two roles. On the one hand, it can help to even the temperature inside the DIY 3D printer cabinet. On the other hand, you can use it to take professional-looking photos of your finished 3D prints.
Enclosure made of the mill photo tent by Reddit user u/AnarashaPros: no need to cut “windows” and “doors,” excellent illumination for the models inside your machine, opportunity to take stunning shots of your 3D prints.
Cons: can be expensive for big 3D printers, flammable, dangerous, requires a smoke detector.
4. Used Furniture
Often, there is no need to buy boxes and search for a photo studio tent. You might have old wood furniture at your house, which you can transform from an ordinary closet into a perfect 3D printer enclosure. Of course, such work requires some time, equipment, might need money for refinishing and reassembling, additional parts, but the result could impress you.
Wooden cabinets have wooden doors, so you might want to replace the door with heat resistant glass. This way, you can see through and watch your 3D printer in action. Besides, it will be great if you can invest in fire retardant treatments for the wooden cabinet walls and roof.
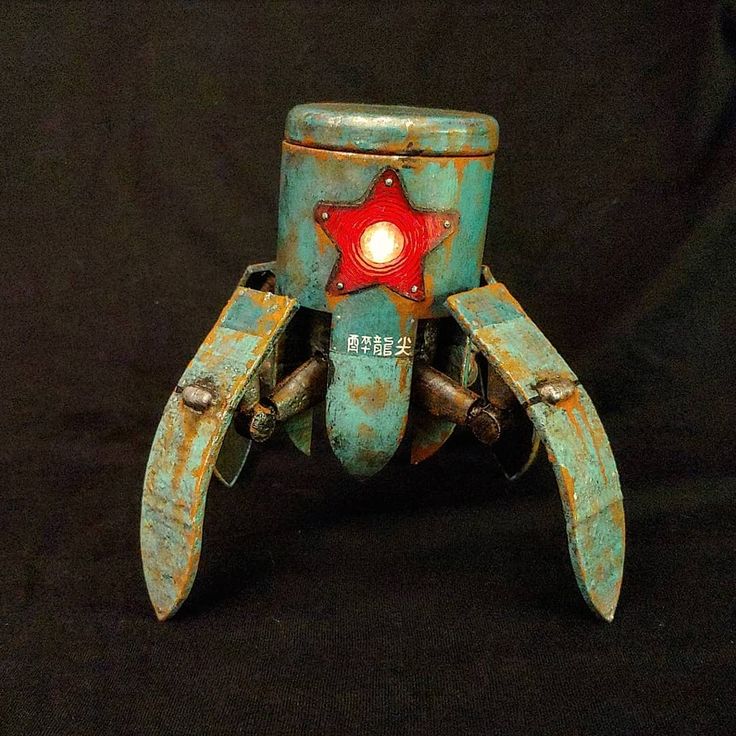
Only look at this Star-Wars-inspired cabinet made by Reddit user BenaprScopian:
DIY 3D printer enclosure inspired by Star Wars. Maker: BenaprScopianIt is something you can make yourself too! And make sure to decorate your room with many fantastic 3D printing Star Wars models!
Pros: upcycling old closets can give a second life to your furniture, you can customise everything to your needs.
Cons: expensive, time-consuming, requires a smoke detector and fire retardant treatments.
Ready-to-Buy 3D Printer Enclosure
Not every 3D printing enthusiast is willing to make a DIY 3D printer enclosure from cardstock, plastic boxes, IKEA Lack side tables, metal and glass or other materials.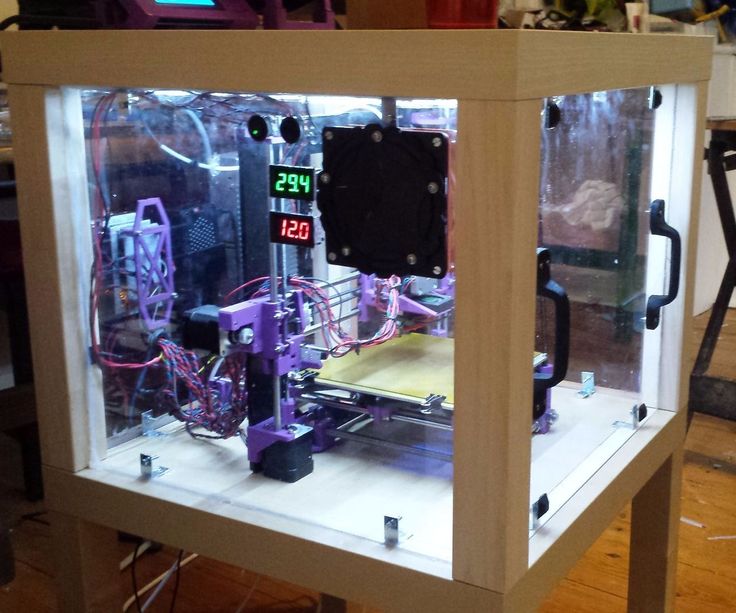 Some users are happier to get a factory accessory explicitly made for Creality CR-10, Ender 3, Anet A8, another machine.
Factories produce ready-to-buy enclosures for different 3D printers. Thus, even if you don’t have an enclosed machine, you can order a special box made of fireproof and dustproof material.
Creality Ender 3 Enclosure
Suppose you wish to keep a constant temperature while your Creality Ender 3 or Ender 5 is running. Then, you could be interested in getting the official Ender 3 enclosure. The market has many offers, and you can find different sizes of this printer cabinet.
Ender 3 enclosure. Image: creality3dofficial.comAt about $80-$100, such an enclosure is often made of aluminium film and flame retardant material that will only melt in case of fire. The construction is light and easy to install. You can fold it for storage and enjoy the noise reduction effect when in use.
Creality CR-10 Enclosure
At about $60-$100, you can find a universal cabinet that suits many 3D printers, including Creality CR-10, CR-20 and others. Such CR-10 enclosure often offers pockets for tools, folding storage, dustproof and fireproof material (pure aluminium foil).
When enclosed, your 3D printer will be secured within the folding box. Its purpose is to stabilise and preserve the temperature, improve the printing quality, protect your machine from dust.
Anet A8 Enclosure
While you can find ready-to-buy Creality CR-10, CR-20, Ender 5, Ender 3 enclosures, similar accessories are not offered for Anet A8 users. Still, you can get one of the folding cabinets designed for other machines sized to fit your particular 3D printer.
Also, there are many great tutorials and videos on how to make one on the internet. So, if you are searching for a nice Anet A8 3D printer enclosure, you might want to build it yourself just like Reddit users inhuman and u/ilcadm did.
Anet A8 enclosure made by Reddit usersAn excellent 3D printer enclosure kit can improve life for hobbyists with FDM machines and protect your device from dust (when not in use). It also helps preserve constant temperature, improve the quality of 3D prints made of ABS filament and reduce the warping issues. You can DIY such a printer cabinet or purchase a ready-to-buy box. When you are happy with your 3D printed models, make sure to join Gambody 3D Printing Community on Facebook to share their photos.
(Visited 8,543 times, 1 visits today)
Author
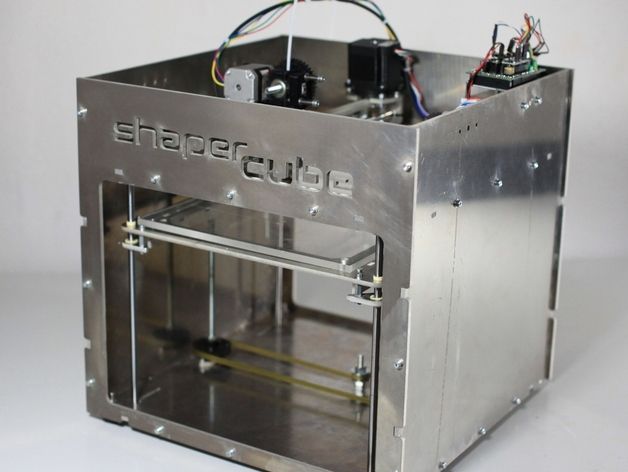
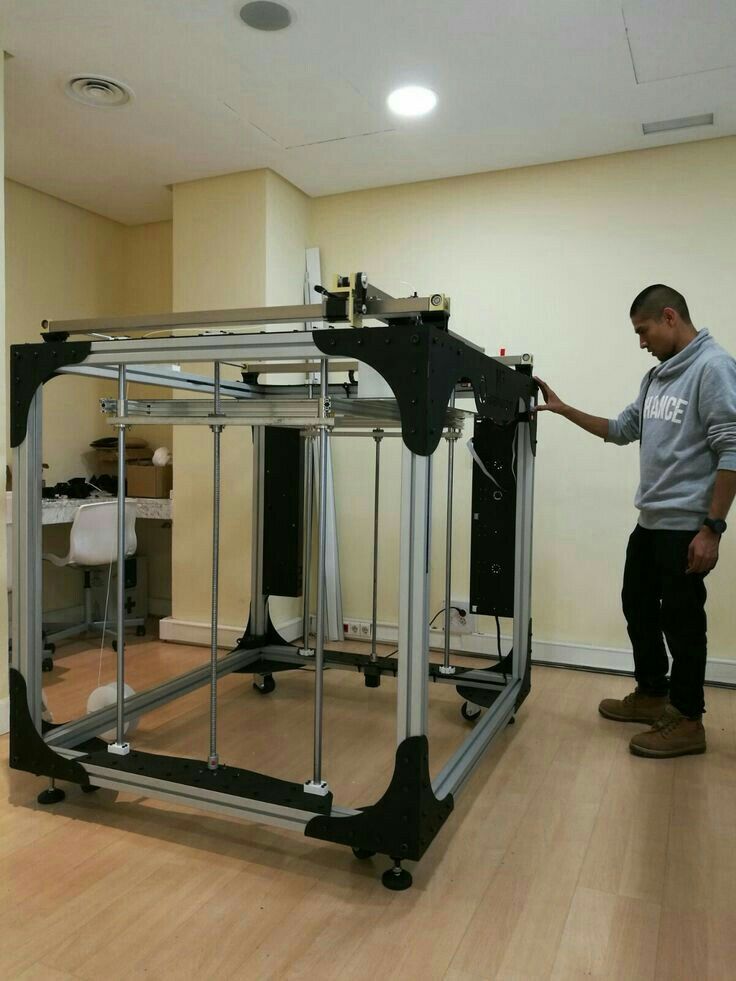
Do-it-yourself cabinet for a 3D printer
Do-it-yourself cabinet for a 3D printer - just a screwdriver, a head and Leroy to help your hands.
Hello everyone! Good day to all and happy reading. I share a positive experience in the manufacture and use of a printer cabinet.
I want to say right away that to make this cabinet, from a tool, you only need a screwdriver or a screwdriver.
Relatively compact cabinet on wheels with dimensions of 600 x 600 x 1600 mm
contains:
1. Ender 3 pro 3D printer and 10 spools of plastic on rotating axes of holders in quick access next to the printer.
2. 28 rolls of plastic on 2 shelves with easy access to each.
3. All available tools, consumables and other small things.
Initial and boundary conditions:
1. Even before purchasing the printer, I learned that there is a very useful addition to the printer - a thermal camera. However, due to the high price, buying a printer with a thermal camera was not part of my plans. But it was decided to make a thermal chamber or just a chamber without drafts in advance - it was implemented.
2. I really wanted all the items related to 3D printing to be in one place (cabinet / pedestal) - implemented, although spare parts for the printer are stored elsewhere, but fortunately they are rarely required.
3. Possibility of easy access to any part of the printer for its maintenance - implemented. The shelf with the printer extends almost completely, giving access to it from all sides.
4. Convenient arrangement of coils with plastic for its quick replacement - implemented. From any spool placed on the holders near the printer, you can thread the bar into the printer by passing it through the rotary blocks and guides (printed parts).
5. Due to my circumstances, the mobility of this closet within the apartment was required - implemented. Wheel supports and a wire reel from a vacuum cleaner with a wire about 6 meters long are installed. The vacuum cleaner reel is protected by a chipboard case and is fixed inside the cabinet to the right of the printer, next to two electrical circuit breakers it can be seen in many photos.
6. The cabinet should be budget-friendly, attractive, with a minimum amount of labor and dust in the apartment during its manufacture.
7. Material and accessories should be easily accessible and preferably in one place.
8. Possibility of developing and modifying an already finished cabinet.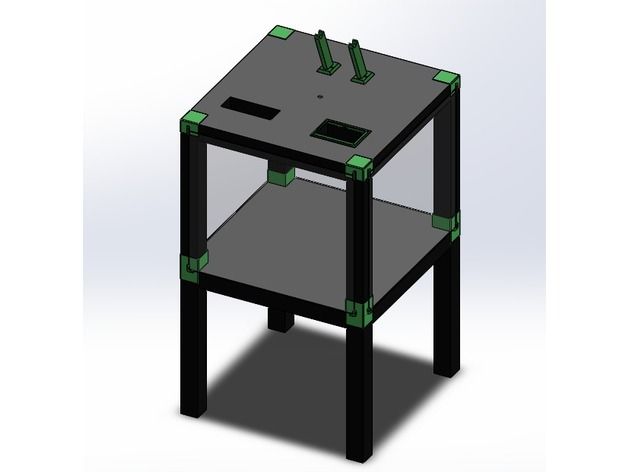
Since there is experience in making furniture, almost all the furniture in the apartment is made on our own. It only remained to move the brain gyrus and come up with the device and layout of this cabinet. I decided to take sliding shelves on ball guides (on ball linear bearings) as the basis for easy access.
From the available stores and companies for the purchase of materials and components, Leroy Merlin was chosen, Laminated chipboard (LDSP) is always available there, ball guides, wheel supports, mounting angles and self-tapping screws. In addition to the availability of material, Leroy provides a wonderful service in our business - this is cutting chipboard to your size, almost without chips, charging a small fee for this in relation to the cost of tools and cleaning mountains of sawdust and dust in the apartment accompanying independent cutting of chipboard. By the way, I have this experience too - I have a tool, and some of the furniture was made in this way. Even with a vacuum cleaner connected to the tool, a lot of dust and sawdust flies past the vacuum cleaner. And after all, this is not just wood dust, but dust containing phenol-formaldehyde compositions used in the manufacture of laminated chipboard, although I may be wrong here, it is possible that laminated chipboard manufacturers have already switched to environmentally friendly binders for its manufacture.
Initially, two drawers were made for plastic reels.
And printed bearings
but due to the curvature of the edges of the coils themselves, they kept flying off the supports, so this option for placing the coils had to be abandoned in favor of the next option, which still works.
The hardest part was deciding how to fix the transparent front panel? On hinges? On magnets? Somehow else? Since the place where the printer stands does not indulge in space, the options with hinges disappeared immediately. I installed the magnets by screwing them with self-tapping screws into the drilled holes in the ends of the sidewalls and the roof of the cabinet,
I fixed a U-shaped profile on the printer shelf, “legs” up.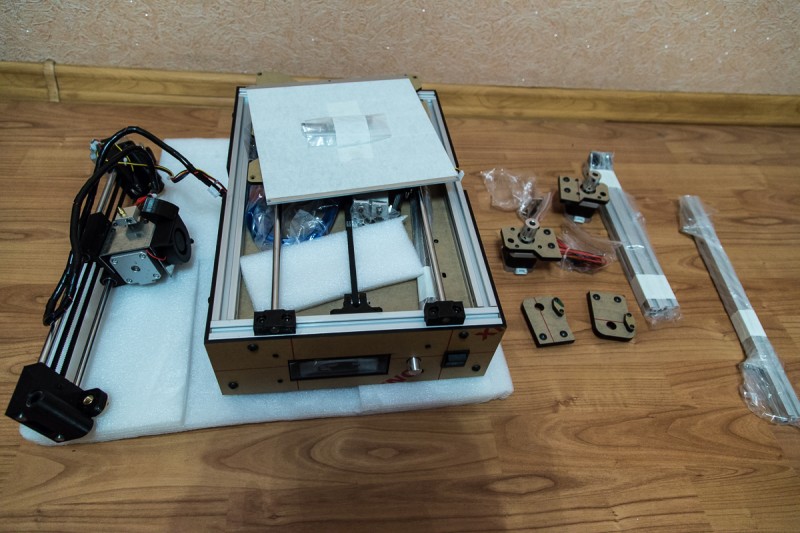 Stationery clips were put on the transparent panel itself so that they would not fidget around the panel, I glued them with adhesive tape, having previously removed the “unclamps” from them.
Printer power supply, system unit, control panel are removed from the printer and fixed at the bottom of the shelf on which the printer is located or on a fixed shelf below it. All switches are displayed on the right edge of the printer shelf (in the photo below on the right): printer, weak lighting, more powerful lighting, turning on the exhaust fan and switching its operating modes. Initially, a flexible air duct was connected to the fan with access to the street. I did not use this exhaust system for a long time, having heard a lot about the stench and harmful fumes of ABS plastic. For the convenience of checking coolers and other 24-volt households arriving from China, I installed wags and brought 24 V to them from the printer power supply. The lighting is powered by 12 V, lying in the corner of the computer power supply.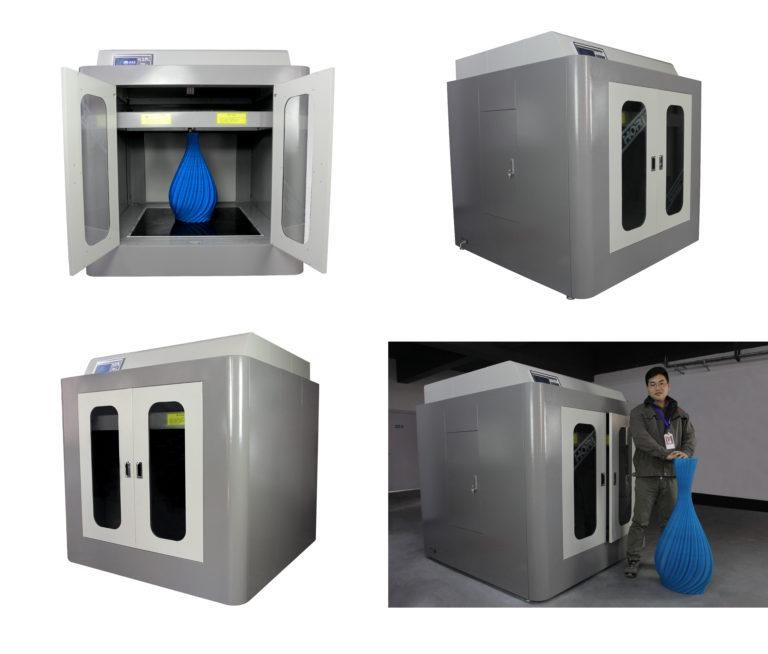 Because the body of the brain turned out to be recessed, which made it inconvenient to insert and remove the micro-SD card, to facilitate the process, an extension cord for the SD card was used in the center of the photo below in the green holder. This extension cable would still be used in order not to "stagger" the regular SD card socket soldered into the motherboard, replacing the extension cable seems to be an easier task than resoldering the regular socket on the motherboard.
If it is required to remove the printer completely from the shelf, then in order not to disconnect the wires from the brains, a slot is made in the shelf,
into which the box with "brains" freely passes. For the same purpose, you can run the wires to the printer behind the shelf, but then the wires will need to be lengthened, the slotted option allows you to get by with regular wires - here who is more suitable.
There is an idea to make mezzanines in two or three tiers, each with 8-10 spools of plastic with each thread passing into the printer chamber from above, but I don’t do it until there is a need for it.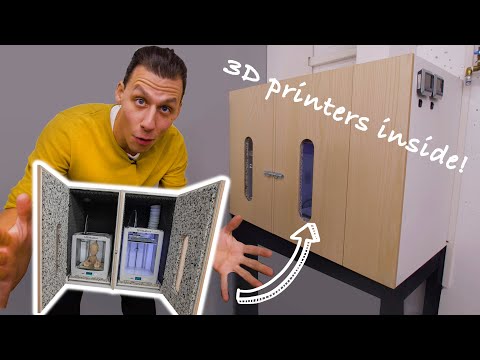
Some remarks for those who are going to repeat this design.
In the file is an Excel book https://yadi.sk/i/xLZoXu-91Qku0A with dimensions and cutting of laminated chipboard sheets All sheets are taken 600 mm wide, 2700 mm long - 3 pcs and 800 mm - 1 pc. Please note that the first column on the “panel cut” sheet is cutting across the sheet (along its short side 600 mm), the second column is cutting along the sheet of already cut parts, it is advisable not to confuse this, otherwise the front ends of the shelves will be without laminate and will have to or put up with this, or buy and glue the edge on the ends of the chipboard. Also, the width of the shelves of 544 mm is designed for the installation of ball guides with a thickness of 12 mm, if your guides are of a different thickness, then this value will need to be changed to double the difference mm. If, for example, your guide is 16 mm thick, then the width of the shelf must be reduced by 8 mm = (16-12) * 2, i. e. shelf width will be 536 mm.
You will also need 4 sets of ball guides from 450 to 550 mm long, for 100% (full) extension, i.e. each guide should consist of three supporting elements and two retractable sections. Otherwise, the shelves will lose some of their functionality.
If you decide to make the printer control panel also retractable, you will need another set of rails.
Optionally, for convenience when moving, it is desirable, but not necessary, to install a wire reel from the vacuum cleaner.
If I remember anything else, I will update this post.
Ask questions, I will answer. If I'm going to shoot a review, then I'll add a link to the video.
Best regards,
Alexander Safonov
Best STL Files for Closet・Cults 3D Printer
Sneaker Keeper Ver 1
Free
Multi-Tier Scarf Tie Pants Hanger
Free
New Clothes Hanger Ring for Kids / Anneau de fixation Cintre pour Enfant
Free
Handle
Free
Tirador para placard closet cajones
0,94 €
Zelda 2 Wardrobe (lid with magnets and removable sword)
5 €
Zelda wardrobe (hinged doors)
5 €
Oval closet rod support
Free
S-Shaped Closet Hook
Free
Polly Pocket clothes rack
Free
Grocery Bag Holder
0,95 €
Ribbed Pencil or Toothbrush Holder
Free
Wavy Floating Cube Modern Lamp
4,73 €
Useable Hairbrush Free model
Free
mini closet
Free
Coat Hanger
Free
Heavy-Duty Hanger
Free
Hanger Hook
Free
heart mirror
2 €
Bed
5 €
Mirror
5 €
Mirror
2 €
Mirror
2 €
Mirror
2 €
vaz
5 €
Furniture Ornament
5 €
Support for 13mm pipe (wardrobe)
Free
Bed
10 €
Bathroom Sign
Free
Modular Glasses Stand
Free
Lazymans Box the Storage Chest Edition
2. 88 €
88 €
Closet Pole Mount - Heavy Duty
Free
Closet Pole Holder
0,50 €
ClosetMaid (Home Depot) organizer shelf locking wedge. SAVE THE LIFE OF YOUR WIFE!
Free
Furniture Ornament
10 €
Cabinet / boat Press Lock - Door Lock
Free
Closet Rod Holder
Free
Barbie Armoire - Shoe cabinet with print-in-place doors
Free
Rifle Pegboard Stand Hook
Free
4 Emotion cabinet
1,80 €
Closet Bar Holder
Free
Pole socket / Holder (20mm pole)
Free
Closet Door Wheel
Free
Hanger expander - expander de ganchos
Free
Door lever.