Mars saturn 3d printer
Elegoo Saturn 3D Printer Review: Large Volume, High Quality, Great Value
Tom's Hardware Verdict
The Elegoo Saturn impressed us with its high-quality output, impressive attention to detail with regards to machine design, and large build volume.
Pros
- +
+ Native integration with ChituBox slicer
- +
+ Exceptionally large build-volume-to-price ratio
- +
+ Rigid dual-Z linear rail system
- +
+ Leveling process is simple
Why you can trust Tom's Hardware Our expert reviewers spend hours testing and comparing products and services so you can choose the best for you. Find out more about how we test.
Elegoo Saturn: Price Comparison
$415.99
$379.99
View
Reduced Price
The larger counterpart to the Elegoo Mars series of printers, the Elegoo Saturn is a large-volume resin MSLA 3D printer that has found a way to offer increased build volume without sacrificing part quality. By increasing both the size and the resolution of the masking Mono LCD, the Elegoo Saturn is able to offer the same XY resolution of the Mars 2 Pro while increasing the total build volume.
One of the best 3D printers, the Saturn impressed me with how easy it was to set up and use but the scarce availability of the typically $500 printer may be a source of frustration when searching for one to buy.
Elegoo Saturn Specifications
| Machine Footprint | 11.02" x 9.44" x 17.55" (28cm x 24cm x 44.6cm) |
| Build Volume | 7.55" x 4.72" x 7.87" (192mm x 120mm x 200mm) |
| Resin | DLP Photopolymer Resin |
| UV Light | 405nm UV LED Matrix |
| Masking LCD Resolution | 3840 x 2400 |
| Masking LCD Size | 8.9-inch |
| Interface | 3.5-inch LCD Touchscreen |
| XY Axis Resolution | .05mm |
Included in the Box of Elegoo Saturn
(Image credit: Tom's Hardware)The Elegoo Saturn ships in a well-packed box and includes all of the accessories you need to start printing as soon as the printer is out of the box. Included in the accessories box is a metal scraper (for removing parts from the build platform), a plastic scraper (for removing parts from the FEP sheet and stirring the resin), some paper funnels with a wire mesh (for filtering resin), wire cutters (for removing support material), latex gloves, and a healthy number of spare bolts, Allen keys, and other easy-to-lose parts. The included USB stick comes pre-loaded with a test print, the Chitubox slicer app, a digital copy of the user manual, and a few files from the 3D model repository site MyMiniFactory.
Elegoo shipped this Saturn with a ‘tomshardware.com’ sticker applied to the UV-resistant lid, which was a nice touch for a review unit. As far as I can tell, this is the only difference between this unit and a typical retail unit, so my experience with this printer should be similar to yours if you purchase it directly from Elegoo.
(Image credit: Tom's Hardware)The Saturn is a typical resin MSLA 3D printer which utilizes a vat of resin, a masking LCD, a UV light source, and a single axis of movement. It took me under five minutes to assemble this printer, and most of that time was removing foam and packaging from the box. The printer doesn’t require any mechanical or electrical assembly, and only needs to be calibrated before printing. The calibration process is almost effortless (more on that later), and the out-of-the-box experience felt quick and easy.
Image 1 of 2
(Image credit: Tom's Hardware)(Image credit: Tom's Hardware)The Saturn uses an 8.9-inch masking LCD with a resolution of 3840 x 2400, which gives it an effective XY resolution of .05mm. The masking LCD ships with a pair of protective stickers on it during shipping, and I had no problem removing them before printing. The black protective tape around the masking LCD needs to be left on the machine, and the manual makes sure to mention this first so a new user doesn’t accidentally remove it while removing the rest of the stickers.
Image 1 of 2
(Image credit: Tom's Hardware)(Image credit: Tom's Hardware)The resin vat on the Saturn uses four bolts that protrude from the bottom as locating posts which makes locking the vat into place a fast and repeatable process. One of the biggest problems I have when cleaning resin vats is that they typically sit with the delicate FEP film flush against the surface they are laid down on, so even a small bump in a table can possibly dent or deform them. The four posts on the corners of the Saturn’s vat keep the FEP film slightly elevated during cleaning, which is a small feature but a welcome change in design.
The resin vat also has a max fill line printed right on it which takes away the stress from potentially over-filling and spilling resin. This feature, along with the spout that is molded into the vat, indicates that Elegoo has put some thought into the needs of users who are frequently changing vats or draining and replacing resin.
Image 1 of 2
(Image credit: Tom's Hardware)(Image credit: Tom's Hardware)Unlike most resin MSLA 3D printers which use a single linear rail for the Z axis, the Saturn uses a threaded leadscrew and a pair of linear rails for added stability. The Saturn features a larger build volume than most MSLA 3D printers, which means more weight is suspended from the cantilevered build platform. Between these two rails and the solid machined bracket for the build platform, the Saturn is able to print without bending the build platform bracket during lift moves, and I was impressed with the rigidity of the system.
The Saturn uses a USB stick for transferring files to the printer, as well as an Ethernet connection for adding the machine to a network. If you’re interested in using the Saturn as part of a high volume print farm, the ability to network the machine means you can transfer files without the need for an external drive. The two fans on the back of the unit provide airflow for the controller board and UV LED light source, but don’t provide air filtration like the fan in the Elegoo Mars 2 Pro. Despite the lack of air filtration, the Saturn didn’t seem to emit an odor any worse than the Mars 2 Pro during printing, but if you’re concerned about air quality you’ll want to take this into account.
Leveling the Build Platform on Elegoo Saturn
(Image credit: Tom's Hardware)When printing on an MSLA resin 3D printer, you want the build platform to be perfectly level with the FEP film so the resin cures evenly across each layer. This leveling process can be a challenge for beginners and it can be frustrating to have failed prints due to poor bed leveling. Elegoo has addressed this problem by using a unique leveling process that is fast, simple, and easy to complete. The Elegoo Saturn uses a build platform held rigid by two bolts and includes simple step-by-step instructions for the leveling process.
Image 1 of 2
(Image credit: Tom's Hardware)(Image credit: Tom's Hardware)After loosening the two bolts on the build platform and placing the included piece of leveling paper over the masking LCD, I dropped the Z axis to the home position and watched as the build platform self-leveled and sat perfectly flush. Once the axis had come to a rest, I simply tightened the two screws in the order indicated and lifted the build platform up. Compared to the leveling process on a printer like the Longer Orange 10 that uses four screws that need to be tightened in a star pattern and tend to shift during tightening, the Saturn feels almost effortless to set up.
Printing Safety with Elegoo Saturn
(Image credit: Tom's Hardware)The Elegoo Saturn uses 405nm UV resin, a material that you need to handle safely when in an uncured state to avoid injury. The resin can be harmful when making contact with skin, so make sure to wear gloves when pouring, cleaning up, or handling uncured resin. I also make sure I’m wearing gloves when removing the build platform after a print, as the resin tends to pool on top of the platform and can drip off while the platform is being removed.
Make sure you use the Saturn in a well-ventilated room to minimize the danger from inhaling fumes. Any spills or uncured resin stuck to a surface should be cleaned using 99% Isopropyl Alcohol and the container for the resin should be kept closed and secured when not actively pouring material.
(Image credit: Tom's Hardware)The build platform on the Saturn is designed with a trapezoidal shape that allows uncured resin to drip off and prevents it from pooling on the top of platform during printing. Despite this shape, I noticed that resin had a tendency to collect at the very edge of the platform, and I couldn’t help but wonder if a more aggressive angle or a chamfered edge would help to allow more resin to drip back into the vat during printing. This is a relatively minor point, as the majority of resin will drip downwards during printing and cleaning the edge of the build platform doesn’t require much effort.
Printing the Included Test Prints on the Elegoo Saturn
Most 3D printers include a prepared test print as an opportunity for the manufacturer to demonstrate the strengths of their machine. Despite this relatively simple premise, I’ve found that test prints can be a source of frustration for first time users as they have a tendency to have issues that most first-time users won’t be expecting.
Image 1 of 2
(Image credit: Tom's Hardware)(Image credit: Tom's Hardware)Unfortunately, the Elegoo Saturn falls short in this category and my experience with the included test print was really the only major disappointment I had while writing this review. The Saturn includes a test print on the included USB drive called “_Rook_SATURN.ctb” that consists of two chess pieces with fine details on the interior and exterior of the model. This test print completes in a very reasonable 3 hours and 49 minutes, and I was impressed with the fine detail on the models once the print had completed. Unfortunately, this is where things took a bit of a turn.
The build platform on the Saturn has a sandblasted textured finish which helps cured resin adhere during printing and prevents parts from delaminating. When removing a part, a thin raft can be bent (as seen in the picture above), which allows the part to easily detach from the build platform without too much trouble. This is a delicate balance; too thin and the part won’t adhere to the plate, too thick and the part can’t be easily removed. I had no trouble with any of the parts I sliced in Chitubox, but as you’ll see below, the included test print was significantly more difficult to remove.
Once printed, the detail on the rooks was impressive, but the solid base of the model printed directly on to the build plate didn’t present an intuitive method of removal. After using the included metal scraper and attempting to gently pry the parts off, I wondered if this was a common problem or if the Elegoo Water Washable Ceramic Grey resin I was using simply wasn’t compatible with the settings provided. A quick Google search for “Elegoo Saturn Test Part Stuck To Plate” shows that this is not an uncommon problem, with some users resorting to using a rubber mallet to remove the parts from the build plate.
(Image credit: Tom's Hardware)I was eventually able to remove the prints from the bed, but it required significantly more effort than I was comfortable with and resulted in both parts being chipped along the bottom layer. This could have been avoided with a demo model that was suspended from a support structure or simply used a sacrificial raft during printing to prevent such a wide and thick model being printed directly on the build plate.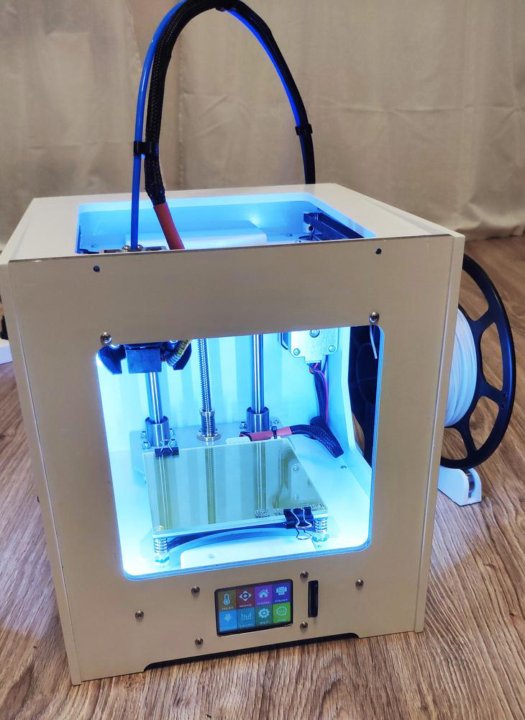 It’s worth noting this was the only time I experienced this issue during this review. The rest of the parts I prepared using Chitubox for printing were easily removed and didn’t require excessive force to remove from the plate.
Preparing Files for Printing with Chitubox
(Image credit: Chitubox)The Elegoo Saturn uses Chitubox for slicing, preparing, and exporting files for 3D printing. Chitubox is a feature-rich program which reduces the need for secondary programs to generate supports, hollow models, or make other changes that would typically require a longer workflow. The general process for preparing a 3D model for resin 3D printing goes like this:
- Import 3D model
- Angle model for printing (avoiding wide per-layer cross-sections)
- Hollow model
- 4Add drain holes
- Generate support material
- Slicer
- Delete islands
- Export printable file
Chitubox makes this easy, as each step can be accomplished within the software without the need to export the file to various third-party softwares. Chitubox also includes a built-in profile for the Elegoo Saturn which gives good quality results without any tweaking or modifications. I’ve been a fan of Chitubox since I started using it, and the ease-of-use and native support for the Saturn makes it a logical choice.
The profile for the Saturn that is included with Chitubox is what I would consider a good starting point for base settings. The Z resolution of .05mm is high enough to give a good quality print, but not so high as to cause an excessively long print time. The per-layer cure time of 2.5 seconds makes the Saturn a speedy printer when compared to machines with 9 second per-layer cure times like the Creality LD-002R.
(Image credit: Tom's Hardware)For a first test, I used the Ancient Statue model from Loot Studios and prepared it using the default settings in Chitubox without making any modifications. For resin, I used the Elegoo Water Washable Ceramic Grey , which has worked very well for me in the past on the Elegoo Mars 2 Pro.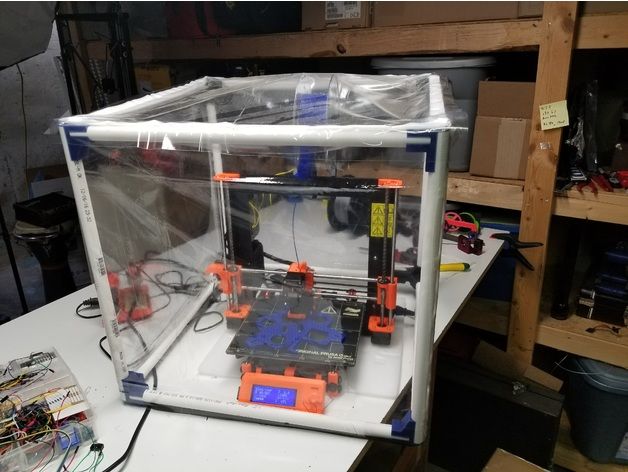 This model used about 28 grams of resin and printed out in just under 4 hours, which seems in line with what I would expect from a Mono LCD 3D printer.
Image 1 of 2
(Image credit: Tom's Hardware)(Image credit: Tom's Hardware)The Water Washable Ceramic Grey resin looked great after printing, and the support structure removal process is simplified by not requiring any isopropyl alcohol or other chemicals to remove the excess resin. A quick soak in a small tub of hot water dissolved the excess resin from the surface of the printer and also softened the support structure. After removing the support structure, I cured the model for a total of two minutes in 30 second increments to prevent it from warping.
(Image credit: Tom's Hardware)It’s worth taking a moment to reflect on the printing process so far before we really look at this model. The steps to create this model are all simple and straight-forward, and a beginner could easily follow along to calibrate the bed, fill the resin vat, and process the file for printing. The resulting print looks sharp and detailed, and even small details like the cracks in the stone of the statue resolve and don’t require any touch-up work. Putting aside the large format nature of the Elegoo Saturn, it’s easy to understand why this machine is in such demand; it’s easy to use, gives good quality results, and the native software doesn’t require tinkering or tweaking.
Print Size Comparison of the Elegoo Mars 2 Pro vs. Elegoo Saturn
Image 1 of 2
(Image credit: Tom's Hardware)(Image credit: Tom's Hardware)The Elegoo Saturn shares many design similarities with the Elegoo Mars 2 Pro, so it makes sense to compare the two 3D printers directly. The Saturn uses a higher resolution masking LCD, but the increased size of the LCD means the XY resolution (pixel size) is .05mm on both machines. This means a part printed on the Mars 2 Pro and Saturn, using the same settings, will result in two parts that should be indistinguishable from one another.
| Elegoo Mars 2 Pro | Elegoo Saturn | |
|---|---|---|
| Masking LCD Resolution | 1620 x 2560 | 3840 x 2400 |
| XY Resolution | . 05mm 05mm | .05mm |
| Build Dimensions | 5.08 x 3.15 x 6.3 inches | 7.55 x 4.72 x 7.87 inches |
| Build Volume | 100.81 cubic inches | 280.46 cubic inches |
| Printer Dimensions | 7.87 x 7.87 x 16.14 inches | 11.02 x 9.44 x 17.55 inches |
| Printer Volume | 999.66 cubic inches | 1825.70 cubic inches |
| Build / Footprint Ratio (higher is better) | 10.0% | 15.4% |
With a retail price of $500, the Saturn offers nearly 3 times the total build volume (280 cubic inches vs. 100 cubic inches) of the Mars 2 Pro, which retails for $330. If you’re interested in throughput and high-volume printing ability, the Saturn is able to produce a large batch of parts at the same resolution as Mars 2 Pro. However, if you’re looking for a higher resolution finished part and aren’t interested in a large build size, a 4K LCD printer like the Phrozen Sonic Mini 4K would be a better choice.
Image 1 of 2
(Image credit: Tom's Hardware)(Image credit: Tom's Hardware)Printing a Large Assembly on the Elegoo Saturn
(Image credit: Tom's Hardware)The large build volume and fast per-layer print time of the Elegoo Saturn make it ideal for printing models that would ordinarily be too large or time-consuming to print on a smaller MSLA resin printer like the Longer Orange 10. To test out the ability of the Saturn to print large models in multiple pieces simultaneously, I loaded up the Olympus Rider model from Loot Studios. This model of a winged Pegasus complete with rider armed with a spear prints in six individual pieces and a single large base.
(Image credit: Chitubox)Unfortunately, the auto-placement feature in Chitubox wasn’t able to automatically place all of these parts on the build platform in order to print them in a single piece. After manually rotating the parts myself, I was able to get everything except the base of the model onto a single tray. This would be an ambitious print under the best of circumstances, as it covered a large portion of the surface area of the build platform and would create a large amount of suction when moving the platform up and down. After slicing, Chitubox generated an estimated build time of 7 hours and 10 minutes as well as a material usage of 128 ml. I wasn’t sure if the Saturn could handle a print this ambitious, but I was eager to see if this hard-to-find machine could live up to its reputation.
Image 1 of 2
(Image credit: Tom's Hardware)(Image credit: Tom's Hardware)The Saturn printed every single part on the build platform without any defects, and I was genuinely surprised and impressed with how easily the Saturn could handle a large and complex build like this. The Elegoo Water Washable resin created a support structure that was easily removed and left minimal pockmarks on the finished model.
(Image credit: Tom's Hardware)After a rinse and cure in the Elegoo Mercury Plus Cure/Wash station, I laid out the parts and assembled the model using DAP RapidFuse CA glue, a favorite of mine for making strong bonds on resin prints like this one. The final result is a finely-detailed print that measures nine inches wide and six and a half inches tall, and it is one of the largest resin MSLA prints I’ve ever made. The 3D model to 3D print process was seamless and easy, and this model earned the Saturn a permanent place on my personal list of all-time favorite 3D printers.
Image 1 of 2
(Image credit: Tom's Hardware)(Image credit: Tom's Hardware)Printing Multiple Miniatures Simultaneously on the Elegoo Saturn
(Image credit: Tom's Hardware)One of the key abilities of a large build volume resin MSLA 3D printer like the Elegoo Saturn is the ability to print multiple parts simultaneously. The Saturn is a popular printer for users interested in tabletop gaming, and the large build volume is ideal for printing out multiple miniatures in a single print. Because the print speed is dictated by the number of layers and not the number of miniatures, printing a single miniature or a full build platform full of them takes the same amount of time.
As a test of the printer’s performance, I filled the build platform with some of the enemies from the Loot Studios Ghostly Odyssey release which features a mix of detailed creatures and human 32mm miniatures.
Image 1 of 2
(Image credit: Chitubox)(Image credit: Chitubox)After importing the models into Chitubox, I manually laid them out to prevent the support structure rafts from touching to reduce the overall total surface area of the bottom cross-section. Chitubox handled the slicing of this large tray without breaking a sweat, and I was easily able to fit a mix of models and bases for a total of 12 parts printing simultaneously. Chitubox gave an estimate of 3 hours and 51 minutes, which is an attractive print speed for such a large yield of parts.
The models have a support structure already generated, so after slicing all I had to do was detect and remove the islands (small, unconnected pixels that can cause floating bits of resin) and scroll through the layer view to check for any missing geometry. This is a quick and largely-automated process made possible by the Chitubox app, which I am grateful that Elegoo has internally decided to endorse as opposed to attempting to make their own slicer app which may lack some of this functionality.
As I expected, the print was completed without incident. Because of the large number of support structures, the first hour or so of the print is just hundreds of tiny cylinders (as seen in the Chitubox preview above). Every time the build platform lifted, it sounded like a Velcro strap being removed as each of the tiny support structures delaminated from the FEP sheet with a tiny pop sound. I couldn’t decide whether the sound was reassuring or not, but in the end, I’m grateful for each pop because it meant the printer was working correctly.
(Image credit: Tom's Hardware)The support structures were easy to remove after a quick soak in hot water, and the models all felt like they had been cured enough to be solid. In particular, the swords and wings on the smaller models were easy to free from the support structure, and I wasn’t concerned with them breaking off or shattering during the cleaning.
Image 1 of 2
(Image credit: Tom's Hardware)(Image credit: Tom's Hardware)Even on these 32mm miniatures, the details were crisp and features like the individual feathers on the harpy model resolved well and could be easily distinguished. If you’ve used a printer like the Anycubic Photon Mono or the Elegoo Mars Pro, this level of resolution (.05mm) is directly comparable with what you’re used to, so the big benefit of the Saturn is being able to increase your output without sacrificing quality.
The Elegoo Saturn is about as hard to find as a PlayStation 5 right now, and it tends to sell out immediately after each restock at Amazon and the Elegoo official store. After using it for this review, it’s clear to me why the printer is in such high demand: it’s fast, relatively inexpensive, and offers a build volume ideal for printing multiple parts simultaneously. The Saturn regularly sells for over $700 on second-hand sites like eBay, so finding one may prove to be a challenge for the foreseeable future.
I asked Elegoo to comment on the relative scarcity of the Saturn, and they indicated a combination of high demand and rigorous quality control were to blame for the shortages.
These two printers are too hot sale, so they always sold out. In fact, we have arranged more products for Amazon every week, but it sold out when available. In addition, our company will test the machine before selling, so it costs some time.
Elegoo
The high-yield nature of the Saturn makes it ideal for printing multiple miniatures simultaneously, so there’s no doubt this printer will be a hit among hobbyists who are interested in printing custom miniatures. The large build volume also offers the ability to print large parts in a single print, something that smaller machines like the Creality LD-002R aren’t able to accomplish.
The overall trouble-free printing experience of the Saturn makes it appealing to beginners as well as more advanced users, but the $500 retail price (if you can even find it for that) might be a little high for a first printer. If you’re interested in a lower cost alternative, the Elegoo Mars Pro or the Anycubic Photon Mono both offer a similar printing experience at a lower price point.
(Image credit: Tom's Hardware)Andrew Sink first used a 3D printer in 2012, and has been enthusiastically involved in the 3D printing industry ever since. Having printed everything from a scan of his own brain to a peanut butter and jelly sandwich, he continues to dive ever more deeply into the endless applications of additive technology. He is always working on new experiments, designs, and reviews and sharing his results on Tom's Hardware, YouTube, and more.
Elegoo Saturn Review - Elegoo's Budget-Friendly Mid-Size Resin Printer – Maker Hacks
Review of the ELEGOO Saturn resin 3D printer - ELEGOO mid-size MSLA printer with 4k mono screen and larger build area than the ELEGOO Mars
Review of the ELEGOO Saturn resin 3D printer – ELEGOO mid-size MSLA printer with 4k mono screen and larger build area than the ELEGOO Mars
ELEGOO SaturnElegoo Mars was and is one of my favourite 3D printers of all time. Yes, I love my Prusa SL1, but you have to face the fact that the SL1 is seriously expensive in comparison to the Elegoo lineup.
After waiting to see what Prusa would come out with as a follow-up to the SL1, I saw they had gone for speed rather than size, so that cemented my decision that my upgrade was going to be my next Elegoo, and I went with the Elegoo Saturn.
TL;DR I love the ELEGOO Saturn
Hardly surprising, really, but I love the Saturn as much and maybe even more than the ELEGOO Mars.
Think of the Saturn as an embiggened Mars with a monochrome screen, at an aggressively good price.
ELEGOO Saturn Specifications
ELEGOO Saturn Linear Rails- Build area 192 x 120 x 200mm (7.55″ x 4.72″ x 7.87″)
- 8.9″ Monochrome LCD (4K resolution / 3840 x 2400)
- Z-Axis Linear rails and lead screw (rock solid)
- Ethernet networking connectivity (print over network)
The main attraction for me was the massive size increase the Saturn has over the Mars while still being a comparatively compact unit:
| Mars | Saturn | |
|---|---|---|
| Build Plate | 5. 08″ x 3.15″ 08″ x 3.15″ | 7.55″ x 4.72″ |
| Build Area | 100.81″3 | 280.46″3 |
| Printer Size | 7.87″ x 7.87″ x 16.14″ | 11.02″ x 9.44″ x 17.55″ |
Monochrome Screen?
Essentially, the Saturn having a monochrome screen means it cures resin faster (up to 60% speed boost over the Mars) and the screen lasts longer.
ELEGOO Saturn isn’t the first or only machine to have this, of course, and under the hood they all mostly use Chitu hardware and firmware, but it does make a noticeable difference in printing speed.
What are ELEGOO Saturn prints like?
The prints are as good as the Mars and maybe marginally better.
3D Prints off the ELEGOO Saturn from Lost Adventures KickstarterRather than print the default rook test print I filled my print bed with the beautifully detailed STLs from the Lost Adventures Kickstarter.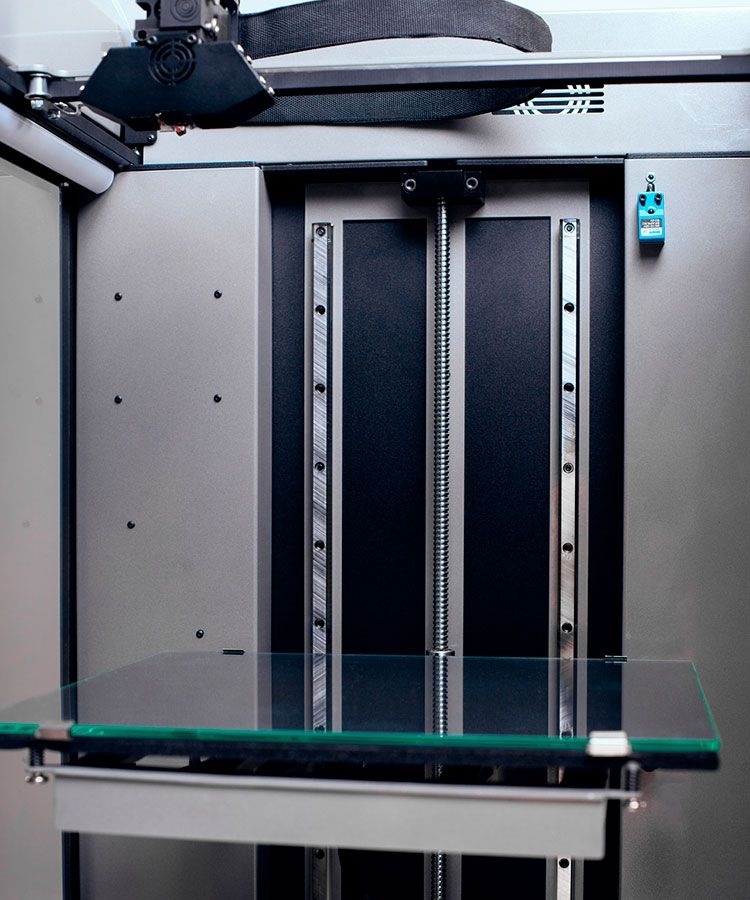
I also put the settings on ludicrous speed – 240 mm/min lift.
ELEGOO Saturn in ChituboxAll of the prints looked excellent, even despite me pushing the speed as far as it could go and using Chitubox default automatic supports.
Yes, I like to live dangerously!
Seriously, though, I wanted my review to be as close as possible to “get it out of the box and hit print” as I could while taking advantage of the enhancements over the Mars.
One part bowed at the start and recovered later, but fortunately the model was a ruined wall so no problem.
What is NOT good with the ELEGOO Saturn?
There are a couple of gripes I still have with the machine that don’t spoil the experience but should certainly be thought about and resolved for future models.
An obvious area people have complained about that I do NOT think is a problem is the “mid-size” middle ground – being simultaneously both not big enough and not small enough. While I would LOVE more build area, there was just no way fit one of the large format machines into my home (even I could afford to buy one). There are enough choices in the market that I don’t think the Saturn being all things to all people should put anyone off.
First, the serial number that you use to determine firmware compatibility for upgrades is on the base of the machine.
Sounds like a minor issue until you discover that you only know you NEED that serial number after you have filled the vat with resin and the machine refuses to print.
Which leads to the second gripe. Turns out while I had been out of the loop we got a whole new lineup of Chitubox software, and the machine and Chitubox Basic are incompatible without a firmware update.
Firmware Update NeededI was vaguely aware because I follow Uncle Jessy (and I fixed my Patreon PayPal issues just so I could be sure I was paying him as a thank you). Wonder how many support requests and Amazon returns that issue has caused.
While I am not convinced I will pay for a pro license for Chitubox yet, thankfully now I can at least print.
The lid is also a pain. I prefer hinged lids, especially lids that actually stay open. This instead is a lift off deal, and anyone who has lifted a resin printer off knows it is not exactly a smooth action until you have performed the manoeuvre a LOT.
Finally, the USB port is on the side, and the power is on the back. Again, a potential resin spill hazard. Wish they had the ports conveniently on the front, maybe with a little roof over to protect from any drips that might fall.
Bottom Line
I am delighted. Yes, the ELEGOO Saturn has a great deal of competition, and I was interested for a short while in the Anycubic Mono X, but in the end I think ELEGOO is the better company and the Saturn was the right choice for me.
You can buy from a bunch of places but I bought mine from Amazon due to prime shipping and the extra reassurance of their customer service and returns policy. Even better I got it at $669.99 CAD (around $550 USD?), which I think is a great deal. It is $500 USD at Amazon.com but import duty etc makes the Canada store more convenient.
Category: Reviews and Buying GuidesTag: 3d printers, 3d printing, elegoo, ELEGOO mars, ELEGOO saturn, resin
Elegoo Saturn 3D printer review
In recent years, Elegoo has established itself as one of the world's most famous manufacturers of LCD 3D printers. In addition to the 5.5" Mars and Mars Pro LCD 3D printers, they now launch the 8.9" Elegoo Saturn LCD 3D printer with a huge footprint of 192 x 120 x 200mm. It is also Elegoo's first LCD 3D printer equipped with a monochrome LCD screen, which is much more durable and allows for much stronger impact intensity.
Features
ELEGOO SATURN MSLA 4K 8.9" MONOCHROME LCD 3D printer
- Software Chitu DLP Slicer
- The weight 22 lb (10 kg)
- Layer thickness range 0.
 01-0.15 mm
 - Light source UV-integrated LED lights (wavelength 405 nm)
- Seal Liquid Crystal UV Photocuring
- Workspace size 7.55" (L) * 4.72" (W) * 7.87" (H) 192 mm (D) * 120 mm
- Dimensions (mm) 11.02"(L)*9.44"(W)*17.55"(H) 28cm(L)*
- System EL3D-3.0.1
- Construction accuracy Z- 0.00125 mm
- Power Requirements 110-240V 50/60Hz 24V4A 96 W
- Speed 30-40 mm/h
- Display 3.
 5" Touch Screen
 - Resolution in X and Y axes (µm) 0.05mm(3840*2400)
Go to product
4K monochrome LCD
The Elegoo Saturn is one of the first 8.9" LCD printers to feature a newly developed 4K monochrome LCD. With this new technology, the Saturn creates incredible print speeds of just 1-2 seconds per shift - compared to conventional LCD 3D printers at 7-8 seconds per shift.
The monochrome LCD is also thermally stable and has a much longer life than conventional LCDs. With it, you can print up to 2000 hours!
Despite the large installation space, Elegoo Saturn has a very high accuracy down to 50 microns, which is achieved thanks to the high resolution of 4K. Combined with 8x anti-aliasing, you can create large and highly detailed works of art.
Double Linear Rail
Large build platform for increased stability. Following the trend of its smaller LCD counterparts, the Saturn features two linear guides on the vertical axis to ensure that the build platform remains level during the printing process.
Easy to use
With its simple design and user-friendly system, the Elegoo Saturn is also suitable for beginners. The printer is already partially assembled and you can start printing within minutes.
With a colorful 3.5-inch touch screen and the latest Elegoo Chitubox software, the Elegoo Saturn is very easy to use. You can even preview the 3D model on USB and monitor the print status in real time.
Unboxing ELEGOO Saturn
One of the buyers, Paul Benson, took a photo review of the unboxing and printing on the ELEGOO Saturn 3D printer.
ELEGOO Saturn packaging includes plastic corner protectors for inside corners and hardboard edges around all of this foam to ensure your printer arrives in good condition.
After removing the top protective layer, you will find ELEGOO Saturn covered with even more foam. I was pleasantly surprised to find that ELEGOO branded a plastic printer cover!
More foam in a plastic case protects the Z-axis drive shaft and also contains the resin reservoir and build plate.
By removing the tool box from the case, you can quickly set up the printer. Many of the same tools found in the Mars Pro are included here (although the box of nitrile gloves in the picture is mine).
3D printing adventures with the Saturn
After I removed the protective plastic covers from the LCD and FEP film, it was time to move on to the most important preliminary step: leveling the printer. Unlike FDM printer alignment, this is a fairly simple process. I liked that ELEGOO included thin cardboard leveling paper with the Saturn. Not only is it the perfect thickness, but it comes with alignment instructions right on the card.
Some demo models are included with the printer on a USB drive, including the ELEGOO boat that comes with Mars Pro. I figured I'd start with it just to provide a baseline (and a good performance comparison with Mars Pro). My first step (and yours) was to set up a profile for the Saturn in Chitubox, MSLA's 3D printing slicing software. The second step was to enter information about the type of resin I was using. I thought it would be fun to make some prints using Elegoo's water-washable clear blue resin. Different resins have different optimum cure times for both the base coat (for good adhesion to the build plate) and subsequent coats. With a bit of internet searching, I was able to find a good guide to the various ELEGOO resins. I then imported the rook model into Chitubox and sliced it using the settings for both Saturn and clear blue resin.
It's time to start printing. I filled the tank with about a third of the resin, as recommended in the instructions, connected the USB drive and selected the boat model in the print menu. At this point, the printer started working.
I should mention that while the Saturn is generally a fast printer, the clear blue resin takes a lot longer to cure than opaque resins. So I didn't have an accurate speed comparison between this printer and Mars Pro. But then again, if you want proof that the Saturn is a faster printer, you can easily find test results from serious 3D printing sources. And so, a little over 7 hours later.
As you can see, the rook adhered well to the base plate... perhaps too well. It was difficult to remove and unfortunately I damaged the base a bit while trying to remove it from the plate with a metal scraper. This was still preferable to a print not sticking to the plate, which would result in a failed print and potentially damage the FEP film.
Finally freeing the rook from the building plate, I went through the standard cleaning. Rinse with water first (because it is a water washable resin) and then, after drying, a few minutes under a UV lamp to cure the resin.
I liked the look of the resin and the overall level of detail so I decided to move on to another print. For the next model, I chose a holiday decoration from Fates End 2 Kickstarter.
This print took slightly longer than the rook, at about 10 hours. However, as with the rook, the print stuck firmly to the mounting plate. Wanting to get it for free without damaging it, I went online again to see what advice I could find to remove the model.
I decided to try a method known as temperature shock. After I removed all remaining liquid resin from the worktable and model, I put the worktable (with the model attached) in the freezer for about 15 minutes. After removing it, I washed it under warm water. This caused the resin to shrink a bit, allowing me to easily remove it from the plate.
I was very impressed with how the details of the model turned out, especially the fins on the dragon heads. I posted a photo of the model on Facebook and my sister even demanded that I give it to her!
Having successfully printed these two models, I decided it was time to really test the Saturn. I was going to print something that would not only take advantage of the printer's larger build volume, but also (if successful) showcase the capabilities of the ELEGOO Saturn. So, I took a free model of Notre Dame Cathedral from MyMiniFactory.
This would also prove to be a long printing process. After slicing the 3D model, the estimated print time was 15 hours. After making sure I added enough resin to the tank, it was time to really test the Saturn.
As you can see from this tank, I almost ran out of resin to finish... the level is pretty low. But they managed to finish it, with amazing detail. Unfortunately my wash and cure station was not large enough to handle such a large model. ELEGOO currently has pre-orders for Mercury X Wash and Cure machines that can accommodate large prints from the Saturn. But for now, I had to use some plastic tubs to wash the model and then cure it with UV light directly from the sun.
ELEGOO Saturn: Verdict
At the beginning of this review, I called the ELEGOO Saturn the big brother of Mars, and this is true for several reasons. The first is the most literal: the Saturn has a print resolution of 3840x2400 compared to 2560x1440 for Mars, the build size is 7. 55″ long x 4.72″ wide x 7.87″ high compared to Mars 4.53 ″ x 2.56″. x 5.9″. This means more and more.
However, size is not the only difference between printers. The level of detail you can achieve with the Saturn is much higher than with the Mars Pro, and when printing the same model with the same resin, the Saturn is also faster.
And while this won't be a problem for everyone, the Saturn also has a network port so you can print from your computer. Mars Pro can only print via the USB port.
- 02 March 2022
- 812
Get expert advice
Elegoo Mars PRO print settings
The part is slightly larger and small holes are closed. How to fix?
Support:
In your case, the model is overexposed. It is necessary to reduce the exposure time of the layer by 20-30%. Print a test model to find the optimal settings for further printing. The test model can be downloaded here.
Small parts did not print, what should I do?
SUPPORT:
To avoid gaps when printing models with thin walls or fine details, increase the exposure time by 20-30%. Then repeat the test print.
Model breaks off supports. How to arrange support?
SUPPORT:
There can be several reasons for the detachment of the model from supports:
- Insufficient number or too small thickness of supports. We recommend using supports 1.2 mm thick, with a contact thickness of 0.8 mm and a contact depth of 0.4 mm.
- Location of the model relative to the printer desktop (XY axis). When a large area layer is printed, it adheres quite strongly to the bottom of the bath. When the platform is raised, a moment occurs that can disrupt the supports.
 We recommend placing the model at an angle of 30-60 degrees.
 - Lift speed too high. In order for the model to come off the bath smoothly, we recommend setting the speed to 100 mm/min or less. The softer the material, the slower the lifting speed should be. Sufficient lifting height of 2-4 mm.
The side surface of the model is rough. What could be the reason?
SUPPORT:
This problem is most likely due to insufficient delay time before printing. It takes time for the polymer to spread evenly over the bottom of the bath after the table is lowered. If the delay is too short, then the resin will continue to flow out from under the model at the moment when the printing of the next layer has already begun. To get a flat side surface, increase the delay time to 5 seconds and print again.
The finished model is difficult to remove from the print platform. This is fine?
Support:
The degree of adhesion (sticking) of the model to the platform depends on the exposure time of the first layers (base), which are also called fixing.