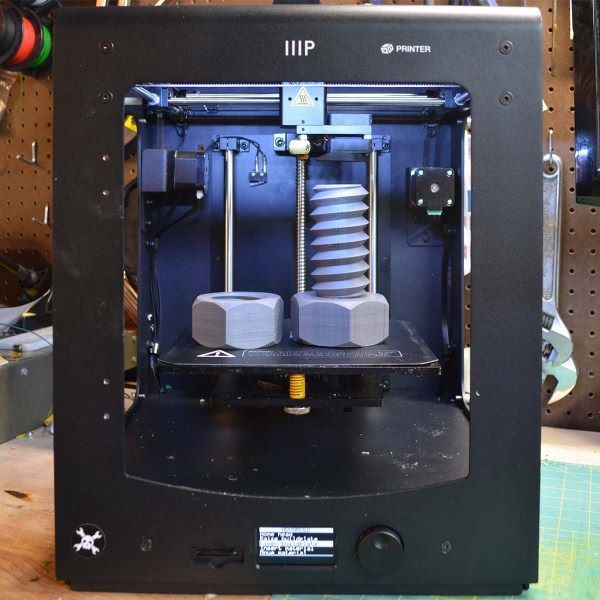
3D print 2 colors single extruder
How to 3D Print in Multiple Colors with Just One Extruder
3D Insider is ad supported and earns money from clicks, commissions from sales, and other ways.
Oftentimes, owning a single-extruder 3D printer feels like you’re missing out on a lot of things. You can’t use HIPS or PVA for support structures, and cannot automatically print multi-colored designs. However, dual-extruder 3D printers can cost quite a bit more.
There still is a way for your 3D prints to have multiple colors – it’s just going to take a bit of extra work. If you don’t mind the extra effort, then check out this guide on how you can 3D print multiple-color models with just a single extruder.
Printing in parts
The simplest way to create a multi-colored print is to separate your 3D model into parts and print these parts separately. This method certainly isn’t for everybody, as you may need advanced 3D modeling skills to pull this off. If you’re just downloading free OBJ files online, you might not even be able to manipulate those freely. Printing in parts is ideal for 3D models that you’ve come up with yourself.
Take note that there will still be limitations to this method. Once all parts have been assembled, you’re going to need to assemble them and glue them together. This may not be possible if your model has odd angles, or if it’s just too complicated.
This may seem like a rudimentary approach to making multicolored 3D prints, but the results are usually good with a bit of creativity and careful planning. If you’re planning to do polishing or post-processing of a multi-part model, it’s best done before assembly.
Use a multicolored filament
Using a multicolored filament is quite an unconventional approach to 3D printing, if only because it lacks any predictability. It involves using a filament that has a spectrum of colors – such as this Rainbow PLA Filament from DO3D.
There are also ways to make your own multicolored filament either by dyeing a white filament or fusing together several filaments of different colors. How much work you want to do is up to you, but there’s always the options of simply buying the multicolored filament.
Printing with multicolored filament results in a model with zones that transition smoothly from one color to another. As we’ve mentioned, this will be an innately unpredictable process. There’s no way to know in which color every single part of the model will be printed.
Instead of treating this unpredictability as a negative, this is actually one of the best things about this method. If you 3D printed the same model ten times using multicolored filament, they will all come out looking different. This element of surprise and variability makes this method novel and unique. You also don’t need any special method or equipment, aside from the multicolored filament itself.
Filament swapping
The most commonly practiced method in the 3D printing community to print in multiple colors with a single extruder is called filament swapping. It involves pausing the print mid-way and swapping one filament for another.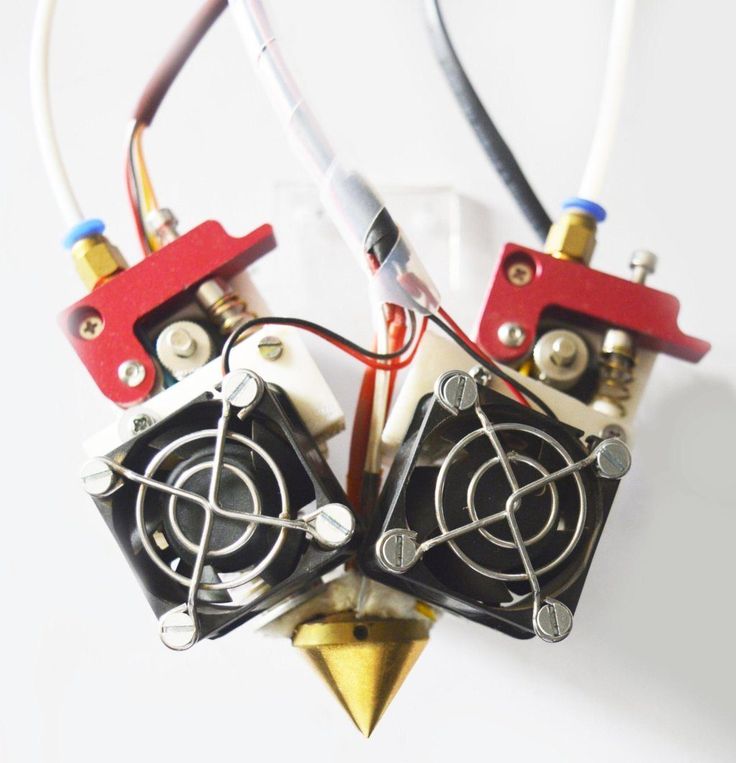 It will take a lot of work as you’ll need to actively monitor and step in every now and then during 3D printing.
There are several approaches to this method. You can either do the pausing of the print manually or include the commands in the model’s G-Code. The latter is a lot more convenient but will require that you know how to write and manipulate G-Code commands. The manual method is still viable if you’re willing to do the work.
The number of times that you’ll need to swap another filament will depend on how complex your design is. Although the method may seem simple, it can be very tedious for models that have to be printed in a lot of colors. You can optimize this process by orienting your model in the slicer software such that color transitions occur neatly on layer boundaries. This may not always be possible.
Manual method
To do manual filament swapping, simply pause the print at the point where you want a color change. Manually raise the nozzle using your 3D printer software by about 20 mm. Retract the filament from the extruder and swap in the new filament.
Extrude the new filament, making sure that all traces of the old filament have been removed. Catch the scrap filament with some cardboard you have lying around. You can then lower the nozzle to the original position and resume printing. Repeat this process as many times as necessary.
Semi-automatic method
If you know how to mess around with G-Code, then you can make this method so much easier. Once your slicer software has generated the G-Code for your model, use the layer preview to identify the layers in which you want to do a filament swap. Write these down as you’ll be referring to this list multiple times.
With the layers identified, you can go ahead and look for the layers in the G-Code and insert a pause (M600) command. It would be best to couple this with a Z20 command, which raises the nozzle by 20 mm. Do this for every layer that requires a filament swap. Make sure to run the layer preview again, just to make sure that the G-Code is functioning as expected.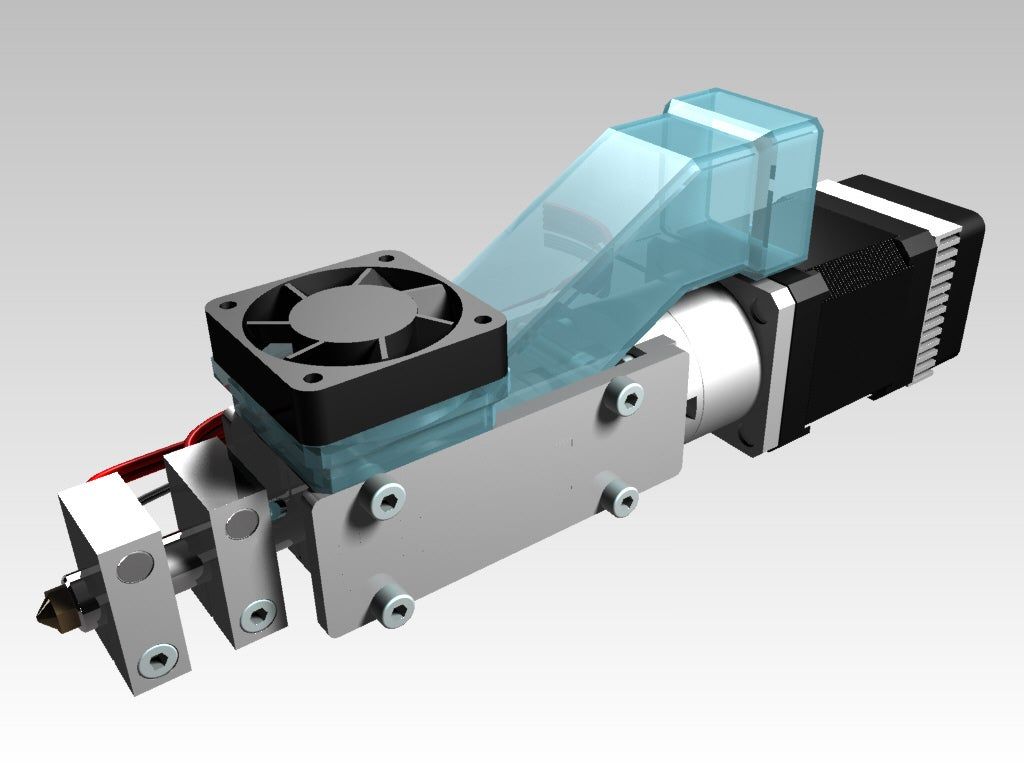
With the G-Code edits in place, your printer should now know to automatically pause when you need to swap in a new filament. The actual swapping step is still manual, of course, but this method is a lot less tedious and prone to error.
Although filament swapping may also seem like a rudimentary method, a lot of 3D printing professionals practice it. It’s the most common method for overcoming the limitations of the number of extruders in a 3D printer – after all, most 3D printers are limited to just one or two. There is a lot of skill needed to pull off filament swapping, but the results are certainly worth the effort.
Filament splicing
Sometimes, splitting up the colors of a model into distinct layers is virtually impossible. Should this be the case, you can augment a single-extruder 3D printer with an accessory with up to four different filaments. This is the idea behind filament splicing – a method that allows for fully automated filament swapping.
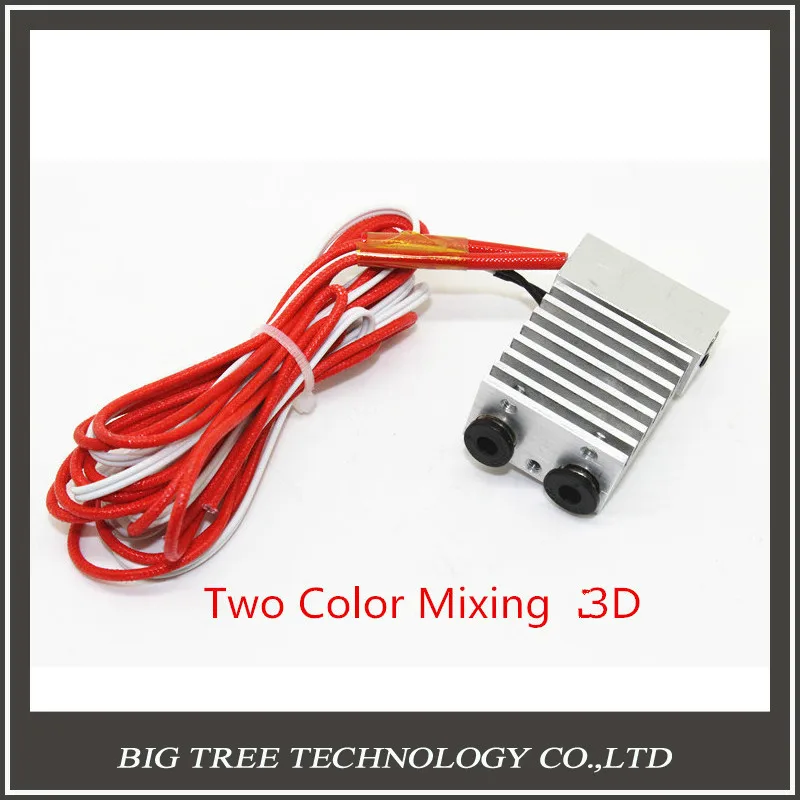
The key to this method is the Palette accessory. The Pallete works by accommodating up to four different filament spools. Inside the Palette is a mechanism that cuts, heats, and splices together any combination of two filaments from the selection. This process is very quick and can be automated using the CANVAS hub. The spliced filament is then fed to the 3D printer as a single, uninterrupted strand.
A great thing about Palette is that they have been in the business for quite some time. The latest model, the Palette 2S Pro, is an extremely streamlined product with a host of quality-of-life features. It’s easy to use, requires no calibration, has tool-free maintenance, and comes with intuitive software. It’s also a really good-looking product and its modern minimalist aesthetics should fit quite well in any workstation.
There is a catch, however – the Palette filament splicer is quite expensive. In fact, you can buy a dual-extruder 3D printer for several hundred dollars cheaper than the Palette 2S Pro. This certainly puts into question the wisdom of investing in a Palette accessory.
Other technologies: PolyJet printing
This may already be outside the subject scope of this article but is still worth mentioning because of how interesting the technology is. One of the most advanced ways to 3D print in multiple colors is via the Multi-Color Polyjet method on the Stratasys J750 printer.
The Polyjet method uses photopolymer resin as raw material. This liquid resin is deposited on a build plate through very small droplets and cured by a flash of UV light. What is unique about Multi-Color Polyjet is that it allows the droplets to be colored before deposition. The result is a full-color 3D print with vibrant hues and an excellent level of detail.
Being able to create multi-colored objects using a PolyJet method may just be the peak of multi-colored 3D printing technology. PolyJet is already a superior technology, capable of reproducing highly detailed models using a rapid and reliable method. Combined with a multi-color option, it’s going to be tough for any other 3D printing method to present a compelling alternative.
The biggest downside, as you would expect, is that you can’t just buy a PolyJet printer. This type of printer is ridiculously expensive and typically only used in businesses or corporations. Instead, you can see the output of Multi-Color Polyjet yourself by having a model printed through a third-party service.
Final thoughts
Most people who are curious about 3D printing start with a simple, single-extruder 3D printer. While this is good enough for practicing, printing with a single color only can feel lackluster after some time.
However, you don’t need necessarily need to upgrade to a dual-extruder model just to print multi-colored models. With a bit of creativity (and a lot of tenacity), you can “hack” your way to multi-colored print with just your humble single-extruder printer.
Warning; 3D printers should never be left unattended. They can pose a firesafety hazard.
Multicolor 3D Printing with a Single Extruder – Clever Creations
One of the best ways to create eye-catching 3D prints is to print them in multiple colors. This is often referred to as multicolor printing. It is a great way to add extra color to your prints without having to resort to post-processing techniques like painting.
Dual extruder 3D printers that allow for printing in multiple colors at the same time have been around for a while. Most of our hobbyist printers only come with a single extruder however. Luckily, there are also methods to multicolor print with only one extruder.
In this article I will show you the most common methods for multicolor printing with a single extruder, along with their advantages and disadvantages.
Let’s take a closer look.
Pause at height and swap filamentOne of the most common ways to 3D print with multiple colors is to pause the print and to manually swap out the filament with filament of a different color. Often this is done when the printer increases its Z position to move to a new layer. It is often referred to as the pause at height or pause at layer method.
You are not limited to swapping filament colors only once, it is possible to swap filaments many times during a single print to create cool visuals.
Close-up of a six-color 3D printed plant label, printed with the pause at height method.You can either pause the 3D printer by hand, or edit the G-code so that the 3D printer pauses automatically at specific points during the print.
Manually pausing the print
If the exact point you want to swap out the filament is not very important, you can simply manually pause the print using the printer’s host software, or by using the printer’s control panel. You will need to keep an eye on your printer to identify the approximate moment you want to swap out the filament.
Edit G-code to pause the print
If you need more precise control, for example, if you want to swap filament on a layer change, it is best to edit the G-code of the print. This causes the printer to automatically interrupt the print and enter a pause state.
One advantage of this method is that there is no need to monitor the 3D printer. Once the printer reaches a specific layer that you want to swap the filament at, it does the pausing without any human input.
Editing the G-code involves inserting pause commands. You can do this by hand, or you can have the slicer software do it for you.
How to manually edit G-code to pause a print
To manually edit G-code to set up a 3D print for automatic pausing, you can do the following:
1. First, find in your slicing software the exact layer(s) you want to swap colors at.
For example, in Simplify3D I adjust the layer preview slider until I am at the layer that needs a different color. In the bottom left corner I can see that it has a Z position of 2.20.This means that if I want to print with a different color starting with that layer, I need to pause and swap out the filament at the beginning of that layer.
2. Generate the regular G-code for the print and open it in a text editor like Notepad.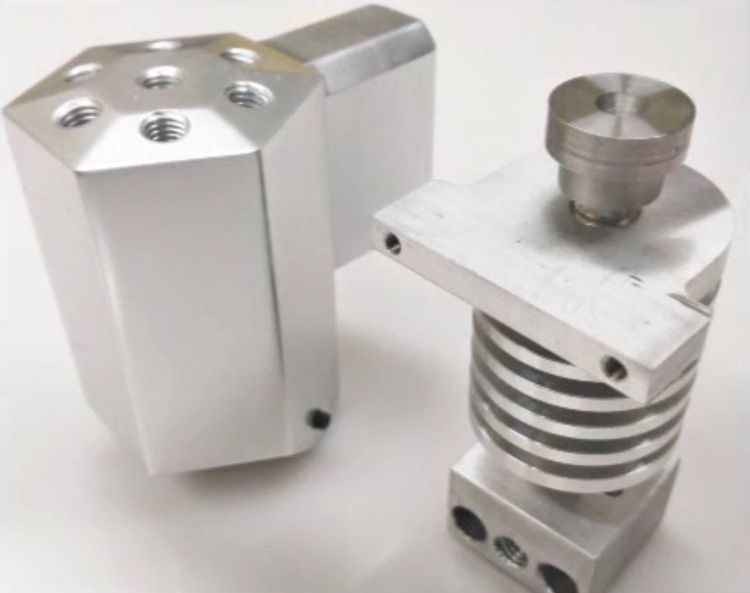
3. Edit the G-code by adding pause commands. For example, the G-code I add to pause the print is as follows:
G91 ; set relative positioning G1 Z10 F4000 ; move Z up 10mm G90 ; set absolute positioning M600 ; suspend/pause
This moves the nozzle up 10mm, and then pauses the print. I let the hotend move upwards first so that any filament that oozes out of the nozzle will be in mid-air instead of oozing on the print.
In the example from before, where I want to pause the print at Z2.20, the resulting section of G-code would look something like this:
G92 E0.0000 G1 E-1.7000 F3000 ; layer 11, Z = 2.200 G91 ; set relative positioning G1 Z10 F4000 ; move Z up 10mm G90 ; set absolute positioning M600 ; suspend/pause ; feature outer perimeter G1 Z2.200 F300 G1 X-2.589 Y3.860 F12000
So what I did there was insert the pause G-code right before the command that moves the 3D printer to Z2. 20 (
20 (G1 Z2.200 F300).
How to automatically insert pause commands in G-code
Aside from manually editing G-code, it is also possible to have the slicer software automatically insert pause commands when the G-code for the print is generated. This saves quite a bit of time and effort when you want to pause a print several times.
Slicers usually do this by running a post-processing script after generating the G-code. This script inserts the pause commands at the relevant locations.
Inserting pause commands with post-processing in Simplify3D
In Simplify3D it is possible to automatically insert the pause commands when the G-code is generated. You can do this by going to Edit Process Settings -> Scripts and then finding the “Additional terminal commands for post-processing” section at the bottom.
In the corresponding text box you can enter a script that inserts the pause G-code. For the example where I want to automatically pause at layer 11 @ Z2. 20, I would add the following:
{REPLACE "; layer 11, Z = 2.200" "; layer 11, Z = 2.200\nG91\nG1 Z10 F4000\nG90\nM600"}
What this does is that it finds the G-code comment that announces the new layer ( ; layer 11, Z = 2.200 ) and replaces that line with itself + the additional pause G-code on the next lines. The \n in the script signals the start of a new line. You can compare it with pressing Enter on your keyboard.
It is also possible to use multiple replace commands at once, for example when you want to pause the print multiple times to swap filament. That would look something like this:
{REPLACE "; layer 11, Z = 2.200" "; layer 11, Z = 2.200\nG91\nG1 Z10 F4000\nG90\nM600"}
{REPLACE "; layer 13, Z = 2.600" "; layer 11, Z = 2.200\nG91\nG1 Z10 F4000\nG90\nM600"}
{REPLACE "; layer 15, Z = 3.000" "; layer 11, Z = 2.200\nG91\nG1 Z10 F4000\nG90\nM600"}
You can find more information on the post-processing feature in Simplify3D on this page.
Post-processing in other slicers
Other slicers have their own implementation of post-processing scripts. For example, Cura has a built-in post-processing script for pausing at specific heights, whereas Slic3r supports external post-processing scripts in a variety of languages such as Perl, Python, Ruby and Bash.
In short, you need to insert the right post-processing script in your slicer, and make sure that the G-code in the script is correct for your specific 3D printer. In many cases you will be able to find an example pause at layer height script online for your 3D printer that you can use. After setting the right layer heights in the script, you will be able to pause 3D prints at the exact height you want.
How to change filament colors after pausing the print
After pausing the print, whichever method you used, the next step is to change to a different filament color. Let’s see how to do that.
To unload the old filament, press the extruder lever to disengage the drive gear, and use your other hand to pull the filament out. Alternatively, use the printer control panel or host software to reverse the filament out mechanically.To load the new filament, press the extruder lever once again, and insert the new filament as far as possible. Make sure that the filament passes the extruder drive gear, before releasing the lever.Purge the old filament from the hotend. I find the best way to do this is to extrude using the printer’s control panel or host software.
Once the color of the extruded filament is the same as the filament going into the hotend, you can resume the print. Make sure to remove any strings of extruded filament from the nozzle with a pair of tweezers first.
To resume the print, once again use the printer’s control panel or the host software. For my printer’s Smoothieboard electronics I need to send the M601 command to resume the print, but for other 3D printer electronics this can be a different command. Make sure to check!
Additional considerations
- Make sure to keep the hotend hot during pausing.
 This allows you to pull all of the old filament out.
 - The same goes for the heated bed. If you are using one, make sure that it does not cool down while the printer is paused. This can cause the part(s) to release, ruining your print.
- It is also important to keep the stepper motors of your 3D printer on/engaged while the print is paused, so that the hotend can resume printing from the exact X/Y coordinates it paused at. Turning the stepper motors off makes it possible for the extruder carriage to move. If it moves, the print will shift on the next layer after resuming.
- You can often set the pause behavior for the three above items in the printer’s firmware. That way you don’t need to set them manually every time you pause a print.
Pros
- Works with every printer.
- Easy to set up.
Cons
- Only lets you print one color per layer.
- Labour intensive if filament has to be swapped many times.
Virtual Extruders
Another method to multicolor print with a single 3D printer extruder is to create virtual extruders in your slicer.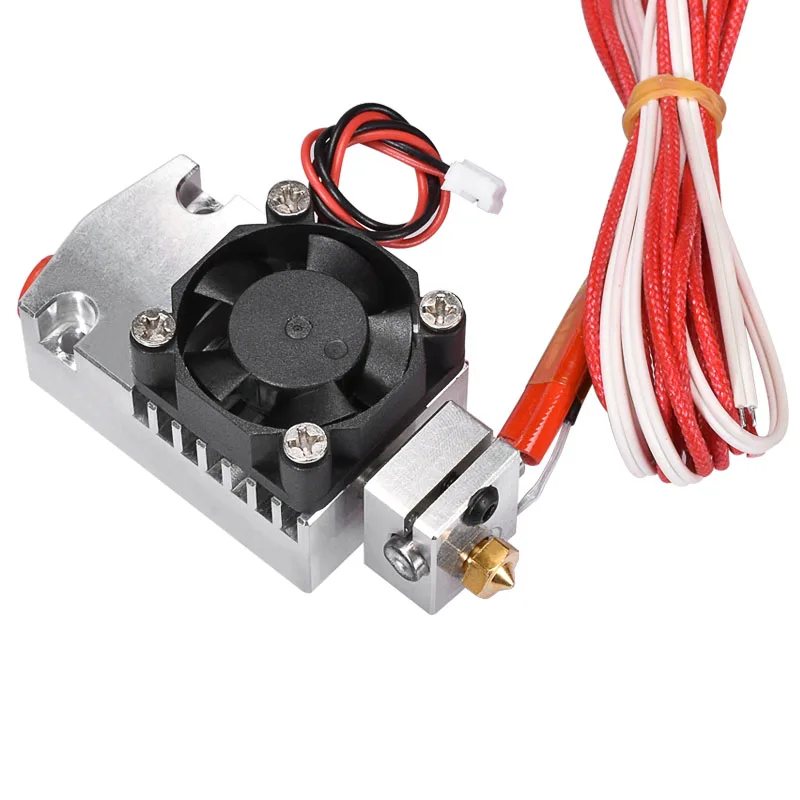 This essentially means telling your slicer that your 3D printer has multiple extruders with different color filaments. In reality, you will be swapping out filament in your only extruder each time the printer is supposed to change extruders.
The big advantage of this is that it gives you the opportunity to print with multiple colors on a single layer, just as you could do with multiple real extruders. This is something that isn’t possible when you swap filament on a layer change.
Virtual extruders come in handy when you have a model that you want to print in multiple colors, but that needs to be perfectly flat without additional colors that stick out (say for something like a coaster).
A downside of this method is that you need a multibody 3D model to print, as each virtual extruder prints one body in a specific color.
Multibody 3D models can take more time to design, and there are less available to download on sites like Thingiverse, compared to singlebody 3D models.
Here you can find a tutorial on setting up virtual extruders in Simplify3D.
Pros
- Allows for 3D printing with multiple colors on one layer.
Cons
- Needs multibody 3D models.
- Can be time-consuming to set up in slicer.
Multicolor filament
Aside from swapping out filament to add additional color to your 3D prints, it is also possible to print with multicolor filament. Multicolor filament is filament that has multiple colors on one spool. It usually gradually transitions from one color into another. Some spools have two or three colors, whereas others cover the entire rainbow.
Multicolor filament is especially useful for large, aesthetically pleasing prints like vases. The gradual color changes really make these sorts of prints stand out.
Not all of these spools work well for smaller prints, because prints can be too small to have the color transitions show up. So if you want to make the best of a spool of multicolor filament, pay attention to this.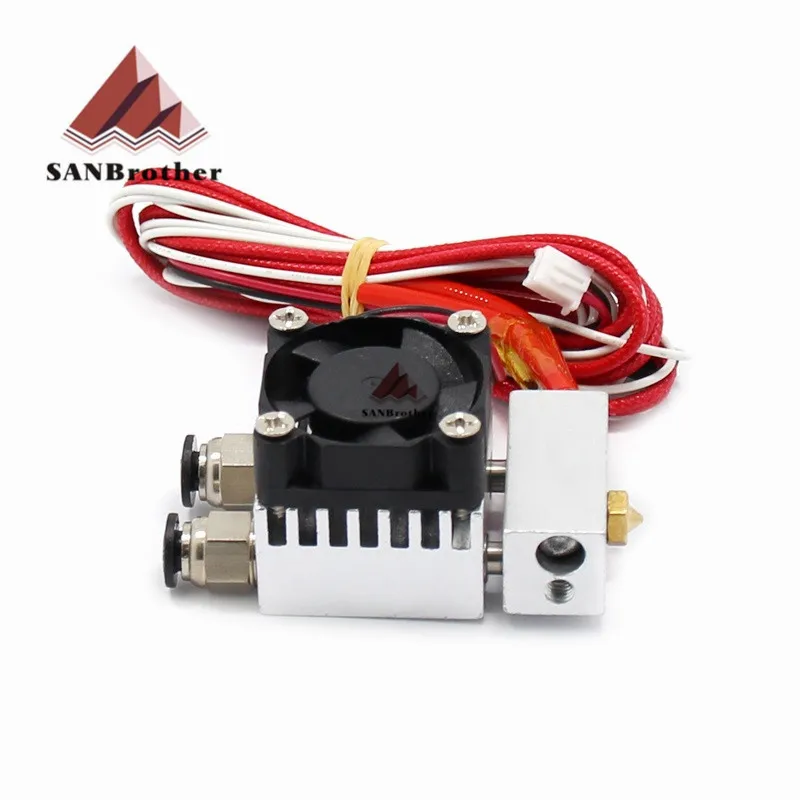
Making your own multicolor filament
Besides buying multicolor filament, it is also possible to create your own. This is done by splicing multiple colors of filament and joining them together. You won’t have any gradients, but you will be able to control the exact colors and number of color changes.
Here you can find a tutorial on fusing filament together yourself.
Pros
- No need to swap filaments.
- No need to modify G-code.
Cons
- Impossible to control placement of colors.
- Significant color transitions are often only visible in large prints.
Recommended:
The 10 Best PLA Filaments for 3D Printing
Conclusion
You have learned:
- How to use the pause at height method to switch filaments on Z change.
- How to manually insert pause commands in G-code.
- How to use Simplify3D’s post-processing function to automatically insert pause commands in your G-code.
- What a virtual extruder is, and its advantages and disadvantages.
- What multicolor filament is, and its benefits and drawbacks.
3D printer PrintBox3D One from the manufacturer PrintBox3D
Construction area, mm: 185x160x150
Printing material: ABS plastic, PLA plastic, PVA plastic,
All specifications
Description of the 3D printer "PrintBox3D One"
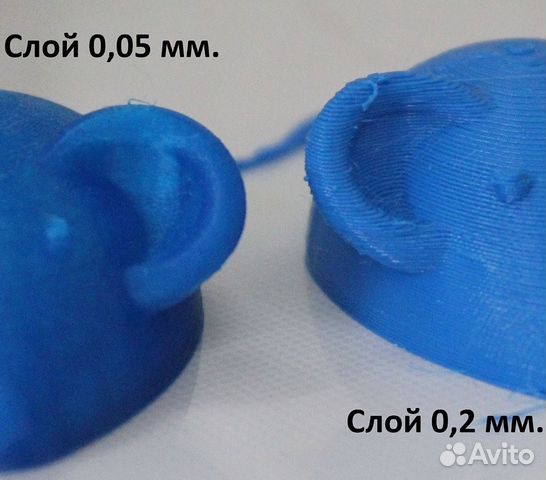
PrintBox3D One is an exceptionally compact Russian-designed desktop printer. Despite the miniature dimensions, 320x360x390mm, the device is able to print objects measuring 185x160x150mm from a wide range of materials, including ABS, PLA and PVA plastics. The minimum thickness of the applied layer is 50 microns. Extruder nozzles have a diameter of 0.15 or 0.3mm. Russified versions of Repetier Host\Cura are used as software.
About PrintBox3D One
One of the most capable Russian 3D printers is RGT's PrintBox3D One. The device was designed by engineers with rich experience in the use of CNC machine tools, and it shows in the design. The PrintBox3D One may be unsightly in appearance, but only because the developers tried to achieve maximum functionality, leaving the appearance in the background. Even the existing cladding is deceptive - it is an aluminum composite, but it is used only in cladding. The base frame, rails and work platform are pure metal – no plastics or plywood. The result is a strong, durable structure that is not subject to loosening. Even the composite sidewalls were obviously installed not to improve the appearance (there is nothing particularly pretty about them), but to further strengthen the design.
The design of the PrintBox3D One is not particularly attractive, but it is highly durable and stable
In general, the appearance of the PrintBox3D One leaves the impression of not a household 3D printer or even a clean printer in general, but rather a small multifunctional machine. As it turns out, this is not accidental - immediately after the PrintBox3D One went on sale, the developers announced the imminent release of the milling nozzle. Add to this the ability to drill and laser cut, and your desktop will have a real multi-functional machine. But no matter how wonderful the versatility is, let's take a closer look at the main function of the device - 3D printing.
Metal extruder made of aluminum and brass
PrintBox3D One is equipped with a single extruder. This means that it is not possible to print different materials or colors at the same time. But is it such a big drawback? It is better to be able to print well with one material than poorly with two. And PrintBox3D One prints perfectly. The developers claim a minimum layer thickness of 50 microns - an indicator at the level of professional printers. The positioning accuracy in the horizontal plane reaches + -20 µm - the high strength of the structure, which counteracts backlash, affects. The size of the construction area is also quite good, especially considering the rather modest dimensions of the printer itself, and reaches 180x180x160mm. At the same time, the device has a fairly high performance - up to 30 cm³ per hour. Although, it all depends on the nozzle, and the choice is quite rich: nozzles with a diameter of 0.1mm, 0.2mm, 0.3mm or 0.5mm have recently been offered. The smaller the diameter, the higher the print accuracy, but the lower the productivity.
One of the obvious advantages of PrintBox3D One is the ability to print with a variety of thermoplastics - PLA, ABS, PVA are listed by the manufacturer along with "others". Under the "other" may well mean nylon and polycarbonate, and any composite material with a polymer filler. The characteristics of the printer allow you to experiment.
The problem with the most popular PLA and ABS plastics is that they have exactly the opposite properties and requirements during printing. PLA plastic is environmentally friendly and safe, but short-lived. ABS is strong and durable, but emits toxic fumes when melted - not that in lethal doses, but the smell is unpleasant. PLA melts easily, but takes a long time to cure, requiring fast enough cooling of the applied layers to prevent the model from deforming. ABS requires a higher temperature regime and smooth solidification in order to avoid deformations during “shrinkage” (the cooling model decreases somewhat in volume).
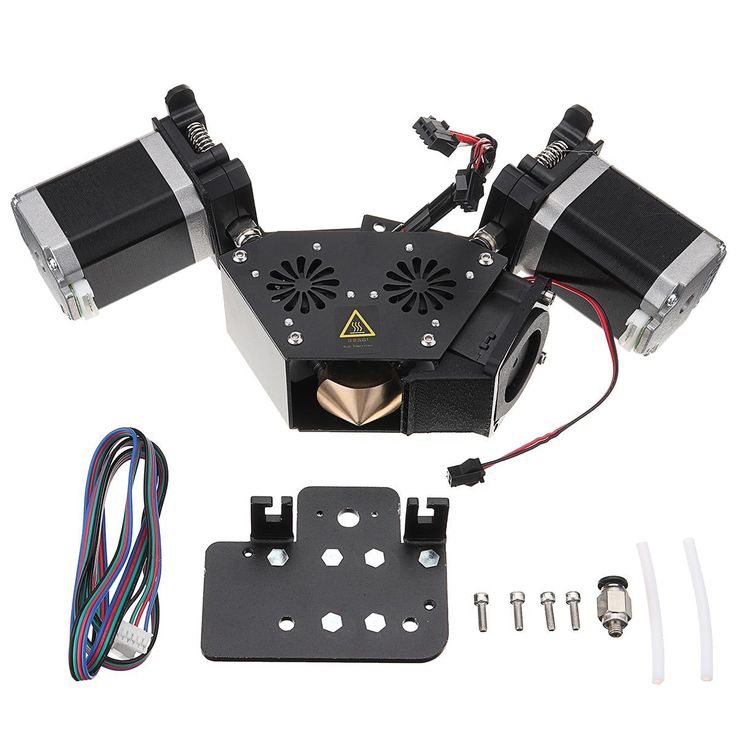
3-fan array cools printed layers quickly
The PrintBox3D One satisfies a conflicting need by heating the bed when printing with ABS and blowing PLA models with an array of 3 fans. The platform is clear - a thick 4mm aluminum construction with a 300W flat heating element and a maximum temperature of 150°C for fast and even heating. This minimizes the possibility of deformation of the first layers of the model - their twisting can lead to the failure of the model from the platform by a clinging nozzle. But the array is quite original. Although a similar solution is used on other printers, we have not yet seen not one, but three fans at once.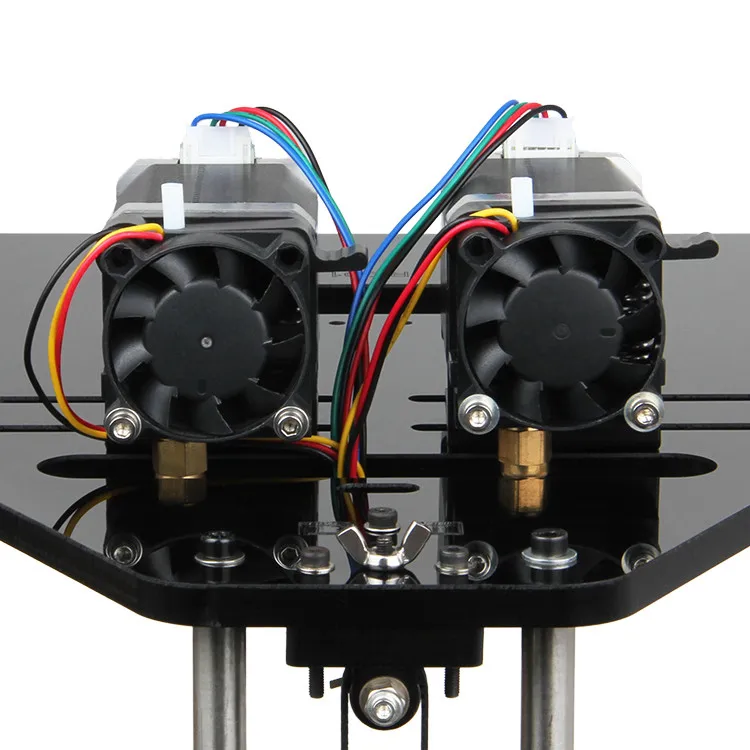 If their power is not enough to quickly cool the layers, it is best to lower the print speed - it's slower, but more reliable. Fortunately, the software allows you to do this. By the way, fast curing can help save consumables - the developers of PrintBox3D One assure that it is possible to print hinged elements at sufficiently large angles, which means less need for printed supports.
PrintBox3D One allows you to print Yoda's ears without plastic supports. You can not be afraid of the fairly common overlapping threads in the spools. The extruder itself heats up to a maximum of 300°C for printing plastics with a high melting point - not enough for nylon, but about enough for polycarbonate. The extruder body is held together by four screws. Disassembly for cleaning in case of clogging does not present any particular difficulties.
Repetier-Host is the standard software for PrintBox3D One
Another interesting feature is the use of the Repetier-Host program, a popular and capable software.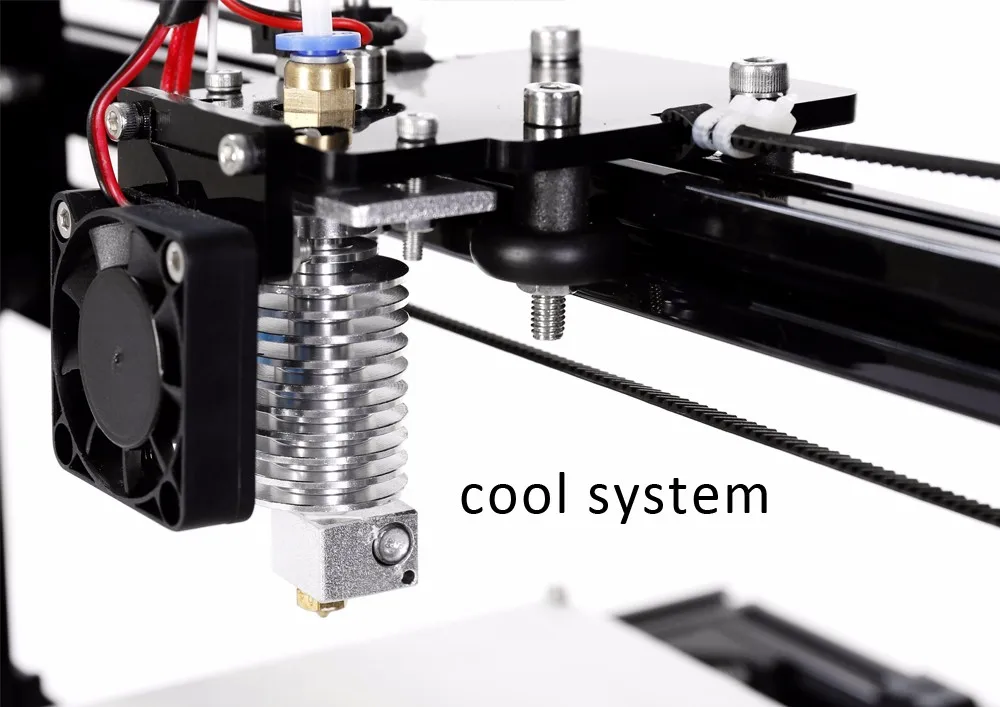 Many manufacturers prefer to take Repetier as a basis, developing their own versions of the program and cutting down many of the features for the sake of the notorious ease of use. In fact, the original Repetier is already famous for its convenience, and the rich, if intimidating, range of settings will only work to the advantage of those who want to squeeze the most out of a 3D printer. In addition, Repetier is compatible with all popular operating systems (Windows, Mac, Linux) and is fully Russified.
Perhaps the only serious shortcoming of the PrintBox3D One is the lack of a memory card reader, which eliminates the possibility of offline printing and leaves the process vulnerable to computer failures. The rather large weight of a small device cannot be considered a disadvantage, because this is the price for strength achieved through the generous use of aluminum.
Finally, one should not forget about such advantage of serial domestic printers as the availability of local service support.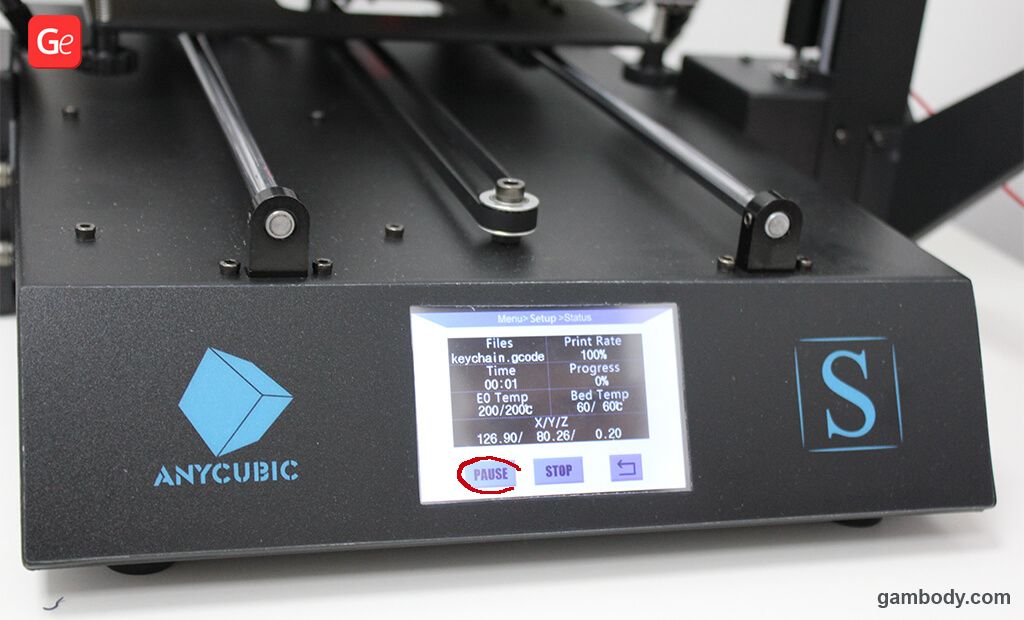 The manufacturer offers service and sales of spare parts, as well as a one-year warranty.
Reviews and owner reviews
- Why PrintBox3D ONE: View
Printed Models
Show More
PrintBox3D One Owner Articles
Show More
Popular 3D Printers
Anet A8
1460 articles 1719 owners
Anet A8 3D printer is a budget 3D printer from China. Region...
3 offers from 12000 ₽
Anet A6
1126 articles 1610 owners
Anet A6 3D printer - Chinese version of RepRap project P...
3 offers at the contractual price
Ender 3
1156 articles 991 owners
Creality Ender 3 is a budget 3D printer from Chinese manufacturer.