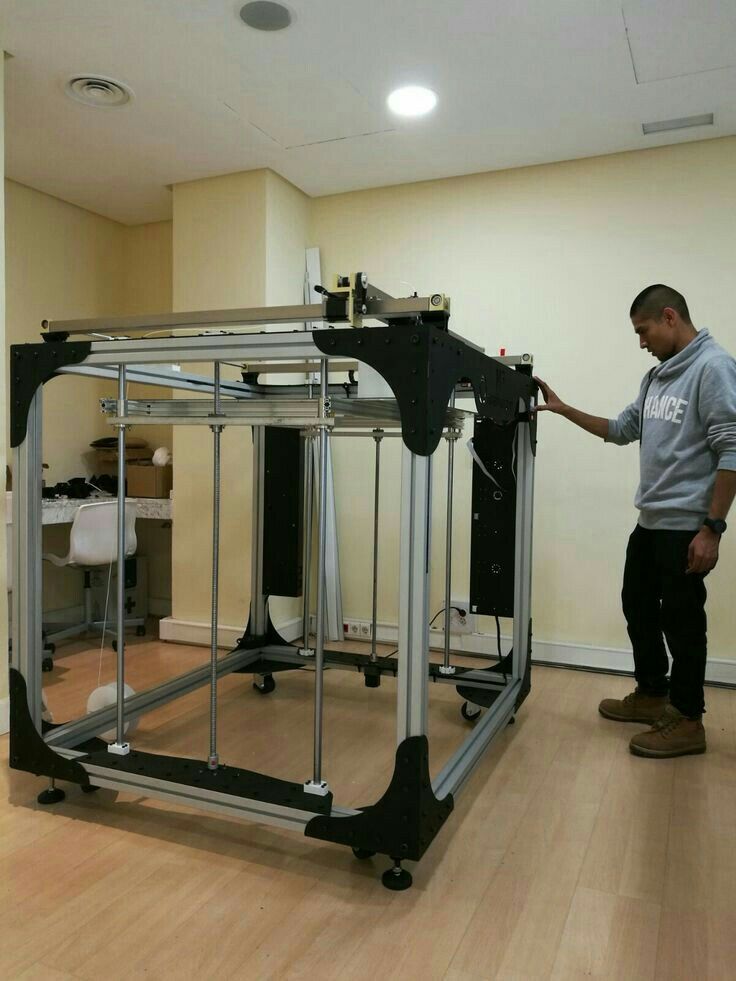
Luzbot 3d printer
Shop LulzBot 3D Printers & Filament
3D Printers
Award-winning LulzBot® desktop 3D printers respect your freedom to create. Enjoy industry-leading robustness, reliability, ease-of-use, and material variety to bring your ideas to life!
Explore 3D Printers
LulzBot TAZ Pro S
LulzBot TAZ Pro S. 1.75mm, Single Extruder.
The LulzBot TAZ Pro S is an industrial desktop 3D printer that provides large, 1.75mm material printing with LulzBot’s award-winning reliability. Create large functional prototypes, manufacturing aids, and print-on-demand parts with easy, professional results.
- Need a TAZ Pro S ABS+ Enclosure? Find it here ➡
3D Printers
$ 3,995 00
3995.0
LulzBot TAZ Workhorse
Bigger. More Reliable. Easier Than Ever.
A name earned over seven years and millions of printing hours, the LulzBot TAZ Workhorse is a ready-to-print powerhouse that builds on the unmatched reliability and print quality of its predecessors while offering more material options than ever before.
- LulzBot TAZ Workhorse Introduction Video ➡
- Need a TAZ Workhorse ABS+ Enclosure? Find it here ➡
3D Printers
$ 2,950 00
2950.0
LulzBot TAZ Pro
Professional Results.
The new LulzBot TAZ Pro is an industrial desktop 3D printer that provides large, multi-material and soluble support printing with LulzBot’s award-winning reliability. Create large functional prototypes, manufacturing aids, and print-on-demand parts with easy, professional results.
- LulzBot TAZ Pro Introduction Video ➡
- Need a TAZ Pro ABS+ Enclosure? Find it here ➡
3D Printers
$ 4,950 00
4950. 0
0
LulzBot Mini 2
Less show pony, more work horse.
Don't let the compact frame and easy operation fool you. The LulzBot Mini 2 Desktop 3D Printer is engineered and built to exacting standards in the USA and ships calibrated and ready to work. Whether you’re keeping pace with growing production demands, engineering mission critical components, or inspiring the next crop of global innovators in the classroom... saddle up!
- LulzBot Mini 2 Introduction Video ➡
- Need a Mini 2 ABS+ Enclosure? Find it here ➡
3D Printers
$ 1,495 00
1495.0
Tool Heads
Upgrade and unleash your LulzBot® 3D Printer! Reach new layer heights for snap-fit parts and tight tolerances with the SL Micro. Make strong parts fast with the HS+. Experience 1. 75mm filament printing with the M175.
Explore Tool Heads
M175 v2 Tool Head | 1.75 mm | Single Extruder | 0.5 mm
LulzBot honors your freedom to print.
Add 1.75 mm filament capability to your LulzBot 3D printer and open up an even wider variety of 3D printing materials. The M175 v2 Tool Head is here to bring the world of 1.75 mm material to your LulzBot Mini 2, TAZ Workhorse, and TAZ Pro.
Tool Heads
$ 375 00
375.0
SE Tool Head | 2.85 mm | Single Extruder | 0.5 mm
Versatility and precision come standard with the LulzBot SE Tool Head, featuring the Universal Mounting System, and the industry leading Titan Aero Hot End and Extruder from E3D. This tried and true combination enables a vast palette of supported 3D printing material, both rigid and flexible. As the featured tool head on both the LulzBot Mini 2 and TAZ Workhorse 3D Printers, the SE tool head is here to bring even more performance and dependability to your already trusty LulzBot TAZ 6, TAZ 5, and LulzBot Mini 1.
Tool Heads
$ 295 00
295.0
Filament
LulzBot® 3D printers offer support for dozens of cutting edge materials, including standard plastics, nylon, metal, conductive, glow-in-the-dark, UV-reactive, polyesters, and more!
Explore Filament
IC3D ABS Filament (2.85 mm, 1 kg Spool, Red, ABS)
IC3D ABS 3D printer filament is the first and only Certified Open Source Hardware 3D printer filament. IC3D has published their filament production process which includes documentation on equipment used, settings and parameters, material grade, and sources.
This transparency not only shows the drive for consistency, precision, and quality, but also a committment to furthering desktop 3D printing material technology. By choosing IC3D filament, you too can help support User Freedom in the 3D printing industry. ABS 3D printer filament is the leading thermoplastic used in consumer electronics. 3D printed ABS objects balance strength, resilience, and heat resistance.
Filament
$ 35 00
35.0
Polymaker PolyLite PLA Filament (2.85 mm, 1 kg Spool, True Black, PLA)
PolyLite™ by Polymaker offers excellent 3D printing performance, a vibrant palette of colors, and will become your affordable, go-to choice. This premium filament 3D prints reliably and has minimal warping and shrinking compared to other materials, perfect for applications featuring flat surfaces and hard angles, or requiring tight tolerances for fit.
PolyLite PLA is available in multiple weight options. Select your preference below.
Filament
$ 22 99
22.990000000000002
$ 18 39
18.392
3D-Fuel Standard PLA+ Filament (2. 85 mm, 1 kg Spool, Ocean Blue, Standard PLA)
Standard PLA from 3D-Fuel® is made from NatureWorks™ 4043d Ingeo PLA
Standard PLA is a basic, entry-level PLA filament. It's available in a broad color selection and uses only virgin NatureWorks Ingeo 4043d PLA resin. No fillers or stretchers means a more predictable 3D printing experience. Because there are no fillers, the ideal print temp might be 5-10C higher than your current PLA settings.
Filament
$ 29 00
29.0
$ 21 75
21.75
Fenner Drives NinjaFlex 85A Filament (2.85 mm, 0.75 kg Spool, Snow, NinjaFlex 85A)
NinjaFlex 3D printing filament performs with an exciting combination of elongation, elasticity, and strength. Simply put, it is the stretchiest material we have ever tested. NinjaFlex comes in many colors that have a beautiful, strong sheen after being 3D printed. Like SemiFlex, NinjaFlex is a premium and high quality filament material capable of opening the door to a wide range of new applications for your LulzBot desktop 3D printer
- Shore Hardness = 85A
- 660% elongation allows for repeated movement and impact without wear or cracking
Filament
$ 64 99
64.99
Accessories
Find the connection your work flow has been missing with custom LulzBot® 3D Printer enclosures, tools, and adhesives.
Explore Accessories
TAZ Pro/Workhorse ABS+ Enclosure
Use this ABS acrylic 3D printer enclosure with your LulzBot TAZ Pro or Workhorse to minimize warping and cracking caused by printing in cold and drafty environments, while keeping curious hands and paws away from the heated and moving parts of your 3D printer. This new 3D printer enclosure features a strengthened design with ABS panels, LulzBot branded laser-etched acrylic, and comes ready to assemble with all components provided (no 3D printing required).
Perfect for:
- Cold and/or drafty environments
- Printing materials with high shrink rates, like ABS, Nylons (Polyamides), and Polycarbonates
- Classrooms, libraries, and high-traffic areas with curious hands
Accessories
$ 350 00
350.0
LulzBox by Repkord (Complete RepBox Package)
The filament management system you've been waiting for!
Holds up to six 1kg spools all in an attractive LulzBot themed RepBox.
Comes in addition to your LulzBox:
Upgraded seal kit
Humidity Hunter kit
Wall mounting kit
Does not come with filament.
Accessories
$ 295 00
295.0
Parts
Customize to your heart’s content, build your own DIY printer from the ground up, or keep your tried and true printers running with exclusive LulzBot® 3D Printer upgrades, spare parts, and more!
Explore Parts
100k Semitec NTC Thermistor
Manufactured by Semitec, this glass thermistor for 3D printers is encapsulated with a stainless steel jacket by E3D to improve heat transfer and to add strength and stability for secure installation into a hot end heater block.
Parts
$ 18 00
18.0
5 Amp Nano Polyfuse (x3)
These fast acting 5 amp nano polyfuses serve as the first line of defense for the full-sized RAMBo control electronics used in the LulzBot TAZ by protecting against potential damage caused by shorting. This three pack of LulzBot 3D printer fuses provides a full replacement set for the hot end/logic fuse, the stepper drivers fuse, with one additional fuse to be held in reserve as further backup.
Parts
$ 10 00
10.0
Mini 2/SK 289 Glass/PEI Print Surface, Retail
The LulzBot Modular Print Bed System ensures your LulzBot Mini is going strong for years to come with improved ease-of-maintenance, increased versatility, and better heat uniformity across the bed surface. The system is an easy and smart upgrade to any existing LulzBot Mini 3D Printer.
This 3D printer glass and PEI bed surface is the upper half of the Modular Print Bed System and features a PEI (Polyetherimide) sheet laminated to a borosilicate glass plate.
Works with: LulzBot Mini 2, LulzBot Mini 1
Parts
$ 40 00
40.0
Beefy Idler Assembly, Retail
Redesigned to be stronger and more reliable, this Beefy Idler Assembly is a direct replacement for the extruder idler used on the LulzBot TAZ 6 and the LulzBot Mini 3D printer, and is compatible with previous LulzBot 3D printer models. Order this part for your LulzBot 3D printer today!
Works with: LulzBot Mini 1, LulzBot TAZ 6, LulzBot TAZ 5, LulzBot TAZ 4, LulzBot TAZ 3, LulzBot TAZ 2 or 1
Parts
$ 10 00
10. 0
0
LulzBot | Taz-6-product-page
LulzBot TAZ 6
Engineers, designers, educatiors, and makers agree: The LulzBot TAZ 6 is the most reliable, easiest to use desktop 3D printer ever, featuring innovative self-leveling and self-cleaning, and a modular tool head design for flexible and multi-material upgrades. With proven 3D printing technology and one of the largest print volumes in its class, the LulzBot TAZ 6 is ready to work.
3D printing is more reliable than ever with the integrated automatic bed leveling system, all metal LulzBot v2 HotEnd, and heated PEI print surface. Withe the alll metal hot end you can take advantage of the cutting edge market for new materials. Perfect for both large and small objects the heated PEI build surface keeps your 3D printed objects in place when hot and releases when cool. With Cura LulzBot Edition, you have hundreds of quickprint profiles built in for seamless 3D printing.
See all available 3d printers!
The LulzBot TAZ series continues to grow, to see the latest 3D printer models available, visit our store page at shop. lulzbot.com and also available through our resellers .
Key Technical Specifications
- Tool Head: TAZ Single Extruder Tool Head v2.1 0.50 mm nozzle
- Layer Resolution 0.05 mm - 0.4 mm (0.002in - 0.02in)
- Max Hot End Temperature 290° C
- Level Automatic Z-Axis Compensation
- Certifications FCC, CE, WEEE, OSHWA, FSF-RYF
Print Volume Dimensions
280 mm x 280 mm x 250mm
(11.02" x 11.02" x 9.80")
Print Volume
19.600 cm³ (1,185 in³)
Full Spec Sheets and Other Resources
Large Print Volume
The LulzBot TAZ 6 has a build volume nearly the size of a basketball so you can make huge 3D prints, or 3D print many objects in a single print run, right on your desktop. Like the generations before it, the TAZ 6 boasts a spacious 280mm x 280mm x 250mm (11 in x 11 in x 9.8in) print area with a heated print surface.
2.85 PolyLite PLA
Polymaker
US $22. 99
99
LulzBot TAZ Dual Extruder v3.1 Tool Head | 0.5 mm
Shop
US$495.00
Support Included
Support for your LulzBot products is included with any LulzBot product. Our staff is extremely qualified to provide assistance and their expertise.
Home Base U.S.A
Our friendly US based support team is just a phone call or email away.
Phone: (+1-701-809-0800 ext 2)
Email: ([email protected])
3D Experts
Our in-house support has years of 3D printing experience and will help ensure that your printer is running optimally!
More Information
" If you want a serious machine, you won't find a better 3D printer on today's market - whether you need to create small pieces or one large part."
Best 3D Printers, Amazon.com"With it’s self-leveling and self-cleaning mechanisms, along with a large build envelope of 280×280×250mm, the TAZ 6 is a workhorse printer that will produce excellent prints consistently. The TAZ 6 also comes equipped with the v2 Hot End, capable of printing in a wide variety of materials ran...
"The TAZ 5 represented the state of the art for FDM 3D printing, and the TAZ 6 does nothing to lose that crown. It is the best FDM 3D printer we have tested. While print quality remains the same, the TAZ 6 is more reliable and easier to use than its predecessor. Plus, the self-leveling print b...
Richard Baguley, Tom's Guide"Even if you're new to printing, there really is nothing to fear as everything you need to set up and use the LulzBot TAZ 6 is in the box, from print tool kit to printed guides."
Alastair Jennings, Techradar.com"The LulzBot TAZ 6 has been the single best out-of-the-box experience of any 3D printer I've ever used... Every detail feels like it's been purposefully put there. Nothing is out of place."
Thomas Sanladerer, 3D Printing Expert"The LulzBot TAZ 6 scored very high for build quality and reliability, and that’s not surprising given the fact it received reviews describing it as “built like a tank” and “it’s metal body is rock solid. ” Furthermore, users of the TAZ 6 have almost unanimously given it 5 stars for print quali...
"The LulzBot TAZ 6 is, in my opinion, the most complete 3D printer currently on the market."
Brent Hale, 3DForged.com"The TAZ 6 automated features and range of software options exist to make the entire printing process as stress-free and as easy as possible. It’s a perfect model for serious 3D professionals who insist on high quality, versatility, and reliability."
Best 3D Printers of 2017, 3D Insider"The auto-leveling system brought over from the LulzBot Mini is an incredibly powerful feature that will save the user a lot of headaches and downtime due to bed leveling issues."
Joel Telling, 3D Printing Nerd"The LulzBot TAZ 6 is clearly the pinnacle of development of the LulzBot TAZ printer line, with hassle-free printing due to its auto leveling and nozzle cleaning. The TAZ 6 is great for beginners and advanced users alike."
WARNING: Cancer and Reproductive Harm - www.P65Warnings.ca.gov.
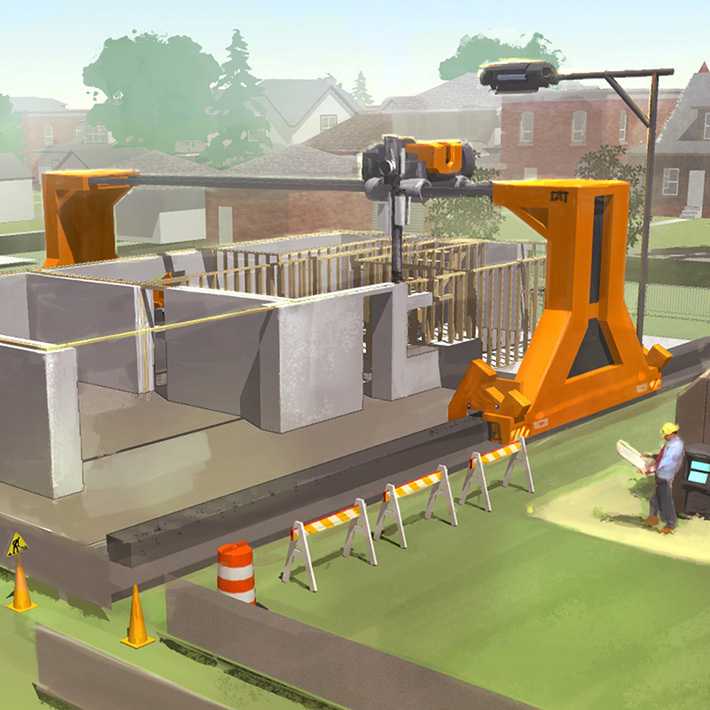
How different is printing on 3D printers for $2200 and for $200000 / Sudo Null IT News The list of materials for printing is gradually increasing. The time is not far off when it will be possible to print metal and glass products at home, and not just plastic ones.
3D printing promises to make an even bigger revolution in industry and construction. Now 3D printers are almost universally used for prototyping, and in the future, mass production of high-quality products will certainly begin.
As home "hobbyist" 3D printers get better and better, an interesting question arises: how different is home print quality from industrial print quality? This is exactly the question asked by American engineer and 3D printing enthusiast Mike Skrzypczak. For a sample, he went to the production laboratory of Caterpillar, one of the leading corporations for the production of large special equipment.
The laboratory has a very expensive Stratasys Fortus 380 MC printer costing approximately $200,000. This 2 meter high printer is designed to produce durable prototypes that meet the characteristics of the final product, as well as various production tools and production parts that withstand high pressure.
Stratasys Fortus 380 MC Printer
Industrial printer prints seven types of thermoplastics: ABS-M30; ABS-M30i; ABS-ESD7; A.S.A.; PC-ISO material in white and translucent; PC; FDM Nylon 12. According to official specifications, the layer thickness is 0.330 mm, 0.254 mm, 0.178 mm or 0.127 mm.
For the print sample, Mike took a real part - an auxiliary device for laying cables in the manufacture of electronic equipment. Previously, such forms were made on a press by molding, but now 3D printing is excellent for this.
So, Lulzbot Taz 5 3D with a retail price of about $2200 will try to compete with the industrial monster.
The Lulzbot Taz 5 3D
Stratasys Fortus 380 MC printed an ABS plastic part, with 100% infill, at standard layer thickness and normal default settings. Mike says the factory didn't allow him to go directly to the machine, so he can't go into all the details about print options. The laboratory just made this detail at his request, well, thanks for that.
Engineer used HIPS filament on home printer, printed with 0.5mm nozzle, 0.1mm layer thickness, 25% coverage, four top and bottom hard layers, 45mm/s print speed and standard acceleration, temperature extrusion 240°C. working surface temperature 110°C and extrusion width 0.6 mm.
It is unlikely that such a test can be called absolutely correct. We do not know the exact parameters for printing on an industrial printer. In addition, for some reason the engineer used a different HIPS filament, although a home printer can print with the same ABS, and 25% infill instead of 100%. In general, this is a very superficial comparison, but still quite interesting.
The product took 18 hours to print on both machines. So what happened?
In the photographs, the two parts are easy to distinguish because the industrial part is black. The experimenter cleaned the details of excess materials as much as possible - and began to photograph.
If you look closely, the difference still becomes noticeable. The Stratasys Fortus 380 MC is slightly better, but the difference is not as drastic as you might think.
Mike Skshipczak carefully examined the individual elements of the two pieces. For example, a mounting protrusion on the edge of a form. The enthusiast sprinkles ashes on his head because there is not adequate support for such protruding parts that he printed on a home printer. Therefore, the mounting ledge on the part from the home printer was not completely printed. But its upper part, which printed normally, is not inferior in quality to a part from an industrial printer.
Another fragment that he examined in detail is the mounting holes and the surrounding part of the parts. Here you can see that in the "home" version around the mounting hole there are small tears in the upper layers of the print. He says that if he were to print the part again, he would make twice as many hard top and bottom layers to eliminate this artifact. It's just that the layers are too thin, so four, as we see, was not enough.
In general, in the above photographs, the difference in the quality of the details is not very different and is not critical.
The part of the part where the biggest difference in print quality is the bottom surface that is in contact with the support. 3D printing enthusiasts are well aware that support spoils the surface that comes into contact with it, so it is advisable to minimize its amount (see the article “10 Rules for Preparing a Model for 3D Printing”).
So, an amateur printer makes a support from the same material from which the part itself is made, with all the ensuing consequences: a lot of burrs and uneven areas that remain on the surface. In the Stratasys Fortus 380 MC Professional Printer, the support is made from a separate, biodegradable material. It dissolves in a special saline solution and is simply washed off. Here we see big difference in product quality .
Regardless of the quality of the print itself, it is the method of chemical removal of support made from a different material that provides the best quality on certain parts of the surface of the part.
A part from a hobby printer, apparently, needs to be carefully sanded to achieve the same quality in these areas. Or make a small upgrade. The Lulzbot Taz 5 3D printer comes with a printhead for about $500 that can also print support from soluble material. Five thousand dollars is, of course, a considerable amount, but still it does not compare with $ 200,000 for a professional Stratasys machine.
And on the “amateur” part, the engineer found one defect that is absent on an industrial printer. Separate fragments of the workpiece did not stick together normally: the photograph shows a horizontal line between them.
Despite this, both parts can normally perform their function, that is, they can be used for laying cables in the manufacture of electronic equipment.
Of course, if you look at the photos of individual fragments, the difference in quality is obvious, and someone can say that a professional printer prints is much better than . But in practice, these are not such significant differences, says Mike Skshipchak.
It is likely that a more experienced craftsman could print the same part in much better quality than Mike's did.
Yes, he himself admits that if he changed the print settings a little and applied a couple of tricks, he could achieve a better quality of the product and eliminate the defects that appeared. That is, here again, a lot depends not only on the printer, but on the even hands and experience of the master who prints the part. This skill comes with experience.
Although the part didn't work out very well, Mike emphasizes that in real work both parts are exactly the same, that is, it makes no difference to him which one to use with electronics cables. Thus, both printers did an excellent job and are excellent for use in the workplace, that is, for the manufacture of original parts. If there's not much difference here, then it's hard to come up with an excuse to buy a printer that's about 90.9 times more expensive.
The engineer is now planning to run some more comparative tests on to the coordinate measuring machine and check whether the two parts are geometrically accurate. There are suspicions that it is in this test that an industrial printer will show why it costs so much.
In general, even from this experiment, we can conclude that "amateur" printers are not so far behind in terms of print quality from professional industrial machines, which are a hundred times more expensive. Much depends on the experience and skill of the engineer who knows how to print a particular part in the best way, how to avoid the most likely defects.
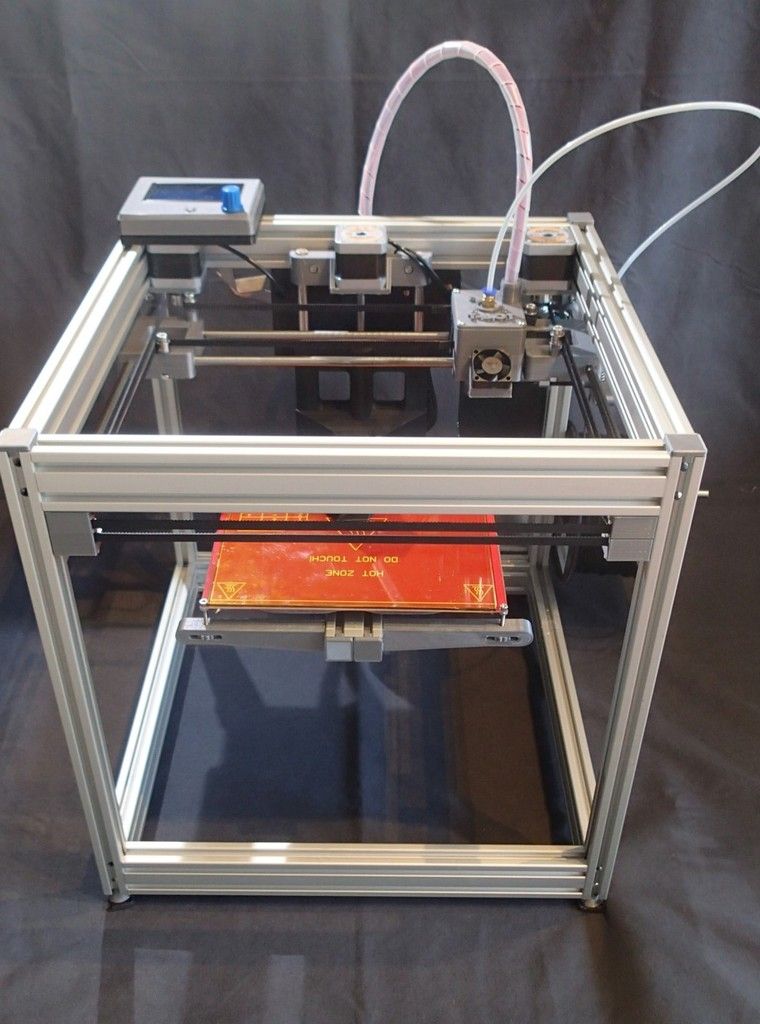
Homemade 3D printer GBot Tiny (small H-Bot)
I got my first 3D printer back in the summer of 2015. Since then, I got a few more printers, but they were build kits, so uninteresting. In addition, after a long use, I had my own criteria for an ideal printer for me.
I haven't printed parts larger than 100x100mm, so a standard 220x220mm table is overkill. A small table heats up faster, consumes less and distributes heat relatively better. Therefore, everything was designed for a table 120 by 120 mm. It's good that you can find anything on Ali)
The printer was built on the principle of the simpler the better. The printer was required: compactness, low noise and ease of assembly. The body consists of two 6mm thick acrylic panels (top and bottom) and 20x20mm v-slot aluminum profiles. The sides are made of 3 mm thick acrylic. The kinematics of the X/Y axes is mounted on the top plate. The choice fell in the direction of HBot'a due to its simplicity. The printer came out 240x270x290mm. With him, it even turned out without any problems to ride the subway to the university. Brought, showed, closed the exam automatically.
All engines are moved back and installed almost in line. Nearby is the MKS Gen V1.4 control board. This arrangement allows you to connect the motors with wires of 5-10 cm. Since the printer is still waiting for a series of improvements, I did not cut the wires. Everything will then be neatly combed. Below is a Mean Well 150 watt power supply, without a cooler, absolutely silent.
The printer itself consumes 90 watts when warmed up from 0 (room temperature), then even less, so the power supply came out with a large margin. The most expensive element of this printer is the guide rails, because Hiwin specifically took the original.
There are optical limit switches on all three axes, the sound of the printer parking is just drop dead, no clicks from the buttons. Since the plastic is thin, it is almost transparent to infrared radiation, so all these flags would not work without copper or aluminum tape.
The printer has a screen from Fysetc model Mini12864 Panel. The choice fell on him, as he is quite small and has convenient mounts, unlike conventional smart controllers. The resolution is the same as the large one, the size is smaller than the small one. It has rgb lighting as a bonus. It is possible to choose one of the presets or set your own color.
This adds some customization, and the ability to set the modes that the printer is in: heating - red, printing - white, cooling - blue, standby - green. In parallel with the backlight of the screen, then there will be another tape, which will be located behind the upper front profile and will highlight the print area.
Print head heatsink… I didn't find the name, I hope they will tell you in the comments. But if anyone needs it, a chimera is sold on Ali in such a form factor, next to it you can find one heater. This radiator was very convenient to mount. The plastic feed mechanism, the one that was available, works fine. On the next versions of the printer, I, of course, will put something richer. Yes, there will be future versions.
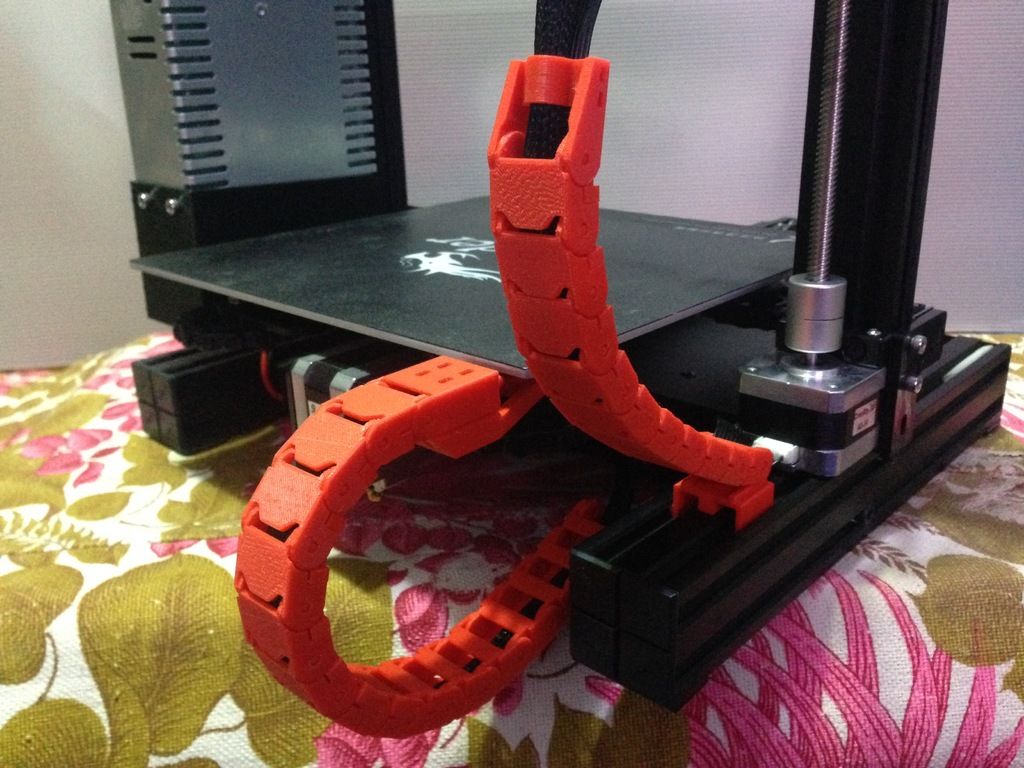
Since the printer was designed for itself, it seemed to me convenient to put the power socket on the side, so the printer can be placed close to the wall, in a corner.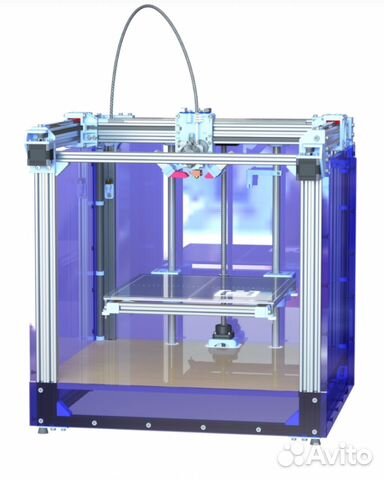 The coil will be located on the same wall. The bar will be fed in a beautiful arc. Everything is compact.
The new version will already be on ball screws and on thicker shafts, otherwise 8mm is nothing (table movement, Z axis). If possible, I will try to make the upper and lower plates from aluminum, so if anyone knows where you can mill in a cheap way, I will be grateful. The most flimsy place is the table, since it is based on the same 6mm acrylic, the rigidity is mediocre, so I will make it metal, ideally aluminum again, and if not, I will sharpen it from what I find.
I will move the screen down, so, firstly, the wires will not hang in the air, and secondly, the view will become better, it will be possible to shoot all sorts of time-lapses.
Well, quickly on the rest of the jambs of the current revision of the printer. While there is no blowing of the model, therefore it is possible to print PLA, but only "bricks", no less than 6 cm in size on the side, everything that is smaller melts.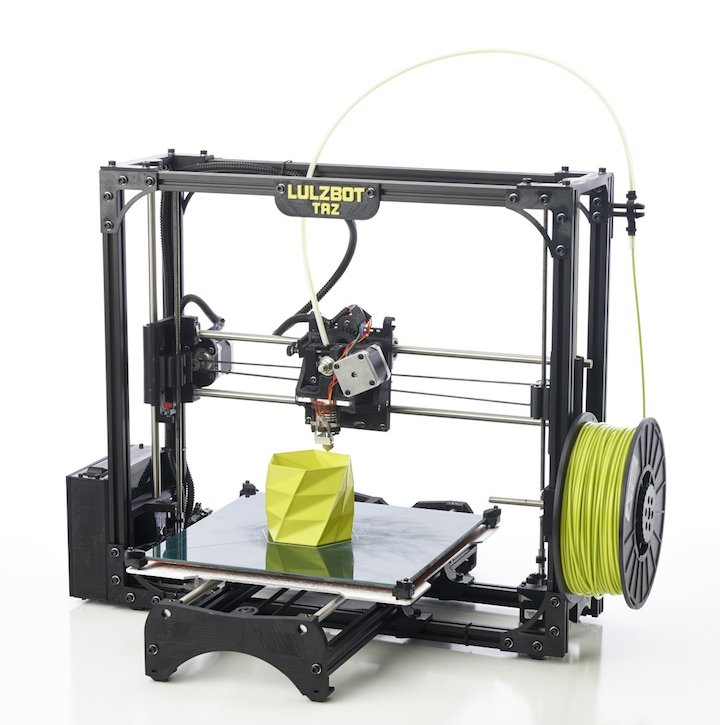 I plan to have two turbines on the sides, I will be mounted directly on the radiator, it has convenient holes in the back, a minimum of alterations.
The fact that the side rails are attached to the bottom of the plate is very good, they are always clean and do not collect dust.
The X-axis rail points upwards, this arrangement made it possible to fix the print head with just one part, and most importantly, an easy-to-print part. But while the printer stood on the first shelf of the rack for a whole year, the rail had time to rust. Most likely, flowers 4 shelves above are to blame. There is not even quite rust, but rather a coating, which after some time of use has become almost invisible.
Well, in general, in any case, you need to put the rail from below. Therefore, this will be fixed in version 2.0). Most likely, the new printer will be built as CoreXY, since everything needs to be tried.
Video version, if suddenly someone will be interested in following my work in this format.