Lotmaxx shark v2 3d printer
Lotmaxx Shark V2 3D Printer Review: Jack of all Trades, Master of None
Tom's Hardware Verdict
The Lotmaxx Shark V2 has an impressive set of hardware features and includes enough accessories to outfit a small makerspace, but the software feels unpolished and detracts from the experience.
Pros
- +
+ Dual extruders allow for colorful and creative prints
- +
+ Included laser engraver module is strong enough to etch wood
- +
+ Silent stepper drivers and whisper-quiet fans allow for quiet printing
Cons
- -
Dual extruders require additional calibration
- -
Laser engraver can be dangerous without an enclosure
- -
Laser engraver settings are frustratingly slow
Why you can trust Tom's Hardware Our expert reviewers spend hours testing and comparing products and services so you can choose the best for you. Find out more about how we test.
Today's best Lotmaxx Shark V2 deals
$399. 99
View
No price information
Check Amazon
The Lotmaxx Shark V2, selling for a retail price of $499, stands out among the competition by not only offering dual extruders for 3D printing multiple colors or materials, but also providing a laser engraver module that ships with the printer and can be installed in under 5 minutes. The build volume of the Shark is slightly larger than other printers in this price range (235 x 235 x 265mm) and the 290W power supply heats both the extruder and heated bed rapidly. The included 1600mW laser engraver works well when engraving wood, but the frustratingly slow speed will likely turn off most users.
Printing with dual extruders can be a challenge due to the enhanced level of calibration required to ensure the offset between nozzles is correct. Lotmaxx has solved this problem by having a pair of extruders both feed into a single nozzle; allowing the printer to swap between material colors during a print without needing a second hot end assembly. While this is a novel idea in theory, in practice it made models that suffered from color bleed from the material purging process. Also note that both filaments must be of the same type so you can’t use PVA, which dissolves in water, for your support material and PLA for the rest.
The lofty goals of the Shark V2 and the somewhat disappointing reality of the machine keep this printer from being one of the best 3D printers, but it’s still an excellent deal for anyone interested in printing with two extruders or using a low-cost laser engraver.
- Lotmaxx Shark V2 (3.5-inch) at Newegg for $399.99
Specifications of Lotmaxx Shark V2
Swipe to scroll horizontally
| Machine Footprint | 17. 4 x 18.3 x 19.2 inches (443mm x 466 x 488mm) 4 x 18.3 x 19.2 inches (443mm x 466 x 488mm) |
| Build Volume | 9.3 x 9.3 x 10.4 inches (235mm x 235mm x 265mm) |
| Material | 1.75mm PLA, PLA+, ABS |
| Nozzle | .4mm |
| Build Platform | Heated Removable Textured Flexible Platform |
| Connectivity | USB, microSD |
| Interface | 4.3-inch Color Touchscreen LCD |
| Laser Power | 1600mW |
| Laser Materials | Leather, Paper, Wood |
Unpacking and Assembling the Lotmaxx Shark V2
(Image credit: Tom's Hardware)The Lotmaxx Shark V2 includes all the accessories you would expect from a printer in this price range including a metal scraper, a set of Allen keys, a screwdriver, a microSD card and USB reader, a USB cable, and a pair of 200g spools of filament. The Shark V2 includes the second extruder as well as the laser engraver module in two separate boxes, along with a set of tinted safety goggles to wear while the laser engraver is running.
The Lotmaxx Shark V2 is somewhere between a fully assembled printer and a DIY kit and took me about 20 minutes to completely put together. The frame has already been wired, and there are only a few electrical connections to make on the printer to get it up and running. This is a much faster process than assembling a DIY kit printer like the Voxelab Aquila X2, which takes about an hour to fully assemble from a box of parts.
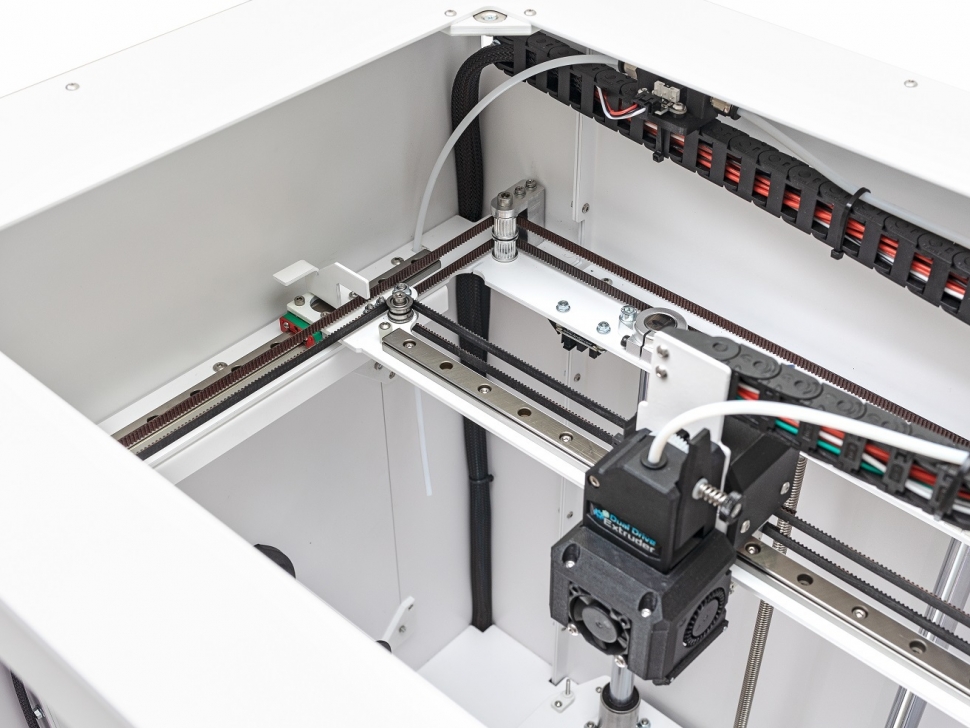
The Shark V2 is a dual extruder 3D printer, which means it is capable of printing two materials simultaneously by using a pair of extruder mechanisms to feed material to the hot end. The first extruder is mounted to the X-axis gantry, which is the typical mounting point for an extruder and comes pre-installed on the Shark V2. The second extruder is included in a box that contains the extruder motor, extruder module, filament run-out sensor, and a cable to connect to the front of the printer.
The second extruder attaches to the top of the frame, and feeds filament down the dual-input hot end. Unfortunately, the PTFE tube included with the printer was too short to connect from the top extruder to the hot end coupler, which restricts the movement of the extruder module. This is an easy problem to solve (I had an extra PTFE tube that was long enough to use), but it’s a clear quality issue to ship the machine with an improperly-cut tube. I reached out to Lotmaxx to request a replacement, and they were able to provide a replacement that was long enough to use with the second extruder.
(Image credit: Tom's Hardware)(Image credit: Tom's Hardware)The Lotmaxx Shark V2 stands out from almost every other i3-frame 3D printer I’ve ever seen thanks to the cool grey aluminum extrusions used for the frame, as opposed to the much more common black aluminum extrusions found on printer like the Elegoo Neptune 2. It’s a unique look, and it also fits with the ‘Shark’ motif of the printer.
The hot end module on the Shark V2 is another unique design; featuring dual part cooling fans on both sides of the hot end as well as a heatbreak cooling fan mounted to the front. These fans are low-noise, an ideal match for the TMC2208 silent stepper drivers which allow the Shark V2 to print at a comfortable volume that will be acceptable in most environments.
The hot end itself has two filament inputs and a single output nozzle, and uses only one heating element and thermistor. This unique nozzle allows for multi-color printing using two extruders without requiring a separate nozzle assembly, which cuts down dramatically on the amount of calibration required between nozzles.
(Image credit: Tom's Hardware)The belts on the X and Y axis on the Shark V2 are adjustable, but this adjustment requires loosening a few bolts, putting tension on the idler bracket, and then tightening everything back up.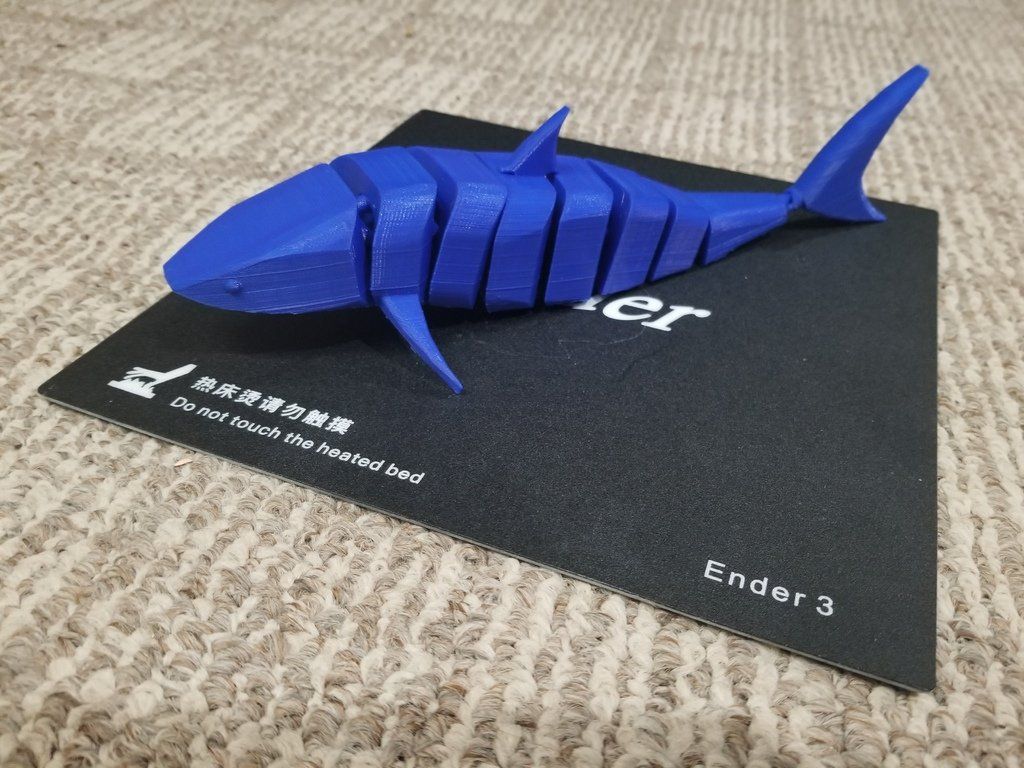 This is a difficult process that feels like it would be easier with three hands, and adding a tensioning knob to each axis like the ones found on the Voxelab Aquila X2 would make this a much easier process. These adjustments typically don’t need to be done often, but the Shark V2 arrived with the Y belt almost entirely slack due to the bracket coming loose during shipping.
Image 1 of 2
(Image credit: Tom's Hardware)(Image credit: Tom's Hardware)When I went to load filament through the primary extruder, I could see the extruder motor turning but the filament wasn’t advancing. This was because the drive gear had come loose from the motor shaft and the teeth weren’t making contact with the filament. Fixing this required removing the idler arm from the extruder, tightening the grub screw on the gear flush against the machined flat face on the shaft, and replacing the idler arm. This isn’t an impossible fix for most users, but someone not familiar with 3D printers would likely have issues identifying, diagnosing, and reseating the drive gear.
User Interface on Lotmaxx Shark V2
(Image credit: Tom's Hardware)The 4.3-inch color touchscreen LCD used by the Lotmaxx Shark V2 as an interface is a unique one that seems like it would be more at home on a piece of commercial office equipment than a 3D printer. The LCD is housed in a plastic enclosure that can be removed from the printer without interrupting the prints. The display sits on an angled bracket on the right side of the Shark V2 and features a clean (if not somewhat underwhelming) user interface.
(Image credit: Tom's Hardware)The LCD is connected to the Shark V2 via a curly cord with an RJ-11 terminal, similar to what you would find on a landline telephone. At first, I didn’t understand the benefit of having a removable LCD, but after holding it in my right hand while I make adjustments to the printer with my left I can see that it’s going to be hard to go back to using a fixed display. In the grand scheme of this machine, it’s just another feature that makes the Shark V2 stand out from other FDM 3D printers in this price range.
Build Platform on Lotmaxx Shark V2
(Image credit: Tom's Hardware)The build platform on the Lotmaxx Shark V2 is a steel sheet with a textured surface that is held in place with magnets underneath the heated build plate. This style of platform is ideal for removing parts, as it can be bent to allow parts to detach effortlessly after cooling and it’s one of my favorite styles of build platform on any kind of 3D printer.
(Image credit: Tom's Hardware)Unfortunately, the build platform on my review unit arrived seriously warped, with the edges curling up as well as a significant dip in the center. This meant that calibrating the printer was a challenge, as the uneven peaks and valleys of the build platform needed to be anticipated when preparing files for printing. The heated aluminum plate that the platform attaches to is flat, but the magnets installed underneath were not strong enough to pull the platform flush with the surface. I reached out to Lotmaxx, and the company shipped me a replacement bed that was perfectly flush with the build platform, confirming that the issues I had were from a defect.
Calibrating and Leveling Lotmaxx Shark V2
(Image credit: Tom's Hardware)Calibrating the build plate on an FDM printer can be a time-consuming ordeal, and Lotmaxx has created a semi-automated process to help reduce the amount of time required. The build platform has four thumbscrews that are used to adjust the height of each corner of the bed. Calibrating the Shark V2 simply requires moving the print head to each corner and adjusting the height until a piece of paper has a light drag when held between the nozzle and the platform.
(Image credit: Tom's Hardware)Using the touchscreen LCD, the Shark V2 will automatically move the print head to a specified location and trigger the Z endstop, effectively bottoming out the nozzle. Once the print head has been parked, each corner can be adjusted before moving on to the next one.
This process usually takes two or three cycles to get a perfect calibration, but the defective, warped build platform on our Shark V2 made this a difficult task at first.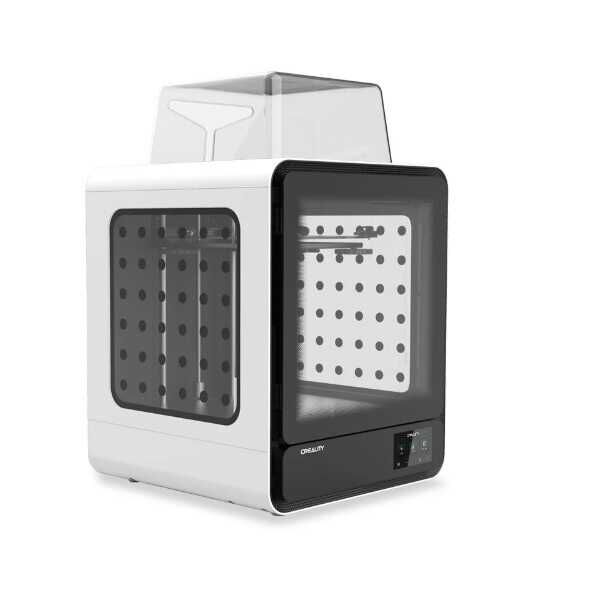 However, once the company sent us a replacement build platform, the leveling process was simple. As with most defects on review units we test, we have no way of knowing whether this is a common problem that affects many other consumers or just our bad luck.
The Lotmaxx Shark V2 includes multiple test files on the microSD card, including multiple single extruder prints, dual extruder prints, and prepared .gcode files for the laser engraver. I wanted to verify the functionality of the primary extruder and the motion system of the machine, so I started with the single extruder demo prints included with the printer. I used one of the included 200g spools of material, a PLA filament in a bright green color.
(Image credit: Tom's Hardware)The ‘LSC10S_Lucky Cat.gcode’ file printed in 1 hour and 12 minutes, and used 20 grams of filament. This is a reasonable amount of time and material for a test, and the Shark V2 successfully completed without any mechanical issues. Unfortunately, the layers had multiple bubbles and voids throughout as well as stringing between the ears, both typical indicators of filament that has absorbed moisture or is otherwise inconsistent in diameter.
The ‘LSC10S_dog.gocde’ printed in about the same amount of time and used a similar amount of material, and had the same material-related issues as the cat model. Lotmaxx did an excellent job selecting the test prints, and I’m satisfied with the slicer settings used to generate these two models.
Dual Extruder Printing on the Lotmaxx Shark V2
Image 1 of 2
(Image credit: Tom's Hardware)(Image credit: Tom's Hardware)One of the primary selling points of the Lotmaxx Shark V2 is the ability to print two materials simultaneously using the included dual extruder setup. After installing the second extruder, I ran the ‘LSC10S_bicolor-dragon.gcode’ file, which produces a two color model of a dragon clutching a cartoon heart. Using Prusa Silver PLA material in the primary extruder and ttyt3D rainbow PLA in the secondary extruder, this model printed out without any of the material-related issues of the single extruder prints.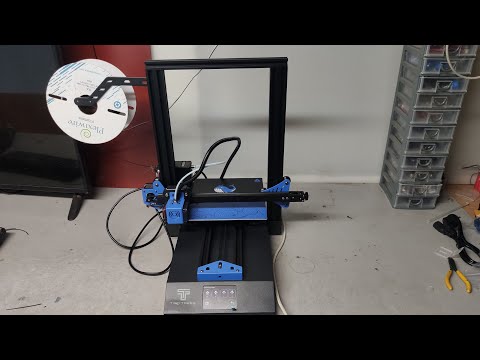
The dual extruder mechanism used by the Shark V2 pushes both materials through the same nozzle, so the printer has to purge any excess material before loading the next filament, and then must prime the nozzle to avoid any air bubbles from causing issues with the following extrusion. To solve both of these problems simultaneously, the printer creates a purge tower at the front right of the build platform, which it uses to switch between materials. This may seem like a waste of material, but for context, the weight of the purge tower is 13 grams, while the weight of the dragon model is 30 grams.
Slicing Software for Lotmaxx Shark V2
(Image credit: Ultimaker)Instead of creating their own proprietary slicer app for the Shark V2, Lotmaxx has opted to create a profile for Ultimaker Cura, a popular and widely-adopted app that offers advanced functionality as well as native dual extruder support. This is a smart move from Lotmaxx; it is able to benefit from the large community of Cura users to fine-tune the provided profiles without needing to create an entire app from scratch.
In addition to the basic single extruder slicer controls offered by Cura, the app also includes robust dual extruder support which is ideal for the unique ‘two-in-one-out’ approach used by Lotmaxx. The latest build of Cura (4.11.0 as of the writing of this article) includes a profile for the Shark with all of the settings dialed in for the machine. The dual extrusion settings have already been set by Lotmaxx, but you can dial them in for speciality applications (assigning one extruder to print infill only, for example).
Ultimaker Cura Draft Settings for Lotmaxx Shark V2
(Image credit: Ultimaker)Swipe to scroll horizontally
| Layer Height | 0.2 mm |
| Infill Percentage | 15%, Grid |
| Print Speed | 45mm/second |
| Extruder Temperature | 200 degrees Celsius (392 degrees Fahrenheit) |
| Heated Bed Temp | 50 degrees Celsius (122 degrees Fahrenheit) |
| Print Time | 2 Hours, 36 Minutes |
A perennial favorite for testing out the functionality of 3D printers, the 3DBenchy model is available in both single, dual, and multicolor versions for testing out the functionality of a machine. I used the dual color version of the Benchy from Thingiverse, and used Printed Solid Beige 500 PLA as the primary color and Prusa Jet Black PLA as the secondary color. I didn’t make any adjustments to the provided profile from Lotmaxx and used a .2mm ‘Draft’ profile, which prints at a speed of 45mm/sec.
Image 1 of 2
(Image credit: Tom's Hardware)(Image credit: Tom's Hardware)It became clear during printing that the model had some color bleed; the amount of material being purged wasn’t enough to completely clean out the nozzle, resulting in layers that had a visible amount of the previous color in them. This meant the light layers on the hull had a dark tint to them, and the dark layers on the trim had some visible beige material on the seams. At about 2 hours into the print, the nozzle became clogged and the print stopped. It can be hard to diagnose issues like this, but my first thought was the amount of material being purged wasn’t sufficient to fully clear the nozzle before loading the next color.
Considering that this was a test using the default settings, it stands to reason that Lotmaxx has created a Cura profile with a conservatively sized purge tower. This purge tower was designed to print without using too much time or material, at the expense of layers that don’t have a clean separation between them. The geometry of the Benchy itself looks good; the details are visible and sharp, but the color bleed is distracting from the quality of the print itself.
(Image credit: Tom's Hardware)This color bleed is also noticeable on the included butterfly test print; notice the orange becomes lighter as you move from left to right. The extruder initially still has some blue material left in the nozzle, and it is gradually purged as the extruder moves from body to body. The dragon model doesn’t suffer from this issue, because the print is simply two large bodies instead of several smaller ones. The benchy has multiple small features that need to be extruded separately, so there isn’t enough time to fully purge the filament between features.
Ultimaker Cura Normal Settings for Lotmaxx Shark V2
(Image credit: Ultimaker)Swipe to scroll horizontally
| Layer Height | 0.15mm |
| Infill Percentage | 10%, Line |
| Print Speed | 45mm/second |
| Extruder Temperature | 200 degrees Celsius (392 degrees Fahrenheit) |
| Heated Bed Temp | 50 degrees Celsius (122 degrees Fahrenheit) |
| Print Time | 5 Hours, 59 Minutes |
The 2-color tree frog from Nervous System is a perfect example of the type of complex geometry that can be created with a dual extruder system. At first glance, it appears the lines on the print are drawn on organically, but the model is made the same as any other FDM 3D printed model; one layer at a time. I used the ‘Normal’ print profile in Cura for this model, which prints models at a layer height of .15mm (150 microns).
Because the Benchy model had some color bleed between layers, I increased the size of the prime tower from 20mm to 35mm and increased the minimum volume from 30 to 50 mm3, which will purge more material after swapping between filaments. This increases the amount of material used in the print as well as the print time, but should create a cleaner transition between colors.
(Image credit: Tom's Hardware)The larger prime tower seemed to help the color transitions, and it was hard to find any layers that appeared to be a blend of colors. However, the .15mm layer height appeared to be a little finer than the Shark V2 was able to print when swapping colors so many times, and there were some blobs and small retraction marks spread throughout the model. Printing this part using a .2mm layer height would have most likely resulted in a higher quality model, which might seem counterintuitive. The thicker layers would be more forgiving of small blobs and defects, while they jump out and are more readily visible at the thinner .15mm layer height.
Image 1 of 2
(Image credit: Tom's Hardware)(Image credit: Tom's Hardware)Generally speaking, this is a pretty good print for a dual extruder 3D printer that is using a mostly-stock profile. Dual extruder printers tend to be difficult to dial in because all the problems you would normally have (wet filament, inconsistent extrusions, retraction blobs) are not only all still present, but have been doubled due to the addition of a second full extruder. The two-in-one-out hot end used by Lotmaxx is a good way to avoid the calibration issues usually present in machines with independent hot ends, but there will also be some tweaking involved depending on your specific application.
Laser Engraver Attachment for Lotmaxx Shark V2
(Image credit: Tom's Hardware)Another unique feature of the Lotmaxx Shark V2 is the included laser engraver module. This engraver features a 24V 1600mW 445nm laser which is capable of engraving wood, leather, paper and more. Lotmaxx has also included a pair of safety goggles with this laser, so it’s worth taking a moment to explain how important safety is when using the laser attachment on the Shark V2.
Lasers create a radiation hazard that can cause instant eye damage if the user is exposed directly to a beam. Using the included goggles is a good way to prevent damage to the eyes of the user wearing them, but the hazard is persistent to anyone who may also be within visible range of the machine. Typically, laser engravers will ship with a lid that must remain closed during the engraving process that uses a filtering panel to prevent any radiation from leaking out.
When using the engraver module, it’s critical to wear the goggles at all times to prevent damage to your eyes. In addition, only use the laser module in a ventilated room to prevent a build-up of smoke or other particulates from the material being engraved.
Laser Engraver Test Prints for Lotmaxx Shark V2
(Image credit: Tom's Hardware)To test out the functionality of the laser engraver module, Lotmaxx has included three prepared files on the microSD card. Unfortunately, there is no way to preview these models without actually running them, which means it’s impossible to tell where they will print on the platform or how much space they will take up. Considering that the Lotmaxx Shark V2 only includes two sheets of plywood, I was concerned about ruining them both with test prints.
Image 1 of 2
(Image credit: Tom's Hardware)(Image credit: Tom's Hardware)The laser engraver moves agonizingly slowly, and the travel speed is the same as the snail's pace experienced during engraving. For reference, the above test engraving took 4 hours and 50 minutes, and it measured just over 5 inches by 4 inches. Analyzing the .gcode file revealed an engraving speed of 0.833mm/s, a far cry from the 45mm/sec reached during 3D printing. I reached out to Adam Haile, an engineer who works on the LightBurn laser engraving software, and he confirmed a laser of this wattage should take closer to 20 minutes or so to create an engraving of this size.
Laser Engraver Software for Lotmaxx Shark V2
(Image credit: Tom's Hardware)Lotmaxx includes an app for preparing images for the laser engraver, but it’s pretty bare-bones and has some concerning errors (Lotmaxx even spelled its own name incorrectly in the title of the app). The app allows you to import an image in either black and white or grayscale, and also includes a text editor that will let you create your own text. The documentation in the user manual is pretty sparse, so fields like “Energy” and “Work” (which seem pretty important) aren’t clearly defined.
(Image credit: Tom's Hardware)The UI of this software is incredibly frustrating; clicking on the picture you import will occasionally cause it to turn completely black, which requires you to reload it. There doesn’t seem to be a way to generate a toolpath preview, and it’s not clear when you are creating a file whether or not the image will be an outline, hatched, or filled.
The ‘Error Distribution’ field includes a number of names that might not jump out to most users, but they are named after various dithering algorithms used by image processors. “Floy” is most likely the Floyd-Steinberg dithering algorithm, a common algorithm used for this style of work. These processors convert images into patterns that can be created with the laser engraver, but offering six of them with no explanation of their effects will be of limited use to most users.
(Image credit: Tom's Hardware)The Lotmaxx Shark V2 is a wildly ambitious machine on paper; it features dual extruders, a laser engraver, a rigid aluminum frame in a unique color and more for under $500. Unfortunately, the machine failed to live up to its potential during testing, and it seemed like a machine that gave acceptable results for each mode and didn’t seem to excel at any one thing in particular.
The dual extruders of the Shark V2 provided colorful parts, but the software profile for the printer will require some adjusting to get the most out of this hardware. The laser engraver is a potentially dangerous accessory that operates at a much lower-than-expected speed, and I suspect that it will not see heavy use from most users.
The issues I had with the hardware of the machine were all resolved relatively easily, but a new user may not have the spare parts or knowledge required to fix these problems, and an experienced user may feel that a $499 machine that ships assembled shouldn’t require any adjusting out of the box.
For the price, the Shark V2 provides an excellent entry-level dual extruder machine for users interested in application-specific printing who need to print multiple colors or materials in a single print or users interested in exploring laser engraving who don’t want to invest a significant amount of money into a larger unit. For anyone interested in exploring the best 3D printers like the Creality Ender 3 Pro or the Prusa SL1S, be sure to read our full list to learn more.
Andrew Sink first used a 3D printer in 2012, and has been enthusiastically involved in the 3D printing industry ever since. Having printed everything from a scan of his own brain to a peanut butter and jelly sandwich, he continues to dive ever more deeply into the endless applications of additive technology. He is always working on new experiments, designs, and reviews and sharing his results on Tom's Hardware, YouTube, and more.
LOTMAXX SC-10 Shark V2 Review: Dual Color Printing And Laser Engraving
The LOTMAXX SC-10 Shark V2 3D printer is trying to be the all-in-one machine for a maker. But does it live up to the marketing material? In this review, we will go over the specs and the features offered by this machine, and I will also share my experience with the printer.
Before starting, please note that I’m the happy owner of a Sidewinder X2 for the past 6 months, I’ve been reading up on how I can improve my 3D printing knowledge, my printer, and my prints. My main interest is in what makes things tick and how it happens, and this is one of the reasons I picked up on this challenge to try and review a printer outside of my comfort zone.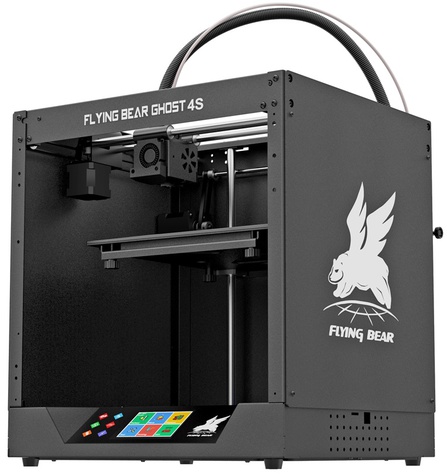 This is a guest post on the 3DPrintBeginner website to share some information about the SC-10 Shark V2.
The time spent with this printer had some positive experiences as well as some points of frustration, I was really happy to have the opportunity to work with my first dual-color extruder and what the process of creating such prints implies.
LOTMAXX SC-10 Shark V2 Shipping and Packaging
The LOTMAXX SC-10 Shark v2 is pretty neat packaged in a big cardboard box with packaging foam to protect it. The printer components were protected during transportation and there were no issues with the delivered product.
During the inspection, I noticed that the bottom lid of the base was misaligned, so not everything was fitted in flush, and to top it over the screws used were not helping as well.
A second thing that I’ve noticed right out of the box is the Y motor bracket was a bit bent and the belt was loose. I had to force it by hand back into place and align the belt.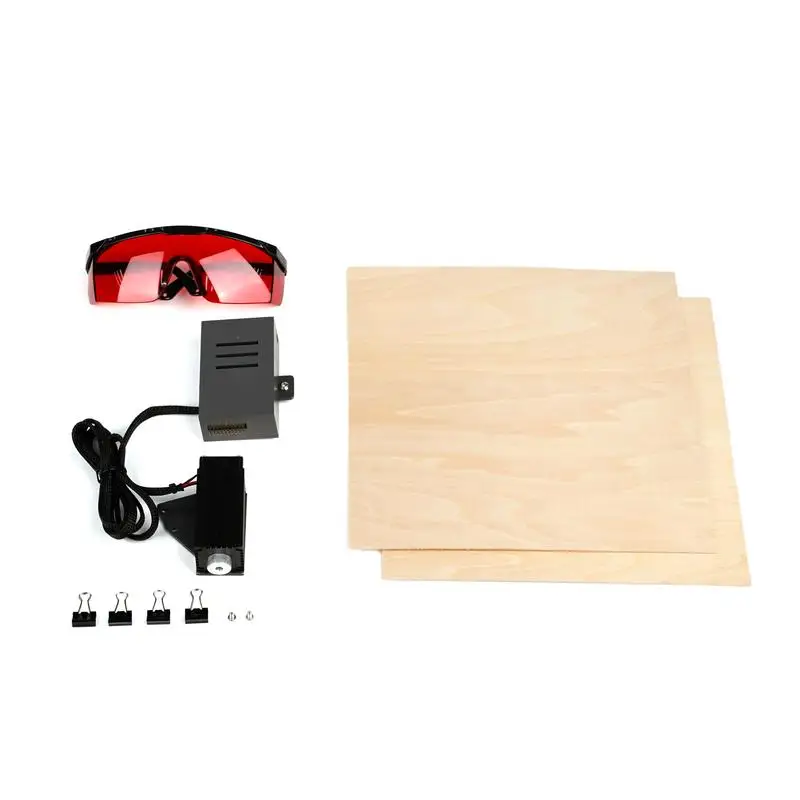 If the belt is overtightened the stepper motor bracket can get bent easily, so be mindful about this when putting your printer together.
The same applies to the X-axis idler which started to got bent after a few prints.
LOTMAXX Shark V2 Assembly
The assembly for this printer is pretty straightforward.
First, you connect the gantry to the base and tighten the 4 pcs of M5 screws that hold everything together.
Second, set up the second extruder using the 2 pcs of M4 screws with T-shaped nuts at the top of the gantry, connect the extruder to the rack and place the PTFE tube in the extruder.
Next, attach the filament spools supports using the 2 pcs of M4 screws with T-shaped nuts for each support.
Install the touch screen support, using 2 pcs of M5 screws, on the right hand side of the rack. connect the touch screen to the rack.
Finally, connect the wires for XYZ movement and end stops.
Executing these five steps gets you up and ready to start calibrating your printer. Assembly time is around 15-20 minutes, please take your time for the assembly process following the instructions provided with the printer.
The LOTMAXX SC-10 Shark v2 aluminum frame paired with the dual geared extruders gives the product a premium look and feel, the only distraction from this perspective is the second spool holder, which is made from plastic.
The LOTMAXX SC-10 Shark v2 occupies a small volume of space, it’s pretty compact so you can install it almost anywhere. I would sometimes keep it on a coffee table in my office for fast interactions with it.
Although the process to assemble is easy enough out of the box, the design takes another hit, due to the lack of the possibility of routing the cables coming from the second extruder and the touch screen. The cables from the second extruder can be routed on the right side of the gantry to the bottom, but from there to the rack it will just leave a snake wandering around the printer that intersects with the cable from the touchscreen.
LOTMAXX SC-10 Shark V2 Specs
| Build Volume | 235*235*265mm |
| Layer Thickness | 0.1~0.4mm |
| Printing Accuracy | ±0.1mm |
| Print Speed | ≤200mm/s, Normal printing speed 45~90mm/s |
| Nozzle Diameter | 0.4mm(can be changed to 0.3mm or 0.2mm) |
| Nozzle Temperature | 260 Degrees MAX |
| Hot Bed Temperature | 100 Degrees MAX |
| Filament Diameter | 1.75mm |
| Slicing Software | LOTMAXX, Cura, Prusa Slicer, Simplify 3D, IdeaMaker |
| Documents Supported | STL, OBJ, AMF Supported Materials |
| Engraving Size | 235*235 mm |
| Image Format | bmp, jpg, jpeg, png |
| Engraving Mode | bitmap, gray, vector |
| Pixel Size | 0.05-0.4mm (suggested 0.1mm) |
| Recommended Laser Intensity | Brown paper 50%, Wood 80% |
| Rated Power | 1600mw |
| Supported Engraving Materials | Wood, plastic, leather, PVC, paper, resin, etc.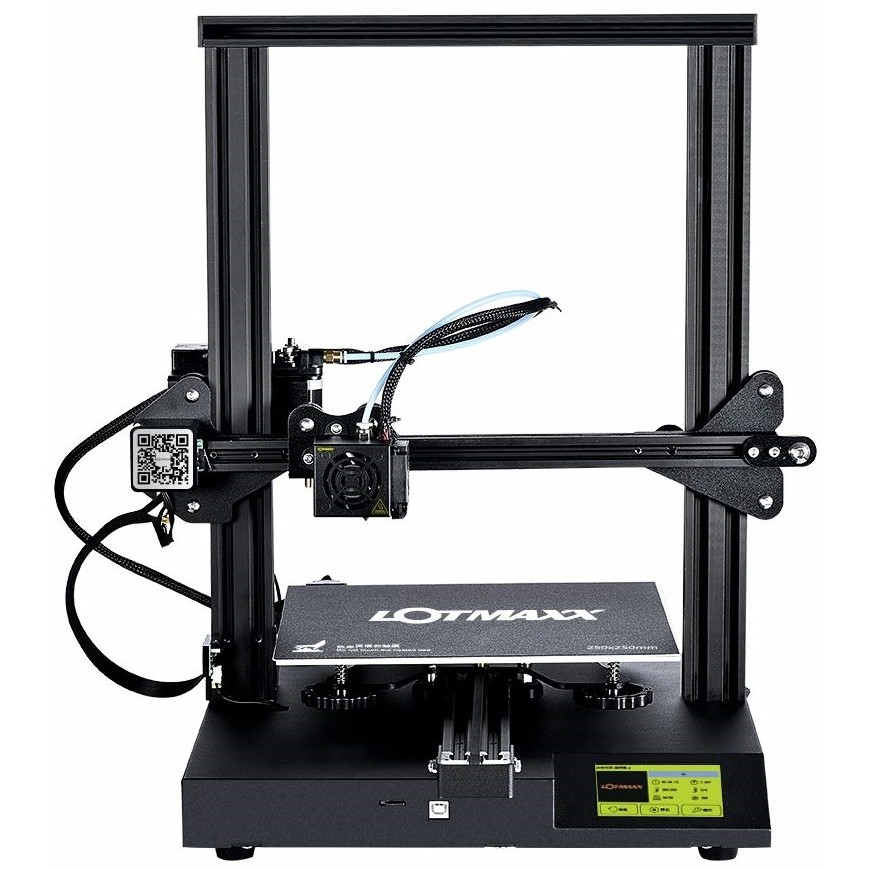 |
| Product Weight | 16kg |
| Package Weight | 16kg |
| Product Size(L x W x H) | 64cm*53cm*27cm |
| Package Size(L x W x H) | 64cm*53cm*27cm |
| Package Size(L x W x H) | 64cm*53cm*27cm |
Dual gear extruders
The LOTMAXX SC-10 Shark V2 comes with two dual gear extruders, one mounted on the frame and the second one in the Dual Print Kit box.
Both extruders are dual gear, made from aluminum and they are similar to the ones used by Creality in their more expensive 3D printers. Most of the time, these extruders perform well during operation.
Dual-Color PTFE lined hotend
The Dual-Color PTFE lined hotend for LOTMAXX SC-10 Shark V2 is well suited for most common PLA prints, be it bicolor or monochrome prints. This setup works great if you don’t intend to print over 240C for long periods. If you go past this temperature, the PTFE tube inside the heat break will start to degrade and release harmful fumes into the air.
As this is my first printer with this type of hotend, it’s difficult to compare it with other products. From my experience with the printer, it did the job but I got a small number of partial clogs caused by the filament swap process.
The front side of the print head has a 4010 fan keeping the hotend cool, and on the left and right side, we have similar fans for part cooling.
Unfortunately, these fans are not suited for part cooling, and they provide little airflow for cooling the models but the airflow is almost good enough considering the print speed used during dual-color prints.
BLTouch clone sensor for Auto Bed Leveling
The LOTMAXX Shark V2 comes with a BLTouch clone sensor which will probe the bed and generate a mesh to compensate for the small differences in the bed uniformity.
The 3D touch sensor sits really close to the hotend, and I was expecting it to degrade because of the heat but I checked it recently and it looks just as good.
The first step is to use the assisted bed leveling feature.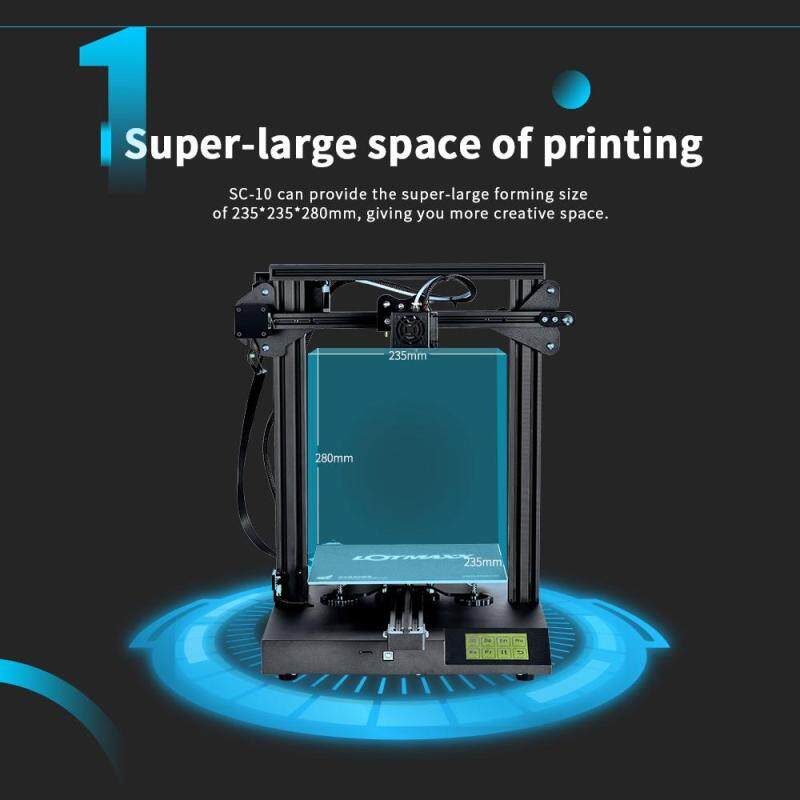 To do this, you need to go to the Control -> Leveling – Manual Leveling menu section. This section will provide a 5 point array, for each thumbscrew under the bed and the center point. You pass through each point and adjust the corners of the bed until the nozzle barely touches the bed. You can use a piece of paper between the bed and the nozzle, and adjust the corners until there is a bit of friction between the nozzle and the paper.
After the assisted bed leveling is done to your satisfaction, we move to the automatic bed leveling process. This process will probe the bed in 16 points, then it will move the nozzle to the center of the bed to adjust the Z offset.
Magnetic flex plate
The removable flex plate is a great addition to this printer. The textured surface can be used for your daily PLA prints and the other end can be used for ABS or PETG prints.
It’s made from a thicker metal sheet and it attaches really well to the bed.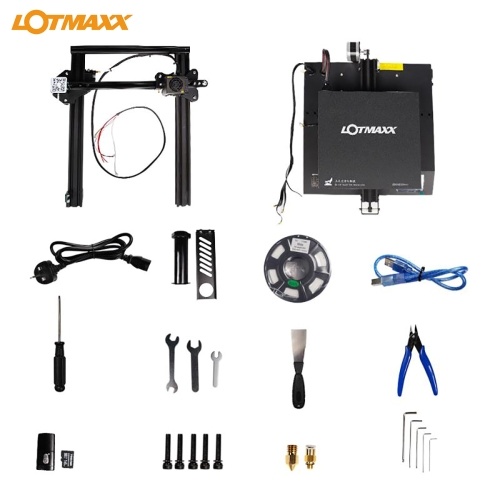 Adhesion is great and prints don’t require a high bed temperature for successful prints. This flexplate can be bent to help you remove the print easier after a few minutes. But make sure you don’t set the Z offset too low, or you are going to struggle to remove the prints.
A really interesting feature of the bed is having the magnets embedded in the bed. This helps with heat distribution, bed heating time, and adhesion for the flex plate.
As you may notice, there is no insulation on the bottom of the bed which means that the bed will take a bit longer to heat up and it will make the printer less efficient in terms of power consumption.
One fine detail that you should also notice, is the springs on the thumbscrews don’t seem to be that sturdy, and a general sense of frustration appears once you try to fine-tune the bed leveling process where each knob may react differently because of these springs.
Removable 4.3 inch Touchscreen
The touch screen is really easy to use and quite responsive.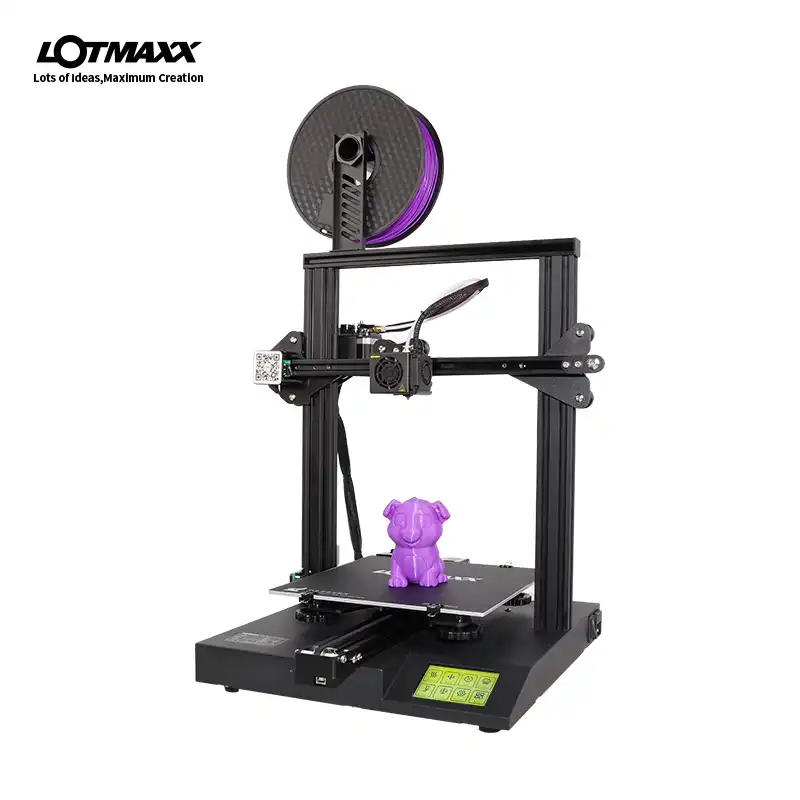 There are 3 major sections in the menu:
- Control
- Settings
As intuitive as it sounds, the Print section covers the functionality of selecting the file you want to print and confirming the start of the print process once the file is selected.
The Control section covers most of the features related to the printer movement, extruder(s) filament load/unload, preheat and individual temperature settings, cooling settings, auto-level function, and homing for your printer.
The Settings section is a bit misleading, as the only setting you can fiddle with is the Language. Apart from the language setting, this section covers the printer Status, and About section and adds a Continue functionality in case you would like to resume a print after a power outage.
From my time with this printer, the touch screen does exactly what it’s supposed to do but most of the time, here are some things I like and some things I hope will be improved in the future.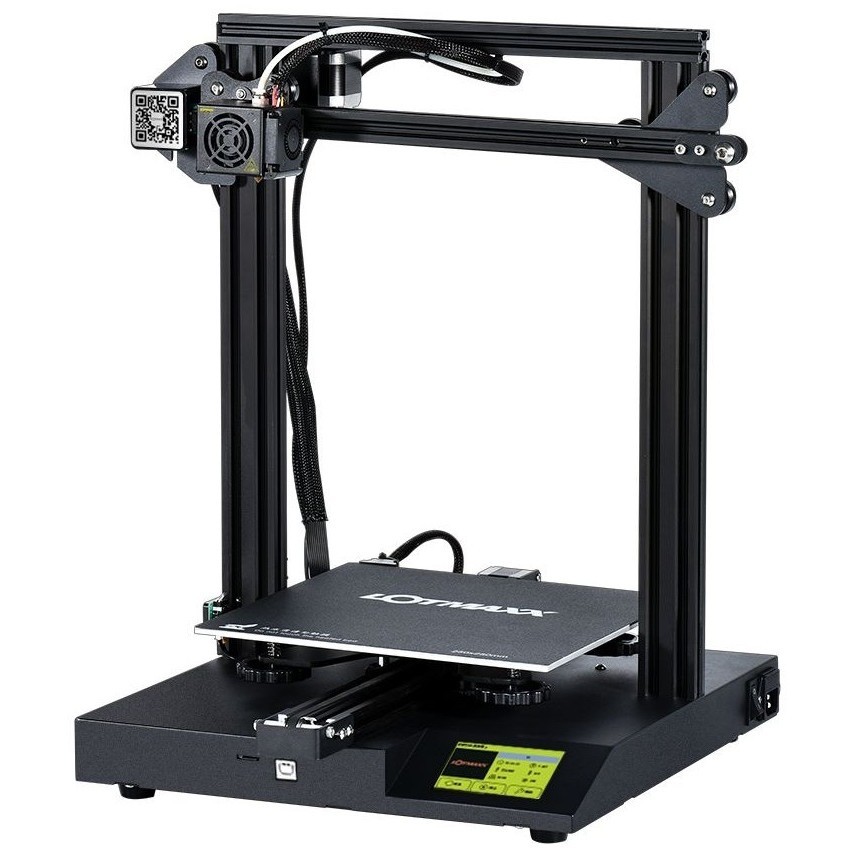
Pros:
- Auto Level Manual – it makes manual bed leveling a breeze
- Easy to use interface
Cons:
- Movement is limited to 1, 5 or 10 mm – option set is not retained.
- Load unload is limited to 1,5 or 10 mm – option set is not retained.
- Baby Steps or adjusting Z-offset during print is not possible – if the bed leveling is not done correctly, you cannot correct this during a test print, you have to stop the printer, change offset, restart the print, observe and repeat until you get the correct squish.
Proprietary 32-bit board with TMC2208 stepper drivers
The LOTMAXX SC-10 Shark v2 uses a proprietary 32-bit board, with an ARM STM32F407 chip which is interesting to see considering the chip shortage we are experiencing right now.
We also get TMC2208 stepper drivers, which are socketed and can be easily replaced if one of them dies. A 5015 radial fan is blowing over them to keep them cool, and this fan is a bit noisy during operation.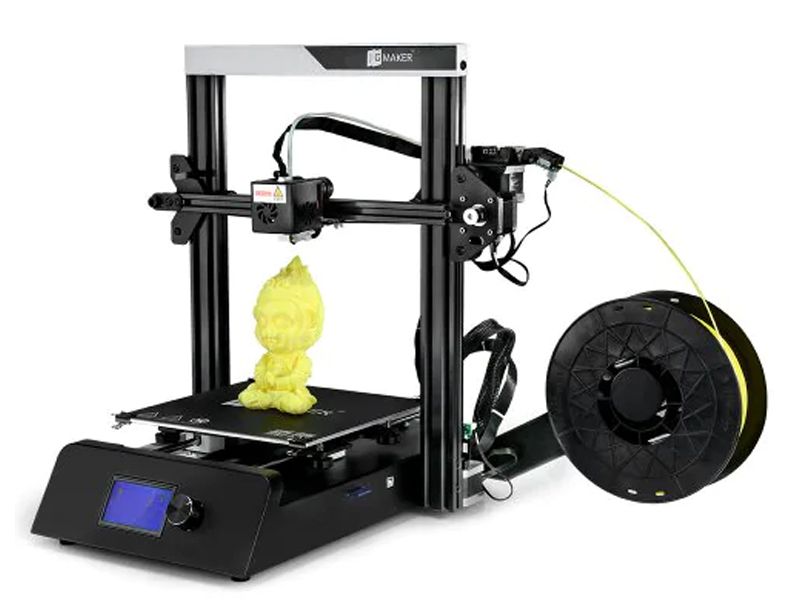
Looking at the connections, you can see that there was a lot of glue used all around. And it’s not the regular kind of hot glue, but something nastier which can’t be easily removed.
Mean Well 24V 350W Power Supply
The LOTMAXX SC-10 Shark v2 comes with a Mean Well 350W 24V power supply which is good to see. These units perform quite well and they are the more premium offering for most 3D printers.
Heating time and power consumption
I tested the heating time for both hotend and heat bed and here are the results:
Hotend
- 200C in 1 minutes and 50 seconds
- 250C in 2 minutes and 25 seconds
Heatbed
- 60C in 2 minutes and 10 seconds
- 100C in 8 minutes and 10 seconds
Power Draw
Idle power draw is around 8W. When the hotend and heatbed are heating up, the LOTMAXX Shark draws around 300W. After it starts printing, the power draw stabilizes to around 50W.
All these measurements were taken with a Blitzwolf smart power socket which indicates the power draw, and it can also be used for remotely powering on and off the printer.
Bed Temperature Uniformity
I tested the temperature uniformity for the LOTMAXX SC-10 Shark V2 bed with the Flir Camera installed on the CAT S62 Pro. The bed has been set to 60C and I waited 2 minutes after reaching that temperature for the temperature to stabilize.
The bed has a decent temperature distribution, but the corners are a bit colder compared to the middle of the bed which is about 5 degrees hotter compared to the set temperature.
LOTMAXX Shark v2 Noise Levels
The hot end on the Shark V2 is equipped with a unique designed cooling solution, dual part cooling fans on both sides of the hot end, and an hotend cooling fan on the front.
All the fans used with the Shark V2 are 4010 24V. While the hotend fan is correct, the part cooling fans are not the right type to provide the best part cooling. The airflow is quite low, and part cooling suffers because of this.
The fans produce low noise during the printing process, stepper motor seems to maintain the same level of ambient noise. Most of the noise coming from the machine during the print is from the lower side of the printer, which is a combination of the power source and the motherboard fan.
IdeaMaker Profiles for LOTMAXX Shark
During my time with the printer, I also prepared an IdeaMaker profile for the SC-10 Shark using the tools available in the 3D Printer Calibration Guide using IdeaMaker article. This profile is tuned for the stock printer.
LOTMAXX SC-10 Shark V2 IdeaMaker Profile – PLA – 3DPrintBeginner
Test prints on LOTMAXX Shark
3D Benchy
The first print with the LOTMAXX SC-10 Shark v2 was a 3D Benchy, which showed a promising start in tuning the IdeaMaker profile.
The second Benchy came out even better, after a bit of slicer profile tuning. There are a few small blobs on the side caused by improper Z seam alignment, but otherwise, the results are respectable.
- Material: LOTMAXX Sample Green PLA and Sunlu Grey PLA
- Layer Height: 0.15 mm
- Nozzle Temperature: 205C
- Bed Temperature: 50C
- Print Speed: 40 mm/s
Phil-A-Ment
After printing the benchies, I felt I could trust the printer enough to start a dual-color print. The first print was made using the Phil-A-Ment model from MatterHackers. While the model looks pretty good, there is some bleed between the orange and grey colors. With a bit more purging, this could have been a great print.
The second attempt to print Phil was in black and grey PLA. There’s less visible color bleeding, but this time, I had a partial clog in the hotend which can be seen in the under-extruded gloves.
I also wanted to test some new Sunlu Silk Filament which I got, and I did another Phil-A-Ment print, this time with a single color. As you can see, there are a few under-extruded spots on the sides, and on the top of the model probably caused by a partial clog.
Lastly, I really wanted to have a dual-color Phil print, so I went back to printing with red and blue eco PLA. The results are pretty good, but the under-extrusion issue is still present. During the color changes, I noticed some small filament skips which could also be a reason for these problems.
- Material: Copper Silk PLA, Sunlu Black PLA, Sunlu Grey PLA, Gembird Orange PLA, 3DJake Glitter Red ecoPLA, 3DJake Glitter Blue ecoPLA
- Layer Height: 0.15 mm
- Nozzle Temperature: 220C
- Bed Temperature: 50C
- Print Speed: 40 mm/s
Dragon and Heart Sample file from LOTMAXX
After my Phil saga, I got off my high horse and went to revisit the sample files, enter the loving dragon. Easy to print, not that much color exchange, came out pretty good from my perspective.
- Material: LOTMAXX Sample Green PLA and Sunlu Grey PLA
- Layer Height: 0.15 mm
- Nozzle Temperature: 205C
- Bed Temperature: 50C
- Print Speed: 40 mm/s
Low Poly Squirtle
Low Poly Squirtle is just too cool for school, and with the Red-Blue Glitter PLA combo he came out amazing. There’s not too much to say about this model. Extrusion is consistent, and the color separation is good.
- Material: 3DJake Glitter Red ecoPLA, 3DJake Glitter Blue ecoPLA
- Layer Height: 0.15 mm
- Nozzle Temperature: 220C
- Bed Temperature: 50C
- Print Speed: 40 mm/s
Low Poly Bulbasaur
The Low Poly Bulbasaur is also a good model to test a dual-color 3D printer. The extrusion is pretty consistent, but the under-extrusion issue can still be seen in some parts of the model. Still, the print quality is not as good as I would expect from such an expensive machine
- Material: Polymaker Teal PLA, Devil Design Green PLA
- Layer Height: 0.15 mm
- Nozzle Temperature: 225C
- Bed Temperature: 50C
- Print Speed: 40 mm/s
Happy Chunky Bum Sitting Pot
This was a challenge, that arrived in my Phil Saga period, to overcome the fear of overhangs, see what I did there? There is a small portion of the print where the extrusion doesn’t seem to be as consistent as I would like it to be, but otherwise, it looks decent.
- Material: Sunlu Black PLA
- Layer Height: 0.15 mm
- Nozzle Temperature: 220C
- Bed Temperature: 50C
- Print Speed: 40 mm/s
Torture Toaster
As always, I included a Torture Toaster test print to evaluate the printer accuracy. The model was completed successfully, but none of the tolerance test pieces could be moved, an issue probably caused by the improper part cooling of the printer. Otherwise, it’s an OK result with some banding on the external walls.
- Material: SUNLU Grey PLA
- Layer Height: 0.2 mm
- Nozzle Temperature: 205C
- Bed Temperature: 50C
- Print Speed: 60 mm/s
Melting Lollipop
After further tuning the filament change, I also tried printing the Melting Lollipop model. The results are pretty good, but there’s still a bit of color bleed for the white filament. The purge block weights twice the weight of the printed model, so expect quite a lot of filament waste when printing this kind of dual-color model.
Material: Generic Red and White PLA
Layer Height: 0.15 mm
Nozzle Temperature: 210C
Bed Temperature: 50C
Print Speed: 50 mm/s
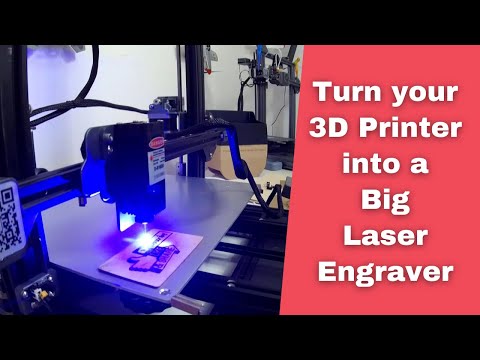
LOTMAXX SC-10 Shark V2 Laser Engraver
Once you run your course on single color printing and/or dual color printing, you reach the final boss, the laser engraver.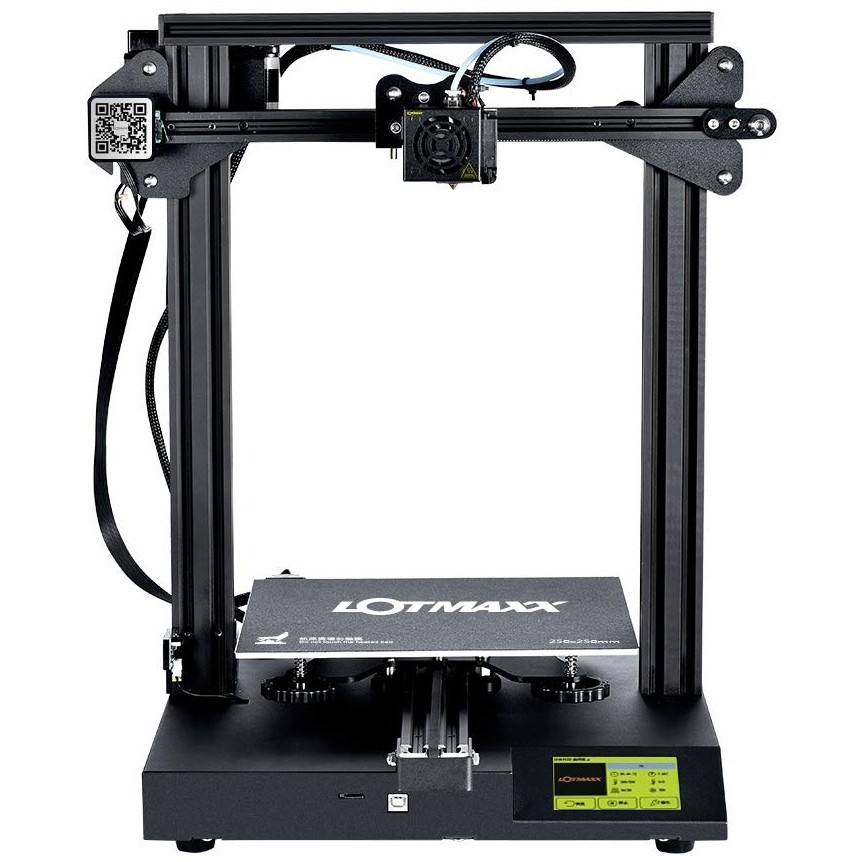 As the LOTMAXX SC-10 Shark v2 makes it really easy to swap modules out and in, it’s just a matter of unscrewing the two pcs of M4 screws from holding the hot end on the X gantry support and moving it at the top left corner of the Z gantry, where there are two holes to help park the hotend.
Once the hotend is out of the way, in comes the laser positioned in the exact location where the hotend used to be, on the X gantry support, and then it’s just a matter of routing yet another cable around the printer to connect the module into the rack and securing its position in the Y gantry with an M4 screw with T-shaped nut.
Before turning the laser on, please make sure to read the instruction thoroughly and always use your safety goggles. Now having this said, googles on, and let’s start this laser!
Since yet again this is my first time using a laser engraver, this was a super easy experience to set up until I reached the calibration of the focal point.
My laser did not raise an mm above the wooden plate, it occurred to me there is no Z offset in place, having no prior experience to what a good distance would be for this power I went to the manual, and surprise, there is no value of reference from where to start with a Z offset.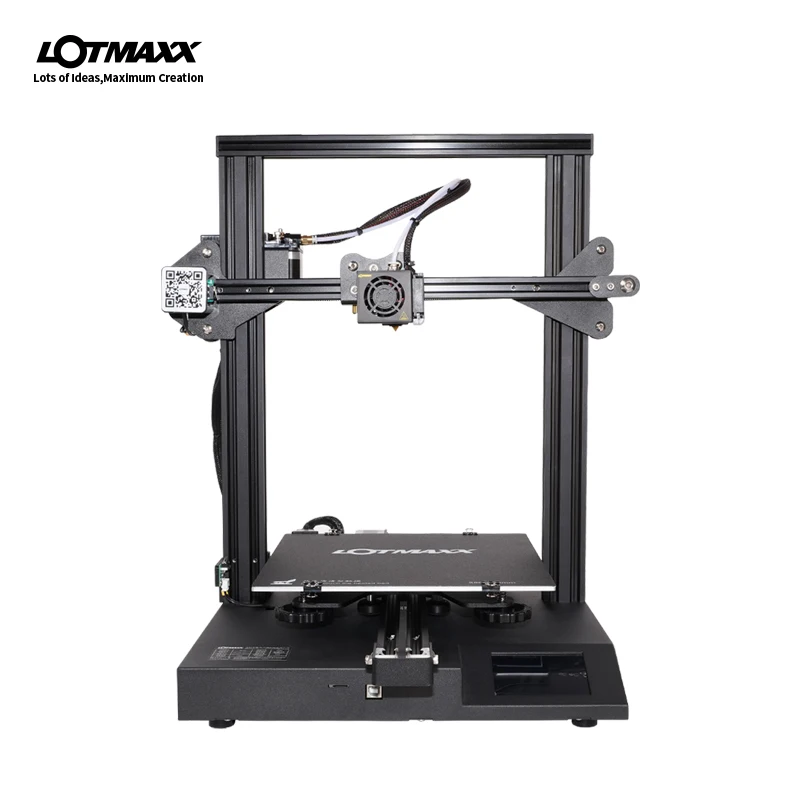 Worked my way up with the Z offset until I obtained a good focal point and I was ready to start my engraving experience. Loaded up the sample file and selected PRINT!
The laser was moving so slow, that I initially thought that it might be a problem with it. After 4.5 hours on a sample file, I’ve decided to research the topic and found out that everyone had the same experience with this as I did.
I wasn’t going to let this experience be ruined by speed, so I picked up a vector file, loaded it into the LOTMAXX engraving software, and raised the speed from 20mm/s to 40mm/s. OK, this was a huge improvement but at the cost of the engraving quality. In the first pass, the engraving was light brown, at the second passing it got at the same nuance as the sample file. At the third pass, it started to eat into the material, leaving the model cut into the board, pretty nicely, from my noob perspective.
Now above I mentioned, first pass, second pass, third pass through the engraved wooden tile, this is not something you can automate with the slicer that LOTMAXX provides, you can eighter choose a third-party solution like open-source GRBL, a slight learning curve for this one, or you can just keep the print in place and just run the print job again and again at high speeds.
I need to mention the terrible LotMaxx laser software. This is one of the worst controls I have seen on laser engravers, and you are really limited in what you can do. Sure, it’s somewhat simple and easy to use by complete beginners, but the things you can do with it are very limited.
What I liked about LOTMAXX SC-10 Shark v2?
- I liked that it is easy to set up. You can start printing within the first hour of receiving the box.
- The package contains everything you need to get you started on your 3D printing journey.
- The interface is easy to navigate and use.
- Leveraging all the modules at your disposal is fast and easy to do.
- Relatively silent printer, but not as quiet as the Sidewinder X2.
What I would like to see improved in the future or did not enjoy?
- Once you stop a print and would like to use the Load/Unload functionality it will simply start to load endlessly, even after firmware update to the most recent version.
- If you have a quick power outage, sometimes the printer will turn back on and the menu is unresponsive partially in the language set up by you and part in Chinese, removing the SD card and restarting the touch screen usually solves this, or just shutting down the printer for 10 seconds and back on again.
- The probe is only used with the ABL option on the screen, and cannot be used to probe the bed using the G29 command, at the beginning of the print.
- I had an issue with leveling, and I raised a ticket with LOTMAXX. After a few weeks, I am still waiting for them to get back to me. So the support is not that great.
- Touch screen UI will freeze if you exceed a certain number of characters for the sliced model name.
- Surface of the flex plate can be easily damaged if your printer nozzle is hot and the Z offset is not set correctly.
- The cable mess in front of the printer and around it is a bit annoying.
- The lack of safety measures like thermal runaway, is something that cannot be overlooked, and having this feature missing from the printer, can turn it into a fire hazzard.
Conclusions: Is the LOTMAXX SC-10 Shark V2 worth it?
Since my main area of focus so far was with a single-color printer, I do see the appeal of what the LOTMAXX SC-10 Shark v2 is offering. The learning curve is short and quite easy to master.
But the bland software running on the LOTMAXX Shark SC-10 v2 doesn’t allow too much tinkering, which might be a good thing for people looking for a simple-to-use 3D printer.
The printed models came out nice, but not great considering the money you need to spend on this printer. I would have expected this printer to excel at least in one area, but instead, it tries to be an all-in-one machine without managing to master any feature. And having an important feature like thermal runaway protection disabled makes it hard to recommend as a good buy.
Instead of spending close to 450$ for the Shark V2, I would recommend spending the money on a single color printer like the Creality Ender 3 S1 or Artillery Genius and getting a separate laser unit if that is also one of your interests. You will probably get better overall results and you will also save some cash.
Where to buy the LOTMAXX SC-10 Shark v2?
The LOTMAXX SC-10 Shark v2 can be purchased from the following websites:
Geekbuying
I recommend checking out the Discount Codes page before purchasing. I regularly update the article with discount codes for various online shops, and you might find one for this particular model.
The LOTMAXX SC-10 Shark v2 was provided free of charge by Geekbuying for the purpose of this review. While the article includes affiliate links, all opinions are my own. Nobody reviewed the article before it was posted, following the Review Guidelines.
Liked it?Consider supporting 3DPrintBeginner if this content helped. You can also join Patreon for exclusive perks! |
LOTMAXX Shark V3 2D printer gray
Highlights
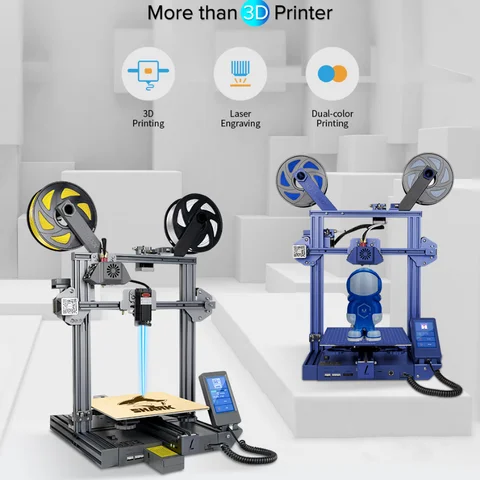
The LOTMAXX 3D laser printer combines the functions of 3D printing and laser engraving.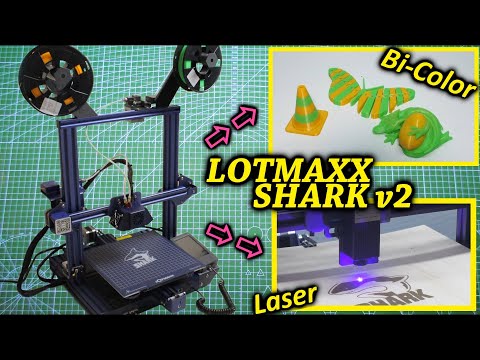 Laser size: 235*235, support 1600mW and 10+ materials, added focus saving function.
Automatic bed leveling : Intelligent leveling, intelligent Z height compensation for easy printing. Accurate measurement, small error, extremely high leveling progress; Injection probe, lightweight and flexible; SMD positioning sensor, higher consistency.
Dual extruders - This FDM 3D printer is equipped with two solid metal extruders, it supports dual color filament automatic switching in one nozzle. With two all-metal gears installed on each extruder, it delivers better, more accurate prints.
Full metal frame and quick installation - LOTMAXX SHARK pre-assembled 3D printers feature a unique color full metal body. 95% of the machine is already pre-assembled and prints right out of the box.
95% Pre-assembled - Just a few screws to complete assembly, you can start typing in 10 minutes
Quiet Driver - TMC2208 Super Quiet Stepper Motor Drivers for X, Y, Z, E, night mode support.
Assembly Plate SGlass - No rounded edges, no indented printing. Excellent flatness and easy removal of models without the need for auxiliary tools. e
Exclusive fan design - The hot end can be completely dismantled. Specially designed fans for more efficient cooling and more stable temperatures.
Resume printing - Don't worry about power outage or print failure, resume printing after reconnect to avoid loss.
Proprietary power supply - Proprietary power supply with surge and overload protection to avoid damage from power fluctuations.
Additional features - 1: Movable touch screen 2: All silent drivers 3: Glass operating panel 4: Exclusive fan design 5: Resume printing 6: Genuine power supply
Specification
| Brand: LOTMAX | |
| Specification | Assembly volume: 235 * 235 * 265 mm Layer thickness: 0. Printing accuracy: ± 0.1 mm Print speed: ≤200mm/s, normal print speed 45~90mm/s Nozzle diameter: 0.4 mm (can be changed to 0.3 mm or 0.2 mm) Nozzle temperature: 260 degrees max. Hot bed temperature: 100 degrees MAX. Thread diameter: 1.75mm Slicing software: LOTMAXX, Cura, Repetier-Host, Simplify 3D Supported documents: STL, OBJ, AMF Supported materials: PLA, TPU, ABS, etc.
|
| Weight and size | Product weight: 16kg Package weight: 16kg Product size (L x W x H): 64cm * 53cm * 27cm Package size (L x W x H): 64cm * 53cm * 27cm |
| Delivery set | 1 x 3D Printer Kit |
 1 ~ 0.4mm
Convenient and quality 3D printing with LOTMAXX SC-10 SHARK printer Blog » Convenient and high-quality 3D printing with LOTMAXX SC-10 SHARK printer
07/01/2022
History
Endless possibilities for creative ideas
Every user's dream is a user-friendly, high-performance 3D printer with impeccable build quality, equipped with features such as laser engraving, auto-levelling, two-color printing with simple additions. The new 3D printing model LOTMAXX SC-10 SHARK has all these advantages. In addition, the printer has a stylish, modern design, perfectly decorates the workplace.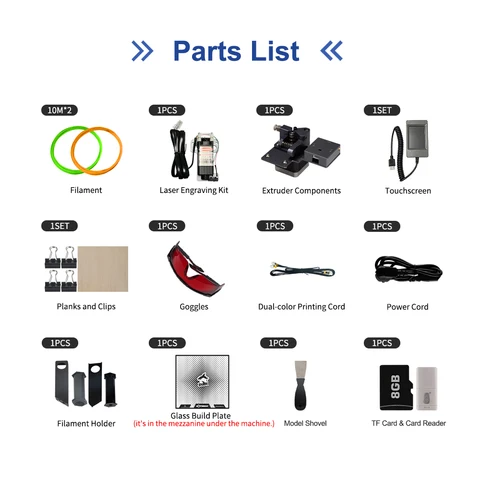
Reasons to use Kickstarter
LOTMAXX has never used crowdfunding platforms to promote its products before. The LOTMAXX SC-10 SHARK printer is the first and last such project. The Kickstarter launch has a single purpose. This platform is the basis for the implementation of limitless creative ideas. By giving everyone the opportunity to participate in the project, it will act as a bridge between the 3D printing community and LOTMAXX.
This technology has a huge potential, the industry is in the initial phase of development. 3D printing has already penetrated deeply into manufacturing, industrial areas, and is widely used in everyday life. The launch of LOTMAXX SC-10 SHARK on Kickstarter will help to get feedback, discuss suggestions and comments, and ensure dynamic development of 3D printing technologies.
About
LOTMAXX was founded 2 years ago. The main activity is the production of equipment for 3D printing, the introduction of innovations in this technology. The company employs more than a hundred experienced professionals, including highly qualified engineers, developers in the field of 3D printing, mechanical engineering, and computer technology. This allows us to achieve significant success in design, research, and production. By introducing new advanced technologies, the company is making significant positive changes in technology.
Main technical characteristics and advantages of the printer LOTMAXX SC-10 SHARK
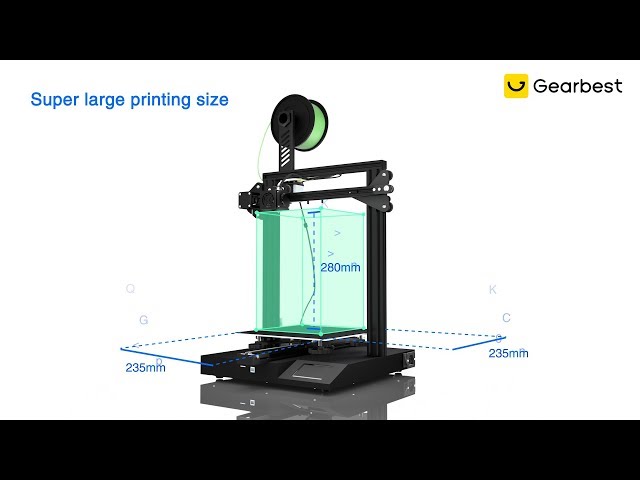
Efficient systems for maximum print speed
The LOTMAXX SC-10 SHARK printers are equipped with two SMS (s Move) and AHD (Aeolus) systems, which provide maximum printing speed, saving up to 30% of model production time.
Quality cooling for safe continuous operation
Long operation of the printer eliminates the risk of overheating. The Aeolus system includes 4 fans that effectively dissipate heat and keep the nozzle cool from all sides. According to laboratory tests, the installation of this device increases the intensity of heat dissipation by 42%.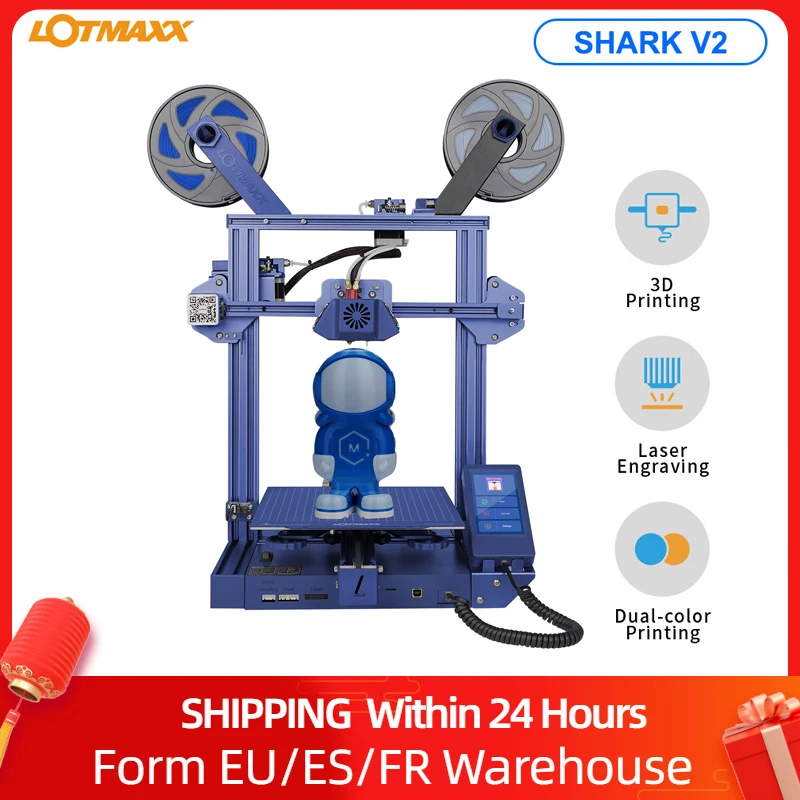 At the same time, the print speed and its quality remain unchanged. The LOTMAXX SC-10 SHARK has three speed modes: normal, medium and fast. This allows you to choose the option taking into account the specifics of the work. The equipment is equipped with a powerful high-speed motor, which guarantees stable operation.
Four fan design
Print faster
Printer Multifunction LOTMAXX SC-10 SHARK
The capabilities of this device are far superior to standard counterparts. Significant advantages are provided by two-color printing, laser engraving, automatic alignment. There is no need for recoding, additional settings, and the 3D printing process is simplified.
Available in 2 colors SC-10 Shark (Deep Purple / Space Grey).
Auto leveling function
The auto alignment feature guarantees high quality prints.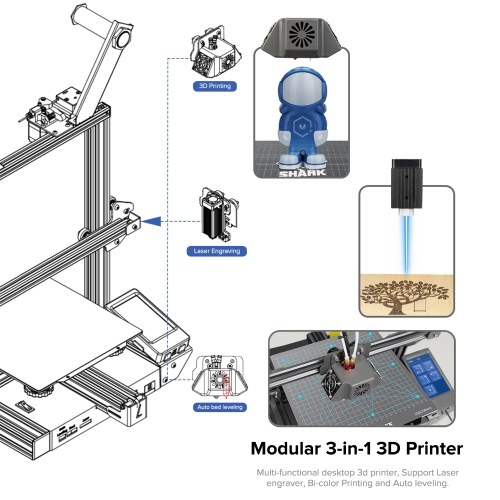 To activate it, you need to press the corresponding icon on the touch screen. The inductive sensor for sensing the heated surface is switched on. He carefully controls the quality of the surface. Not only the risk of defects is excluded, but also clogging of the nozzle, reduced adhesion. The sensor automatically measures the slope of the surface, eliminating the time-consuming manual process. This allows even a beginner to achieve excellent results.
3D Touch
Laser Engraving
The LOTMAXX SC-10 SHARK is equipped with a laser engraver. It can be performed on any materials: wood, resin, polymers, leather. The use of the replacement module is simple. A 1.6 W laser engraver is fixed near the print head.
Two-color printing
Colors play a vital role in the attractiveness of a design. Most standard 3D printers come with a single nozzle that allows you to use a single shade of material. There are 2 packages for LOTMAXX SC-10 SHARK.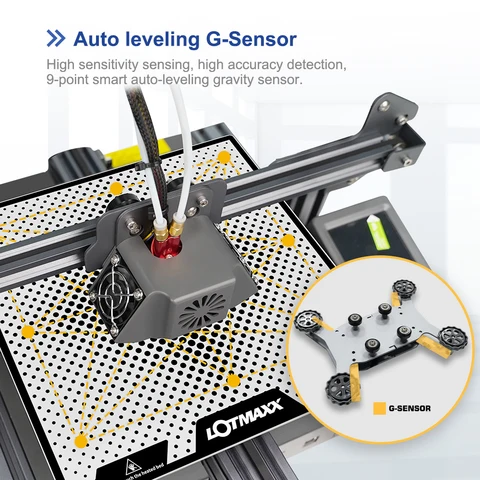 In one nozzle, 2 extruders are added, in the other, a two-color print head. This makes it possible to use two materials of different colors in the work, to increase the aesthetic performance of the models.
Two-color printing
Power failure recovery function
A sudden power outage during work wastes time, material. The LOTMAXX SC-10 SHARK printer has a function of full restoration of parameters after connecting the electricity. To activate it, there is a corresponding icon on the touch screen.
Filament control
Broken thread can jeopardize the quality of the model. The LOTMAXX SC-10 SHARK printer has a sensor that controls its supply. If the thread breaks, ends, the device turns off. Restoring the filament feed ensures that printing continues from where it stopped.
Noise floor
The printer is equipped with the TMC2208 driver, which provides near-silent operation of the device.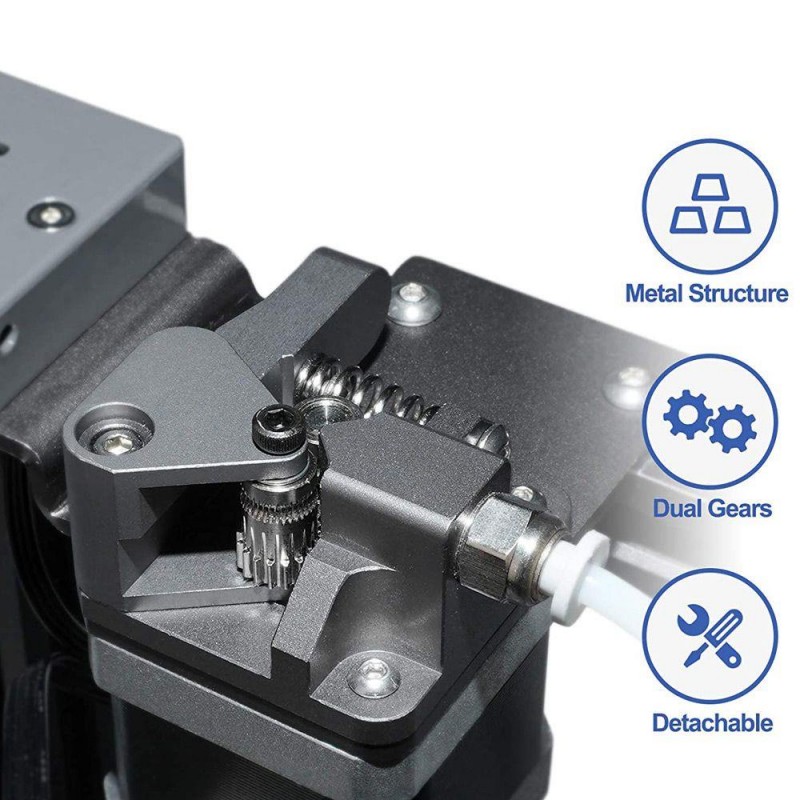 In addition, a V-shaped drive is installed on the X-axis, providing a minimum noise level, an accuracy of +0.1 even during long-term operation.
Equipment LOTMAXX SC-10 SHARK also has a silent night mode, which eliminates discomfort for others when working at odd hours.
Handy printer control device
The LOTMAXX SC-10 SHARK printer is controlled by a 3.5-inch touch screen. The device has high sensitivity, has an ergonomic shape that provides comfortable placement in the hand. It allows not only to manage actions and settings, but also provides data on time and progress.
Multilingual interface for user accessibility
Printer developers have ensured maximum accessibility, user-friendliness by including the world's most popular language options in the interface. A total of 8 languages are supported: English, Spanish, German, Italian, French, Chinese, Japanese, Portuguese.
Comfort surface adjustment
Leveling the surface, giving it the right position does not create problems. The LOTMAXX SC-10 SHARK printer is equipped with advanced adjustment. The user-friendliness is ensured by the large size of the surface area for pressing the finger, the ergonomic shape that guarantees a secure grip.
Insert features and high quality
The LOTMAXX SC-10 SHARK has a strong, flexible steel plate. It provides maximum convenience in removing, gluing models. In the production of the plate, the technology used in aluminum anodizing is used. This provides it with increased rigidity, impeccable quality.
Safety and security
At LOTMAXX, reliability and safety are top priorities. The SHARK printer strictly complies with these requirements. The device has a unique, patented power supply that guarantees high-quality protection against overloads, power surges. This eliminates equipment failure due to fluctuations in the mains.
Optimum temperature for quality printing
High quality 3D printing is ensured by maintaining the optimum temperature in the area of the sweet melting spot. The surface instantly warms up to a temperature of 100°C. It provides temperature operating conditions for various types of filaments.
Control software
The LOTMAXX SC-10 SHARK printer is equipped with a 32-bit control unit. It manages 5 limit switches, 6 drivers, 5 controlled high power outputs. Built-in software for controlling the functions of two-color printing, laser engraving eliminates the need for recoding, additional adjustments. They simply connect to perform these jobs. SHARK models mount a motherboard that supports a long file name, OctoPrint, which speeds up the loading of gcode files, ensures that the algorithm is followed during automatic alignment. This optimizes and simplifies the 3D printing process.
Free software features, laser engraving
In 3D printing, the most important assistant in the implementation of a creative idea is software. SHARK printers come with the free Slicer2-in-1 software. It provides 3D printing and laser engraving functions. This option is ideal not only for novice users, but also for experienced professionals who want to work comfortably, without any extra effort. The software works with Mac, Windows support.
For 3D printing:
- Optimizes the two-color printing process.
- Supports medium, normal speed, fast mode settings.
- Provides a preview option.
For laser engraving:
- Includes Berkers algorithms and the Floe interpolation method.
- Provides compliance with the specified parameters: width and length, speed, power.
- Supports vector image parameters - gray value.
- Follows the contour extraction algorithm.
Easy to adjust
Users who do not have experience, knowledge to set up the printer, LOTMAXX SC-10 SHARK will provide practical assistance. The developers have already put together an inbox for them. It can be created within 5-10 minutes and get to work.