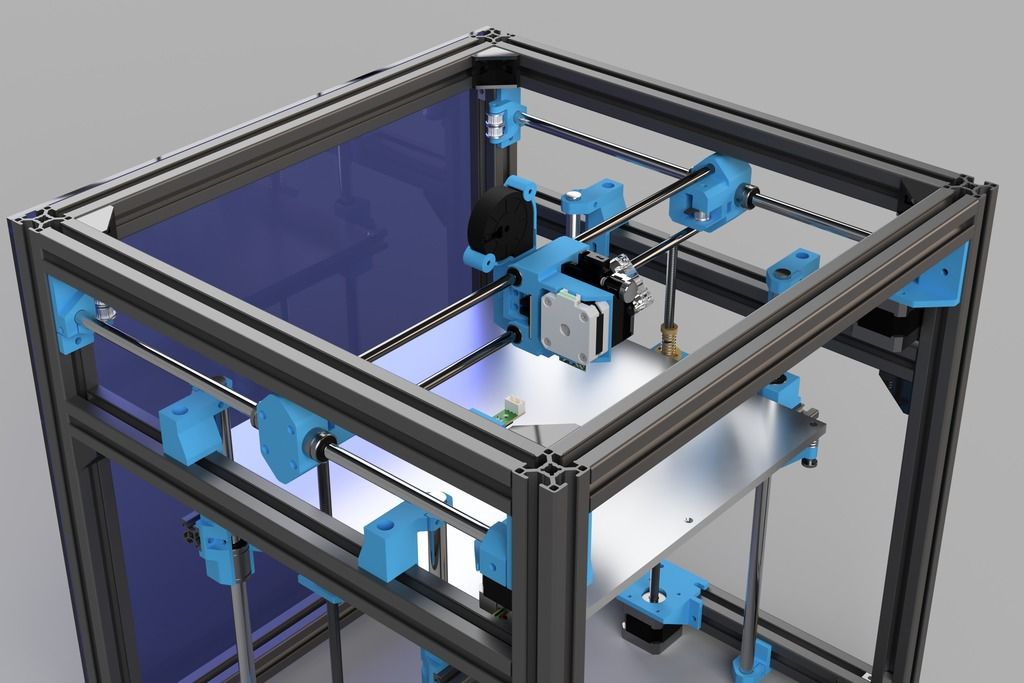
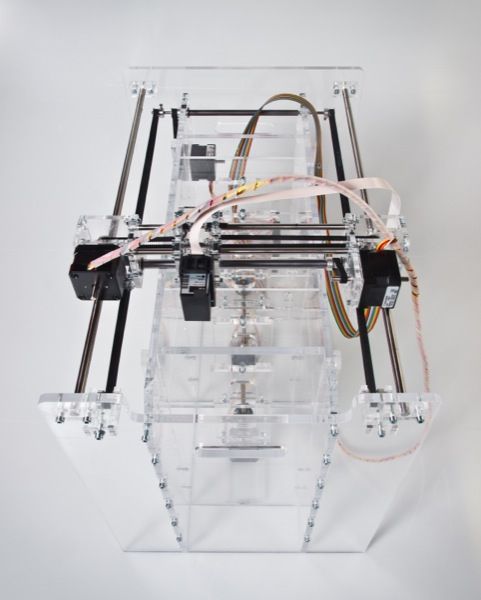
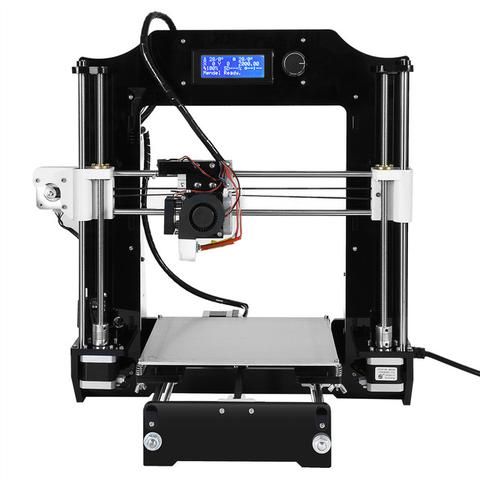
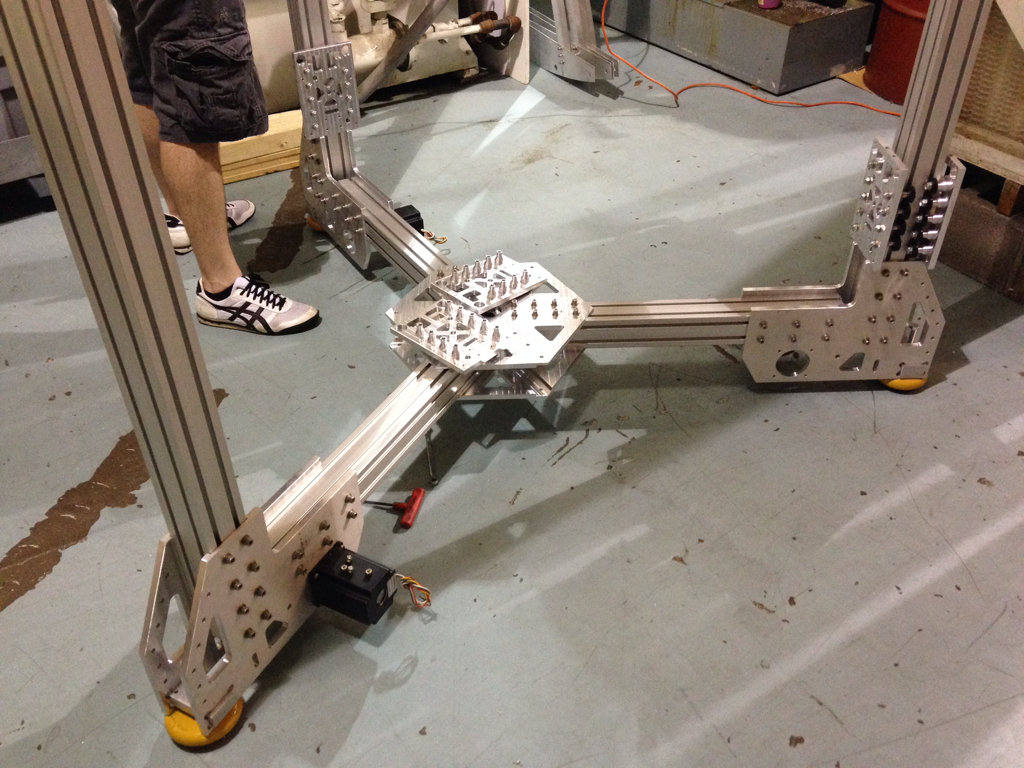
Large sized 3d printer
Large Volume 3D Printers | MatterHackers
Bring your most ambitious prints to life with these large-volume 3D Printers! From the enormously large Modix 3D Printers to flexible & industrial-grade 3D printers from brands such as Raise3D, MakerGear, or BCN3D; MatterHackers has the right large-volume 3D printer to fit your needs.
Available for purchase as kits or ready to ship fully assembled, these large-volume 3D Printers will enable you to print BIG and explore product development and prototyping without the need to invest in costly, full-scale additive manufacturing systems.
Guides & Articles
What is 3D Printing?
3D printing is a process where physical, three-dimensional objects, parts, or models are made layer-by-layer from Computer-Aided Design, or CAD, and digital files.
Anatomy of a 3D Printer
Get an understanding of how 3D printing works, from the inside and out. This guide will walk you through each of the critical components of a 3D Printer, answering the question: "How does a 3D printer work?"
The Top Ten Tips For Getting Started With 3D Printing
We were all noobs at one point! Here the ten best tips for getting started with 3D printing - whether it's your first time 3D printing or you need to brush up on the basics, this guide will help you out!
3D Printer Troubleshooting Guide
Use this guide to help you identify and solve the most common issues that may occur while 3D printing.
How To Calibrate Your 3D Printer's Extruder
This quick and informative guide will help you calibrate your extruder perfectly, resulting in accurate, quality prints.
3D Printing 101: How to Succeed with a Perfect First Layer for Every 3D Print
The first layer of your 3D print is the foundation of everything that comes after, which makes it such an important part of the 3D printing process.
How To Get The Best 3D Printed Parts By Understanding Extrusion Settings
Melting is a critical concept to 3D printing, and yet it hasn’t received a lot of in-depth attention. This article will teach you how to extrude your filament properly so it flows smoothly. Make filament jamming, delamination, and weak parts things of the past.
3D Printing Essentials: How to Succeed with Every Bed Surface Solution
Matching 3D printing filaments with the proper bed surface material is an important part of the 3D printing process. Read more to find out the best path to success.
3D Printing Essentials: Filament Loading
Proper filament loading and unloading is a necessary part of 3D printing without trouble. Read on to learn the essential method you should be following.
3D Printing Essentials: Bed Leveling
For some, levelling a 3D printer's bed can be challenging, but it doesn't need to be. Read this essential guide to see what it takes to do it right.
Quick Tips: How To Get Started With Batch 3D Printing
Utilizing 3D printer time most efficiently is much easier once you start batch printing parts to maintain 3D printer uptime and minimize downtime.
WHY SHOULD I SELECT A LARGE-VOLUME 3D PRINTER?The number of available large-volume 3D Printers is growing every day. Whether you are just getting started with 3D Printing, consider yourself an experienced hobbyist, or are a professional looking to take that next step into the world of large-scale production there is a large-volume 3D Printer to fit your needs.
Large-volume 3D Printers can range in price from as low as $500, such as the Creality Ender 5 Plus, while some can be as expensive as $15,000, such as the absolutely massive Modix Big-180X.
There are many other additional factors to consider when discussing the costs associated with large-volume 3D printers. It's important to thoroughly take into consideration things such as the type of 3D Printer Filament Or 3D Printer Resins you are planning to print with, the type of HotEnds and Nozzles required, as well as any other accessories such as Build Surfaces & Fume Extractors.
HOW LARGE CAN I PRINT?The Modix 3D Printer line easily takes the lead when it comes to print volume. Large, highly upgradable, and available exclusively as kits these printers are exceptional options for achieving ridiculously large prints.
- Modix BIG-40: 400mm x 400mm x 800mm, starting at $5,600
- Modix BIG-60 V3: 600mm x 600mm x 660mm, starting at $4,500
- Modix BIG-120X: 1200mm x 600mm x 640mm, starting at $7,550
- Modix BIG-120Z: 600mm x 600mm x 1200mm, starting at $7,450
- Modix BIG-180X: 1800mm x 600mm x 600mm, starting at $15,150
- Modix BIG-Meter: 1010mm x 1010mm x 1010mm, starting at $13,150
Large Scale 3D Printers Big Enough to Print Furniture
Home / 3D Printers / Large Scale 3D Printers Big Enough to Print Furniture
Use Cases
Just like all types of 3D printing, XL 3D printing has its own strengths and tradeoffs. Users are constantly finding more applications for these gigantic machines so the XL 3D printing space is getting bigger and bigger. Let’s have a closer look.
Quick jump to:
- Request XL 3D printer quote
- Request XL service quote
When To Consider Large Scale 3D Printing
It takes a large scale 3D printer to print furniture, vehicle parts and architectural components. Obviously, size is the driving factor in choosing to use large-format printing but there’s more to it than that. Here’s a breakdown of some of the less-obvious considerations:
- Unibody Parts – Often, producers are already able to fabricate their large objects through traditional methods of assembly but those objects would perform better if they were produced as one solid piece, something only a large 3D printer can do efficiently.
- Weight Reduction – Large objects are usually made of wood, metal, or injection molded plastics.
 Printing the same objects in plastic will make them much lighter, especially when factoring that users can easily adjust the density infill of 3D printed objects. Consolidating large assemblies into single components also reduces weight by eliminating the need for fasteners like nuts and bolts.
 - Faster Development – The larger an object, the longer it takes to create and setup the tooling to fabricate it through traditional means. With 3D printing, there are essentially no setup steps so large prototypes are significantly faster to print than to make them any other way. A large object may take a while to print, but by cutting out the time-consuming tooling step, it may also be faster to do production runs of large objects, depending upon the specifics.
- Reduced Cost – 3D printed large parts can be cost competitive with conventionally-made parts almost entirely because of the tooling costs of the latter. Consolidated assemblies usually cost less as well because fewer materials have to be sourced from different places.
- Design Freedom – Using conventional manufacturing methods, many geometries are just not possible, such as internal channels and complex lattice structures. Many large objects, like furniture, benefit from such features and XL printers are the only way to realize those designs.
Large Scale 3D Printing Examples
- Restoration and replication – XL 3D printing has become rather popular among paleontologists as the technology allows them to both study and preserve the delicate fossils that they regularly handle.
- Furniture – Thanks to large-scale 3D printers it is now possible to create complex functional designs within a fully digitized process chain. From full-size prototyping to production of 3D printed furniture.
- Display advertising – XL 3D printers are perfect for making high-quality, modern signage and lettering for retail stores, businesses and exhibitions.
- Props – With the introduction of large scale 3D printers, designers can now produce enormous set pieces – overnight.
 3D printing can help designers quickly manifest their wildest imaginations into the physical reality, and the Film & TV industry has taken notice.
Pellet Extrusion
One of the differences between desktop-sized machines and XL printers is the possibility to utilize pellet extrusion systems on the large printers. Pellet extrusion doesn’t use spooled filament as feedstock but instead uses the same virgin plastic pellets that are used for injection molding, which are much cheaper than spooled filament. This makes it easy to mix different plastics to make custom polymer blends and colors. These systems can also take shredded plastics as feedstock, which enables users to directly recycle water bottles, milk jugs, and failed and unneeded prints into new objects. Such a degree of a circular ecosystem can not be achieved with any other form of manufacturing.
That’s all great but what compels most users to opt for pellet extrusion is its blazing speed as the technology enables output of several kilograms per hour.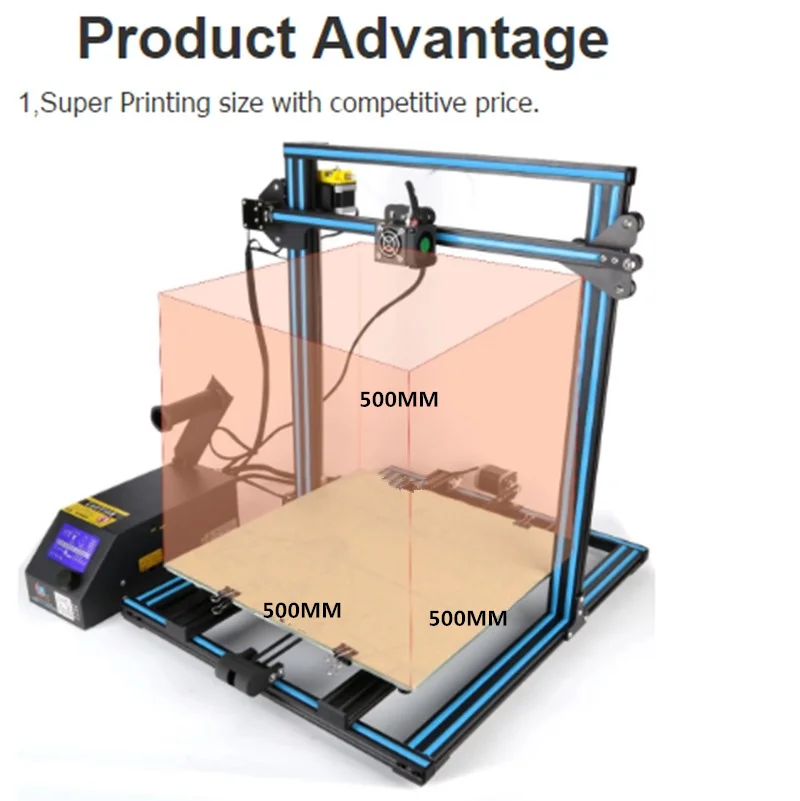 Printing times scale exponentially with part size so having a high extrusion rate is pretty important for large-format 3D printing. One drawback of pellet extrusion systems is that they struggle with retraction, a feature that filament extruders employ to improve surface finish by pulling back on the filament during non-extrusion travel moves; retraction reduces or eliminates blobs, dots, and stringing on prints. Some XL printers can operate with both filament and pellet extrusion systems, allowing users to choose the best toolhead for their specific application.
Get a Quote
Large Scale 3D Printers
Looking to implement large scale 3D printers in your production process? Get a quote from Modix or Industry
Modix BIG Meter
With the Modix BIG Meter, you are now able to manufacture objects as large as 1010 x 1010 x 1010 mm in one go!
$13,500Modix
Request a Quote
modix big meter
- Benefits
- Applications
- - DIY self-assembly kit
- - Print Volume: 1010 x 1010 x 1010 mm
- - Printer Dimensions: 1300 x 1470 x 1830 mm
- - Shipping Weight: 200kg
- - Included: Dual print head, E3D Aero & Volcano 1.
 75mm
75mm - - Reprap Firmware developed and supported by Duet3D
- - 7 inch touchscreen made by Duet3D
- - E3D Titan Aero extruder with E3D Volcano hotend
- - Automatic bed tilt calibration
- - Power Requirements: 32A, single phase, 208-240V
Mold Making, Prototyping, Research and Development, Restoration
Industry MAGNUM
Hailing from Sweden, Industry is a company that has made major waves in the world of 3D printing. The new MAGNUM large scale pellet 3D printer enables you to print parts measuring 1500 x 1200 x 1200 mm.
A powerful E25 extruder manufactured to handle shredded material, granules or pellets. The MAGNUM handles nozzles between 2-8mm and has an average output between 1-8 kg / hour & a maximum output of 15 kg / hour.
MAGNUM offers powerful control features based on Bosch Rexroth MTX system control. It comes with a camera and mail/text module for external monitoring. A large touch screen display allows for easy setup and agile control.
€159,000Industry
Request a Quote
Industry MAGNUM
- Benefits
- Applications
- - Large scale pellet 3D printer
- - XL build size: 1500 x 1200 x 1200 mm
- - Granular extruder, which reduces material costs
- - Fast build rate: up to 15 kg per hour
- - Touch screen display
- - High quality linear motion modules from Bosch Rexroth MTX
Mold Making, Production, Prototyping, Research and Development, Restoration
Modix BIG-180X
The BIG-180X features a print volume of 1800 x 600 x 600 mm and comes at a competitive price of $12,000 USD. The unique extra width of the build chamber is designed per request of customers working in the automotive industry.
$15,500Modix
Request a Quote
modix 180
- Benefits
- Applications
- - DIY self-assembly kit
- - Print Volume: 1800 x 600 x 600 mm
- - Printer Dimensions: 2170 x 1060 x 1430 mm
- - Shipping Weight: ~240kg
- - Included: Dual print head, E3D Aero & E3D Volcano 1.
 75mm
75mm - - Reprap Firmware developed and supported by Duet3D
- - 7 inch touchscreen made by Duet3D
- - E3D Titan Aero extruder with E3D Volcano hotend
- - 4 X Z axis motors are controlled individually providing automatic bed tilt calibration.
- - Minimal Electricity requirements: 32A, single phase, 208-240V
Prototyping, Research and Development, Restoration
Modix BIG-120Z
The closed enclosure of the BIG-120Z is made of aluminum composite panels and polycarbonate doors. It incorporates a premium motion system including HIWIN motion rails, Gates timing belts and IGUS signal cables. This is a smart 3D printer providing several key reliability features including power-off resume, filament runout sensor, 120 probing points based automatic bed leveling, stall detection and more. The manufacturer offers an active air filter device as an add-on.
$7,500Modix
Request a Quote
BIG-120Z
- Benefits
- Applications
- - DIY self-assembly kit
- - XL print volume of 600 x 600 x 1200 mm
- - Z axis guides, HIWIN MGW Linear Rails
- - Duet 2 Wifi, 32Bit controller developed by Duet3D
- - Reprap Firmware developed and supported by Duet3D
- - 7 inch touchscreen made by Duet3D
- - Dual print head
- - E3D Titan Aero extruder with E3D Volcano hotend
Displays, Fashion, Mold Making, Prototyping
Modix BIG-120X
Modix BIG-120X Version 3 represents a major leap forward with regards to the printer reliability, print quality, ease of assembly and readiness to future advanced updates. Since Modix big60 and 120X share the same core design the new update is benefiting both models.
$7,500Modix
Request a Quote
BIG-120X
- Benefits
- Applications
- - DIY self-assembly kit
- - XL print volume of 1200 x 600 x 660 mm
- - Duet 2 Wifi, 32Bit controller developed by Duet3D
- - Reprap Firmware developed and supported by Duet3D
- - 7 inch touchscreen made by Duet3D
- - E3D Titan Aero extruder with E3D Volcano hotend
- - Closed loop motion system (optional)
Mold Making, Prototyping, Research and Development, Restoration
Get a Quote
XL 3D Print Service
3D printing is a viable option for display advertising, large scale concept models, car parts, furniture, molds & tooling. We offer both cost effective solutions with thick layers and rough surfaces for rapid prototyping as well as highly detailed & post-processed end-use objects. Please contact — [email protected] — for any questions or complete the form below and we’ll answer you as soon as possible.
- Technologies: FDM, SLA, GDP
- Materials: From PLA to CF composites & more
- Maximum print size: 1450 x 1100 x 1800 mm
- Post-processing: Spray paints, metal coatings, assembly & many more
CreateBot D600 Large Professional 3D Printer
Hello everyone, the company 3Dtool is with you. Today in our review is an impressive 3D printer that takes professional 3D printing to a new level.
It proudly bears the name CreatBot D600 and comes in a fairly sturdy wooden box.
Let's start unpacking it
The printer is packaged just fine, with foam padding on all sides, all glasses sealed with packaging film to avoid scratches, and inside the moving parts are fixed with nylon ties. nine0005
CreatBot D600 , it is no coincidence that it has these numbers in the name, because the size of its working area is 600 mm x 600 mm x 600 mm and the usable volume is 216 liters.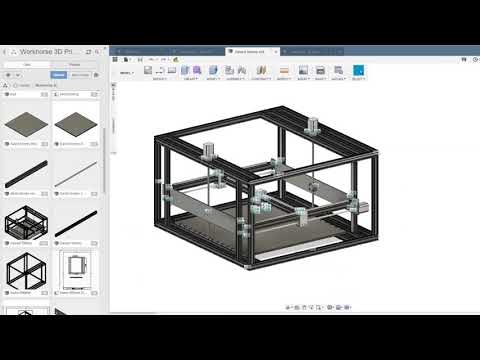
Also, its main advantage (besides the size) is the dual print unit with two separate extruders
The size of the working area is impressive, because there are not many FDM 3D printers on the market that can compete with the D600 in this indicator. At the same time, the dual print unit can print supports using soluble materials. Such capabilities allow CreatBot D600 to create complex models of large size. That in itself is a rare combination and is highly demanded in the market of professional 3D equipment. nine0005
Housing
The body of the printer is all metal and its overall dimensions are 915 x 845 x 1085 mm . The weight of the printer is 125 kg , which, coupled with a rather impressive rigidity, has a beneficial effect on reducing vibration during printing.
There are many opening doors and windows on the body, providing access from any side to the printed model.
With a fully closed housing, the possibility of external interference in the operation of the printer is eliminated, the noise level during operation is reduced, and the temperature inside the chamber is maintained at a constant temperature so that the product does not deform during printing. Thanks to this, the printer allows you to print with high shrinkage plastics, such as ABS derivatives or nylon, without problems. nine0005
The location for installing the material spools is at the back of the housing.
Kinematics
Designed as a single unit with a belt, rail guides provide a high degree of positioning accuracy, higher than not only their counterparts, but even some optical printers available on the mass market. The classic kinematic scheme allows you to print, albeit a little slower than analogues at H-Bot and Core-XY systems, but much more reliable due to the direct drive of the motor along the axes. By the way, along the axis Y the printing unit moves due to the movement of two belts (one per rail), but one powerful stepper motor with a through drive
Along the axis Z , the heating table is moved by two ball screws installed at the side walls. As guides for the table, there are four cold-rolled shafts with a diameter of 16 mm .
Along the X and Y axes, block rail guides with an integrated belt are installed.
Extruder
As standard, the printer has a dual print unit with two extruders. Optionally, it is possible to install a third. The extruders are equipped with a gearbox with a gear ratio of 1:10 .
The pull mechanism is completely metal. This allows you to confidently print with any materials, which is also provided by the nozzle heating limit, right up to 400°C . The printing unit itself is made according to the classic direct extruder scheme, has an extruder tube and heating blocks similar to the Vulcan. The cold zone (ColdEnd) is forcibly blown by two small fans, the speed of which can be adjusted. nine0005
Nozzles with a diameter of 0.4 mm are installed by default. They are interchangeable and, if necessary, you can always install other diameters suitable for your tasks (0.3, 0.5, 0.6, 0.8, 1.0 mm) .
When the power is suddenly turned off, the printer automatically remembers the current position and saves the print data, lowers the build platform and retracts the nozzle.
The platform of a heating table is made of glass ceramics. Can heat up to 100 - 110 °C . This is not as much as, for example, MarkForged printers, but allows you to use any of the most common materials for 3D printing. The adhesive on the platform is a BuildTak-like surface that securely holds even very large objects made of high shrinkage materials (eg ABS).
The calibration screws are located at the bottom of the heating table.
Control screen
For convenience, the printer is equipped with a 4.3” touch screen with an English menu. There are separate menus for preheating and movement along the axes. It is quite easy to handle. Intuitive icons allow you to quickly understand the tools and manage the printer, with almost one touch.
Interfaces
3D printer CreatBot D600 is equipped with a USB 1.0 port. This allows you to pair with a computer and send print jobs from it directly. However, we recommend using the USB flash drive slot to the right of the display in order to take full advantage of the device's capabilities. nine0005
Software
The printer comes with free software CreatWare based on the popular and well-known Cura 1.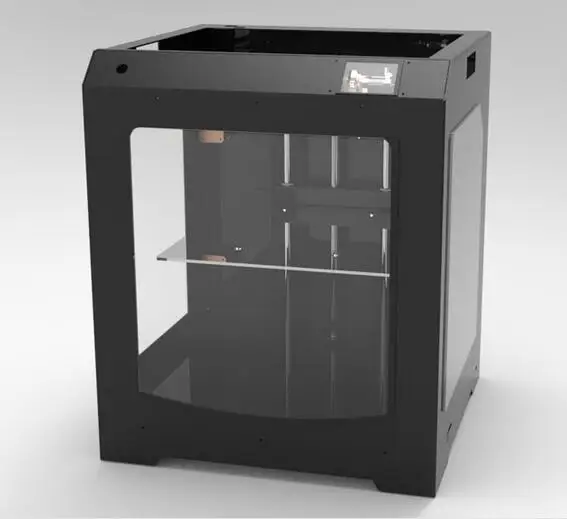 5.4, which can be downloaded from the manufacturer's website.
It is very simple and easy to learn, so there should not be any problems in working with this software.
This 3D printer is designed to solve serious problems of printing large-sized models. The quality of workmanship and ease of use allow the CreatBot D600 to be used in professional 3D printing studios, various design and design offices 24/7. The build quality of the 3D printer is factory. All components of the 3D printer are made of high quality components. Significant advantages of CreatBot D600 include: nine0005
1) The ability to heat the extruder up to 400 degrees (Important for 3D printing with engineering plastics)
2) Reliable and accurate kinematics for a working area of this size.
3) The presence of 2 extruders in the base.
4) Factory assembly
If you need a printer with a large print area, we recommend 100% for consideration.
You can order the CreatBot D600 3D printer from our company. Delivery time 6 weeks. nine0005
Link to equipment: https://www.3dtool.ru/product/3d-printer-creatbot-d600/
How to create models that are larger than the print volume of a 3D printer
Don't have a large format 3D printer yet? When evaluating the capabilities of a compact desktop 3D printer, do not limit yourself to print volume. Many objects, like your smartphone or a bridge over a river, are made up of many individual components. Therefore, splitting the model into smaller parts that can be aligned after printing is a great solution for 3D printing large objects that do not fit on the platform. nine0005
Also, splitting the model can be a great way to get a high quality result, even if the whole model fits on the platform. This makes sense when multiple or opposing surfaces must be free from support structures, when the model has complex ledges, or contains cavities where liquid polymer can remain.
3D printing of various parts opens up new possibilities, for example, the creation of prefabricated structures from various materials or the combination of rigid and flexible parts to simulate the overmolding method. nine0005
When choosing a gluing method, it is necessary first of all to take into account the required degree of strength of the glued joints, which depends on the purpose of the models:
-
chemical: use adhesive on artwork, scale models, and complex shapes that are not intended for functional use and should not be impacted;
-
Mechanical: Provide threaded holes or sockets for attaching parts that require a secure mechanical connection, or repeatedly detaching and attaching components as needed. nine0005
This tutorial focuses on building large, prefabricated 3D stereolithography (SLA) printed models with chemically bonded components. Read on to learn all the steps in this process, from model separation to post-processing for a professional finish.
Formlabs Form 3L is the first affordable, easy-to-use large format 3D printer optimized for reliable production of industrial quality models. The Form 3L stereolithographic 3D printer features a huge print volume of 30 x 33.5 x 20 cm and unrivaled cost-effectiveness. nine0005
Meet the Form 3L
We recommend two ways of separating models: adding features to the design that allow the parts to fit together, or separating the model with straight lines that will require them to fit properly during the bonding process.
Regardless of which method you choose, if you have a lot of parts, it's helpful to add a unique identifier (letters/numbers) for each one to make assembly easier. nine0240
Use CAD software to split a 3D model and add basic centering components such as slots, pins, slots, notches, and tabs, or more complex features such as dovetails and slots to match model folds.
Adding centering components to the design makes it easier to assemble parts.
Ideally, these components should make it easier to align and assemble parts, but can cause problems if they differ even slightly from your 3D models, preventing perfect centering. Therefore, it is best to use centering components only when the printer can print parts with accurate dimensions that are not subject to deformation. nine0005
Splitting a 3D model along straight lines requires less effort than adding components to center. With this separation method, there are also fewer problems if the parts are slightly deformed or differ in size.
Adding IDs for each part makes the assembly process easier.
On the other hand, parts separated by straight lines can take a long time to assemble, since each part must be manually centered and ensured that they all remain in the correct position until the adhesive is completely dry. nine0005
By default, when printing on a stereolithographic 3D printer, solid models without voids are obtained. Depending on the design, different requirements may apply to the manufacture of large items.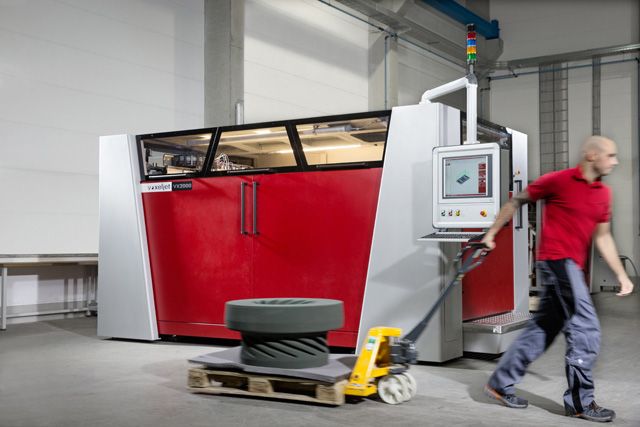 In such cases, 3D printing the outer shell or converting the structure into a hollow is a great way to save a lot of material and time. When printing hollow models on a stereolithographic 3D printer, be sure to add ventilation holes to avoid creating cavities filled with air and pressurized resin. nine0005
SAMPLE PART
Experience Formlabs print quality first hand. We will send a free sample of the printed model directly to your office.
Request a free print sample
Converting the design of the model to a hollow saves a lot of time and materials because the printer only needs to print the outer shell.
Learn more about how to save materials and time by hollowing out 3D models.
Depending on the size of the details and the purpose of the model, we recommend three mounting methods:
| Epoxy glue (5-30 min) | Cyanoacrylate (CU, Supercolla) | Large | Small/Medium | Small |
|---|---|---|---|
| Paintable | Yes | Yes | Yes | Medium | Low | Low |
For large parts and maximum adhesion, use 5-30 minute dry epoxy. It takes longer to dry than other adhesives, allowing you to fit large 3D printed parts but slows down the assembly process. Most 5-minute epoxy adhesives stop changing shape in as little as five minutes and cure by about 75% in less than an hour.
For large parts and maximum adhesion we recommend using epoxy adhesive. nine0005
The next option is cyanoacrylate (CA or superglue), which quickly forms a strong bond, ideal for small to medium sized parts. Thoroughly clean the part before applying CA to the surface, because contaminants adversely affect the quality of the connection. CA has a moderate impact strength, but is not recommended for models that require high strength.
For small models, you can simply use liquid resin from a stereolithographic 3D printer. Pour a small amount of resin into a tray from a bottle or cartridge, pick it up with a pipette or syringe, and place it on the surface to be bonded. Connect the parts and wipe off excess resin that may spill around the edges. Aim a 5mW (405µm wavelength) UV laser pointer at the contact area to cure the resin and bond the parts. nine0005
This method produces a chemical bond similar to that of a stereolithographic 3D printer, but is only suitable for bonding small surfaces as a low power light pointer cannot penetrate the model deep enough to create a strong bond.
Protective equipment must be worn when working with polymers, including proper eye protection and gloves.
Download PDF
Don't have time to read the article now? Download it in PDF format.
Download as PDF
After assembling the model, it is time to move on to post-processing. This step includes geometric correction of the model to provide a smooth surface that matches the original 3D model, and aesthetic finishing to obtain a uniformly colored surface.
Depending on the precision of the printer and the size of the printed parts, there will almost always be slight voids or mismatches at the contact points. Automotive sealant (e.g. Bondo 907) adheres well to polymers, therefore, to eliminate such inconsistencies, it is recommended to apply it in a thin layer on the surface. Lightly sand the surface after each coat has dried to bring the model to its final shape.
Sealing models with automotive sealant (red area in image) will help eliminate small gaps and inconsistencies between parts.
Sanding helps remove traces of support structures and remaining inconsistencies in the model. Gently start sanding the surface with 150-grit sandpaper to remove traces of support structures and smooth edges where parts meet. Once the surface is smooth, sand it wet using 320 grit sandpaper to remove any remaining layer lines. Sand the surface in random motions so as not to leave marks. In most cases, these two methods will produce a fairly smooth surface, but you can continue to increase the grit of the sandpaper up to 2 times and, after wetting it, sand the entire model until the surface is reasonably smooth. nine0005
Power sanding is great for large flat surfaces, but can ruin fine details. Grinding of small models is recommended to be done by hand, and for large ones, a combination of manual and mechanical grinding is recommended.
Machining large parts with mechanical and manual grinding saves a lot of time. Power sanding is great for large, flat surfaces, but can ruin the fine details, sharp corners, and subtle contours that are typical of stereolithography. As a result of mechanical grinding, a lot of dust is also generated, so before starting processing, it is necessary to prepare the working area. nine0005
The use of power tools requires full attention and the use of protective equipment. The surface can be damaged very quickly without even realizing it, just by leaving the sander without moving.
When finished sanding the model, rinse it in soapy water to remove dust and debris and dry thoroughly before proceeding to the last step.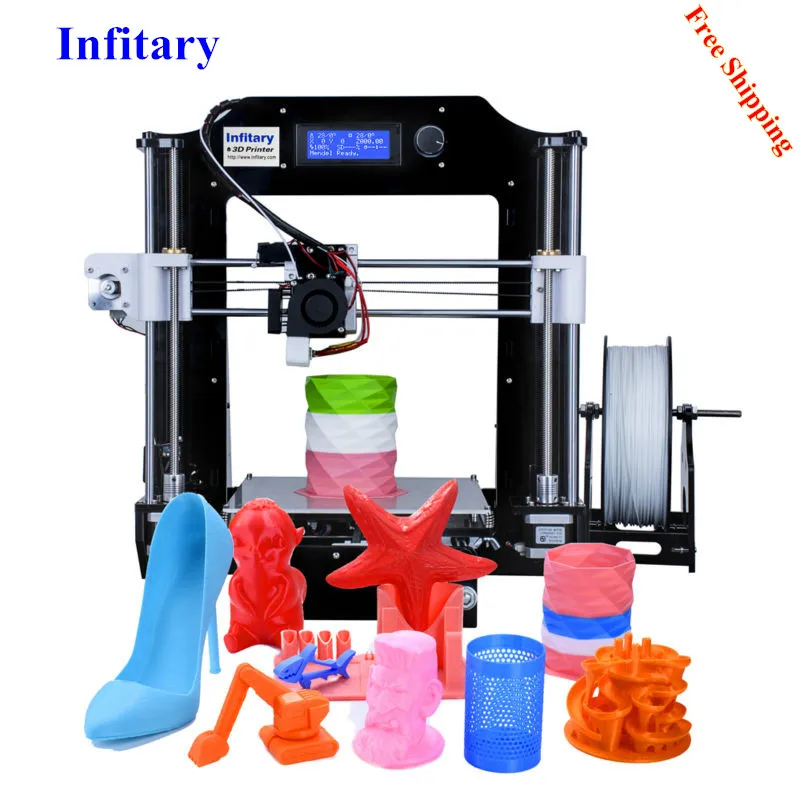
The primer helps the paint adhere to the surface and can indicate areas where additional sanding is needed or removal of traces of supports that you may have missed. The Universal Matte Gray Plastic Primer shows these spots exceptionally well. For best results, apply it to the surface in several thin coats. Sand critical areas and reapply a thin coat of primer. Repeat this process until the entire surface of the model is level. nine0005
Use protective equipment during priming and painting, including a respirator to protect against paint fumes.
Universal Matte Gray Plastic Primer is exceptionally good at showing fine details and helping to identify areas that need to be sanded down.
Find out more about sanding and priming in our detailed guide.
When painting with multiple colors, protect the model with a temporary coat. First, plan the order in which you will paint the model, depending on the color, transparency, and size of the area of a certain color. Start with small details so that fewer of them can be protected when painting with the main color. Apply painter's tape to the edges and corners. To quickly cover large areas, attach sheets of paper to them. Ribbon guides (laser cut) can also be useful for creating straight lines, circles and complex shapes. nine0005
When it comes to masking, figuring out the correct order is your first priority. In our case, the parts were first painted silver and the sections that would remain silver on the final part were then covered with painter's tape to hide them from the next l
painting. In our case, we first painted the parts silver and put masking tape on the areas that should remain silver in the finished model so that they do not get paint of a different color. nine0005
As with primer, several thin coats of paint should be applied for optimal results, rather than one thick coat. Most spray paints will achieve the best color in warm and slightly damp conditions in the absence of wind. In this case, you must always follow the manufacturer's recommendations, which can be given on the paint container or in the technical documentation.
Consider the time the paint needs to dry: Allow the layers to settle before applying the same color and allow the paint to dry completely before applying a new color. nine0005
The area where we applied masking tape is still silver.
Become an expert in painting 3D models with our detailed guide
Already wondering what your finished model will look like?
"Sorry sir, that R2-D2 over there is in excellent condition and not expensive."
Formlabs optics designer Adrien Tanner created this R2-D2 model from 105 parts printed on a Formlabs stereolithographic 3D printer. It even has working electronics borrowed from the Form 2 printer - a galvanometer drive for sound reproduction, a cartridge dispenser for lamps, and a Z-axis drive for dome rotation. nineThe 0005
Form 3L is the first large format 30 x 33.