Kingroon 3d printer upgrades
3D Printable Upgrades for your Kingroon KP3S — Kingroon 3D
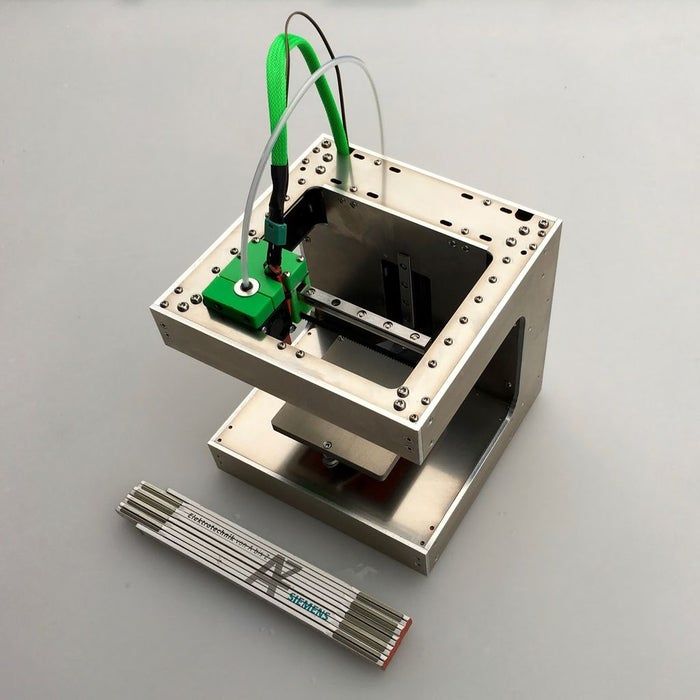
Kingroon KP3S 3D printer is very popular aomng 3D printing community and already there's a bunch of 3d printed upgrades available on Thingiverse and elsewhere on the Internet. We picked one well upgraded Kingroon KP3S 3D printer from our user Mauro Riccardi in Kingroon official Facebook group.
KP3S Fan Guard 40mm
The first one is the fan cover here. There's a fair chance that loose bits of filament can fall in and jam the fan or foul the electronics. This one was a pretty simple print and I urge you to make that your very first mod.
Thingiverse: thing 4674297
Designer: gergreko
Z-axis Stabilizer with 608 Bearing
This 3D printable Z-axis stabilizer uses a 608 bearing to provide further stability to the threaded rod from the top of the printer. While, if your threaded rod isn't going perfectly straight up and you add this top bearing, you can potentially bend the threaded rod even more.
Design file could be download on Cults3d.
Designer: MAST3RBLAST3R
Printed Base to Store PSU
Some customers might feel it takes up a little more space than is necessary with separt power bank of Kingroon KP3S 3D printer. This base solution design from SQUIRRELBRAIN not only to make your KP3S look cool, but also to minimize the storage space of your KP3S.
Desgin file could be download on Cults3d.
Designer: SQUIRRELBRAIN
PETG is an ideal material for such a project, because of its durability. If you must, PLA would do (the parts are not mechanically stressed or subject to excessive heat), but we don’t recommend it.
35º Tilt LCD Faceplate
The mods adds a 35º tilt the flat LCD faceplate for your KP3S, making it easier to read and control.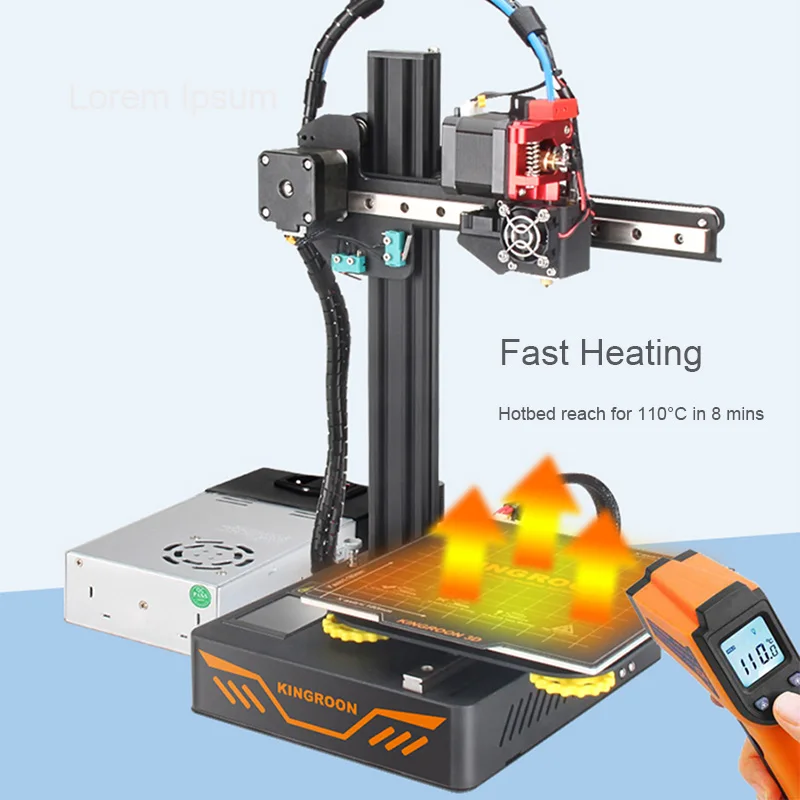
Thingiverse: thing 4659751
Designer: arcade_galicia
Cable Fixing Strap
Three cable fixing straps to hold cables in position and reduce rubs with other parts.
Kingroon KP3S X-axis cable strap:
Thingiverse: thing 4948907
Designer: 95cruzer
Kingroon KP3S Z-axis cable strap:
Thingiverse: thing 4942374
Designer: 95cruzer
Kingroon KP3S bed cable support:
Thingiverse: thing 4942388
Designer: 95cruzer
Kingroon KP3S Heatbed Handle
The handle to move the bed more easily and avoid heat injuries. The handle won't take any print space. It need to be assembled on the screws of the front heatbed knobs. Better to print with PETG for more solid use.
You may need to re-adjust the z-stop for the thickness of the glass bed changed.
Thingiverse: thing 5101100
Designer: ko3Des
The above upgrades on Kingroon KP3S, some improved the printer's ease of use and some actually improved the performance and even capabilities of the printer. Thank you to the contributions from our Kingroon users' community. And welcome to share more functional or fun upgrades to your Kingroon KP3S in the following comments.
Kingroon KP3S
Below are my notes, upgrades, info on the Kingroon KP3S 3D Printer Amazon | AliExpress If you need to be convinced that this is the printer for you, please see the following review. I was in need of a smaller printer that I could fit on a shelf, and this fit the bill. It’s very similar in build size and quality to the Prusa Mini, but you can get this in 2 days vs. 2 months and save $200.
Feel free to contact me or ping me on twitter if you have additions.
Cura Configuration
- Select Creality -> Ender 3 as your device and make these changes
- My settings are here: PETG PLA TPU
Octoprint Configuration
- Setup/Install Octoprint
- Create new device and configure following these guidelines
Downloads
For Kingroon-provided firmware, installation is as follows:
- Format a MicroSD card as FAT32-formatted, MBR boot record.
- Copy files to the root of the SD card: Robin_nano.bin, robin_nano_cfg.txt, mks_pic (directory & its contents) and mks_font (directory & its contents)
- Insert into printer & reboot. This will only work once; after upgrade, the folders/files will be renamed.
- KP3S Manual - Local Archive - 12/28/2020
- Latest Official Firmware (w/ old extruder) - Local Archive - 12/12/2020
- Latest Official Firmware (w/ old extruder and 3D Touch/BL Touch feature) - Local Archive - 12/12/2020 - note, I don’t think anyone has gotten this firmware to work successfully with BLTouch - yes, the videos exist, but it just doesn’t work and they don’t care it doesn’t work - you’ve been warned to save your sanity. See the Marlin link below for the best way to do this.
- Latest Official Firmware (Titan Extruder) - Local Archive - 4/2021
The following firmware is not supplied by, or supported by Kingroon and is the main way to get BLTouch working with the KP3S.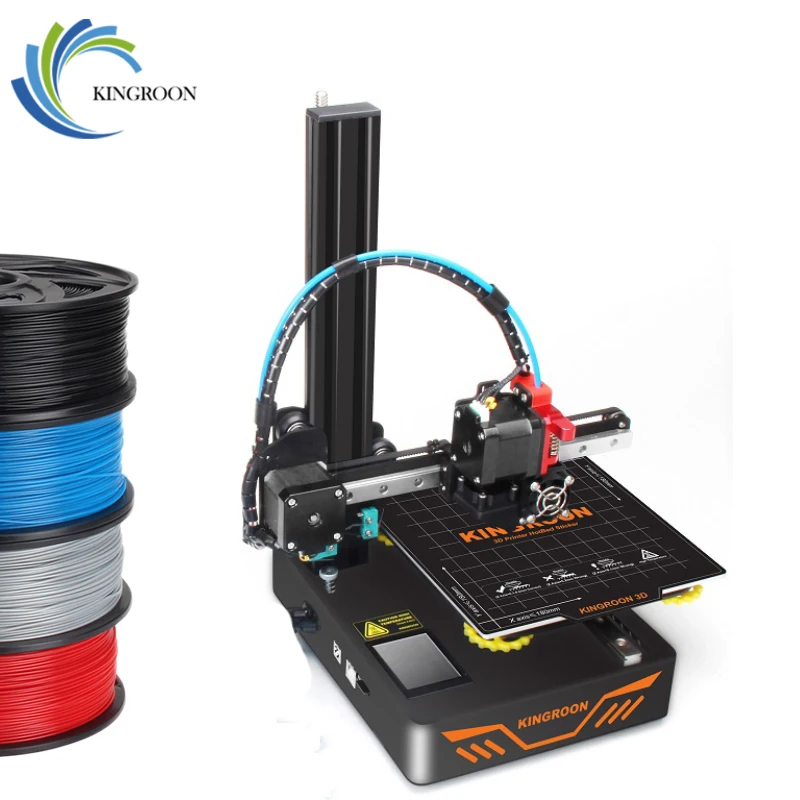
- Marlin Firmware
Printable Parts
- Quick Bed Level Test - Pick 175mm verison, Another quick level test print
- First Layer Test - trying to get that first layer to lay down or get your z offset dialed in? This is what helped me. Stop after first layer to assess bed adhesion.
- Filament Elephant - sits at the top of the Z-axis and helps you guide the filament into your extruder.
- X-Carriage Cable Support
- Z-Carriage Cable Support
- Y-Axis Mod/Tension - the internal Y spindle is bent on many devices and may break. Print this in advance of this breaking.
- X-Axis Mod/Tension
- X-Axis Endstop Bumper
- SD Card fix - sd card slot is open too much, thus you may stick your SD card into the case vs. the slot
- Marlin LCD Mount (Marlin firmware requires display be in landscape orientation)
- BL Touch Mount - non-Titan - Install Guide Only working with Marlin Firmware
- BL Touch Mount - Titan: Option 1, Option 2
- Cable Insert Tool
- Modular Hotend fan mount for 5015 and 3D Touch - non-Titan and 5015 fans
- Fan Duct - Titan: Option 1, Option 2
- Powersupply Stand
- Fan Silencer use this with the temperature-sensor mod to really quiet your device down.
- Self-centering Z coupler fix that z-banding/wobble issue. Use in conjunction with the anti-backlash nut below. Image
Upgrades
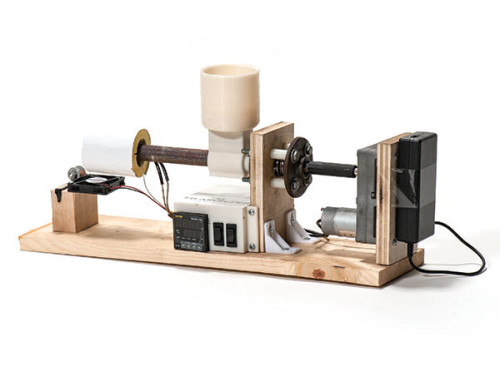
- Temperature-based fan controller for KP3S power supply
- BL Touch/3D Touch
Parts
- Energetic 180x180mm Spring Steel Plate - smooth/textured - these are great! I only use the Kingroon plate for situations where the bed might get damaged (when messing with BL Touch, etc).
- Energetic 180x180mm Spring Steel Plate - smooth - one sided - these are great! I only use the Kingroon plate for situations where the bed might get damaged (when messing with BL Touch, etc). This is only one-sided, the one above this one is 2 sided - smooth on one side, textured on the other.
- Kingroon Flexible/magnetic build plate.
- 5015 24v Blower Fans
- Super Lube Synthetic Oil - my printer came with dry rails, so this is required for a new printer.
- Anti-backlash nut - Direct replacement for existing T9 screw nut but adds the anti-backlash spring.
3d Printer References
Even after several years, I still rely on several sites to make sure things work as they should. Here are a few of my favs.
- PID Tuning
- First Layer Advice: TeachingTech AndrewEllis93
- Calibrating Esteps - hint, measure a piece of filament to 200mm and use that as your reference piece
- Flow Calibration - Yes, you have to do this for each different type of filament you buy. This is why many folks stick with a single brand, even still, the rates may vary. This plus Esteps can make the sizes of your models vary significantly if they are off.
- Troubleshooting - Simply3d, rigid.ink
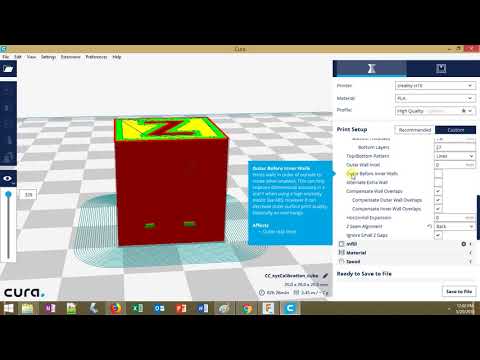
Installing Marlin firmware on a 3D printer using the Cura slicer or what to do with a hex file?
Hello everyone. This article is the second part of a trilogy about 3D printer firmware. In the first part, we looked at how to flash a 3D printer using the Arduino IDE. This method is possible when there is a source code for the firmware or, as programmers say, when there are sources. However, this option is not always possible, because. often the firmware comes in an already compiled form, i.e. as a single file with *.hex extension. This is a ready-made compiled firmware file with pre-configured parameters. At the same time, it becomes impossible to edit anything.
Naturally, this file cannot be opened using the Arduino IDE. What to do? This is what we will deal with in this article. And so, let's figure it out.
On the one hand, firmware in the form of source code is good. We can easily independently make the necessary changes to it, or, so to speak, customize it for ourselves.
From the manufacturer's point of view, firmware source code is evil. The user will pick it up, make changes that are not provided by the manufacturer, and then apply for a guarantee if something goes wrong. There are ways in which you can flash the firmware into the printer once and for all, while eliminating the possibility of flashing. Thank God manufacturers don't do that.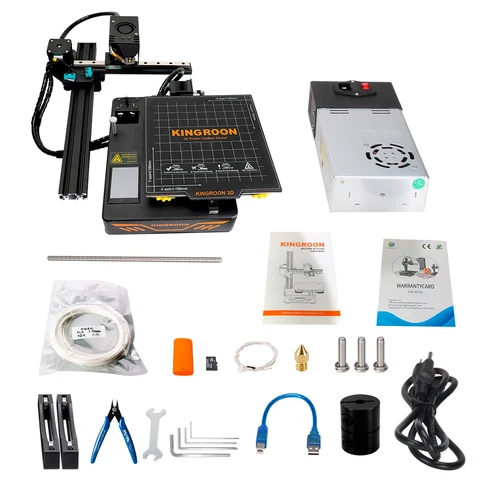
You can protect the firmware from modifications in another way - by supplying it as a ready-made firmware file. Let it not always go with the observance of the license. But this option works just fine.
We, as ordinary customers, are not interested in all these vicissitudes. We have another question: How to flash a 3D printer with a ready-made firmware file?
Do not believe it, but this option is much easier than flashing the printer from the firmware sources (the process of flashing the printer from the sources is described in the article “Installing Marlin firmware on a 3D printer using the Arduino IDE“). There are several ways to flash a 3D printer using a hex file. In my opinion, the easiest way is flashing with the Cura slicer. We will consider this method next.
The technique is described using the Cura 4.2.1 slicer as an example.
We need a Cura slicer
And the actual firmware file.
Now turn on your 3D printer and connect it to your computer with a cable.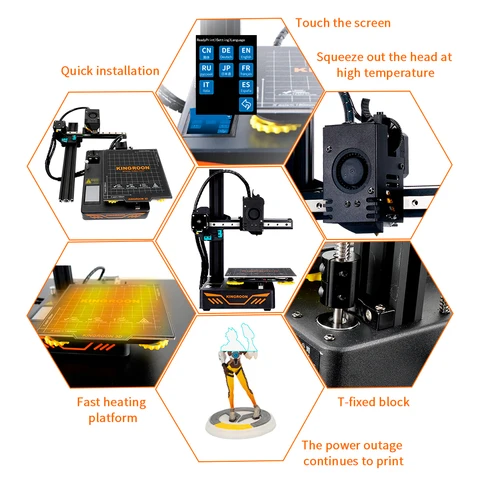
Make sure the slicer can see your printer.
Now start the slicer and go to your printer's Menu. To do this, go to the menu item “ Parameters ” -> “ Printer ” -> “ Printer management ”
If you have several printers, select the one you want to flash from the list.
After selection, a menu with several buttons will be available on the right, among which there will be a button labeled “Update Firmware”. Click on this button.
This will open a window named “ Upgrade Firmware ”. In this window, press the button “ Upload your own firmware ”.
Now the Cura slicer will ask you to select the firmware file you will be slicing. The explorer menu will open. We go to the directory in which the firmware file lies and select this file.
In my case, it was the firmware for the Anycubic 4max 3D printer. In your case, this should be the firmware you want to flash.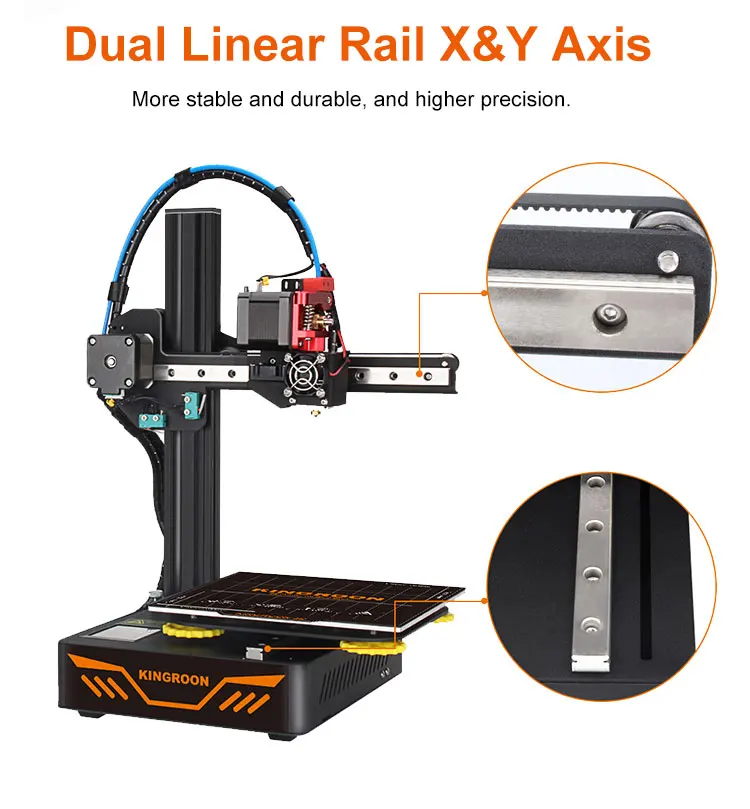 After selecting the firmware file, you must press the button “ Open ”
After clicking the “Open” button, the process of flashing your 3D printer will automatically start. And it will last for some time.
After the firmware is finished, the window will look like this:
Button “ Close ” becomes active. To complete the flashing process, press the button “ Close “.
Click the “ Close ” button in the “ Upgrade Firmware ” window.
Click the “ Close ” button in the “ Settings ” window Section “ Printers”.
Now close the slicer.
Restart your 3D printer. To do this, unplug it from the outlet for 1-2 minutes and turn it on again.
Through the printer menu or command.
To reset the printer settings to default settings, execute the following commands:
M502
M500
The process of sending commands to the 3D printer was described in the article “3D Printer's Diary.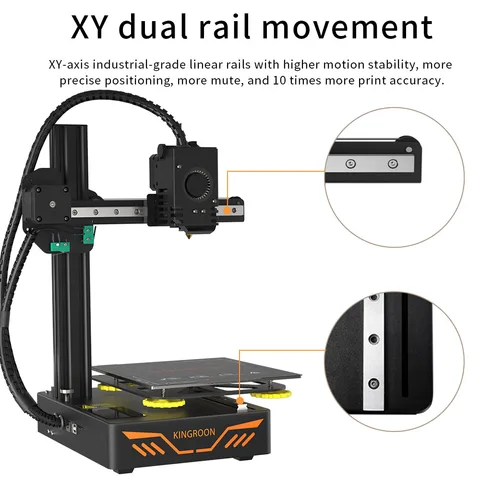 Calibration of the plastic feed on the extruder MK8 of the Anycubic 4max 3D printer
At this point, the 3D printer firmware process can be considered complete.
I hope the article was useful to you. For those who are interested, an article will soon be published on how to compile the firmware hex file yourself.
If you have not got a 3D printer yet and are thinking which model to choose, I can recommend the following models:
Anycubic i3 Mega 3D printer
Anycubic Mega-S (Anycubic S) 3D printer If you like the article and want to support the site and receive notifications about new materials, join our Vkontakte group: https://vk.com/ionline_by
http://ionlineby.pushassist.com/
Printers Kingroon KP3S DIY 3D Printer Impressora Printer Kit Upgrade Direct Extrusions TMC2225 Dual Metal Rail Metal Rail 180*180*180mm
Model number: KP3S
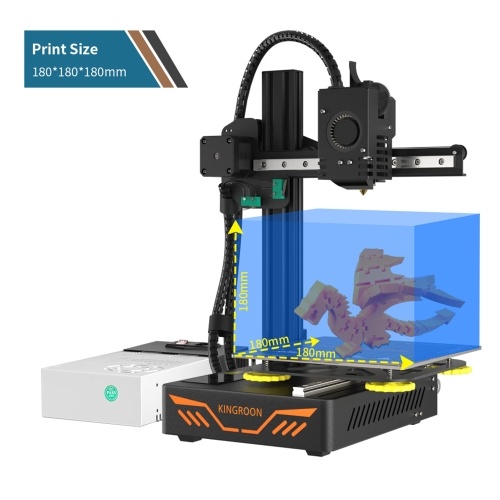
The size of the assembly: 180 * 180 * 180 * 180 mm
Technology: FDM
LOOK LUCK: 1
DIAMETE OF SOMPLA: 0. 4 mm 9000
Print resolution: 0.05-0.3 mm
thread diameter: 1.75 mm
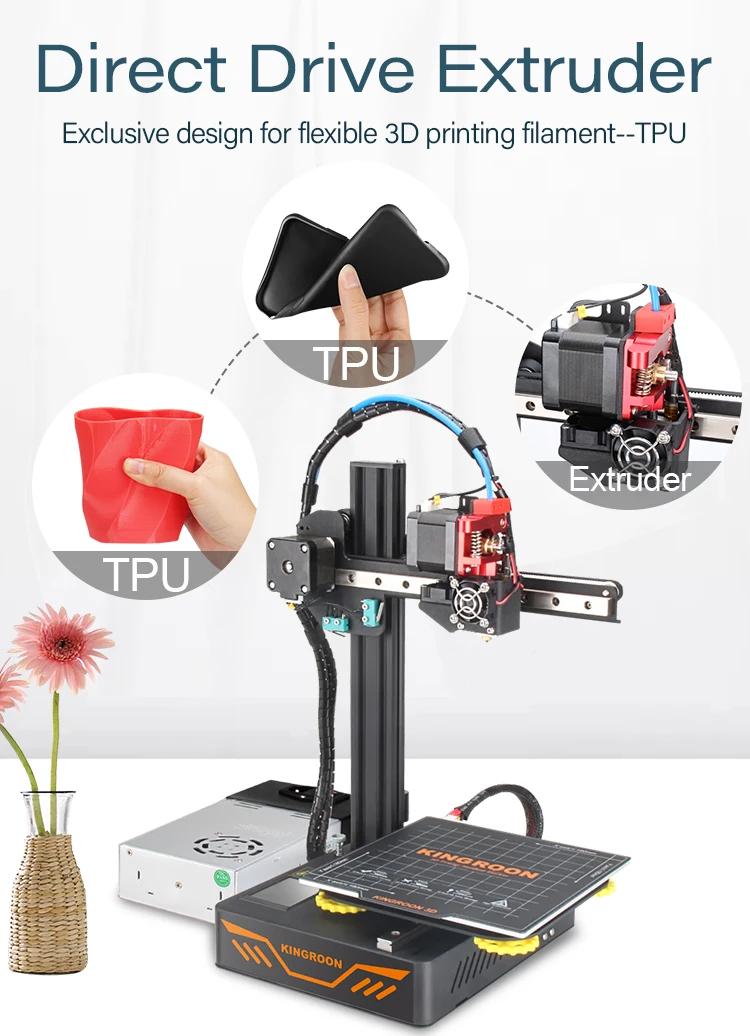
Applicable thread: PLA / Wood / TPU
MECOUS OF SOMPLA: ≤260c
Charming temperature: ≤1110c 9000 9000 9000 COMMUNITION: ≤200 mm / s
Print speed: ≤100mm/s 20mm-60mm/s highly recommended
Print via: USB/TIF card
Supported file types: STL/OBJ/GCODE
System Compatibility: Win7-10/Mac/LiNix
Software: Cura/Slice/Host...
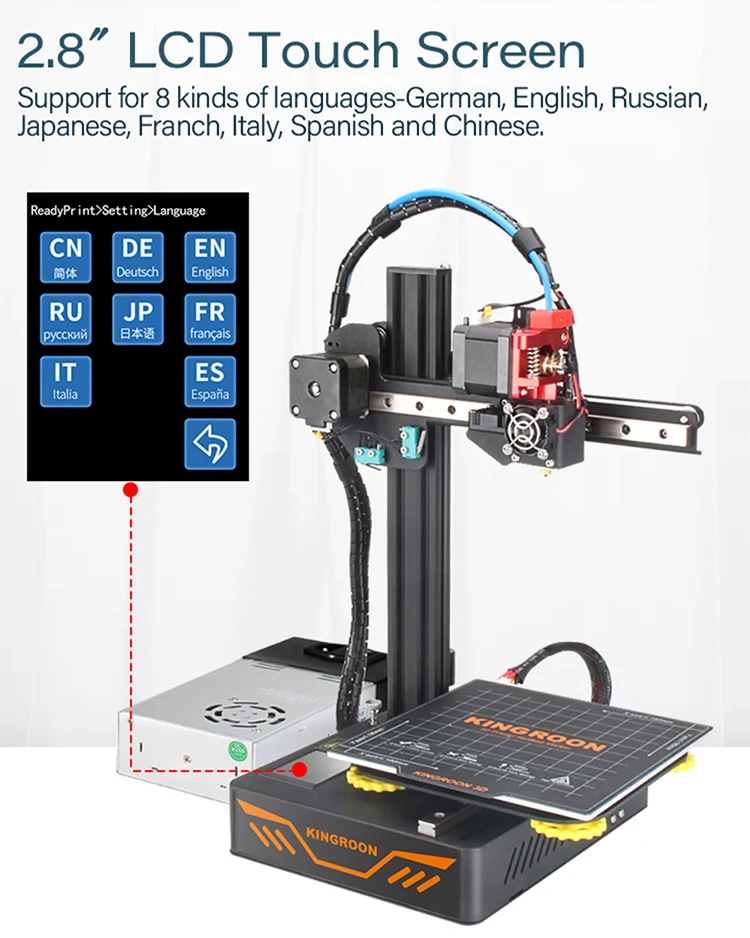
Screen Language: CN/DE/EN/RU/JP/FR/IT
Machine power: 240 W
Entrance voltage: 110 B-220 V
Source source: 24V15A360W
incandescent engine: updated
Automatic equalization: updated 3D Touch
Summary Press after energy consumption: Support
Weight Net: 6 kg
Machine size: 280 * 285 * 370 mm
Packaging size: 400 * 390 * 200 mm
WITTEN Gross: 7.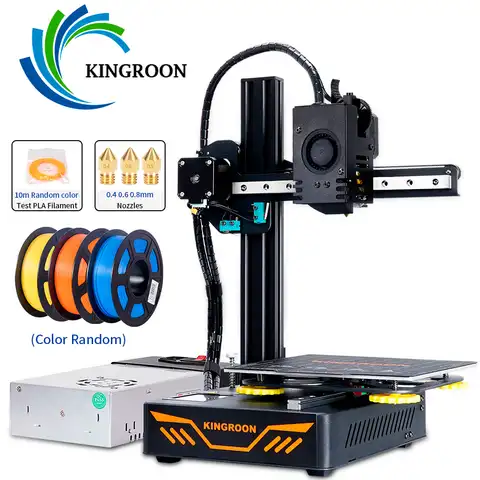 45kg
45kg
To Ship:
All of our items will be shipped to buyers' address that offered to buyers, please confirm your address before payment. We will send the items within 3 business days after your payment is completed. (Holidays may be extended) for color:
Pictures are samples for reference only. Due to limitations in photography and the inevitable differences in monitor settings, the colors shown in the photograph may not correspond 100% to the items themselves. For the weak:
Your satisfaction and positive EESTBACKIS are very improvised for us. Please leave follow-up reviews and 5Stars if you are into management and services.
If you have any problems with our items or services, please feel free to contact us before you leave negative feedback. We will do our best to ove any problems that TheBestCustomer services provide you. Company Profile
We are a cross-border e-commerce company, integrating several overseas online and offline sales channels.
About provider
* In general, all orders will be processed within 3-5 business days after payment is confirmed by DHGATE.
* The item will be shipped via Epacket, Sfexpress, Yanwen, China Post Air Mail, EMS, DHL, FEDEX, USPS which you choose when placing an order. Delivery depends on the carrier after the packages are sent, plus it is international TR
Ansport, delivery may delay, hope you can understand and wait patiently. Thanks in advance. * You can track your package on 17Track. If you can't find the tracking information, please contact us.
Customer Service:
1. Please feel free to contact us if you need help with online chat (instant messaging) or email, we will respond as soon as we read it.
2. All the pictures we provided may exist normal tiny color difference due to different monitor and brightness.
3. If you have any problems before or after submitting the order or receiving the package, please contact us first instead of opening a dispute, we will do our best to solve for you.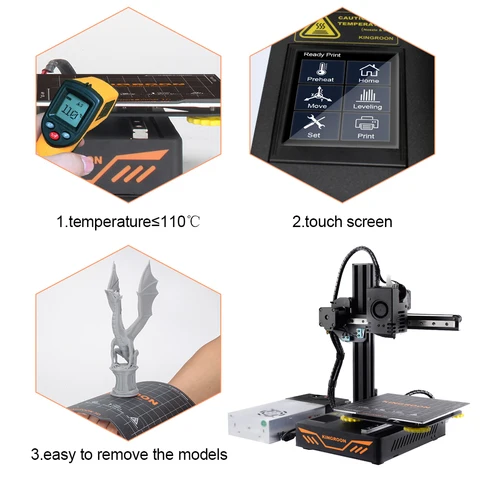
Feedback
* Your early confirmation will be highly appreciated after receiving the item(s)
* Your feedback is of vital importance to us, we sincerely hope that you can leave a positive overall 5 stars if you are satisfied with our products and service.
* Please contact us first before leaving any negative feedback, we will solve the problems for you.
QA.
Q: When will my order arrive?
A: Delivery depends on the destination and the carrier you choose, plus it is an international transport that takes time, please understand and wait patiently.
Q: What can I do if I want to change the address?
A: The address may change after the package has been shipped, so please check your address is correct and complete before submitting the order.
Q: What can I do if I receive wrong/broken products or empty package(s)?
A: We check and check carefully, but if this situation happens, please contact us first instead of making a dispute, we will do our best to solve for you.