Infiltration 3d printing
An Overview of Binder Jetting
What is binder jetting? In 1993, the Massachusetts Institute of Technology developed this Inkjet-in-powder-bed form of 3D printing to print complex parts out of a variety of materials. Today, there are binder jetting applications in several industries, and you can create everything from metal parts to large sand-casting cores to full-color prototypes. Binder jetting is fast and cost-effective, but many product teams are unfamiliar with this manufacturing process. Here’s what you need to know.
What is binder jetting?
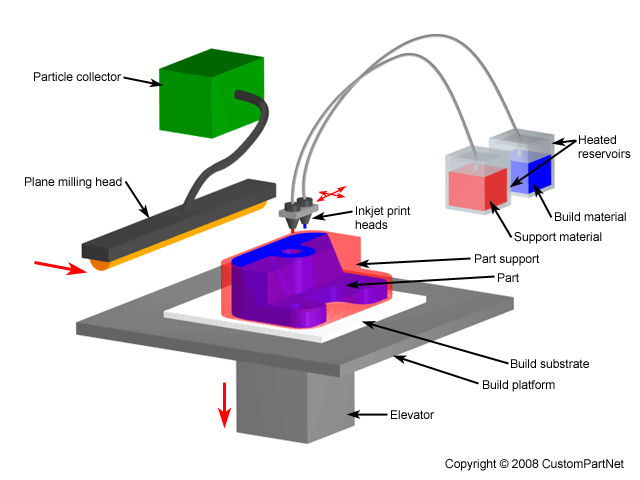
While many other 3D printing methods use a single nozzle or laser to create parts layer by layer, binder jetting sprays liquid binder onto a bed of powder. In fact, the binder jetting 3D printing process is similar to how a 2D printer adds ink to paper. It’s mainly used to print metal, sands, and ceramics and is known for its speed, affordability, and ability to print large parts.
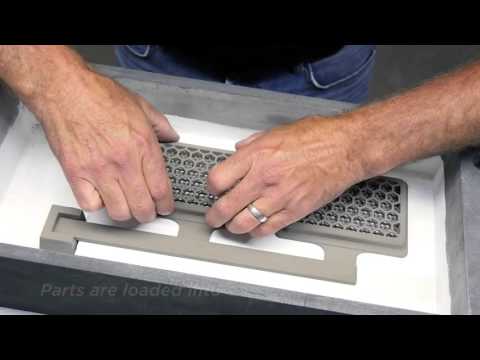
To begin the binder jetting process, you’ll need to create a digital model of your part, slice it, and send it to your manufacturing partner. They’ll then input it into the binder jetting printer. Then, a recoating blade or roller will spread a thin layer of powder over the build platform, and a carriage with Inkjet nozzles will pass over the powder bed, depositing drops of binding agent. If you’re creating a full-color part, the machine will also deposit colored ink during this step.
The build platform will then lower in accordance with your model’s layer thickness. Most full-color models have a layer height of 100 microns, most metal parts have a layer height of 50 microns, and most sand casting mold materials have a layer height between 200 and 400 microns. Next, the blade or roller will recoat the surface, and the process will repeat until your part is complete. Your engineer can then cure your part to increase its strength, gently free it from the loose powder on your powder bed, and clean it using a brush or pressurized air.
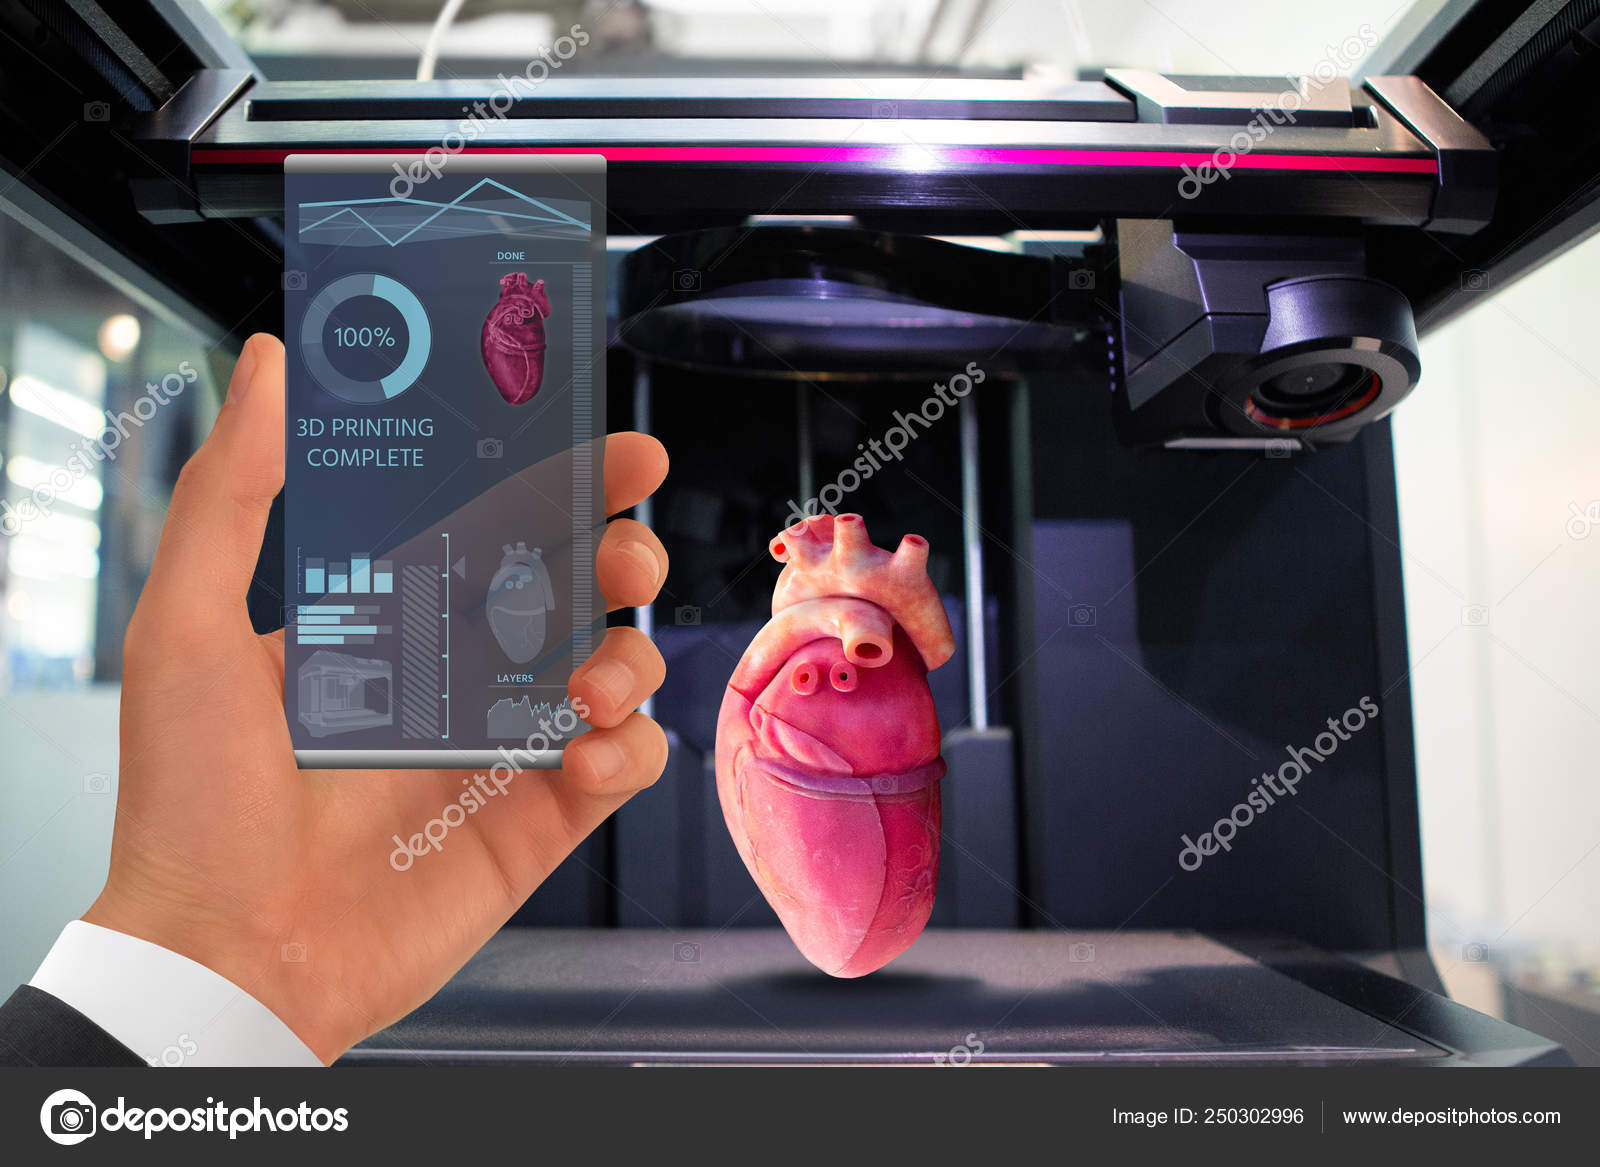
Parts that have just been created using binder jetting are in a green state and typically have high porosity and poor mechanical properties. As such, your engineer might add on a few post-processing steps after printing, which will vary depending on your part’s material. For example, a metal part might need to be sintered with a low-melting-temperature metal like bronze. If you have a full-color part, your engineer might infiltrate it with acrylic to improve its vibrancy. If you have a sand casting core or mold, no additional processing is required.
Common materials binder jetting materials
Binder jetting materials fall into three categories — powder, sand, and metal.
Sandstone and PMMA powder
Since binder jetting 3D printing machines often have secondary printheads that add color as the primary printhead adds the binding agent, it’s easy to create full-color models using sandstone or polymethyl methacrylate (PMMA) powders. However, the resulting parts will be very brittle — even after processing — and are best used as non-functional models like topographical maps or figurines.
Sand
Sand and silica sand are relatively affordable, so they’re great for creating one-time-use molds and cores. Not only will binder jetting sand enable you to create complex geometries that would be difficult or impossible to produce with traditional methods, but you’ll also be able to achieve a dimensional accuracy of ± 0.3 mm. Also, note that:
- You won’t need additional post-processing.
- Layer thicknesses for sand casting cores and molds usually fall between 200 and 400 μm.
- Build sizes can be as large as 2200 x 1200 x 600 mm.
Metal
Binder jetting is also a popular choice for 3D printing metal. It’s up to 10 times more economical than selective laser sintering (SLS) or selective laser melting (SLM) and offers relatively large build sizes of up to 800 x 500 x 400 mm. Binder jetting also allows for complex geometries, doesn’t require support structures, and has a dimensional accuracy of ± 0.2 mm.
Binder jetting is compatible with steel, titanium, chromite, copper, and more, but you’ll need to post-process your part to improve its strength no matter which metal you use. Post-processing options include:
- Infiltration: Infiltration involves placing a cured part in a hot furnace. After the binding agent has burned off, the part’s density will reduce to around 60%. Your engineer can then fill the voids left behind with bronze or another low-melting-temperature metal until it reaches at least 90% density. Infiltrated parts are relatively strong and have good mechanical properties, but they will be around 2% smaller after infiltration.
- Sintering: If you want even better mechanical properties, you can have your metal part sintered. Sintering involves heating a part in a furnace to bake out its binders and fuse its metal particles. Sintered parts have high corrosion resistance and 3% porosity, but the drawback is that they often shrink around 20% from their initial size. This shrinkage may not be uniform, which can cause post-printing inaccuracies, even if your design already accounted for 20% shrinkage.

Binder jetting advantages and disadvantages
When you choose binder jetting, you can:
- Achieve relatively high dimensional accuracy: Since binder jetting occurs at room temperature, you don’t need to worry about warp and your part will remain highly dimensionally accurate. If you’re binder jetting with metal, you also don’t need to worry about relieving residual stresses during secondary post-processing. However, you’ll likely notice shrinkage after sintering.
- Save money: Binder jetting a metal part is more than ten times more economical than using SLM or SLS. Not only is it more affordable, but it also uses less energy because it uses a liquid binding agent instead of a laser. Plus, binder jetting ceramic and metal powders are usually more affordable than powders for SLS and SLM. Similarly, you can produce a full-color prototype via binder jetting for a fraction of what it would normally cost to produce one via SLS, SLM, or material jetting.
- Forgo support structures: In binder jetting, the unbound powder provides all the support your part needs, eliminating the need for support structures and giving you more design freedom. This also means shorter post-processing times and less material consumption compared to other 3D printing technologies.
- Cut back on waste: 100% of unused powder can be reused for future prints, helping you save material and money. In comparison, only 50% of powder used by SLS 3D printers is reusable.
- Quickly produce a large part or several smaller parts simultaneously: Binder jetting machines have build volumes of up to 2200 x 1200 x 600 mm, which means you can produce large parts or simultaneously build several smaller ones.
However, there are a few disadvantages to consider when using binder jetting. Keep in mind that:
- Metal binder jetting parts will have lower mechanical properties than their SLS counterparts because of their higher porosity.
- Binder jetting offers a limited material selection compared to other 3D printing processes.
- Parts are brittle in their green state, which means you can only print rough details.
- Most binder jetted parts require post-processing, which can significantly lengthen production times and introduce inaccuracies.
3D printing with Fast Radius
Binder jetting is a fast and affordable technology that’s great for large prints and full-color prototypes. Is binder jetting the best process for your next project? Working with an experienced manufacturing partner can help you make the right decision.
At Fast Radius, our team of professionals has years of experience with the latest 3D printing technologies. We can help optimize your design for 3D printing, select a material and 3D printing method that suits your needs, and more. Contact us today to get started.
Visit our resource center to learn more about the cost of 3D printing, choosing the right 3D printing technology, and more.
Ready to make your parts with Fast Radius?
Start your quote
Metal Additive Manufacturing (AM) Processes - Binder Jetting - 3DEO
Overview of Binder Jetting
Binder Jetting is a powder bed process that utilizes inkjet technology and a binding agent. The liquid binder is used to “glue” the metal powder together within and between layers. A layer of metal powder is first rolled onto the build tray, and then an inkjet print head moves along the x and y axes and deposits binder in the shape of the part for each respective layer. After each layer is created, the build platform is lowered incrementally to make room for the next layer. The part being printed is supported within the powder bed by the unbound powder, which is then removed to complete the process. The result is a “green part” which then needs to be placed in a sintering furnace to achieve final part density.
3DEO Series: An Introduction to Metal 3D Printing
This post is part 3 of a guide by 3DEO meant to introduce engineers and designers to metal additive manufacturing.
Subscribe to our email list to stay current on all of our articles.
The other articles in the series are:
1) What is Additive Manufacturing? An Intro & Benefits
2) Overview of the Metal 3D Printing Processes
3) Intro to Powder Bed Fusion (DMLS, SLS, SLM, LMF, DMP, EBM)
ExOne was the original metal binder jetting company, but there is a flurry of activity to release new machines using the technology since the patents have expired in the last few years. Höganäs AB under the Hoeganaes brand has recently released a binder jetting machine Digital Metal, HP has announced a move to metal that is very likely to use binder jetting given their inkjet core competency, and Desktop Metal’s production system due out in 2019 will use binder jetting.
Advantages of Binder Jetting in Additive Manufacturing
Binder jetting introduced a faster and novel way to create metal parts in an additive process as compared to existing technologies such as laser sintering. PBF processes were among the first additive technologies but the high costs and slow build times prompted the need for a higher volume technology that could be cost competitive. The binder jetting machines represented a cost reduction when compared to PBF machine costs, and the throughput proved to be higher as well. The inkjet print heads offer a high level of precision and parts can be created with minute details. The build volume with binder jetting is moderate and comparable to other technologies.
- Lower cost than PBF
- Fast process
- Established process
Disadvantages of Binder Jetting in Metal AM
Due to use of composite materials and binding method, the material characteristics are not always suitable for structural parts. Also, despite the relatively high printing speed, the surface finish usually requires post processing and can add significant time and cost to the overall process. Often, a different metal is added to the part to stabilize it during the sintering process to prevent shrinkage when making larger parts. This metal is typically bronze and the process is called infiltration. If printing in 17-4PH stainless steel for example, up to 40% of a binder jetted part will be bronze infiltrated. This has significant implications on material properties and often precludes parts created with binder jetting from being used in many production applications. The need for infiltration is perhaps the single biggest reason for binder jetting did not see widespread adoption when it first debuted.
- Non-engineering material composite
- Degrading inkjet process
- Significant part shrinkage without infiltration
- Parts are lower in density
Applications of Binder Jetting – Metal 3D Printing
While bronze infiltration might scare away engineers from trusting binder jetted parts in production, the technology has been receiving a lot of attention from new companies looking to put their own spin on binder jetting and push it to it’s full potential. For smaller parts that do not require infiltration, binder jetting can be a very attractive option due to the high speed and detail they are able to achieve while offering lower cost parts than laser sintering. Binder jetting is in a good position for high-volume, low-cost applications.
Work with 3DEO
3DEO makes high quality metal components with our proprietary metal 3D printers. We specialize in manufacturing low/medium volumes on demand, which means there’s no need to worry about long lead times, minimum order quantities, or high tooling/setup costs.
3D Inkjet Printing (3DP) – 3dprofy
Turch October 21st, 2014
3DP stands for Three-Dimensional Printing , and translates as three-dimensional printing. This technology is one of the varieties of systems for the additive construction of a product according to its CAD model and differs from numerous similar schemes in that the process is carried out according to the principle of a conventional printer - through print head nozzles. Thus, 3D inkjet printing is a natural continuation of the development of conventional 2D printing technologies. To date, it has achieved fairly good results, such as color printing.
Products printed on the Z Corp's Spectrum Z510 color 3D printer
The history of the emergence and development of 3DP
For the first time, the idea of \u200b\u200brealizing equipment using this printing scheme was proposed by two students at the Massachusetts Institute of Technology Tim Anderson and Jim Bredt in 1993. It is thanks to them that the term 3D printing has spread around the world. And this is quite fair, because the first model of the device was a modification of a conventional 2D printer. Instead of ink, he used a special adhesive composition, which applied layer by layer to the surface of the bonded substance, the boundaries of the future three-dimensional product.
In 1995, Tim and Jim formed the Z Corporation, which brought this technology to market, improving it to such an extent that in 2012 3D systems Corporation wished to acquire it along with the company. Under her brand, former Z Corporation models are now sold worldwide.
One of the directions of the ExOne company (USA) is the production of 3D printers that use the same technology. This firm was founded in 2005 as a subsidiary of the Extrude Hone Corporation. Using the patents obtained by Anderson and Bedt, they launched a line of printers that even print metal products today.
3D inkjet printing technology
Today there are more than thirty 3D printing technologies, which in one way or another duplicate each other, although each has its own characteristics. The American Society for Testing and Materials (ASTM International) has divided 3D inkjet printing technologies into two categories:
- Material jetting - material jetting.
- Binder jetting Binder jetting.
In the first case, the building material itself is fed directly through the nozzles, which hardens after application. In the second, an adhesive is sprayed onto a thin layer of gypsum, polymer or metal powder. 3DP technology in its original form represented exactly the second method.
If we consider it in more detail, then printing occurs in the following way:0003
- To begin with, a CAD model is loaded into a computer connected via an Ethernet cable to the printer, which is “cut” into layers, about 0.
 1 mm thick.
 - Next, a thin layer of powdered material (gypsum, polymers, sand, metal) is applied with a roller on a special platform.
- The print head sprays the binder (glue, water, special mixture) along the coordinates of the boundaries of the first layer received from the computer.
- After that, the platform with the model is lowered by the thickness of the layer down, and the chamber with the building material is lowered by the same distance.
- Next, the roller unrolls the next layer and the process repeats.
- After the end of 3D printing, the product is removed from the powder layer and thoroughly cleaned of its residues.
When making models from metal powder, a firing process in a special furnace is added. Let's take a closer look at this process.
The figure above shows 4 stages of his stage:
- First, according to the above scheme, the so-called "green model" is formed from the matrix powder and binder (1,2).

- Next, the article is placed in an oven filled with a protective gas, usually nitrogen.
- When the temperature rises to 1000-1100 degrees, the binder is removed, and the free space around the powder particles is impregnated with bronze (or other metal) previously placed next to the "green" model. This process is called infiltration.
Materials used for 3DP printing and their cost
Gypsum has traditionally been used in 3D printing, and water played the role of a binder in this case. However, technology has stepped forward and, as is clear from the previous section, metals (bronze, copper), sand and polymer mixtures are now also used. Dyes are mixed into the binder, which makes it possible to carry out color printing on such a 3D printer.
The cost of the simplest powders is on average 600-700 euros for a 10 kg bucket (8200 cm3), the price of the binder is about 660 euros for 3.8 liters.
Characteristics of finished products and their application
Models made of gypsum and polymers are not too strong to be used in the production cycle as a mold, however, they are quite suitable for rapid visualization of prototypes of various parts and products .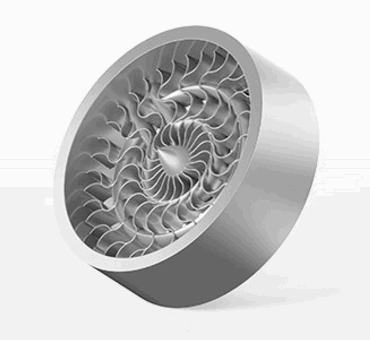 It can also be used in various architectural and design works or in the manufacture of souvenirs.
Products using metals have better properties, however, their strength is still at an average level: tensile strength 610 MPa, hardness HRC = 10-20.
Such characteristics are quite suitable for the manufacture of plastic injection molds, which can withstand from 200 to 500 thousand production cycles. They are also used to make parts that work under friction conditions - shafts, bushings, gears, etc.
Disadvantages
- Gypsum-based products are quite fragile and can only be used in a narrow field of activity. As a mold, it can only be used once, after which it is destroyed.
- When working with gypsum powders, a lot of dust is generated, so a good extraction is necessary.
Advantages
- High speed of building parts - about 6 mm in height per hour, with a working area of 780 x 400 mm it will be 1780 cm3, which is an order of magnitude superior to laser rapid prototyping technologies.
- Relatively low cost of consumables.
ExOne offers the following 3D printer models:
M-Flex printer model from ExOne.
Results
Printers using inkjet 3D printing technology is one of the possible solutions to implement the problem of rapid prototyping. It should be noted that despite some shortcomings, it still found a place in the market today and continues to develop actively along with many of its competitors.
Sealing 3D plastic FDM models on a 3D printer
Overview
In many applications, the use of FDM parts can provide significant cost savings and time-to-market. FDM technology is an additive process for building plastic parts in layers based on data from CAD files. The use of FDM also allows you to significantly expand the horizons of applicability, since it is less dependent on the geometry of the part. However, FDM parts are characterized by porosity, which is an obstacle to their use in functional prototypes and direct digital manufacturing, where sealing for gases and liquids is required.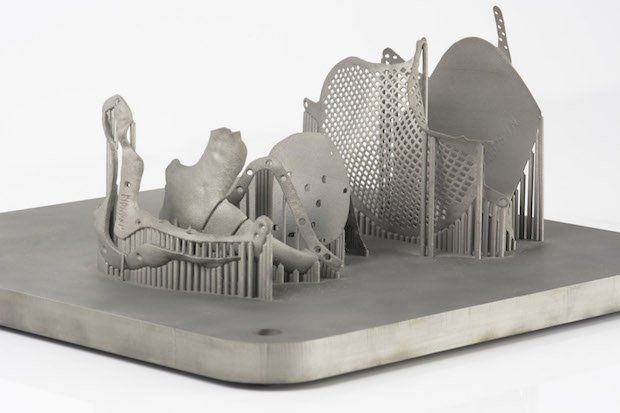 To address this issue, a number of different compaction methods have been tried, bringing the benefits of FDM technology to a wide range of new applications.
Application Contours
There are many methods for sealing FDM parts and many factors to consider when choosing the right approach. To assist in selection, Stratasys evaluated the cost, time, difficulty, geometry limitations, maximum part size, toughness, accuracy retention, chemical resistance, and temperature sensitivity of five common sealing methods.
Smoothing Station
Finishing Touch Smoothing Station densifies the surface of a part by exposing it to the evaporating smoothing agent inside the chamber. When using a smoothing station, the integrity of geometric dimensions is well preserved. Its use is limited to applications where the pressure is not higher than atmospheric pressure and the temperature is not higher than 100 degrees. The smoothing station is often chosen when electroplating parts that are used as templates for investment casting or the production of functional prototypes for sealed containers such as bottles or cooling lines in molds.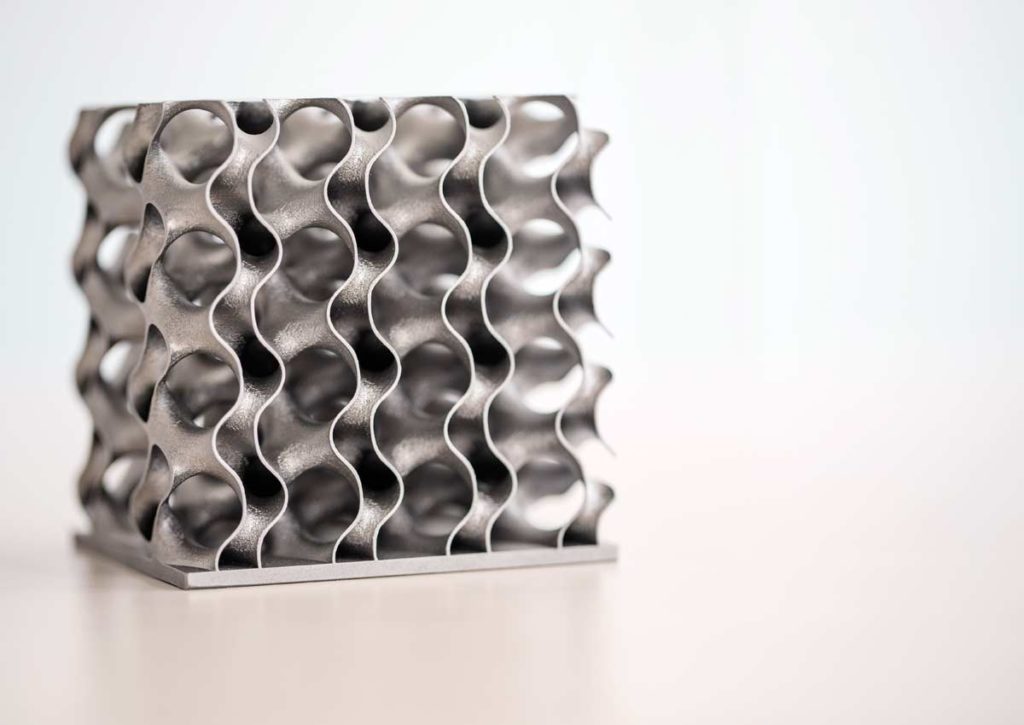
Epoxy
Material Hysol E-20HP is a two part epoxy resin that is applied to small areas of the part. This method does not require any investment in equipment and the end results are well suited to harsh environments. The coating will maintain an airtight seal up to 448 kPa, can withstand temperatures that meet or exceed those for FDM materials, and is resistant to many chemicals. Large and complex parts may be difficult to seal with epoxy. Inaccessible elements such as internal channels cannot be sealed. The thickness of the epoxy layer, combined with manual application, reduces the geometric accuracy of the part. Hysol E-20HP can be used with any FDM material currently available.
Epoxy Infiltration
BJB Epoxy Resin (TC-1614) penetrates the surface of porous and semi-porous parts. The FDM parts are immersed in the resin and a vacuum is applied to infiltrate the resin into the part. In addition to the vacuum chamber, an oven is required to preheat and prepare the epoxy. Epoxy infiltration offers a hermetic seal for water and air up to 448 kPa. Parts sealed with this method also withstand high temperatures and are chemically resistant. The densification process is simple and can be done in less than three hours, but is somewhat expensive due to the cost of the epoxy. When using epoxy infiltration, the geometric dimensions change slightly. The BJB TC-1614 can be used with any FDM material currently available.
Immersion
Solvent immersion of FDM parts can replace the use of the Smoothing Station when it is not available or the part is larger than its working chamber. All characteristics are similar except that the geometric accuracy is lower. The melting action of the solvent is fast and aggressive, so geometric accuracy is difficult to control. As with the Smoothing Station, use of this method should be limited to low temperature and low pressure applications. Immersion is suitable for all FDM materials based on ABS.
Painting and filling
When only part of the surface of an FDM part needs to be sealed, a light coat of paint or putty can be used as an inexpensive method.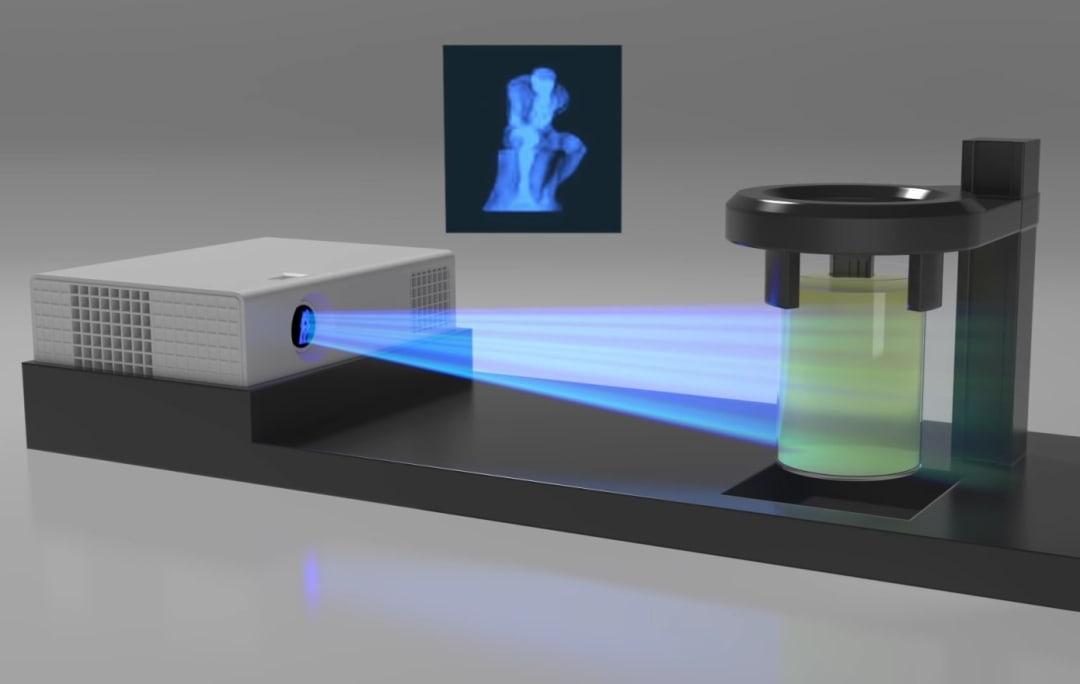 Since this is a manual operation, the accuracy and quality of the final product depends on the skill and care of the technician. The advantages of this option include low cost, short time and ease of application. Its disadvantages include the lack of tightness and resistance to temperatures and chemical environments. This method can be used to reduce the porosity of FDM tools used for example in thermoforming.
Customer Experience
3D Innovation Center provides high quality rapid prototyping and rapid manufacturing services. Recently, a manufacturer of air intakes and other automotive parts entered the market looking to improve the manufacturing process. She had run computer simulations of fluid flow through an air intake and wanted to test prototypes of various designs that seemed promising. A common method for building a prototype air intake is to machine a solid piece of aluminum, which is expensive and time consuming.
The main difficulty of this task was that the surface of the part must be compacted before being used for functional testing.